Go Back
- 4 ripe bananas, sliced and frozen - 1/2 cup natural peanut butter - 1/2 cup Greek yogurt (plain or vanilla) - 2 tablespoons honey or maple syrup (optional) - 1 teaspoon vanilla extract - A pinch of sea salt - Optional garnishes: chopped peanuts or chocolate chips The key to this ice cream is using ripe bananas. They give natural sweetness and a creamy texture. Frozen bananas work as the base. They turn soft when blended, making your ice cream smooth and rich. Natural peanut butter is essential. It adds flavor and healthy fats. Greek yogurt boosts protein and creaminess. I prefer using plain or vanilla yogurt to keep the taste balanced. You can sweeten your ice cream with honey or maple syrup. This is optional, depending on how sweet you like it. A hint of vanilla extract enhances the flavors. Don’t forget a pinch of sea salt; it elevates the taste. For extra crunch or a sweet touch, consider garnishing with chopped peanuts or chocolate chips. These add a fun texture and visual appeal. - First, slice the ripe bananas into even pieces. - Arrange the slices in a single layer on a baking sheet. - Place the baking sheet in the freezer. - Freeze the banana slices for 2 hours or until they are solid. - Once the bananas are frozen, take them out. - Transfer the frozen banana slices to a food processor. - Blend the bananas until they become smooth. - Scrape down the sides if needed. This should take about 2-3 minutes. - Now, add the natural peanut butter to the food processor. - Include the Greek yogurt, honey (if you want), vanilla extract, and a pinch of sea salt. - Blend all the ingredients until they are creamy and fully mixed. - Taste the ice cream mixture to check for sweetness. - If you want it sweeter, add more honey or maple syrup. - Blend again for a few seconds if you adjust the sweetness. - You can serve the ice cream right away for a soft-serve texture. - If you prefer it firmer, transfer it to an airtight container. - Freeze it for an extra 1-2 hours for a firmer consistency. - When serving, scoop the ice cream into bowls. - You can garnish with chopped peanuts or chocolate chips if you like. For this ice cream, you need ripe bananas. Look for bananas with brown spots. They are sweeter and more flavorful. Frozen bananas are great too. They help make the ice cream creamy and cool. When you freeze bananas, their natural sugars get sweeter. This gives your ice cream a great taste. To blend smoothly, chop your frozen bananas into smaller pieces. This helps the food processor work better. Blend for 2-3 minutes. Stop to scrape the sides. This will help mix everything well. To avoid ice crystals, scoop the ice cream into a container right after blending. Seal it tightly before freezing. Presenting your ice cream well makes it more fun. Serve it in a chilled bowl. This keeps it cold longer. You can also drizzle some peanut butter on top. Add banana slices or chopped peanuts for color. These simple touches make your treat look special and tasty. {{image_2}} You can easily change the flavor of your ice cream. Adding cocoa powder gives it a rich chocolate taste. Just mix in a tablespoon or two when blending. If you want more protein, try adding protein powder. A scoop will boost the protein and keep it creamy. If you want to switch up the sweetness, consider agave syrup or dates. These options can replace honey or maple syrup. You can adjust the sweetness to match your taste. Start with a small amount, then add more if needed. You can make this ice cream vegan. Simply leave out the Greek yogurt or use a plant-based yogurt. This keeps the recipe tasty and dairy-free. For gluten-free needs, you can enjoy this treat without worry. All the ingredients are already gluten-free. To keep your ice cream fresh, store it in an airtight container. This will help prevent ice crystals. Use a container that is just the right size. If it’s too big, air can cause freezer burn. If it’s too small, the ice cream may expand and spill. A good choice is a glass or plastic container with a tight lid. Your high-protein peanut butter banana ice cream can last about one month in the freezer. After that, it may lose flavor and texture. Look for signs of freezer burn, like white patches or a dry surface. To avoid freezer burn, always cover the ice cream with plastic wrap before sealing the lid. To make scooping easier, let the ice cream sit at room temperature for about 5-10 minutes. This will soften it just enough. You can also run a scoop under warm water for a quick fix. For serving, use a chilled bowl to keep it cold longer. Add your favorite toppings like chopped peanuts or chocolate chips for extra fun! Yes, you can use other nut butters. Almond butter or cashew butter works well too. Each nut butter adds its unique flavor. Feel free to experiment! Absolutely! This ice cream is great for meal prep. You can make it ahead of time and store it. It keeps well in the freezer for a few weeks. Just scoop and enjoy when you want a treat. To make this recipe dairy-free, swap Greek yogurt for a plant-based yogurt. You can use almond or coconut yogurt. For sweeteners, consider maple syrup or agave. Both options work well and keep it yummy. This ice cream packs a protein punch. Each serving contains about 10-12 grams of protein. The Greek yogurt and peanut butter boost the protein content. This treat helps you stay full and satisfied. Yes, mix-ins can add fun flavors. You can add chocolate chips, berries, or nuts. Mix them in after blending the base. Try adding them once the ice cream is smooth for the best results. You now have all the steps to create a delicious banana-peanut butter ice cream. We covered the key ingredients, step-by-step blending, and how to adjust flavors for your taste. Remember, you can customize this treat with different flavors or sweeteners too. Store it well to enjoy later, and don’t forget to try mix-ins! Making this ice cream is easy and fun. I hope you enjoy every creamy bite of your homemade delight.

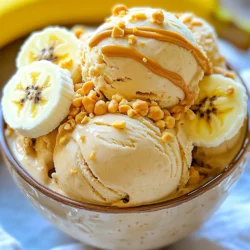
High-Protein Peanut Butter Banana Ice Cream

Indulge in a deliciously creamy and healthy treat with this high-protein peanut butter banana ice cream recipe! Made with just four simple ingredients, this guilt-free dessert is perfect for satisfying your sweet tooth while packing in protein. Discover how to whip up this refreshing ice cream and enjoy its rich flavor. Click through for full instructions and make your day a little sweeter!

Ingredients
  

4 ripe bananas, sliced and frozen

1/2 cup natural peanut butter

1/2 cup Greek yogurt (plain or vanilla)

2 tablespoons honey or maple syrup (optional, for sweetness)

1 teaspoon vanilla extract

A pinch of sea salt

Chopped peanuts or chocolate chips for garnish (optional)

Instructions
 

Start by slicing your ripe bananas and placing them in a single layer on a baking sheet. Freeze the banana slices for about 2 hours or until solid.

    Once frozen, transfer the banana slices to a food processor. Blend until smooth, scraping down the sides as needed. This should take about 2-3 minutes.

      Add in the natural peanut butter, Greek yogurt, honey (if using), vanilla extract, and a pinch of sea salt to the food processor. Blend again until everything is creamy and fully incorporated.

        Taste the ice cream mixture and adjust sweetness if necessary by adding more honey or maple syrup. Blend again if you make any adjustments.

          Once the mixture is smooth, you can either serve it immediately for a soft-serve texture or transfer it to an airtight container for later. If freezing for later, allow the ice cream to freeze for an additional 1-2 hours to achieve a firmer consistency.

            When ready to serve, scoop the ice cream into bowls and sprinkle with chopped peanuts or chocolate chips if desired.

              Prep Time: 10 minutes | Total Time: 2 hours 10 minutes (includes freezing time) | Servings: 4

                - Presentation Tips: Serve in a chilled bowl and garnish with a drizzle of peanut butter on top and a few banana slices for an appealing look.