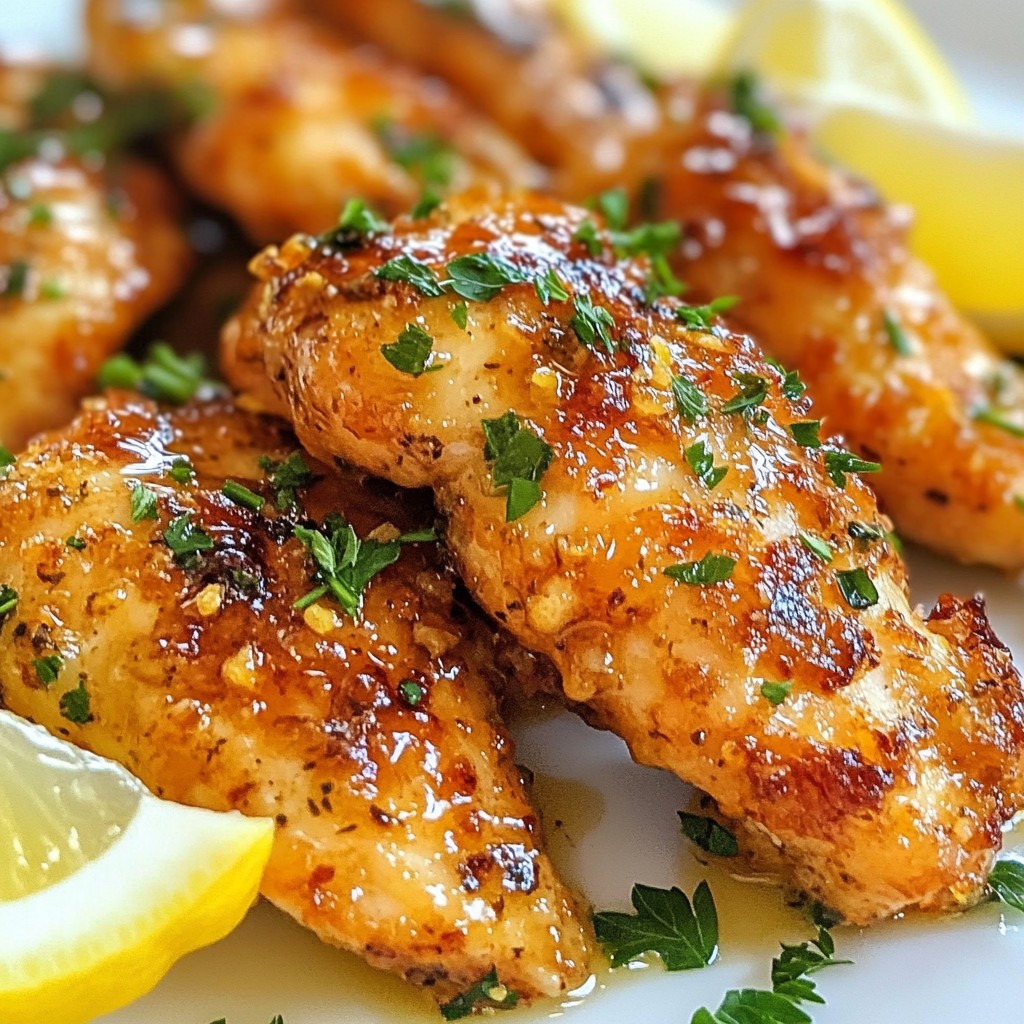
If you're looking for a quick and tasty meal, you're in the right place! This Garlic Butter Chicken Tenders recipe is simple and packed with flavor. You’ll want to make this dish again and again. From choosing fresh tenders to serving tips, I’ve got you covered. Read on to learn how to make the best savory dinner that your family will love!
Why I Love This Recipe
- Quick and Easy: This recipe can be prepared in just 20 minutes, making it perfect for busy weeknights.
- Flavor Packed: The combination of garlic, butter, and herbs creates a rich and savory flavor that everyone will love.
- Versatile Dish: These chicken tenders can be served with a variety of sides, from salads to grains, making them a versatile option.
- Healthy Protein: Chicken tenders are a great source of lean protein, making this dish both delicious and nutritious.
Ingredients
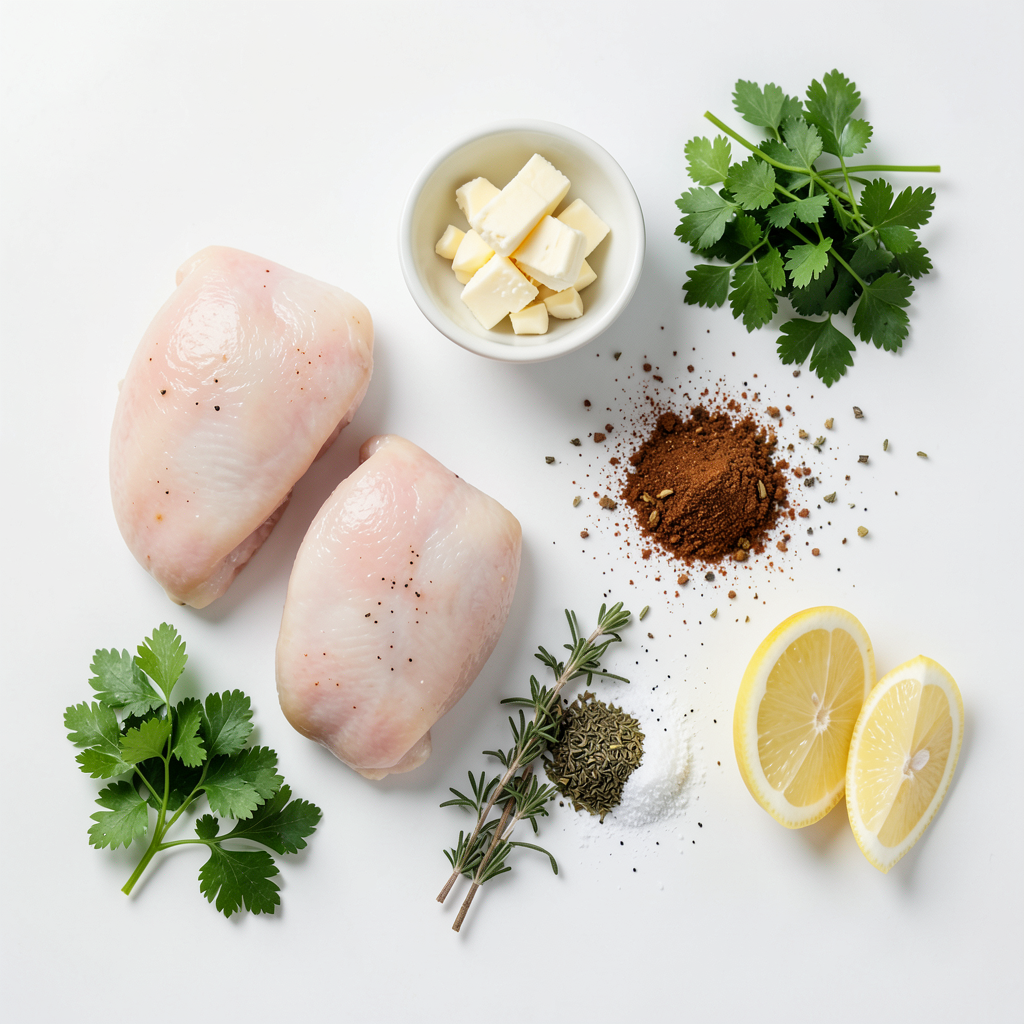
List of Required Ingredients
To make savory garlic butter chicken tenders, gather these ingredients:
- 1 lb chicken tenders
- 4 tablespoons unsalted butter
- 4 cloves garlic, minced
- 1 teaspoon smoked paprika
- 1 teaspoon dried thyme
- 1 teaspoon dried oregano
- Salt and pepper to taste
- 2 tablespoons fresh parsley, chopped (for garnish)
- Lemon wedges (for serving)
Ingredient Substitutions
You can swap some ingredients if needed. Use olive oil instead of butter for a lighter option. If you lack fresh garlic, garlic powder works in a pinch. Dried herbs can replace fresh herbs. For a different spice, try cayenne pepper instead of smoked paprika.
Tips for Choosing Fresh Chicken Tenders
When buying chicken tenders, look for a few key signs of freshness. Choose tenders that are pink and moist, not gray or slimy. The smell should be mild, not sour. If possible, buy from a trusted butcher or a grocery store with high turnover. Always check the sell-by date to ensure quality. Fresh chicken will cook better and taste great in your dish.
Step-by-Step Instructions
Preparation Steps
- First, pat the chicken tenders dry with paper towels.
- Next, season both sides with salt, pepper, smoked paprika, thyme, and oregano.
- Make sure to coat them well for full flavor.
Cooking Process
- In a large skillet, melt the butter over medium heat until it is foamy.
- Add the minced garlic and sauté for about one minute.
- Be careful not to burn the garlic; you want it fragrant.
- Now, add the seasoned chicken tenders to the skillet.
- Cook for 3-4 minutes on each side.
- The chicken should be golden brown and reach an internal temperature of 165°F.
- Once cooked, lower the heat and spoon the garlic butter over the chicken.
- Let them simmer in the buttery goodness for another minute.
Finishing Touches and Serving Suggestions
- Remove the skillet from heat and garnish the chicken with freshly chopped parsley.
- Serve the chicken tenders with lemon wedges on the side.
- Squeeze the lemon over the chicken for a fresh, zesty flavor.
- Enjoy your savory garlic butter chicken tenders with a side of your choice!
Tips & Tricks
How to Perfect the Garlic Butter Flavor
To get the best garlic butter flavor, use fresh garlic. Fresh garlic has a strong taste. Mince it finely to release more oils and flavor. Cook the garlic in the melted butter until it smells good. This step adds depth. Always watch the garlic closely. If it burns, it will taste bitter. Add a squeeze of lemon juice at the end. It brightens the dish and enhances the garlic flavor.
Cooking Time Adjustments for Different Stovetops
Stovetops vary in heat. Gas stoves often cook faster than electric ones. If you use an electric stove, keep an eye on the chicken. Cook it for 4-5 minutes per side instead of 3-4. Always check the internal temperature. It should be 165°F for safe eating. If your chicken tends to brown too quickly, lower the heat slightly. This helps to cook the chicken evenly without burning.
Suggestions for Achieving Crispy Chicken Tenders
To make crispy chicken tenders, pat the chicken dry before cooking. This removes excess moisture. Season the chicken well with salt and pepper. After cooking, let the tenders rest for a minute. This helps keep them juicy. For an extra crunch, you can coat the chicken in breadcrumbs before cooking. Use panko for a lighter, crispier texture. Lastly, avoid overcrowding the pan. Cook in batches if needed. This allows the heat to circulate, giving you that perfect crispy finish.
Pro Tips
- Tip Title 1: Make sure to pat the chicken tenders dry before seasoning. This helps the spices adhere better and ensures a nice sear.
- Tip Title 2: Don’t rush the butter melting process. Allowing it to foam before adding garlic enhances the flavor and prevents burning.
- Tip Title 3: Use a meat thermometer to check the internal temperature of the chicken. This guarantees it’s fully cooked without drying it out.
- Tip Title 4: For extra flavor, let the cooked chicken tenders rest for a few minutes before serving. This allows the juices to redistribute.
Variations
Spicy Garlic Butter Chicken Tenders
To make spicy garlic butter chicken tenders, add heat with red pepper flakes. Use about one teaspoon for a nice kick. You can also use hot sauce in the garlic butter mix. Start by adding a tablespoon of your favorite sauce. This spice makes your dish exciting and fun. The heat pairs well with the rich butter flavor.
Herb-Seasoned Chicken Tenders
For herb-seasoned chicken tenders, change the spices a bit. Use fresh herbs like rosemary or basil instead of dried ones. You can also mix in some fresh garlic to enhance the taste. Just chop a few cloves and add them when cooking. This gives a fresh twist to the dish and brightens the flavors.
Garlic Butter Chicken Tenders with Veggies
To add veggies, toss in some colorful options like bell peppers or green beans. Cut them into small pieces for even cooking. Add them to the skillet when you cook the chicken. This way, they soak up the garlic butter flavor too. It also makes the meal more balanced and satisfying. Enjoy a tasty mix of protein and veggies!
Storage Info
Proper Storage Techniques
To keep your garlic butter chicken tenders fresh, let them cool first. Place them in an airtight container. This helps keep moisture in. You can store them in the fridge for up to three days. If you use a glass container, avoid thermal shock. Wrap the container with plastic wrap for added freshness.
How to Reheat Leftovers
When you're ready to eat, reheat the chicken tenders. Use a skillet for best results. Add a little butter or oil to the pan. Heat on medium until warm, about five minutes. You can also use a microwave. Heat on medium power for one to two minutes. Check the temperature, it should be at least 165°F.
Freezing Chicken Tenders for Later Use
If you want to enjoy these tenders later, freezing is a great option. Place cooled tenders in a single layer on a baking sheet. Freeze them for one hour. After that, transfer them to a freezer bag. Make sure to squeeze out all the air. They can last up to three months in the freezer. When you're ready to use them, thaw in the fridge overnight before reheating.
FAQs
What to serve with Garlic Butter Chicken Tenders?
You can serve Garlic Butter Chicken Tenders with many sides. Some great options include:
- Mashed potatoes for a creamy texture.
- Steamed broccoli for a healthy crunch.
- Rice to soak up the garlic butter.
- Salad for a fresh and light touch.
- Pasta tossed in olive oil or butter.
These sides pair well and balance the rich flavors of the chicken.
Can I use chicken breasts instead of tenders?
Yes, you can use chicken breasts. They will need to be cut into strips. This helps them cook evenly and stay juicy. Adjust the cooking time to about 6-8 minutes per side. Make sure to check the internal temperature. It should reach 165°F for safety.
How to tell when chicken tenders are fully cooked?
To check if the chicken tenders are cooked, use a meat thermometer. Insert it into the thickest part of the tender. If it reads 165°F, it's done. You can also cut one open. The meat should be white and the juices should run clear. If you see pink, cook it a little longer. Always ensure the chicken is safe to eat.
We covered how to make tasty garlic butter chicken tenders from scratch. You learned about the key ingredients, how to pick fresh chicken, and tried some fun variations. We discussed storage tips so you can enjoy leftovers too. Remember, cooking is about having fun and sharing good food. Try these steps, and I bet you will impress your friends and family with your skills. Enjoy each bite!