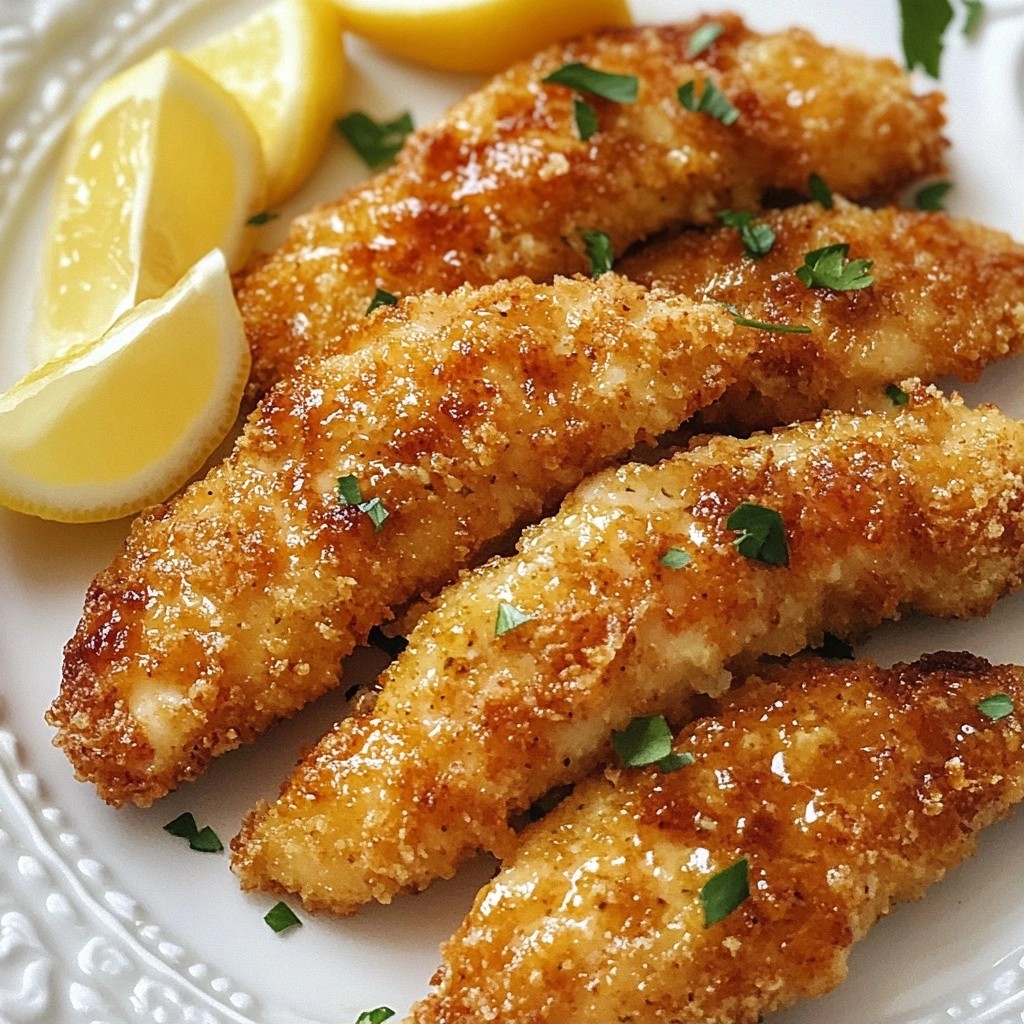
If you're craving a quick, tasty dinner, look no further! My crispy Pan-Seared Lemon Chicken Tenders are here to impress. With juicy chicken, zesty lemon, and a crunchy panko coating, this dish is simple and satisfying. You’ll learn how to season, bread, and cook these tender bites perfectly every time. Get ready to delight your taste buds and make your kitchen the go-to spot for dinner!
Why I Love This Recipe
- Crispy Texture: The panko breadcrumbs create a delightful crunch that contrasts perfectly with the juicy chicken inside.
- Bright Flavor: The addition of lemon zest and juice brightens up the dish, giving it a refreshing taste in every bite.
- Quick and Easy: This recipe comes together in under 30 minutes, making it perfect for a weeknight dinner.
- Versatile Dish: These chicken tenders can be served as a main dish, in a salad, or as a tasty appetizer for gatherings.
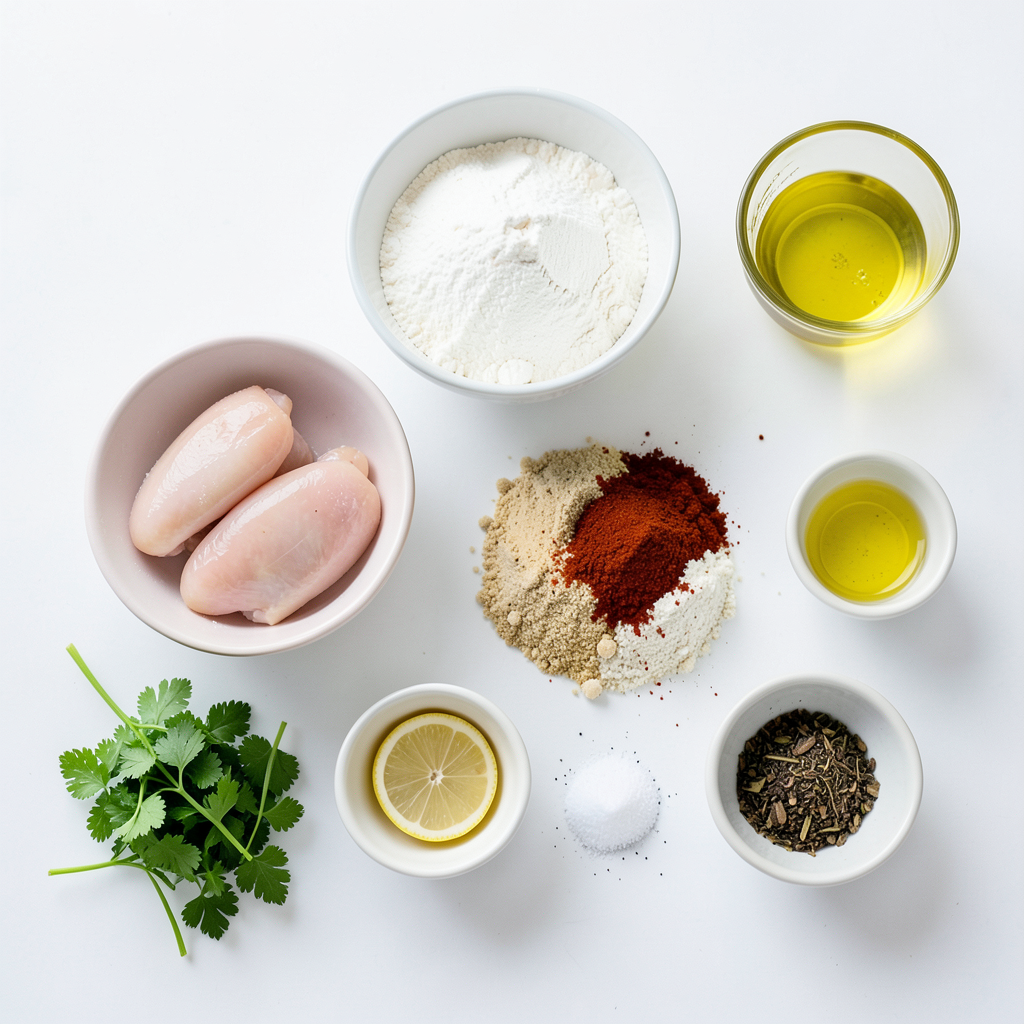
Ingredients
Main Ingredients
- 1 lb chicken tenders
- 1/4 cup olive oil
- 1 cup panko breadcrumbs
Seasoning Components
- 1 teaspoon garlic powder
- 1 teaspoon onion powder
- 1 teaspoon paprika
Additional Flavorings
- Zest of 1 lemon
- Juice of 1 lemon
- Fresh parsley, chopped
Step-by-Step Instructions
Preparing the Chicken
First, I pat the chicken tenders dry with paper towels. This helps the seasoning stick. Next, I season both sides with salt, pepper, garlic powder, onion powder, and paprika. This mix adds great flavor. After seasoning, I set the chicken aside to absorb all those tasty spices.
Setting Up Breading Stations
Now, I arrange my breading stations. I use three shallow bowls. In the first bowl, I place the flour. In the second, I beat the eggs until smooth. In the third bowl, I mix the panko breadcrumbs with lemon zest. This zest gives a bright, fresh taste.
Breading the Chicken
To bread the chicken, I start with the flour. I dredge each tender, shaking off the excess. Then, I dip it into the beaten eggs. The egg helps the breadcrumbs stick. Finally, I coat the tender with the panko mixture, pressing down to make sure it sticks well.
Cooking the Chicken
Next, I heat a large skillet over medium-high heat. I add olive oil and wait until it shimmers. I add the breaded chicken tenders in batches. I avoid overcrowding the pan, which helps them cook evenly. I cook each side for about 3-4 minutes until they turn golden brown and crispy.
Adding Lemon Juice
After the chicken is cooked, I drizzle fresh lemon juice over the tenders. This adds a bright, zesty kick. I let the juice soak in for a minute while the chicken is still hot. This step is key for flavor.
Draining and Garnishing
Finally, I remove the chicken from the skillet. I place them on a paper towel-lined plate to drain excess oil. Before serving, I garnish the chicken with freshly chopped parsley. This adds a pop of color and freshness.
Tips & Tricks
Achieving Maximum Crispiness
To achieve the best crispiness, use panko breadcrumbs. They create a light, crunchy coating. Regular breadcrumbs do not deliver the same crunch.
Temperature control is key during cooking. Heat your skillet to medium-high heat. If the oil is too hot, the coating burns. If it’s too cool, the chicken gets soggy.
Flavor Enhancements
For more flavor, try alternative seasonings. You can add herbs like thyme or rosemary for a fresh taste.
Using different citrus fruits can also add a twist. Lime or orange juice can replace lemon juice. Each fruit gives a unique flavor to the chicken.
Serving Suggestions
Presentation matters! Serve the chicken tenders on a colorful platter. Add lemon wedges for squeezing on top. Garnish with fresh parsley for a pop of color.
Pair these tenders with sides like roasted veggies or a crisp salad. A tangy dipping sauce also works well. Consider ranch or a spicy aioli for extra flavor.
Pro Tips
- Use Fresh Chicken: For the best flavor and texture, opt for fresh chicken tenders instead of frozen ones. Fresh chicken tends to yield a juicier and more tender result.
- Adjust the Heat: If the oil is too hot, the breadcrumbs may burn before the chicken is cooked through. Keep the heat at medium to ensure even cooking and a crispy exterior.
- Let It Rest: After cooking, allow the chicken tenders to rest for a couple of minutes before serving. This helps the juices redistribute, making them more flavorful and moist.
- Experiment with Seasonings: Feel free to customize the seasoning mix by adding herbs like thyme or oregano, or spice it up with cayenne pepper for some heat!
Variations
Spicy Lemon Chicken Tenders
To kick up the heat, add chili powder or cayenne to the seasoning. This spice brings a nice kick to the tender chicken. You can also serve these spicy tenders with hot dipping sauces. This extra flavor will make your meal pop.
Herb-Crusted Chicken Tenders
If you love herbs, try adding dried herbs like thyme or oregano to the breadcrumbs. You can even use fresh herbs in the marinade for a bright taste. This twist on the recipe adds freshness and depth to your meal.
Gluten-Free Option
For a gluten-free version, use gluten-free flour instead of all-purpose flour. You can also swap panko for crushed cornflakes. This change keeps the crunch while making it safe for those avoiding gluten. Your gluten-free friends will appreciate this tasty option!
Storage Info
Storing Leftovers
To store your crispy chicken tenders, let them cool first. Place them in an airtight container. This helps keep them fresh. You can refrigerate them for up to three days. If you want to enjoy them later, freezing is a great option.
Reheating Tips
For reheating, use the oven for the best results. Preheat it to 375°F. Place the chicken on a baking sheet and cover it with foil. Heat for about 10-15 minutes. This method keeps the chicken crispy. Avoid using a microwave, as it can make the tenders soggy. If you do use a microwave, heat for a short time and check often.
Freezing Instructions
You can freeze the chicken before or after cooking. If freezing before cooking, bread the chicken and place it in a single layer on a baking sheet. Once frozen, transfer the chicken to a freezer bag. This helps keep the breading intact. If freezing after cooking, let the chicken cool, then store it in an airtight container. Thaw in the fridge overnight before reheating. Enjoy your crispy chicken tenders anytime!
FAQs
Can I use chicken breasts instead of tenders?
Yes, you can use chicken breasts. However, they take longer to cook. Cut the breasts into thin strips for even cooking. Tenders are more tender and cook faster. They also stay juicier than breasts. Adjust your cooking time to prevent dryness.
What can I serve with pan-seared lemon chicken tenders?
You have many tasty options. Pair the tenders with a fresh salad for crunch. Rice or quinoa works well for a filling side. Roasted vegetables add color and flavor. Garlic mashed potatoes are a comforting choice too. Feel free to mix and match for a great meal.
How do I ensure my chicken stays juicy?
Cook your chicken at medium-high heat. This helps seal in moisture. Use a meat thermometer to check the internal temperature. Aim for 165°F for safe eating. Let the chicken rest for a few minutes before slicing. This keeps the juices inside.
Can I make this recipe ahead of time?
Yes, you can prep the chicken ahead. Season and bread the tenders, then store them in the fridge. This keeps them fresh for up to 24 hours. You can also cook them a day before. Just reheat in the oven to keep them crispy.
After exploring this recipe, you now know how to make crispy lemon chicken tenders. We discussed the main ingredients, seasoning, and flavor additions that give these tenders their zing. I also shared steps for preparing, breading, cooking, and garnishing. You learned tips for crispiness and variations to suit your taste.
With these insights, you'll create a dish that’s not only tasty but also fun to make. Enjoy sharing this dish with others, and don’t hesitate to experiment with new flavors. Happy cooking!