Get ready to indulge in a delicious fall treat with my White Chocolate Maple Pumpkin Cups! These no-bake delights combine rich white chocolate with creamy pumpkin filling for a sweet experience. Perfect for any gathering or just your cravings, they’re easy to make and fun to customize. Join me as I guide you through each step, from choosing the best ingredients to serving them in style. Let’s create some autumn magic together!
Ingredients
List of Ingredients with Measurements
– 1 cup white chocolate chips
– 1/4 cup pumpkin puree
– 2 tablespoons maple syrup
– 1 teaspoon vanilla extract
– 1/2 teaspoon ground cinnamon
– 1/4 teaspoon ground nutmeg
– 1/2 cup graham cracker crumbs
– 1/4 cup crushed pecans (or walnuts)
– Pinch of salt
– Mini cupcake liners
Best Practices for Choosing Ingredients
When you pick ingredients, focus on quality. Use real white chocolate chips instead of candy melts. Look for pure pumpkin puree, not pumpkin pie filling. This ensures a rich taste. For maple syrup, choose 100% pure syrup for the best flavor. Fresh spices like cinnamon and nutmeg give a great aroma.
For nuts, pecans add a nice crunch, but walnuts work too. If you can, buy them chopped for ease. Always check for freshness, especially with nuts. They can go stale quickly.
Possible Ingredient Substitutions
You can swap white chocolate chips for dark chocolate if you prefer a richer taste. For a healthier option, try using almond butter in place of white chocolate. If you want to avoid nuts, just leave them out. The graham cracker crumbs can change too. Use gluten-free crumbs if you need a GF option.
For a sweeter touch, you might add a bit more maple syrup. You can also use honey instead if it suits your taste. These swaps keep the recipe fun and flexible, letting you make it your way!
Step-by-Step Instructions
Melting the White Chocolate
Start by melting the white chocolate chips. Use a microwave-safe bowl. Heat it in 30-second bursts. Stir after each burst to ensure even melting. Keep checking until it is smooth. Be careful not to overheat the chocolate. If it gets too hot, it can seize.
Preparing the Pumpkin Filling
Next, prepare the pumpkin filling. In a separate bowl, mix the pumpkin puree and maple syrup. Add the vanilla extract, ground cinnamon, and nutmeg. Don’t forget the pinch of salt! Stir these ingredients until they form a smooth filling. This mix brings warmth and flavor to your cups.
Assembling the Cups
Now, it’s time to assemble the cups. First, stir half of the melted white chocolate into the pumpkin filling. This step makes the filling creamy and sweet. In another bowl, combine the graham cracker crumbs and crushed pecans. Add the rest of the melted white chocolate to this mix and stir until coated.
Next, line a mini muffin tin with mini cupcake liners. Spoon a tablespoon of the graham mix into each liner. Press down firmly to form a base. Then, add a spoonful of the pumpkin filling on top of the graham base. For extra sweetness, drizzle any leftover melted white chocolate on top.
Finally, place the muffin tin in the fridge. Let the cups chill for at least one hour. This step helps them set. Once firm, carefully remove the cups from the tin and peel off the liners. Enjoy these tasty treats!
Tips & Tricks
How to Perfect the White Chocolate Melting Process
To melt white chocolate well, use a microwave-safe bowl. Heat it in 30-second bursts. Stir after each time. This helps avoid burning the chocolate. Keep an eye on it; white chocolate melts fast. If it feels thick, add a little coconut oil. This makes it smooth and easy to work with.
Storage Recommendations for Best Taste
Store your pumpkin cups in an airtight container. This keeps them fresh and tasty. Place a piece of parchment paper between layers to avoid sticking. Keep them in the fridge for up to one week. For longer storage, you can freeze them. Just wrap each cup in plastic wrap.
Serving and Presentation Ideas
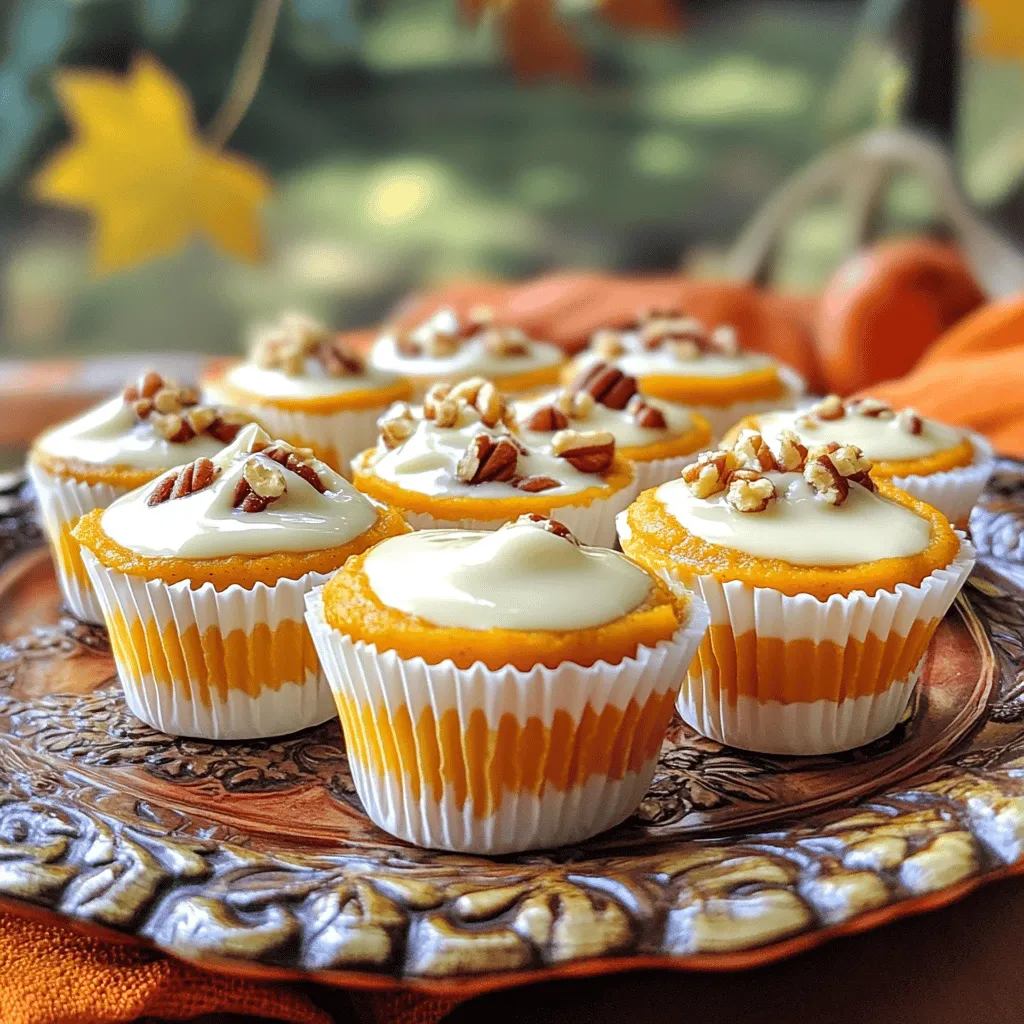
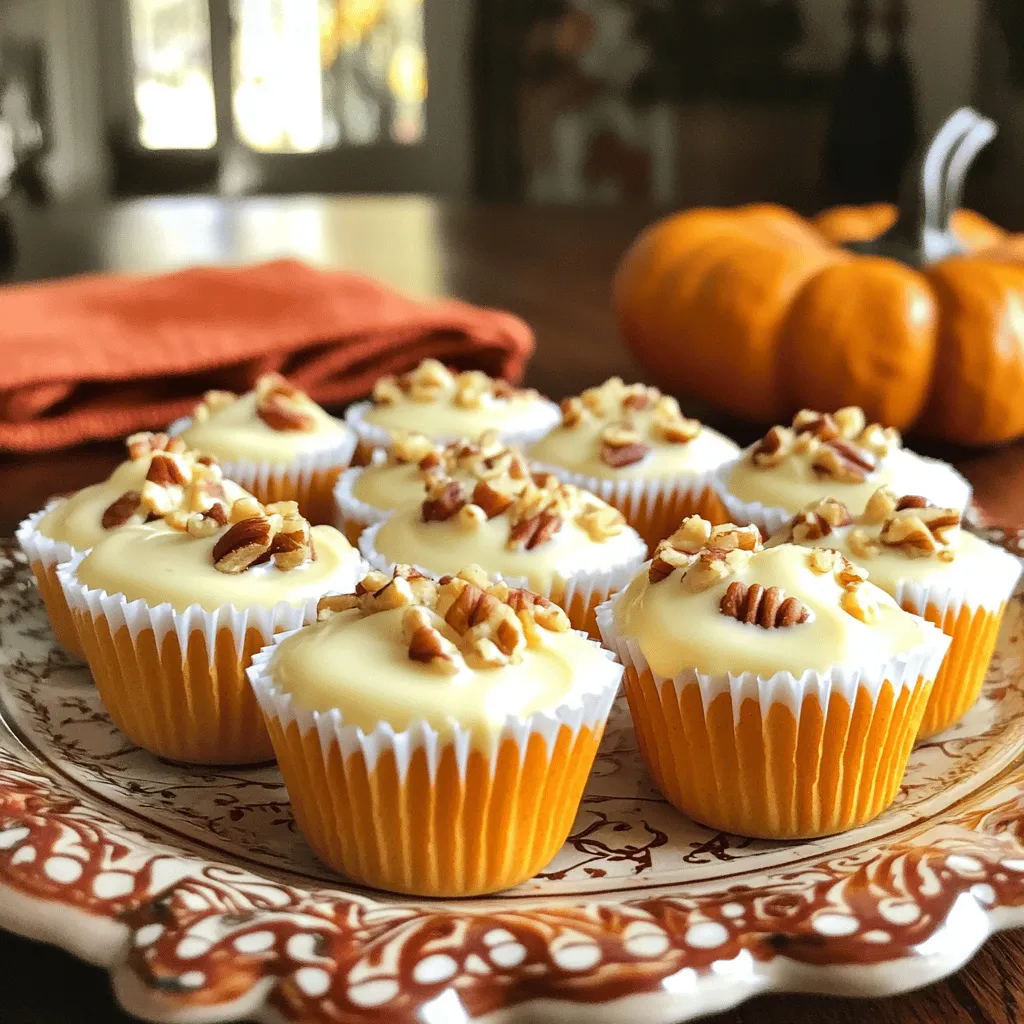
For a beautiful display, use a decorative platter. Arrange the pumpkin cups in neat rows. Sprinkle extra crushed pecans on top for a nice touch. Drizzle some maple syrup on the platter for added sweetness. This makes a lovely dessert for any gathering. Your guests will be impressed!
Variations
Chocolate Pumpkin Cups with Dark Chocolate
If you love dark chocolate, you will enjoy this twist. To make chocolate pumpkin cups, swap the white chocolate for dark chocolate. Melt the dark chocolate as you did with the white chocolate. Then, follow the same steps to create your pumpkin filling. The rich, bold flavor of dark chocolate adds a nice depth to the cups. It pairs perfectly with pumpkin and spices. You get a tasty treat that’s a bit more grown-up.
Gluten-Free and Vegan Modifications
You can easily make these cups gluten-free and vegan. For a gluten-free option, use gluten-free graham crackers. You can find these in many stores. For a vegan version, choose dairy-free white chocolate or dark chocolate. Check the labels to ensure they are vegan-friendly. Also, you can replace the maple syrup with agave syrup for a vegan sweetener. These swaps keep the cups delicious and suitable for different diets.
Seasonal Flavors Additions (like Spice or Citrus)
Want to spice things up? You might add seasonal flavors to your pumpkin cups. Try adding a pinch of ginger or clove for warmth. These spices give a cozy taste that fits well with fall. You can also add a splash of orange or lemon zest for a citrus kick. The bright notes from citrus balance the sweetness of the pumpkin. Experimenting with flavors can turn this treat into a new favorite!
Storage Info
How to Store the Pumpkin Cups
You want to store your White Chocolate Maple Pumpkin Cups in an airtight container. This keeps them fresh and tasty. Place parchment paper between layers to avoid sticking. Store them in the fridge. They will stay cool and firm.
Shelf Life of No-Bake Desserts
No-bake desserts like these cups usually last about five days in the fridge. After that, they may lose their yummy taste and texture. Always check for any signs of spoilage, like an off smell or change in color.
Freezing Instructions for Long-Term Storage
You can freeze the pumpkin cups for longer storage. First, place them in a single layer on a tray. Freeze for one hour until solid. Then, transfer them to a freezer-safe bag or container. They can last up to three months in the freezer. When you’re ready to eat, just thaw them in the fridge overnight.
FAQs
Can I use other types of chocolate instead of white chocolate?
Yes, you can use dark or milk chocolate. Dark chocolate gives a rich flavor. Milk chocolate adds sweetness. Both options will change the taste. Make sure to adjust the melting time. Dark chocolate may melt slower than white chocolate. Use the same melting method for best results.
What can I do with leftover pumpkin puree?
Leftover pumpkin puree is great in many dishes. You can add it to smoothies for a healthy twist. It works well in oatmeal for extra flavor. You can also use it in pancakes or muffins. It makes tasty soups too! Just store it in an airtight container in the fridge. Use it within a week for best taste.
How long do these cups need to set in the refrigerator?
These cups need at least 1 hour to set. This allows the chocolate to harden properly. If you want a firmer cup, leave them for 2 hours. Just remember to keep them covered. This keeps them fresh and prevents drying out. Enjoy your tasty treats once they are set!
This blog post provided a clear guide to making delicious pumpkin cups. We covered all the ingredients, best practices for choosing them, and how to substitute when needed. You learned the step-by-step process for melting chocolate, preparing pumpkin filling, and assembling the cups.
Remember the tips for perfect melting and storage. Explore variations like dark chocolate and seasonal flavors to keep things exciting. With proper storage, enjoy these treats for days. Dive in and enjoy your sweet creations!