Skip to content
DisclaimerTerms Of UseGDPR PolicyCookie Policy

Home Cooking Style

  • Home
  • Drinks
  • Appetizers
  • Dinner
  • Dessert
  • About
  • Contact
  • Privacy Policy
DisclaimerTerms Of UseGDPR PolicyCookie Policy

NO-ING-IMG

- Quinoa and Broth - 1 cup quinoa, rinsed - 2 cups vegetable broth or water - Fresh Vegetables - 1 zucchini, diced - 1 bell pepper (any color), diced - 1 cup cherry tomatoes, halved - 1 red onion, chopped - Seasonings and Oils - 2 tablespoons olive oil - 1 teaspoon garlic powder - 1 teaspoon smoked paprika - Salt and pepper to taste - Optional Toppings - 1 avocado, sliced - Fresh parsley or cilantro for garnish - ¼ cup feta cheese or crumbled tofu (optional) - 1 tablespoon lemon juice This list gives you everything needed for roasted veggie quinoa bowls. The quinoa and broth form the base. Fresh veggies add color and nutrition. Seasonings bring bold flavors to life. Optional toppings elevate the meal, making it more special. You can mix and match to fit your taste. For the full recipe, check the details above. Cooking Quinoa Start by rinsing 1 cup of quinoa under cold water. This helps remove any bitter taste. In a medium pot, bring 2 cups of vegetable broth or water to a boil. Add the rinsed quinoa, then lower the heat. Cover the pot and let it simmer for 15 minutes. When all the liquid is absorbed, take it off the heat. Fluff the quinoa with a fork to keep it light. Preparing the Vegetables While the quinoa cooks, prepare your veggies. Take a large bowl and add 1 diced zucchini, 1 diced bell pepper, 1 cup of halved cherry tomatoes, and 1 chopped red onion. These veggies bring color and taste to the dish. Drizzle 2 tablespoons of olive oil over the mix. Sprinkle in 1 teaspoon of garlic powder, 1 teaspoon of smoked paprika, and add salt and pepper to taste. Toss everything until the veggies are well coated. Roasting the Veggies Next, spread the seasoned vegetables on a baking sheet lined with parchment paper. Preheat your oven to 425°F (220°C). Roast the veggies in the oven for 25-30 minutes. Stir the veggies halfway through to ensure even cooking. They should come out tender and slightly caramelized. Mixing Quinoa and Veggies In a large serving bowl, combine the cooked quinoa with the roasted vegetables. This mix creates a hearty base. Drizzle 1 tablespoon of lemon juice over everything and toss gently to mix the flavors. Adding Final Toppings Now, it's time for the fun part—toppings! Slice 1 avocado and add it on top. If you like, sprinkle ¼ cup of feta cheese or crumbled tofu for extra flavor. Finish with fresh parsley or cilantro for a pop of color. Enjoy your beautiful and tasty Roasted Veggie Quinoa Bowls! For the full recipe, refer to the beginning of this article. Importance of Rinsing Quinoa Always rinse your quinoa before cooking. This removes a bitter coating called saponin. Rinsing will give your quinoa a clean, nutty taste. Simply place the quinoa in a fine mesh strainer and rinse under cold water for a minute. Trust me, this step makes a big difference! Checking for Doneness After cooking, check if your quinoa is done. The grains should look fluffy, and you should see tiny spirals called germ. If the liquid is gone but the quinoa seems hard, add a splash more water. Cover and cook for another few minutes. This ensures a perfect texture! Achieving Perfectly Roasted Vegetables Roasting brings out the sweet flavors in veggies. Cut your vegetables into even pieces to help them cook evenly. Spread them in a single layer on a baking sheet. Overcrowding will make them steam instead of roast. Bake at 425°F for 25-30 minutes, stirring halfway through for best results. Flavor Enhancements Through Seasoning Seasoning is key to tasty roasted veggies. Use olive oil to help spices stick. Garlic powder and smoked paprika add depth. Don’t forget salt and pepper! Toss your veggies well to coat them evenly. This simple step boosts flavor and makes every bite delightful. For more details on how to prepare this dish, check the Full Recipe. {{image_2}} Adding protein can enhance your roasted veggie quinoa bowls. You can use cooked chicken for a hearty touch. Simply grill or roast the chicken breasts before slicing them. Toss them right in with the quinoa and veggies. If you prefer a plant-based option, chickpeas work great too. They add a nice texture and protein boost. Just drain and rinse a can of chickpeas, then roast them alongside your veggies. For a different twist, try tofu or tempeh. These ingredients soak up flavors well. Cut the tofu into cubes and press it to remove excess water. Marinate it in olive oil, garlic powder, and smoked paprika. Roast it until golden and crispy. Tempeh, with its nutty flavor, can be sliced or crumbled. It also benefits from similar seasonings. Both options are tasty and nutritious. Using seasonal veggies is a smart way to keep your bowls fresh and exciting. In the summer, add corn or eggplant for sweetness. In fall, consider butternut squash and Brussels sprouts for warmth. The key is to mix a variety of colors. Colorful mixes not only look great but also provide different nutrients. Try bell peppers, carrots, and broccoli for a vibrant blend. Each veggie brings its unique flavor and crunch. You can also experiment with roasted sweet potatoes or beets. They add sweetness and a lovely color. Always remember to cut your veggies into similar sizes for even cooking. With these variations, your roasted veggie quinoa bowls will never get boring! - Refrigerating Leftovers After you enjoy your roasted veggie quinoa bowls, let them cool. Store leftovers in an airtight container. They will stay fresh in the fridge for up to four days. When you want to eat them again, just take them out. - Freezing Options You can freeze your quinoa bowls for later. Place the cooled dish in a freezer-safe container. It will keep well for up to three months. Label the container with the date. This way, you know when to use it. - Ensuring Optimal Texture To keep your quinoa bowl tasty, reheat it gently. You can use the microwave or a pan on the stove. If using the microwave, add a splash of water to keep it moist. Cover it with a lid or a damp paper towel to trap steam and heat evenly. - Quick Reheat Methods For quick reheating, use the microwave. Heat it for one to two minutes, stirring halfway. If using a pan, heat on medium and stir often. This helps prevent sticking and keeps the veggies from getting mushy. Enjoy your delicious meal again! Can I use different grains instead of quinoa? Yes, you can! You can use rice, farro, or barley. Just remember that cooking times might change. Check the package for the right water and time needed. Quinoa is great, but other grains can add new flavors. What vegetables are best for roasting? Many veggies roast well! I love using zucchini, bell peppers, and cherry tomatoes. You can also try carrots, Brussels sprouts, or broccoli. Each veggie brings its own taste and texture, so feel free to mix them up! Is this dish gluten-free? Yes, this dish is gluten-free! Quinoa is naturally free from gluten. It makes a perfect base for a healthy meal. Just ensure any added ingredients, like broth or toppings, are also gluten-free. How to make it vegan-friendly? Making this dish vegan is easy! Just skip the feta cheese or use crumbled tofu instead. You can also add more veggies or legumes for protein. This way, you keep it tasty and plant-based. For the full recipe, check out the section above! Roasted veggie quinoa bowls are easy and fun to make. This blog covered ingredients, step-by-step cooking, and tips to enhance your dish. You learned how to store leftovers and reheat them well. Adding proteins and seasonal veggies makes it flexible and tasty. Enjoy your meal creation, and don't hesitate to get creative with ingredients! This dish is sure to impress and satisfy everyone’s taste buds. Happy cooking!

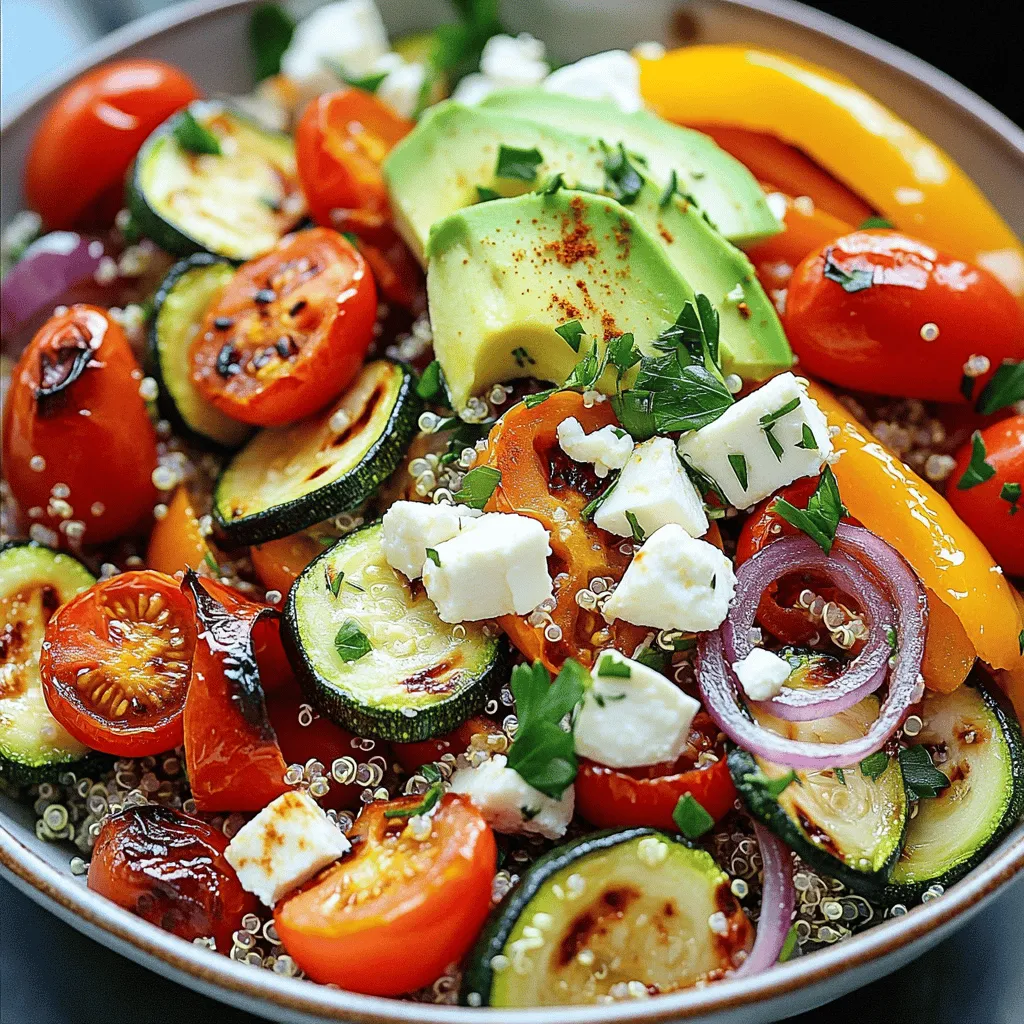
Roasted Veggie Quinoa Bowls Nutritious and Flavorful

Are you craving a meal that’s both hearty and healthy? Roasted Veggie Quinoa Bowls are here to satisfy your hunger

For a tasty creamy tomato tortellini soup, gather these simple ingredients: - 1 tablespoon olive oil - 1 medium onion, diced - 3 cloves garlic, minced - 1 carrot, diced - 1 rib celery, diced - 1 can (28 oz) crushed tomatoes - 4 cups vegetable broth - 1 teaspoon dried basil - 1 teaspoon dried oregano - ½ teaspoon red pepper flakes (optional) - 1 package (9 oz) refrigerated cheese tortellini - 1 cup heavy cream or coconut milk (for a dairy-free option) - Salt and pepper to taste - Fresh basil leaves for garnish You can swap ingredients based on what you have. If you lack olive oil, use any cooking oil. For the onion, shallots work well too. If you prefer a lighter flavor, replace heavy cream with milk or a plant-based cream. You can use fresh herbs instead of dried ones. Just double the amount for the best taste. If you want a spicy kick, try using jalapeños instead of red pepper flakes. Choose fresh vegetables for the best taste. Look for onions that feel firm and have a smooth skin. When picking garlic, choose heads that are tight and plump. For carrots and celery, select ones that are crisp and bright in color. Avoid any that show signs of wilting or soft spots. When it comes to tomatoes, check for ones that are ripe and free from blemishes. Fresh basil should smell sweet and look vibrant. These small details make a big difference in flavor. For the full recipe, check out the detailed instructions. Start by heating one tablespoon of olive oil in a large pot over medium heat. Add one medium diced onion and sauté it for about 3-4 minutes. The onion should look clear but not brown. Next, toss in three minced garlic cloves, one diced carrot, and one diced rib of celery. Cook these veggies for an extra 5 minutes. They should soften nicely. Now, pour in one can of crushed tomatoes and four cups of vegetable broth. Stir in one teaspoon each of dried basil and dried oregano. If you like a bit of heat, add ½ teaspoon of red pepper flakes. Bring this mixture to a gentle simmer. Once it simmers, add one package of refrigerated cheese tortellini. Cook it according to the package instructions, usually around 3-5 minutes. Check that the tortellini is tender before moving on. After cooking the tortellini, reduce the heat. Stir in one cup of heavy cream or coconut milk for a dairy-free option. Heat it through but do not let it boil. Finally, season your soup with salt and pepper to taste. Serve it hot and garnish with fresh basil leaves for a nice touch. - Prep Time: 10 minutes - Cooking Time: 20 minutes - Total Time: 30 minutes This entire process is quick and easy, making it perfect for a cozy weeknight meal. This recipe yields about 4-6 servings. It’s a great dish to share or to enjoy over a few days. You can easily adjust the recipe for more or fewer servings, depending on your needs. For the full recipe, check out the complete details above. To make your creamy tomato tortellini soup pop, try these tips: - Fresh herbs: Use fresh basil instead of dried for a bright taste. - Umami boost: Add a splash of balsamic vinegar or soy sauce for depth. - Savory finish: Top each bowl with grated Parmesan cheese for extra flavor. These small changes can transform an already great soup into a dish you crave. When making this soup, keep these mistakes in mind: - Overcooking the tortellini: Follow the package time closely. Overcooked pasta becomes mushy. - Skipping seasoning: Don’t forget salt and pepper. They balance the soup's flavor. - Boiling after adding cream: Heat gently to avoid curdling the cream. Avoiding these errors helps you achieve a perfect soup every time. For a well-rounded meal, consider these pairs: - Crusty bread: A good sourdough or baguette is perfect for dipping. - Salad: A simple green salad with vinaigrette adds freshness. - Wine: A light red wine, like Pinot Noir, complements the flavors well. These pairings elevate your meal and make it more enjoyable. For the full recipe of creamy tomato tortellini soup, check the earlier section. {{image_2}} You can easily make this soup dairy-free. Simply replace the heavy cream with coconut milk. This swap keeps the soup creamy and rich without dairy. You can also use a vegan tortellini. Look for brands that offer plant-based fillings. With these changes, you still enjoy the same great flavor. If you want to boost nutrition, add more veggies. Spinach, kale, or zucchini work well. Chop them into small pieces and toss them in during the last few minutes of cooking. This way, they stay bright and tender. For extra protein, try adding cooked chicken, sausage, or beans. These options will make your soup heartier and more filling. Feel free to play with the spices. If you like heat, add more red pepper flakes. You can also try smoked paprika for a hint of smokiness. Fresh herbs like thyme or rosemary can add depth too. Experimenting with different seasonings will create a unique flavor each time. Check out the Full Recipe for the classic version, then get creative! After enjoying your creamy tomato tortellini soup, let it cool to room temperature. Use an airtight container to store the leftovers. This keeps the soup fresh and tasty. You can keep it in the fridge for up to three days. If you want to enjoy it later, you might want to freeze it. To reheat, pour the soup into a pot. Heat it on medium-low. Stir it often to prevent it from sticking. This helps the flavors come back to life. You can also microwave it. Just use a microwave-safe bowl and cover it with a lid. Heat in short bursts, stirring in between, until hot. For long-term storage, freeze the soup. Use freezer-safe containers or bags. Leave some space for expansion. This soup can last up to three months in the freezer. When you're ready to eat, thaw it overnight in the fridge. Then, reheat it as mentioned above. This way, you’ll have a warm, comforting meal ready anytime. For the full recipe, check out the complete guide. Yes, you can use frozen tortellini in this soup. Just add the frozen tortellini directly to the pot during cooking. They will take a bit longer to cook, usually about 5-7 minutes. This makes it easy to enjoy a warm meal without extra prep. To make this soup ahead, follow all steps except for adding the cream. Cook the soup and let it cool. Store it in a sealed container in the fridge for up to three days. When ready to serve, reheat the soup and stir in the cream. This keeps the soup creamy and fresh. If you want more heat, add more red pepper flakes to the pot. You can also mix in some hot sauce or diced jalapeños. Both options will give the soup a nice kick. Adjust the spice level to your liking for a comforting yet bold flavor. For the full recipe, check out the complete list of steps and ingredients. This blog post covered key ingredients for a great dish. It shared tips to choose fresh produce and offered helpful substitutes. I provided step-by-step cooking instructions and tips to avoid common mistakes. We explored variations for different diets and discussed how to store leftovers. In my final thoughts, remember that cooking is fun. Try new flavors and enjoy the process. Your meals can be both tasty and healthy with the right ingredients and methods. Happy cooking!

Creamy Tomato Tortellini Soup Savory and Comforting

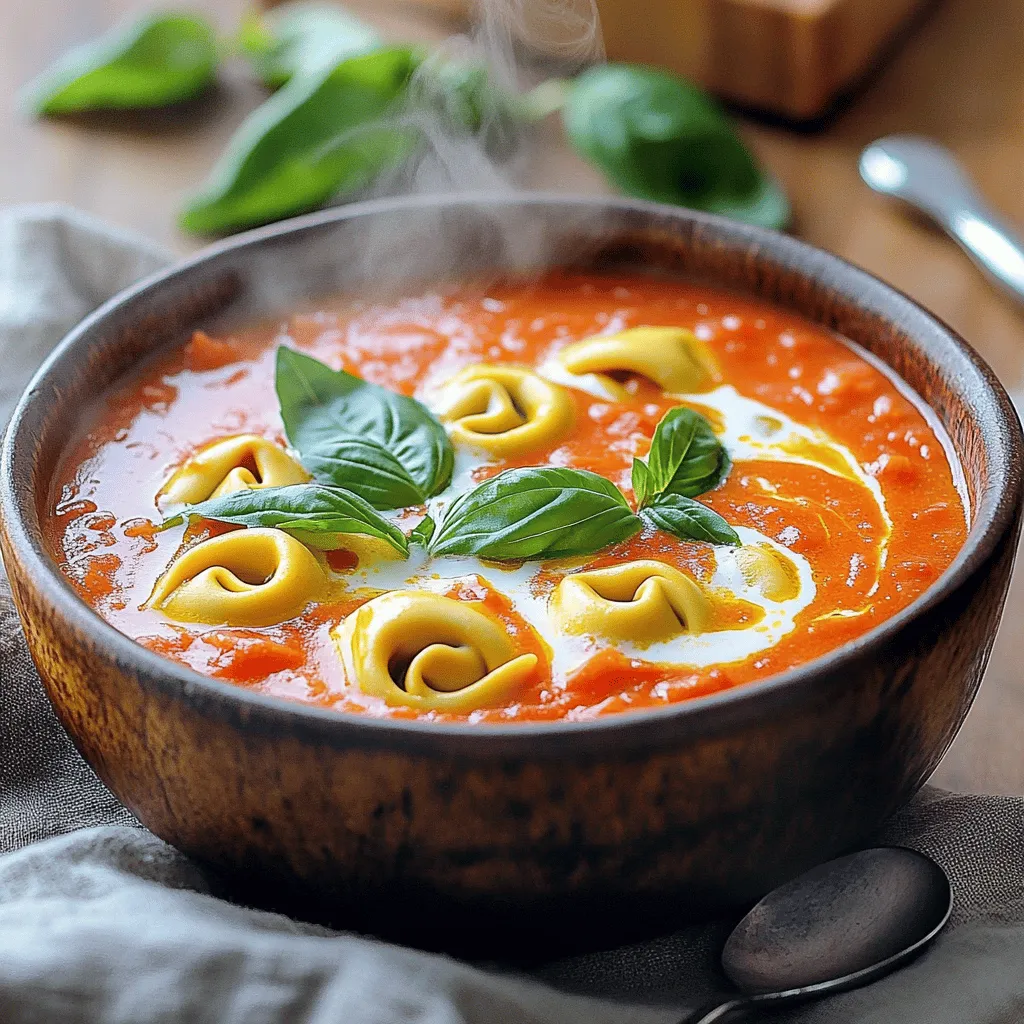
Looking for a cozy meal that warms your heart? My Creamy Tomato Tortellini Soup is just what you need! Packed

To make a tasty Spinach Ricotta Lasagna, you need simple ingredients that pack a punch in flavor. Here’s what you will need: - 9 lasagna noodles - 2 cups fresh spinach, chopped - 1 cup ricotta cheese - 1 cup mozzarella cheese, shredded - 1/2 cup grated Parmesan cheese - 1 large egg - 3 cups marinara sauce - 2 cloves garlic, minced - 1 tablespoon olive oil - Salt and pepper to taste - 1 teaspoon Italian seasoning - Fresh basil leaves for garnish These ingredients create layers of flavor and texture in your lasagna. The fresh spinach adds color and nutrients. The cheeses give it that creamy, rich taste we all love. Don't forget the marinara sauce for a punch of tomato goodness. You can find the complete cooking steps in the Full Recipe section. - Preheat the oven to 375°F (190°C). - Cook the lasagna noodles until al dente. This means they should be firm but not hard. Drain them and set aside. - In a skillet, sauté garlic in olive oil. - Add chopped spinach and cook until wilted, about three minutes. - Season with salt, pepper, and Italian seasoning. Remove from heat and let it cool. - In a bowl, combine ricotta cheese, shredded mozzarella, grated Parmesan, egg, and the cooled spinach. - Mix well until you have a uniform consistency. This helps the flavors blend. - Spread a thin layer of marinara sauce in a baking dish. - Place three lasagna noodles over the sauce. - Spread half of the ricotta-spinach mix over the noodles. - Top with another layer of marinara sauce. - Repeat the layers: noodles, remaining ricotta-spinach mixture, and more sauce. - Finish with a final layer of noodles and top with remaining marinara sauce and reserved mozzarella cheese. - Cover the baking dish with foil to keep it moist. - Bake in the preheated oven for 25 minutes. - Uncover and bake for an additional 15 minutes, until the cheese is bubbly and golden. - After baking, let the lasagna rest for about 10 minutes before slicing. - Garnish with fresh basil leaves before serving. - Enjoy this tasty dish from the Full Recipe! - Use fresh ingredients for the best flavor. Fresh spinach and cheeses bring life to the dish. - Avoid overcooking the noodles. You want them al dente so they hold their shape. - Layer ingredients evenly for a uniform bake. This ensures each slice has the same great taste. - Use fresh basil for a pop of color. It brightens the dish and adds a nice aroma. - Skipping the resting period before slicing leads to messy servings. Let it rest for ten minutes. - Not seasoning the spinach mixture can make it bland. A little salt and pepper go a long way. For more tips, be sure to check out the Full Recipe. {{image_2}} You can add ground beef or sausage to your lasagna for a hearty twist. Just brown the meat in a skillet before adding it to your layers. This adds a rich flavor that many love. If you're looking for a leaner choice, try using turkey. Ground turkey keeps the dish light while still being tasty. For a veggie boost, toss in more vegetables. Think bell peppers, mushrooms, or zucchini. These add both flavor and color. You can also swap out cheeses. Try a blend of feta and mozzarella for a tangy kick. This adds a fun twist to the classic flavors. If you need a gluten-free dish, switch to gluten-free lasagna noodles. Many brands offer great options that cook just like regular noodles. You might need to adjust cooking times slightly, so keep an eye on it. This way, everyone can enjoy your delicious spinach ricotta lasagna. For the full recipe, check out the details provided above. To store your Spinach Ricotta Lasagna safely, first let it cool. Once cooled, cover it tightly with plastic wrap or aluminum foil. This keeps the flavors fresh and prevents drying. You can also place it in an airtight container. Use a glass or plastic container that is safe for the fridge. To freeze unbaked lasagna, assemble it in a freezer-safe dish. Wrap it tightly with plastic wrap and aluminum foil. This helps prevent freezer burn. When you want to cook it, thaw it in the fridge overnight. For reheating, bake it straight from the fridge at 375°F (190°C) for about 45-60 minutes. Spinach Ricotta Lasagna lasts about 3-5 days in the fridge. After that, the quality may drop. Signs of spoilage include a sour smell, discoloration, or a slimy texture. If you notice these, it’s best to discard it. Yes, you can use frozen spinach. First, thaw it completely. You can do this in the fridge overnight or by microwaving it on low. Once thawed, drain excess water. This step is key. Too much water makes the lasagna soggy. After draining, chop the spinach if needed, and use it just like fresh spinach in the recipe. Making Spinach Ricotta Lasagna ahead is simple. Prepare the lasagna as directed but do not bake it. Cover it tightly with plastic wrap or foil. You can store it in the fridge for up to 24 hours. When you're ready, bake it straight from the fridge. Just add a few extra minutes to the baking time. This method keeps flavors fresh and saves time. This dish pairs nicely with a fresh salad. A simple green salad with a light vinaigrette complements the lasagna well. Garlic bread is another great choice. It adds a nice crunch and flavor. You can also try a side of roasted veggies for a healthy touch. These options balance the richness of the lasagna. Absolutely! This recipe works great for meal prep. You can portion out servings right after cooking. Use airtight containers for easy storage. When you want a meal, just reheat a portion. This way, you always have a tasty option ready to go. Plus, it helps reduce food waste. Yes, you can get creative with cheeses! Try adding feta or goat cheese for a tangy twist. Cream cheese can also add creaminess. Just mix it into the ricotta layer. Experiment with your favorite cheeses to find your perfect flavor. Each option can bring a new touch to the dish. To reheat leftovers, use an oven for the best results. Preheat it to 350°F (175°C). Place the lasagna in an oven-safe dish, covering it with foil. Heat it for about 20 minutes, or until warm. This method keeps the lasagna from drying out. If you're short on time, you can use a microwave. Just heat it in short bursts to avoid overcooking. For the complete dish, don’t forget to check the Full Recipe! You learned how to make Spinach Ricotta Lasagna step by step. We discussed the key ingredients and the techniques to prepare them. You now know how to assemble and bake lasagna for delicious results. Remember, using fresh ingredients makes a big difference. Avoid common mistakes for the best outcome. Whether you prefer meat, vegetables, or gluten-free options, this recipe is versatile. Enjoy your lasagna with family and friends. With these tips, you can impress everyone with your cooking skills!

Spinach Ricotta Lasagna Delightful and Easy Recipe

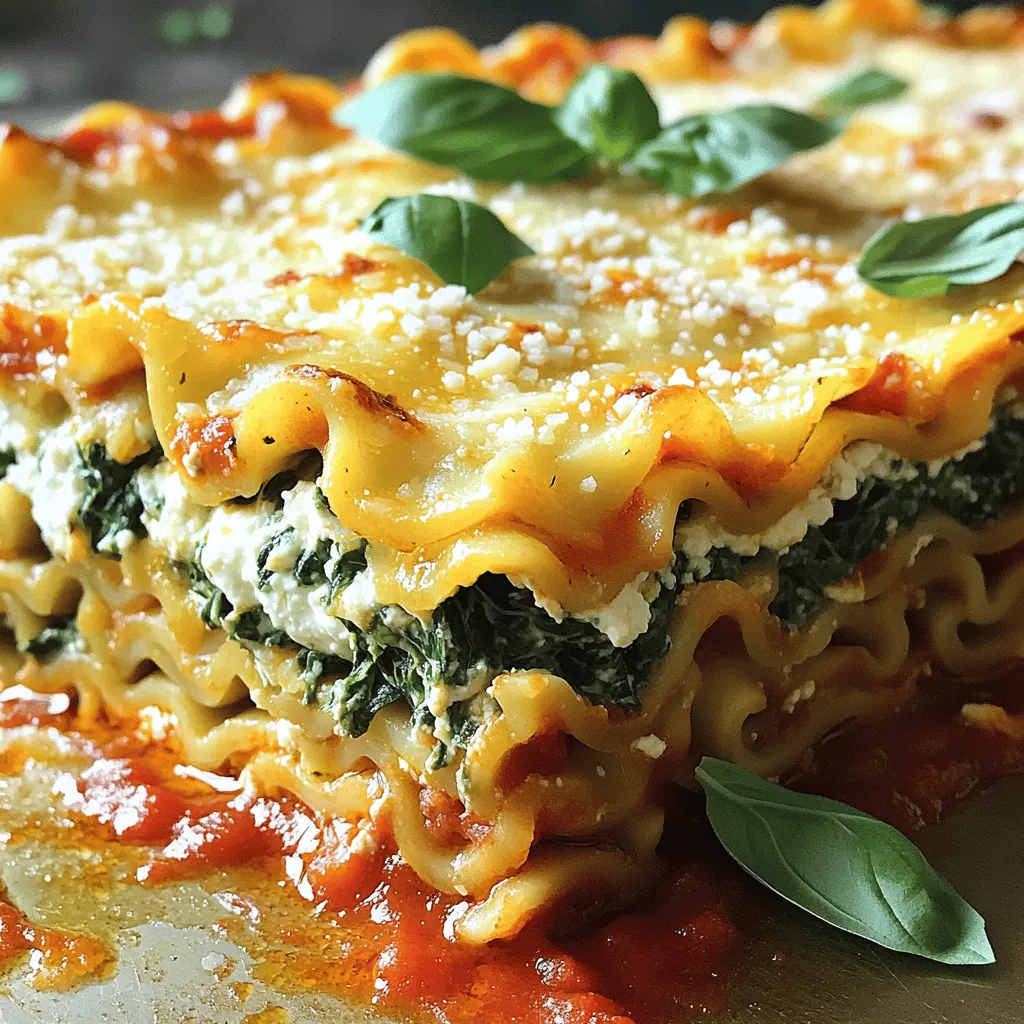
Are you ready to make a dinner that’s as tasty as it is easy? This Spinach Ricotta Lasagna combines fresh

For a great creamy mushroom and spinach pasta, you need a few key items: - Pasta choices: You can use fettuccine, penne, or any pasta you like. - Key vegetables: Mixed mushrooms like button, cremini, and shiitake add depth. Fresh spinach gives a nice color and taste. - Essential dairy: Heavy cream creates that rich, creamy texture. Grated Parmesan cheese adds flavor and creaminess. These ingredients work together to make a dish that feels hearty and satisfying. The mushrooms give a nice earthy taste, while the spinach brightens each bite. The heavy cream and Parmesan create a sauce that clings to the pasta perfectly. Seasoning is vital in making your dish pop. Here’s what you need: - Herbs: Dried Italian herbs, like basil and oregano, add warmth and flavor. - Salt and pepper: Simple but essential for enhancing all the flavors. - Fresh parsley: This adds a fresh touch and color on top. Drizzling olive oil adds a lovely shine and rich flavor. Using these seasonings and garnishes makes your pasta not only taste better, but look beautiful too. You can find the full recipe [here](#). To cook pasta to al dente, bring a large pot of salted water to a rolling boil. Add your pasta and cook according to the package instructions. For most types, this is usually around 8 to 10 minutes. You want it to be firm but not hard. Before draining, reserve about 1 cup of the pasta water. This water is full of starch, and it helps thicken the sauce later. In a large skillet, heat olive oil over medium heat. Add finely chopped onion and sauté for about 3 to 4 minutes. You want them soft and translucent. Next, stir in minced garlic and sliced mushrooms. Cook these for about 5 to 7 minutes. The mushrooms should become soft and golden. To avoid burning the garlic, add it after the onions have started to soften. If it starts to brown too quickly, reduce the heat. Once your vegetables are ready, reduce the heat to low. Pour in the heavy cream and stir well. Next, add grated Parmesan cheese and mix until it melts and becomes creamy. If the sauce looks too thick, add the reserved pasta water a little at a time. Keep stirring until you reach the desired consistency. Now, add the cooked pasta to the skillet with the sauce. Toss everything together until the pasta is well-coated. Season with salt, pepper, and dried Italian herbs. For a beautiful presentation, serve the pasta in shallow bowls. Drizzle with extra olive oil and sprinkle fresh parsley on top. You can also add a bit more grated Parmesan for extra flavor. For the complete recipe, check the Full Recipe. To avoid mushy pasta, cook it until al dente. This means the pasta should be firm when bitten. Make sure to salt the water well before adding the pasta. This adds flavor and helps keep it from sticking. Remember to reserve some pasta water. You can add a bit to your sauce if it gets too thick. For mushrooms, choose a mix like button and cremini. This adds depth. Cook them until they are golden brown. This keeps their texture nice and firm. If you add them to the pan too soon, they may turn soggy. To boost flavor, consider adding a pinch of red pepper flakes or some fresh thyme. These spices can bring out the richness of the cream. You can also add a splash of white wine after cooking the mushrooms. This adds a nice depth to the sauce. Using homemade broth instead of water can enhance the dish. It adds more flavor than plain water. If you have leftover broth, use it to cook the pasta. This makes the pasta tasty from the start. To make the dish vegetarian or vegan, swap the heavy cream for coconut cream or cashew cream. These options give a similar rich texture. For cheese, use nutritional yeast or vegan cheese. If you need gluten-free pasta, look for options made from rice or chickpeas. They work well in this recipe and taste great. Just follow the cooking instructions on the package closely. {{image_2}} You can easily switch up the veggies in this dish. For example, try using kale instead of spinach. Kale adds a nice crunch and is very healthy. Zucchini is another tasty option. It has a mild flavor and cooks quickly. If you want to make this dish dairy-free, there are great substitutes for cream and cheese. Use coconut cream or cashew cream instead of heavy cream. Both options add creaminess without dairy. Nutritional yeast can replace Parmesan cheese for a cheesy flavor. Want to add more protein? Chicken is a great choice. Simply cook it in the skillet before adding the veggies. Shrimp is another fun option. It cooks fast and adds a nice touch to the pasta. You can also play with flavors by using different herbs or spices. Try adding thyme or rosemary for extra depth. A pinch of red pepper flakes can bring a bit of heat. Experimenting with these flavors can make your creamy mushroom and spinach pasta unique. For the full recipe, check out the section above. To keep your creamy mushroom and spinach pasta fresh, store it in an airtight container. This prevents moisture loss and keeps flavors intact. Place the leftovers in the fridge within two hours of cooking. Generally, the dish stays fresh for about three to four days. If you notice any off smells or changes in texture, it’s best to toss it. You can freeze this pasta dish if you want to keep it longer. First, let it cool completely. Then, transfer portions into freezer-safe bags or containers. Squeeze out excess air to avoid freezer burn. When you’re ready to eat, thaw the pasta overnight in the fridge. To reheat, warm it gently on the stove. Add a splash of cream or pasta water to restore its creamy texture. This way, you can enjoy a delicious meal anytime! For the complete recipe, check out the Full Recipe. You can make this dish earlier in the day. Cook the pasta and the sauce separately. Store them in containers. Keep the sauce in the fridge to keep it fresh. When ready to eat, heat the sauce. Mix it with the cooked pasta. This way, you enjoy a fresh meal without much fuss. Yes, you can use dried mushrooms. Just remember to rehydrate them first. Soak them in warm water for about 20 minutes. This will help them regain some moisture. Dried mushrooms add a rich flavor, but fresh mushrooms offer a nice texture. Choose based on your taste preference. This pasta pairs well with a simple green salad. A light Caesar salad or arugula salad works great. For wine, try a crisp white like Sauvignon Blanc. It balances the creamy sauce nicely. Garlic bread is also a tasty side to soak up any leftover sauce. Yes, this recipe is perfect for meal prep. Portion the pasta and sauce separately in containers. You can reheat them easily in the microwave. The dish stays tasty for up to three days in the fridge. It makes for quick lunches or dinners during the week. For the full recipe, check out the earlier section. In this blog post, we explored the key ingredients that make creamy mushroom and spinach pasta irresistible. We discussed cooking techniques that help you prepare each element perfectly and shared tips for enhancing flavor and accommodating dietary needs. Now, you have a solid recipe and suggestions for variations. This dish is not just about taste; it's about making cooking easy and fun. Use these tips to create your own version and enjoy a delicious meal that impresses every time.

Creamy Mushroom and Spinach Pasta Hearty and Simple

Looking for a comforting dish that’s easy to make? Creamy Mushroom and Spinach Pasta is the answer! This hearty recipe

- 1 lb boneless chicken thighs, cut into bite-sized pieces - 1 cup bell peppers (red, green, and yellow), diced - 1 medium onion, sliced - 1 cup pineapple chunks (fresh or canned) - 1/4 cup honey - 1/4 cup apple cider vinegar - 1/4 cup ketchup - 1 tablespoon soy sauce - 1 tablespoon cornstarch - 1 tablespoon vegetable oil - 2 cloves garlic, minced - Salt and pepper to taste - Cooked rice, for serving - Sesame seeds, for garnish - Fresh cilantro, for garnish (optional) Gather these items to make your sweet and sour chicken shine. The chicken thighs give a juicy bite. The bell peppers add color and crunch. Onions bring a nice sweetness. The sauce is where the magic happens. Pineapple makes it fruity and bright. Honey adds sweetness, while apple cider vinegar gives zing. Ketchup ties it all together. For a smooth sauce, use cornstarch. Vegetable oil helps cook your chicken just right. Garlic adds flavor, while salt and pepper enhance everything. Serve your sweet and sour chicken over rice. Top it with sesame seeds and cilantro for a nice touch. You can find the Full Recipe [here]. Start by mixing the honey, apple cider vinegar, ketchup, soy sauce, salt, and pepper in a large bowl. This mixture will be your marinade. Cut the chicken thighs into bite-sized pieces and add them to the bowl. Toss the chicken to coat it well. Cover the bowl and let it marinate for at least 30 minutes. The longer you marinate, the more flavor the chicken will absorb. While the chicken marinates, prepare the sauce. In a small bowl, take one tablespoon of the marinade from the chicken. Add one tablespoon of cornstarch to this and stir until smooth. This mixture will help thicken your sauce later. Set it aside for now. Heat one tablespoon of vegetable oil in a large skillet over medium heat. Once hot, add the marinated chicken to the skillet. Cook the chicken until it turns brown and is fully cooked, which takes about 5 to 7 minutes. Remove the cooked chicken and keep it warm. In the same skillet, add the sliced onion and diced bell peppers. Sauté them for about 3 to 4 minutes, until they start to soften. Then, add the minced garlic and cook for another minute. Next, return the chicken to the skillet along with the pineapple chunks and the remaining marinade. Stir everything together to combine. Finally, pour the cornstarch mixture into the skillet. Stir constantly for about 2 to 3 minutes until the sauce thickens. You can find the Full Recipe for more detailed instructions. To get sweet and sour just right, use equal parts honey and vinegar. Honey gives a sweet touch, while vinegar adds tang. Adjust these to your taste. If it's too sweet, add more vinegar. If it's too sour, add more honey. A dash of soy sauce adds depth without overpowering the dish. For tender and juicy chicken, use boneless thighs. They stay moist during cooking. Marinate your chicken for at least 30 minutes. This step infuses flavor and keeps it juicy. Cook the chicken on medium heat. This method ensures it cooks evenly without drying out. To keep your veggies crisp, add them at the right time. Sauté onions and bell peppers for about 3-4 minutes. Wait to add garlic until the last minute. This helps it stay fragrant and bright. Add pineapple for a burst of sweetness just before serving. This keeps the texture firm and fresh. For the full recipe, check out the [Full Recipe]. {{image_2}} To make a tasty vegetarian version of sweet and sour chicken, simply swap the chicken for tofu or tempeh. Both options absorb flavors well. I recommend using firm tofu for the best texture. Press the tofu to remove excess water, then cut it into bite-sized pieces. Tempeh has a nutty flavor and works great too. Just slice it into cubes or strips. You can marinate these proteins just like you would the chicken. This keeps all the vibrant flavors. You can get creative with the sweet and sour sauce. Try using different fruits like mango, peach, or even apricot for a unique twist. Each fruit gives the sauce a different taste. If you want a bit more tang, use rice vinegar or white vinegar instead of apple cider vinegar. Each option adds its own flavor profile, making the dish your own. Sweet and sour chicken pairs well with many side dishes. Serve it over fluffy cooked rice, which soaks up the sauce nicely. You can also try it with steamed broccoli or snap peas for added crunch. If you're feeling adventurous, serve it with fried rice or noodles. Garnish with sesame seeds and fresh cilantro for a lovely look. These additions enhance both taste and appeal. For a complete meal, consider adding a light salad on the side. To keep your Sweet and Sour Chicken fresh, place leftovers in an airtight container. This helps prevent moisture loss. You can store it in the fridge for about three to four days. Always let the dish cool before sealing it. This keeps the flavors intact and avoids sogginess. If you want to save some for later, freezing works well. First, let the dish cool completely. Then, divide it into portions. Use freezer-safe bags or containers. Remove as much air as possible to avoid freezer burn. Sweet and Sour Chicken can last up to three months in the freezer without losing quality. When you're ready to enjoy your leftovers, reheating is key. You can use the microwave for quick results. Heat it on low power to ensure even warming. Stir halfway through to avoid hot spots. If you prefer, reheat in a skillet over medium heat. Add a splash of water or broth to keep it moist. This method also helps revive the flavors. Sweet and sour chicken is a popular dish in Chinese cuisine. It combines tender chicken with a tangy sauce. This dish has roots in Chinese-American cooking. It blends sweet and sour flavors, giving a burst of taste. The bright colors of vegetables add to its appeal. The dish often includes pineapple for a fruity twist. It is served over rice, making it a complete meal. You can find variations across different cultures, but the core flavors remain the same. Yes, you can make sweet and sour chicken ahead of time. This dish stores well and tastes great later. To prepare, marinate the chicken and cook the dish as normal. Allow it to cool before storing in an airtight container. Keep it in the fridge for up to three days. You can also freeze it for longer storage. Just make sure to separate the rice. To reheat, use the microwave or stovetop. Add a splash of water to keep it moist. Sweet and sour chicken can be part of a balanced meal. The chicken provides protein, while the vegetables add vitamins. To make it healthier, you can use less sugar or honey. Consider using lean chicken breast instead of thighs. You can also add more vegetables for extra nutrients. If you want a lighter version, try using tofu as a protein source. Overall, with mindful choices, sweet and sour chicken can fit into a healthy diet. Check out the Full Recipe for more details. In this blog post, we explored the delicious components of Sweet and Sour Chicken. We reviewed main ingredients, sauce components, and techniques for perfect chicken and veggies. Remember, balancing flavors is key to success. Experiment with substitutions for a twist, like tofu for chicken. Store leftovers properly for great taste later. Prepare this dish ahead for easy meals. Enjoy your cooking journey, and don't hesitate to try new variations to make this dish your own!

Sweet and Sour Chicken Flavorful Recipe Guide

Craving a dish that dances between sweet and tangy? Sweet and Sour Chicken captures that perfect harmony! In this flavorful

To make Baked Garlic Parmesan Chicken, gather these ingredients: - 4 boneless skinless chicken breasts - 1 cup grated Parmesan cheese - 1/2 cup breadcrumbs (Panko preferred for extra crunch) - 4 cloves garlic, minced - 1/4 cup olive oil - 1 tablespoon dried Italian herbs (or a mix of basil, oregano, and thyme) - Salt and pepper to taste - Fresh parsley, chopped (for garnish) You can easily swap ingredients to match your taste or what you have: - Use chicken thighs instead of breasts for more flavor and juiciness. - Try different cheeses like mozzarella or cheddar if you want a change. - Use gluten-free breadcrumbs if you need a gluten-free option. - Olive oil can be replaced with melted butter for a richer taste. - Fresh garlic works too; just use about one clove per teaspoon of minced. This dish is not only tasty but also offers good nutrition. Each serving has roughly: - Calories: 350 - Protein: 35g - Fat: 20g - Carbohydrates: 6g - Fiber: 1g - Sodium: 600mg This meal provides a great source of protein and healthy fats, making it a hearty choice. Enjoy your meal with a side of veggies for extra nutrition! Start by preheating your oven to 400°F (200°C). This heat is perfect for cooking the chicken evenly. While the oven warms, prepare your baking dish. You can line it with parchment paper or lightly grease it with cooking spray. This step helps prevent the chicken from sticking. Next, take the boneless, skinless chicken breasts and pat them dry with paper towels. Drying the chicken helps the coating stick better. Trim any extra fat to make it neat. Now, set the chicken aside as you mix the coating. In a mixing bowl, combine 1 cup of grated Parmesan cheese, 1/2 cup of breadcrumbs, 4 minced garlic cloves, and 1 tablespoon of dried Italian herbs. Make sure to add salt and pepper to taste. Mix these ingredients well. You want a nice, even blend. In another bowl, whisk together 1/4 cup of olive oil with a pinch of salt and pepper. This oil mixture will help the coating stick to the chicken. Take each chicken breast and dip it into the olive oil mixture first. Make sure it is well-coated. Then, dredge the chicken in the breadcrumb and Parmesan mixture. Press gently to ensure the coating sticks well. Place the coated chicken breasts in the prepared baking dish. Leave some space between each piece. This space helps the chicken cook evenly. Now, it's time to bake! Place the dish in your preheated oven. Bake for 25 to 30 minutes. Check that the chicken is cooked through and the coating is golden brown and crispy. The ideal internal temperature is 165°F (75°C). Once done, take the chicken out of the oven. Let it rest for about 5 minutes. This helps keep it juicy. Before serving, garnish the chicken with fresh chopped parsley for a pop of color. Enjoy your tasty Baked Garlic Parmesan Chicken! For the complete process, check the Full Recipe. To get a crispy coating, start with dry chicken. Pat your chicken breasts with a paper towel. This helps the coating stick better. Use Panko breadcrumbs for extra crunch. They are light and airy, giving a great texture. Make sure to press the coating onto the chicken firmly. This step ensures it sticks during baking. Also, don’t crowd the chicken in the baking dish. Space allows hot air to circulate, making the coating crispier. To check if your chicken is done, use a meat thermometer. Insert it into the thickest part of the chicken. The internal temperature should reach 165°F (75°C). If you don't have a thermometer, look for clear juices. Cut into the thickest part and check for any pink. If it’s fully cooked, the meat should be white and the juices clear. Let the chicken rest for five minutes to keep it juicy. Serve your Baked Garlic Parmesan Chicken on a large platter. Garnish it with fresh parsley and lemon wedges. The lemon adds a bright flavor that pairs well with the chicken. Great side dishes include a simple salad or roasted veggies. You can also serve it with pasta or rice for a complete meal. Try pairing it with a light white wine for a special touch. For more ideas, check the Full Recipe for Baked Garlic Parmesan Chicken. {{image_2}} You can boost flavor by adding other herbs and spices. Try adding smoked paprika for a hint of smokiness. Fresh herbs, like thyme or rosemary, work well too. If you like heat, add red pepper flakes to the coating. Experiment with garlic powder or onion powder for extra depth. Mixing these flavors can lead to a new favorite twist. If you need a gluten-free option, you can easily swap out the breadcrumbs. Use crushed gluten-free crackers or almond flour instead. Both options provide a great crunch without gluten. You can also make your own breadcrumbs from gluten-free bread. Just toast it and crush it into fine crumbs. These alternatives do not sacrifice taste or texture. Pair your baked chicken with sides that complement its rich flavor. Roasted vegetables, like broccoli or carrots, add color and nutrition. You could also serve it with a fresh salad for a light touch. For a heartier meal, mashed potatoes or rice work well too. Each side adds a different flair, making your meal special. Check out the Full Recipe for more ideas! After you enjoy your Baked Garlic Parmesan Chicken, let any leftovers cool down. Place the chicken in an airtight container. This keeps it fresh for up to three days in the fridge. Make sure to separate pieces to avoid sogginess. If you want to keep it longer, consider freezing it. To reheat, avoid the microwave if possible. Microwaving can make the chicken tough. Instead, preheat your oven to 350°F (175°C). Place the chicken on a baking sheet and cover it lightly with foil. Heat for about 15-20 minutes. This keeps the coating crispy and the chicken juicy. For longer storage, freeze your leftovers. Wrap each piece tightly in plastic wrap. Then, place them in a freezer bag. Label the bag with the date. You can store it this way for up to three months. When ready to eat, thaw it in the fridge overnight. Reheat as mentioned above for the best taste. Bake chicken at 400°F for 25-30 minutes. The chicken needs to reach 165°F inside. This keeps it juicy and safe to eat. If you want a crispy topping, check near the end of the time. The coating should be golden brown. Yes, you can make this dish ahead. Prepare the chicken and coat it. Then, cover it and store it in the fridge. It can sit for up to 24 hours. When you’re ready, bake it straight from the fridge. Just keep an eye on the baking time. Baked Garlic Parmesan Chicken pairs well with many sides. Here are a few great options: - Steamed broccoli - Garlic mashed potatoes - Caesar salad - Roasted vegetables - Rice pilaf These sides add flavor and color to your meal. You can find the full recipe above. It has all the details you need to make this tasty dish. Enjoy the rich garlic and cheesy flavor in every bite! Baked Garlic Parmesan Chicken is simple and tasty. We discussed the ingredients, instructions, and tips to ensure success. You can customize it with herbs or different sides to fit your taste. Store leftovers properly for later enjoyment. The FAQs section answered common questions to clear any doubts. You can easily make this dish tasty and satisfying for any meal. Enjoy cooking and eating your delicious creation!

Baked Garlic Parmesan Chicken Flavorful and Easy Meal

Craving a delicious and easy dinner? Baked Garlic Parmesan Chicken is your answer! This dish is packed with flavor and

- 3 medium zucchinis, spiralized - 1 cup cherry tomatoes, halved - 1 bell pepper (any color), diced - 1/2 red onion, thinly sliced - 1 avocado, diced - 2 tablespoons extra virgin olive oil - 1 tablespoon lemon juice - 1 teaspoon honey or agave syrup - Salt and pepper to taste - Fresh basil, chopped - Sesame seeds To make my zucchini noodle salad pop, I use fresh, vibrant ingredients. The zucchinis serve as the base. Spiralizing them gives a fun twist. Cherry tomatoes add sweetness, while bell peppers bring crunch. The red onion gives a nice bite, and avocado adds creaminess. For the dressing, I keep it simple yet flavorful. Extra virgin olive oil adds richness. Lemon juice gives a bright zing. Honey or agave syrup balances the flavors. I finish with salt and pepper to enhance everything. For extra flair, I love to sprinkle fresh basil on top. It adds a lovely aroma. Sesame seeds give a nice crunch and look great too. This salad is fresh, colorful, and great for any meal. You can find the full recipe in the provided details. Enjoy creating this dish! To start, spiralize the zucchinis to make noodle-like strands. You can use a spiralizer or a vegetable peeler. If you use a peeler, make thin ribbons. This gives a fun shape to your salad. Next, sprinkle salt over the zucchini noodles. Let them sit for about ten minutes. This step helps soften the noodles. While the zucchini rests, prepare the other vegetables. Halve the cherry tomatoes and dice the bell pepper. Slice the red onion thinly. Each of these adds color and taste. In a small bowl, whisk the dressing. Mix together olive oil, lemon juice, honey, salt, and pepper. Whisk until everything blends well. Once the zucchini noodles are ready, pat them dry with a paper towel. This removes any extra moisture. Now, add the cherry tomatoes, bell pepper, red onion, avocado, and fresh basil to the bowl with the noodles. Drizzle the dressing over the top. Toss the salad gently until all the ingredients are coated. Taste it and adjust the seasoning with more salt, pepper, or lemon juice. Let the salad sit for about five minutes to meld the flavors. For the full recipe, check the earlier section. Enjoy your fresh and flavorful zucchini noodle salad! To make zucchini noodles, you need the right tools. I recommend using a spiralizer. This tool creates long, thin noodles quickly. If you don't have one, use a vegetable peeler. You can slice the zucchini into thin ribbons. Both methods work well! Adjust the seasoning to match your taste. Start with salt and pepper. If you want more flavor, try adding garlic powder or chili flakes. Fresh herbs like dill or oregano can boost the taste too. Don't be afraid to experiment! Serve your salad in a large bowl. This makes it easy to mix and enjoy. For a pretty touch, garnish with extra basil leaves. A sprinkle of sesame seeds adds crunch and color. These small details make a big difference! Try the Full Recipe to see how all these tips come together in a tasty dish! {{image_2}} You can mix up the dressing for your Zucchini Noodle Salad in fun ways. For a bright vinaigrette, use balsamic vinegar or apple cider vinegar instead of lemon juice. If you like creamy dressings, try Greek yogurt or tahini mixed with herbs. These options add new flavors and keep the salad exciting! Boost the protein in your salad with tasty options. Add grilled chicken, shrimp, or tofu for extra energy. You can also toss in extra veggies, like diced cucumbers or shredded carrots, for a colorful crunch. These add-ins make the salad more filling and fun. Change your salad with the seasons! In spring, add fresh peas and thinly sliced radishes for a crisp taste. In summer, throw in juicy berries or ripe peaches for a sweet touch. These seasonal fruits and veggies brighten the salad and enhance its flavor. Explore these variations to make your Zucchini Noodle Salad your own! For the full recipe, check the earlier section. To keep your Zucchini Noodle Salad fresh, use a tight-sealing container. Glass or BPA-free plastic works best. Make sure the container is clean and dry before adding the salad. Store it in the fridge right away. This helps keep the flavors bright and the veggies crisp. The salad stays fresh for about 2 to 3 days in the fridge. After that, the zucchini may become soggy. Look for signs of spoilage, such as a sour smell or slimy texture. If you notice these signs, it’s best to discard the salad. You should not heat zucchini noodles. They lose their texture and become mushy when heated. Instead, enjoy leftover Zucchini Noodle Salad cold. You can add fresh herbs or a splash of lemon juice to revive the flavors. This keeps your meal vibrant and tasty. Yes, zucchini noodle salad is low in carbs. Zucchini has about 2 grams of net carbs per cup. This makes it a great choice for anyone watching their carb intake. The other veggies like bell peppers and tomatoes add flavor without many carbs. This salad is also rich in fiber, vitamins, and minerals, which support good health. You can make this salad ahead of time. To keep it fresh, prepare the salad without the dressing. Store the zucchini noodles and veggies in a bowl and cover it with plastic wrap. You can make the dressing in a jar and keep it in the fridge. Just mix the salad with the dressing right before serving to keep it crisp. If you don't have zucchini, you can try other veggies. Cucumbers are a great choice. They add a nice crunch. Carrots can work too if you spiralize them. Use a vegetable peeler for thin ribbons. You can also try yellow squash for a different flavor and color. Yes, this salad is great for meal prep. Store the salad in airtight containers. Keep the dressing separate until you are ready to eat. This way, the noodles and veggies stay fresh. You can enjoy this salad for lunch or dinner throughout the week. Check out the Full Recipe for more details on making it! Zucchini noodle salad is fresh, simple, and packed with flavor. You learned about key ingredients, like zucchini, tomatoes, and avocado. The easy steps for making and mixing the salad make it fun. You can customize it with different dressings, toppings, and even seasonal veggies. Remember to store leftovers properly for the best taste. Enjoy this healthy dish anytime you want a light meal.

Zucchini Noodle Salad Fresh and Flavorful Recipe

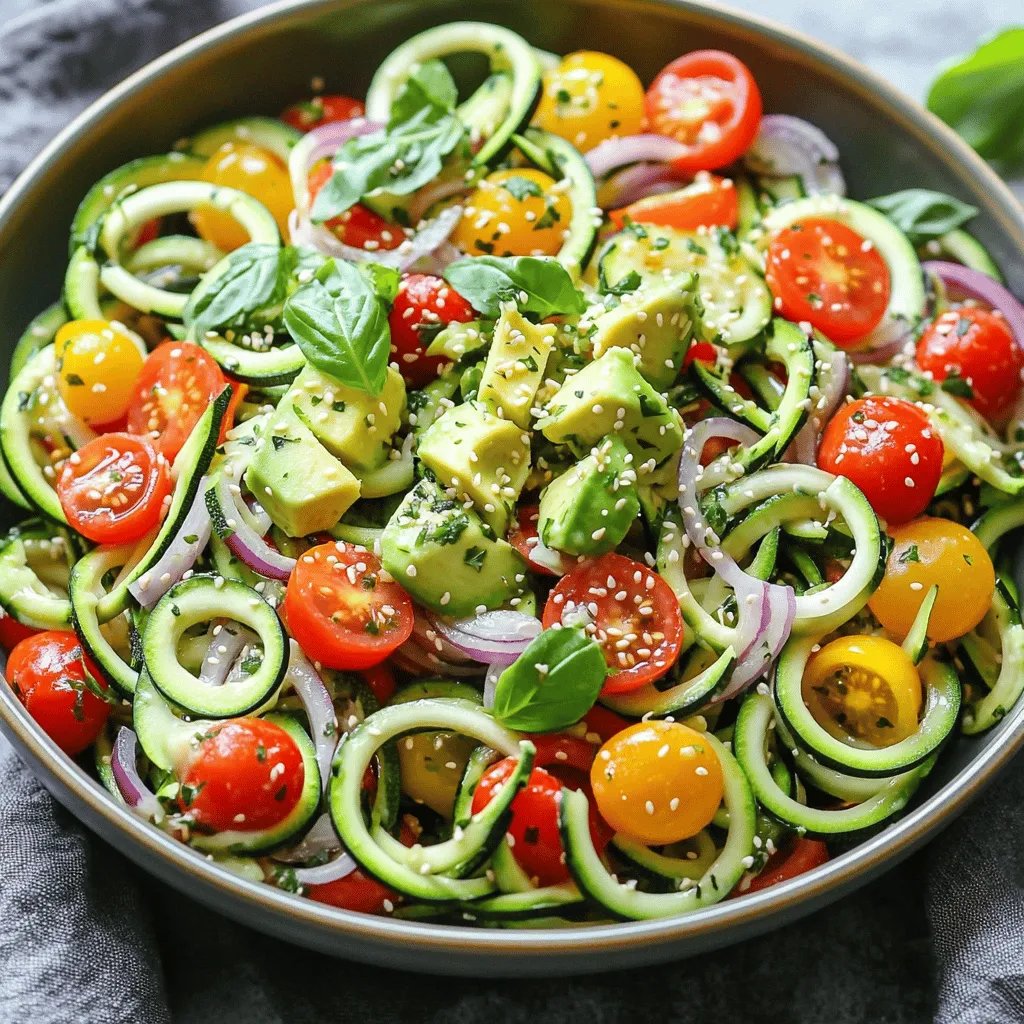
Looking for a fresh, delightful dish that’s also healthy? Look no further! My Zucchini Noodle Salad is packed with vibrant

To make a tasty pesto pasta salad, you need some key ingredients. Here’s what to gather: - 12 oz fusilli pasta - 1 cup fresh basil pesto - 1 cup cherry tomatoes, halved - 1 cup mozzarella balls, halved These ingredients create a colorful and delicious base for your salad. Fusilli pasta holds the pesto well, and the cherry tomatoes add a sweet burst. The mozzarella brings creaminess that makes each bite enjoyable. You can make your salad even better with a few extras. Here are some optional ingredients to consider: - 1/2 cup black olives, pitted and sliced - 1/4 cup pine nuts, toasted - 1/4 cup grated Parmesan cheese Adding black olives gives a nice briny touch. Pine nuts add a crunchy texture, while Parmesan adds a rich flavor. Feel free to mix and match based on your tastes. Seasoning makes a difference in flavor. Here’s what you will need: - 2 tablespoons olive oil - Salt and pepper to taste - Fresh basil leaves for garnish A drizzle of olive oil enhances the taste. Adjust the salt and pepper to your liking. Finally, fresh basil leaves not only look nice but also give a burst of freshness. For the full recipe, check the details above. To cook fusilli pasta properly, bring a large pot of salted water to a boil. Add the pasta and cook for about 8 to 10 minutes, or until al dente. Stir occasionally to prevent sticking. Once done, drain the pasta in a colander. After draining, rinse the pasta under cold water. This stops the cooking and cools it down. Make sure to rinse well so the pasta doesn’t stick together. Set the cooled pasta aside in a large bowl. Now comes the fun part! In the bowl with the cooled fusilli, add the fresh basil pesto. Make sure the pasta is well-coated. This is key for flavor. Next, toss in the halved cherry tomatoes, mozzarella balls, sliced black olives, and toasted pine nuts. Each ingredient adds its own taste and texture. Don't forget to gently mix everything to combine well. Drizzle some olive oil over the salad and toss it again. This helps add richness and flavor. Now, season it with salt and pepper to taste. Adjust it based on your preference. Finally, sprinkle the grated Parmesan cheese over the top. Give it one last gentle toss. Let the salad sit for about 15 minutes. This time allows the flavors to meld together beautifully. Serve the pasta salad chilled or at room temperature. Garnish with fresh basil leaves for a pop of color. Enjoy your delicious pesto pasta salad! To cook pasta well, follow these steps: - Use a large pot of boiling water. - Add salt to the water for taste. - Stir the pasta for even cooking. - Check the pasta a minute before time ends. - Drain and rinse under cold water. This stops the cooking. Cooling the pasta is key. It helps the salad taste fresh. Mix the cooled pasta with pesto in a large bowl. Toss gently to coat every piece evenly. For a gluten-free option, try brown rice pasta or chickpea pasta. Both work well in salads. If you need dairy-free options, use vegan cheese instead of mozzarella. For the pesto, look for dairy-free versions or make your own with nuts and olive oil. Serve the pasta salad chilled or at room temperature. This way, it tastes best. You can also serve it in small cups for parties. Add fresh basil leaves on top for a nice touch. For a fun twist, try adding grilled chicken or shrimp for extra protein. {{image_2}} You can make your pesto pasta salad even better by adding more veggies. Consider using bell peppers, artichokes, or spinach. These add color and crunch. Each bite becomes more exciting. You can also try different cheeses for a unique taste. Feta cheese gives a tangy kick. Goat cheese adds creaminess. Experiment to find your favorite combo! Want to make your salad heartier? Add grilled chicken or shrimp. These proteins boost flavor and make your meal more filling. Simply toss them in after cooking. If you prefer vegetarian options, try chickpeas or black beans. They are rich in protein and add a nice texture. You can even use tofu for a plant-based twist! Seasonal ingredients can elevate your dish. In spring, try fresh peas or arugula. In summer, use zucchini or corn. Fall calls for roasted squash, while winter might inspire you to add Brussels sprouts. You can also customize based on what’s fresh at your local market. This ensures your salad is always tasty and vibrant. Use what you love, and your salad will shine! To keep your pesto pasta salad fresh, use airtight containers. Glass or plastic containers work well. Make sure to seal them tightly to prevent air from getting in. Store the salad in the fridge for up to three days. After that, the salad may lose its freshness and flavor. You can freeze pesto pasta salad for later use. Use freezer-safe containers to avoid freezer burn. When ready to eat, let it thaw in the fridge overnight. Keep in mind, freezing may change the texture of the salad. The pasta might become softer, and the pesto could lose some vibrancy. If you need to reheat your pesto pasta salad, do it gently. Place the salad in a microwave-safe dish. Heat in short bursts of 20 seconds, stirring in between. This helps to keep the flavors intact. Avoid high heat, as it can dry out the pasta and wilt the fresh ingredients. Yes, you can use store-bought pesto for this recipe. It saves time and still tastes great. Homemade pesto has a fresher taste and lets you control the ingredients. You can adjust garlic, cheese, and nuts to your liking. If you choose store-bought, look for one with simple ingredients. This way, you keep it healthy and tasty. You can keep the pasta salad in the fridge for three to five days. Make sure you store it in an airtight container. This keeps it fresh and prevents odors from other foods. If you notice any changes in smell or look, throw it out. Always trust your senses! Pesto pasta salad goes well with many dishes. You can serve it with grilled chicken or fish for protein. It pairs nicely with a refreshing green salad. You might also like crusty bread or garlic bread on the side. These options round out the meal and add variety. Yes, pesto pasta salad is great for meal prep. You can make it ahead of time and store it in portions. It keeps well, and the flavors get better over time. Just be sure to store it in airtight containers. This way, you grab a quick and tasty meal whenever you need one. Pesto pasta salad is simple yet delicious. You start with fusilli pasta, fresh basil pesto, cherry tomatoes, and mozzarella balls. Add black olives and pine nuts for extra flavor. Cool and toss everything with olive oil, salt, and pepper. Remember, you can customize with seasonal veggies or proteins. Store it well, and enjoy for days. Whether for lunch or a gathering, this dish shines. Embrace easy meal prep and share with friends! Enjoy making your own tasty twists on this classic dish.

Delicious Pesto Pasta Salad Easy and Flavorful Recipe

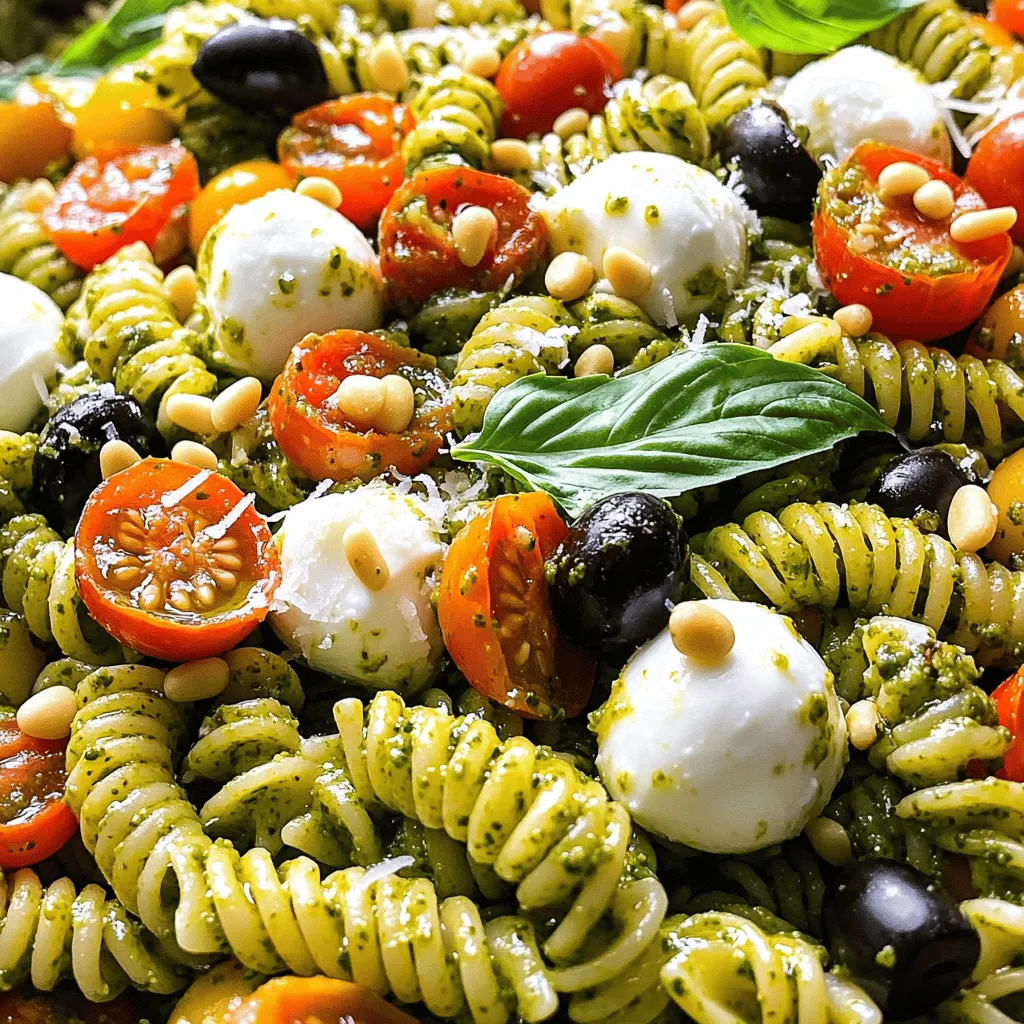
Are you ready to bring a burst of flavor to your table? This Delicious Pesto Pasta Salad is easy to

- 1 frozen banana - 2 tablespoons creamy peanut butter - 1 tablespoon unsweetened cocoa powder - 1 cup almond milk (or milk of choice) - 1 tablespoon honey or maple syrup - 1 tablespoon chia seeds (optional) - 1/2 teaspoon vanilla extract - Ice cubes (optional) Making a chocolate peanut butter smoothie is easy. You will need simple ingredients that you might already have. First, get a frozen banana. This gives the smoothie a thick and creamy texture. Next, grab some creamy peanut butter. It adds a rich flavor and healthy fats. Cocoa powder is next on the list. Use unsweetened cocoa powder for a deep chocolate taste. Almond milk works great, but you can use any milk you prefer. For sweetness, honey or maple syrup does the trick. If you want to boost nutrition, add chia seeds. They are rich in omega-3s. A little vanilla extract brings all the flavors together. Finally, add ice cubes if you want a colder, thicker smoothie. These ingredients make the perfect base for the best chocolate peanut butter smoothie. For the full recipe, check the details above. Making a Chocolate Peanut Butter Smoothie is easy and fun. Here’s how to do it. - Step 1: Combine all ingredients in the blender. Start with one frozen banana. Then, add two tablespoons of creamy peanut butter. Next, include one tablespoon of unsweetened cocoa powder. Pour in one cup of almond milk. Add one tablespoon of honey or maple syrup for sweetness. If you want more nutrition, toss in one tablespoon of chia seeds. Finally, add half a teaspoon of vanilla extract for flavor. - Step 2: Blend until smooth and creamy. Turn on your blender and mix everything well. Blend on high speed. You want a rich, creamy texture. If you want it thicker, add a few ice cubes now. Blend again until it’s just right. - Step 3: Adjust sweetness and blend again if necessary. Taste your smoothie. If it needs more sweetness, add a bit more honey or maple syrup. Blend briefly to mix in the extra sweetness. - Step 4: Serve and enjoy. Pour the smoothie into a tall glass or bowl. If you use a bowl, you can top it with sliced bananas or granola. Enjoy your Choco-Peanut Bliss Smoothie right away for the best flavor! These steps will guide you through making this creamy treat in just five minutes. Check out the full recipe for more details. - Choose a ripe banana for natural sweetness. - Use chilled almond milk for a refreshing taste. - Blend longer for a smoother consistency. Using a ripe banana is key. It adds a nice, sweet flavor. The banana should have some brown spots. This means it is at its best for smoothies. Chilled almond milk makes the smoothie feel cool and fresh. If you can, keep your almond milk in the fridge. This way, it is ready when you want to blend. Blend the smoothie longer if you like it super smooth. This helps mix everything really well. If your blender has a smoothie setting, use it for the best results. - Add a pinch of salt to enhance flavors. - Experiment with different nut butters. - Try adding leafy greens for extra nutrition. A small pinch of salt can make the flavors pop. It balances the sweetness and cocoa notes. Do not be afraid to switch nut butters. Almond butter or cashew butter can give a fun twist. Each nut butter has its own taste. Adding leafy greens like spinach or kale boosts nutrition. You won’t taste them much, but you will get more vitamins. This makes your smoothie even better for you. For the complete experience, check out the Full Recipe for the Choco-Peanut Bliss Smoothie 🥜. {{image_2}} You can change up the taste of your smoothie in fun ways. Here are a few ideas: - Mocha Peanut Butter Smoothie: Add a shot of hot coffee. This gives a rich, deep flavor. The coffee pairs well with the chocolate and peanut butter. - Protein-Packed Chocolate Peanut Butter Smoothie: Toss in a scoop of protein powder. This adds extra protein and keeps you full longer. You can use any flavor you like. - Vegan Chocolate Peanut Butter Smoothie: Make sure all your ingredients are vegan. Use plant-based milk and a sweetener like maple syrup. This keeps it creamy and delicious without dairy. Your smoothie can change with the seasons. Here’s how to adapt it: - Summer: Add ice or some frozen berries. This makes it cold and refreshing. You can use strawberries, blueberries, or raspberries. - Winter: Mix in a pinch of cinnamon or nutmeg. This gives a warm, cozy flavor. It feels like a hug in a glass. Try these variations to keep your chocolate peanut butter smoothie exciting and new! For the full recipe, check out the Choco-Peanut Bliss Smoothie. To keep your Chocolate Peanut Butter Smoothie fresh, store it in the fridge. It stays good for up to 24 hours. Use an airtight container to seal in the flavor. This way, it won’t lose its creamy texture or taste. You can freeze your smoothie for later. Pour it into ice cube trays for easy use. When you want to enjoy it again, just blend the frozen cubes. This gives you a thicker smoothie that tastes just as good as fresh. Can I use other types of milk? Yes! You can use any milk you like. Almond milk, oat milk, or regular milk all work well. Each type adds a unique flavor and texture. Just make sure it is unsweetened if you want to keep it healthy. How can I make this smoothie more filling? To make your smoothie more filling, add a scoop of protein powder or Greek yogurt. You can also add more chia seeds or oats. These ingredients give you extra protein and fiber, which help you feel full longer. What are the health benefits of this smoothie? This smoothie is packed with nutrients. Bananas provide potassium, while peanut butter adds protein and healthy fats. Cocoa powder gives you antioxidants. Plus, chia seeds are great for fiber and omega-3s. It’s a tasty way to boost your health! Can I prepare the smoothie in advance? Yes! You can make this smoothie ahead of time. Just blend all the ingredients and store it in the fridge for up to 24 hours. If you want it thicker later, add a few ice cubes before drinking. What to do if the smoothie is too thick? If your smoothie is too thick, just add more milk. Pour a little in and blend again until you reach your desired consistency. You can also add more ice to thin it out a bit. How to fix an overly sweet smoothie? If your smoothie tastes too sweet, add a splash of unsweetened almond milk or a bit of cocoa powder. This will balance the sweetness. Blend again to mix everything well. Adjust until you find the flavor you enjoy. For the full recipe, check out [Full Recipe]! This chocolate peanut butter smoothie is delicious and easy to make. You simply blend a few key ingredients like banana, peanut butter, and cocoa powder. Follow the steps for a creamy treat that satisfies your taste buds. With simple tips, you can customize it to your liking. Try different flavors or add more nutrients. Make it fresh or freeze it for later. Enjoy this tasty smoothie whenever you crave something sweet and healthy. You now have all you need to create a perfect drink!

Chocolate Peanut Butter Smoothie Creamy Delightful Treat

Are you ready to indulge in a creamy, dreamy treat that hits the spot? The Chocolate Peanut Butter Smoothie is

To craft a delicious roasted vegetable quinoa bowl, gather the following ingredients: - 1 cup quinoa, rinsed - 2 cups vegetable broth or water - 1 medium zucchini, diced - 1 red bell pepper, diced - 1 yellow squash, diced - 1 cup cherry tomatoes, halved - 1 red onion, sliced thinly - 3 tablespoons olive oil - 1 teaspoon garlic powder - 1 teaspoon smoked paprika - Salt and pepper to taste - 1 avocado, sliced - Fresh parsley or cilantro for garnish - Optional: Feta cheese or tahini sauce for drizzling Each ingredient plays a role in making the bowl tasty and healthy. Quinoa serves as a great base, packed with protein. Fresh vegetables add color and nutrients, while spices elevate the flavor. The optional toppings give you a chance to make it your own. This recipe is flexible, so feel free to swap in your favorite veggies. You can find the full recipe with steps to bring this bowl to life. Enjoy creating this vibrant meal! Preheating your oven is key for roasting. It helps your vegetables cook evenly. Set your oven to 400°F (200°C) to achieve the best results. While it heats up, you can prepare the rest of your ingredients. Make sure to use an oven thermometer to check the temperature. This step ensures you roast the vegetables perfectly. Start by rinsing the quinoa. Rinsing helps remove any bitter taste. Use a fine mesh strainer for this task. After rinsing, combine 1 cup of quinoa with 2 cups of vegetable broth or water in a medium saucepan. Bring this mixture to a boil. Then, reduce the heat to low, cover, and let it simmer for about 15 minutes. When done, the quinoa should be fluffy and the liquid absorbed. Set it aside while you work on the vegetables. Cut your vegetables into similar sizes for even cooking. Dice the zucchini, red bell pepper, and yellow squash. Halve the cherry tomatoes, and slice the red onion thinly. In a large bowl, toss the veggies with olive oil, garlic powder, smoked paprika, salt, and pepper. This mix adds flavor and helps the vegetables roast nicely. Spread the veggies in a single layer on a baking sheet. Roast them for 20-25 minutes. Stir halfway through to ensure they cook evenly. Look for tenderness and a slight caramelization for the best texture. Now it’s time to assemble your bowl. Start with a layer of cooked quinoa at the bottom. This acts as a base and adds protein. Next, add the roasted vegetables on top. For a fresh touch, include sliced avocado. Garnish with fresh parsley or cilantro for color. If you like, drizzle feta cheese or tahini sauce over the top for extra flavor. This layering not only looks great but also balances the flavors. Enjoy your beautiful Roasted Vegetable Quinoa Bowl! For the complete recipe, refer to the Full Recipe section. To make great quinoa, avoid some common mistakes. First, always rinse your quinoa before cooking. This removes a bitter coating called saponin. Not rinsing can lead to a less tasty dish. Next, use the right water-to-quinoa ratio. A good rule is two cups of liquid for one cup of quinoa. This helps achieve fluffy quinoa. After cooking, let your quinoa sit for five minutes. This allows it to steam and get even fluffier. Use a fork to fluff it gently. This step makes a big difference! Roasting vegetables perfectly is all about timing and temperature. Most vegetables roast well at 400°F (200°C). For firmer veggies, like carrots, roast them a bit longer. For softer ones, like tomatoes, check them sooner. To prevent soggy vegetables, don't overcrowd the pan. Give them space to roast and caramelize. Stir halfway through to ensure even cooking. Adding spices and herbs can boost your bowl's flavor. Try cumin, oregano, or thyme for extra depth. A squeeze of lemon juice adds brightness, too. For dressings or sauces, tahini and olive oil are great options. You can also mix yogurt with herbs for a fresh dip. These small changes can take your meal from good to great. For the full recipe, check out the complete instructions above! {{image_2}} You can swap vegetables based on what you have. Use seasonal veggies for fresh flavor. Try carrots, broccoli, or sweet potatoes. These add great taste and texture. For more complex flavors, add roasted garlic or caramelized leeks. These ingredients can elevate your dish. You can also try different herbs, like thyme or rosemary, for a fragrant touch. Adding protein makes your bowl more filling. You can include grilled chicken or roasted chickpeas. Tofu is a great vegan option too. To integrate them, just layer the protein on top of the quinoa and veggies. If you want, marinate the chicken or tofu for extra flavor before cooking. This adds depth to each bite. You can easily adjust this bowl to fit your diet. For vegan options, skip cheese and use tahini sauce. If you're gluten-free, ensure your quinoa is certified gluten-free. For low-carb diets, reduce the quinoa and add more veggies. You can also use cauliflower rice instead of quinoa. This keeps it light and healthy. Each modification keeps the dish tasty and satisfying. For the full recipe, check the details above. After enjoying your roasted vegetable quinoa bowl, store any leftovers safely. First, let the bowl cool to room temperature. Then, place it in the fridge within two hours. Use airtight containers to keep it fresh. Glass or BPA-free plastic containers work best. They help prevent moisture loss and keep flavors intact. Reheating the bowl is easy and quick. Use the microwave for fast results. Heat it in short bursts of 30 seconds. Stir in between to ensure even warmth. This helps keep the quinoa fluffy and the veggies tender. You can also reheat in an oven. Preheat it to 350°F (175°C). Spread the leftover bowl in a baking dish. Cover it with foil to avoid drying out. Bake for about 15-20 minutes until it's hot. For an extra twist, try adding a splash of vegetable broth while reheating. This adds moisture and flavor. You can also top it with a fresh squeeze of lemon juice or a drizzle of tahini for a new taste. For a creative serving idea, mix in some chickpeas or shredded chicken. This adds protein and makes your bowl even heartier. Enjoy your delightful leftovers! Cooked quinoa lasts about 5 days in the fridge. Store it in an airtight container. You can freeze cooked quinoa for up to 3 months. Just place it in a freezer-safe bag. Label it with the date for easy tracking. Yes, you can! Make the quinoa and roasted veggies ahead. Store them separately in the fridge. This helps keep everything fresh. When you're ready, just reheat and assemble. It's a great meal prep option. You can switch up the veggies based on what you like. Try adding carrots, broccoli, or cauliflower. You can also change the spices. For example, use cumin or curry powder for a different taste. Experiment with dressings, too! If you want it mild, skip the smoked paprika. You can also add a pinch of sugar to balance flavors. For more heat, add red pepper flakes or diced jalapeños. Always taste as you go to find your ideal spice level. Yes, this recipe is nut-free! It uses veggies, quinoa, and olive oil. If you want to add crunch, try seeds like pumpkin or sunflower. Always check labels for packaged ingredients to avoid hidden nuts. Enjoy your delicious and safe meal! In this blog post, we explored creating a delicious quinoa bowl. We covered essential ingredients, like fresh veggies and spices. You learned the step-by-step process, from cooking quinoa to roasting vegetables. I shared tips for perfecting texture and flavor, including how to store and reheat leftovers. Remember, experiment with different vegetables and proteins to make the dish your own. This bowl is easy to adapt, ensuring you can enjoy it your way. Create, taste, and share your unique version!

Roasted Vegetable Quinoa Bowl Flavorful and Healthy Meal

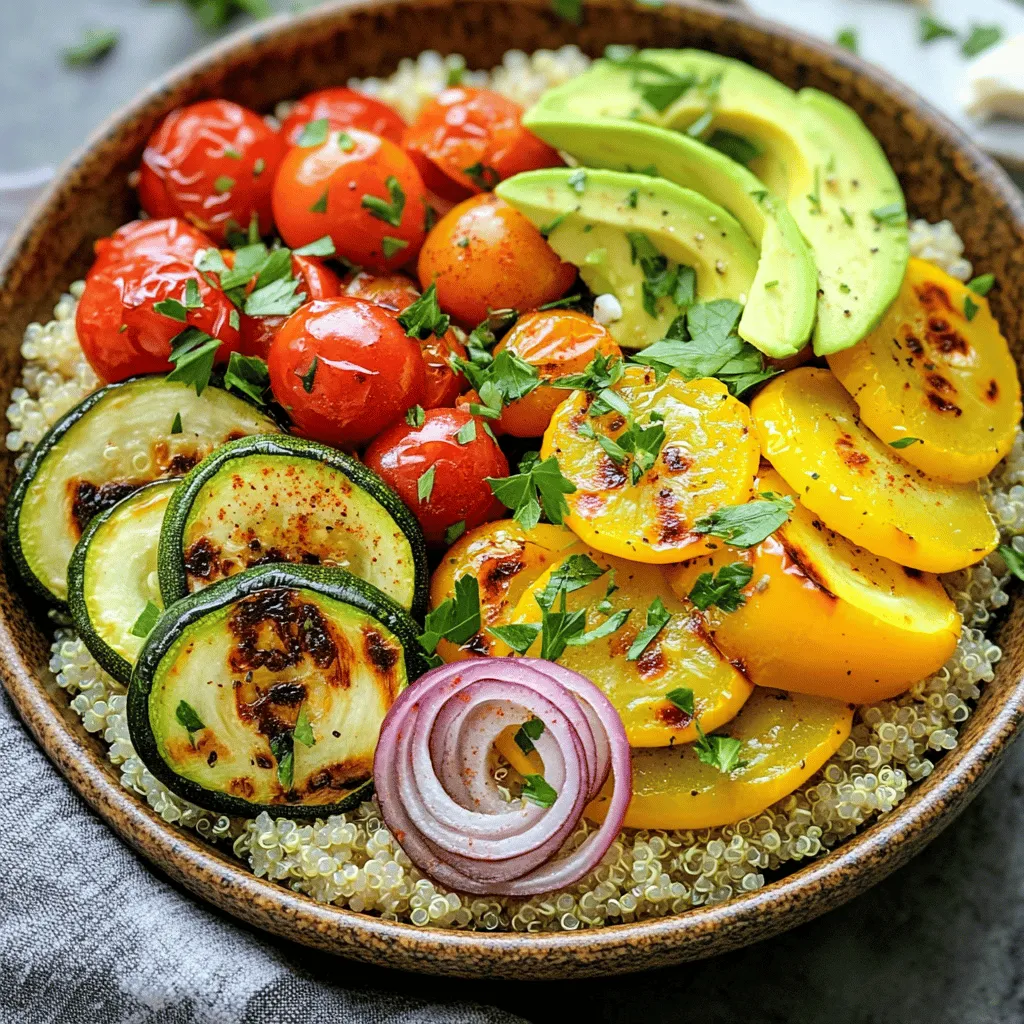
Looking for a tasty and healthy meal? My Roasted Vegetable Quinoa Bowl is perfect for you! Packed with fresh veggies

Older posts
Newer posts
← Previous Page1 … Page80 Page81 Page82 … Page84 Next →

dsad

© 2026 Home Cooking Style • Built with GeneratePress

Our Policies

  • Copyright Policy
  • Cookie Policy
  • GDPR Policy
  • Privacy Policy
  • Disclaimer
  • Terms Of Use

More Information

  • Home
  • About
  • Contact
  • Appetizers
  • Dessert
  • Dinner
  • Drinks
©2026, Home Cooking Style About Back To Top