Skip to content
DisclaimerTerms Of UseGDPR PolicyCookie Policy

Home Cooking Style

  • Home
  • Drinks
  • Appetizers
  • Dinner
  • Dessert
  • About
  • Contact
  • Privacy Policy
DisclaimerTerms Of UseGDPR PolicyCookie Policy

NO-ING-IMG

- 2 cups jasmine rice (cooked and cooled) - 2 tablespoons vegetable oil - 3 cloves garlic, minced - 1 small onion, diced - 1 red bell pepper, sliced - 1 cup green beans, trimmed and cut into 1-inch pieces - 1 fresh red chili, thinly sliced - 2 tablespoons soy sauce - 1 tablespoon oyster sauce (optional) - 1 tablespoon fish sauce - 1 cup fresh Thai basil leaves - 2 eggs, lightly beaten - Salt and pepper to taste When making Spicy Thai Basil Fried Rice, start with high-quality ingredients. Jasmine rice gives a nice texture. Using day-old rice helps too. Fresh vegetables add crunch and flavor. If you can’t find jasmine rice, try basmati or long-grain rice. For a twist, swap in other veggies like carrots or peas. If you prefer a gluten-free option, use coconut aminos instead of soy sauce. This recipe is flexible. Feel free to mix and match based on personal taste. You can make it your own while keeping that bold flavor. For the full recipe, check out the details above. - Cooking jasmine rice First, cook the jasmine rice according to the package. For best results, use day-old rice. It helps keep the grains from clumping. - Preparing vegetables and aromatics Dice the onion, slice the bell pepper, and trim the green beans. Also, mince the garlic and slice the fresh chili. These will add great flavor. - Heat oil and sauté aromatics Heat 2 tablespoons of vegetable oil in a large skillet over medium-high heat. When it shimmers, add the garlic and onion. Stir-fry for about 1 minute until the onion becomes soft. - Add vegetables and stir-fry Toss in the sliced bell pepper, green beans, and chili. Stir-fry for about 2 to 3 minutes. You want the veggies to stay crisp and colorful. - Incorporate rice and season Turn the heat to high and add the cooked jasmine rice. Break up any clumps and mix well for about 2 minutes. Pour in the soy sauce, oyster sauce (if you want), and fish sauce. Stir-fry for another minute. - Scrambling eggs Push the rice to one side of the pan. Pour the beaten eggs into the empty side. Scramble until fully cooked, then mix the eggs into the rice. - Mixing in Thai basil Remove the skillet from the heat. Fold in the fresh Thai basil leaves. Stir until they wilt and release their lovely aroma. - Adjusting flavors with salt and pepper Taste the rice. Add salt and pepper as needed. This step enhances the flavors and balances the dish. For the complete recipe, check out the Full Recipe section. Using day-old rice is key for great texture. Freshly cooked rice can be too soft and sticky. When you cool the rice in the fridge, it dries out. This helps the grains stay separate when you fry them. To achieve the perfect stir-fry, keep your heat high. A hot pan helps to sear the rice and veggies. Make sure to stir quickly. This keeps everything from sticking and burning. You want that nice, smoky flavor. If you want more heat, add extra chilies or hot sauce. Just a little goes a long way to spice it up. You can also try other herbs or spices. Fresh cilantro or mint can add a nice twist. Experiment to see what you like best! For effective stir-frying, use a large skillet or wok. A wok lets you cook quickly and evenly. The high sides help keep everything in the pan. If you don’t have a wok, a large non-stick pan works too. Just make sure it’s sturdy and heat-resistant. For the full recipe, check out the complete instructions. Enjoy making your Spicy Thai Basil Fried Rice! {{image_2}} You can customize your Spicy Thai Basil Fried Rice by adding proteins. Chicken, beef, and shrimp are great options. Simply cook your choice of meat before adding it to the rice. For a vegetarian or vegan twist, use tofu or tempeh instead. Both options absorb flavors well and add protein. You can change the flavor of your fried rice by using different sauces. Instead of just soy sauce, try adding teriyaki or hoisin sauce for a sweet touch. You can also add citrus for a bright flavor. Squeeze some lime juice over the finished dish or mix in lime zest. Fresh herbs like cilantro can add a unique twist, too. Making larger batches of Spicy Thai Basil Fried Rice is smart for meal prep. Cook a double batch and store it in the fridge. It holds up well for days. To save even more time, freeze portions in airtight containers. You can simply reheat them later for a quick meal. To keep your Spicy Thai Basil Fried Rice fresh, follow these steps: - Let the rice cool down to room temperature. - Place any leftovers in an airtight container. - Store it in the fridge for the best results. For the best containers, use glass or BPA-free plastic. These types help keep the flavors locked in. When reheating, aim to keep the rice moist and flavorful. Here are the best methods: - Stovetop: Heat a non-stick pan over medium heat. Add a splash of water or oil, then add the rice. Stir until heated. - Microwave: Place the rice in a microwave-safe dish. Add a little water, cover, and heat for 1-2 minutes. Stir halfway through. These methods help avoid dry or rubbery rice. You can keep Spicy Thai Basil Fried Rice in the fridge for about 3-4 days. If you want to store it longer, consider freezing it. In the freezer, it can last up to 1 month. Just remember to seal it well to prevent freezer burn. What is the best rice for fried rice? The best rice for fried rice is jasmine rice. It has a nice texture and flavor. Make sure to use cooked and cooled rice. This helps keep the grains separate when frying. Can I make Spicy Thai Basil Fried Rice ahead of time? Yes, you can make it ahead of time. Cook and cool the rice first. Store it in the fridge for up to three days. Reheat the rice before frying. This keeps it fresh and tasty. How can I make it less spicy? To make it less spicy, use fewer fresh red chilies. You can also remove the seeds from the chili. Another tip is to add more vegetables or rice to balance the heat. Caloric content and macros per serving Each serving of Spicy Thai Basil Fried Rice has around 400 calories. It contains 10 grams of protein and 15 grams of fat. The carbs come to about 60 grams per serving. Is this recipe healthy? Yes, this recipe is healthy. It features fresh vegetables and lean protein from eggs. The use of Thai basil adds great flavor without extra calories. Just watch the sauces, as they can add sodium. What to serve with Spicy Thai Basil Fried Rice You can serve this dish with grilled chicken or shrimp. A fresh salad on the side works well too. For a snack, try spring rolls or dumplings. Drinks pairing with this dish Pair your meal with a cold Thai iced tea. A light beer or sparkling water also complements the dish. If you prefer non-alcoholic options, try coconut water for a refreshing choice. To make Spicy Thai Basil Fried Rice, you need a few key ingredients. You will use jasmine rice, vegetable oil, garlic, onion, bell pepper, green beans, fresh chili, soy sauce, fish sauce, and Thai basil. 1. First, cook the jasmine rice and let it cool. 2. Heat vegetable oil in a skillet. 3. Sauté garlic and onion for a minute. 4. Add bell pepper, green beans, and chili. 5. Stir-fry until the veggies are crisp. 6. Next, add the cooled rice and mix well. 7. Pour in soy sauce and fish sauce. 8. Scramble the eggs in the pan. 9. Finally, fold in the Thai basil leaves. For serving, I recommend placing the fried rice in bowls. You can garnish with extra basil and fresh chili slices. A lime wedge on the side adds a nice touch. Enjoy your Spicy Thai Basil Fried Rice! For the complete recipe, check out the details above. Spicy Thai Basil Fried Rice is a tasty dish that’s easy to make. We went through all the ingredients, from jasmine rice to fresh basil. I shared tips for cooking and storing your rice. You can even switch up proteins and flavors to fit your taste. This dish is perfect for quick meals or impressing friends. Enjoy every bite and keep experimenting with your own twists!

Spicy Thai Basil Fried Rice Flavorful Dinner Delight

Are you ready to take your dinner game to the next level? Spicy Thai Basil Fried Rice is a vibrant

- 2 ripe bananas - 1 cup dark chocolate chips - 1 tablespoon coconut oil - 1/4 cup chopped nuts - Sea salt for sprinkling - Optional: 1/4 cup shredded coconut To make chocolate covered banana bites, you need simple and fresh ingredients. First, use two ripe bananas. The riper the bananas, the sweeter they are. Next, gather one cup of dark chocolate chips. Dark chocolate gives the bites a rich flavor. You will also need one tablespoon of coconut oil. This oil helps the chocolate melt smoothly and gives a nice shine. For some crunch, add a quarter cup of chopped nuts. You can choose walnuts, almonds, or pistachios. They add texture and taste. A sprinkle of sea salt is key for balance. It enhances the sweet and rich chocolate. If you want to be extra fancy, add a quarter cup of shredded coconut. It gives a tropical twist to your treats. These ingredients are easy to find. They come together to make a delightful, simple treat. This recipe is perfect for sharing or enjoying as a snack. Check out the Full Recipe for more details. Start by peeling the bananas. I like to use ripe bananas for the best taste. Cut them into bite-sized rounds, about half an inch thick. This size makes them easy to eat and perfect for dipping. Once sliced, arrange the banana pieces on a baking sheet lined with parchment paper. This will keep them from sticking later. In a microwave-safe bowl, combine one cup of dark chocolate chips and one tablespoon of coconut oil. The coconut oil helps the chocolate melt smoothly. Heat the bowl in the microwave in 30-second intervals. Stir the mixture after each interval. Keep doing this until the chocolate is fully melted and smooth. This step is key for a nice coating. You will need a fork or a toothpick for dipping. Use the fork to dip each banana slice into the melted chocolate. Make sure to coat each piece fully. When you lift it out, let any extra chocolate drip off. This way, you achieve a nice, even coat. Now comes the fun part! You can add toppings like chopped nuts or shredded coconut. Do this right after coating the bananas. The chocolate should still be soft, so the toppings stick well. I suggest using walnuts, almonds, or pistachios for a crunchy finish. To set the bites, place the baking sheet in the freezer. Let it sit for about 15 to 20 minutes. This helps the chocolate harden quickly. Once set, the bites will be ready to enjoy! You can also store them in an airtight container in the freezer for up to a week. For an extra touch, sprinkle a little sea salt on top for more flavor. For more in-depth instructions, you can check the Full Recipe. To avoid clumping, keep the chocolate smooth. Stir often while melting. If you notice it getting thick, add a little more coconut oil. This helps it stay liquid. When dipping, use a fork or toothpick. Dip each banana slice fully. Make sure no spots are left bare. Let the excess chocolate drip off before placing it on the baking sheet. You can spice it up! Adding cinnamon gives a warm flavor. A pinch of chili powder can add a fun kick. You can also use flavored chocolate. Think about adding orange or mint chocolate for a twist. These small changes make your bites even more exciting. Make your banana bites stand out! Try stacking them in a small tower for fun. Use a colorful plate to catch the eye. For parties, arrange them on a wooden board. Add some fresh fruit around the bites to make it pretty. You can also garnish with a drizzle of melted chocolate. This adds a nice touch and looks great. {{image_2}} You can change up your chocolate covered banana bites by using different nuts. I love walnuts, almonds, and pistachios. Each nut adds its own flavor and crunch. If you want a nut-free option, consider seeds like sunflower or pumpkin seeds. These seeds give a nice crunch and are safe for those with nut allergies. When it comes to chocolate, you have choices! Milk chocolate is sweet and creamy. Dark chocolate has a rich taste and is less sweet. White chocolate is sweet too, but it lacks cocoa flavor. You can also try flavored chocolates, like mint or orange. These add a twist to your bites and make them more exciting. Bananas are great, but other fruits work well too! Try strawberries, apples, or pineapple. Each fruit brings its own taste and texture. You can create a fun fruit platter with chocolate covered banana bites and other fruits. This makes a colorful and tasty snack for parties or just for you! Store your chocolate covered banana bites in an airtight container. This keeps them fresh and prevents freezer burn. I recommend using a glass container or a heavy-duty plastic one. Keep them in the freezer for the best taste and texture. The cold environment helps maintain the chocolate's crunch. Avoid storing them at room temperature, as they will melt and become messy. These treats stay fresh for about a week in the freezer. To keep them at their best, avoid repeated thawing. If you notice any change in color or texture, they may be spoiled. Signs of spoilage include a dull look or a strong odor. When in doubt, throw them out. Enjoy your bites when they are fresh! Yes, you can use other types of chocolate. Each kind has a unique taste. Dark chocolate is rich and slightly bitter. Milk chocolate is sweet and creamy. White chocolate is sweet but lacks cocoa flavor. The coating properties also change. Dark chocolate hardens well, while milk chocolate may stay softer. Choose the type you love best! To make these bites vegan, swap the chocolate chips. Use dairy-free chocolate chips instead. Coconut oil is already vegan, so keep it. Make sure the nuts are also vegan. You can add more toppings like dried fruits or seeds. Enjoy a tasty vegan treat without any hassle! Yes, you can prepare these banana bites in advance. Make them and freeze them right away. They freeze well for up to a week. When you want to serve, just take them out. Let them sit for a few minutes before enjoying. This way, they will be ready for any occasion! Yes, you can melt chocolate without a microwave. Use a double boiler for this method. Fill a pot with water and heat it. Place a heat-safe bowl on top, making sure it doesn't touch the water. Add the chocolate and stir until it melts. This method works well and prevents burning. Chocolate-covered banana bites are a fun and easy treat. You learned how to make them with simple ingredients like bananas and dark chocolate. I shared steps to melt chocolate, dip the bananas, and add tasty toppings. We also explored storage tips and fun variations to customize your bites. Enjoy these delicious snacks at home or share them at a party. They’re sure to be a hit! Get ready to impress your friends with this tasty treat.

Chocolate Covered Banana Bites Delightful Simple Treat

Looking for a fun and tasty snack? You’ll love these Chocolate Covered Banana Bites! They mix sweet bananas with rich

When I think of Easy Chicken and Rice Soup, I focus on fresh, simple ingredients. Each one plays a key role in making this dish comforting and tasty. Here’s what you need: - 1 tablespoon olive oil - 1 medium onion, chopped - 2 cloves garlic, minced - 2 medium carrots, diced - 2 celery stalks, diced - 1 pound boneless, skinless chicken breasts - 6 cups chicken broth - 1 cup long-grain rice (uncooked) - 1 teaspoon dried thyme - 1 teaspoon dried oregano - Salt and pepper to taste - Juice of 1 lemon - Fresh parsley for garnish These ingredients create a warm and hearty soup. The olive oil gives a nice base flavor. The onion and garlic add depth, while the carrots and celery bring sweetness and crunch. Chicken breasts provide protein and heartiness. Chicken broth is the soul of the soup, while rice thickens it up. Herbs like thyme and oregano enhance the flavor. A little salt and pepper bring everything together. The lemon juice adds brightness at the end, and parsley gives a fresh touch. Gather these items before you start cooking. Trust me, having everything on hand makes the process smoother. If you want the full recipe, check the [Full Recipe]. 1. Sautéing vegetables Start by heating one tablespoon of olive oil in a large pot over medium heat. Add one chopped onion. Cook it until it is soft and clear, which takes about five minutes. Then, stir in two minced garlic cloves, two diced carrots, and two diced celery stalks. Cook these veggies for three to four minutes until they soften a bit. 2. Cooking chicken in broth Next, add one pound of boneless, skinless chicken breasts into the pot. Pour in six cups of chicken broth to cover the chicken. Bring this mixture to a gentle boil. Once it boils, reduce the heat, and let it simmer for about 15 minutes. The chicken should be fully cooked at this point. 3. Shredding chicken and adding rice After cooking, take the chicken out of the pot. Use two forks to shred it into bite-sized pieces. Return the shredded chicken back into the pot. Add one cup of uncooked long-grain rice, one teaspoon of dried thyme, and one teaspoon of dried oregano. Season with salt and pepper to your taste. 4. Simmering and flavoring the soup Mix everything well. Cover the pot and let it simmer for 20 to 25 minutes. The rice should be tender and fluffy. Before serving, add the juice of one lemon for a fresh, bright taste. You can adjust the seasoning again if needed. This recipe makes a cozy meal for four to six people. For the full recipe, check the ingredients and steps above. Choosing the right chicken for flavor I recommend using boneless, skinless chicken breasts. They cook quickly and stay tender. If you want deeper flavor, try bone-in chicken thighs. They add richness to the soup. Adjusting seasoning for personal taste Taste your soup while cooking. If you like more flavor, add salt, pepper, or herbs. Fresh herbs, like parsley, can brighten up the dish. A splash of lemon juice adds a nice zing too. How to make the soup creamier For a creamier soup, add a splash of heavy cream or milk near the end. Stir it in gently to combine. You can also mash some of the rice to thicken the broth. This will give your soup a nice, silky texture. Try these tips to make your chicken and rice soup perfect every time. For the full recipe, check the Cozy Chicken and Rice Soup section. {{image_2}} You can change up your Easy Chicken and Rice Soup in fun ways. - Adding vegetables like peas or corn: Toss in some frozen peas or corn. These add color and sweetness. You can add them in the last 5 minutes of cooking. They will stay bright and tasty. - Using brown rice instead of white: Brown rice gives a nuttier flavor. It also adds more fiber. Just remember, it takes longer to cook. Add about 10 extra minutes to your cooking time. - Making it gluten-free with alternative broth: If you want a gluten-free version, choose a gluten-free broth. Many brands offer this. Check the labels to make sure. You can also use vegetable broth for a lighter taste. Feel free to mix and match these ideas! You can create a soup that suits your taste. For the full recipe, check out the Cozy Chicken and Rice Soup. Proper storage keeps your soup fresh and tasty. First, let the soup cool down. This step is key. After cooling, you can put it in a container. Use an airtight container for best results. - Refrigeration guidelines: Store your Easy Chicken and Rice Soup in the fridge. It stays good for about 3 to 4 days. Make sure to label the container with the date. This way, you know when to use it. - Freezing tips for leftovers: If you want to keep it longer, freeze the soup. Pour it into freezer-safe bags or containers. Leave some space at the top to allow for expansion. It will last for about 3 months in the freezer. When you are ready to eat it, thaw it in the fridge overnight. - Best reheating methods to maintain flavor: Reheat the soup on the stove for the best flavor. Pour it into a pot and heat over medium-low heat. Stir it often to prevent sticking. You can also use a microwave. Just heat it in a microwave-safe bowl. Stir it halfway through heating to warm it evenly. This soup is great because you can make it ahead. Enjoying it later is easy with these storage tips. For the full recipe, check out the Cozy Chicken and Rice Soup above. Can I use leftover chicken for this recipe? Yes, you can use leftover chicken. Just shred it and add it in step 5. This step saves time and adds flavor. Make sure the chicken is cooked and safe to eat. How can I make this soup dairy-free? To make this soup dairy-free, simply skip any cream or milk. The broth and lemon juice add great taste. You can also add a splash of coconut milk for creaminess if you like. What can I serve with chicken and rice soup? You can serve this soup with crusty bread or a fresh salad. Both pair well with the soup's warmth. I also like to add some crackers for a nice crunch on the side. For a full meal, consider a light dessert afterward. For the complete guide on making this soup, check out the Full Recipe. Enjoy! You learned how to make an easy chicken and rice soup. We covered the key ingredients and detailed steps for cooking. I shared tips for perfecting your soup and customizing it to your taste. Plus, I provided storage advice and answered common questions. Now, you can enjoy a warm bowl of soup that's both simple and delicious. Cook it for yourself or share with friends. This recipe is sure to please!

Easy Chicken and Rice Soup Comforting and Healthy Meal

Are you craving a warm, delicious bowl of chicken and rice soup? This recipe is both easy to make and

For blackened fish tacos, you need quality fish and spices. Here are the key ingredients: - 1 lb white fish fillets (tilapia, mahi-mahi, or snapper) - 2 tablespoons paprika - 1 tablespoon cayenne pepper - 1 tablespoon garlic powder - 1 tablespoon onion powder - 1 teaspoon dried oregano - 1 teaspoon salt - ½ teaspoon black pepper - 2 tablespoons olive oil The fish is the star. Choose a fresh fillet for the best taste. The spices give the fish a smoky kick. Paprika adds color and flavor. Cayenne brings heat. Garlic and onion powders add depth. Oregano gives a hint of earthiness. Salt and pepper enhance all the flavors. Next, you need tortillas and toppings for your tacos. Here’s what you’ll need: - 8 small corn tortillas - 1 cup shredded cabbage - ½ cup diced tomatoes - ¼ cup chopped fresh cilantro - 1 avocado, sliced - Lime wedges for serving Corn tortillas are traditional for tacos. They hold the fish and toppings well. Shredded cabbage adds crunch. Diced tomatoes bring freshness. Cilantro gives a bright flavor. Sliced avocado adds creaminess. Finally, lime juice adds a zesty touch. Want to kick it up a notch? Consider these optional ingredients: - Hot sauce for drizzling Hot sauce can add more heat. It’s perfect if you love spice. You can drizzle it on top or serve it on the side. For the full recipe, check out the details provided earlier. Enjoy cooking! Start with fresh fish fillets. Rinse them under cold water. This helps remove any residue. Next, pat the fish dry with paper towels. Dry fish cooks better and gets a nice crust. Choose white fish like tilapia, mahi-mahi, or snapper for great flavor. Making the spice mix is simple. In a small bowl, combine paprika, cayenne pepper, garlic powder, onion powder, oregano, salt, and black pepper. This mix adds bold flavor to the fish. Use a whisk or fork to blend the spices well. You can adjust the cayenne for more or less heat. Heat olive oil in a large skillet over medium-high heat. Wait until the oil shimmers but is not smoking. Carefully add the seasoned fish fillets to the hot skillet. Cook for about 3-4 minutes on each side. Look for a dark, crispy crust. The fish should flake easily with a fork. Remove it from the skillet and let it rest. While the fish rests, get your corn tortillas ready. Warm them in a separate pan over medium heat. Heat each side for about 30 seconds. This step makes the tortillas soft and pliable. You can also wrap them in a clean towel to keep warm. Now it’s time to build the tacos! Break the blackened fish into large chunks. Place a few pieces on each warm tortilla. Top with shredded cabbage, diced tomatoes, and avocado slices. Sprinkle fresh cilantro on top for extra flavor. Serve the tacos with fresh lime wedges. Squeeze lime juice over the top for a zesty kick. If you like heat, drizzle with your favorite hot sauce. For a fun presentation, arrange the tacos on a colorful platter. Enjoy your blackened fish tacos with friends and family! For the complete recipe, check out the Full Recipe section. Pick white fish for tacos. Good choices are tilapia, mahi-mahi, or snapper. These fish have a mild taste. They soak up flavors and hold their shape well. Fresh fish is best, but frozen works too. Just make sure to thaw it properly. The spice mix is key to blackened fish tacos. You can adjust it for your taste. If you like heat, add more cayenne. For a milder taste, cut back on it. You can also add herbs like thyme or basil. Feel free to experiment with different spices. A nice presentation makes your tacos stand out. Use a colorful platter to serve them. Arrange tacos neatly and add lime wedges for a pop of color. You can also sprinkle fresh cilantro over the top. A small bowl of hot sauce on the side looks great too. One mistake is overcooking the fish. It should flake easily but not be dry. Another is not warming the tortillas. Warm tortillas make the tacos more enjoyable. Don’t skip the toppings; they add flavor and texture. Lastly, don’t forget to squeeze lime over the tacos before serving. This adds a bright taste. For the full recipe, refer to the previous sections. {{image_2}} You can use many types of fish for blackened tacos. Tilapia, mahi-mahi, and snapper work well. Try salmon or swordfish for a richer flavor. Each fish brings its unique taste and texture. Choose what you like best for a fun twist. To make a vegetarian version, use firm tofu or tempeh. Press the tofu to remove extra water. Then, coat it with the same spice mix. For a vegan option, try jackfruit. The texture mimics fish when cooked. It absorbs the spices well and tastes amazing! Beyond the typical toppings, get creative! Add mango salsa for a sweet kick. Pickled red onions add a tangy crunch. Roasted corn gives a burst of flavor. For heat, jalapeños work great. Mix and match your favorites to create your ideal taco. Sauces can elevate your tacos. A creamy lime sauce adds richness. For spice, try a chipotle mayo. A fresh cilantro sauce brings brightness. You can also make a simple avocado dressing. These sauces can add layers of flavor and make your tacos shine. To keep your blackened fish tacos fresh, store them in an airtight container. Separate the fish and toppings. This helps maintain the taco's crunch. Place the fish in the fridge right after eating. Use the leftovers within two days for the best taste. When you’re ready to eat the leftovers, reheat the fish in a pan. Heat it on medium until warm. This keeps the fish juicy. You can warm the tortillas in a separate pan. This way, they stay soft and pliable. Avoid using the microwave, as it makes them tough. You can freeze blackened fish, but do it right. Wrap the fish tightly in plastic wrap. Then place it in a freezer bag. This prevents freezer burn. Don't freeze the tortillas or toppings. They lose texture and taste when thawed. For best flavor, use frozen fish within three months. Check out the Full Recipe for more tips on enjoying your blackened fish tacos! Blackening seasoning is a mix of spices. It usually includes paprika, cayenne pepper, garlic powder, onion powder, oregano, salt, and black pepper. Each spice brings its own flavor. The paprika adds sweetness, while cayenne gives heat. You can adjust the spices to fit your taste. Yes, you can make blackened fish tacos gluten-free. Just use corn tortillas instead of flour ones. Check the labels on your seasonings to ensure they are gluten-free. Most spices are naturally gluten-free, so you should be safe. If your fish is too salty or spicy, try these tips. Rinse the fish under cold water to remove excess seasoning. Another option is to serve it with a creamy sauce, like sour cream or yogurt. This will help balance out the strong flavors. Blackened fish tacos go well with many sides. Consider serving them with: - Mexican rice - Black beans - Grilled corn - Fresh salsa - A light salad These sides add freshness and help balance the flavors. Yes, you can use frozen fish for this recipe. Just make sure to thaw it first. Thaw the fish in the fridge overnight or place it in cold water for quicker results. Once thawed, pat it dry before seasoning. This helps the spices stick better. For the full recipe, check out the instructions provided earlier! To sum up, this guide covers all you need for tasty blackened fish tacos. We looked at key ingredients, step-by-step cooking, and helpful tips. I shared fun variations and storage advice, too. These tacos are simple to make and customize. Enjoy them with your favorite toppings and side dishes. Dive in and bring the flavors to life!

Blackened Fish Tacos Flavorful and Easy Recipe

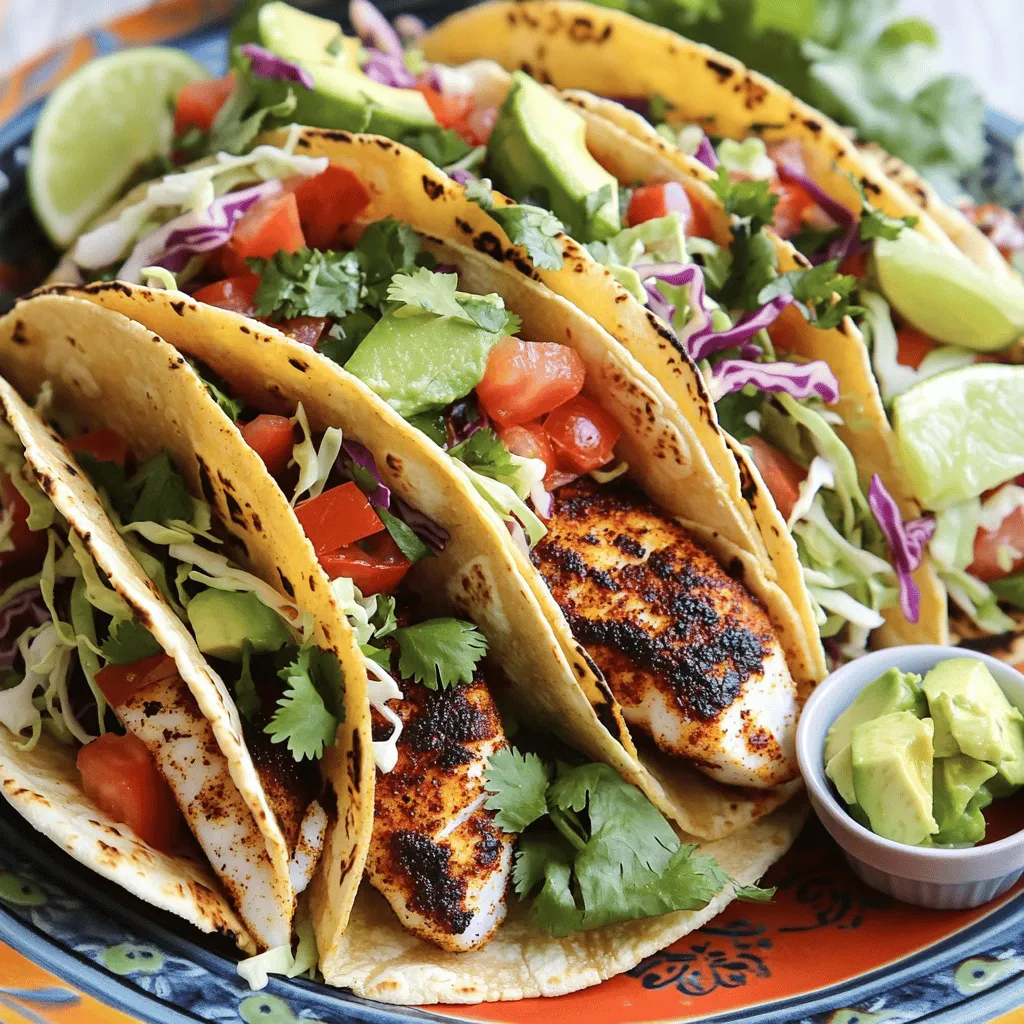
Are you ready to make a tasty meal? Blackened fish tacos are full of flavor and easy to prepare! I’ll

Making vegan chocolate chip cookies is quick and fun. You can whip up a batch in just 25 minutes. These cookies are made with wholesome ingredients that taste great. I love how they are soft and chewy, yet simple to prepare. Here’s what you need to make these delightful cookies: - 1 cup almond flour - 1 cup old-fashioned oats (gluten-free if needed) - 1/2 cup coconut sugar - 1/2 cup maple syrup - 1/3 cup coconut oil, melted - 1 teaspoon vanilla extract - 1 teaspoon baking soda - 1/2 teaspoon sea salt - 1/2 cup dairy-free chocolate chips These ingredients work together to create a rich, sweet taste. Almond flour adds a nice texture. Coconut sugar brings a subtle caramel flavor. Maple syrup keeps the cookies moist and naturally sweet. You can customize your cookies with these fun add-ins: - 1/4 cup chopped walnuts or pecans Feel free to swap ingredients based on your taste. If you want a nut-free option, skip the nuts. You can also try other sweeteners, like agave syrup. Just keep the same measurements for the best results. By using these ingredients and tips, your vegan chocolate chip cookies will be tasty and satisfying. Enjoy experimenting with flavors and textures! First, preheat your oven to 350°F (175°C). This step is key for even baking. While it heats, take a baking sheet and line it with parchment paper. This helps your cookies not stick. You want to make sure you have a clean workspace. A tidy area makes baking more fun! In a large bowl, start mixing your dry ingredients. Add 1 cup of almond flour, 1 cup of old-fashioned oats, 1/2 cup of coconut sugar, 1 teaspoon of baking soda, and 1/2 teaspoon of sea salt. Mix everything well with a whisk or spoon. It should look even and fluffy. This mix creates a nice base for our cookies. Now, grab another bowl for the wet ingredients. Whisk together 1/3 cup of melted coconut oil, 1/2 cup of maple syrup, and 1 teaspoon of vanilla extract. Mix until it's smooth and shiny. This is where the magic happens! Once mixed, pour the wet mixture into the dry ingredients. Stir until a dough forms. If it feels too sticky, add a bit more almond flour. Finally, gently fold in the 1/2 cup of dairy-free chocolate chips and nuts if you want. With these steps, you're on your way to making delicious vegan chocolate chip cookies! For the complete guide, check the Full Recipe. To bake the best vegan chocolate chip cookies, start with fresh ingredients. Old ingredients can change the taste. Use a kitchen scale for precise measurements. This helps keep the cookie texture just right. Always preheat your oven to 350°F (175°C) before baking. This ensures even cooking. If you want softer cookies, bake them for the shorter time. For crispier cookies, let them bake a bit longer. One common mistake is not measuring the flour correctly. Too much flour makes cookies dry. Another mistake is skipping the cooling time. Letting cookies cool lets them firm up. Don’t overcrowd the baking sheet. Give each cookie space to spread. If you use too many chocolate chips, the dough may not hold well. Stick to the recipe for the best results. You can easily adjust this recipe. For gluten-free cookies, use gluten-free oats. If you want to cut sugar, reduce the coconut sugar. You can replace maple syrup with agave syrup for a different taste. For nut allergies, use sunflower seed butter instead of almond flour. These adjustments keep the cookies tasty while meeting dietary needs. You can find the full recipe [here]. {{image_2}} If you want gluten-free cookies, swap out regular oats for certified gluten-free oats. Almond flour works great as a base. You can also use a gluten-free flour blend. This keeps your cookies soft and chewy. You won't lose flavor or texture. I love to change things up with flavors! For a nutty twist, add peanut butter. Just mix in 1/4 cup of creamy peanut butter with the wet ingredients. You can also try mint. Add 1/2 teaspoon of mint extract for a fresh taste. Imagine biting into a warm cookie with a hint of mint! Want a lighter treat? You can reduce sugar. Use 1/3 cup of coconut sugar instead of 1/2 cup for a low-sugar option. For a low-fat version, replace half the coconut oil with applesauce. This keeps the cookies moist while cutting down on fat. Enjoy these healthier options without losing taste! Try these variations for a unique cookie experience. For the full recipe, check the main section. To keep your vegan chocolate chip cookies fresh, store them in an airtight container. This helps prevent them from drying out. If you leave them at room temperature, they stay good for about four to five days. For longer freshness, consider refrigeration. Just remember to let them warm up a bit before enjoying. Freezing is a great way to keep these cookies fresh for longer. To freeze, first, let them cool completely. Next, place the cookies in a single layer on a baking sheet. Freeze for about an hour. Then, transfer them to a freezer-safe bag or container. They can last up to three months in the freezer. When you're ready to eat them, simply thaw and enjoy! Use glass or plastic containers for the best storage. These materials seal well and keep air out. If you want to keep them crispy, add a slice of bread to the container. The bread helps to maintain the right moisture level. Just change it out every few days to keep it fresh. For a fun touch, label your containers with the date. This way, you always know how fresh your treats are! Yes, you can use regular flour. However, almond flour gives these cookies a nice texture. If you swap it out, the cookies may change in taste and softness. You might also need to adjust the amount since regular flour absorbs more liquid. Start with the same amount, then add more if needed. These cookies contain almond flour, which is not safe for people with nut allergies. If you have a nut allergy, try a seed-based flour like sunflower seed flour. This will give a similar texture without the nuts. Check all ingredients to ensure they are nut-free, especially chocolate chips. You can find vegan chocolate chips at most grocery stores. Look in the baking aisle or health food section. Many brands offer dairy-free options. You can also buy them online from sites like Amazon or specialty vegan stores. Check the labels to ensure they fit your diet. For the full recipe, use quality chocolate chips for the best flavor. In this post, I covered vegan chocolate chip cookies from ingredients to storage tips. We explored key ingredients and optional add-ins to customize your cookies. We also went step-by-step through baking instructions, shared tips to avoid mistakes, and looked at tasty variations. Remember, these cookies can fit different diets and tastes. With the right storage, you can keep them fresh for longer. Enjoy baking, and make these cookies your own!

Vegan Chocolate Chip Cookies Delightful and Easy Treat

Get ready to bake the most delicious vegan chocolate chip cookies! They are simple, tasty, and a treat everyone will

To make a delightful baked French toast casserole, you need a few simple ingredients. These ingredients come together to create a warm, comforting dish that everyone loves. Here’s the list: - 1 loaf of brioche bread, cut into cubes - 6 large eggs - 2 cups whole milk - 1 cup heavy cream - 1/2 cup maple syrup - 2 teaspoons vanilla extract - 1 teaspoon ground cinnamon - 1/2 teaspoon nutmeg - 1/4 teaspoon salt - 1 cup mixed berries (blueberries, strawberries, raspberries) - 1/2 cup chopped nuts (walnuts or pecans) - Powdered sugar for dusting (optional) Each ingredient plays a role in the flavor and texture. The brioche bread gives a soft, rich base. Eggs, milk, and cream create a custard that soaks into the bread. Maple syrup adds sweetness, while vanilla and spices bring warmth. Berries and nuts add freshness and crunch. This combination makes a perfect breakfast or brunch dish. For the full recipe, check out the complete instructions. First, preheat your oven to 350°F (175°C). This step is key for even cooking. Next, grab a 9x13 inch baking dish and grease it with butter or cooking spray. This helps prevent sticking and makes serving easier. Now, let's whisk the egg mixture. In a large bowl, combine 6 large eggs, 2 cups of whole milk, and 1 cup of heavy cream. Add in 1/2 cup of maple syrup, 2 teaspoons of vanilla extract, 1 teaspoon of ground cinnamon, 1/2 teaspoon of nutmeg, and 1/4 teaspoon of salt. Use a whisk to mix everything until it’s smooth. This mixture gives flavor and richness to the casserole. Next, it’s time to layer the bread. Take your loaf of brioche bread and cut it into cubes. Spread the cubed bread evenly in the greased baking dish. This allows each piece to soak up that tasty egg mixture. After layering the bread, add some fun toppings. Sprinkle 1 cup of mixed berries over the bread. You can use blueberries, strawberries, or raspberries. Then, add 1/2 cup of chopped nuts. Walnuts or pecans work well here. These toppings add texture and a burst of flavor. Now for the soaking part. Pour the egg mixture over the bread and toppings. Make sure all the pieces are soaked. Press down gently to help the bread absorb the liquid. Cover the baking dish with aluminum foil and let it sit in the refrigerator for at least 30 minutes. You can leave it overnight for deeper flavor. When you are ready to bake, remove the foil. Place the dish in your preheated oven and bake for 30 to 35 minutes. The top should be golden brown, and the center should be set. After baking, let it cool for a few minutes before serving. Dust with powdered sugar if you like. This recipe is simple and delicious! For the full recipe, check out the details above. To make your baked French toast casserole truly special, focus on soaking times. I suggest soaking the bread for at least 30 minutes. If you can wait, overnight soaking works wonders. It lets the flavors blend fully. Covering the dish during baking is also key. This keeps the moisture in and helps the eggs cook evenly. Serve the casserole warm for the best taste. It’s great on its own, but you can add more. Try drizzling extra maple syrup on top. Fresh whipped cream or yogurt makes a nice touch, too. Garnish with berries and mint for a colorful look. One mistake is over-soaking the bread. If you let it soak too long, it can turn mushy. Another common error is undercooking the casserole. Always check if the center is set. If it’s still jiggly, bake it a bit longer. Following these tips will help you create a perfect dish every time. For the complete recipe, check the Full Recipe link. {{image_2}} You can make your baked French toast casserole even tastier. Try adding other fruits to the mix. Sliced bananas, apples, or peaches work great. You can also use dried fruits like raisins or cranberries for a chewy texture. For a spice twist, think about adding cardamom or ginger. Both spices bring a warm flavor to the dish. A little goes a long way, so start with a pinch. You can always add more next time! If you need gluten-free options, use gluten-free bread. There are many tasty choices available. Just check the labels and find one you love. For vegan alternatives, replace the eggs with flaxseed meal or a vegan egg substitute. Use almond milk or coconut milk instead of regular milk. You can use maple syrup to sweeten the dish, making it perfect for everyone. Mini casseroles are a fun way to serve this dish. Use muffin tins or small ramekins to create individual servings. They bake faster and are easy to share. If you want a more personal touch, consider making individual portions. You can serve each person their own dish, which adds charm to any meal. Plus, it makes serving easy! For the full recipe, check out the detailed instructions above. To keep your baked French toast casserole fresh, store it in the fridge. Place leftovers in an airtight container. This helps prevent drying out. You can also cover the dish tightly with plastic wrap or aluminum foil. Glass or plastic containers with lids work best for storage. If you want to save some for later, freezing is easy. First, let the casserole cool completely. Then, cut it into portions. Wrap each piece tightly in plastic wrap. Place the wrapped pieces in a freezer bag. Squeeze out extra air before sealing. For reheating, thaw the casserole in the fridge overnight. You can warm it in the oven at 350°F (175°C) for about 20 minutes. Store leftover casserole in the fridge for up to 3 days. If frozen, it stays good for about 2 months. Check for signs of spoilage. Look for mold or an off smell. If it looks or smells bad, don’t eat it. Always use your best judgment! The best bread for French toast casserole is brioche. Its soft texture and rich flavor make it perfect. Challah is another great choice. Both breads soak up the egg mixture well, creating a tasty dish. You can also use French bread or sourdough if you prefer. Just make sure to cut it into cubes. Yes, you can make this casserole ahead of time. Prepare it the night before and let it soak in the fridge. Cover it with foil to keep it fresh. When ready to bake, just remove the foil and put it in the oven. This makes it great for brunch or special gatherings. To reheat leftovers, preheat your oven to 350°F (175°C). Place the casserole in an oven-safe dish. Cover it with foil to keep it from drying out. Bake for 15 to 20 minutes or until warmed through. You can also microwave single portions for a quick snack, but the oven gives better results. Yes, you can make this casserole without eggs. Use a mixture of silken tofu and plant-based milk as a substitute. Blend them until smooth for a creamy texture. You can also use a commercial egg replacer. This way, everyone can enjoy this tasty dish, regardless of dietary needs. This blog post shared a simple recipe for a delicious French toast casserole. We covered the ingredients, step-by-step instructions, and useful tips. I explained ways to personalize your casserole and how to store it properly. I hope you find joy in making this dish. Enjoy delightful breakfasts with your loved ones! Happy cooking!

Baked French Toast Casserole Deliciously Easy Recipe

Get ready for a breakfast treat that’s simple and indulgent! My Baked French Toast Casserole is the perfect blend of

- 2 large chicken breasts - 1 cup buttermilk - 1 cup all-purpose flour - Spices: paprika, garlic powder, onion powder, cayenne pepper - Salt and pepper to taste - 4 burger buns - Lettuce leaves, sliced tomatoes, dill pickles - 2 tablespoons mayonnaise - Vegetable oil for frying The secret to a great crispy fried chicken sandwich lies in your ingredients. First, you need chicken breasts. Use two large ones for the best size and flavor. Next, add buttermilk to make your chicken juicy and tender. For the breading, combine flour with spices. I love paprika, garlic powder, onion powder, and a bit of cayenne for heat. Make sure you add salt and pepper to taste for extra flavor. Lastly, for the sandwich itself, grab four burger buns. Freshness matters! You will also need crunchy lettuce, juicy sliced tomatoes, and tangy dill pickles. Don't forget the mayonnaise; it ties everything together. Vegetable oil is crucial for frying, too. This simple ingredient list will help you create a crispy fried chicken sandwich that is both delightful and satisfying. For the full recipe, check out the detailed instructions. Start by taking your chicken breasts. Place them in a large bowl. Pour in the buttermilk until the chicken is fully submerged. Cover the bowl tightly and put it in the fridge. Let it marinate for at least two hours. For even better flavor, marinate overnight. This makes the chicken tender and juicy. Next, grab a separate bowl. In this bowl, mix the flour, paprika, garlic powder, onion powder, cayenne pepper, salt, and pepper. Stir it well to combine all the flavors. This will be your crispy coating. Make sure everything is evenly mixed. This step is key to achieving that perfect crunch. Now, it’s time to heat the oil. Use a deep skillet or frying pan. Pour in enough vegetable oil to cover about two inches of the bottom. Heat it over medium-high heat until it reaches about 350°F. You can test it by dropping a small bit of flour in the oil. If it sizzles, you’re ready! Take the chicken out of the buttermilk. Let the excess liquid drip off. Dredge each piece in the flour mixture. Press it firmly so that the coating sticks well. Carefully place the chicken in the hot oil. Don’t overcrowd the pan; this ensures even cooking. Fry each side for 5 to 7 minutes until golden brown. Check that the internal temperature reaches 165°F for safety. Once the chicken is cooked, transfer it to a wire rack or a plate lined with paper towels. Let it rest for about 5 minutes to drain the oil. While it rests, toast the burger buns until they are golden brown. Spread mayonnaise on the bottom half of each bun. Layer with lettuce, a fried chicken breast, slices of tomato, and dill pickles. Finally, place the other half of the bun on top. Enjoy your crispy fried chicken sandwich! For the full recipe, check out the detailed instructions. To get that perfect crunch, follow these steps: - Marinate Well: Use buttermilk to tenderize the chicken. The longer, the better. - Dry the Chicken: After marinating, let the chicken dry a bit. This helps the coating stick. - Coat Generously: Press the chicken into the flour mix. Make sure it covers all sides. - Hot Oil: Heat the oil to 350°F. This temperature is key for crispiness. - Don’t Overcrowd: Fry in batches. Too much chicken cools the oil and makes it soggy. You can elevate your sandwich with these tasty ideas: - Toppings: Add avocado slices or crispy bacon for extra flavor. - Sauces: Try hot sauce, sriracha mayo, or honey mustard for a kick. - Cheese: A slice of cheddar or pepper jack adds creaminess and zest. - Pickles: Use spicy pickles for a tangy crunch that boosts flavor. Make your meal special with these serving ideas: - Classic Sides: Serve with crispy fries or coleslaw for a great combo. - Presentation: Stack the sandwich high and place it on a colorful plate. - Garnish: Add fresh herbs like parsley or cilantro for a pop of color. - Extra Dips: Offer a small bowl of ranch or blue cheese dressing for dipping. Try these tips to make your crispy fried chicken sandwich even better! For the complete guide, check the Full Recipe. {{image_2}} You can make your crispy fried chicken sandwich spicy. Just add heat with spices or sauces. Try using extra cayenne pepper in the breading. You can also use spicy sauces like sriracha or hot sauce. Mix these into the mayonnaise for a creamy kick. This adds flavor and a nice zing to your sandwich. If you want a healthier version, consider baking the chicken. Preheat your oven to 400°F (200°C). Coat the chicken with the same spices but use less oil. Place the chicken on a baking sheet lined with parchment paper. Bake for about 20-25 minutes, or until golden and cooked through. You can also use whole wheat buns or swap out the mayonnaise for avocado spread. For a vegan or vegetarian twist, use plant-based chicken alternatives. Brands like Beyond Meat or Gardein offer great options. You can also make a chickpea patty. Mash chickpeas and mix with spices and breadcrumbs. Then, fry or bake until crispy. Serve it just like the chicken sandwich, with all your favorite toppings. This way, everyone can enjoy a tasty sandwich! To store your crispy fried chicken sandwich, place it in an airtight container. You can keep it in the fridge for up to three days. If you separate the components, the chicken stays crispier. Store the chicken, buns, and toppings in different containers. This way, the sandwich won't get soggy. To reheat the chicken, use your oven. Preheat it to 375°F (190°C). Place the chicken on a baking sheet. Bake for 10 to 15 minutes. This method keeps the chicken crispy. You can also use an air fryer for a quicker option. Set it to 350°F (175°C) and heat for about 5 minutes. If you want to freeze the chicken, first let it cool completely. Wrap each piece tightly in plastic wrap. Then, place the wrapped chicken in a freezer bag. It can stay frozen for up to three months. When you’re ready to use it, thaw it in the fridge overnight before reheating. This keeps the chicken juicy and tasty. For the full recipe, check out the Crispy Fried Chicken Sandwich details above. Yes, you can use chicken thighs. Thighs have more fat and flavor. They stay juicy during cooking. Prepare them the same way as the breasts. Just adjust cooking time as thighs may take a bit longer. To check if the chicken is cooked, use a meat thermometer. Insert it into the thickest part of the chicken. It should read 165°F or 75°C. This ensures the chicken is safe to eat. If you don't have a thermometer, cut into the chicken. It should not be pink inside. You can serve crispy fries, coleslaw, or a fresh salad. These sides balance the sandwich's flavors. For drinks, iced tea, lemonade, or beer work well too. They complement the meal nicely. Yes, you can make this sandwich dairy-free. Use a dairy-free milk like almond or soy for marinating. Replace buttermilk with these alternatives. For mayonnaise, choose a dairy-free version. This way, everyone can enjoy the sandwich! In this article, we covered how to make a crispy fried chicken sandwich. You learned about the key ingredients like chicken, the breading mixture, and tasty toppings. I shared step-by-step cooking tips and fun variations, plus how to store leftovers properly. Remember, you can customize this recipe to fit your taste, whether you want spicy or healthier options. Enjoy creating your perfect sandwich!

Crispy Fried Chicken Sandwich Delightful and Simple Recipe

Are you ready to elevate your lunch game? This Crispy Fried Chicken Sandwich is not just any sandwich; it’s a

To make tasty jalapeño poppers, you need fresh ingredients. Here’s what you will use: - 12 fresh jalapeños, halved and seeded - 8 oz cream cheese, softened - 1 cup shredded sharp cheddar cheese - 1/2 cup crumbled feta cheese - 1/4 cup fresh cilantro, chopped - 2 green onions, finely chopped - 1/2 tsp garlic powder - 1/2 tsp smoked paprika - Salt and pepper to taste - 1 cup panko breadcrumbs - Cooking spray or olive oil for drizzling You can switch things up with some fun changes. Here are some optional items: - Cooked bacon bits for a smoky taste - Diced tomatoes for freshness - Different cheeses like pepper jack or gouda - Hot sauce for extra heat You don’t need fancy tools for this recipe. Just grab the basics: - Baking sheet - Parchment paper - Mixing bowls - Spoon for filling - Knife for cutting jalapeños - Measuring cups and spoons This list ensures you have everything you need to create delicious jalapeño poppers. For more details, check the Full Recipe. Happy cooking! Start by washing the jalapeños. Cut each one in half lengthwise. Use a spoon to scoop out the seeds and membranes. This step helps reduce the heat. If you want more spice, leave some seeds. Place the halved jalapeños on a baking sheet lined with parchment paper. In a bowl, mix the cream cheese, sharp cheddar, feta, cilantro, green onions, garlic powder, smoked paprika, salt, and pepper. Stir until all the ingredients blend well. This mixture should be creamy and flavorful. Make sure to taste it; adjust the seasonings if needed. Preheat your oven to 375°F (190°C). Spoon the cheese mixture into each jalapeño half. Fill them generously to ensure great flavor in every bite. In a separate bowl, mix the panko breadcrumbs with a bit of olive oil or cooking spray. Coat the tops of the stuffed jalapeños with the breadcrumbs. Place them on the baking sheet, spaced out. Bake for 20-25 minutes. Look for bubbly cheese and golden breadcrumbs. Let them cool for a few minutes before enjoying. Check the Full Recipe for more details. Wear gloves when you cut jalapeños. The oils can burn your skin. If you touch your face, it can hurt. Always wash your hands after handling them. If you want less heat, remove more seeds and membranes. This will make them milder. For crispy poppers, use panko breadcrumbs. They give a great crunch. Lightly coat them with olive oil or cooking spray. This helps them brown nicely. Bake at 375°F (190°C) until they are golden brown. This usually takes about 20-25 minutes. Serve jalapeño poppers on a bright plate. A colorful platter makes them pop! Pair them with ranch dressing or salsa for dipping. You can also serve them with guacamole for a fun twist. Enjoy them as an appetizer or snack at parties! For a complete dish, try serving with tacos or grilled chicken. You can find the Full Recipe for more tips. {{image_2}} You can switch up the cheese for fun and unique flavors. Try using mozzarella for a stretchy, gooey texture. Pepper jack adds a nice kick. Goat cheese brings a tangy twist. Mix and match to find your favorite combination. Each cheese changes the popper's taste and texture. Adding proteins makes your poppers more filling. Crispy bacon is a popular choice. Cook it until crispy, then crumble it into the cheese mix. You can also use cooked sausage for a hearty option. Just remember to drain any excess grease for a cleaner bite. These additions make each popper satisfying and full of flavor. Want to turn up the heat? Add jalapeño powder or a dash of hot sauce to your cheese mix. This will give your poppers an extra kick. You can also sprinkle red pepper flakes on top before baking. These spicy additions ensure you get a pop of heat in every bite. After you enjoy your jalapeño poppers, store any leftovers right away. Place them in an airtight container. You can keep them in the fridge for up to three days. Make sure they are cool before sealing the container. This helps keep them fresh and tasty. Reheating jalapeño poppers is easy. Preheat your oven to 350°F (175°C). Place the poppers on a baking sheet. Heat them for about 10-15 minutes. This warms them up and keeps the crunch. You can also use the microwave, but they may get soggy. If you choose the microwave, heat them in short bursts. Check every 30 seconds to avoid overheating. Freezing is a great option if you want to save jalapeño poppers for later. To freeze them, first let them cool completely. Then, place them in a single layer on a baking sheet. Put the sheet in the freezer for about 2 hours. Once frozen, transfer the poppers to a freezer bag. They can last for up to three months. When ready to eat, bake them straight from the freezer. Just add a few extra minutes to the cooking time. Enjoy your cheesy fiesta jalapeño poppers anytime! Yes, you can prepare Easy Jalapeño Poppers ahead of time. You can stuff the jalapeños with the cheese mixture and coat them with breadcrumbs. Then, cover them tightly and store them in the fridge. You can keep them for up to 24 hours. When you are ready, bake them straight from the fridge. Just add a few extra minutes to the baking time. This makes it easy for parties or last-minute snacks. Jalapeño poppers pair well with many tasty sides. Here are some ideas: - Ranch dressing - Salsa - Guacamole - Queso dip - Fresh veggies like carrots and celery - Tortilla chips These sides add extra flavor and make your poppers even more fun to eat. To make jalapeño poppers less spicy, you can take out the seeds and membranes. This is where most of the heat is. Another option is to use mild jalapeños instead of regular ones. You can also add more cream cheese to the filling. This will help to balance the spice. Finally, serve them with a cool dip, like ranch or sour cream, to calm the heat while enjoying your snack. For the full recipe, check out the detailed steps to create these delicious poppers! In this blog post, we explored how to make easy jalapeño poppers. We covered the key ingredients, essential equipment, and simple steps to prep and bake them. I shared tips for handling jalapeños safely and achieving that perfect crispy texture. You learned different ways to customize your poppers and how to store any leftovers. Now, it’s time to enjoy your tasty snack. Jalapeño poppers are fun to make, eat, and share. Dive into your own kitchen and create your delicious version today!

Easy Jalapeño Poppers Flavorful and Quick Recipe

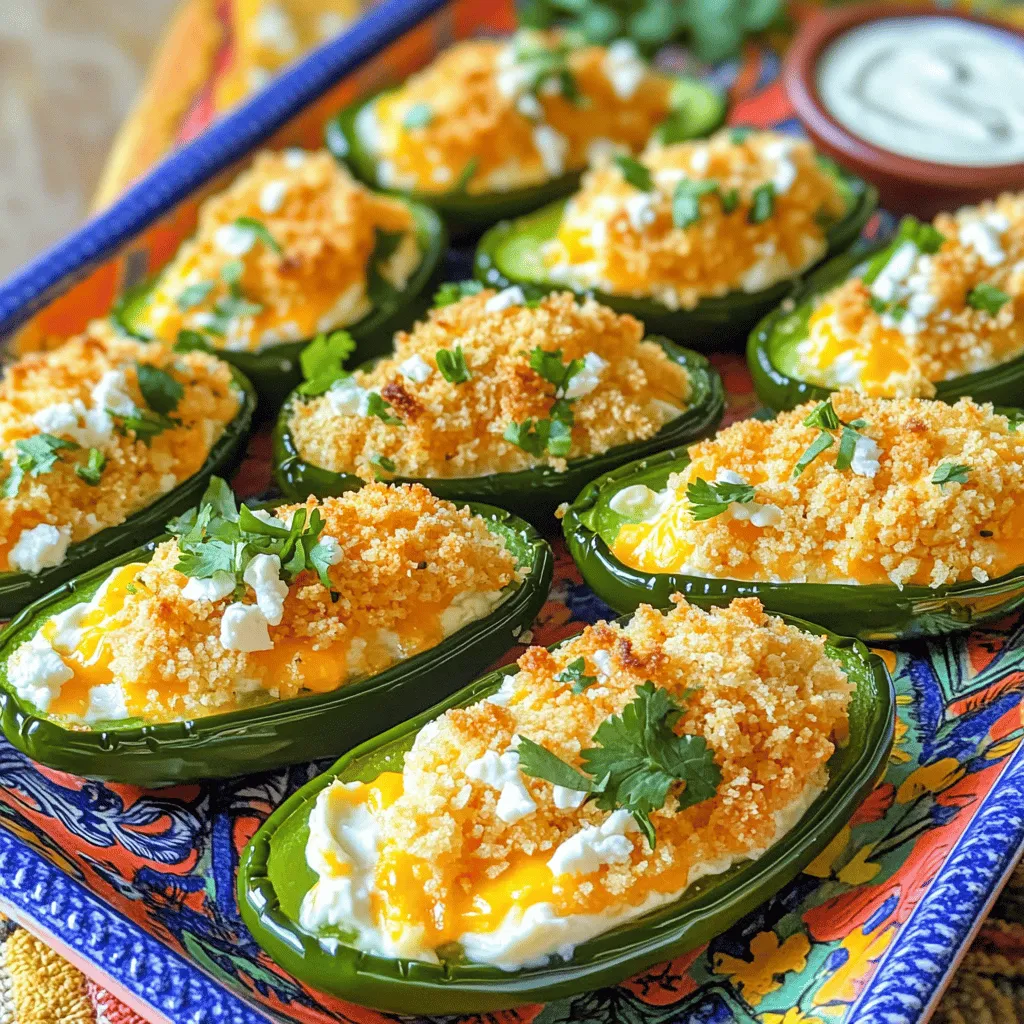
If you’re craving a tasty snack, I’ve got the perfect recipe for you! These easy jalapeño poppers are not just

To make Lemon Butter Garlic Cod, you need the following ingredients: - 4 cod fillets (approximately 6 oz each) - 3 tablespoons unsalted butter - 4 cloves garlic, minced - Zest and juice of 1 large lemon - 1 teaspoon dried thyme - 1 teaspoon dried parsley - Salt and pepper to taste - Fresh parsley, chopped (for garnish) - Lemon slices (for garnish) These ingredients come together to create a bright and zesty flavor. The cod is mild and flaky, which pairs well with the rich butter and tangy lemon. When choosing cod, fresh is best. Look for fillets with a clean, ocean-like smell. They should be firm to the touch and have a moist appearance. If you can, buy wild-caught cod for better taste and texture. For the garlic, use fresh cloves instead of pre-minced or jarred. Fresh garlic has a stronger flavor. Choose a lemon that feels heavy for its size, as this means it is juicy. If you can’t find cod, you can use other fish like haddock or tilapia. Both will work well with the lemon butter sauce. For a little twist, try olive oil instead of butter for a healthier option. You can also replace lemon with lime for a different taste. If you don't have dried thyme and parsley, fresh herbs are great. Just use three times the amount of fresh herbs to get the same flavor. For a full recipe, check out the detailed steps to make this dish shine! Start by rinsing your cod fillets under cold water. Pat them dry with paper towels. This step helps remove any extra moisture. Next, season both sides of the fillets with salt and pepper. This simple seasoning enhances the fish's natural flavor. 1. Preheat your skillet over medium heat. Add 2 tablespoons of unsalted butter. Let it melt until it bubbles slightly. 2. Add 4 cloves of minced garlic to the skillet. Sauté for about 30 seconds. The goal is to make the garlic fragrant, not burnt. 3. Stir in the zest and juice of 1 large lemon. Then add 1 teaspoon of dried thyme and 1 teaspoon of dried parsley. Mix it all together and let it simmer for one more minute. 4. Now, carefully place the seasoned cod fillets in the skillet. Cook for about 4-5 minutes on each side. The fish should become opaque and flake easily with a fork. 5. In the last minute, add the remaining tablespoon of butter. Let it melt and coat the fillets for extra flavor. 6. Once the cod is cooked, carefully lift it out of the skillet. Place it on a serving platter. 7. Drizzle the garlic lemon butter sauce over the cod. For the finishing touch, garnish with chopped fresh parsley and lemon slices. Serve the cod fillets on a nice platter. Add fresh lemon slices on the side for color. A sprinkle of chopped parsley makes it look fresh. Drizzle some extra lemon butter sauce over the top for an appetizing finish. This will make your dish not just tasty, but also beautiful! For the full recipe, check the section above. When making Lemon Butter Garlic Cod, avoid these pitfalls for the best dish. - Overcooking the fish: Cod cooks quickly. Keep an eye on it. Cook it just until it flakes easily. - Burning the garlic: Garlic burns fast. Sauté it for only 30 seconds. Watch it closely to keep it fragrant. - Skipping seasoning: Don’t forget to season both sides of the cod. Salt and pepper enhance the flavor. You can easily boost the taste of your cod. Here are some ideas: - Add herbs: Fresh herbs like dill or basil can add a bright touch. - Citrus variations: Try using lime or orange juice instead of lemon for a twist. - Spicy kick: A pinch of red pepper flakes can add some heat to the dish. A few simple tools will help you create this meal: - Skillet: A non-stick skillet works best for cooking the cod. - Spatula: Use a spatula to flip the fish without breaking it. - Measuring spoons: Accurate measurements ensure the flavors balance well. For the full recipe, check out the Lemon Butter Garlic Cod section above. Enjoy your cooking experience! {{image_2}} For a fresh twist, try lemon herb butter cod. Use the same base recipe. Just mix in fresh herbs like basil or dill. The herbs add a bright flavor that pairs well with the lemon and garlic. You can even add a pinch of red pepper flakes for a slight kick. If you prefer baking, this method works great. Preheat your oven to 400°F. Prepare the cod fillets as in the full recipe. Place them in a greased baking dish. Pour the lemon butter garlic sauce over the top. Bake for about 15-20 minutes. The cod will be flaky and delicious. You can make this dish a full meal by adding vegetables. As the cod cooks, toss in some asparagus, green beans, or cherry tomatoes. The veggies soak up the lemon butter flavor. They add color and nutrition to your plate. This option makes dinner easy and healthy. To store your leftover Lemon Butter Garlic Cod, let it cool first. Place the cooled cod in an airtight container. You can keep it in the fridge for up to three days. Make sure the container is sealed well to keep the fish fresh. If you want to store it longer, freezing is a great option. Wrap the cod tightly in plastic wrap and then foil. This helps prevent freezer burn. You can freeze it for up to two months. When you’re ready to eat it, thaw it in the fridge overnight. Reheating cod can be tricky. You want to avoid drying it out. The best way to reheat it is in the oven. Preheat your oven to 350°F (175°C). Place the cod on a baking dish and cover it with foil. Heat for about 10-15 minutes until it’s warm. You can also reheat it in a skillet over low heat with a bit of butter. This keeps it moist and tasty. For more details, check the Full Recipe. Yes, you can use frozen cod. Just make sure to thaw it first. Place the frozen cod in the fridge overnight or use cold water for a quick thaw. Once thawed, pat the cod dry with paper towels. This helps the fish absorb the flavors better in the recipe. Lemon Butter Garlic Cod pairs well with many sides. Here are some ideas: - Steamed broccoli - Garlic mashed potatoes - Rice pilaf - Roasted asparagus - A fresh garden salad These sides add color and flavor to your meal. They also balance the richness of the cod. You can tell cod is cooked when it turns opaque. Use a fork to check if it flakes easily. The internal temperature should reach 145°F. If you have a food thermometer, this is a great tool to ensure it's done. Cooking cod just right gives you a tender, moist fish. For a delicious experience, try the Full Recipe. This blog post covered key ingredients, step-by-step cooking, and storage tips for cod. We explored ways to enhance flavor and shared common mistakes to avoid. You can also try fun variations to make each meal unique. Remember to store leftovers properly and know how to reheat them. With these tips, cooking cod can be simple and delicious. Enjoy your cooking journey, and keep experimenting!

Lemon Butter Garlic Cod Flavorful and Easy Recipe

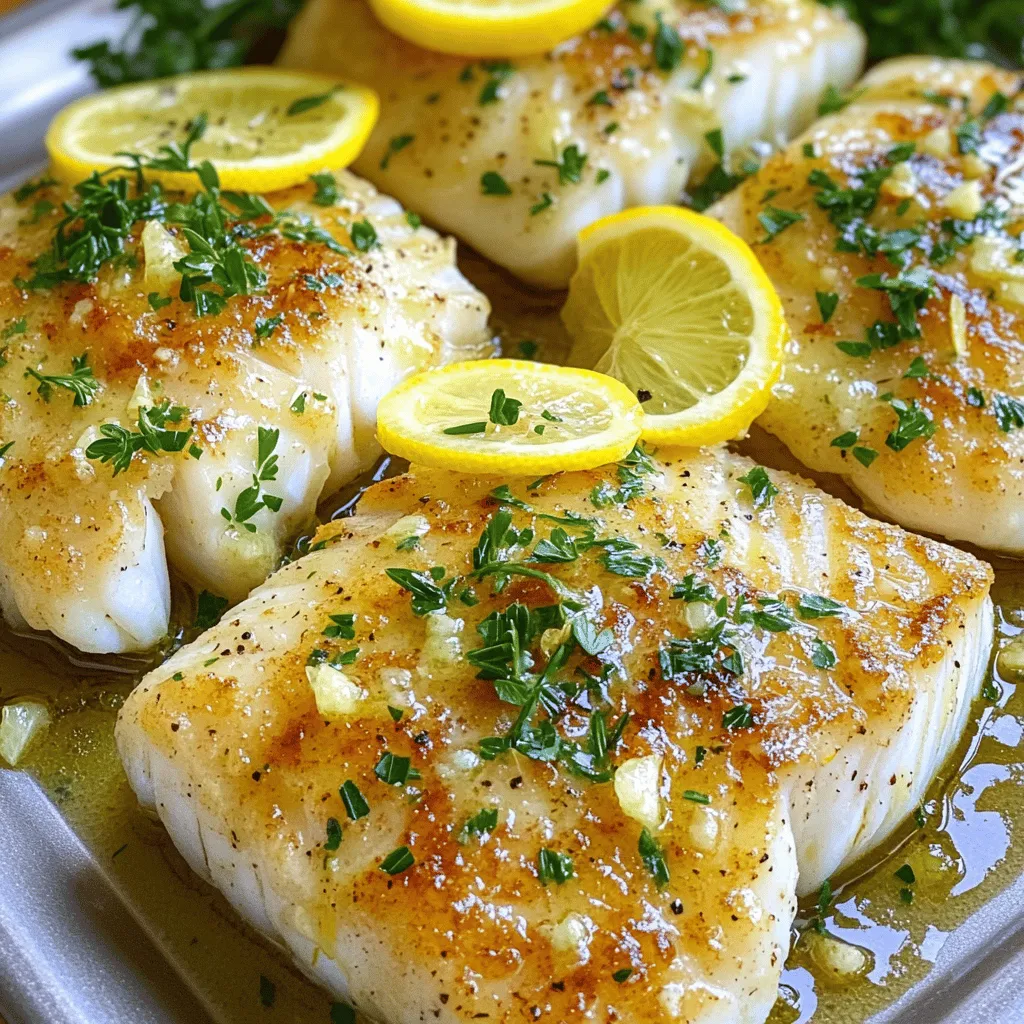
Ready to impress your dinner guests with a quick and tasty dish? This Lemon Butter Garlic Cod is not only

To make chicken fajita stuffed peppers, gather these key items: - 4 large bell peppers (red, yellow, or green) - 2 cups cooked chicken, shredded or diced - 1 medium onion, sliced - 2 cloves garlic, minced - 1 tablespoon olive oil - 1 teaspoon cumin - 1 teaspoon smoked paprika - 1/2 teaspoon chili powder - Salt and pepper to taste - 1 cup corn kernels (fresh or frozen) - 1 cup black beans, rinsed and drained - 1 cup shredded cheese (cheddar or Mexican blend) - Fresh cilantro leaves, for garnish - Lime wedges, for serving These ingredients create a tasty meal packed with flavor and nutrients. You can switch up the recipe to match your taste. Here are some fun additions: - Diced tomatoes for extra juiciness - Jalapeños for heat - Avocado slices for creaminess - Sour cream for a cool finish - Different cheese like pepper jack for more spice Feel free to mix and match these options! If you need alternatives, here are some ideas: - Use ground turkey or beef instead of chicken. - Swap bell peppers for zucchini or eggplant. - Try quinoa or rice instead of black beans for a different texture. - Use vegetable broth instead of olive oil to sauté. These changes keep the dish fresh and exciting while catering to your needs. For the full recipe, check out the entire cooking guide. To start, gather all your ingredients. You will need four large bell peppers, cooked chicken, onion, garlic, and spices. Cut the tops off the bell peppers. Remove the seeds and membranes. Place the peppers upright in a baking dish. This step is key. It makes stuffing easier. Next, slice the onion and mince the garlic. Heat the olive oil in a large skillet over medium heat. Add the onion and cook until it becomes soft and clear. This takes about three to four minutes. Add the minced garlic to the skillet. Stir it in for about one minute. Then, add the cooked chicken, corn, black beans, cumin, smoked paprika, chili powder, salt, and pepper. Mix everything well. Cook for about five more minutes until the mixture is hot. Remove the skillet from the heat. Fold in half of the shredded cheese. This makes the filling creamy and tasty. Now, it’s time to stuff your peppers! Fill each pepper tightly with the chicken mixture. Top each stuffed pepper with the remaining cheese. This will form a nice, cheesy crust. Cover the dish with aluminum foil. Bake in your preheated oven at 375°F for twenty-five minutes. After that, take off the foil. Bake for another ten minutes. The peppers should be soft, and the cheese should be bubbly and golden. Once they are done baking, remove the dish from the oven. Let the peppers cool for a few minutes. This will make them easier to handle. Garnish with fresh cilantro. Serve with lime wedges for a burst of flavor. Enjoy your delicious chicken fajita stuffed peppers! For the full recipe, check the detailed instructions above. To make the best Chicken Fajita Stuffed Peppers, start with fresh peppers. Choose large, firm bell peppers that hold their shape well. Pre-cooking the filling helps blend the flavors. Use cooked chicken for speed and flavor. Mix in spices like cumin and smoked paprika for depth. Pack the filling tightly into the peppers to avoid gaps. Topping with cheese adds a nice crust. Covering with foil helps steam the peppers. Remove the foil for the last 10 minutes to get a golden brown top. One big mistake is overcooking the peppers. You want them tender, not mushy. Avoid using too much filling, as it can spill out. Don’t skip the resting time after baking; it makes serving easier. Also, remember to taste your filling for seasoning. Balance is key! Serve the Chicken Fajita Stuffed Peppers with lime wedges for a fresh kick. I love adding a side of guacamole or salsa. A simple green salad works great, too. You can also serve them with tortilla chips for a fun crunch. For a twist, wrap leftovers in a tortilla for a quick meal. Enjoy experimenting with your own sides! For the complete recipe, check out the Full Recipe section. {{image_2}} If you want a meatless meal, you can swap the chicken for veggies. Use mushrooms, zucchini, or eggplant. You can also add black beans or chickpeas for protein. This option is tasty and colorful. You can still use the same spices to keep that fajita flavor. To make your stuffed peppers spicier, add jalapeños or hot sauce. You can also use pepper jack cheese instead of cheddar. If you want less heat, remove the chili powder or use mild salsa. Adjust it to fit your taste. You don't have to use chicken for this recipe. Ground turkey or beef are great swaps. Tofu is another option if you want it plant-based. Just make sure to cook it well with the spices. This keeps the flavors rich and satisfying. For more ideas, check the Full Recipe for inspiration. To keep your chicken fajita stuffed peppers fresh, store them in an airtight container. This method helps to lock in flavors and moisture. Make sure the peppers are cool before sealing. You can keep them in the fridge for up to four days. If you want to separate the filling from the peppers, place them in different containers. This way, the peppers stay crisp. Reheating stuffed peppers is easy. You can use an oven or a microwave. For the oven, preheat it to 350°F (175°C). Place the peppers in a baking dish and cover with foil. Heat for about 15-20 minutes until warm. If using a microwave, place a pepper on a microwave-safe plate. Heat on high for 2-3 minutes. Check that the center is hot before eating. Freezing is a great option for meal prep. To freeze, let the peppers cool completely. Wrap each one tightly in plastic wrap. Then, place them in a freezer-safe bag or container. They can last for up to three months in the freezer. When ready to eat, thaw them in the fridge overnight. Reheat as mentioned above. Enjoy your meal anytime! To make chicken fajita stuffed peppers, follow these steps: 1. Preheat your oven to 375°F (190°C). 2. Cut the tops off four large bell peppers. Remove the seeds and membranes. 3. Place the peppers upright in a baking dish. 4. In a skillet, heat one tablespoon of olive oil over medium heat. 5. Add one sliced onion and cook for 3-4 minutes until soft. 6. Stir in two minced garlic cloves, two cups of cooked chicken, one cup of corn, and one cup of black beans. 7. Add one teaspoon of cumin, one teaspoon of smoked paprika, and half a teaspoon of chili powder. Season with salt and pepper to taste. 8. Cook for another 5 minutes until warm. 9. Mix in half of one cup of shredded cheese. 10. Stuff each bell pepper with the chicken mixture. 11. Top with the rest of the cheese. 12. Cover with foil and bake for 25 minutes. 13. Remove foil and bake for 10 more minutes until the peppers are tender. 14. Garnish with fresh cilantro and serve with lime wedges. This full recipe makes a tasty meal that is simple and fun to cook. Stuffed peppers pair well with many sides. Here are some ideas: - A fresh salad with mixed greens - Rice or quinoa for a hearty addition - Salsa or guacamole for a zesty kick - Tortilla chips for crunch - Sour cream or Greek yogurt for creaminess These sides brighten the meal and add flavor. Yes, you can prepare stuffed peppers ahead of time. Here’s how: - Prepare the filling and stuff the peppers. - Cover them tightly and store in the fridge for up to 24 hours. - When ready to cook, bake them directly from the fridge, adding extra time if needed. You can also freeze stuffed peppers for later. Just thaw them in the fridge before baking. In this blog post, we covered how to make Chicken Fajita Stuffed Peppers. We looked at the key ingredients, cooking steps, and tips to get it just right. You learned about variations, like vegetarian options and spice levels, which can fit your taste. Remember the best storage practices to keep leftovers fresh. This dish is easy to customize and perfect for any meal. Enjoy your cooking, and let this recipe inspire your kitchen creativity! Don’t hesitate to make it your own.

Chicken Fajita Stuffed Peppers Tasty and Simple Meal

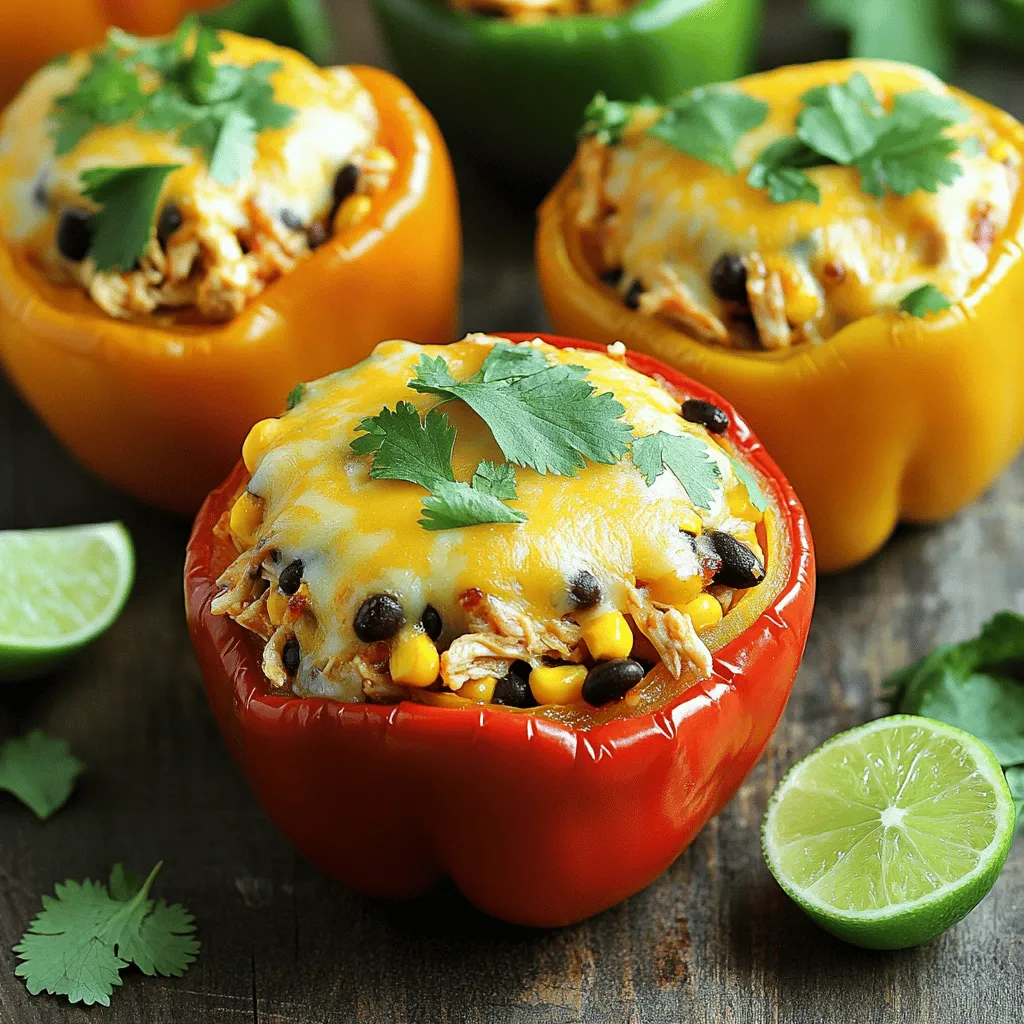
Are you searching for a quick and delicious meal? Chicken Fajita Stuffed Peppers are both tasty and simple to make.

Older posts
Newer posts
← Previous Page1 … Page79 Page80 Page81 … Page84 Next →

dsad

© 2026 Home Cooking Style • Built with GeneratePress

Our Policies

  • Copyright Policy
  • Cookie Policy
  • GDPR Policy
  • Privacy Policy
  • Disclaimer
  • Terms Of Use

More Information

  • Home
  • About
  • Contact
  • Appetizers
  • Dessert
  • Dinner
  • Drinks
©2026, Home Cooking Style About Back To Top