Skip to content
DisclaimerTerms Of UseGDPR PolicyCookie Policy

Home Cooking Style

  • Home
  • Drinks
  • Appetizers
  • Dinner
  • Dessert
  • About
  • Contact
  • Privacy Policy
DisclaimerTerms Of UseGDPR PolicyCookie Policy

NO-ING-IMG

To make maple pecan banana muffins, gather these ingredients: - 3 ripe bananas, mashed - 1/3 cup melted coconut oil - 1/2 cup maple syrup - 2 large eggs - 1 teaspoon vanilla extract - 1 teaspoon baking soda - 1/2 teaspoon salt - 1 teaspoon ground cinnamon - 1 1/2 cups all-purpose flour - 1/2 cup chopped pecans (plus extra for topping) - Optional: 1/4 cup chocolate chips The quality of your ingredients matters a lot. Use ripe bananas for sweetness and great flavor. The riper they are, the better. Choose pure maple syrup for the best taste. Avoid imitation syrup, as it lacks depth. Use fresh eggs from a trusted source for the best results. Opt for organic coconut oil if you can; it adds richness without altering the flavor. If you have dietary needs, there are easy swaps. For a dairy-free version, keep using coconut oil. For a vegan option, replace eggs with flax eggs. Mix one tablespoon of ground flaxseed with three tablespoons of water; let it sit for a few minutes. If you want gluten-free muffins, swap the all-purpose flour for a gluten-free blend. Just ensure it contains xanthan gum for structure. To make these muffins, first gather your ingredients. You will need: - 3 ripe bananas, mashed - 1/3 cup melted coconut oil - 1/2 cup maple syrup - 2 large eggs - 1 teaspoon vanilla extract - 1 teaspoon baking soda - 1/2 teaspoon salt - 1 teaspoon ground cinnamon - 1 1/2 cups all-purpose flour - 1/2 cup chopped pecans (plus extra for topping) - Optional: 1/4 cup chocolate chips Preheat your oven to 350°F (175°C). Line a muffin tin with paper liners or grease it lightly. In a large bowl, combine the mashed bananas and melted coconut oil. Mix until smooth. Next, add in the maple syrup, eggs, and vanilla extract. Stir until everything blends well. In another bowl, whisk together the baking soda, salt, ground cinnamon, and all-purpose flour. Gradually add this dry mixture to the wet mixture. Stir gently until just combined. Be careful not to overmix, as this can make your muffins tough. Fold in the chopped pecans, and add chocolate chips if you choose to use them. Divide the batter evenly into the muffin tin, filling each cup about 3/4 full. This helps them rise nicely. Sprinkle a few extra pecans on top for a nice look and added crunch. Bake in your preheated oven for 18-20 minutes. To check if they are done, insert a toothpick into the center of a muffin. If it comes out clean, they are ready! After baking, let the muffins cool in the tin for 5 minutes. Then, transfer them to a wire rack to cool completely. Enjoy the delightful aroma of maple and banana filling your kitchen! To get the best texture, use ripe bananas. They should be brown and soft. Mashed bananas mix well with oil and syrup. This gives your muffins a moist feel. Don’t overmix the batter. Stir just until the dry and wet ingredients combine. Overmixing can make your muffins tough. Maple syrup adds a sweet touch. You can use pure maple syrup for more flavor. Ground cinnamon brings warmth to the muffins. Add extra chopped pecans on top for a crunch. If you love chocolate, fold in some chocolate chips. They add richness and balance the sweetness. Make sure your oven is at the right temperature. Preheat it to 350°F (175°C) before baking. If you bake too long, the muffins can dry out. Use a toothpick to check for doneness. Insert it in the center; it should come out clean. Lastly, let the muffins cool in the tin for a few minutes. This helps them set and makes them easier to remove. {{image_2}} You can make these muffins even more fun by adding chocolate chips. Just fold in 1/4 cup of chocolate chips when you mix in the pecans. The sweet chocolate and rich banana make a great pair. Kids love this twist! If you want to change the flavor, try different nuts. Walnuts or almonds can be good choices. They add a nice crunch and taste. Simply swap out the pecans for your favorite nut. Just remember to chop them up before mixing. You can also boost the flavor with spices or fruits. Try adding nutmeg or ginger for a warm taste. You can mix in dried fruits like raisins or cranberries for added sweetness. Just keep the total amount of mix-ins similar to the pecans for best results. To keep your maple pecan banana muffins fresh, store them in an airtight container. Place parchment paper between layers to avoid sticking. This method keeps them moist and delicious for about 3 days at room temperature. If you want them to last longer, refrigerate them in a sealed bag. They can stay good for up to a week this way. Freezing is a great option if you want to save muffins for later. To freeze, let the muffins cool completely. Wrap each muffin in plastic wrap, then place them in a freezer-safe bag. This method protects against freezer burn. They can stay frozen for up to 3 months. When you’re ready to enjoy, simply take out as many as you want. Reheating your muffins is simple. For a warm muffin, microwave it for about 15-20 seconds. If you prefer a crispy top, place it in the oven at 350°F (175°C) for about 5-10 minutes. Both methods bring back the fresh taste and aroma of your muffins, making them taste like they just came out of the oven. To make these muffins gluten-free, swap the all-purpose flour for a gluten-free blend. Look for a blend that includes xanthan gum. This gum helps mimic the texture of regular flour. You can find many good brands at the store. Just measure it the same way you would with regular flour. The muffins will still taste great! Yes, you can use brown sugar. Replace the half cup of maple syrup with a half cup of brown sugar. Mix it with the melted coconut oil and other wet ingredients. This change will make your muffins sweeter and add a hint of caramel flavor. Keep in mind, they won’t have the same maple taste, but they will still be yummy! These muffins can last about three to four days at room temperature. Store them in an airtight container. If you want to keep them longer, freeze them! They can stay fresh for up to three months in the freezer. When you’re ready to eat one, just let it thaw at room temperature. Enjoy the fresh taste! In this blog post, we explored the key ingredients needed for delicious muffins. I shared tips for ingredient quality and substitutions for dietary needs. You learned step-by-step instructions for prepping, mixing, and baking. We also covered tips to perfect texture and flavor while avoiding common mistakes. Finally, I discussed various muffin variations and storage tips. Baking can be fun and simple. With these guidelines, you can create tasty muffins your way. Enjoy your baking adventures!

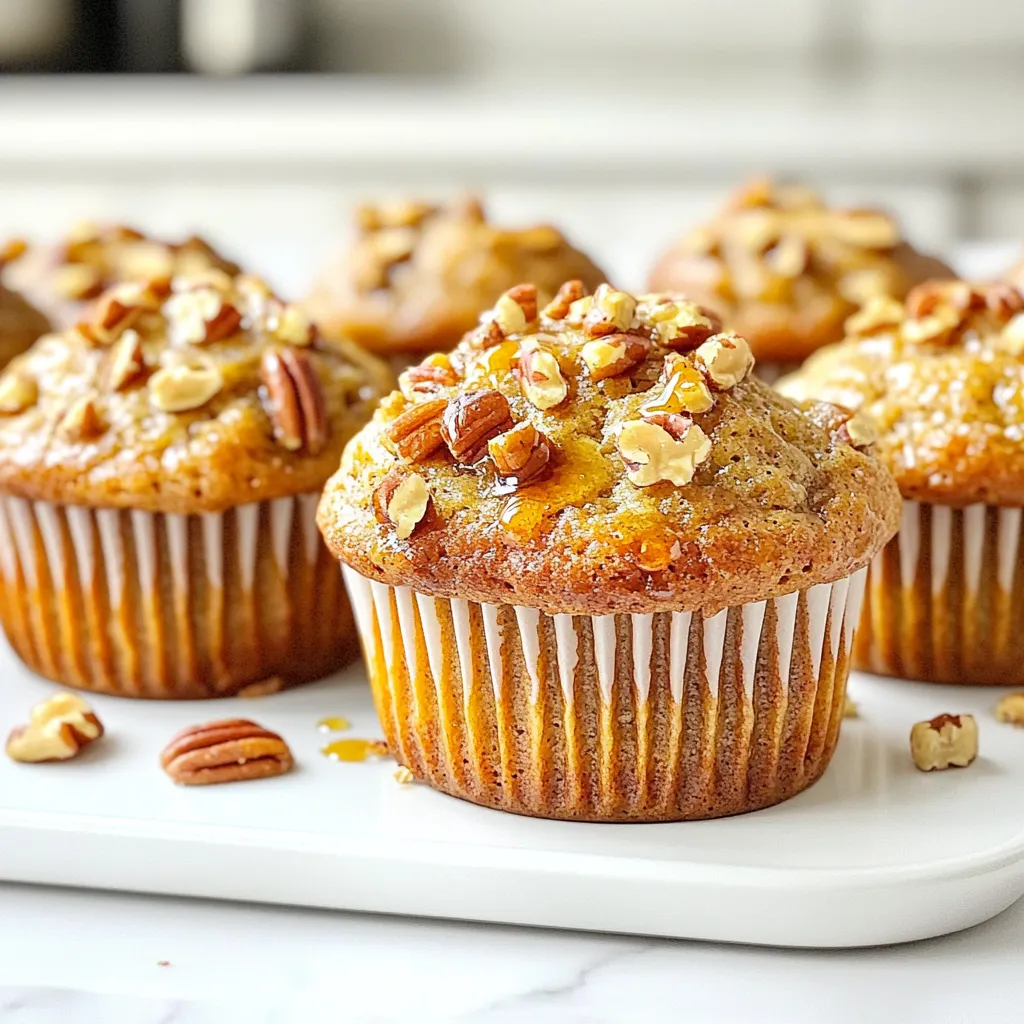
Maple Pecan Banana Muffins Delightful and Simple Treat

If you love simple treats that are full of flavor, you’ll adore my Maple Pecan Banana Muffins. They blend sweet

- 1 lb boneless chicken breasts - 3 tablespoons olive oil - 2 tablespoons fresh lemon juice - 2 teaspoons lemon zest - 4 cloves garlic, minced - 1 teaspoon dried oregano - 1/2 teaspoon red pepper flakes (optional) - Salt and black pepper, to taste You need fresh, simple ingredients for Minute Lemon Garlic Chicken Bites. Start with one pound of boneless chicken breasts. Cut them into bite-sized pieces. This makes them easy to cook and eat. Use three tablespoons of olive oil to help with flavor. Fresh lemon juice adds brightness. You will want two tablespoons of this. Lemon zest gives a nice kick. Add two teaspoons for a fresh taste. Garlic makes everything better, so use four cloves, minced. Dried oregano adds a lovely herb flavor. You will need one teaspoon here. If you like spice, red pepper flakes are optional, but fun! Use half a teaspoon if you dare. Finally, season with salt and black pepper to taste. - Fresh parsley - Lemon wedges Garnishes make your dish look great. Use fresh parsley, chopped finely. This adds color and freshness. Also, include lemon wedges on the side. They are perfect for squeezing over the chicken bites. This adds more lemony goodness. You can serve these tasty bites with rice or a fresh salad for a full meal. Enjoy your cooking! To make the chicken flavorful, you need to mix the marinade. In a medium bowl, combine these ingredients: - 3 tablespoons olive oil - 2 tablespoons fresh lemon juice - 2 teaspoons lemon zest - 4 cloves garlic, minced - 1 teaspoon dried oregano - 1/2 teaspoon red pepper flakes (optional) - Salt and black pepper to taste Add the chicken pieces and toss to coat them well. Let the chicken marinate for 10 minutes. This helps the flavors soak in. You can even marinate longer if you want a stronger taste. Next, preheat your skillet. Heat a large skillet over medium-high heat. Once it’s hot, drizzle a little olive oil to coat the pan. Now, it's time to cook the chicken. Add the marinated chicken pieces in a single layer. You might need to do this in batches to avoid crowding. Cook for 3-4 minutes on each side. Your goal is to get a nice golden brown color. Make sure the chicken reaches an internal temperature of 165°F (75°C) for safety. After cooking, remove the chicken bites from the skillet. Place them on a serving platter. For a great touch, garnish with freshly chopped parsley. Serving lemon wedges on the side is also a must. This allows everyone to squeeze fresh lemon over the chicken for extra zing. To get the most flavor into your chicken, marinate it well. Here are some best practices: - Mix the marinade well. Combine olive oil, lemon juice, lemon zest, minced garlic, oregano, red pepper flakes, salt, and pepper. - Cut the chicken into small, bite-sized pieces. This helps it soak up the marinade. - Let the chicken marinate for at least 10 minutes. For even better taste, you can marinate it longer. To enhance the garlic flavor, use fresh garlic cloves. Mince them finely to release more oils and aroma. You can also add extra garlic if you love the taste. When cooking, you can choose between pan-frying or grilling. Pan-frying gives the chicken a nice, golden crust. Grilling adds a smoky flavor. For cooking in batches, don’t overcrowd the pan. This helps each piece cook evenly and brown nicely. If you have more chicken than fits, cook it in two or three rounds. If your chicken is undercooked, return it to the pan. Cook it for a few more minutes. Check that the internal temperature reaches 165°F (75°C). Use a meat thermometer for accuracy. To adjust the seasoning, taste the chicken before serving. If it needs more flavor, sprinkle a bit more salt, pepper, or lemon juice. You can also add a touch of oregano to boost the taste. {{image_2}} You can change the flavor of these chicken bites easily. Adding fresh herbs like basil or thyme will give a new twist. You might also try using smoked paprika for a unique taste. If you want a bit more heat, add cayenne pepper instead of red pepper flakes. You can even mix in a bit of honey for a sweet touch. Citrus fruits also bring a fresh flavor. Instead of lemon, try orange or lime juice. The zest from these fruits can add depth too. Each option creates a new dish with its own charm. You have options when it comes to cooking these chicken bites. Stovetop cooking gives you a great sear and flavor. But baking can be easier and still tasty. To bake, preheat your oven to 400°F (200°C) and spread the marinated chicken on a baking sheet. Bake for about 20 minutes until it’s cooked through. If you own an air fryer, give it a try! Preheat your air fryer to 400°F (200°C). Cook the chicken bites for about 10-12 minutes, shaking the basket halfway for even cooking. This method makes the chicken crispy and is quick! How you serve these chicken bites can change the meal. For a fresh salad, top mixed greens with the chicken. Add cherry tomatoes and cucumber for color. You can drizzle with a lemon vinaigrette. Wraps are another fun option. Use soft tortillas and fill them with chicken, lettuce, and your favorite sauce. You can also make a sandwich with crusty bread, adding avocado or aioli for a rich flavor. Each serving style makes for a versatile meal. To keep your Minute Lemon Garlic Chicken Bites fresh, refrigerate them right away. Place the chicken in a container. I recommend using airtight containers. This will help keep the moisture in and prevent drying. When you reheat the chicken, aim for low heat. This keeps the chicken juicy and tasty. You can use a skillet or microwave for reheating. Heat the chicken for about 2-3 minutes on medium heat. Stir occasionally to ensure even heating. Leftovers can last in the fridge for up to three days. If you want to enjoy this dish later, freezing is a great option. First, let the chicken cool completely. Then, place it in a freezer-safe bag. Try to remove as much air as you can before sealing. This helps prevent freezer burn. You can freeze the chicken for up to three months. To thaw, move the chicken to the fridge overnight. For quick thawing, place the bag in cold water for about an hour. When ready, reheat in a skillet over low heat. This method keeps the chicken bites flavorful and tender. It takes about 20 minutes to cook these chicken bites. This includes 10 minutes for marinating and 10 minutes for cooking. The prep is simple. You mix the marinade and cut the chicken. After marinating, heat your pan. Then, cook the chicken for 3-4 minutes per side. Make sure it cooks to 165°F (75°C) for safety. Yes, you can use frozen chicken, but it needs some adjustments. Thaw the chicken first. You can do this overnight in the fridge or in cold water for a quick option. After thawing, follow the same marinating steps. Cooking might take a bit longer, so check it often. Many sides pair well with lemon garlic chicken. Here are some tasty options: - Rice: Fluffy white or brown rice soaks up the juice. - Vegetables: Steamed broccoli or sautéed green beans add color and crunch. - Salad: A fresh green salad with lemon vinaigrette is light and refreshing. - Potatoes: Roasted or mashed potatoes offer a comforting balance. Choose what you like best to enjoy with your meal! This blog shared the recipe for tasty lemon garlic chicken bites. You learned how to marinate, cook, and serve them. I included tips to ensure great flavor and texture. You can also explore different cooking methods and variations for your meals. Try these ideas out in your kitchen. Enjoy cooking and get creative! Tasty meals await you!

Minute Lemon Garlic Chicken Bites Flavor-Packed Meal

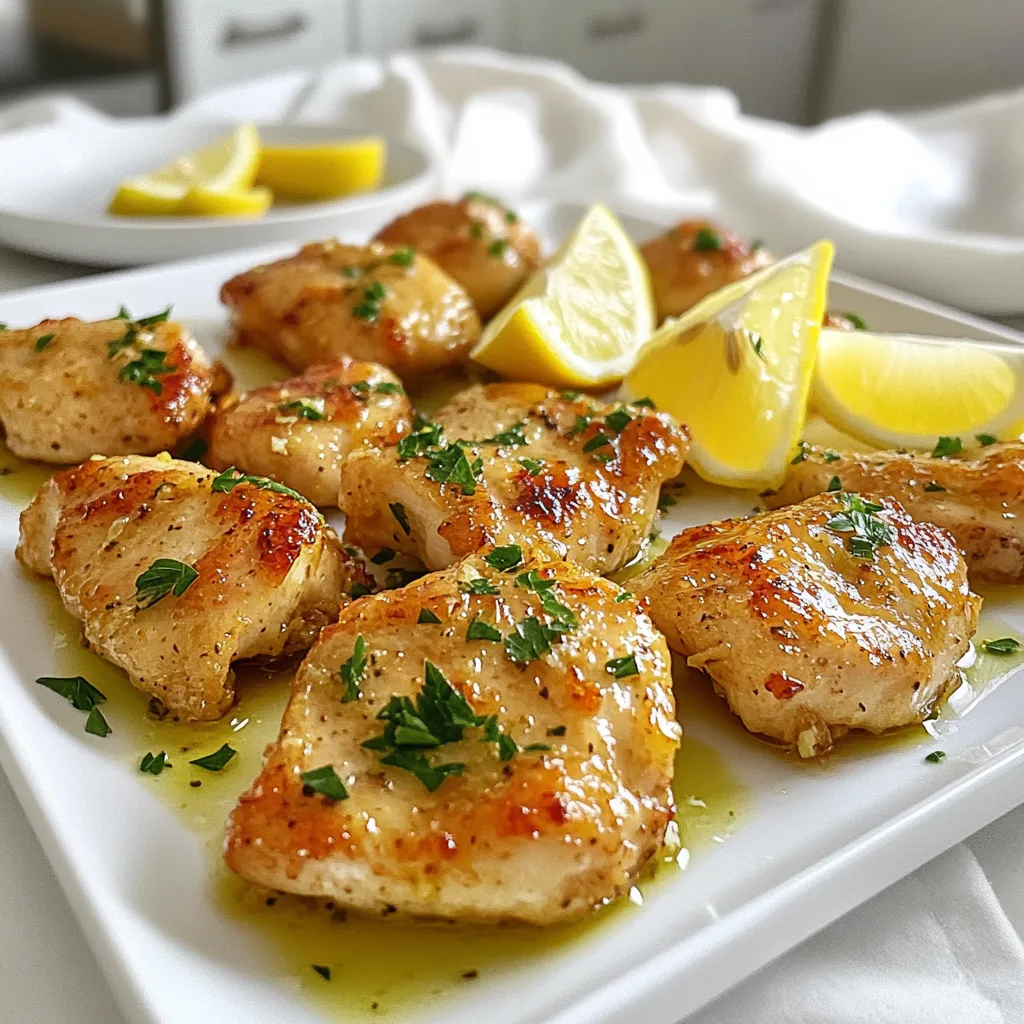
Looking for a quick yet delicious meal? These Minute Lemon Garlic Chicken Bites will wow your taste buds and elevate

To make crispy Air Fryer Parmesan Zucchini Rounds, you need a simple list of ingredients. Here is what you’ll gather: - 2 medium zucchinis, sliced into 1/4-inch rounds - 1 cup grated Parmesan cheese - 1 cup breadcrumbs (panko for extra crunch) - 2 teaspoons Italian seasoning - 1 teaspoon garlic powder - 2 large eggs, beaten - Olive oil spray - Salt and pepper to taste These ingredients work together to create a tasty dish. The zucchinis give a fresh taste, while the Parmesan adds a rich flavor. Breadcrumbs provide that nice crunch. Italian seasoning and garlic powder bring in great herbs and spices. Eggs help the coating stick, and olive oil gives a little extra crispness. Salt and pepper round out the flavors. Make sure your zucchinis are fresh! They should be firm and vibrant. This will help ensure your rounds are delicious and have the right texture. Using panko breadcrumbs is a great choice for extra crunch, making every bite more enjoyable. Get these ingredients ready, and you’ll be on your way to a quick and tasty snack! First, wash the zucchinis well. After that, dry them off. Cut the zucchinis into 1/4-inch rounds. This size helps them cook evenly. Next, grab two bowls. In one bowl, mix the grated Parmesan cheese, breadcrumbs, Italian seasoning, garlic powder, salt, and pepper. In the second bowl, beat the eggs until they are smooth and well mixed. Now, take each zucchini round. Dip it into the beaten eggs first. Let any extra egg drip off. Then, coat the round in the breadcrumb mix. Press lightly to help it stick well. It's time to preheat the air fryer. Set it to 400°F (200°C) and let it heat for about 5 minutes. This step ensures your zucchini gets crispy. While the air fryer heats, spray the basket lightly with olive oil spray. Place the coated zucchini rounds in a single layer. Make sure they are not crowded. You may need to work in batches for best results. Now, cook the zucchini rounds in the air fryer. Set the timer for 10-12 minutes. Flip them halfway through cooking. They should turn golden brown and crispy. Once they are ready, take the zucchini rounds out. Let them cool for a minute. Serve them warm. You can add fresh parsley or more Parmesan cheese on top if you like. Enjoy your crispy treats! To get those zucchini rounds crispy, follow these tips. First, slice the zucchinis evenly. Each round should be about 1/4-inch thick. This helps them cook at the same rate. Next, after coating them, let the rounds sit for a few minutes. This allows the coating to stick better. A light spray of olive oil before air frying can also boost crunchiness. Using your air fryer effectively can make a big difference. Preheat it to 400°F (200°C) for about 5 minutes. This helps cook the zucchini evenly. Arrange the rounds in a single layer. Overcrowding them makes it harder for air to circulate. If you have many rounds, work in batches to keep that crispiness. Cooking times may vary based on your air fryer model. For most, 10-12 minutes should work well. However, keep an eye on them. If they start to brown too quickly, lower the temperature slightly. Flip them halfway through to ensure even cooking. If you like them extra crispy, you can add a few more minutes. {{image_2}} You can change the coating for your zucchini rounds. Try using crushed cornflakes for a crunchier texture. You can also use almond flour for a gluten-free option. Mix in some spices for extra flavor. Try smoked paprika or cumin for a unique twist. Add fresh herbs to the breading mix. Chopped basil or parsley brightens the taste. You can also add a pinch of red pepper flakes for heat. For a cheesy kick, mix in some shredded mozzarella with the Parmesan. This adds a stretchy, melty layer to each bite. Serve the zucchini rounds as a snack or appetizer. Pair them with marinara sauce for dipping. You can also serve them alongside grilled meats or as a side dish. For a fun twist, top them with a dollop of sour cream or yogurt for creaminess. To store leftover zucchini rounds, let them cool first. Place them in an airtight container. You can keep them in the fridge for up to three days. This way, they stay fresh and tasty. When you want to eat the leftovers, preheat your air fryer to 350°F (175°C). Place the zucchini rounds in the basket. Heat them for about 5 minutes. This makes them crispy again. You can also use the oven if you prefer. Just bake them at 350°F (175°C) for 10 minutes. If you want to freeze zucchini rounds, it is best to do it before cooking. After you coat them, place them in a single layer on a baking sheet. Freeze them until solid, then transfer them to a freezer-safe bag. They can stay in the freezer for up to three months. When ready to eat, cook them straight from the freezer. Add a couple of extra minutes to the cooking time. Yes, you can use other cheeses! Try mozzarella, cheddar, or even feta. Each cheese gives a different taste. Mozzarella adds stretch, while cheddar gives sharpness. Feta brings a salty kick. Explore flavors and find your favorite! You can use crushed crackers or cornflakes. Both options add crunch. For a low-carb choice, try almond flour or ground nuts. These swaps keep the texture crispy. Just remember, adjust the seasoning based on what you use! Cooked zucchini rounds can last for about 3-5 days in the fridge. Store them in an airtight container. If you want them to stay fresh, make sure they cool first. Reheat in the air fryer for crispy results! Yes, you can bake these zucchini rounds. Preheat your oven to 425°F (220°C). Place them on a baking sheet lined with parchment paper. Bake for about 15-20 minutes, flipping halfway. Keep an eye on them until they turn golden! These rounds pair well with many dips. Try marinara sauce for a classic touch. Ranch dressing adds a creamy taste. You can also use garlic aioli for a richer flavor. Explore different dips and find your favorite match! You now have a clear plan to make delicious Parmesan zucchini rounds. We covered the key ingredients, step-by-step instructions, and helpful tips. You can also explore tasty variations and learn how to store leftovers. These crispy rounds are perfect for snacks or meals. Try dipping them for added flavor. Enjoy cooking with these simple steps, and don't hesitate to get creative in the kitchen!

Air Fryer Parmesan Zucchini Rounds Crispy and Easy

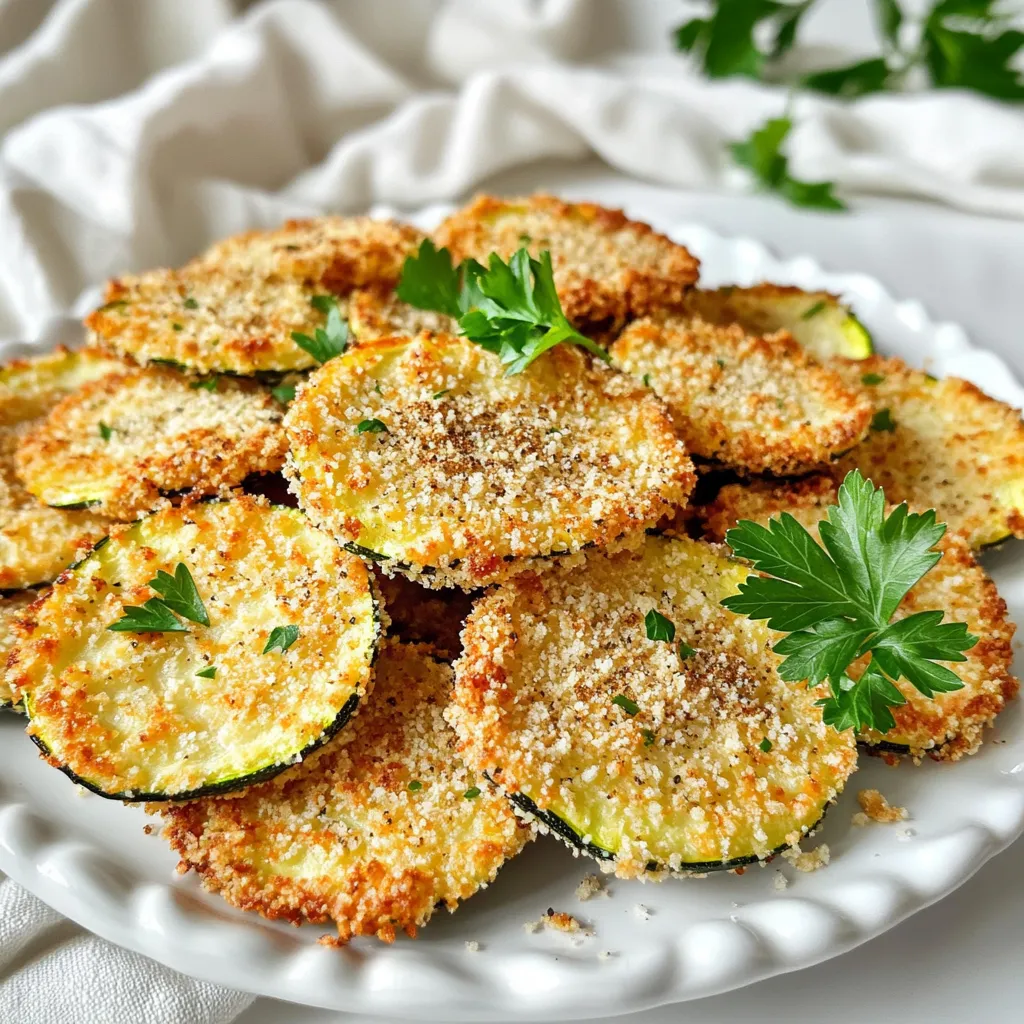
Looking for a quick, tasty snack? Try my Air Fryer Parmesan Zucchini Rounds! These crispy bites are easy to make

To make No Bake Biscoff Cheesecake Cups, you'll need the following items: - 250g Biscoff cookies, crushed - 100g unsalted butter, melted - 500g cream cheese, room temperature - 300ml heavy cream - 100g powdered sugar - 1 teaspoon vanilla extract - 150g Biscoff spread - A pinch of salt - Extra Biscoff cookies for garnish If you can't find an ingredient, here are some substitutes: - Use any crunchy cookie in place of Biscoff cookies. Graham crackers work well. - Swap unsalted butter for margarine if you need a dairy-free option. - Cream cheese can be substituted with mascarpone cheese for a lighter texture. - For a dairy-free version, use coconut cream instead of heavy cream. Choosing good ingredients makes a big difference. Here’s what to look for: - Select fresh Biscoff cookies without any cracks or breaks. This helps in making a sturdy crust. - Look for full-fat cream cheese for a rich and creamy filling. Low-fat versions can be too soft. - Choose heavy cream that has at least 36% fat. This whips better and gives a nice texture. - If possible, buy organic ingredients. They often taste better and are healthier. Using quality ingredients makes your No Bake Biscoff Cheesecake Cups taste even more delicious! To start, you need to make the cookie crust. Grab a medium bowl. Add 250g of crushed Biscoff cookies and 100g of melted unsalted butter. Mix these two ingredients well until the cookies look like wet sand. This texture is key for a solid crust. Next, you want to spoon about 2 tablespoons of this mixture into each dessert cup. Press it down firmly. This step helps it hold together. After all the cups are filled, place them in the fridge. Let them chill while you work on the cheesecake filling. Now, let’s move on to the filling. In a large mixing bowl, beat 500g of room temperature cream cheese with an electric mixer. Mix it for about 2 minutes until it is smooth and creamy. Then, add 100g of powdered sugar, 1 teaspoon of vanilla extract, and a pinch of salt. Keep mixing until everything is well blended. In a separate bowl, whip 300ml of heavy cream. Whip until you see stiff peaks. Be careful not to overwhip, or it won’t blend well. Once whipped, gently fold this cream into the cream cheese mixture. Do this in three parts to keep it fluffy. Finally, fold in 150g of Biscoff spread until the mixture is smooth. This adds that rich flavor you love. Now it’s time to put it all together. Take the chilled cups from the fridge. Spoon or pipe the cheesecake filling over the cookie crusts. Make sure to smooth the tops. After that, you need to refrigerate the cups for at least 4 hours. For the best results, leave them overnight. When you’re ready to serve, drizzle some leftover Biscoff spread on top. Add a whole Biscoff cookie for that perfect finish. Enjoy your tasty treat! To get a creamy and smooth cheesecake, use room temperature cream cheese. Cold cream cheese will clump up and ruin your mix. When you whip the heavy cream, beat it until stiff peaks form. This helps add air to the mix. Be gentle when you fold the whipped cream into the cream cheese. This keeps the texture light and fluffy. If you overmix, it will become dense. These cheesecake cups look great when served chilled. For a fun twist, drizzle some extra Biscoff spread on top. You can also add a whole Biscoff cookie as a garnish. It adds a nice touch and makes it more appealing. Serve these cups after dinner or at a party. They are easy to grab and eat. One common mistake is not letting the cream cheese warm up. This can lead to lumps in your filling. Make sure to use a fine crumb for the cookie crust. If the pieces are too big, the crust won’t hold together well. Also, be careful not to overwhip the cream. It can turn into butter if you're not cautious. Lastly, don’t rush the chilling time. Let them set properly for the best flavor and texture. {{image_2}} You can mix things up with your No Bake Biscoff Cheesecake Cups. Try swapping Biscoff spread for other spreads. Nutella adds a rich chocolate flavor. Creamy peanut butter gives a nutty twist. Or, use fruit preserves for a fruity note. Strawberry or raspberry work great! You can also add lemon zest to the cream cheese for a refreshing kick. Each option creates a unique taste, while still keeping the same creamy texture. Toppings can change the look and flavor of your cups. You can drizzle chocolate sauce or caramel on top for extra sweetness. Fresh fruit, like berries or banana slices, adds color and texture. Crushed cookies on top can add crunch. For a bit of fun, sprinkle some crushed nuts or coconut flakes. Just remember, the topping should fit the flavor base you choose! These cheesecake cups are perfect for parties! You can adjust the size based on your needs. Use smaller cups for bite-sized treats. This way, guests can enjoy a taste without filling up. You can also use larger cups if you want a bigger dessert. Just remember, the total time to set remains the same. Plan ahead to ensure they are ready when your guests arrive! To keep your no bake Biscoff cheesecake cups fresh, use an airtight container. Place the cups in the container and seal it well. This will help keep them from drying out or absorbing other smells from the fridge. Store them in the fridge for best results. They taste great chilled! You can freeze these cheesecake cups if you want to save some for later. Wrap each cup tightly in plastic wrap or foil. After that, place them in a freezer-safe container. They can stay in the freezer for up to three months. When you are ready to eat them, move them to the fridge to thaw overnight. These cheesecake cups last about 5 days in the fridge. To enjoy them at their best, eat them within this time. The flavor and texture remain top-notch for the first few days. After that, they might lose some creaminess. If you notice any change in smell or texture, it’s best to toss them. Always check before eating! Yes, you can use other cookies for the crust. Try Oreos, graham crackers, or even chocolate wafers. Each cookie gives a unique taste. Just crush them and mix with melted butter. Use the same amount as Biscoff cookies. These cheesecake cups need at least 4 hours to set. For best results, chill them overnight. This helps the flavors blend and makes the texture firm. If you are in a hurry, 4 hours will still work well. If you don't have Biscoff spread, try using Nutella or peanut butter. You can also make your own by blending cookies with a bit of cream. This gives you a similar flavor and texture. Just adjust the sweetness to your taste. In this blog post, we covered all you need for cheesecake cups. We looked at essential ingredients, substitutes, and how to select the best ones. Then, I guided you through the steps to make cheesecake cups, including crust, filling, and assembly. I shared tips for texture, serving ideas, and mistakes to avoid. You also learned about flavor variations and storage options. With these details, you can create your own delicious cheesecake cups. Enjoy experimenting and sharing them with friends!

No Bake Biscoff Cheesecake Cups Tasty and Simple Treat

Indulge in a sweet treat that’s as simple as it is delicious! My No Bake Biscoff Cheesecake Cups are perfect

- 1 ripe peach, chopped - 3 tablespoons all-purpose flour - 2 tablespoons granulated sugar - 1/8 teaspoon baking powder - 1/8 teaspoon cinnamon - Pinch of salt - 3 tablespoons milk - 1 tablespoon vegetable oil - 1/2 teaspoon vanilla extract - 1 tablespoon brown sugar (for topping) - Optional: Vanilla ice cream (for serving) Gathering the right ingredients is key to making a great Microwave Peach Cobbler Mug Cake. First, you need a ripe peach. Make sure it is soft and sweet. This fruit adds flavor and moisture. Next, grab some all-purpose flour. This will give the cake its structure. You will also need granulated sugar for sweetness. Baking powder helps the cake rise. A touch of cinnamon adds warmth and a nice flavor. Don’t forget the pinch of salt. It balances the sweetness. For the wet mix, you need milk, vegetable oil, and vanilla extract. These ingredients create a smooth batter. Lastly, use brown sugar on top. It makes a sweet crust. If you like, add a scoop of vanilla ice cream. This makes your dessert even better. With these ingredients ready, you can start making your mug cake. It’s quick and fun! First, grab a microwave-safe mug. In your mug, combine the dry ingredients. Add the chopped peach, flour, granulated sugar, baking powder, cinnamon, and salt. Mix well until the dry ingredients coat the peach pieces. This helps spread the flavor evenly. Next, it’s time to add the wet ingredients. Pour in the milk, vegetable oil, and vanilla extract. Stir everything together until you have a smooth batter. Make sure there are no lumps. A good mix is key for a soft cake. Now, let’s add the brown sugar topping. Sprinkle it on top of your batter. This will create a tasty, caramelized crust when cooked. Microwave your mug cake on high for 1 minute and 30 seconds. After that, check if it’s done. If it’s a bit wet in the middle, microwave it for another 10-15 seconds. Keep an eye on it, as microwave times can vary. Once it’s cooked, let the mug cake cool for about a minute. This makes it easier to eat. For a special touch, serve the mug cake warm. Add a scoop of vanilla ice cream on top. You can also drizzle honey or sprinkle more cinnamon for extra flavor. Enjoy your simple and sweet treat! To get a great mug cake, you must check for doneness. After microwaving, poke the center with a toothpick. If it comes out clean, your cake is ready. If it’s still wet, microwave it for an extra 10-15 seconds. This small step makes a big difference in texture. Remember, microwaves vary in power. Some cook faster than others. If your microwave is strong, check the cake at 1 minute. If it's weak, you might need the full 1 minute and 30 seconds. Always watch closely to avoid overcooking. Toppings can take your mug cake to the next level. I love adding a scoop of vanilla ice cream on top. It melts into the warm cake and adds creaminess. You can also drizzle honey for extra sweetness. A sprinkle of extra cinnamon adds a lovely touch. For a fun twist, try adding spices. You can mix in ginger or nutmeg for a different taste. If you like nuts, sprinkle some chopped pecans or walnuts on top. Each of these options can change the flavor profile and make your mug cake unique. {{image_2}} You can swap out peaches for other fruits. Apples work great in this mug cake. Just chop them up like you would with peaches. Berries are another fun choice, too. Try blueberries or raspberries for a tart twist. Mixing fruits is also a hit. Combine peaches with berries for a fruity explosion. You can even add some chopped nuts for crunch. This keeps the flavor fresh and fun. If you need a gluten-free version, use almond flour or coconut flour. Both work well in this mug cake. They keep it light and fluffy. For a dairy-free option, substitute milk with almond or oat milk. You can also skip the ice cream or use a dairy-free version. These swaps make the dish friendly for many diets. To store your leftover mug cake, let it cool first. Then, cover the mug with plastic wrap or a lid. You can keep it in the fridge for up to two days. This keeps it fresh and tasty. If you want to reheat it, place the mug in the microwave. Heat it for about 15 to 20 seconds. Check to see if it's warm enough. If not, add a few more seconds. You can prepare some ingredients ahead of time. Chop the peach and store it in a small bowl. Keep it in the fridge until you are ready to use it. You can also mix the dry ingredients and store them in a jar. When you want a quick treat, just add the wet ingredients. For quick serving, warm your mug cake in the microwave for about 30 seconds, or until it's nice and hot. This way, you can enjoy a sweet dessert in no time. Making this mug cake is quick and easy. It takes about 5 minutes to prep. Cooking in the microwave takes 1 minute and 30 seconds. So, the total time is just 2 minutes and 30 seconds. You can enjoy a warm dessert in no time! Yes, you can use frozen peaches! Just remember to thaw them first. Drain any extra juice after thawing. Frozen peaches can work well, but fresh peaches give a better taste. Fresh fruit adds a nice texture and flavor. If your mug cake is dry, this could be due to too much flour or cooking too long. To keep it moist, use the right flour amount. Also, check your microwave time. If it feels dry, try adding a bit more milk next time. This will help make it softer and more delicious! This blog post shared a simple microwave peach cobbler mug cake recipe. We covered ingredients, steps, and tips for perfecting your cake. You learned how to enhance flavors and explore variations with different fruits. Proper storage and reheating methods help keep your dessert tasty. With these easy steps, you can enjoy a quick treat anytime. Experiment with flavors and enjoy the fun of baking in a mug!

Microwave Peach Cobbler Mug Cake Simple and Sweet Treat

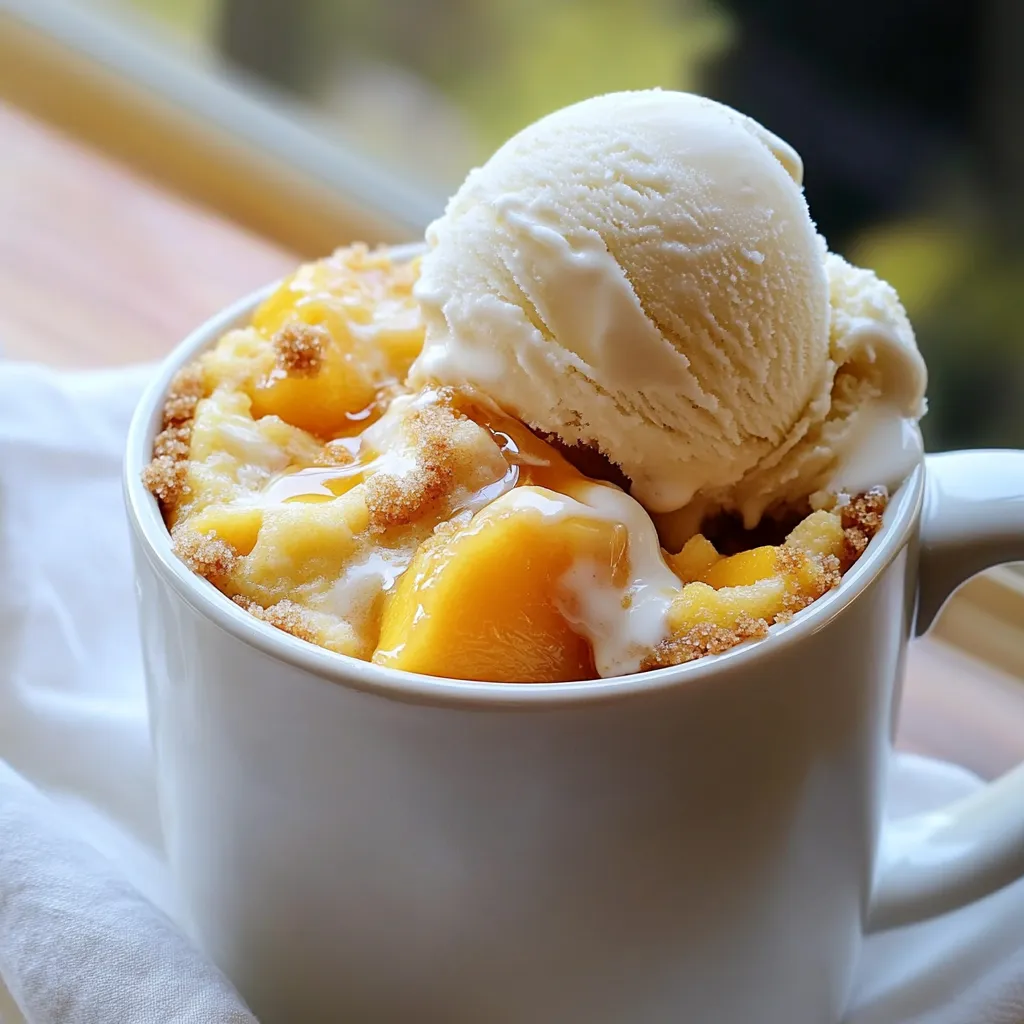
Craving a quick dessert? I’ve got just the thing: a Microwave Peach Cobbler Mug Cake! This simple treat combines fresh

- 1 block (14 oz) firm tofu, pressed and cubed - 1 cup cooked quinoa - 1 cup broccoli florets - 1 red bell pepper, sliced - 1 carrot, julienned - 1 cup snap peas In this dish, firm tofu is your star. It holds its shape well and absorbs flavors. Cooking it until golden gives it a nice crunch. Quinoa adds protein and a nutty flavor. The mix of broccoli, red bell pepper, carrot, and snap peas adds color and nutrients. Each vegetable brings its own taste and texture, making every bite exciting. - 1/4 cup low-sodium soy sauce - 2 tablespoons maple syrup - 1 tablespoon rice vinegar - 1 tablespoon freshly grated ginger - 2 cloves garlic, minced The teriyaki sauce is simple yet full of flavor. Low-sodium soy sauce gives it a savory base. Maple syrup adds sweetness without being too strong. Rice vinegar adds a tangy note that balances the sauce. Fresh ginger and garlic give it a warm, aromatic touch. Mix these ingredients well to get a smooth sauce. - 2 green onions, chopped - Sesame seeds for garnish Green onions add a fresh crunch. They brighten the dish with color and taste. Sesame seeds add a nutty flavor and extra crunch when sprinkled on top. Together, these garnishes elevate your power bowls, making them look and taste great. First, you need to press the tofu. This step removes excess water. Wrap the tofu in a clean towel. Place a heavy object on top. Let it sit for 15-20 minutes. After pressing, cut the tofu into small cubes. Aim for about one-inch pieces. Next, cook the tofu until it is crispy. Heat one tablespoon of sesame oil in a non-stick skillet over medium heat. Add the tofu cubes to the skillet. Cook them for 8-10 minutes. Turn them often for an even golden color. Once crispy, pour the teriyaki sauce over the tofu. Let it cook for an extra 2-3 minutes. This will give the tofu a nice glaze. To make the teriyaki sauce, combine the ingredients in a bowl. You will need low-sodium soy sauce, maple syrup, rice vinegar, grated ginger, and minced garlic. Stir everything well. Set the sauce aside until you are ready to use it. Now, heat the remaining tablespoon of sesame oil in another pan. Add the broccoli, red bell pepper, carrot, and snap peas. Sauté the vegetables for about 5-7 minutes. You want them tender but still bright and crisp. This keeps the veggies flavorful and colorful. To assemble your power bowls, start with a base of cooked quinoa. Spoon in about a cup of quinoa in each bowl. Next, layer on the crispy teriyaki tofu. Add a generous amount of sautéed vegetables on top. The layers create a beautiful and tasty meal. Finally, garnish your bowls. Sprinkle chopped green onions over the top. Add a few sesame seeds for extra crunch. Serve your teriyaki tofu power bowls right away. Enjoy the bright colors and rich flavors! Pressing tofu is key. It removes extra water, allowing the tofu to absorb flavors better. To do this, wrap the tofu in a clean towel. Place a heavy object on top for about 15-20 minutes. This step helps achieve a firmer texture. To get perfectly crispy tofu, heat a non-stick skillet over medium heat. Use sesame oil, as it adds flavor. Cook the tofu cubes for 8-10 minutes. Turn them often until they are golden brown on all sides. Pour teriyaki sauce over the tofu at the end. This gives a nice glaze and enhances the taste. Each vegetable has an ideal cooking time. Broccoli florets need about 5-7 minutes to stay bright and crisp. Red bell peppers also take around 5-7 minutes. Carrots should be julienned thinly for quick cooking. Snap peas only need about 3-4 minutes to keep their snap. If you can’t find a vegetable, use seasonal ones. For example, zucchini or asparagus work well in this dish. They add color and flavor while keeping the meal fresh. To boost the flavor of your Teriyaki Tofu Power Bowls, consider adding extra seasonings. A sprinkle of red pepper flakes can add heat. You can also mix in sesame seeds for a nutty taste. Customizing the teriyaki sauce is simple. Try adding a splash of orange juice or a spoonful of peanut butter. These additions can create new flavor profiles. Experiment until you find your perfect blend! {{image_2}} You can switch the tofu for tempeh or chicken. Tempeh gives a nutty taste. Chicken adds a different texture. Both options work well. You can also add legumes, like chickpeas or black beans. They boost protein and fiber. This makes your meal more filling and nutritious. To make this dish gluten-free, use tamari instead of soy sauce. Tamari is a great gluten-free option. You can also use coconut aminos for a sweeter flavor. For a fully vegan dish, make sure your maple syrup is pure. This ensures you keep it plant-based and tasty. While quinoa is a great base, you can use brown rice or farro. Brown rice adds a chewy texture, while farro has a nutty taste. Mixing different grains can create a fun texture. You can try half quinoa and half brown rice. This adds variety and makes it exciting to eat! To keep your Teriyaki Tofu Power Bowls fresh, store leftovers in an airtight container. Place the tofu, quinoa, and veggies separately. This helps maintain the texture. You can enjoy them for up to four days in the fridge. If you want to save some for later, freeze individual portions. Use freezer-safe containers or bags to store the tofu and veggies. They can last up to three months in the freezer. When ready to eat, thaw them overnight in the fridge. Reheat in a skillet or microwave until warm. To make meal prep easy, wash and chop your veggies ahead of time. Cook the quinoa and tofu in advance, too. Store each ingredient in separate containers. This way, you can quickly assemble your bowls during the week. Just mix and match for a fresh meal every day. To make Teriyaki sauce, you need a few simple items. Start with: - 1/4 cup low-sodium soy sauce - 2 tablespoons maple syrup - 1 tablespoon rice vinegar - 1 tablespoon freshly grated ginger - 2 cloves garlic, minced Mix these ingredients in a small bowl. Stir well until combined. This sauce adds a nice sweet and savory flavor to your dish. Yes, you can use frozen vegetables. They are a great time saver. When cooking frozen veggies, add them directly to the pan. Sauté them for about 5-7 minutes. This keeps them crisp and tasty. Just make sure to adjust the cooking time, as frozen veggies may release more water. Teriyaki Tofu Power Bowls pair well with many sides. Here are some ideas: - Steamed brown rice - A fresh green salad - Edamame for extra protein - Pickled ginger for a tangy kick These sides can enhance your meal and add more flavors. Yes, it's very healthy! This dish includes tofu, which is full of protein. The veggies add vitamins and minerals. Quinoa provides fiber and whole grains. Plus, using low-sodium soy sauce keeps the salt low. Overall, this meal is balanced and nutritious. To add some heat, try these tips: - Sprinkle red pepper flakes on top. - Add a dash of sriracha to the sauce. - Mix in some chili paste during cooking. These options can boost the flavor and give your dish a nice kick. In this article, we explored how to create Teriyaki Tofu Power Bowls. I covered the main ingredients, from firm tofu to vibrant vegetables, and the tasty teriyaki sauce. You learned the step-by-step process for preparing each component, assembling the bowls, and garnishing them for appeal. Remember, you can customize this dish to your taste and dietary needs. Try different proteins or grains; get creative with your veggies. Enjoy making and sharing these delicious bowls!

Teriyaki Tofu Power Bowls Flavorful and Healthy Meal

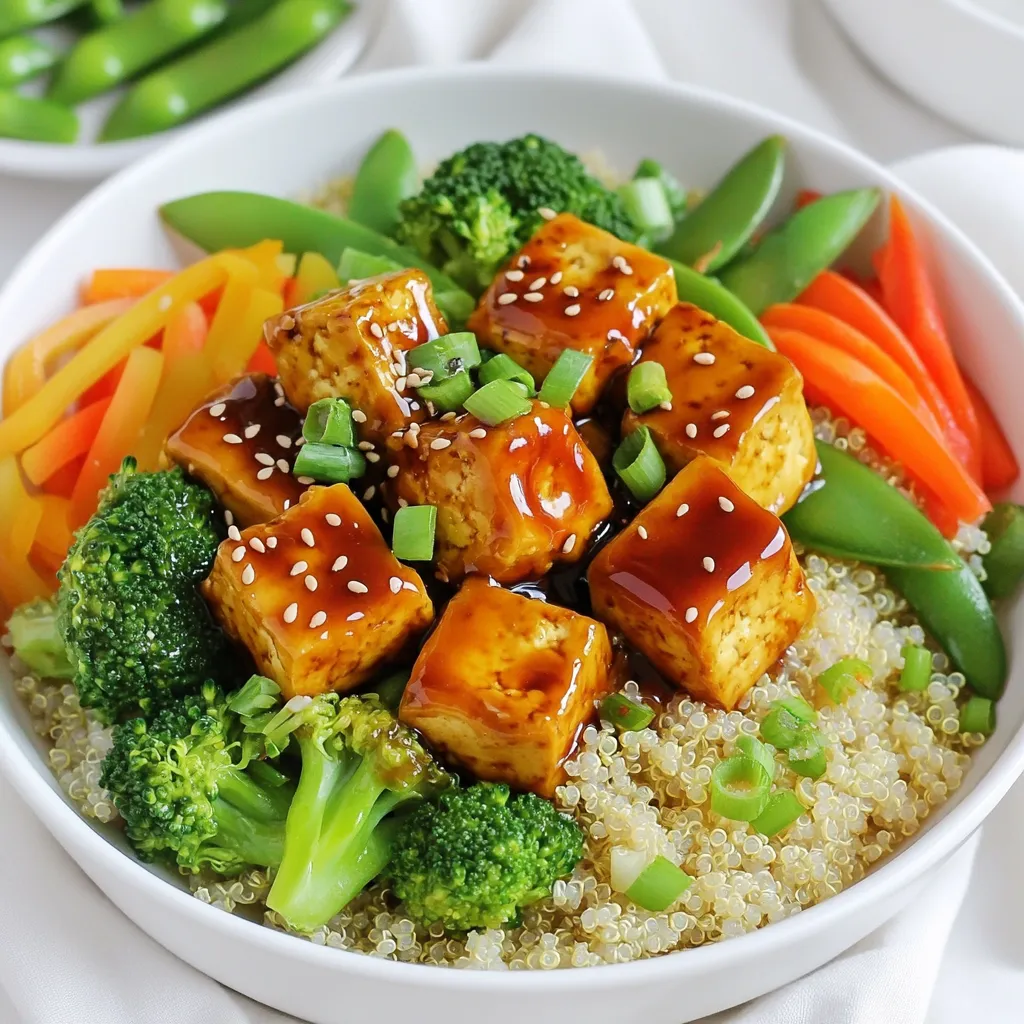
If you’re looking for a quick, healthy meal, you’ve come to the right place! Teriyaki Tofu Power Bowls combine firm

To make Blueberry Lemon Cheesecake Bars, you'll need a few key ingredients. Here's a list to help you gather everything you need: - 1 cup graham cracker crumbs - 1/4 cup granulated sugar - 1/2 cup unsalted butter, melted - 16 oz cream cheese, softened - 1 cup powdered sugar - 2 large eggs - 1 tablespoon lemon zest - 1/4 cup lemon juice - 1 cup fresh blueberries - 1 teaspoon vanilla extract - A pinch of salt Each of these ingredients plays a vital role in creating the perfect balance of sweet and tangy. The graham cracker crumbs form the crust, while the cream cheese provides that creamy texture. Lemon zest and juice add brightness, and blueberries give bursts of flavor. It’s truly a delightful mix! 1. Preheat and prepare the baking dish: Start by setting your oven to 325°F (163°C). Line an 8x8 inch baking dish with parchment paper. Leave some paper hanging over the edges. This helps with easy removal later. 2. Mixing graham cracker base ingredients: In a medium bowl, combine 1 cup of graham cracker crumbs, 1/4 cup of granulated sugar, and 1/2 cup of melted unsalted butter. Mix until it looks like wet sand. 3. Baking the crust to set: Press the mixture evenly into the bottom of your prepared dish. Bake for 10 minutes. After baking, let it cool while you make the filling. 1. Creaming the cream cheese: In a large bowl, beat 16 oz of softened cream cheese with an electric mixer. Blend for about 2-3 minutes until it is smooth and creamy. 2. Incorporating the sugar and eggs: Gradually add 1 cup of powdered sugar to the cream cheese. Mix well. Next, add 2 large eggs one at a time. Blend well after each addition. 3. Adding lemon flavoring and folding in blueberries: Stir in 1 tablespoon of lemon zest, 1/4 cup of lemon juice, and 1 teaspoon of vanilla extract. Add a pinch of salt. Gently fold in 1 cup of fresh blueberries, being careful not to mash them. 1. Pouring the filling over the crust: Pour the creamy cheesecake mixture over the cooled crust. Spread it out evenly using a spatula. 2. Baking time and checking doneness: Bake in the oven for 25-30 minutes. The edges should be set, while the center may still jiggle a bit. 3. Cooling and chilling instructions: Once baked, let the cheesecake cool at room temperature for about an hour. After that, transfer it to the refrigerator. Chill for at least 3 hours, or overnight for best results. When ready, lift the bars out using the parchment paper and slice into squares. Enjoy your delicious Blueberry Lemon Cheesecake Bars! To make great cheesecake bars, use room temperature ingredients. This helps the cream cheese mix well. Cold cream cheese can create lumps. Let the cream cheese sit out for about an hour before you start. To avoid cracks, do not overbake the cheesecake. It should jiggle a bit in the center when done. This means it will set perfectly as it cools. Let the bars cool slowly at room temperature before chilling them in the fridge. This step is key! If you have leftovers, store them in an airtight container. Keep them in the fridge for up to five days. Wrap them well to keep them fresh. You can also freeze them for longer storage, but be sure to wrap them tightly. For a stunning look, garnish the bars with fresh blueberries. You can also dust them with powdered sugar. This adds a nice touch and makes them look fancy. When serving, place the cheesecake bars on a pretty platter. They make a great dessert for dinner parties or special occasions. Pair them with tea or coffee for a delightful treat! {{image_2}} You can change up the flavors in these cheesecake bars easily. If you want a new twist, try using raspberries or strawberries instead of blueberries. These fruits bring their own sweetness and tartness, making your bars unique. Simply replace the blueberries with an equal amount of your chosen fruit. You can also adjust the tartness with different citrus fruits. Instead of lemon, you might use lime or orange juice and zest. This switch will give a fresh taste and still keep that creamy cheesecake flavor. Feel free to experiment with flavors to find your favorite! If you need to make these bars gluten-free, you can swap the graham cracker crust. Use almond flour or gluten-free cookies for the crust instead. Just mix them with melted butter and press them into the pan like you would with regular crumbs. For those who prefer vegan options, you can replace cream cheese with a vegan cream cheese alternative. Use flax eggs instead of regular eggs. Mix 1 tablespoon of ground flaxseed with 2.5 tablespoons of water to make one flax egg. This will keep your bars creamy and delicious without using animal products. To keep your blueberry lemon cheesecake bars fresh, store them in the fridge. Place them in an airtight container. They will last for about 5 to 7 days. Make sure to let them cool completely before covering. This helps avoid soggy bars. If you want to save some for later, freezing is a great option. Wrap each bar tightly in plastic wrap. Then, place them in a freezer-safe bag or container. They can stay good for up to 3 months. Just remember to label the bag with the date. When you’re ready to enjoy frozen cheesecake bars, take them out of the freezer. Leave them in the fridge for several hours or overnight to thaw. This gentle method keeps the texture nice. After thawing, you can serve the bars cold. If you prefer, you can warm them slightly in the oven. Set the oven to 300°F (150°C) and heat for about 5 to 10 minutes. This makes them creamy and soft again. Can I use frozen blueberries instead of fresh? Yes, you can use frozen blueberries. Just make sure to thaw and drain them first. This helps avoid excess liquid in your cheesecake. How long do the cheesecake bars last in the fridge? These cheesecake bars last about 4 to 5 days in the fridge. Keep them covered to maintain freshness. Can I make the cheesecake bars ahead of time? Absolutely! You can make these bars a day in advance. Just chill them overnight for the best flavor. What can I substitute for cream cheese? If you want a non-dairy option, you can use cashew cream or vegan cream cheese. These work well for similar texture. How do I know when the cheesecake is done baking? The cheesecake is done when the edges are set, but the center still jiggles slightly. This indicates a creamy texture. Blueberry lemon cheesecake bars are tasty and fun to make. You need simple ingredients like graham crackers, cream cheese, sugar, and fresh blueberries. Follow the steps to create a rich crust and creamy filling. Remember to chill the bars for the best taste. Don't forget to try different fruits or make it gluten-free if needed. Enjoy sharing these delightful treats at your next gathering. With the right tips, you can impress friends and family. Happy baking!

Blueberry Lemon Cheesecake Bars Delightful and Sweet Snack

Indulge your sweet tooth with these Blueberry Lemon Cheesecake Bars! They combine tangy lemon and sweet blueberries for a tasty

To make your churros, gather these main ingredients: - 1 cup water - 2 tablespoons unsalted butter - 2 tablespoons granulated sugar - 1/2 teaspoon salt - 1 cup all-purpose flour - 2 large eggs - 1 tablespoon vanilla extract These simple items create a tasty dough. The water, butter, and sugar mix to form the base. The flour gives the churros their structure. Eggs add richness and lightness. Vanilla brings in a lovely flavor. For the sweet coating, you'll need: - 1/2 cup granulated sugar (for coating) - 1 tablespoon ground cinnamon Mixing these two makes the churros shine with sweetness and warmth. The cinnamon sugar adds a cozy touch. It’s the perfect finish for your crispy treats. To elevate your churros, consider these fun sauces: - Chocolate sauce - Caramel sauce Dipping sauces add extra flavor and make each bite special. You can choose what you love best or try both. Enjoy the mix of flavors as you savor your churros! Start by boiling water, butter, sugar, and salt. Use a medium saucepan on medium heat. Stir often until the mix boils. Once it boils, take it off the heat. Add the flour and mix until smooth. Let it rest for about five minutes to cool. Then, add each egg one at a time. Mix well until the dough looks shiny. Don’t forget to stir in the vanilla extract for flavor. When done, pipe the dough into a bag with a star tip. Now, preheat your air fryer to 375°F (190°C). This step takes about five minutes. Preheating helps cook the churros evenly and gives them that perfect crispy texture. Pipe strips of dough onto parchment paper. Aim for six-inch long strips and leave some space between them. Lightly spray each churro with cooking spray. Place them in a single layer in the air fryer basket. Depending on your air fryer, you may need to work in batches. Cook them for 10 to 12 minutes. They should turn golden brown and crispy. While the churros cook, mix sugar and cinnamon in a shallow dish. Once the churros finish cooking, take them out right away. Roll them in the cinnamon sugar mix until coated well. Let them cool for a couple of minutes before you serve. Enjoy the warm, sweet crunch! To get churros that are crispy on the outside and soft inside, follow these tips: - Make sure to boil the water and butter mixture well. - Stir in the flour quickly to form a dough. - Let the dough cool before adding eggs. This helps keep the churros from being too runny. - Don’t skip the cooking spray. It helps them crisp up nicely in the air fryer. Piping the churros can be tricky but fun. Here are some tips: - Use a star-shaped nozzle for a classic churro look. - Pipe straight strips about 6 inches long. - Leave space between each strip to prevent sticking. - If your dough is too thick, add a bit of water. It should flow easily. Even seasoned cooks can make mistakes. Here are some to watch for: - Don’t overmix the dough after adding eggs. This can make churros tough. - Avoid overcrowding the air fryer basket. This can cause uneven cooking. - Make sure to coat churros in cinnamon sugar right after cooking. It sticks best when warm. - Don’t skip the cooling time. Churros taste better when they are slightly cooled. {{image_2}} You can take churros to the next level by adding a chocolate filling. To do this, melt some chocolate chips or a chocolate bar. Once your churros cool, use a piping bag to fill them with warm chocolate. This extra step makes every bite a delight. Kids and adults alike love the surprise of melted chocolate inside. If you want to switch up the flavor, try adding spices. A pinch of nutmeg or allspice can add warmth. You can also use vanilla sugar instead of plain sugar for coating. This will give your churros a unique twist. You can even mix in some cayenne pepper for a spicy kick. Just be careful not to add too much! For a gluten-free version, you can swap all-purpose flour for a gluten-free blend. Make sure to check the mix for xanthan gum, which helps with texture. This will let everyone enjoy churros, no matter their diet. Just follow the same steps in the recipe, and you'll have tasty treats for everyone! Store any leftover churros in an airtight container. This keeps them fresh. Place parchment paper between layers to prevent sticking. Churros last up to two days at room temp. For longer storage, put them in the fridge. They can last up to a week in the fridge. To bring back the crispiness, reheat churros in your air fryer. Set it to 350°F (175°C) for about 3-5 minutes. This method helps them regain their crunch. You can also use a toaster oven. Avoid using a microwave as it can make them soggy. You can freeze churros for later enjoyment. Let them cool completely first. Wrap each churro in plastic wrap and place them in a freezer bag. Be sure to remove as much air as possible. They can stay fresh in the freezer for up to three months. When ready to eat, thaw them in the fridge overnight. Reheat in the air fryer for the best results. The best temperature for churros in an air fryer is 375°F (190°C). This heat cooks the churros evenly. It creates a golden brown, crispy outside while keeping the inside soft. Preheat your air fryer for about 5 minutes before you cook. This helps the churros get the right texture. Yes, you can use a different type of flour, but it may change the texture. All-purpose flour gives churros their classic look and taste. If you want a gluten-free option, try a gluten-free blend. Make sure it is suitable for baking. This can work well, but the taste might vary a bit. To make churros without eggs, replace eggs with a flaxseed meal or applesauce. For flaxseed, mix 1 tablespoon of flaxseed with 3 tablespoons of water. Let it sit until it thickens, then add it to the dough. For applesauce, use 1/4 cup in place of each egg. This helps the churros stay moist and hold together. Churros taste great with many dips. Serve them with chocolate sauce for a sweet touch. You can also use caramel or dulce de leche. Some people enjoy a fruit sauce or whipped cream. These dips add a fun twist to your churro experience. Churros are best eaten fresh. They stay good for about 1-2 days at room temperature. Store them in an airtight container to keep them from getting stale. If you want to keep them longer, freeze them. You can reheat them in the air fryer for a crispy treat later. Churros are a delicious treat you can easily make at home. We covered the main ingredients, step-by-step instructions, and tips for perfecting your churros. Don’t forget the fun variations and how to store them. With these guidelines, you can enjoy churros fresh or later. I hope you feel inspired to try this recipe. Happy cooking and enjoy every crispy bite!

Cinnamon Sugar Air Fryer Churros Easy Treat Recipe

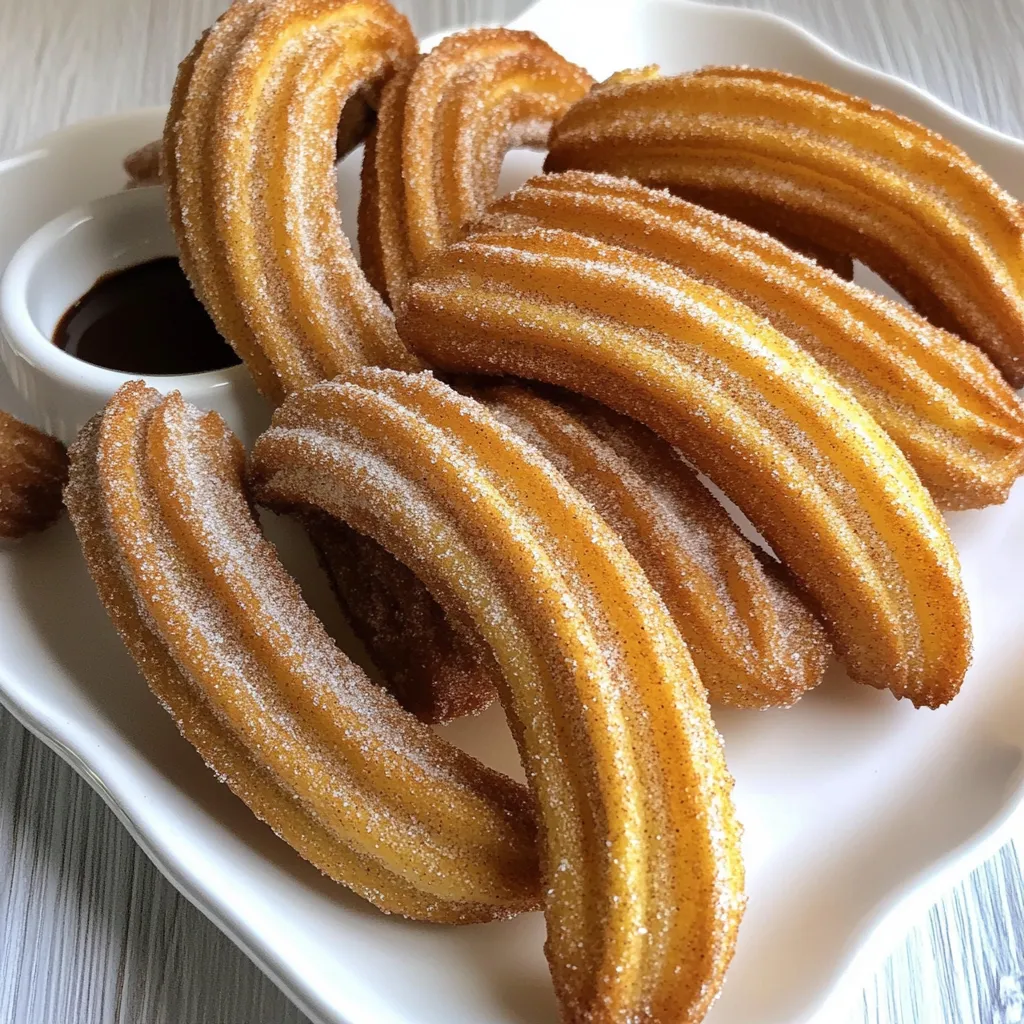
Are you craving a sweet snack that’s easy to make? Look no further than these Cinnamon Sugar Air Fryer Churros!

- 3 large red bell peppers - 2 tablespoons olive oil - 4 cloves garlic, minced - 1 teaspoon smoked paprika - 1 teaspoon dried basil - 1 cup vegetable broth - 1 can (14 oz) coconut milk - 12 oz pasta (preferably whole grain or gluten-free) - Salt and pepper to taste - Fresh basil leaves for garnish - Crushed red pepper flakes (optional) Gathering fresh ingredients is key. I love using vibrant, large red bell peppers. They bring a sweet and smoky flavor to the dish. The olive oil adds richness and helps with roasting. Garlic gives a warm depth to the sauce. Smoked paprika and dried basil add amazing flavor notes that truly shine. Vegetable broth keeps everything plant-based while adding depth. Coconut milk creates a creamy texture without dairy. Choose your favorite pasta—whole grain or gluten-free works well. Remember to have salt and pepper on hand. Fresh basil leaves make a lovely garnish, adding color and flavor. If you like heat, crushed red pepper flakes are a fun option. With these ingredients, you can create a meal that is not only tasty but also visually stunning. Each ingredient plays a role in the final flavor, making this pasta a delightful dish for any occasion. - Preheat the oven to 425°F (220°C). - Cut the red bell peppers in half and remove the seeds. Place them cut side down on a baking sheet. Drizzle with 1 tablespoon of olive oil. Roasting brings out the sweetness in the peppers. After about 25 to 30 minutes, the skins will blister and char. This adds great flavor. After roasting, let them cool. Then, peel off the skins and chop the peppers into chunks. - Roast the peppers and sauté the garlic. - Add remaining ingredients and simmer. In a large skillet, add the remaining tablespoon of olive oil. Heat over medium heat and add the minced garlic. Sauté for 1 to 2 minutes until it smells nice. Next, add the roasted peppers, smoked paprika, dried basil, vegetable broth, and coconut milk. Stir everything together. Let it simmer for 5 to 7 minutes. Now, blend the sauce until smooth. You can use an immersion blender or a regular one. Season with salt and pepper to taste. This sauce is creamy and rich. - Cook pasta, reserve water, and mix with the sauce. In a large pot, cook the pasta according to the package instructions. After cooking, drain the pasta but keep about 1/2 cup of the pasta water. This water helps to adjust the sauce's thickness. Add the cooked pasta to the sauce and toss it all together. If the sauce seems too thick, add some reserved pasta water until it’s just right. Serve hot, garnished with fresh basil leaves. You can also sprinkle crushed red pepper flakes if you like some heat. Enjoy your meal! To make the sauce smooth, use an immersion blender. This tool helps you blend right in the pan. If you don’t have one, a regular blender works too. Just be careful with hot liquids. If your sauce seems thick, add some reserved pasta water. This water has starch, which helps the sauce stick to the pasta. Add a little at a time until it reaches your desired creaminess. To boost flavor, consider adding more spices. A pinch of oregano or thyme can brighten the taste. You can also add a squeeze of lemon juice for a zesty kick. Want a heartier meal? Add protein like chickpeas or lentils. They blend well and give you extra nutrients. You can mix them in just before serving. Pair the pasta with a fresh side salad. A simple mix of greens, tomatoes, and cucumbers works great. This adds crunch and freshness to your meal. For presentation, serve the pasta in shallow bowls. Top with fresh basil leaves and a sprinkle of crushed red pepper flakes. This makes the dish look inviting and colorful. {{image_2}} For a gluten-free option, try using gluten-free pasta. Many brands make great choices, like brown rice or chickpea pasta. These pastas hold up well and taste great. You can also swap out the coconut milk. Almond milk or oat milk works well too. These nut milk alternatives keep the dish creamy. Add veggies like spinach or mushrooms for extra taste. Spinach wilts down nicely and adds color. Mushrooms bring a meaty texture. You can stir them in while the sauce simmers. Using different herbs or spices can change the flavor. Try thyme or oregano for a new twist. Or add a dash of lemon juice for brightness. Make the sauce ahead of time. It keeps well in the fridge for about five days. You can also freeze it for up to three months. Just thaw before using. When storing, keep the pasta and sauce separate. This way, the pasta stays firm. To reheat, warm the sauce in a skillet. Add the pasta and a splash of water to keep it moist. To store your vegan roasted red pepper pasta, let it cool first. Place it in an airtight container. This helps keep it fresh and tasty. You can store it in the fridge for up to three days. If you want to enjoy it later, freezing is a great option. To freeze the pasta and sauce, follow these steps: - Allow the dish to cool completely. - Divide it into portions. - Place each portion in a freezer-safe container. - Seal tightly to prevent freezer burn. For thawing, take it out of the freezer and place it in the fridge overnight. To reheat, warm it on the stove over low heat. You may need to add a splash of water or broth to loosen it up. Use glass or BPA-free plastic containers for storage. Glass containers are great for reheating. Label your containers with the date and contents. This way, you can keep track of how long they have been in the fridge or freezer. Yes, you can add red pepper flakes for heat. They give the dish a spicy kick. Start with a small amount. You can always add more later. If you want less heat, skip them or use just a pinch. The roasted peppers add a sweet flavor, so you may not need them. To make this dish nut-free, simply avoid any nut-based products. The recipe already uses coconut milk, which is nut-free. If you want a different flavor, try using oat milk or soy milk. Both create a creamy texture. Be sure to check labels to avoid hidden nuts. This way, everyone can enjoy the meal safely. This pasta pairs well with many sides. A simple green salad is a great choice. You can add a lemon dressing for freshness. Garlic bread also complements the dish nicely. If you want more veggies, roasted broccoli or steamed spinach work well. For a fun twist, serve with vegan garlic knots. These sides make your meal even more delightful. This blog post explored making a delicious vegan roasted red pepper pasta. You learned about key ingredients like red bell peppers and coconut milk. The step-by-step guide covered prepping ingredients and cooking methods. I shared tips for enhancing flavor and storing leftovers. You can adjust the recipe for dietary needs and enjoy various meal prep ideas. Cooking this dish will not only delight your taste buds but also impress your guests. Try it today to create a satisfying meal that’s easy to make!

Vegan Roasted Red Pepper Pasta Flavorful and Easy Meal

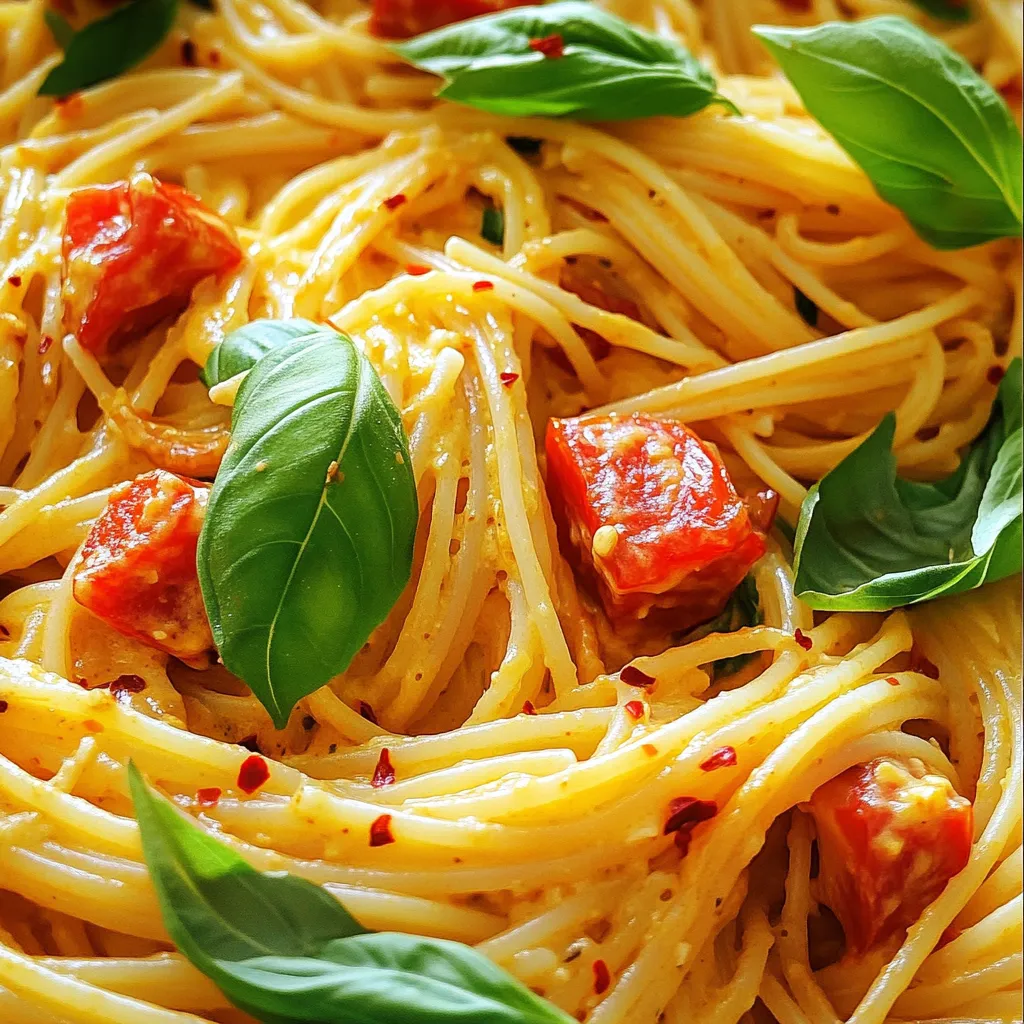
Are you ready to impress your taste buds with a quick and scrumptious dish? My Vegan Roasted Red Pepper Pasta

- 1 cup all-purpose flour - 1/2 cup granulated sugar - 2 teaspoons baking powder - 1/2 teaspoon salt - 1/4 teaspoon nutmeg These dry ingredients create a rich base for the donut holes. The flour gives structure. Sugar adds sweetness, while baking powder helps them rise. Salt and nutmeg enhance flavor and balance the sweetness. - 1/2 cup milk - 1/4 cup unsalted butter, melted - 1 large egg - 1 teaspoon vanilla extract The wet ingredients bring moisture and richness. Milk makes the batter smooth. Melted butter adds flavor and a tender crumb. The egg binds everything together, while vanilla adds a warm, inviting aroma. - 1/2 cup powdered sugar - 2 tablespoons pure maple syrup - 1 tablespoon milk The maple glaze is the star! Powdered sugar gives a smooth finish. Pure maple syrup offers a sweet, earthy flavor. Milk thins the glaze so it coats the donut holes perfectly. This glaze turns simple donut holes into a treat you can't resist! Start by preheating your oven to 350°F (175°C). This step helps the donut holes bake evenly. Next, grease a mini muffin pan or a donut hole pan. This keeps them from sticking and makes for easy removal later. In a large bowl, add 1 cup of all-purpose flour, 1/2 cup of granulated sugar, 2 teaspoons of baking powder, 1/2 teaspoon of salt, and 1/4 teaspoon of nutmeg. Whisk these together until they mix well. This blend gives your donut holes a lovely, sweet flavor. In another bowl, mix 1/2 cup of milk, 1/4 cup of melted unsalted butter, 1 large egg, and 1 teaspoon of vanilla extract. Stir until smooth. This mix adds moisture and richness to your donut holes. Pour the wet ingredients into the dry mix. Stir gently until just combined. Be careful not to overmix. Then, scoop about a tablespoon of batter into each cavity of your pan. Fill them about three-quarters full for the best rise. Place the filled pan in the preheated oven. Bake for 10 to 12 minutes. The tops should be lightly golden. You can check doneness by poking a toothpick into one. If it comes out clean, they are ready! While your donut holes bake, prepare the glaze. In a small bowl, whisk together 1/2 cup of powdered sugar, 2 tablespoons of pure maple syrup, and 1 tablespoon of milk. Mix until the glaze is smooth and slightly thick. This glaze adds a sweet finish. Once the donut holes cool for about 5 minutes in the pan, transfer them to a wire rack. Dip the tops of each donut hole into the maple glaze. Allow any excess to drip off. Place them back on the rack to let the glaze set. Enjoy your sweet treat! Store your maple glazed donut holes in an airtight container. They stay fresh for about three days at room temperature. If you want longer storage, freeze them. Place them in a freezer-safe bag for up to three months. Just thaw them overnight in the fridge before serving. - Measure Ingredients Accurately: Use a kitchen scale for best results. - Don’t Overmix: Mix until just combined to keep them soft. - Check Oven Temperature: An oven thermometer ensures you bake at the right heat. - Use a Nonstick Pan: This helps with easy removal after baking. - Test for Doneness: A toothpick should come out clean when they’re ready. Make your donut holes look special. Arrange them on a nice platter. You can dust the tops with powdered sugar for a sweet touch. Use colorful paper liners to add flair. Add some fresh fruit or mint leaves around the platter for color. This makes your treat pop! {{image_2}} You can make these donut holes even more fun! Try adding chocolate chips or fresh fruit. Here are some ideas: - Chocolate Chips: Add 1/2 cup of mini chocolate chips to the batter. They melt and create sweet pockets of chocolate. - Fruit: Fold in 1/2 cup of chopped berries or mashed banana for a fruity twist. Berries add a burst of flavor, while banana makes them extra moist. If you want to switch up the glaze, there are many options. Here are a few tasty choices: - Chocolate Glaze: Melt 1 cup of chocolate chips and mix with 1 tablespoon of butter. Dip the donut holes for a rich chocolate flavor. - Vanilla Glaze: Replace maple syrup with vanilla extract in the glaze. Use 1 teaspoon of vanilla for a sweet, classic taste. You can adapt this recipe for different diets. Here’s how you can make these donut holes fit your needs: - Gluten-Free: Swap all-purpose flour with a gluten-free blend. Ensure it has a good binding agent like xanthan gum. - Vegan: Use a flax egg instead of a large egg. Mix 1 tablespoon of ground flaxseed with 2.5 tablespoons of water and let it sit for 5 minutes. Replace milk with almond or oat milk, and use vegan butter in place of regular butter. These variations let you customize your donut holes. Enjoy experimenting! Each maple glazed donut hole has about 100 calories. This total includes the dough and the glaze. For a batch of 24 donut holes, that amounts to about 2,400 calories in total. These donut holes contain key nutrients like: - Fat: Around 4 grams per donut hole, mostly from butter. - Sugar: Approximately 10 grams from both granulated and powdered sugar. - Carbohydrates: Roughly 15 grams, providing energy for your day. - Protein: About 1 gram, thanks to the egg and milk. You can make these donut holes a bit healthier: - Flour: Use whole wheat flour for more fiber. - Sugar: Swap granulated sugar with coconut sugar for less impact on blood sugar. - Milk: Use almond milk or oat milk for a dairy-free option. - Butter: Substitute with applesauce to reduce fat content. These small changes can help you enjoy a treat while being mindful of health! Yes, you can freeze maple glazed donut holes. Wait until they cool completely. Then, place them in a freezer-safe bag or container. They will stay fresh for about three months. When you're ready to eat them, simply thaw them at room temperature. You can tell the donut holes are done when they turn a light golden brown. Insert a toothpick into the center; it should come out clean. If the toothpick has batter on it, bake for another minute or two. If the glaze is too thin, add more powdered sugar. Mix a little at a time until it thickens. If it’s too thick, add a splash of milk. Stir well until you reach your desired consistency. Yes, you can make these donut holes in advance. Bake them up to a day ahead. Store them in an airtight container at room temperature. Glaze them right before serving for the best taste. Baked donut holes last about 2 to 3 days at room temperature. Keep them in a covered container to maintain freshness. If you want to keep them longer, freeze them as mentioned earlier. We covered the essential ingredients for making tasty maple glazed donut holes. You learned how to mix dry and wet ingredients, bake perfectly, and glaze them. I shared tips for storage, baking, and presentation. You also discovered fun flavor variations and key nutritional facts. In the end, these donut holes are both delicious and easy to make. Enjoy crafting your perfect treat!

Maple Glazed Donut Holes Baked Sweet and Simple Treat

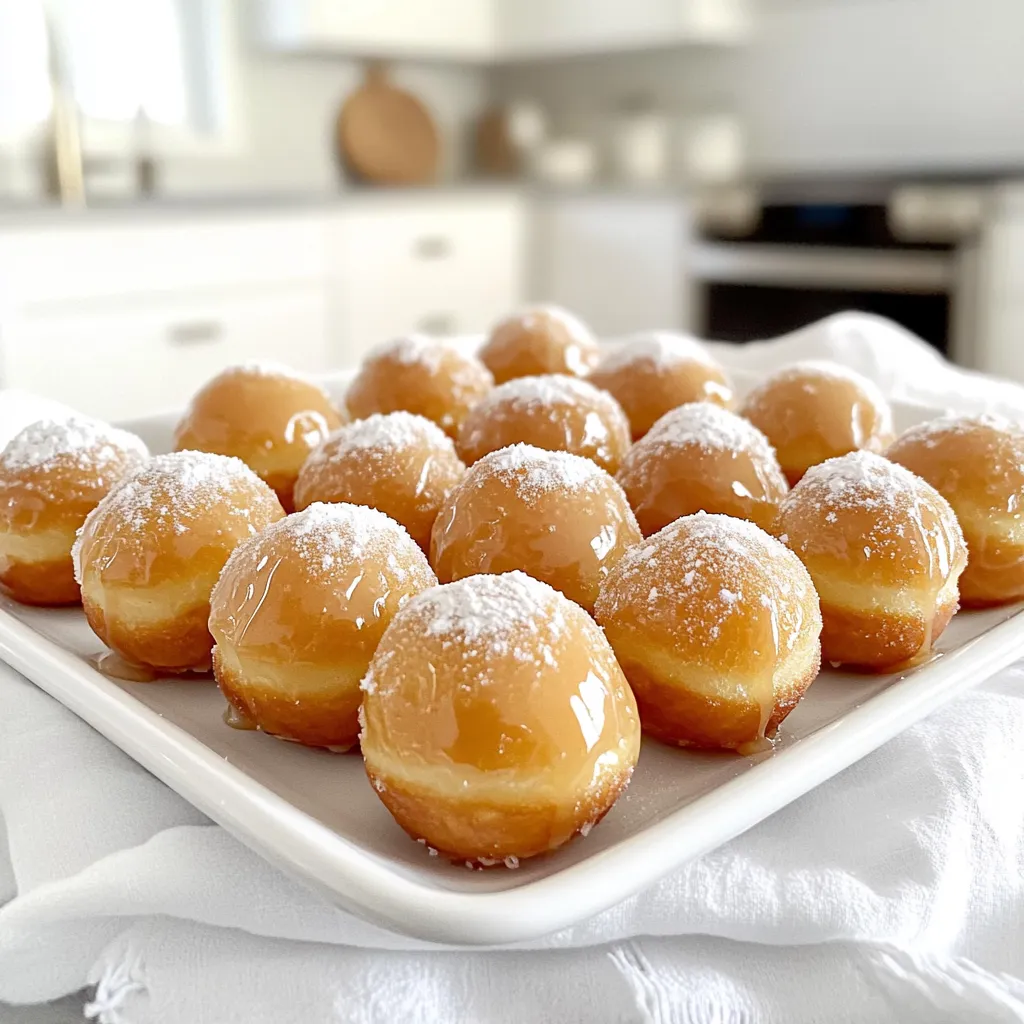
You love sweet treats, right? Imagine enjoying warm, soft maple glazed donut holes, fresh from your oven. With just a

Older posts
Newer posts
← Previous Page1 … Page3 Page4 Page5 … Page84 Next →

dsad

© 2026 Home Cooking Style • Built with GeneratePress

Our Policies

  • Copyright Policy
  • Cookie Policy
  • GDPR Policy
  • Privacy Policy
  • Disclaimer
  • Terms Of Use

More Information

  • Home
  • About
  • Contact
  • Appetizers
  • Dessert
  • Dinner
  • Drinks
©2026, Home Cooking Style About Back To Top