Skip to content
DisclaimerTerms Of UseGDPR PolicyCookie Policy

Home Cooking Style

  • Home
  • Drinks
  • Appetizers
  • Dinner
  • Dessert
  • About
  • Contact
  • Privacy Policy
DisclaimerTerms Of UseGDPR PolicyCookie Policy

NO-ING-IMG

- 4 medium zucchinis - 1 pound ground chicken - 1/4 cup teriyaki sauce (gluten-free if needed) - 1/4 cup chopped green onions - 1/4 cup shredded carrots - 2 cloves garlic, minced - 1 tablespoon fresh ginger, minced - 1 tablespoon sesame oil - 1/4 teaspoon black pepper - Sesame seeds for garnish - Fresh cilantro for garnish Zucchini is the star here, giving the dish a fresh taste. If you can't find zucchini, you can use bell peppers or eggplants. Ground chicken brings a mild flavor and cooks quickly. You can swap it with ground turkey or beef if you like. For a gluten-free option, make sure your teriyaki sauce fits that need. The green onions add crunch and color, but you can use chives if they're not available. Shredded carrots add sweetness and texture; you can also use bell pepper strips. Fresh ginger and garlic make the filling aromatic. If you prefer, use ginger paste and garlic powder instead. Finally, sesame seeds and cilantro are great for garnish, but you can skip them if you want. To make this dish, you need a few key tools. Here’s what I suggest: - A sharp knife for cutting the zucchinis - A spoon to scoop out the zucchini centers - A large skillet for cooking the chicken and veggies - A spatula for stirring and mixing - A baking sheet lined with parchment paper for easy cleanup - An oven to bake the zucchini boats These tools help make the cooking process smooth and fun. Start by preheating your oven to 400°F (200°C). This step gets your oven ready for the zucchini boats. Next, take the zucchinis and slice them in half lengthwise. Use a spoon to scoop out the center. This creates a small boat for the filling. Set the hollowed zucchinis aside while you prepare the filling. In a large skillet, heat 1 tablespoon of sesame oil over medium heat. Add 2 cloves of minced garlic and 1 tablespoon of minced ginger. Sauté them for about 1 minute until they smell great. Then, add 1 pound of ground chicken to the skillet. Cook the chicken for about 5-7 minutes. Break the meat apart with a spatula as it cooks. When it turns brown, stir in 1/4 cup of teriyaki sauce, 1/4 cup of chopped green onions, and 1/4 cup of shredded carrots. Cook this mixture for another 2-3 minutes. This allows all the flavors to come together nicely. Now, take the cooked chicken mixture and spoon it evenly into each zucchini boat. Press it down a bit to pack it in. Place the stuffed boats on a baking sheet lined with parchment paper. Bake them in the preheated oven for about 20-25 minutes. The zucchini should be tender and slightly golden on the edges when done. After baking, let them cool for a few minutes. Finally, garnish with sesame seeds and fresh cilantro for a nice touch. Enjoy your tasty and healthy meal! For the chicken filling, use fresh ground chicken. Fresh meat has a better taste. Cook it on medium heat. This keeps the chicken juicy. Add garlic and ginger first. These give the filling a great flavor. Stir in teriyaki sauce next. This sauce adds sweetness and tang. Mix in chopped green onions and carrots last. These add crunch and color. Make sure to pack the filling into the zucchini well. This ensures every bite is flavorful. To get the best zucchini texture, pick medium-sized zucchinis. They hold their shape better. Cut them in half lengthwise. Use a spoon to scoop out the center. This creates a nice boat. Don't scoop too much; leave some flesh. It helps the zucchini stay firm while baking. Bake until they are tender but not mushy. This takes about 20-25 minutes. The edges should be slightly golden, adding to the flavor. Teriyaki chicken zucchini boats are great on their own. For a full meal, pair them with rice. Jasmine or brown rice works well. You can also serve them with a fresh salad. A crunchy cucumber salad adds a nice touch. For extra flavor, drizzle more teriyaki sauce on top. You can also top with sesame seeds and fresh cilantro. This makes every plate look beautiful and inviting. {{image_2}} You can easily make this dish vegetarian. Swap the ground chicken for a meat alternative. Options like plant-based ground meat or chopped mushrooms work well. These alternatives absorb flavors just like chicken. Use the same teriyaki sauce and spices. This way, you still get that tasty umami flavor without meat. Want to kick up the flavor? Try adding spices to the chicken mix. A pinch of red pepper flakes adds heat. You can also mix in a bit of hoisin sauce for extra sweetness. If you prefer a tangy twist, drizzle a little lime juice before serving. This will brighten up the dish and add a fresh touch. Zucchini is great, but you can use other veggies too. Bell peppers, eggplants, or even sweet potatoes make great boats. Just cut them in half and scoop out the insides. Each vegetable brings its own taste and texture. Feel free to mix and match to keep things fun and exciting. To store leftover zucchini boats, let them cool first. Place them in an airtight container. Keep the container in the fridge for up to three days. You can also wrap them in plastic wrap. This method helps keep them fresh and tasty. When it's time to eat the leftovers, I recommend reheating them in the oven. Preheat your oven to 350°F (175°C). Place the zucchini boats on a baking sheet. Heat them for about 10-15 minutes. This way, they stay soft and warm all the way through. You can also use a microwave if you're in a hurry. Just heat them for 1-2 minutes. If you want to freeze the zucchini boats, prepare them without baking. After filling the zucchini, wrap each boat tightly in plastic wrap. Then place them in a freezer-safe bag. Label the bag with the date. You can freeze them for up to three months. When you’re ready to eat, thaw them in the fridge overnight. Bake them as usual for a quick meal. Yes, you can use different proteins in this dish. Ground turkey, beef, or pork work well. If you prefer a vegetarian option, use lentils or mushrooms. Each protein adds its own flavor to the dish. Just adjust the cooking time as needed for the protein you choose. These zucchini boats pair great with rice or quinoa. You can also enjoy them with a fresh salad. A side of steamed broccoli or snap peas adds color and nutrition. Feel free to serve them with extra teriyaki sauce for dipping! To prepare ahead, make the filling and store it in the fridge. You can scoop out the zucchini and keep the halves ready too. When you are ready to cook, just stuff the zucchini and bake. This saves time and makes dinner easy! This blog post covered how to make tasty zucchini boats. We looked at the key ingredients, kitchen tools, and simple steps for preparation and cooking. I shared tips for perfecting your chicken filling and achieving the best texture. We also discussed variations for different diets and how to store leftovers. In the end, you have all you need to create a fun and healthy dish. Try it today and enjoy a delightful meal!

Teriyaki Chicken Zucchini Boats Tasty and Healthy Meal

Looking for a tasty and healthy meal that’s easy to make? Try my Teriyaki Chicken Zucchini Boats! These colorful, stuffed

- 1 cup pumpkin puree - 1/2 cup brown sugar - 1/2 cup granulated sugar - 1/2 cup unsalted butter, softened For these cookies, pumpkin puree is key. It gives moisture and flavor. I love using the canned version for ease. Both brown and granulated sugar add sweetness and depth. The brown sugar also creates a chewy texture. Softened butter blends smoothly into the mix, making every bite rich. - 2 cups all-purpose flour - 1 teaspoon baking soda - 1 teaspoon baking powder - 1 teaspoon ground cinnamon - 1/2 teaspoon ground nutmeg - 1/4 teaspoon ground ginger - 1/2 teaspoon salt Flour is the backbone of these cookies. It gives them structure. Baking soda and baking powder help them rise perfectly. The spices add warmth and depth. Cinnamon is a must for that cozy holiday taste. Nutmeg and ginger complement the pumpkin, making each bite special. Salt enhances all the flavors, tying everything together. - 1 cup chocolate chips - 1 large egg - 1 teaspoon vanilla extract Chocolate chips bring sweetness and texture to the cookies. I use semi-sweet, but feel free to choose your favorite. The egg binds the ingredients, keeping the cookies moist. Vanilla extract adds a lovely aroma and flavor that brightens the whole dish. - Preheat your oven to 350°F (175°C). - Line a baking sheet with parchment paper. - In a large bowl, cream together the softened butter, brown sugar, and granulated sugar until it is light and fluffy. - Next, beat in the pumpkin puree, large egg, and vanilla extract. Mix until everything is well combined. - In a separate bowl, whisk together the all-purpose flour, baking soda, baking powder, ground cinnamon, ground nutmeg, ground ginger, and salt. - Gradually add this dry mix to the wet ingredients, stirring until just combined. Be careful not to overmix. - Gently fold in the chocolate chips, making sure they are evenly spread throughout the dough. - Use a tablespoon to scoop the dough onto the prepared baking sheet. Leave about 2 inches between each cookie. - Bake in the preheated oven for 10-12 minutes. The edges should be lightly golden. The centers may look soft, which is okay. - Once baked, remove the cookies from the oven and let them cool on the baking sheet for 5 minutes. Transfer them to a wire rack to cool completely. To get the best texture, avoid overmixing the dough. When you combine the wet and dry ingredients, mix just until you can’t see flour. This keeps your cookies soft and chewy. Recognizing proper doneness is key. Bake the cookies until the edges are lightly golden. The centers may look soft, but that’s okay. They will firm up as they cool. For spices, use fresh ones for the best taste. Ground cinnamon, nutmeg, and ginger add warmth. You can even adjust the amounts to fit your taste. Using fresh ingredients also matters. Fresh pumpkin puree gives a richer flavor than canned. Always check the dates on your spices and ingredients to ensure they are fresh. Serve your cookies on a decorative plate. Stack them for a lovely look. You can sprinkle a little powdered sugar on top for a nice touch. Garnishing can elevate your cookies. Consider adding a mini pumpkin or some cinnamon sticks around the plate. These simple touches make your cookies festive and fun! {{image_2}} You can make these cookies healthier. Start by using whole wheat flour instead of all-purpose flour. Whole wheat flour adds fiber and nutrients. This swap does not change the taste too much. Next, try alternative sweeteners. Instead of brown and granulated sugar, use maple syrup or honey. These sweeteners add a unique flavor while cutting down on refined sugars. Just remember to adjust the wet ingredients since these are liquid. Want to mix it up? Add nuts or dried fruit to your dough. Chopped walnuts or pecans give a nice crunch. Dried cranberries or raisins add a sweet and chewy surprise. You can also use different types of chocolate. Swap in white chocolate chips or dark chocolate chunks. Each type of chocolate brings its own taste. Experiment to find your favorite combo! Get festive with seasonal twists! Add cranberries for a tart bite. White chocolate can add a sweet touch that pairs well with pumpkin. Adjust the spices too. If you love a spicier cookie, increase the cinnamon or add cloves. If you prefer milder flavors, reduce the spices. Customize your cookies to fit your taste and the season! To keep your pumpkin chocolate chip cookies fresh, store them at room temperature. Place them in an airtight container. This helps keep them soft and chewy. Make sure to layer them with parchment paper to avoid sticking. These cookies stay good for about a week. If you want to save cookies for later, freezing works great. Wait until the cookies cool completely. Then, place them in a freezer bag or container. Seal it well to avoid freezer burn. You can freeze these cookies for up to three months. When ready to enjoy, just thaw them at room temperature. Reheating cookies can bring back their fresh-baked taste. Preheat your oven to 350°F (175°C). Place the cookies on a baking sheet for about 5 minutes. This warms them nicely and softens them up. Avoid using a microwave, as it can make them too chewy. Enjoy your warm, tasty treat! Yes, you can use fresh pumpkin. Start by selecting a small sugar pumpkin. Cut it in half, remove the seeds, and place the halves face down in a baking dish. Add a bit of water to the dish, cover it with foil, and bake at 350°F for about 45 minutes until soft. Let it cool, then scoop out the flesh and puree it until smooth. Use this puree in place of canned pumpkin. Fresh pumpkin gives a nice taste and texture. Absolutely! If you want to skip eggs, you can try several substitutes. Use 1/4 cup unsweetened applesauce for each egg. You can also use 1/2 of a mashed banana or 1 tablespoon of ground flaxseed mixed with 2.5 tablespoons of water. Let it sit for a few minutes until it thickens. These options work well and keep your cookies moist. To create thicker cookies, adjust your dough. Add a bit more flour, about 1/4 cup, to the mix. This change helps the cookies hold their shape better. You can also chill the dough for 30 minutes before baking. Chilling firms up the butter, which helps the cookies rise less while baking. Yes, you can double this recipe easily! Just multiply each ingredient by two. Make sure to use a large bowl for mixing. This way, you can make a big batch of delicious cookies to share. Keep an eye on the baking time; it may vary slightly with the larger amount of dough. Enjoy baking! In this blog post, we explored the key ingredients for perfect pumpkin cookies, from pumpkin puree to sugars and spices. We walked through each step, from mixing wet ingredients to baking and cooling. I shared tips for texture and flavor, along with variations to try. Remember, enjoying your cookies is just as important as making them. Use these insights to create delicious treats that everyone will love. Happy baking!

Pumpkin Chocolate Chip Cookies Tasty Holiday Treat

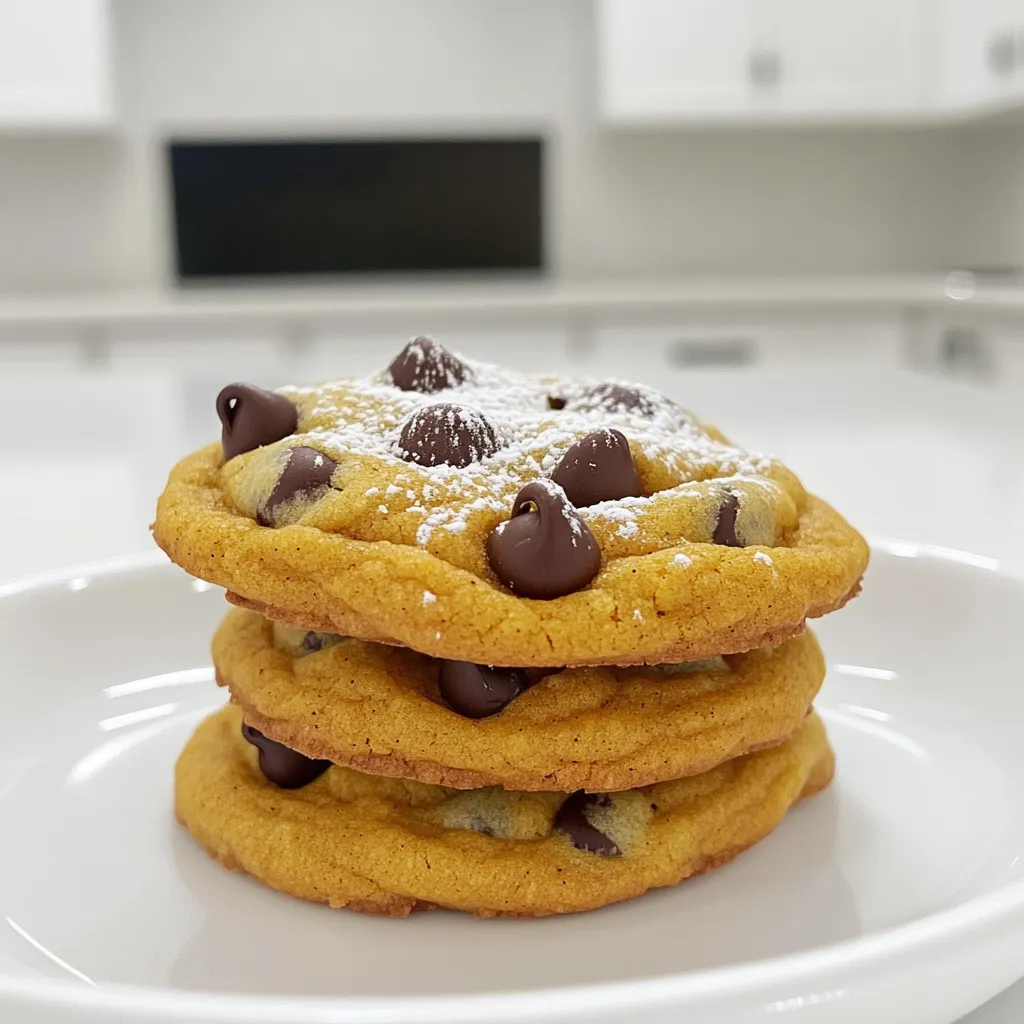
Are you ready to enjoy the perfect holiday treat? These Pumpkin Chocolate Chip Cookies blend warm spices with rich chocolate,

- 2 cups cooked chicken breast, shredded - 4 cups mixed salad greens (e.g., romaine, spinach, arugula) - 1 cup cherry tomatoes, halved - 1 cup corn kernels (fresh or canned) - 1/2 cup black beans, rinsed and drained - 1/2 cup shredded cheddar cheese - 1/4 cup red onion, thinly sliced Let's talk about the main ingredients in the BBQ Ranch Chicken Salad. First, you need cooked chicken breast. Shredded chicken gives flavor and protein. You can use leftover chicken or rotisserie chicken for ease. Next, mixed salad greens form a fresh base. I like a mix of romaine, spinach, and arugula for texture. Cherry tomatoes add sweetness and color. Halving them makes them easier to eat. Corn kernels bring a sweet crunch. You can use fresh corn or canned corn, depending on what's handy. Black beans are a great source of fiber and protein. Rinse them well to remove any canning liquid. Shredded cheddar cheese gives a tasty, creamy touch. Finally, red onion adds a nice bite. Slice it thin so it mixes well in the salad. - 1/2 cup BBQ sauce - 1/3 cup ranch dressing - Salt and pepper to taste - Fresh cilantro, chopped (for garnish) Now, let’s dive into the dressings and seasonings. BBQ sauce is key because it adds rich flavor to the chicken. Choose a sauce you love. Ranch dressing complements the BBQ taste. It brings creaminess and tang. Don’t forget salt and pepper! They enhance the flavors of all the ingredients. Use them to your taste. Fresh cilantro adds a pop of color and fresh flavor. Chop it up and sprinkle it on top before serving. - Mixing the BBQ chicken Start by taking your cooked chicken breast. Shred the chicken into small pieces. In a mixing bowl, add the shredded chicken. Pour in the BBQ sauce. Toss the chicken well until it is fully coated in the sauce. Set this aside while you prepare the salad. - Creating the salad base Grab a large salad bowl. Add 4 cups of mixed salad greens, like romaine, spinach, or arugula. This will be the base of your salad. Make sure the greens are clean and dry for the best texture. - Adding toppings On top of the greens, layer your toppings. Start with 1 cup of halved cherry tomatoes. Then add 1 cup of corn kernels, either fresh or canned. Next, sprinkle in 1/2 cup of black beans, rinsed and drained. Add 1/2 cup of shredded cheddar cheese, and finish with 1/4 cup of thinly sliced red onion. - Drizzling ranch dressing Now it’s time to add flavor. Drizzle 1/3 cup of ranch dressing over the entire salad. This adds creaminess and ties all the flavors together. Make sure to spread it evenly. - Tossing the salad With everything in the bowl, gently toss the salad. Mix the ingredients carefully to keep the greens intact. You want everything to combine without crushing the salad. - Garnishing with cilantro Finally, take some fresh cilantro and chop it up. Sprinkle the cilantro on top of your salad. This adds a bright, fresh flavor that makes the dish even more delicious. Serve your salad right away to enjoy its freshness! - Choosing the right chicken Use cooked chicken breast for this salad. Shredded chicken is best for blending flavors. You can grill it for extra taste. If you are in a hurry, rotisserie chicken works great too. - Balancing flavors with sauces Use BBQ sauce to add a sweet and smoky taste. The ranch dressing gives a creamy contrast. Mix the sauces well with the chicken for full flavor. Adjust the amount to fit your taste. A little salt and pepper can enhance all the flavors. - Maintaining freshness of greens Always wash your salad greens before using them. This keeps them crisp and clean. Add greens to the bowl just before serving to keep them fresh. Avoid dressing the salad too early to prevent sogginess. - Colorful layering Make your salad look appealing by layering the ingredients. Start with greens, then add colorful veggies like tomatoes and corn. This not only looks good but also keeps flavors separate until you mix. - Serving temperature Serve the salad cold or at room temperature. This keeps the ingredients fresh and crunchy. If you make it ahead of time, chill it in the fridge before serving. Enjoy it at its best flavor and texture! {{image_2}} You can make this salad lighter by using grilled chicken instead of BBQ chicken. Grilling keeps the chicken juicy and adds a nice smoky flavor. It also cuts down on sugar and calories from the BBQ sauce. Another option is to substitute dressings. You can mix plain yogurt with herbs for a creamy taste. Or, try a vinaigrette for a tangy twist. Both options add flavor without the extra calories. You can change up the beans in this salad. Try pinto beans or kidney beans for different tastes and textures. Each type brings its own flavor and nutrition. Adding nuts or seeds is another great idea. Sliced almonds or sunflower seeds give your salad a nice crunch. They also add healthy fats and protein. This makes your salad more filling. To keep your BBQ Ranch Chicken Salad fresh, start by storing it in the fridge. Place the salad in an airtight container. This helps prevent the greens from wilting. You can also layer the ingredients. Keep the chicken and dressings separate. This way, the salad tastes great when you eat it later. Use glass or plastic containers. They are both good options. If you have a smaller salad, a smaller container works well too. Store the salad for up to three days in the fridge. After that, the salad may lose its crunch. When reheating the chicken, do it gently. You can use a microwave or a stovetop. If you use a microwave, heat in short bursts. This helps keep the chicken moist. On the stovetop, warm the chicken over low heat. Stir it often to avoid burning. After reheating, add the chicken back to the salad. Drizzle the ranch dressing on top again. Toss the salad lightly to mix. Serve it right away for the best flavor. Enjoy your fresh and flavorful BBQ Ranch Chicken Salad! Can I make this salad ahead of time? Yes, you can make this salad ahead of time. Just keep the chicken and dressing separate until you are ready to serve. This helps keep the greens fresh and crisp. What can I use instead of ranch dressing? If you want a change, try using Greek yogurt or blue cheese dressing. Both options will give a different taste while still being creamy and delicious. Is this salad gluten-free? Yes, this salad is gluten-free. Just make sure to check the BBQ sauce and ranch dressing labels. Some brands may add gluten. This blog post covered how to make a tasty BBQ ranch chicken salad. I shared the main ingredients like chicken, beans, and greens. I outlined steps for preparation, serving tips, and ways to keep it fresh. You can even swap ingredients to suit your taste! Remember to store leftovers properly and reheat them well. This salad is not just easy to make; it’s also customizable and delicious. Enjoy making this dish your own!

Irresistible BBQ Ranch Chicken Salad Fresh and Flavorful

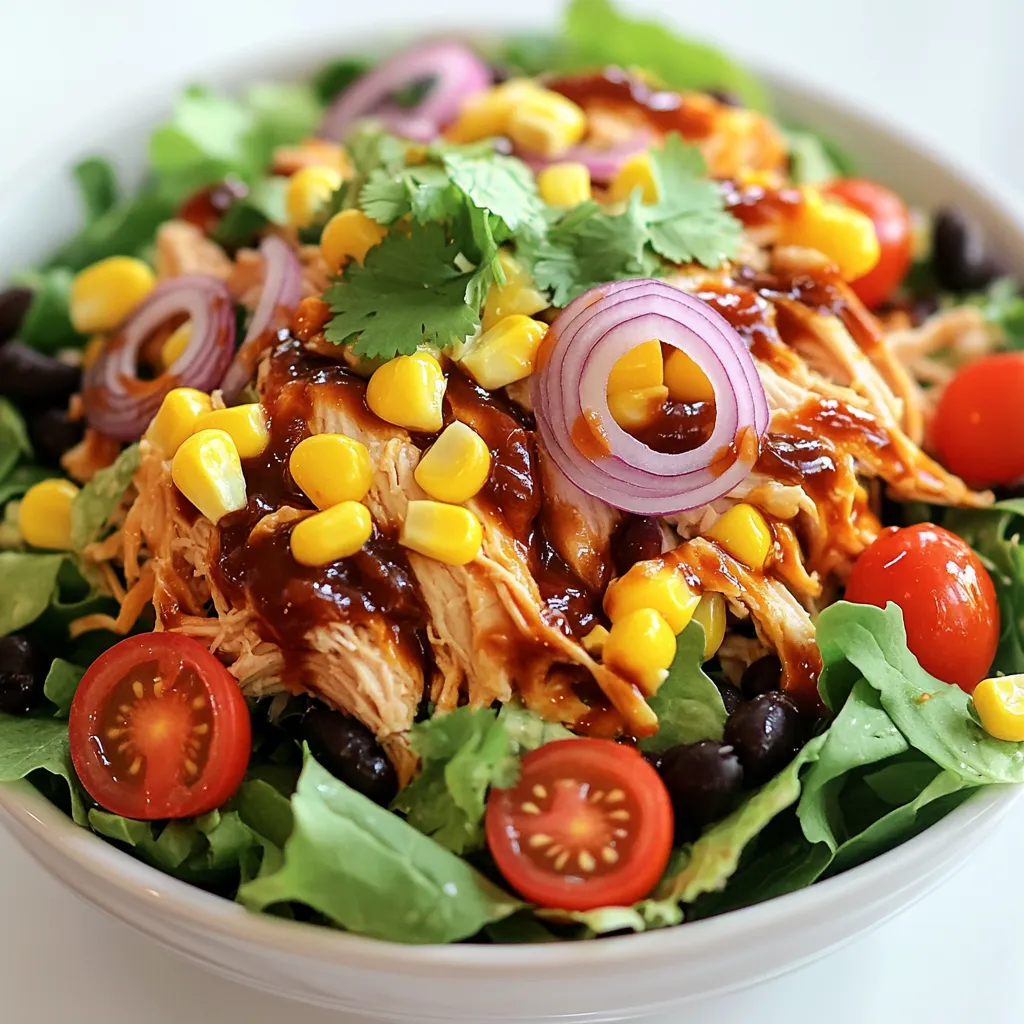
Looking for a fresh and tasty meal? You’ll love this BBQ Ranch Chicken Salad! It combines juicy chicken, crisp greens,

- 1 cup fresh or frozen pineapple chunks - 1 ripe banana - 1 cup coconut milk - 1/2 cup Greek yogurt (or coconut yogurt) - 1 tablespoon honey or agave syrup (optional) - 1/2 teaspoon vanilla extract - Ice cubes (optional) - Fresh mint leaves for garnish (optional) To make a tasty pineapple coconut smoothie, you need a few simple ingredients. First, fresh or frozen pineapple gives the drink its sweet and tangy flavor. The banana adds creaminess and natural sweetness. Coconut milk makes the smoothie rich and smooth. I love using Greek yogurt for a protein boost, but coconut yogurt works too if you're dairy-free. If you want a touch of sweetness, add honey or agave syrup. A dash of vanilla extract enhances the flavors. For a colder drink, toss in some ice cubes, especially if you use fresh pineapple. Lastly, some fresh mint leaves on top make it look pretty and add a refreshing taste. Gather these ingredients, and you are ready to blend up a delicious smoothie! First, gather your ingredients. You need one cup of fresh pineapple chunks, a ripe banana, and one cup of coconut milk. Add half a cup of Greek yogurt, one tablespoon of honey, and half a teaspoon of vanilla extract. Toss everything into your blender. Blend on high speed until the mix is smooth. If it’s too thick, pour in a bit more coconut milk to make it creamier. If you use fresh pineapple, add some ice cubes to chill the smoothie. Blend again until it’s completely smooth. This step makes your drink refreshing and cool, perfect for hot days or after workouts. Now, it’s time to taste your smoothie. If you want it sweeter, add more honey or agave syrup. Blend again for a few seconds. Adjust the sweetness to match your taste buds. Enjoy your delicious pineapple coconut smoothie! Use fresh, ripe pineapple for the best flavor. Look for a pineapple with a sweet smell. The skin should be golden and firm. If fresh pineapple is not available, frozen chunks work great. They save time and still taste good. If you want a dairy-free option, swap Greek yogurt for coconut yogurt. Coconut yogurt brings a creamy texture and a nice coconut flavor. It keeps the smoothie light yet rich. This option is great for those with lactose issues. To make a thicker smoothie, add more banana or yogurt. If you prefer a thinner smoothie, pour in more coconut milk. Ice also helps if you like a colder drink. Remember, you can always add more ingredients but can’t take them out. Taste as you go to find your perfect mix. {{image_2}} You can make this smoothie even more exciting by adding other fruits. Try mango for a sweet twist. Kiwi will add a nice tart flavor. Berries like strawberries or blueberries give a burst of color and taste. Each fruit brings its own special touch. You can mix and match to find your favorite flavors. Boosting your smoothie with superfoods makes it more nutritious. Spinach adds vitamins without changing the taste much. Chia seeds give you fiber and omega-3s. You can also add protein powder for an extra energy kick. Just a scoop can help keep you full longer. These additions make your smoothie a powerful snack or meal. Want to give your smoothie a tropical twist? Adding citrus fruits is a great idea. Squeeze in some lime or orange juice for zing. You might also try passion fruit for a unique flavor. Coconut flakes can enhance the coconut taste, making it even more delightful. These ideas will transport your taste buds to a sunny beach. To keep your pineapple coconut smoothie fresh, pour it into an airtight container. This helps seal in the flavor and nutrients. Store it in the fridge if you plan to drink it within two days. If you want to keep it longer, freeze it in ice cube trays or freezer-safe bags. Just remember to label the bags with the date. After blending, your smoothie will last about two days in the fridge. If you freeze it, it can last up to three months. Just thaw it in the fridge overnight before using. Give it a good shake or stir to mix everything again. You can creatively repurpose frozen smoothies. Turn them into smoothie bowls by adding your favorite toppings like granola or fresh fruit. You can also blend the frozen smoothie with a bit of milk to make a thicker drink. For a fun treat, pour the mixture into popsicle molds. Freeze these for a cool snack on hot days. If you don’t have coconut milk, you can use several substitutes. Almond milk, soy milk, or oat milk work well. These options give a different flavor but still create a creamy texture. You can also blend water with shredded coconut for a quick homemade option. Each substitute changes the taste slightly, so choose one that you enjoy. Yes, using frozen fruits is a great idea! Frozen pineapple or banana makes your smoothie cold and thick. It also saves time, as you don’t need to chop fresh fruit. Frozen fruits keep their nutrients, so you still get all the benefits. Plus, they blend smoothly, creating a creamy drink. To boost nutrition, add some greens like spinach or kale. You can also mix in chia seeds or flaxseeds for extra fiber. A spoonful of nut butter adds healthy fats and protein. If you want a protein boost, try adding protein powder. These small additions make your smoothie more filling and healthy. This blog post guides you through making a tasty tropical smoothie. We covered fresh ingredients, simple steps, and helpful tips. You learned how to adjust flavors and explore fun variations. Smoothies are easy to store, so leftovers are not wasted. With so many ways to tailor your smoothie, the options are endless. Get creative and enjoy your healthy treat!

Pineapple Coconut Smoothie Refreshing and Creamy Blend

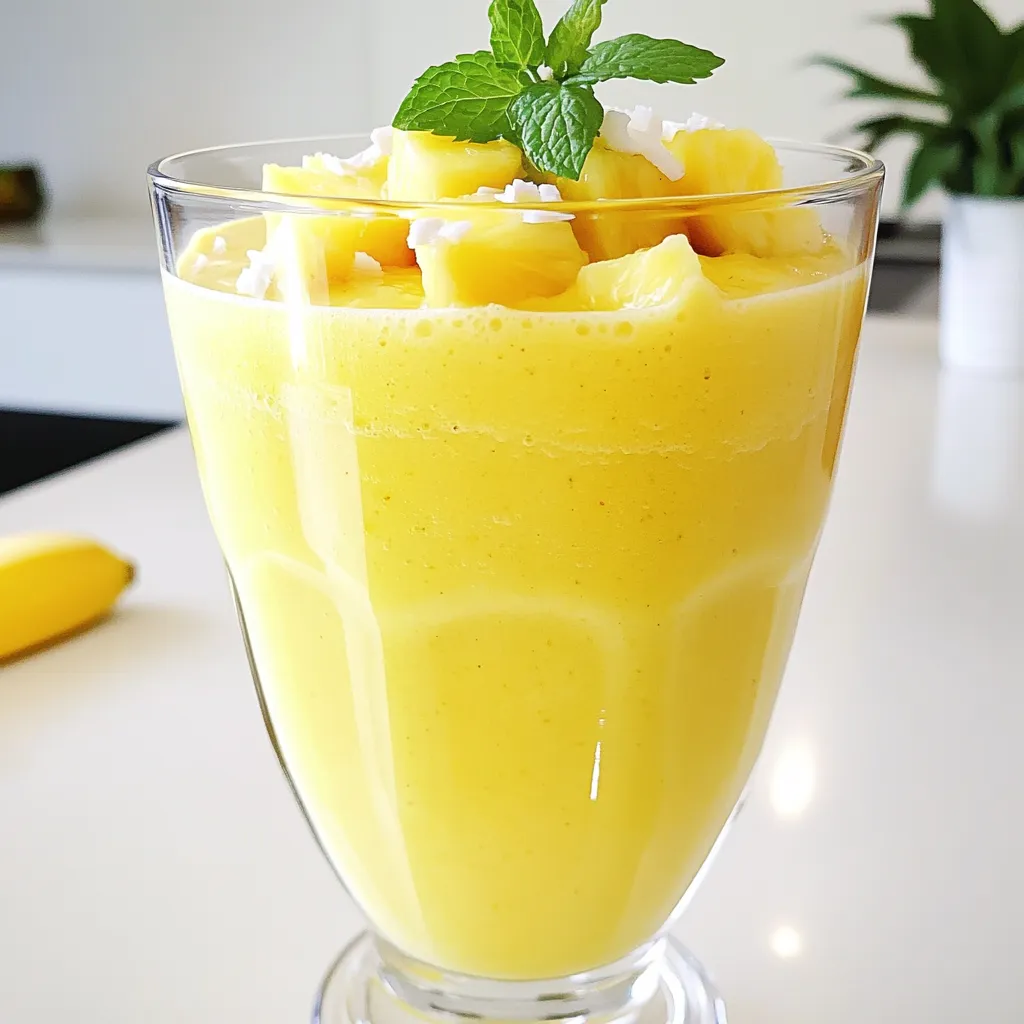
Craving a taste of the tropics? This Pineapple Coconut Smoothie is your ticket to a refreshing getaway! Creamy, fruity, and

To make a creamy mushroom stroganoff, you will need: - 12 oz (340g) egg noodles or pasta of your choice - 2 tablespoons olive oil - 1 large onion, finely chopped - 3 cloves garlic, minced - 16 oz (450g) mixed mushrooms (like cremini, shiitake, and button), sliced - 1 teaspoon dried thyme - 1 teaspoon smoked paprika - 1 tablespoon soy sauce - 1 cup vegetable broth - 1 cup sour cream (or Greek yogurt for a healthier option) - Salt and pepper to taste - Fresh parsley, chopped (for garnish) You can easily adapt this recipe. For a gluten-free version, swap egg noodles with gluten-free pasta. If you avoid dairy, use cashew cream or coconut milk instead of sour cream. For a vegan option, replace the sour cream with a dairy-free yogurt and skip the butter. You can also use tamari instead of soy sauce for a gluten-free choice. To boost the flavor, consider adding a splash of white wine before the broth. A squeeze of lemon juice at the end brightens the dish. You can also add a dash of hot sauce for some heat. Fresh herbs, like thyme or dill, can enhance the taste. Lastly, sprinkle some nutritional yeast for a cheesy flavor without the dairy. Start by boiling water in a large pot. Add salt to the water for flavor. Add 12 oz of egg noodles. Cook until they are al dente. This usually takes about 8-10 minutes. Drain the noodles and set them aside. In a large skillet, heat 2 tablespoons of olive oil over medium heat. Add 1 large, finely chopped onion. Sauté for about 3-4 minutes until the onion softens. Next, add 3 cloves of minced garlic. Cook for 1 more minute until you smell the garlic. Now, stir in 16 oz of sliced mixed mushrooms. This can include cremini, shiitake, and button mushrooms. Add 1 teaspoon of dried thyme and 1 teaspoon of smoked paprika to the mushrooms. Pour in 1 tablespoon of soy sauce. Cook everything for 5-7 minutes. The mushrooms should become tender and release their juices. Now, pour in 1 cup of vegetable broth. Bring it to a simmer and let it cook for about 3-4 minutes. This will help reduce the broth slightly. Reduce the heat to low. Stir in 1 cup of sour cream or Greek yogurt. Mix until you have a creamy sauce. Taste and add salt and pepper if needed. Gently fold in the cooked noodles until they are fully coated in the sauce. Serve hot and garnish with chopped fresh parsley. This adds a nice touch and flavor. Enjoy your creamy mushroom stroganoff! To make the best noodles, use a large pot. Fill it with salted water. Bring it to a boil before adding the noodles. This helps the noodles cook evenly. Stir them often to prevent sticking. Cook them until al dente, which means firm to the bite. Drain the noodles and set them aside. Do not rinse them, as you want the starch to help the sauce stick. To get a creamy sauce, use sour cream or Greek yogurt. Add it at the end of cooking. Stir it in slowly over low heat. This way, it blends well without curdling. If you want more creaminess, consider adding a splash of heavy cream. You can also use a bit of pasta water for extra smoothness. The water has starch, which helps bind the sauce. One common mistake is overcooking the noodles. This makes them mushy and less tasty. Another mistake is adding sour cream too early. If you do this, it may curdle. Always adjust the seasoning at the end. Taste your dish before serving. If it's too salty, add a little more vegetable broth. Lastly, don’t skip the fresh parsley. It adds a nice touch of flavor and color. {{image_2}} You can make this creamy mushroom stroganoff vegan easily. Instead of sour cream, use cashew cream or coconut yogurt. Both options give a rich taste without dairy. For the butter, swap it for olive oil or vegan margarine. This keeps the dish creamy and satisfying. To make this dish gluten-free, choose gluten-free pasta. Many brands offer great options that taste good. If you want to skip pasta, serve the stroganoff over rice or quinoa. These grains absorb the sauce well and add texture. You can customize the flavor to fit your taste. Try adding spinach or kale for extra greens. If you like spice, toss in some red pepper flakes. For a smoky kick, add more smoked paprika. You can also mix in beans or lentils for added protein. Each change can make this dish your own! After enjoying your creamy mushroom stroganoff, let the leftovers cool down. Place them in an airtight container. Store the container in the fridge for up to three days. This keeps your meal fresh and tasty. To reheat, take the stroganoff out of the fridge. You can use a pan or microwave. If you use a pan, add a splash of vegetable broth. This helps keep the sauce creamy. Heat it on low until warm. If using a microwave, cover with a lid and warm in short bursts. Stir in between to warm evenly. You can freeze creamy mushroom stroganoff for later. Use a freezer-safe container. Make sure to leave some space at the top, as the sauce will expand. It can last up to two months in the freezer. When ready to eat, let it thaw in the fridge overnight. Then, reheat as mentioned above. Enjoy your meal anytime! Yes, you can use various mushrooms. Cremini, shiitake, or button mushrooms all work well. Mix them for a richer flavor. Try using portobello mushrooms for a meatier bite. Each type adds a unique taste to your dish. You can prepare this dish ahead of time. Cook the noodles and sauce separately. Store them in the fridge for up to two days. When ready to serve, combine the noodles and sauce in a pan. Heat gently until warm. Creamy Mushroom Stroganoff pairs well with several sides. A fresh green salad adds a nice crunch. You can serve it with garlic bread for a hearty meal. Roasted vegetables also complement the flavors nicely. To add spice, include red pepper flakes or cayenne pepper. Start with a small amount and taste as you go. You can also use spicy paprika instead of smoked paprika. For heat, consider adding sautéed jalapeños to the mix. This article covered many aspects of making a great Creamy Mushroom Stroganoff. We explored essential ingredients and tasty substitutions for dietary needs. You learned step-by-step cooking instructions, from preparing the noodles to serving the dish. I shared tips to make your sauce creamy and avoid common mistakes. Plus, you discovered variations like vegan and gluten-free options. Finally, we discussed storage tips for leftovers and reheating. Remember, cooking should be fun and creative. Enjoy experimenting with flavors and ingredients!

Creamy Mushroom Stroganoff Flavorful Comfort Meal

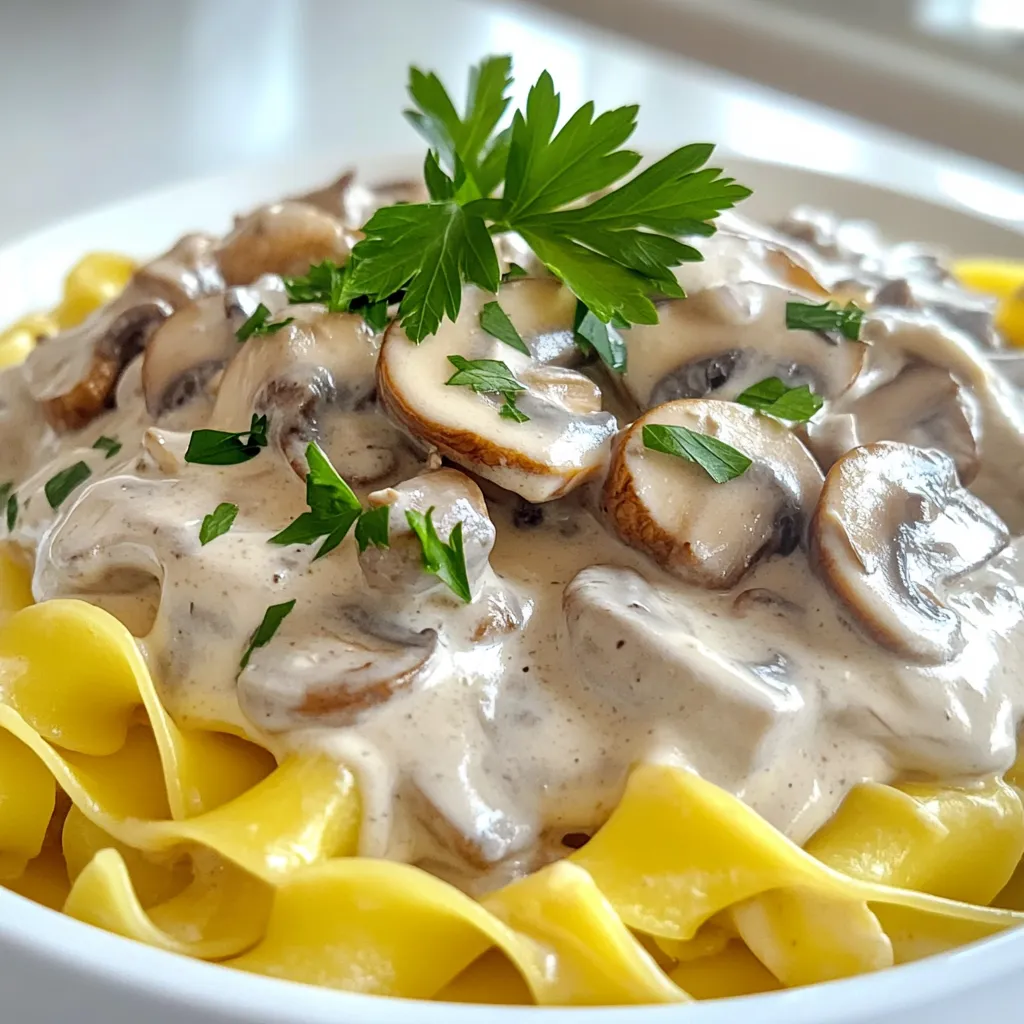
If you crave a warm, comforting meal, creamy mushroom stroganoff is your answer. This dish offers rich flavors that satisfy

- 1 pound baby carrots, peeled and trimmed - 2 tablespoons honey - 2 tablespoons unsalted butter - 2 cloves garlic, minced - 1 teaspoon fresh ginger, grated - 1 tablespoon soy sauce (or tamari for gluten-free) - Salt and pepper to taste - Fresh parsley, chopped (for garnish) In this dish, baby carrots serve as the main star. They are sweet and tender, making them perfect for glazing. Honey adds a rich sweetness that balances the savory flavors. Unsalted butter provides creaminess and helps to coat the carrots. Garlic and ginger give a warm, aromatic touch. They add depth and make the dish more flavorful. Soy sauce (or tamari) brings umami and a bit of saltiness. Finally, salt and pepper enhance the taste. You can easily swap ingredients if needed. For a vegan option, replace butter with olive oil or vegan butter. Use maple syrup instead of honey for a plant-based sweetener. If you are gluten-free, stick with tamari instead of regular soy sauce. You can also use regular carrots if baby ones are not available. Just cut them into similar sizes for even cooking. 1. Start by melting the butter in a large skillet over medium heat. This takes about 1 minute. 2. Add the minced garlic and grated ginger. Cook for 1 minute. Stir often to prevent burning. 3. Toss in the baby carrots, mixing them well in the butter. This step should take around 2 minutes. 4. Pour in the honey and soy sauce. Add salt and pepper to taste. Stir well to coat the carrots evenly. 5. Cover the skillet and lower the heat. Cook for 10 to 15 minutes. Stir occasionally until the carrots are tender. 6. After the carrots are tender, remove the lid. Increase the heat to medium-high for 2 to 3 minutes. This helps thicken the glaze. 7. Taste your dish. Adjust the seasoning if needed. 8. Finally, garnish with chopped parsley before serving. - Melting butter: Watch the heat closely. Butter can burn quickly. - Garlic and ginger: Stir frequently. They can easily go from fragrant to burnt. - Coating carrots: Make sure all carrots are well covered. This ensures even flavor. - Covering skillet: Keep the lid on to trap steam. This helps cook the carrots faster. - Adjusting heat: Increase heat slowly. You want a gentle bubble, not a boil. - Tasting: Always taste before serving. This way, you can adjust flavors. - Use fresh garlic and ginger: Fresh ingredients give the best flavor. - Honey consistency: Warm honey slightly if it’s too thick. This helps it mix well. - Stirring regularly: Stir during cooking to help the glaze coat all carrots evenly. - Thickening the glaze: Let the glaze bubble. This allows excess moisture to evaporate. - Garnishing: Add parsley just before serving. It adds color and freshness to your dish. To make honey garlic glazed carrots even better, try adding spices. A pinch of cayenne pepper gives a nice kick. You can also add a sprinkle of paprika for a smoky flavor. If you love herbs, consider adding thyme or rosemary. These herbs pair well with the sweetness of the carrots. You can even toss in a splash of lemon juice for a bright touch. Experiment with these flavors to find what you like best. Presentation matters when serving honey garlic glazed carrots. Start by using a nice serving dish to show off the bright colors. Arrange the carrots in a circular pattern for a stunning look. Drizzle some of the glaze over the top to make it shine. Finally, sprinkle chopped parsley on top for a fresh touch. This adds color and a hint of flavor. A well-presented dish makes every meal feel special. One common mistake is overcooking the carrots. They should be tender but still have a slight crunch. Keep an eye on them while they cook. Stir occasionally to coat them evenly with the glaze. Another pitfall is burning the garlic. Garlic cooks quickly, so add it early but watch it closely. If it burns, it will taste bitter. Lastly, taste your dish before serving. Adjust the seasoning as needed to ensure perfect flavor. Following these tips will help you create a delicious side dish. {{image_2}} You can swap baby carrots with other veggies. Try using sliced bell peppers, zucchini, or green beans. Each will add its own flavor and texture. For a colorful dish, mix several vegetables. Just keep the cooking time in mind, as some may cook faster than others. If you need a vegan version, replace the butter with olive oil or vegan butter. The honey can be swapped for maple syrup or agave nectar. This keeps the sweetness but makes it plant-based. Always check your soy sauce for gluten-free options if needed. For extra flavor, add a splash of citrus juice, like lemon or orange, right at the end. You can also mix in fresh herbs such as thyme or rosemary. These herbs will enhance the dish and give it a fresh twist. Experimenting with spices like cumin or chili powder can add warmth and depth. To keep your Honey Garlic Glazed Carrots fresh, store them in an airtight container. Let them cool first. Place them in the fridge within two hours of cooking. They will stay good for about 3 to 5 days. Use a clean spoon to serve. This helps avoid germs. Reheat your carrots on the stove for the best texture. Place them in a skillet over low heat. Add a splash of water to help steam them. Stir often for even heating. You can also use a microwave if you are in a hurry. Use a microwave-safe dish and cover it loosely. Heat in short bursts, checking often to prevent overcooking. If you want to freeze your glazed carrots, first cool them completely. Place them in a freezer-safe bag or container. Remove as much air as possible. Label the bag with the date. They can last for up to 3 months in the freezer. When you are ready to eat, thaw them overnight in the fridge. Reheat as mentioned above for the best results. You can serve Honey Garlic Glazed Carrots with many dishes. They pair well with roasted chicken, grilled fish, or pork chops. The sweet and savory flavor makes them a great side. You can also enjoy them with rice or quinoa for a complete meal. For a special touch, serve them alongside a fresh salad. This combo adds color and texture to your table. Yes, you can use frozen carrots! They save time and are easy to find. However, they may need a bit longer to cook. Thaw them first for best results. Once thawed, follow the same steps in the recipe. Just monitor them to ensure they reach the right tenderness. The glaze will still coat the carrots nicely. Making this dish ahead is simple. You can prepare the carrots and glaze in advance. Cook them until they are tender, then let them cool. Store them in a sealed container in the fridge. When you're ready to eat, reheat them in a skillet. Add a bit of water to loosen the glaze if needed. They will taste just as good as fresh! Honey Garlic Glazed Carrots are simple and versatile. We went through the key ingredients and their roles, plus substitutions for dietary needs. I provided clear steps, helpful tips, and techniques to achieve a great glaze. You also learned how to enhance flavors, present your dish, and avoid common mistakes. Think about trying different vegetables and flavor options. With proper storage and reheating tips, you can enjoy these carrots later. This dish offers variety and satisfaction, making it a must-try for any meal.

Honey Garlic Glazed Carrots Tasty and Simple Recipe

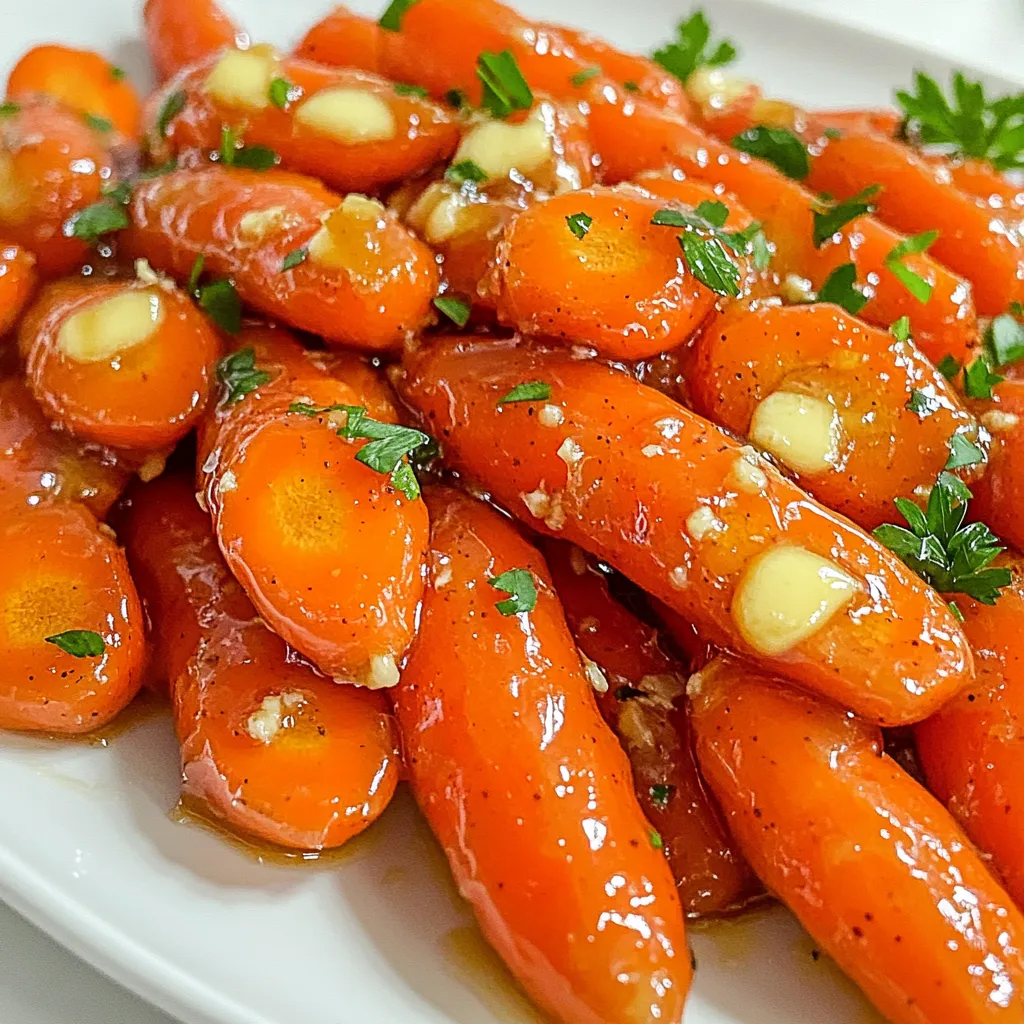
Are you ready to elevate your side dishes? Honey Garlic Glazed Carrots offer outstanding flavor with just a few simple

To make Blueberry Lemon Overnight Oats, you need simple and fresh items. This recipe uses oats, milk, yogurt, and blueberries. These ingredients come together to create a tasty and healthy breakfast. - Rolled oats: They are the base of our dish. Oats add fiber and keep you full. - Almond milk: This milk adds creaminess. You can use any milk you like. - Plain Greek yogurt: This ingredient adds protein and a rich texture. - Fresh blueberries: Blueberries are sweet and packed with nutrients. - Honey or maple syrup: These sweeteners add a touch of natural sweetness. - Lemon zest and juice: They bring bright and fresh flavors to the oats. - Vanilla extract: This adds a warm and comforting taste. - Pinch of salt: Salt enhances all the flavors in the dish. If you want to change things up, you can easily swap ingredients. Here are some ideas: - Use coconut milk for a tropical twist. - Replace Greek yogurt with dairy-free yogurt for a vegan option. - You can use agave nectar instead of honey for a lighter sweetener. - If you don’t have fresh blueberries, frozen ones work well too, just thaw them first. - For a nut-free option, choose oat milk instead of almond milk. Start with a medium bowl or jar. Pour in 1 cup of rolled oats. Add 1 cup of almond milk, or any milk you like. Then, mix in 1/2 cup of plain Greek yogurt. Stir these ingredients gently until they blend well. This base is creamy and full of flavor. Next, it’s time for the fun part! Add 1/2 cup of fresh blueberries. Toss in the zest of 1 lemon and 1 tablespoon of lemon juice. These add a bright taste. Also, include 1/2 teaspoon of vanilla extract and a pinch of salt. Stir everything until you see the blueberries and lemon spread throughout. Each bite will burst with flavor! Cover your bowl or jar tightly with a lid or plastic wrap. Place it in the fridge. Let it chill overnight or for at least 4 hours. This time allows the oats to soak up the liquid and flavors. In the morning, stir well. If it looks thick, just add a splash of almond milk. Your oats will be ready to enjoy! To make perfect overnight oats, start with a good mix. Use rolled oats for the best texture. Combine 1 cup of oats with 1 cup of almond milk. Add 1/2 cup of Greek yogurt for creaminess. Stir in 1 tablespoon of honey for sweetness. This blend gives you a great base. Make sure to add fresh blueberries. They add a burst of flavor. Mix in the zest and juice of 1 lemon. This makes the oats bright and fresh. Don't forget a pinch of salt; it brings out the other flavors. Cover your jar and refrigerate overnight. To boost flavor, try different milks. Coconut milk adds a tropical twist. You can also use flavored yogurt for extra taste. Consider adding nuts or seeds for crunch. Chia seeds can help thicken the oats too. For more lemon flavor, add extra zest. You can also mix in a dash of cinnamon. This gives a warm note that pairs well with berries. If you want more sweetness, drizzle a bit more honey in the morning. One common mistake is not letting the oats soak long enough. They need at least four hours to absorb liquid and flavors. Another mistake is using instant oats. They become mushy and lose texture. Avoid overloading with toppings too soon. This can weigh down your oats. Add toppings just before you eat. Lastly, don’t skip the salt. It enhances the overall taste of your dish. {{image_2}} You can change the flavor of your blueberry lemon overnight oats easily. Try adding different fruits. Strawberries, raspberries, or even peaches work well. You can also swap lemon for lime for a zesty twist. If you want a richer taste, add a spoonful of peanut butter or almond butter. This adds creaminess and a nutty flavor that pairs nicely with blueberries. Making your overnight oats fit your diet is simple. To make it vegan, use plant-based yogurt instead of Greek yogurt. Almond milk is great, but coconut or oat milk are good choices too. For gluten-free oats, ensure you buy certified gluten-free rolled oats. This will keep your breakfast safe and delicious. Toppings can elevate your overnight oats. Fresh blueberries are a must, but you can add sliced bananas or chopped nuts too. A sprinkle of chia seeds adds a nice crunch and nutrition. Drizzle some honey or maple syrup on top for extra sweetness. If you want a special touch, add a dollop of whipped coconut cream. This will make your breakfast feel like a treat! To keep your blueberry lemon overnight oats fresh, use an airtight container. A jar works great. Make sure to seal it well before placing it in the fridge. This keeps the oats tasty and prevents them from drying out. You can also layer the oats with extra blueberries for added flavor. These overnight oats last about 3 to 5 days in the fridge. For the best taste, eat them within 3 days. Check for any changes in smell or texture before eating. If you find any, it's time to toss them. Keep in mind that the longer they sit, the softer the oats get. You can eat overnight oats cold or warm. If you prefer them warm, heat them in the microwave. Start with 30 seconds, then stir. Check if they need more time. Add a splash of almond milk if they feel too thick after heating. Enjoy your meal warm or cold, it’s your choice! You can use regular yogurt, dairy-free yogurt, or cottage cheese. Each will change the flavor a bit. Regular yogurt gives a nice creaminess. Dairy-free options work well for allergies. Cottage cheese adds protein and a different texture. Yes, you can use frozen blueberries! They work great in overnight oats. Just add them directly to the mix. They may make the oats a little colder, but the flavor stays good. You can also let them thaw before adding. Overnight oats last about 3 to 5 days in the fridge. Store them in a sealed container to keep them fresh. If you see any signs of spoilage, it’s best to throw them away. Enjoy your oats within this time for the best taste! In this post, we explored how to make overnight oats. We detailed the key ingredients and substitutions. You learned the step-by-step preparation and mixing tips for smooth oats. We shared clever tricks for perfecting your dish and avoiding common mistakes. You discovered various flavor options and dietary adjustments to suit your tastes. Finally, we covered the best storage practices to keep your oats fresh. You now have the tools to create tasty overnight oats that fit your needs. Enjoy experimenting with flavors and make breakfast fun!

Blueberry Lemon Overnight Oats Healthy Start Today

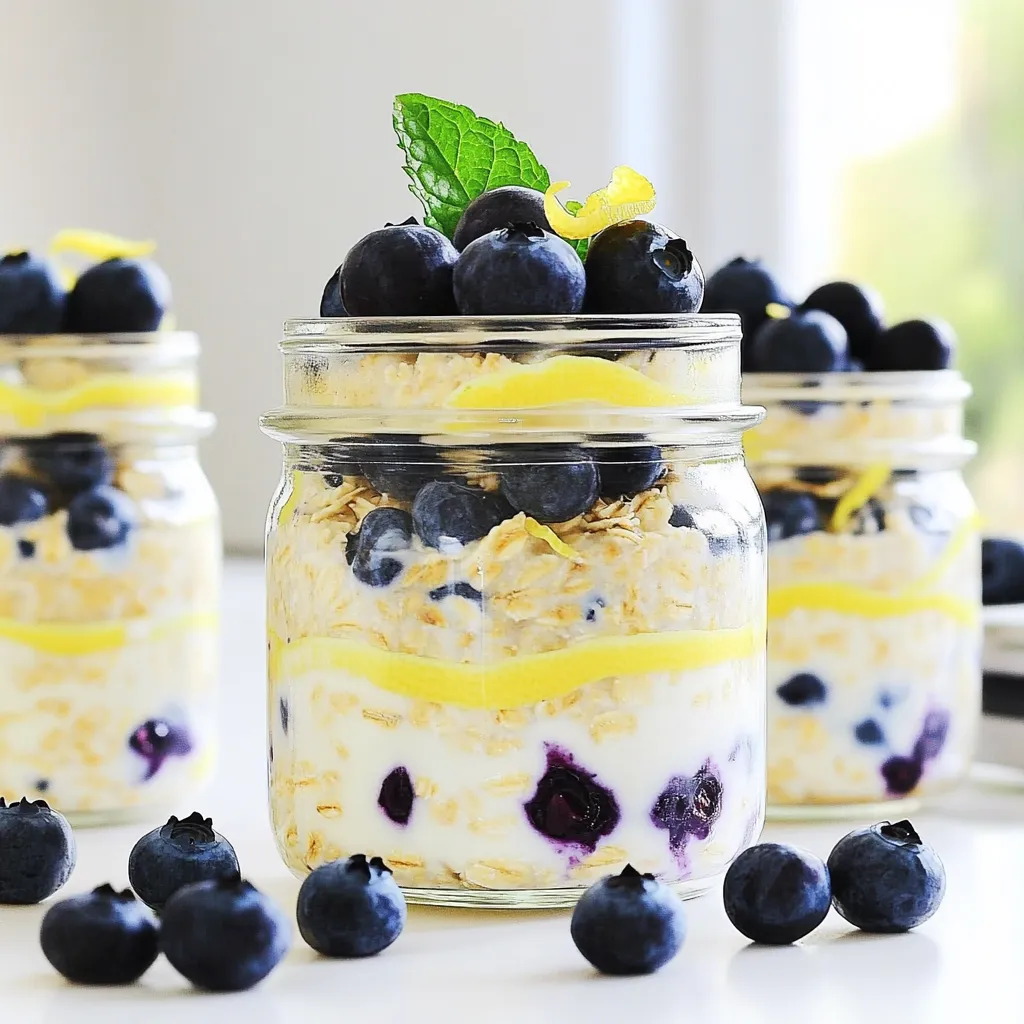
Want a bright and healthy start to your day? Blueberry Lemon Overnight Oats are your answer! Packed with berries and

- 4 medium sweet potatoes - 2 cups shredded cooked chicken - ½ cup buffalo sauce - ½ cup Greek yogurt or sour cream - 1 cup shredded cheddar cheese - ¼ cup green onions, sliced - Salt and pepper to taste - Olive oil for drizzling - Baking sheet - Mixing bowl - Fork - Calories: 400 - Protein: 30g - Total Fat: 15g - Carbohydrates: 45g - Fiber: 6g Sweet potatoes are great. They are sweet, filling, and packed with nutrients. When you fill them with buffalo chicken, you create a tasty meal. This dish is easy to make and fun to eat. The crunchy outside and soft inside make each bite a delight. You will need to bake the sweet potatoes until they are soft. Use a fork to pierce the skin. This helps the steam escape. Olive oil and a sprinkle of salt add flavor. Once baked, you scoop out a bit of the flesh to make room for the chicken filling. For the filling, mix cooked chicken with buffalo sauce. Adjust the heat to your liking. Some like it spicy; others prefer it mild. Stir in half of the cheese for creaminess. After you fill the sweet potatoes, top them with more cheese. Baking them again allows the cheese to melt. The last step is to add a dollop of yogurt and some green onions on top. This gives a fresh touch. Buffalo chicken stuffed sweet potatoes are perfect for lunch or dinner. They are filling, tasty, and simple. Enjoy making this dish! - Preheat your oven to 400°F (200°C). - Wash the sweet potatoes well and dry them with a towel. - Pierce each potato several times with a fork. Rub them with olive oil and sprinkle with salt. - Place the sweet potatoes on a baking sheet. - Bake them for about 45-60 minutes. They should be tender when pierced with a fork. - In a mixing bowl, combine the shredded chicken with buffalo sauce. - Adjust the amount of sauce based on your spice preference. Mix it in well. - Stir in half of the shredded cheddar cheese into the mixture. - Once the sweet potatoes are cooked, take them out of the oven. - Let them cool for a few minutes before cutting them in half lengthwise. - Gently scoop out some of the flesh to make room for the filling. - Spoon the buffalo chicken mixture into each potato half, packing it in lightly. - Sprinkle the remaining cheddar cheese on top of the stuffed sweet potatoes. - Return them to the oven and bake for an additional 10-15 minutes. - Bake until the cheese is melted and bubbly. - Top each potato with a dollop of Greek yogurt or sour cream. - Garnish with sliced green onions and add salt and pepper to taste. To make your Buffalo Chicken Stuffed Sweet Potatoes milder, use less buffalo sauce. You can also mix in some Greek yogurt or sour cream. This will cool down the heat. If you crave more spice, add extra buffalo sauce. You can also sprinkle in red pepper flakes for a kick. You can cook sweet potatoes in different ways. If you want a quicker option, try the microwave. Just wash and pierce them, then microwave for 10-12 minutes. Turn them halfway through for even cooking. For the oven, stick with the original baking method. Both ways yield sweet, soft potatoes. If you wish to change the cheese, there are many options. You can use mozzarella for a milder flavor. Pepper jack cheese adds heat and creaminess. For a dairy-free choice, try nutritional yeast or a vegan cheese. Each option gives a unique taste to your dish. {{image_2}} You can swap chicken for other proteins. Tofu works well for a plant-based option. It soaks up flavors nicely. Try using shredded jackfruit for a unique texture. For dairy-free meals, use coconut yogurt instead of Greek yogurt. Nutritional yeast can replace cheese for a cheesy taste without dairy. Experiment with different hot sauces like sriracha or chipotle sauce. You can also add spices like smoked paprika or garlic powder to the chicken mix. For toppings, consider crispy bacon or diced avocado. Chopped jalapeños add heat, while fresh cilantro gives a fresh twist. Pair your stuffed sweet potatoes with a fresh salad or roasted veggies. Serve with dips like ranch or guacamole for extra flavor. A side of tortilla chips offers a crunchy contrast. For a hearty meal, add black beans or corn to the mix. To store leftovers, let the stuffed sweet potatoes cool first. Place them in an airtight container. They will stay fresh in the fridge for about 3 to 4 days. If you want to keep them longer, freeze them instead. For freezing, wrap each stuffed sweet potato in plastic wrap. Then, place them in a freezer-safe bag or container. They can last up to 3 months in the freezer. Label them with the date to track their freshness. To reheat, the best way is to bake them. Preheat your oven to 350°F (175°C). Place the sweet potatoes on a baking sheet. Bake for about 20 to 25 minutes. This method keeps the skin crispy and the filling warm. You can also microwave them if you're short on time. Just cover with a damp paper towel and heat for 2-3 minutes, but this may make the skin soft. Buffalo Chicken Stuffed Sweet Potatoes can last about 3 to 5 days in the fridge. Store them in an airtight container to keep them fresh. When you're ready to eat, simply reheat them in the oven or microwave. Yes, you can prepare these sweet potatoes ahead of time. Bake the sweet potatoes and prepare the buffalo chicken filling. Store both separately in the fridge. When you're ready, just stuff the potatoes and bake them with cheese on top. If you don’t have Greek yogurt, sour cream is a great substitute. You can also use plain yogurt or a dairy-free option like cashew cream. Each of these will still give your stuffed sweet potatoes that creamy touch. No, you should not use raw sweet potatoes. They need to be cooked until tender. Baking them at 400°F (200°C) for 45 to 60 minutes makes them soft and ready for stuffing. Buffalo Chicken Stuffed Sweet Potatoes are an easy and tasty meal. You need just a few simple ingredients and steps to make this dish. From baking sweet potatoes to mixing the filling, it's all straightforward. Don’t forget tips for spice levels and ingredient swaps. Enjoy this dish fresh or as leftovers. It’s versatile and satisfying. I hope you try it soon and explore your own variations!

Buffalo Chicken Stuffed Sweet Potatoes Crispy Delight

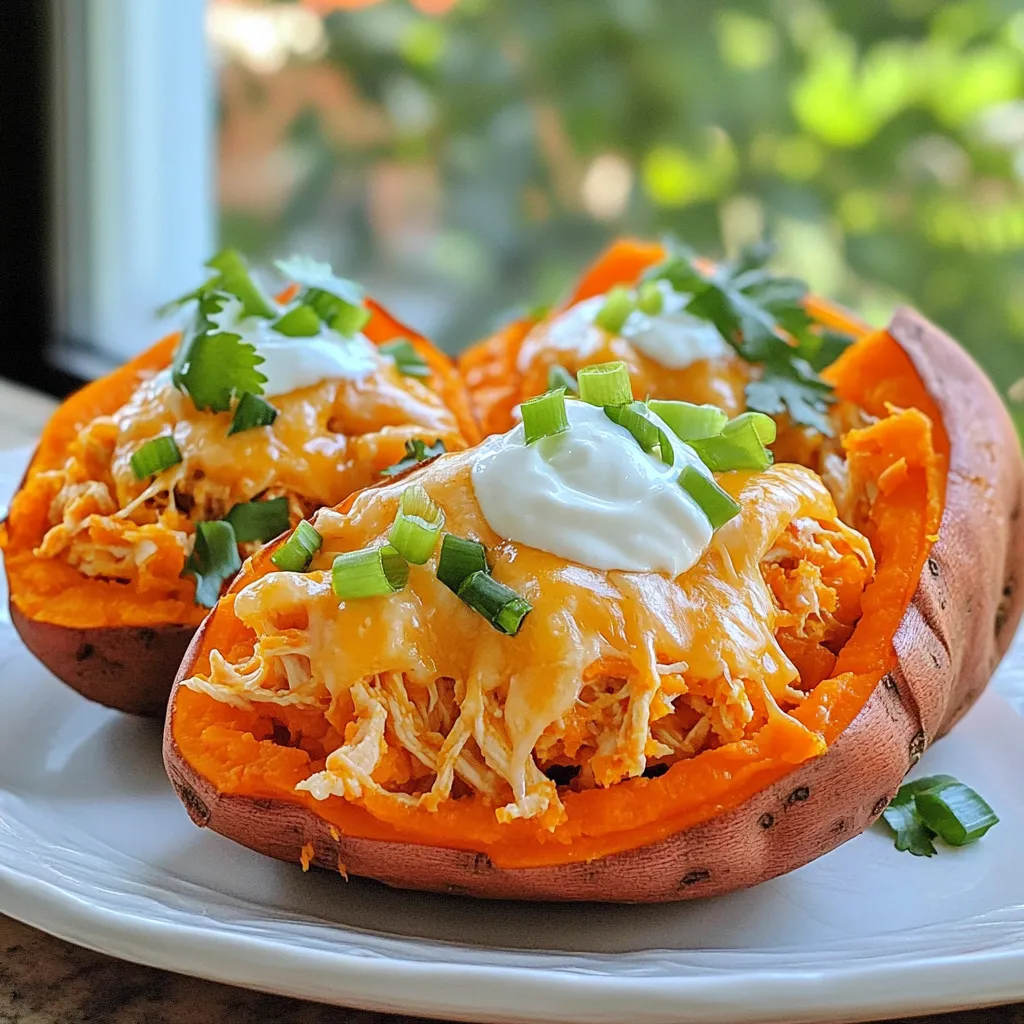
Are you ready to spice up your dinner with a tasty twist? Buffalo Chicken Stuffed Sweet Potatoes are a game-changer.

- 2 boneless, skinless chicken thighs, thinly sliced - 1 onion, thinly sliced - 2 cups cabbage, shredded - 1 carrot, julienned - 1 bell pepper, sliced (any color) - 3 green onions, chopped - 4 cups cooked yakisoba noodles (or any stir-fry noodles) For a great Chicken Yakisoba, I always use chicken thighs. They are juicy and tender. I slice them thin to cook quickly. The veggies I choose add color and crunch. Cabbage, onion, carrot, and bell pepper work well together. Green onions give a fresh taste and nice look. Using cooked yakisoba noodles makes the dish easy and quick. - 2 tablespoons soy sauce - 1 tablespoon oyster sauce (or mushroom sauce for a vegetarian option) - 1 tablespoon mirin (optional) - 1 teaspoon sesame oil - Salt and pepper to taste Sauces make this dish pop. Soy sauce adds saltiness and depth. Oyster sauce gives a rich umami flavor. You can use mushroom sauce if you want a veggie dish. Mirin adds a sweet touch, but it's optional. Sesame oil brings a nutty aroma. I also season with salt and pepper for balance. - Vegetarian substitutes like tofu or tempeh - Add-ins such as mushrooms or additional vegetables Feel free to make this dish your own. If you want it vegetarian, swap chicken for tofu or tempeh. Mushrooms add an earthy flavor, while extra veggies keep it vibrant. You can mix and match to suit your taste. The goal is to enjoy a meal that feels personal and satisfying. {{ingredient_image_1}} First, heat 1 tablespoon of vegetable oil in a large wok or skillet. I like to use medium-high heat for a good sear. Once the oil is hot, add the thinly sliced chicken thighs. Season them with salt and pepper. Stir-fry the chicken for about 5 to 7 minutes. You want the chicken to be fully cooked and no longer pink. Remove the chicken from the pan and set it aside. This keeps it juicy and ready for later. In the same pan, add your sliced onion, bell pepper, and julienned carrot. Stir-fry these for 3 to 4 minutes. You want them to soften but still be crisp. Next, add the shredded cabbage and minced garlic. This mix adds flavor and color. Cook for another 2 to 3 minutes until the cabbage wilts. This order helps each veggie cook just right. Now it's time to combine everything. Return the cooked chicken to the pan. Add in the 4 cups of cooked yakisoba noodles. Pour in 2 tablespoons of soy sauce, 1 tablespoon of oyster sauce, and if you like, 1 tablespoon of mirin. Drizzle 1 teaspoon of sesame oil over the top. Toss everything well for about 2 to 3 minutes. This ensures the noodles soak up all the tasty flavors. Finally, add the chopped green onions and give it one last toss. Now you have a colorful, flavorful dish! To make your chicken yakisoba shine, seasoning is key. Use salt and pepper on the chicken as it cooks. This simple step brings out the meat's natural taste. Using fresh ingredients is also important. Fresh vegetables add crunch and flavor. Try to use crisp cabbage, bright bell peppers, and aromatic green onions. They all enhance the dish's overall taste. For stir-frying, I recommend using a large wok or skillet. A wide surface allows food to cook evenly. Heat it over medium-high heat for best results. Adjust cooking times based on your equipment. If your pan is small, cook in batches. This helps avoid steaming the food. Stir-fry the chicken until it is golden brown. Cook the veggies until they are tender but still vibrant. Presentation matters! Serve your yakisoba in large bowls. Top each bowl with extra green onions and a sprinkle of sesame seeds. This adds color and texture. For sides, consider serving it with a light salad or steamed edamame. A refreshing drink, like iced green tea, pairs well too. These options complement the rich flavors of the dish. Pro Tips Use Fresh Ingredients: Fresh vegetables and high-quality chicken will enhance the flavors of your yakisoba significantly. Customize Your Veggies: Feel free to switch up the vegetables based on what you have on hand or your personal preferences. Perfectly Cooked Noodles: Make sure your yakisoba noodles are cooked al dente to maintain a great texture when stir-fried. Balance Your Sauces: Adjust the soy sauce and oyster sauce to taste, ensuring a perfect balance of saltiness and umami in your dish. {{image_2}} You can switch out chicken for shrimp or beef. Shrimp cooks fast and adds a nice flavor. Use peeled and deveined shrimp, and stir-fry them until pink. For beef, thinly slice it against the grain. Sauté until browned for a savory twist. If you want a vegan version, try tofu or tempeh. Tofu should be firm and pressed to reduce water. Cut it into cubes and pan-fry until golden. Tempeh has a nutty taste. Slice it thinly and fry until crispy for added texture. You can spice up your yakisoba with chili or ginger. Fresh ginger adds warmth and zest. Grate a bit and add it with the garlic for a fragrant kick. If you like heat, add some sliced chili peppers or chili paste. For sweeter flavors, use teriyaki sauce. It gives a nice glaze and sweetness. You can mix it with soy sauce to balance flavors. Drizzle it on top just before serving for a shiny finish. While yakisoba noodles are great, you can use other types too. Udon or rice noodles work well in this dish. Just cook them according to the package and toss them in. If you need gluten-free options, look for rice noodles made from rice flour. They are easy to find in stores. Cook them as directed, and they will soak up the flavors nicely. After you finish your meal, store any leftovers right away. Put the Chicken Yakisoba in an airtight container. This keeps it fresh and tasty. You can safely refrigerate it for up to four days. If you wait longer, it might lose its flavor and texture. When it's time to reheat, you have two great options: the microwave or the stovetop. For the microwave, heat in short bursts. Stir after each minute to avoid hot spots. This method is fast but can make the noodles soggy if overcooked. Using the stovetop is my favorite. Heat a bit of oil in a pan over medium heat. Add the yakisoba, stirring gently. This helps keep the noodles firm and tasty. Add a splash of soy sauce if it seems dry. Yes, you can freeze Chicken Yakisoba! Just make sure it cools completely before packing it up. Use a freezer-safe container or bag. This will protect the dish from freezer burn. It can last up to three months in the freezer. When you're ready to eat it, thaw it in the fridge overnight. To reheat, use the stovetop method for the best results. Just like before, add a little oil and stir gently. This way, you’ll enjoy your dish just like the first time! Yakisoba is a Japanese stir-fried noodle dish. It often features wheat noodles mixed with meat and vegetables. The dish dates back to the early 20th century. It was inspired by Chinese chow mein but has its own unique flavors. Yakisoba means "fried noodles" in Japanese. Soy sauce, Worcestershire sauce, and other seasonings give it a rich taste. This dish is popular at festivals and street food stalls in Japan. Yes, you can make Easy Chicken Yakisoba ahead of time. It's great for meal prep. Cook the chicken and veggies, then cool them. Store them in an airtight container in the fridge. You can also cook the noodles separately. When you are ready to eat, just reheat everything in a pan. Add the sauces, and enjoy a quick meal. If you can't find yakisoba noodles, use other noodles. Udon or soba noodles work well. You can also use spaghetti or ramen noodles. Just cook them according to the package instructions. Make sure to rinse them under cold water after cooking. This step keeps them from sticking together. Easy Chicken Yakisoba is not spicy by default. You can adjust the spice to your taste. If you like heat, add chili flakes or hot sauce. You can also mix in sliced jalapeños for a fresh kick. Start with a small amount and taste as you go. This way, you can find the perfect spice level for you. You’ve learned about making Easy Chicken Yakisoba, from key ingredients to cooking steps. I covered essential sauces, optional add-ins, and helpful tips for flavor. Remember, fresh ingredients make a big difference. You can easily customize this dish to suit your taste. So go ahead, make your own version! Enjoy this fun meal any time—whether it's a busy weekday or a family gathering. Your kitchen adventures with yakisoba will surely impress everyone!

Easy Chicken Yakisoba Quick and Flavorful Dish

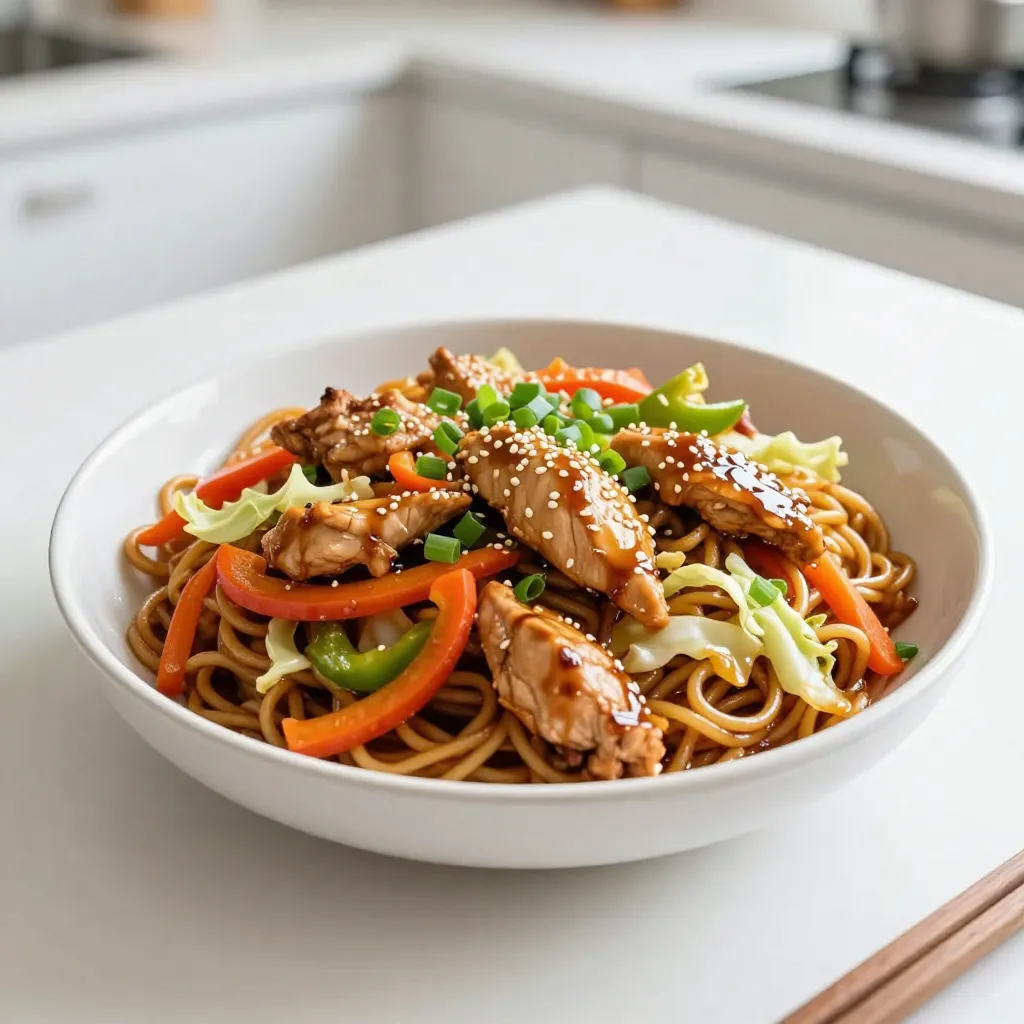
Dive into the world of Easy Chicken Yakisoba, a quick and tasty dish that fits your busy life! With tender

- 1 cup canned pumpkin puree - 1 ripe banana, frozen - 1/2 cup Greek yogurt - 1/2 cup almond milk (or any milk of your choice) - 1 tablespoon maple syrup (optional) - 1 teaspoon pumpkin pie spice - 1/2 teaspoon vanilla extract - Suggested Toppings: granola, chia seeds, sliced bananas, pecans, coconut flakes, cinnamon This list gives you the key items to whip up a tasty pumpkin pie smoothie bowl. I love using canned pumpkin puree because it’s full of flavor and saves time. A frozen banana adds creaminess and natural sweetness. Greek yogurt gives it a rich texture while almond milk keeps it smooth. You can adjust the maple syrup for sweetness. The pumpkin pie spice adds that classic fall taste. Don’t forget the vanilla extract to enhance the overall flavor! For toppings, get creative! Granola adds crunch, while chia seeds bring nutrition. Sliced bananas and pecans add more flavor and texture. Coconut flakes give a tropical hint, and a sprinkle of cinnamon completes this delightful bowl. Gather these ingredients, and you’re ready to enjoy a delicious smoothie bowl that tastes like pumpkin pie! - Combining Ingredients in the Blender Start by adding 1 cup of canned pumpkin puree into the blender. Next, add 1 ripe frozen banana. This banana adds creaminess and sweetness. Then, pour in 1/2 cup of Greek yogurt. This will give your smoothie a rich texture. After that, add 1/2 cup of almond milk. You can use any milk you like. Don’t forget 1 tablespoon of maple syrup if you want extra sweetness. Add 1 teaspoon of pumpkin pie spice for that warm flavor. Lastly, include 1/2 teaspoon of vanilla extract for a touch of sweetness. - Blending for Smooth Consistency Blend all the ingredients on high speed. Watch as the mixture starts to come together. Make sure to scrape down the sides. This helps mix all the ingredients evenly. Blend until the mixture is smooth and creamy. This should take about 30 seconds to a minute. - Adjusting Consistency as Needed Check the smoothie’s thickness. If it feels too thick, that’s okay! Just add a bit more almond milk. Blend again until it reaches your desired texture. You want it thick but pourable. - Pouring the Smoothie into a Bowl Once the smoothie is ready, carefully pour it into a bowl. Make sure to leave some space at the top for toppings. - Arranging Toppings Creatively Now comes the fun part! Start with a layer of granola for crunch. Next, add sliced bananas for a fruity touch. Sprinkle some chia seeds for extra nutrition. Then, toss on chopped pecans for a nutty flavor. Don’t forget coconut flakes for a tropical vibe! Finally, finish with a light dusting of cinnamon. This adds warmth and makes your bowl look beautiful. Enjoy your delicious creation! Tips for Achieving the Right Consistency To get the perfect smoothie bowl, focus on the blend. Start with the pumpkin puree, frozen banana, and Greek yogurt. Blend these first to create a thick base. If it feels too thick, add almond milk slowly. This will help it mix well without losing creaminess. A good rule is to keep the mixture thick but smooth. You want it almost like soft ice cream. This ensures your toppings stay on top! Best Practices for Topping Arrangement Arranging toppings can turn your smoothie bowl into art. Start with a layer of granola at the bottom. This adds a nice crunch. Then, add sliced bananas in a fan shape. Sprinkle chia seeds evenly across the top for texture. Next, add chopped pecans for a nutty flavor. Finally, finish with coconut flakes and a dusting of cinnamon. This not only looks good but also creates layers of flavor. How to Increase Sweetness Naturally To sweeten your smoothie bowl, use ripe bananas. They add natural sweetness. If you want more, drizzle a little maple syrup on top. This adds flavor without being too sugary. You can also try adding a hint of honey or agave syrup. Just remember to taste as you go! Experimenting with Spice Levels Spice can take your smoothie bowl to the next level. Pumpkin pie spice is already a great start. If you love warmth, add a bit more. You can also try adding a pinch of nutmeg or ginger for a twist. Each spice brings its own flavor and warmth. Don't be afraid to mix and match to find what you love! {{image_2}} Alternative Milk Options You can switch almond milk for your favorite milk. Try oat milk, coconut milk, or soy milk. Each milk brings a unique taste to your smoothie bowl. For a creamier texture, use whole milk or cashew milk. Experimenting with milk options can change the whole vibe of your bowl! Adding Protein Powder or Nut Butter Want to boost the protein? Add a scoop of your favorite protein powder. Vanilla or chocolate flavors work great. You can also stir in a spoonful of nut butter. Almond or peanut butter adds creaminess and a nutty taste. This swap makes your smoothie bowl even more filling. Incorporating Other Fall Flavors While pumpkin shines, other fall flavors can join the party! Try adding a bit of apple or pear puree for a fruity twist. You can also mix in some chopped dates for added sweetness. If you like spice, try adding a pinch of nutmeg or ginger. These flavors will make your smoothie bowl feel warm and cozy, just like autumn! To keep your pumpkin pie smoothie bowl fresh, use airtight containers. Glass jars or plastic containers with tight lids work well. These containers help prevent air from getting in and changing the taste. You can store the leftover smoothie in the fridge for up to two days. However, for the best taste and texture, enjoy it within one day. If you notice any separation, just give it a good stir before eating. If you want to save the smoothie for later, freezing is a great choice. First, pour the smoothie into ice cube trays or freezer-safe bags. Leave some space in the bags, as liquids expand when frozen. To enjoy your frozen smoothie, thaw it in the fridge overnight or leave it out for a few hours. You can also blend the frozen cubes with a splash of almond milk for a quick treat. This way, you get a thick, creamy smoothie bowl whenever you crave it! Yes, you can make this smoothie bowl vegan. Use coconut yogurt instead of Greek yogurt. Swap almond milk for any plant-based milk. This keeps the creamy texture and rich flavor. If you want a dairy-free option, use coconut yogurt or soy yogurt. Both will give a similar creaminess. You can also try silken tofu for added protein and smoothness. You can prepare the smoothie mix ahead. Blend all the ingredients and store in the fridge. When you are ready, pour it in a bowl and add toppings. This saves time and still tastes fresh. Absolutely! Just use oat milk or rice milk instead of almond milk. Avoid adding nuts for toppings too. Use seeds or fruits for crunch and flavor. This keeps your bowl nut-free and delicious. This blog post covers how to make a tasty and healthy smoothie bowl. We discussed key ingredients like pumpkin puree and banana, plus the steps to blend them into a smooth mix. I shared tips for perfecting your bowl and ways to switch it up with different flavors and toppings. Remember to store any leftovers wisely to keep them fresh. Smoothie bowls are fun and versatile, so don’t hesitate to get creative! Enjoy experimenting and finding your favorite mix.

Pumpkin Pie Smoothie Bowl Rich and Creamy Delight

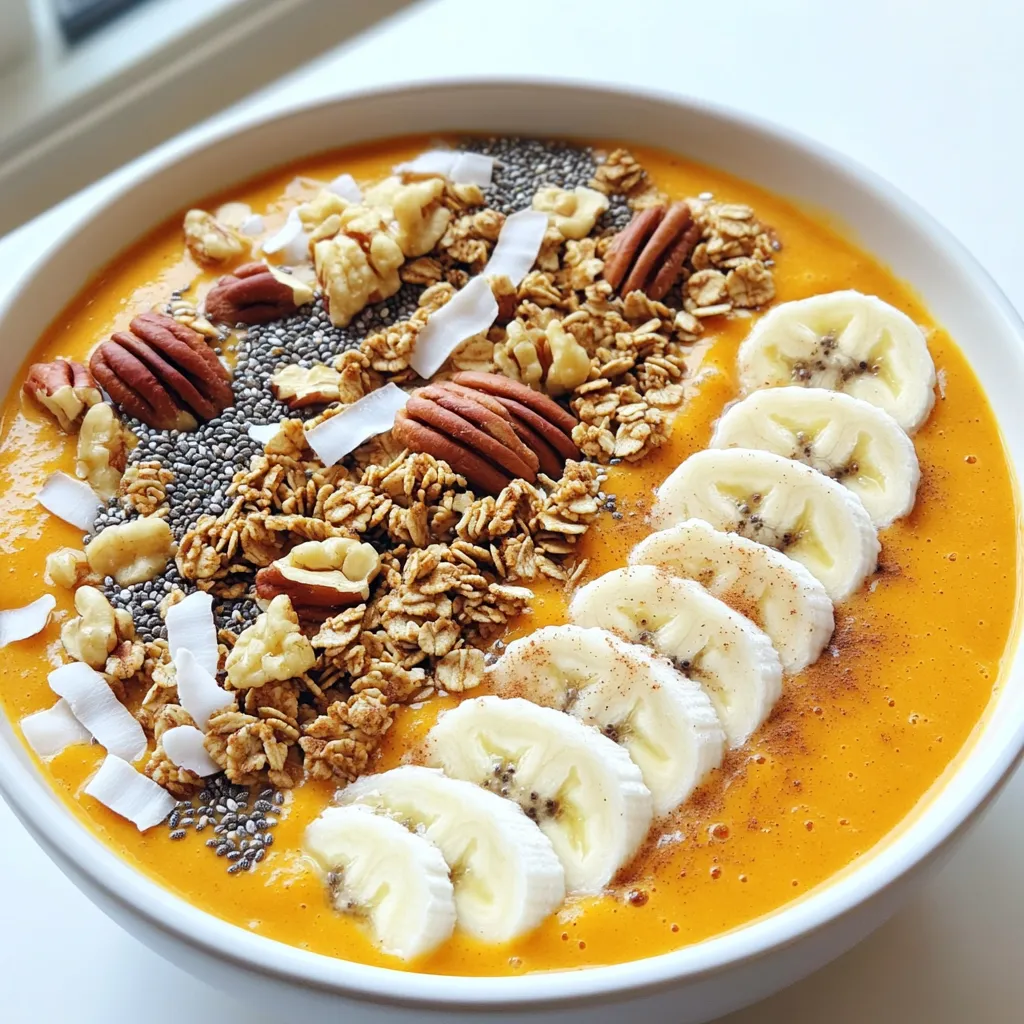
Looking for a creamy treat packed with fall flavors? Dive into my Pumpkin Pie Smoothie Bowl! It’s rich, delicious, and

Older posts
Newer posts
← Previous Page1 Page2 Page3 Page4 … Page84 Next →

dsad

© 2026 Home Cooking Style • Built with GeneratePress

Our Policies

  • Copyright Policy
  • Cookie Policy
  • GDPR Policy
  • Privacy Policy
  • Disclaimer
  • Terms Of Use

More Information

  • Home
  • About
  • Contact
  • Appetizers
  • Dessert
  • Dinner
  • Drinks
©2026, Home Cooking Style About Back To Top