Are you ready to whip up a treat that’s both sweet and tangy? Strawberry Lemonade Crumble Bars are the perfect dessert for any occasion. With a buttery crust, vibrant strawberry filling, and a crumbly topping, these bars are simple to make and downright delicious. In this blog post, I will guide you through easy steps, helpful tips, and tasty variations. Let’s turn your kitchen into a haven of flavor!
Ingredients
List of Ingredients
– Key Ingredients: Flour, Oats, Brown Sugar, and More
– 1 cup all-purpose flour
– 1/2 cup rolled oats
– 1/3 cup brown sugar
– 1/2 teaspoon baking powder
– 1/4 teaspoon salt
– 1/2 cup cold butter, cubed
– 1/4 cup granulated sugar
– 1 tablespoon lemon zest
– 2 tablespoons lemon juice
– 2 cups fresh strawberries, hulled and chopped
– 1 tablespoon cornstarch
– 1 teaspoon vanilla extract
The key ingredients in these bars create a lovely balance of flavors. The flour and oats form a sturdy base. Brown sugar adds a rich sweetness. The baking powder and salt help the crust rise. Cold butter gives the crumble its flaky texture.
– Optional Ingredients for Added Flavor
– A pinch of cinnamon for warmth
– A handful of chopped nuts for crunch
You can add a pinch of cinnamon to enhance the flavor. Chopped nuts can add great texture and taste. Feel free to mix and match as you like!
Step-by-Step Instructions
Preparation Steps
– Preheating Oven and Preparing the Baking Dish
First, preheat your oven to 350°F (175°C). This step is key to getting the bars just right. Next, grease an 8×8-inch baking dish or line it with parchment paper. Lining makes it easy to remove the bars later.
– Mixing Dry Ingredients and Preparing the Crust
In a medium bowl, mix together the flour, rolled oats, brown sugar, baking powder, and salt. This mixture forms the base for your crust. Then, add the cold butter. Use your fingers or a pastry cutter to blend until the mixture looks crumbly. Set aside about 1/2 cup of this mixture for the topping.
– Making the Strawberry Filling
In another bowl, combine the chopped strawberries, granulated sugar, lemon zest, lemon juice, cornstarch, and vanilla extract. Toss gently to coat the strawberries. This mixture will add a bright flavor to your bars.
Baking Process
– Assembling the Crumble Bars
Press the remaining crust mixture firmly into the bottom of your prepared dish. Make sure it’s even. Bake this crust for 10-12 minutes until it is lightly golden.
– Baking Time and Techniques
After removing the crust from the oven, spread the strawberry mixture evenly over it. Then, sprinkle the reserved crumble mixture on top of the strawberries. This will create a delicious topping. Return to the oven and bake for another 25-30 minutes, or until the topping is golden and the strawberry filling is bubbly.
– Cooling Tips for Best Results
Once baked, allow the bars to cool completely in the dish. This helps them set and makes slicing easier. It’s hard to wait, but this step is important for the best texture.
Tips & Tricks
Best Practices for Perfect Bars
– Ensuring the Right Texture: To get a perfect crust, use cold butter. Cold butter helps create a crumbly texture. When mixing, don’t overwork the dough. Just blend until it looks sandy. For the topping, make sure to reserve half of the mixture. This adds a nice crunchy layer on top.
– How to Get the Perfect Strawberry Filling: Use fresh strawberries for the best flavor. Make sure to chop them into small pieces. This helps them cook evenly. Mixing them with sugar and lemon juice brings out their natural sweetness. The cornstarch thickens the filling, so it doesn’t run.
Common Mistakes to Avoid
– Overmixing or Undermixing Ingredients: Be careful not to mix too much. Overmixing can make the crust tough. If you under-mix, the crust may break apart. Aim for a crumbly texture that holds together but feels light.
– Baking Time: How to Know When They’re Done: Keep an eye on the color. The topping should turn golden brown. You can also check for bubbling around the edges. This means the filling is hot and ready. Let the bars cool completely before slicing. This helps them hold their shape.
Variations
Alternate Flavor Combinations
You can have fun by adding other fruits to your crumble bars. Raspberries, blueberries, or peaches will work great. Each fruit adds a new twist to the flavor. Raspberries give a nice tartness. Blueberries add sweetness, while peaches bring a juicy touch.
You can also try different citrus flavors. Think about lime or orange instead of lemon. Each choice will change the taste. Lime will add a bright, zesty kick. Orange will bring a sweeter, floral note. Mixing and matching flavors keeps things interesting and fun.
Dietary Adjustments
If you need gluten-free options, you can easily switch the flour. Use a gluten-free flour blend to replace all-purpose flour. This keeps the texture nice without gluten. You can also use oats that are certified gluten-free.
For vegan bars, replace the butter with coconut oil or vegan butter. This keeps the bars rich and tasty. You can also use flaxseed meal mixed with water instead of eggs, if needed.
Looking for healthier bars? You can swap out sugar for natural sweeteners. Try using maple syrup, honey, or agave. They can lower the refined sugar in your recipe. You will still get a sweet taste without the guilt.
These easy adjustments make the bars suit different diets. Enjoy experimenting with flavors and ingredients!
Storage Info
Proper Storage Techniques
To keep your Strawberry Lemonade Crumble Bars fresh, store them in an airtight container. This will help maintain their taste and texture. You can store them at room temperature for up to three days. If you want to keep them longer, refrigerate them. They will last about a week in the fridge.
For longer storage, freezing is a great option. Wrap each bar tightly in plastic wrap. Then, place them in a freezer-safe bag or container. This way, they can last for up to three months. To eat, simply thaw them in the fridge overnight.
Reheating Recommendations
To enjoy your bars at their best, reheat them gently. Preheat your oven to 350°F (175°C). Place the bars on a baking sheet. Heat for about 10 minutes. This method keeps the crust crisp and the filling warm.
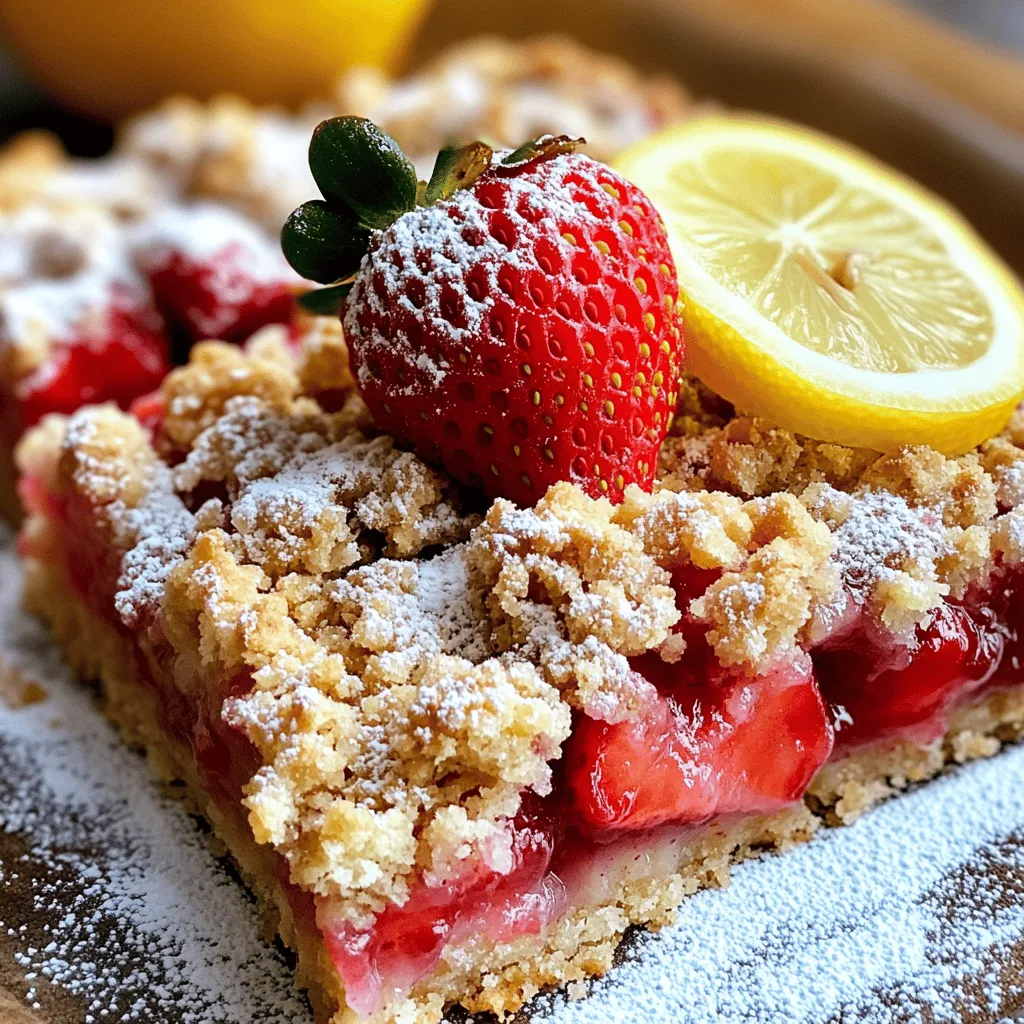
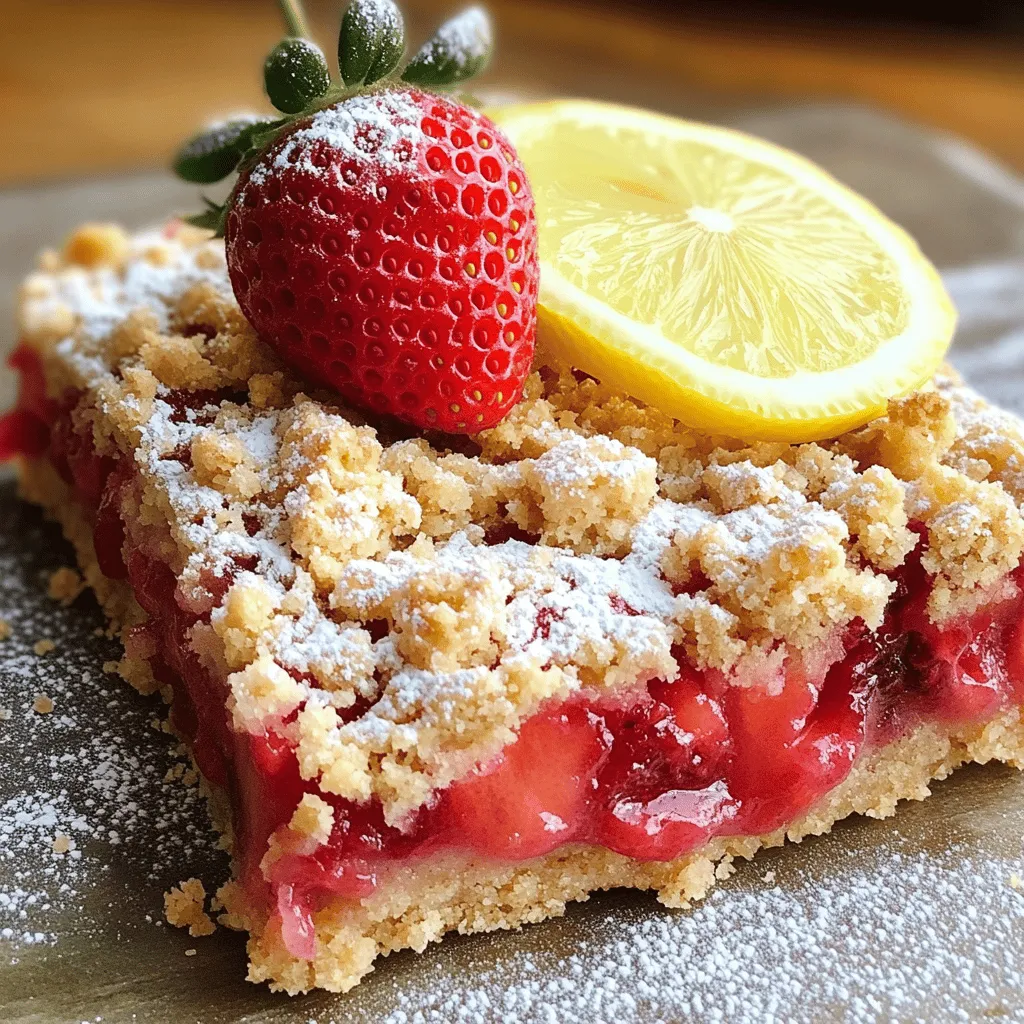
After storage, serve the bars with a dusting of powdered sugar. A slice of lemon or a fresh strawberry on top adds a nice touch. You can also pair them with a scoop of vanilla ice cream for extra indulgence.
FAQs
Common Questions About Strawberry Lemonade Crumble Bars
How can I adjust the sweetness of the bars?
You can easily change the sweetness by adding more or less sugar. If you want a sweeter bar, increase the granulated sugar in the filling. For a less sweet option, reduce the sugar in both the filling and crust. Taste the strawberry mixture before baking to find your perfect balance.
Can I use frozen strawberries instead of fresh ones?
Yes, you can use frozen strawberries! Just thaw them first and drain any excess juice. This will keep the filling from becoming too watery. Frozen berries work well, but fresh strawberries usually taste better in this recipe.
How do I know when the crumble bars are fully baked?
Look for a golden topping and bubbling filling. The edges should pull away from the pan slightly. A toothpick inserted in the center should come out clean or with a few crumbs. If you see any liquid, give it a few more minutes in the oven.
Additional Recipe Questions
What is the best way to serve these bars?
Serve them chilled or at room temperature. Dust with powdered sugar for a pretty touch. You can also add a slice of lemon or a fresh strawberry on top for extra flair.
Can I make these bars ahead of time?
Absolutely! These bars keep well in the fridge for up to five days. Just store them in an airtight container. They also freeze well, so you can make a batch for later.
What other desserts pair well with Strawberry Lemonade Crumble Bars?
These bars go great with vanilla ice cream or whipped cream. You could also serve them with a light fruit salad or a refreshing sorbet. They complement summer desserts beautifully!
This blog post explored making Strawberry Lemonade Crumble Bars. We discussed the key ingredients, steps for preparation, and how to achieve the perfect texture. You learned tips to avoid common mistakes and tried various flavor combinations through easy substitutions. Knowing how to store and reheat these bars helps keep them fresh. These delightful treats are flexible, letting you create your own twist. Now, you can enjoy these tasty bars any time by following the guidance shared. Happy baking!