S’mores No-Bake Cheesecake Delightful and Easy Recipe

WANT TO SAVE THIS RECIPE?


Save It

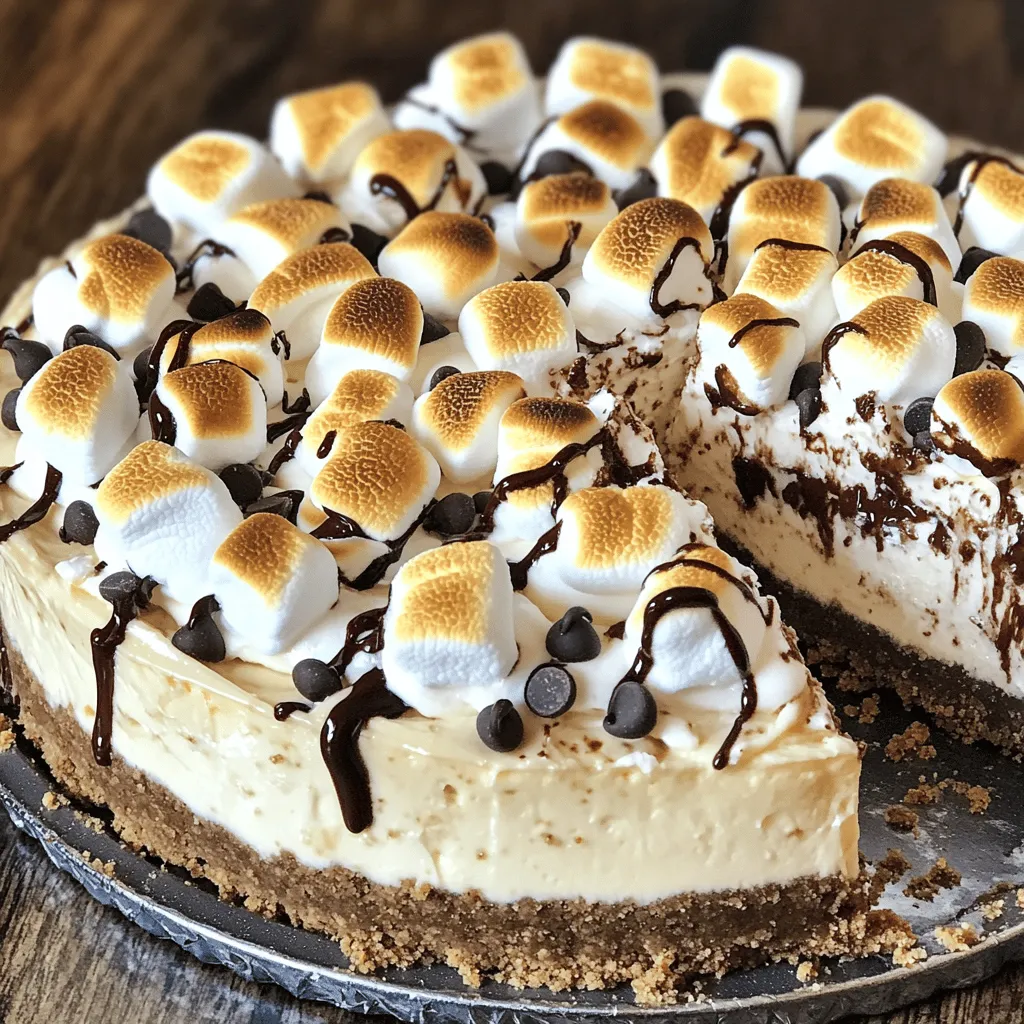
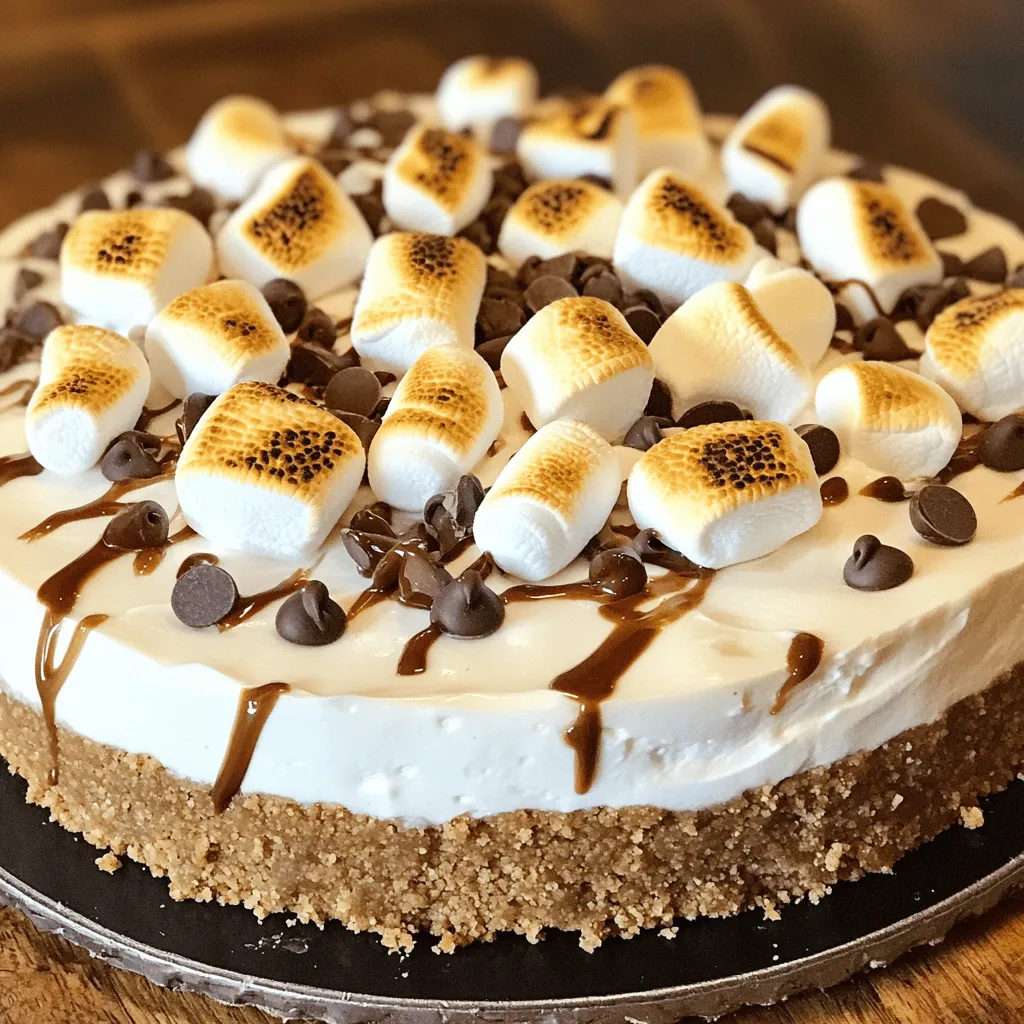
Craving a sweet treat that’s easy and delicious? I’ve got you covered with my S’mores No-Bake Cheesecake! This recipe brings all the campfire flavors to your kitchen without the fuss of baking. You’ll enjoy a creamy filling topped with gooey marshmallows and crunchy graham crackers. Plus, it’s simple enough that anyone can make it. Let’s dive in and create this delightful dessert together!

Ingredients

List of Ingredients for S’mores No-Bake Cheesecake

– 1 ½ cups graham cracker crumbs

– ½ cup unsalted butter, melted

– 2 tablespoons brown sugar

– 16 oz cream cheese, softened

– 1 cup powdered sugar

– 1 teaspoon vanilla extract

– 1 cup heavy whipping cream

– 1 cup mini marshmallows

– ½ cup chocolate chips (semi-sweet or milk chocolate)

– Additional mini marshmallows and chocolate shavings for topping

Measurement Guide

When you measure ingredients, use dry measuring cups for solids. This helps ensure accurate amounts. For butter, use a liquid measuring cup if melted. It’s best to pack brown sugar tightly in the cup. Cream cheese should be soft for easy mixing.

Substitutions and Alternatives for Ingredients

You can swap graham crackers with chocolate cookies for a richer crust. Use dairy-free butter for a vegan option. If you need a sugar-free version, try using a sugar substitute like erythritol. For the cream cheese, vegan cream cheese works well. You can also replace mini marshmallows with whipped coconut cream for a lighter touch. Use any chocolate you prefer, like dark or white chocolate, for a different flavor twist.

Step-by-Step Instructions

Preparation of the Crust

First, gather your ingredients for the crust. You need graham cracker crumbs, melted butter, and brown sugar. In a medium bowl, mix the crumbs, butter, and sugar until crumbly. Make sure it sticks together when you pinch it. Press this mixture evenly into the bottom of a 9-inch springform pan. Use a flat bottom to pack it tightly. Place the crust in the refrigerator to firm up while you work on the filling.

Making the Cream Cheese Filling

Now it’s time for the filling. In a large mixing bowl, beat the softened cream cheese. Do this on medium speed for about three minutes. It should be smooth and creamy. Slowly add in the powdered sugar and vanilla extract. Keep beating until it blends well. In a separate bowl, whip the heavy cream until it forms stiff peaks. Gently fold the whipped cream into the cream cheese mixture. Add the mini marshmallows and chocolate chips. Fold these in carefully so the mixture stays fluffy.

Assembling and Refrigerating the Cheesecake

Pour the cream cheese filling into your prepared crust. Use a spatula to smooth the top flat. Cover the cheesecake with plastic wrap and place it in the fridge. Let it chill for at least 4-6 hours, but overnight is best. This step allows the cheesecake to set properly. Before serving, you can add a fun touch. Use a kitchen torch to toast extra mini marshmallows on top or broil them in the oven for a few seconds. Just watch closely so they don’t burn! Finally, garnish with chocolate shavings and enjoy your tasty treat.

Tips & Tricks

How to Achieve the Perfect Consistency

To get a smooth and creamy cheesecake, start with soft cream cheese. Let it sit at room temperature for about 30 minutes before mixing. This helps blend it well. When you add the whipped cream, fold it gently. This keeps your filling light and fluffy. If you mix too hard, it can deflate.

Common Mistakes to Avoid

One common mistake is not chilling the crust long enough. If the crust is warm, the filling can become too soft. Always chill it for at least 30 minutes. Another mistake is not using enough cream cheese. Make sure you use the full 16 oz for the best taste. Lastly, don’t skip the chilling time for the cheesecake. It needs at least 4-6 hours to set.

Ways to Enhance Flavor Experience

To boost flavors, use high-quality chocolate chips. They add richness. You can also try adding a pinch of sea salt. This brings out the sweetness. For a twist, add a splash of almond extract with the vanilla. It adds a nice depth. Don’t forget to toast the extra mini marshmallows before serving. This gives a smoky touch that pairs well with the sweet cheesecake.

Variations

Gluten-Free S’mores No-Bake Cheesecake

To make a gluten-free version, swap regular graham crackers for gluten-free ones. You can find these at most grocery stores. The rest of the recipe stays the same. The flavor remains delicious, and everyone can enjoy it!

Vegan Adaptations

For a vegan s’mores cheesecake, use vegan cream cheese instead of regular cream cheese. Also, replace heavy cream with coconut cream. Use maple syrup instead of powdered sugar for sweetness. Mini vegan marshmallows and dairy-free chocolate chips work great here. This version is just as tasty and friendly for plant-based diets.

Flavor Variations: Chocolate Mint, Peanut Butter, etc.

You can easily change the flavor of your cheesecake. For a chocolate mint twist, add 1 teaspoon of peppermint extract to the cream cheese filling. For a peanut butter flavor, mix in ½ cup of creamy peanut butter. Both options bring a fun twist to the classic s’mores taste. Don’t be afraid to try new flavors!

Storage Info

Best Ways to Store the Cheesecake

To keep your S’mores no-bake cheesecake fresh, cover it well. Use plastic wrap or aluminum foil. You can also store it in an airtight container. This helps prevent it from drying out and keeps it tasty. Always store cheesecakes in the fridge. This dessert loves the cold!

Freezing Instructions and Tips

You can freeze the cheesecake for later. To do this, chill it first in the fridge. Once set, wrap the cheesecake tightly in plastic wrap. After this, place it in a freezer-safe container. It can last up to three months in the freezer. When ready to eat, let it thaw in the fridge overnight. This keeps the texture nice and creamy.

Shelf Life After Preparation

Your S’mores cheesecake stays good for about five days in the fridge. After that, the flavors may not taste the same. If you see any signs of spoilage, like an off smell or mold, throw it away. Always trust your senses! Enjoy this sweet treat while it’s fresh for the best taste.

FAQs

Can I use different types of chocolate?

Yes, you can use different types of chocolate. Semi-sweet and milk chocolate both work well. Dark chocolate gives a richer taste. You can even try white chocolate for a sweet twist. Just remember to adjust the sweetness if needed.

What can I do if my cheesecake doesn’t set?

If your cheesecake doesn’t set, it might need more time in the fridge. Make sure it chills for at least 4-6 hours. If it’s still soft, check the cream cheese. It should be well-beaten and smooth. You can also add more whipped cream to help it firm up.

How long before serving can I assemble the cheesecake?

You can assemble the cheesecake up to a day before serving. It needs time to chill and set properly. This also helps the flavors blend well. Just cover it tightly with plastic wrap in the fridge. It stays fresh and ready to serve when you need it.

This blog post covered the key steps to make a S’mores No-Bake Cheesecake. We looked at ingredients, measurements, and tasty substitutes. You learned how to prepare the crust and make the cream cheese filling. Tips helped you avoid mistakes and enhance flavor. We also explored gluten-free, vegan, and flavored variations. Finally, storage info ensured your cheesecake stays fresh.

Enjoy creating this delicious treat, and share it with friends and family!

- 1 ½ cups graham cracker crumbs - ½ cup unsalted butter, melted - 2 tablespoons brown sugar - 16 oz cream cheese, softened - 1 cup powdered sugar - 1 teaspoon vanilla extract - 1 cup heavy whipping cream - 1 cup mini marshmallows - ½ cup chocolate chips (semi-sweet or milk chocolate) - Additional mini marshmallows and chocolate shavings for topping When you measure ingredients, use dry measuring cups for solids. This helps ensure accurate amounts. For butter, use a liquid measuring cup if melted. It’s best to pack brown sugar tightly in the cup. Cream cheese should be soft for easy mixing. You can swap graham crackers with chocolate cookies for a richer crust. Use dairy-free butter for a vegan option. If you need a sugar-free version, try using a sugar substitute like erythritol. For the cream cheese, vegan cream cheese works well. You can also replace mini marshmallows with whipped coconut cream for a lighter touch. Use any chocolate you prefer, like dark or white chocolate, for a different flavor twist. First, gather your ingredients for the crust. You need graham cracker crumbs, melted butter, and brown sugar. In a medium bowl, mix the crumbs, butter, and sugar until crumbly. Make sure it sticks together when you pinch it. Press this mixture evenly into the bottom of a 9-inch springform pan. Use a flat bottom to pack it tightly. Place the crust in the refrigerator to firm up while you work on the filling. Now it’s time for the filling. In a large mixing bowl, beat the softened cream cheese. Do this on medium speed for about three minutes. It should be smooth and creamy. Slowly add in the powdered sugar and vanilla extract. Keep beating until it blends well. In a separate bowl, whip the heavy cream until it forms stiff peaks. Gently fold the whipped cream into the cream cheese mixture. Add the mini marshmallows and chocolate chips. Fold these in carefully so the mixture stays fluffy. Pour the cream cheese filling into your prepared crust. Use a spatula to smooth the top flat. Cover the cheesecake with plastic wrap and place it in the fridge. Let it chill for at least 4-6 hours, but overnight is best. This step allows the cheesecake to set properly. Before serving, you can add a fun touch. Use a kitchen torch to toast extra mini marshmallows on top or broil them in the oven for a few seconds. Just watch closely so they don’t burn! Finally, garnish with chocolate shavings and enjoy your tasty treat. To get a smooth and creamy cheesecake, start with soft cream cheese. Let it sit at room temperature for about 30 minutes before mixing. This helps blend it well. When you add the whipped cream, fold it gently. This keeps your filling light and fluffy. If you mix too hard, it can deflate. One common mistake is not chilling the crust long enough. If the crust is warm, the filling can become too soft. Always chill it for at least 30 minutes. Another mistake is not using enough cream cheese. Make sure you use the full 16 oz for the best taste. Lastly, don’t skip the chilling time for the cheesecake. It needs at least 4-6 hours to set. To boost flavors, use high-quality chocolate chips. They add richness. You can also try adding a pinch of sea salt. This brings out the sweetness. For a twist, add a splash of almond extract with the vanilla. It adds a nice depth. Don’t forget to toast the extra mini marshmallows before serving. This gives a smoky touch that pairs well with the sweet cheesecake. {{image_2}} To make a gluten-free version, swap regular graham crackers for gluten-free ones. You can find these at most grocery stores. The rest of the recipe stays the same. The flavor remains delicious, and everyone can enjoy it! For a vegan s'mores cheesecake, use vegan cream cheese instead of regular cream cheese. Also, replace heavy cream with coconut cream. Use maple syrup instead of powdered sugar for sweetness. Mini vegan marshmallows and dairy-free chocolate chips work great here. This version is just as tasty and friendly for plant-based diets. You can easily change the flavor of your cheesecake. For a chocolate mint twist, add 1 teaspoon of peppermint extract to the cream cheese filling. For a peanut butter flavor, mix in ½ cup of creamy peanut butter. Both options bring a fun twist to the classic s'mores taste. Don't be afraid to try new flavors! To keep your S’mores no-bake cheesecake fresh, cover it well. Use plastic wrap or aluminum foil. You can also store it in an airtight container. This helps prevent it from drying out and keeps it tasty. Always store cheesecakes in the fridge. This dessert loves the cold! You can freeze the cheesecake for later. To do this, chill it first in the fridge. Once set, wrap the cheesecake tightly in plastic wrap. After this, place it in a freezer-safe container. It can last up to three months in the freezer. When ready to eat, let it thaw in the fridge overnight. This keeps the texture nice and creamy. Your S’mores cheesecake stays good for about five days in the fridge. After that, the flavors may not taste the same. If you see any signs of spoilage, like an off smell or mold, throw it away. Always trust your senses! Enjoy this sweet treat while it’s fresh for the best taste. Yes, you can use different types of chocolate. Semi-sweet and milk chocolate both work well. Dark chocolate gives a richer taste. You can even try white chocolate for a sweet twist. Just remember to adjust the sweetness if needed. If your cheesecake doesn't set, it might need more time in the fridge. Make sure it chills for at least 4-6 hours. If it's still soft, check the cream cheese. It should be well-beaten and smooth. You can also add more whipped cream to help it firm up. You can assemble the cheesecake up to a day before serving. It needs time to chill and set properly. This also helps the flavors blend well. Just cover it tightly with plastic wrap in the fridge. It stays fresh and ready to serve when you need it. This blog post covered the key steps to make a S’mores No-Bake Cheesecake. We looked at ingredients, measurements, and tasty substitutes. You learned how to prepare the crust and make the cream cheese filling. Tips helped you avoid mistakes and enhance flavor. We also explored gluten-free, vegan, and flavored variations. Finally, storage info ensured your cheesecake stays fresh. Enjoy creating this delicious treat, and share it with friends and family!

S’mores No-Bake Cheesecake

Indulge in a delightful S'mores No-Bake Cheesecake that's perfect for any occasion! With a deliciously creamy filling, a crunchy graham cracker crust, and topped with toasted marshmallows and chocolate shavings, this dessert is a summer must-try. Easy to make and ideal for gatherings, it's sure to impress your guests.

Ingredients
  

1 ½ cups graham cracker crumbs

½ cup unsalted butter, melted

2 tablespoons brown sugar

16 oz cream cheese, softened

1 cup powdered sugar

1 teaspoon vanilla extract

1 cup heavy whipping cream

1 cup mini marshmallows

½ cup chocolate chips (semi-sweet or milk chocolate)

Additional mini marshmallows and chocolate shavings for topping

Instructions
 

In a medium bowl, combine graham cracker crumbs, melted butter, and brown sugar. Mix until crumbly and well combined.

    Press the crumb mixture evenly into the bottom of a 9-inch springform pan to create the crust. Place the crust in the refrigerator to firm up while preparing the filling.

      In a large mixing bowl, beat the softened cream cheese on medium speed until smooth and creamy, about 3 minutes.

        Gradually add the powdered sugar and vanilla extract, continuing to beat until well incorporated.

          In a separate bowl, whip the heavy cream until stiff peaks form. Gently fold the whipped cream into the cream cheese mixture until fully combined.

            Add the mini marshmallows and chocolate chips to the mixture, folding them in carefully to keep the fluffiness.

              Pour the filling into the prepared crust, smoothing the top with a spatula.

                Cover the cheesecake with plastic wrap and refrigerate for at least 4-6 hours, or until set (overnight is ideal).

                  Before serving, torch the additional mini marshmallows using a kitchen torch for a toasted effect, or broil them in the oven for a few seconds until golden—watch closely to avoid burning!

                    Garnish the cheesecake with chocolate shavings and the toasted marshmallows on top. Slowly remove the sides of the springform pan before slicing.

                      Prep Time: 30 minutes | Total Time: 6 hours | Servings: 8-10

                        - Presentation Tips: Serve slices on individual plates drizzled with chocolate sauce, and garnish with extra chocolate chips for an added touch of sweetness!

                          Leave a Comment

                          Recipe Rating