Latest & Greatest

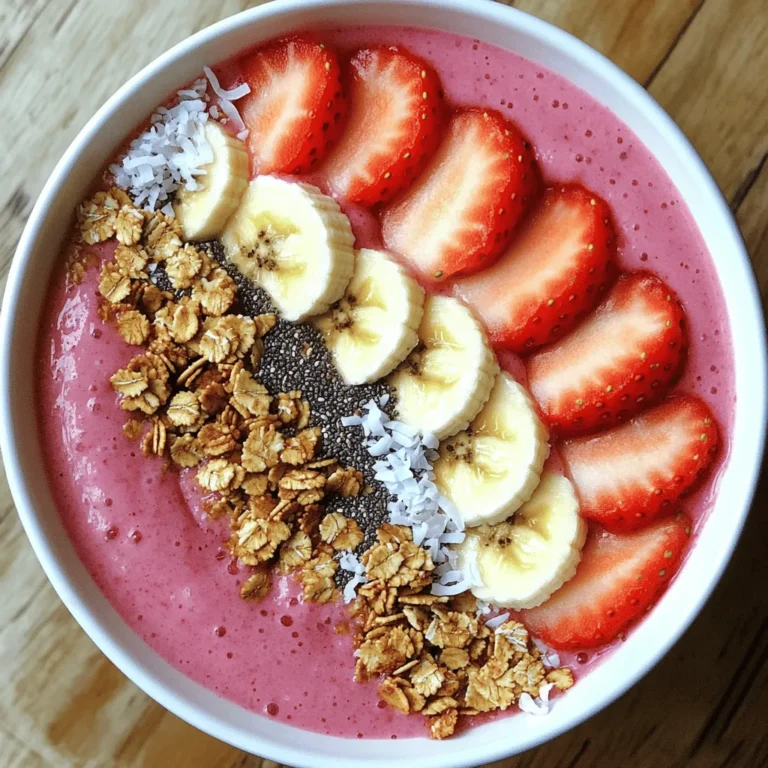
Berry Smoothie Bowl Delicious and Nutritious Treat
Do you crave a tasty treat that’s both delicious and good for you? Look no further! This Berry Smoothie Bowl
Read more…
Orange Glazed Carrots Tasty and Vibrant Side Dish
Looking for a simple but stunning side dish? My Orange Glazed Carrots are the answer! With their bright color and
Read more…
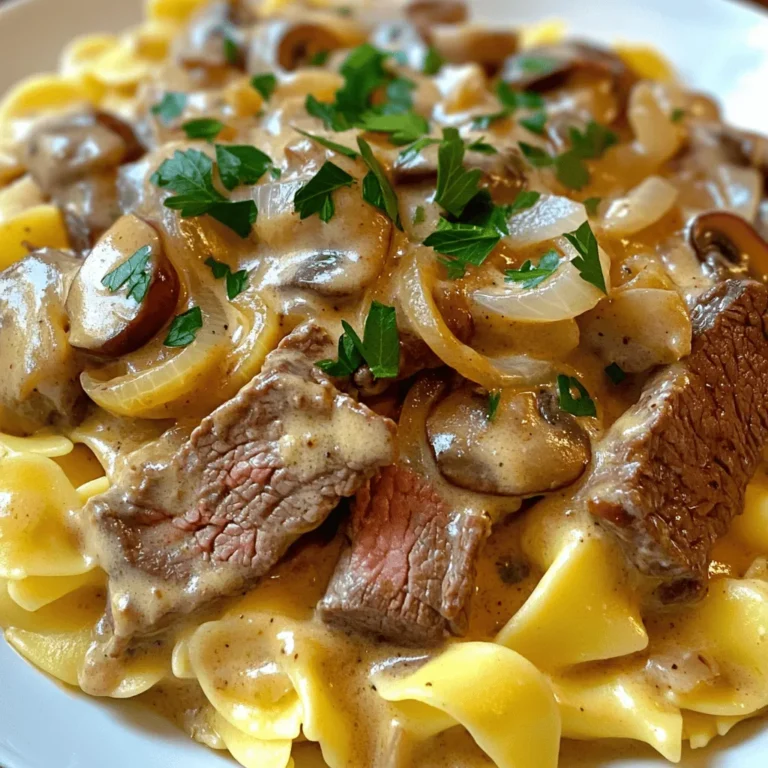
Classic Beef Stroganoff Savory and Comforting Meal
Craving a dish that warms your heart and fills your belly? Classic beef stroganoff is just the answer. This savory
Read more…
Caprese Salad Skewers Flavorful and Easy Appetizer
If you’re looking for a tasty and quick appetizer, Caprese Salad Skewers are your answer! They’re simple, colorful, and bursting
Read more…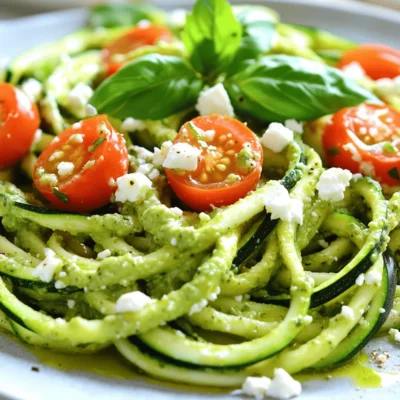
Zucchini Noodles with Pesto Flavorful and Fresh Dish
Are you ready to try a fresh and tasty dish? Zucchini noodles with pesto are easy to make and full
Read more…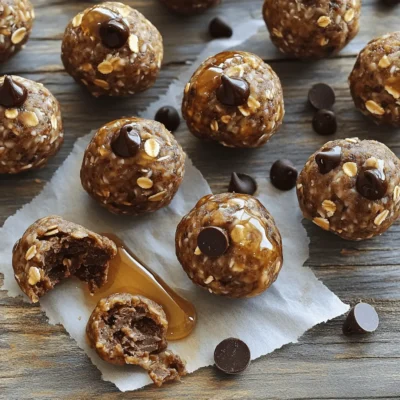
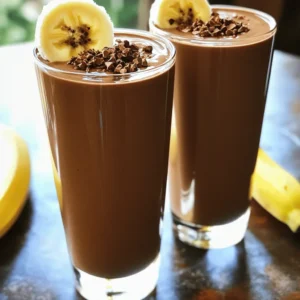
Chocolate Peanut Butter Protein Balls Simple and Easy
If you’re looking for a quick snack loaded with flavor and nutrition, you’re in the right place! Chocolate Peanut Butter
Read more…
Banana Oatmeal Muffins Tasty and Simple Recipe
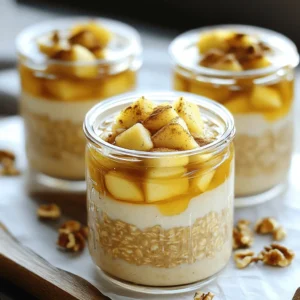
Looking for a tasty and easy treat? These Banana Oatmeal Muffins fit the bill! Made with ripe bananas, rolled oats,
Read more…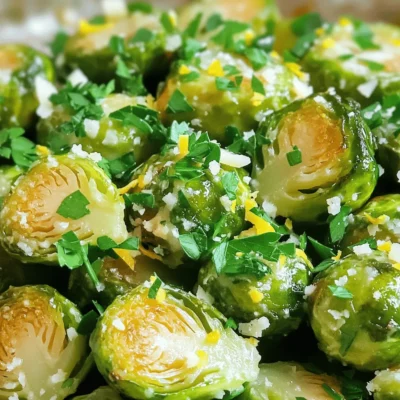
Lemon Garlic Roasted Brussels Sprouts Flavorful Dish
Are you ready to transform Brussels sprouts into a tasty delight? My Lemon Garlic Roasted Brussels Sprouts are bursting with
Read more…browse recipes


Berry Smoothie Bowl Delicious and Nutritious Treat
Do you crave a tasty treat that’s both delicious and good for you? Look no further! This Berry Smoothie Bowl will delight your taste…
My Latest Desserts
-

Vegan Chocolate Mug Cake Simple and Delicious Treat
Craving something sweet and easy? You’re in the right place! My vegan chocolate mug cake is quick to make and Read Full Recipe -

Chocolate Hazelnut Spread Pancakes Irresistible Treat
Get ready to indulge in a sweet breakfast treat! Imagine fluffy pancakes, warm from the skillet, drizzled with rich chocolate Read Full Recipe -
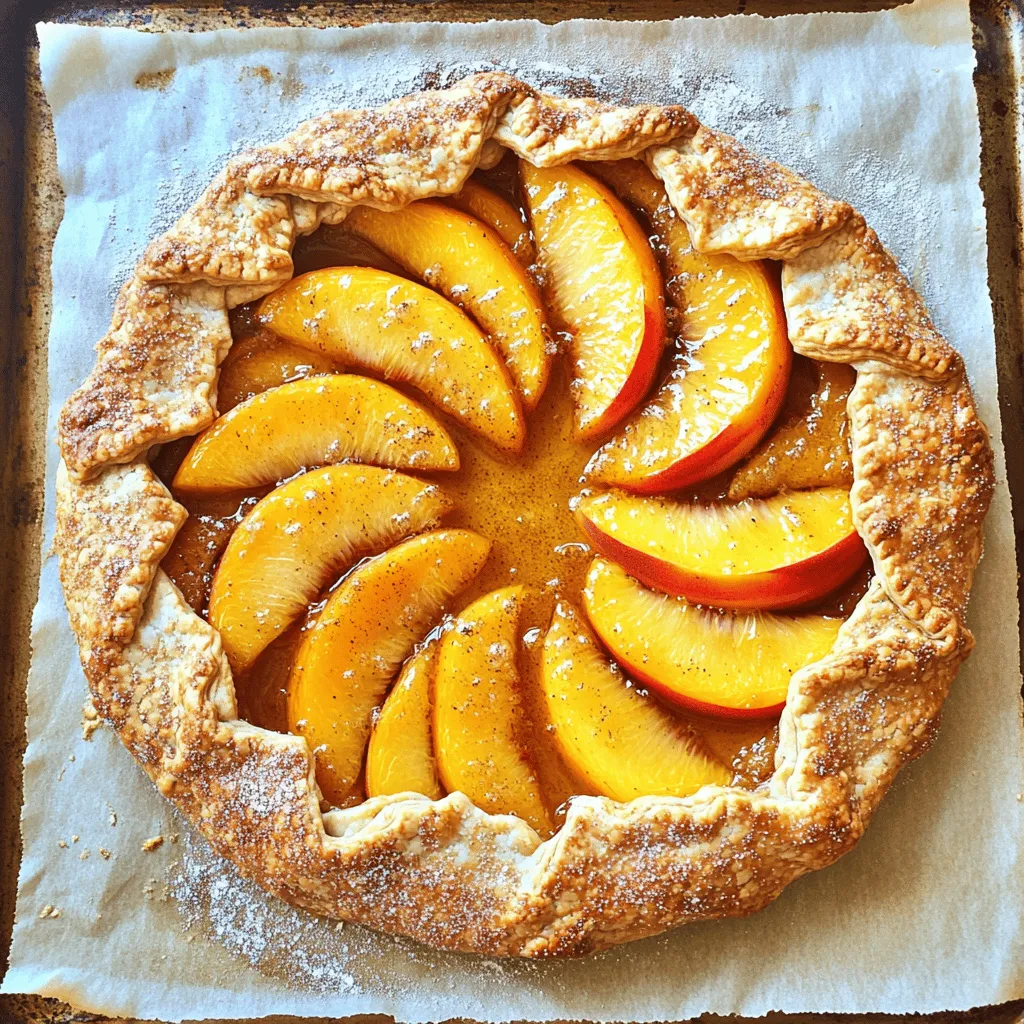
Peach Galette with Almond Crust Delightful Recipe
Are you ready to impress your friends with a stunning dessert? Try this Peach Galette with Almond Crust! This treat Read Full Recipe -
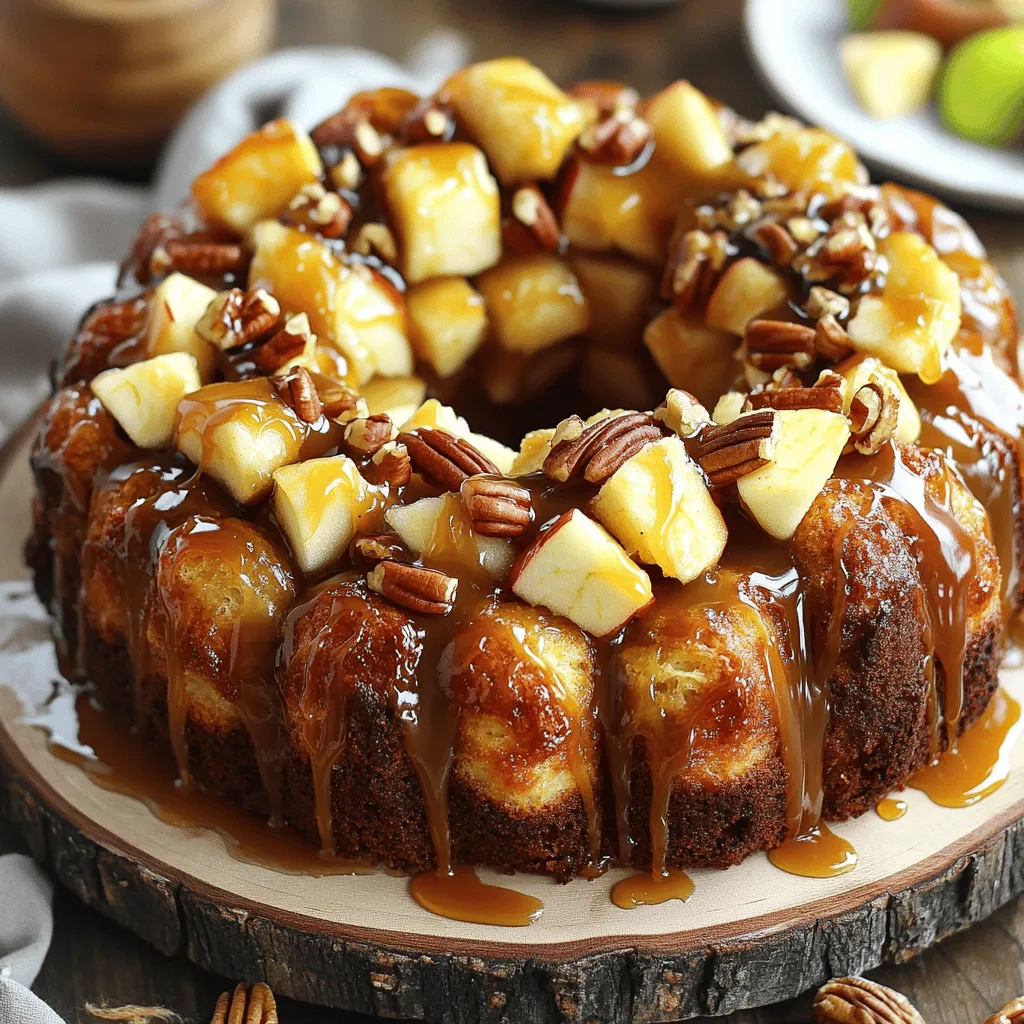
Caramel Apple Monkey Bread Irresistible Sweet Delight
Get ready to indulge in a mouthwatering treat with my Caramel Apple Monkey Bread! This sweet delight is packed with Read Full Recipe -
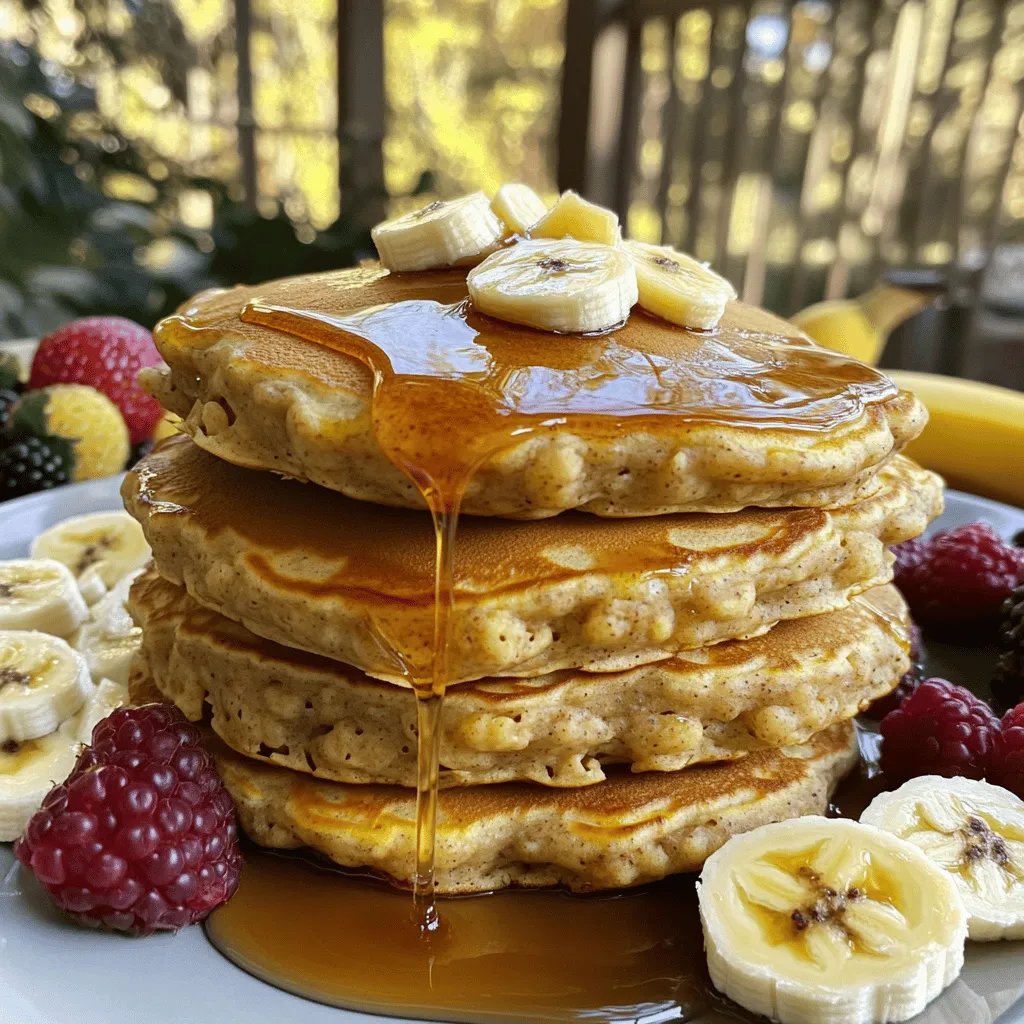
Banana Oatmeal Pancakes Simple and Nutritious Recipe
If you love pancakes but want a healthy twist, you’ll enjoy my Banana Oatmeal Pancakes! This simple recipe combines ripe Read Full Recipe -

No-Bake Chocolate Oatmeal Cookies Simple Delight
Are you ready to indulge in a sweet and easy treat? My No-Bake Chocolate Oatmeal Cookies are simple to make Read Full Recipe -

Coconut Macaroons Irresistible Sweet Treat Recipe
Are you ready to indulge in a sweet treat that is both simple and delicious? Coconut macaroons are the perfect Read Full Recipe -

Chocolate Peanut Butter Protein Balls Simple and Easy
If you’re looking for a quick snack loaded with flavor and nutrition, you’re in the right place! Chocolate Peanut Butter Read Full Recipe -
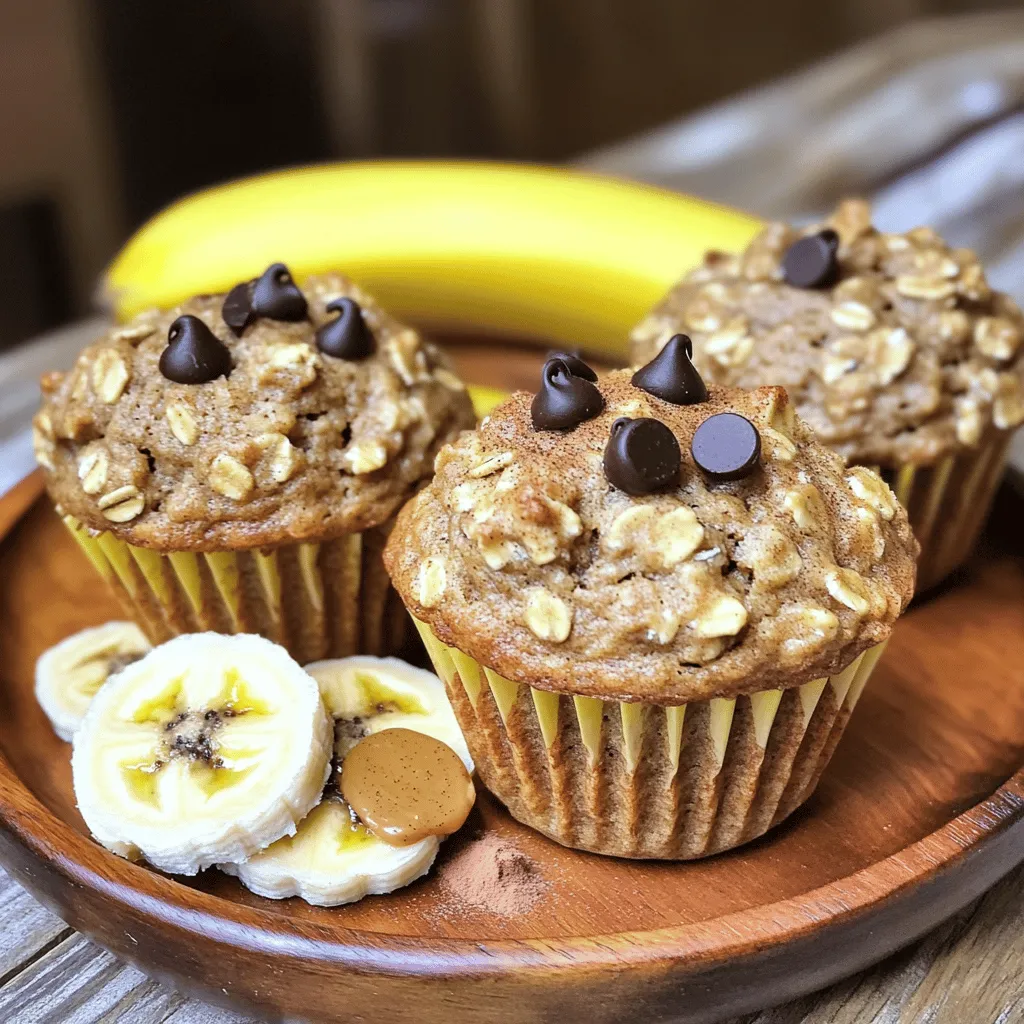
Banana Oatmeal Muffins Tasty and Simple Recipe
Looking for a tasty and easy treat? These Banana Oatmeal Muffins fit the bill! Made with ripe bananas, rolled oats, Read Full Recipe -
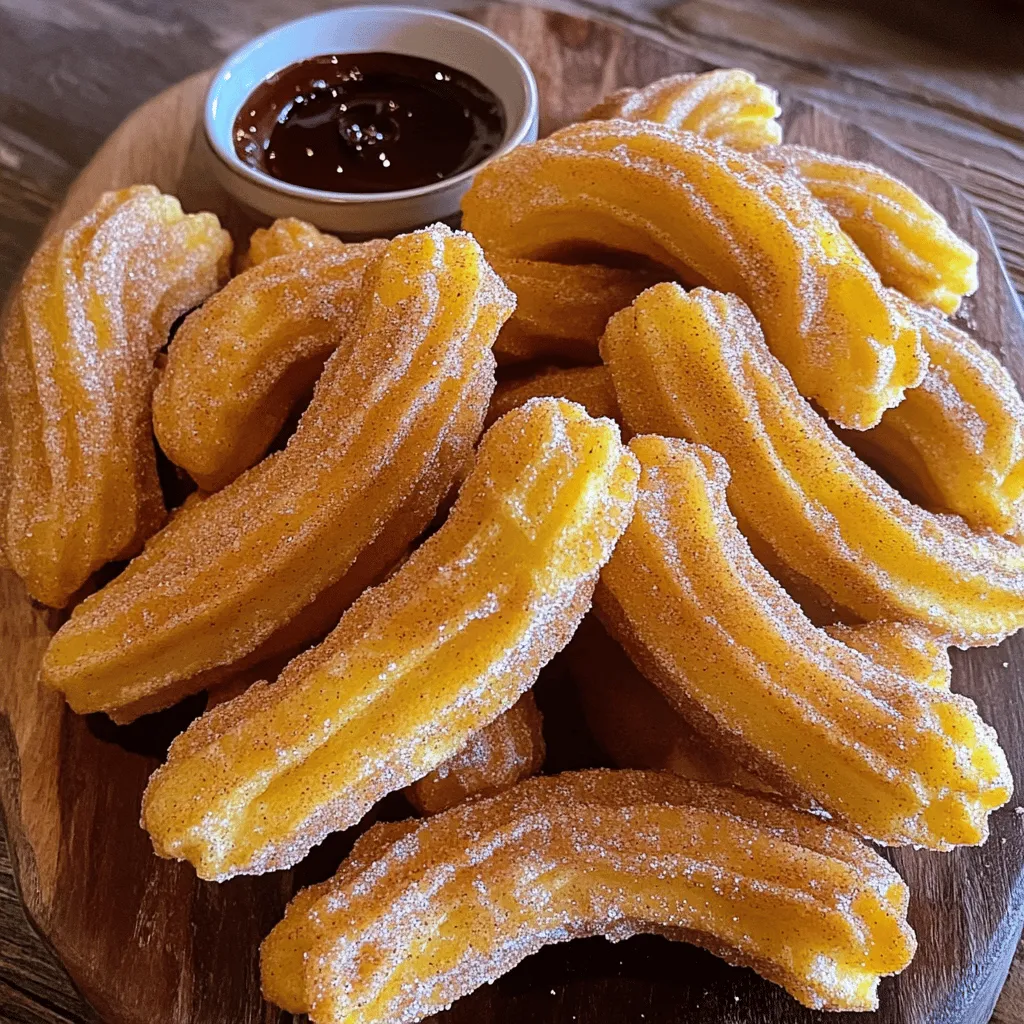
Cinnamon Sugar Churros Irresistible Sweet Treats
Are you ready to indulge in the warm and delicious world of cinnamon sugar churros? These sweet treats are crispy Read Full Recipe
My Latest Recipes

hey,
i’m !
I’m so happy you’re here!
From my kitchen to your table, each dish is a labor of love. May they delight your palate and warm your heart. Let’s savor the beauty of cooking together.
![To make creamy garlic mashed potatoes, you need: - 2 pounds Yukon gold potatoes, peeled and cut into chunks - 4 cloves garlic, peeled - 1/2 cup unsalted butter, softened - 1 cup heavy cream (or whole milk) - Salt and black pepper to taste You can add a few extras to make this dish unique: - 1/4 cup fresh chives, finely chopped (for garnish) - 1/4 teaspoon smoked paprika (for a unique twist) Choosing the right potato is key for creamy mashed potatoes. - Yukon Gold: They are buttery and creamy, perfect for mashing. - Russet: These are starchy and yield a fluffy texture. - Avoid waxy potatoes like red potatoes. They do not mash well. To get the best flavor, pick fresh, firm potatoes. Look for smooth skin without blemishes. Store them in a cool, dark place. This keeps them fresh longer. Start by peeling 2 pounds of Yukon gold potatoes. Cut them into chunks. This helps them cook evenly. Next, peel 4 cloves of garlic. Place the potatoes and garlic into a large pot. Cover them with cold water. Add a good pinch of salt to the water. This step enhances the flavor. Bring the pot to a boil over medium-high heat. Once it boils, reduce the heat to medium-low. Let the potatoes simmer for 15-20 minutes. They should be fork-tender when done. This means you can easily poke them with a fork. Drain the potatoes and garlic in a colander. Then, return them to the pot. Add 1/2 cup of softened unsalted butter to the warm potatoes. Let it melt for a few seconds. Using a potato masher, mash the mixture until it becomes smooth and creamy. Gradually pour in 1 cup of heavy cream. Keep mashing until you reach your desired texture. If you want it creamier, add more cream. Season your mashed potatoes with salt and black pepper. Add a sprinkle of smoked paprika for a unique twist. Mix well to blend the flavors. Taste your dish and adjust the seasoning if needed. If you like, fold in 1/4 cup of finely chopped fresh chives for a fresh touch. Serve the mashed potatoes warm. Add a pat of butter on top for a beautiful finish. For the full recipe, check the details provided above. To get the perfect creamy texture in your mashed potatoes, start with Yukon gold potatoes. They have a buttery flavor and smooth texture. When cooking, make sure to boil the potatoes until they are fork-tender. This ensures they mash easily. After draining, return them to the pot while still warm. This helps steam escape and keeps them fluffy. Add softened butter first. It melts quickly and mixes in well. Gradually add heavy cream. If you want it creamier, just add more cream. For more flavor, use fresh garlic and add it to the pot with the potatoes. Roasting the garlic before mashing adds a rich taste. You can also stir in fresh herbs like chives or parsley for a burst of freshness. Smoked paprika gives a nice twist too. This small addition can change the whole dish. Always taste your mashed potatoes before serving. Adjust salt and pepper to make sure the flavors pop. One common mistake is overcooking the potatoes. If they fall apart too much, they can turn gummy. Another mistake is not seasoning enough. Don’t be shy with salt and pepper; they enhance the taste. Using cold butter or cream can also lead to lumps. Always make sure your ingredients are at room temperature. Lastly, avoid using a food processor. It can make your potatoes sticky. Stick to a potato masher for the best texture. For the full recipe, check out the instructions. {{image_2}} You can make your creamy garlic mashed potatoes even better with fun additions. Cheese works great! Try mixing in grated Parmesan or sharp cheddar. They add a rich flavor that melts into the potatoes. Fresh herbs like thyme or rosemary also give a nice touch. Just chop them finely and fold them in at the end. You can even sprinkle some crispy bacon bits on top for a savory crunch! If you want a lighter version, you can make these mashed potatoes dairy-free. Substitute the butter with olive oil or vegan butter. For the cream, use unsweetened almond milk or coconut milk. They still taste creamy and delicious! This way, you enjoy the same great flavor while cutting down on dairy. Switch up the flavor by changing the garlic method. Roasted garlic adds a sweet, mellow taste. To do this, wrap whole garlic cloves in foil and roast them until soft. Then mash them into your potatoes. You can also add flavors like smoked paprika for a hint of spice or a splash of lemon juice for brightness. Each twist makes the dish unique, so feel free to experiment! For the full recipe, check out the earlier section. To keep your creamy garlic mashed potatoes fresh, place them in an airtight container. Make sure to cool the potatoes to room temperature first. This step helps prevent moisture build-up. Store them in the fridge for up to four days. If you want to enjoy them later, freezing is a good option. When you're ready to eat your leftovers, reheat them gently. You can use the stovetop or microwave. For the stovetop, place the mashed potatoes in a pot. Add a splash of milk or cream to keep them creamy. Heat over low heat, stirring often. In the microwave, use a covered dish and heat in short bursts. Stir between each burst to avoid hot spots. You can freeze mashed potatoes for up to two months. To freeze, scoop the cooled potatoes into freezer bags. Remove as much air as possible before sealing. Label the bags with the date. When you're ready to use them, thaw in the fridge overnight. Reheat as mentioned above for best taste and texture. For the full recipe, you can refer to the earlier section. Enjoy your creamy garlic mashed potatoes any time! Yes, you can make these mashed potatoes ahead of time. Prepare them as usual, then store them in an airtight container in the fridge. They will stay fresh for up to three days. When you are ready to serve, reheat them gently on the stove or in the microwave. Add a splash of cream to help bring back the creamy texture. If your mashed potatoes are too runny, don't worry. You can fix them easily. First, try adding more potatoes. Boil and mash a few more Yukon gold potatoes. Mix them in with the runny batch. Another option is to simmer the mashed potatoes on low heat. This method helps to evaporate excess moisture. Always mix well to get a smooth texture. Creamy Garlic Mashed Potatoes pair well with many dishes. Consider serving them with roasted chicken, grilled steak, or baked fish. They also go great with vegetables, like steamed green beans or sautéed spinach. For a hearty meal, try them alongside a rich beef stew. The creamy texture complements these savory dishes nicely. For the full recipe, click here: [Full Recipe]. In this post, we covered how to make Creamy Garlic Mashed Potatoes. We explored the right ingredients, from essential to optional choices. I shared easy steps for preparation and cooking, plus tips to avoid mistakes. You learned about fun variations, from cheesy to dairy-free options. Finally, we went over proper storage and reheating methods. Mastering this dish will impress your guests. Enjoy the perfect side for any meal. Happy cooking!](https://homecookingstyle.com/wp-content/uploads/2025/05/085a87b9-ba5a-48fd-bbe2-99407bdef77a-300x300.webp)
![To make tasty cauliflower buffalo wings, you need a few key items: - 1 large head of cauliflower, cut into bite-sized florets - 1 cup all-purpose flour (or gluten-free flour) - 1 teaspoon garlic powder - 1 teaspoon onion powder - 1 teaspoon smoked paprika - 1/2 teaspoon salt - 1/4 teaspoon black pepper - 1 cup water (adjust as needed) These ingredients create a crispy coating for the cauliflower. The flour gives it structure, while the spices add flavor. For the sauce and to dip, consider these options: - 1 cup buffalo sauce (store-bought or homemade) - 2 tablespoons melted vegan butter (or regular butter) - Suggested garnishes: fresh parsley or chopped green onions The buffalo sauce brings heat and flavor. Mixing it with vegan butter adds richness. You can serve the wings with celery sticks and your choice of blue cheese or ranch dressing for extra flavor. To prepare your cauliflower buffalo wings, gather the following tools: - Baking sheet and parchment paper - Mixing bowls and whisk - Measuring cups and spoons Using parchment paper helps with cleanup. Mixing bowls make it easy to combine ingredients. Measuring cups and spoons ensure you get the right amounts for the best taste. For the full recipe, check out the complete guide! Preheating the oven Start by preheating your oven to 450°F (230°C). This step is key for crispy wings. While the oven heats up, line a baking sheet with parchment paper. This makes cleanup easy and helps the cauliflower not stick. Cutting the cauliflower into florets Take a large head of cauliflower and remove the leaves. Cut the cauliflower into bite-sized florets. Ensure they are even in size. This helps them cook evenly. You want pieces that are not too small, so they hold up well during baking. Mixing dry ingredients In a mixing bowl, combine 1 cup of all-purpose flour, 1 teaspoon of garlic powder, 1 teaspoon of onion powder, 1 teaspoon of smoked paprika, 1/2 teaspoon of salt, and 1/4 teaspoon of black pepper. Mix these dry ingredients well. This blend gives the wings a great flavor. Achieving the perfect batter consistency Gradually add 1 cup of water to the dry mix. Whisk until you get a smooth, thick batter. It should be thick enough to coat the cauliflower but not so thick that it drips off. If needed, adjust with a bit more water or flour. Initial baking process Dip each cauliflower floret into the batter. Make sure each piece is well-coated. Shake off any extra batter. Place the florets evenly on the baking sheet. Bake in the preheated oven for 20 minutes. This makes them crispy. Final baking steps after coating in sauce While the cauliflower bakes, mix 1 cup of buffalo sauce with 2 tablespoons of melted butter. After 20 minutes, take the baking sheet out. Toss the baked cauliflower in the buffalo sauce until well coated. Return the coated wings to the oven for another 10-15 minutes. This final bake allows the sauce to set and adds extra crispiness. To make the crispiest cauliflower buffalo wings, you need a good batter. Use a thick batter to coat each floret well. This helps create a crispy crust. Bake the wings on parchment paper to prevent sticking. Space them out on the sheet. This allows hot air to circulate around them. To prevent sogginess, do not overcrowd the baking sheet. If they touch, steam builds up. Steam makes wings soft instead of crispy. You can also bake them longer if needed. Just watch them closely to avoid burning. Adding spices to the batter can boost flavor. Try adding cayenne pepper for heat. You can also mix in cumin or Italian herbs. This makes the batter more exciting and tasty. For alternative sauces, try BBQ or teriyaki. You can also use a honey mustard sauce. These different sauces keep the meal fresh and fun each time you make it. Serving and garnishing can make your wings look great. Arrange the wings on a platter with celery sticks. Add a bowl of blue cheese or ranch dip in the center. This makes a nice display for parties. For plating suggestions, use large plates or bowls. Stack the wings high for an enticing look. Sprinkle fresh parsley or green onions on top for color. A good presentation makes your dish even more inviting. For the full recipe, check [Full Recipe]. {{image_2}} You can play with sauces to change the flavor. For a sweet twist, try honey mixed with hot sauce. This sweet and spicy mix is a crowd-pleaser. You can also make a barbecue version! Just swap buffalo sauce for your favorite BBQ sauce. Your guests will love these options. Dipping sauces can make a big difference too. Ranch dressing is a classic choice. It cools the heat from buffalo sauce. Blue cheese dressing is another great option. Its creamy texture pairs well with the spicy wings. If you need gluten-free options, use gluten-free flour. Almond flour or chickpea flour works well. These flours keep the wings crispy. They still taste amazing! For vegan-friendly options, use plant-based butter. This keeps your wings tasty without dairy. Also, make sure your buffalo sauce is vegan. Many brands offer delicious vegan choices. You can add fun ingredients to the batter. Try mixing in herbs like parsley or cilantro. They add fresh flavor to each bite. You can also toss in chopped vegetables like spinach or bell peppers for extra nutrition. Experimenting with seasonings is also fun. Add cayenne for more heat or smoked paprika for a deeper flavor. The more you play, the more unique your wings will be. Enjoy creating your own version of cauliflower buffalo wings! For the full recipe, check out the link above. To keep your cauliflower buffalo wings fresh, store them in an airtight container. Make sure the wings cool down before sealing. They will last in the fridge for about 3 to 5 days. If you want to enjoy them later, refrigeration is the best option. The best way to reheat cauliflower wings is in the oven. Preheat your oven to 375°F (190°C). Spread the wings on a baking sheet. Heat them for about 10 to 15 minutes until they feel warm and crispy. You can use a microwave, but it may make them soft. To keep them crispy, avoid the microwave if you can. You can freeze cauliflower wings before or after baking. If you freeze them before baking, coat them in batter and place them on a baking sheet. Once they’re frozen, transfer them to a freezer bag. If you freeze after baking, let them cool first. Use the same method for storage. For thawing, place them in the fridge overnight. You can also reheat them directly from the freezer. Just add a few extra minutes to the baking time. Enjoy your tasty cauliflower buffalo wings anytime! For detailed steps, check the Full Recipe. To make cauliflower buffalo wings gluten-free, use gluten-free flour. Some great options are almond flour and chickpea flour. You can also use a store-bought gluten-free flour blend. These flours work well in the batter. They give a nice crunch and flavor. Just follow the same steps in the recipe. You will enjoy tasty wings without gluten! Yes, you can use an air fryer for cauliflower buffalo wings. First, prepare the batter as usual. Then coat the cauliflower florets. Place them in a single layer in the air fryer basket. Cook at 400°F (200°C) for about 12-15 minutes. Check halfway through and shake the basket. This method gives you a crispy texture without much oil. Some great dipping sauces for cauliflower buffalo wings include ranch dressing and blue cheese dressing. They both balance the spicy heat well. You can also try honey mustard for a sweet twist. If you want something different, try a creamy avocado dip. Each sauce adds unique flavors to your wings! The spice level of the cauliflower buffalo wings can vary. The heat comes from the buffalo sauce used. If you like less spice, use a milder buffalo sauce. You can also mix in some yogurt or sour cream to tone it down. For more heat, add extra hot sauce to the recipe. Adjust it to your taste! Cauliflower buffalo wings are a healthier option than traditional wings. They are lower in calories and fat. Cauliflower is high in fiber and vitamins. This makes them a great choice for health-conscious eaters. You can enjoy the flavor without the guilt. Plus, they are plant-based, making them good for vegan diets. Check the full recipe for detailed nutritional info! In this blog post, we explored making delicious cauliflower buffalo wings. We covered essential ingredients like cauliflower, flour, and seasonings. You also learned about tasty sauces, equipment needed, and the step-by-step process from preparation to baking. We shared tips for the best texture and flavor variations to try. Finally, we discussed storage methods for leftovers to enjoy later. By following these steps and tips, you can create a tasty, healthier snack that everyone will love. Enjoy your cooking!](https://homecookingstyle.com/wp-content/uploads/2025/04/111c091e-de5e-479c-b933-097f88dcab8e-300x300.webp)
![To make Buffalo Cauliflower Bites, you need a few main items: - 1 medium head of cauliflower, cut into bite-sized florets - 1 cup all-purpose flour - 1 cup almond milk (or any plant-based milk) - 1 teaspoon garlic powder - 1 teaspoon onion powder - 1 teaspoon smoked paprika - 1/2 teaspoon salt - 1/2 teaspoon black pepper - 1 cup buffalo sauce These ingredients create a crispy and tasty snack that packs a punch. You can enhance your bites with these optional items: - 2 tablespoons melted vegan butter for richness - Fresh parsley, chopped for garnish - Celery sticks and ranch dressing for serving These additions add flavor and make your dish look great on the table. Buffalo Cauliflower Bites fit many diets. - They are vegan and vegetarian-friendly. - They offer a low-calorie snack option compared to traditional wings. These bites are a guilt-free treat that everyone can enjoy! For the full recipe and details, check the [Full Recipe]. First, preheat your oven to 450°F (230°C). This step gets the oven hot enough to make the cauliflower crispy. While the oven heats, prepare your baking sheet. Line it with parchment paper. This keeps the bites from sticking and makes cleanup easy. Next, grab a large mixing bowl. In this bowl, combine your dry ingredients: one cup of all-purpose flour, one teaspoon of garlic powder, one teaspoon of onion powder, one teaspoon of smoked paprika, half a teaspoon of salt, and half a teaspoon of black pepper. Mix these together well. Now, whisk in one cup of almond milk. Keep mixing until your batter is smooth and thick but not too runny. Now it’s time for the cauliflower. Take your medium head of cauliflower and cut it into bite-sized florets. Dip each floret into the batter, making sure each piece is fully coated. Place the battered florets on the prepared baking sheet. Make sure they are in a single layer. Bake the cauliflower in the hot oven for about 20 to 25 minutes. Halfway through, flip the florets to help them bake evenly. While the cauliflower bakes, it’s time to prepare the buffalo sauce. In a separate bowl, mix one cup of buffalo sauce with two tablespoons of melted vegan butter, if you want it richer. Once the cauliflower is golden brown and crispy, take it out of the oven. Immediately toss the hot cauliflower in the buffalo sauce until all pieces are coated. Then, return the coated cauliflower to the baking sheet. Bake for another 10 minutes to get that extra crunch. The bites will be perfect for dipping once cooled slightly. Enjoy! To make sure your Buffalo Cauliflower Bites are crispy, use the right coating. Dip each floret fully in the batter. This helps create a nice layer that becomes crunchy when cooked. Place them on the baking sheet in one layer. Avoid crowding them; give each piece space. Flip the florets halfway through the bake time. This ensures that all sides cook evenly. Don't be afraid to get creative with spices! You can add cumin or chili powder for a twist. These spices give the bites a new flavor profile. You can also try mixing in different sauces. For example, a mix of buffalo sauce and barbecue sauce can add a fun taste. The options are endless, so experiment to find your favorite! Pair your Buffalo Cauliflower Bites with great dips. Ranch dressing is a classic choice, but blue cheese dressing works too. For a fresh touch, serve with celery sticks. They add crunch and balance the heat. For presentation, arrange the bites on a colorful platter. You can sprinkle some extra parsley on top for a bright look. This makes your dish more inviting for gatherings. Check out the Full Recipe to get started! {{image_2}} To make your buffalo cauliflower bites even spicier, add more hot sauce. You can increase the heat to your liking. If you enjoy a deeper flavor, mix in chili powder with the batter. This will give your bites an extra kick that heat lovers will adore. If you need a gluten-free version, swap the all-purpose flour for gluten-free flour. Many options are available, like almond or oat flour. Use a binding agent like ground flaxseed mixed with water or a bit of cornstarch to help the batter stick. Pair your bites with a creamy vegan sauce. You can make a simple homemade vegan ranch dressing using cashews, lemon juice, and herbs. Alternatively, try other plant-based dips, like tahini sauce or guacamole. These dips will enhance the flavor and provide a nice balance to the heat of the buffalo sauce. For the complete preparation method, check out the Full Recipe. To keep your cauliflower bites fresh, cool them completely before storage. This step helps avoid sogginess. Use a shallow container with a tight-fitting lid. Glass or BPA-free plastic works best. Place a paper towel at the bottom to absorb moisture. You can store them in the fridge for up to three days. When it comes to reheating, the oven is my top choice. Preheat it to 350°F (175°C). Spread the cauliflower bites on a baking sheet. Bake for about 10-15 minutes. This method keeps them crispy. If you use a microwave, the bites may become soft. If you must use the microwave, heat them for just a few seconds. To freeze cauliflower bites, let them cool completely. Arrange them in a single layer on a baking sheet. Freeze for about an hour. Once frozen, transfer them to a zip-top bag. Remove as much air as you can. They can last up to three months. When ready to eat, thaw them overnight in the fridge. Reheat in the oven for best results. To add more heat, try using extra buffalo sauce. You can also mix in some hot sauce. Another great option is to sprinkle chili powder into the batter. Just remember to balance the heat with flavors. Adding a bit of sweetness, like maple syrup, can help. This way, the bites stay tasty and not just hot. Yes, you can use different kinds of milk. If you don’t have almond milk, try soy or oat milk. Both work well in the batter. Just make sure the milk is unsweetened. This keeps the flavor strong without extra sugar, which can change the taste. Buffalo cauliflower bites can be a healthy choice. They have fewer calories than traditional buffalo wings. A serving has about 150 calories, while wings can have over 400 calories. Cauliflower is also rich in vitamins and fiber. This makes it a smart snack option. Plus, it’s vegan and gluten-free, so it fits many diets. Enjoy them guilt-free! Buffalo Cauliflower Bites are a fun, tasty snack. With simple steps, you can whip them up quickly. Remember to play around with spices and sauces for your perfect flavor. These bites are not just healthy; they're also vegan and a hit at gatherings. Whether you want them spicy or mild, they fit any palate. Enjoy your crispy treats, and don’t hesitate to customize! They’re easy to store and reheat, so you can savor them anytime. Get creative and enjoy every bite!](https://homecookingstyle.com/wp-content/uploads/2025/05/910a882d-f6f3-4950-a9ac-a6bfa4c4f20c-300x300.webp)
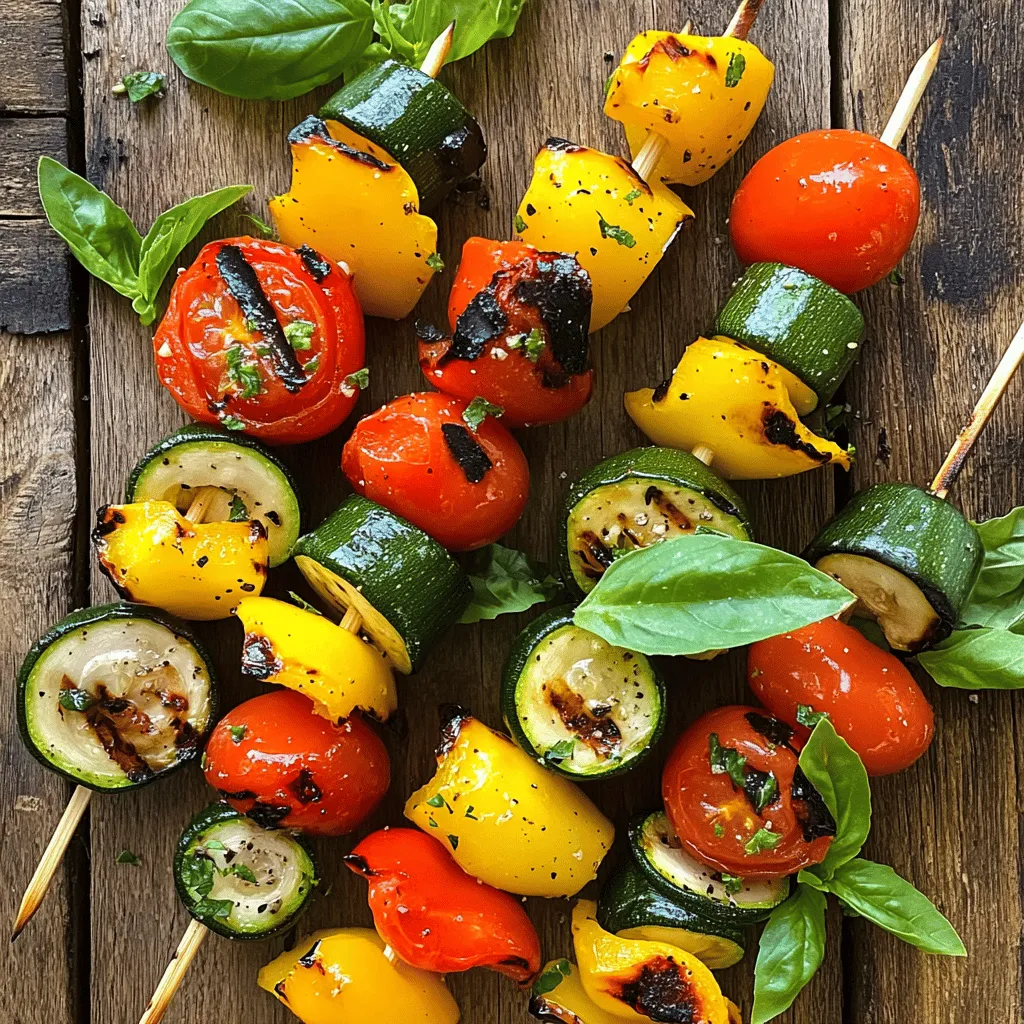
Grilled Vegetable Skewers Flavorful and Easy Recipe
Grilled vegetable skewers are vibrant, tasty, and easy to make. Whether you’re a barbecue pro or a kitchen newbie, I’ll guide you through a…