

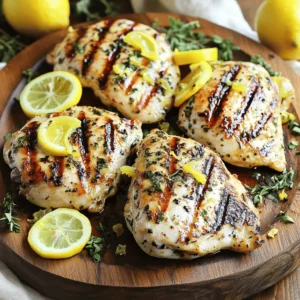
Latest & Greatest

Creamy Garlic Chicken Simple and Delightful Dish
If you’re craving a dish that’s both easy to make and full of flavor, you’re in the right place. This
Read more…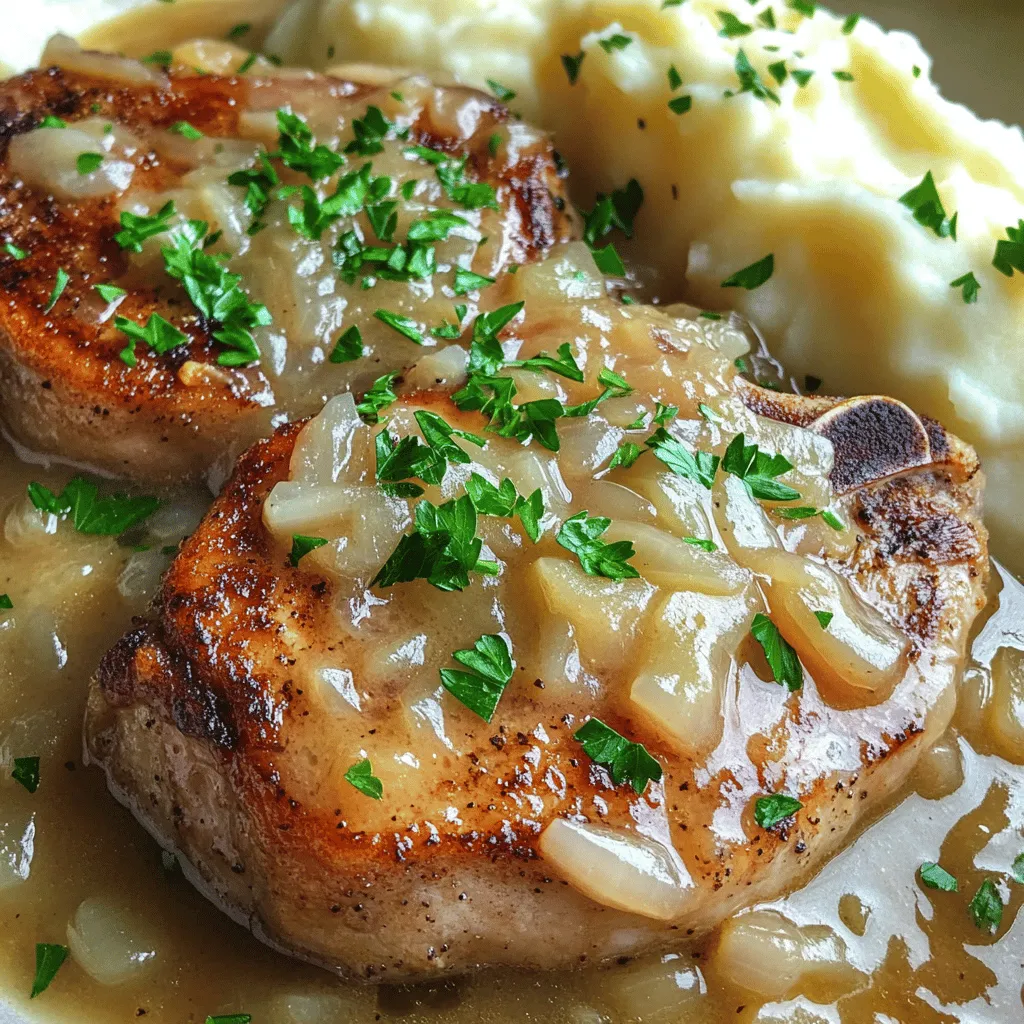
Delicious Smothered Pork Chops Simple and Flavorful Dish
Looking for a comforting and tasty meal? You’ve found it! My Delicious Smothered Pork Chops are simple to make and
Read more…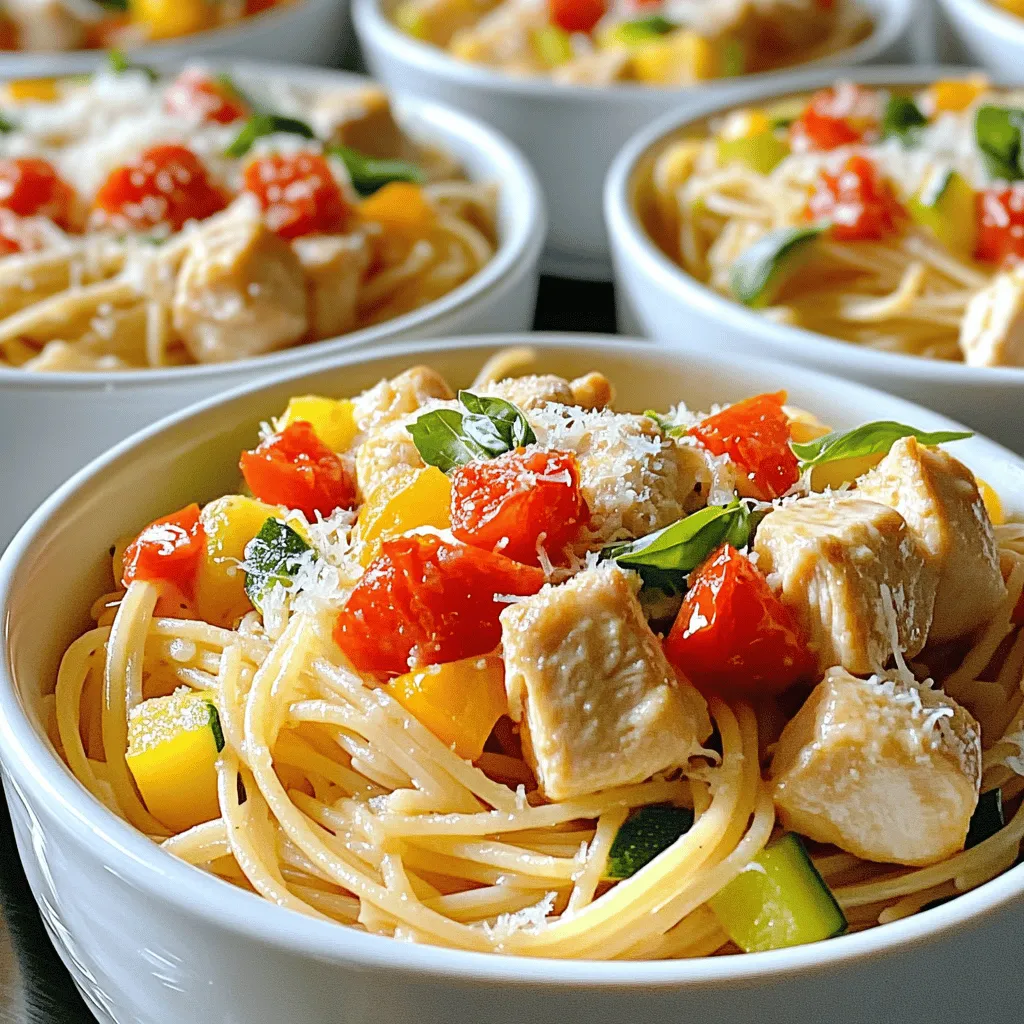
Tasty Nan Recipe Simple and Flavorful Delight
Welcome to my kitchen! Today, I’ll share a tasty nan recipe that’s both simple and flavorful. You don’t need to
Read more…
Chicken Spaghetti Flavorful and Simple Recipe Guide
Looking for a tasty meal that’s both flavorful and simple? You’re in the right place! In this guide, I’ll show
Read more…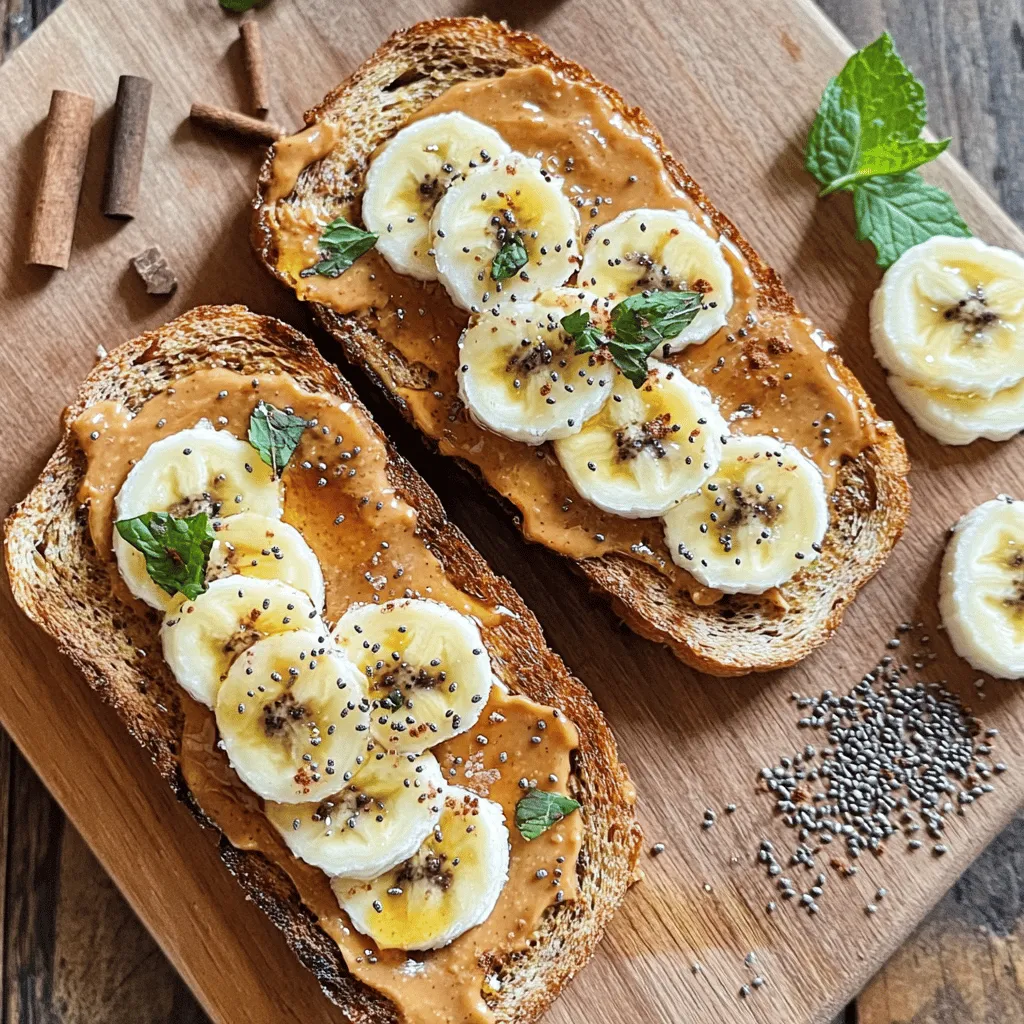
Peanut Butter Toast Simple and Satisfying Snack
Peanut butter toast is a simple snack that can brighten your day! With just a few key ingredients, you can
Read more…
Cheesy Beef and Bowtie Pasta Savory Comfort Food
Are you ready for a meal that feels like a warm hug? Cheesy Beef and Bowtie Pasta is your answer.
Read more…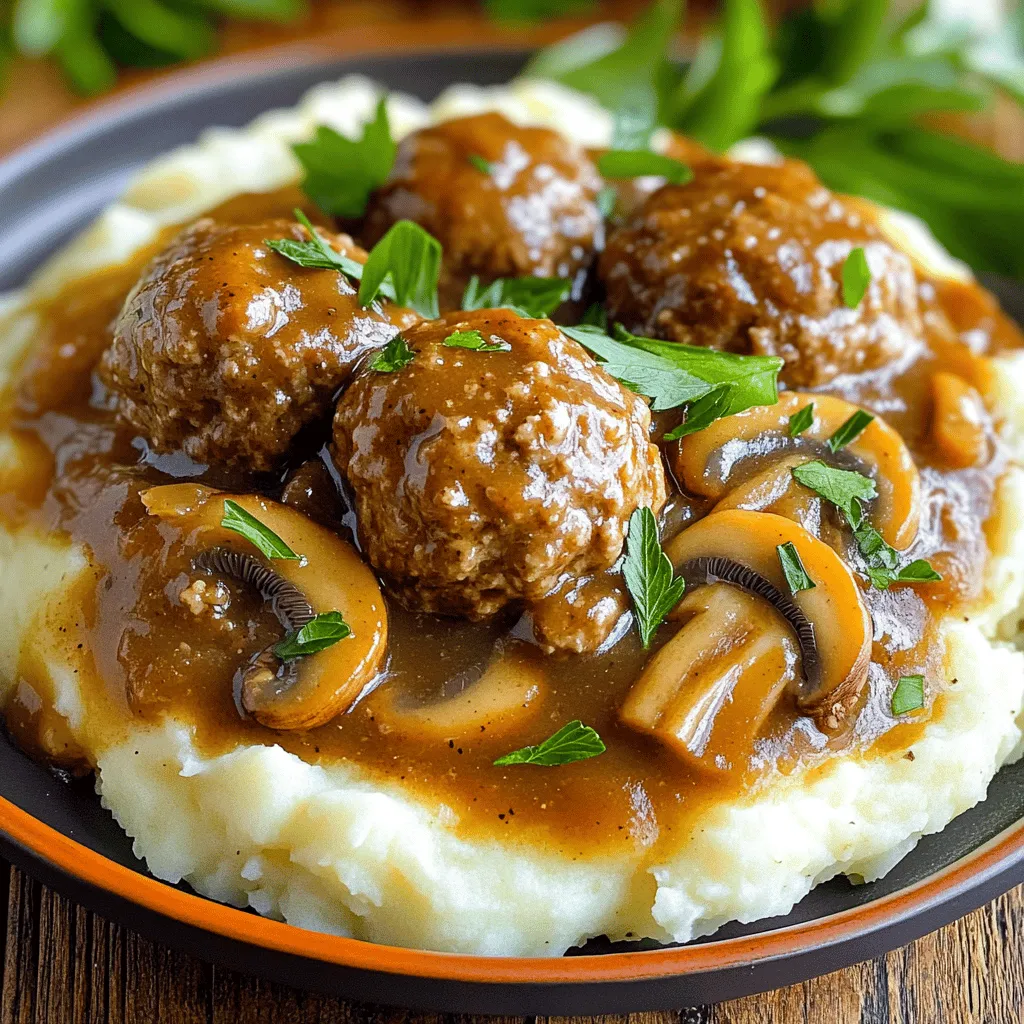
Savory Slow Cooker Salisbury Steak Meatballs Recipe
Are you ready to impress your family with a delicious meal? This Savory Slow Cooker Salisbury Steak Meatballs Recipe is
Read more…
Vegetable Quiche Flavorful and Nutritious Dish
If you’re craving a dish that’s both tasty and good for you, vegetable quiche fits the bill! This colorful blend
Read more…browse recipes

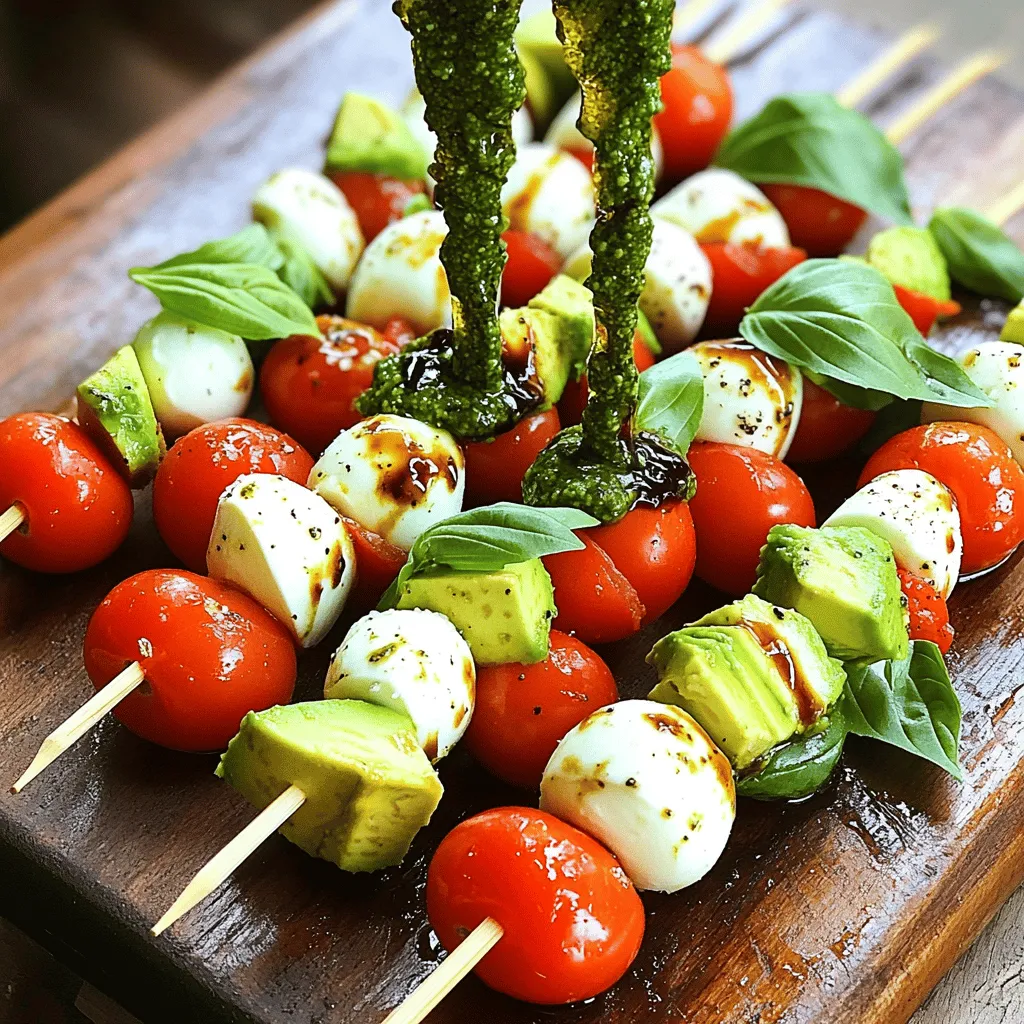
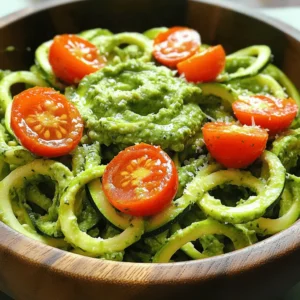
Caprese Salad Skewers Flavorful and Easy Appetizer
If you’re looking for a tasty and quick appetizer, Caprese Salad Skewers are your answer! They’re simple, colorful, and bursting with flavor. Using fresh…
My Latest Desserts
-

Coconut Cream Pie Bars Delightfully Creamy Treat
If you’re craving something sweet and creamy, Coconut Cream Pie Bars are your answer. These bars combine rich coconut flavor Read Full Recipe -

Caramel Apple Nachos Delightful Sweet Snack Idea
Get ready to indulge in a sweet twist with Caramel Apple Nachos! This fun snack combines crisp apples, gooey caramel, Read Full Recipe -

Chocolate Chip Banana Bread Simple and Tasty Recipe
Do you love warm, sweet treats? If so, you’ll adore this simple and tasty Chocolate Chip Banana Bread recipe! With Read Full Recipe -

Cinnamon Sugar Donut Muffins Soft and Tasty Treat
Get ready to satisfy your sweet tooth with these Cinnamon Sugar Donut Muffins! They’re soft, tasty, and perfect for any Read Full Recipe -

Chocolate Chip Cookie Dough Brownies Delightful Treat
Do you love brownies and cookie dough? Then, you’ll adore Chocolate Chip Cookie Dough Brownies! This delightful treat combines rich, Read Full Recipe -
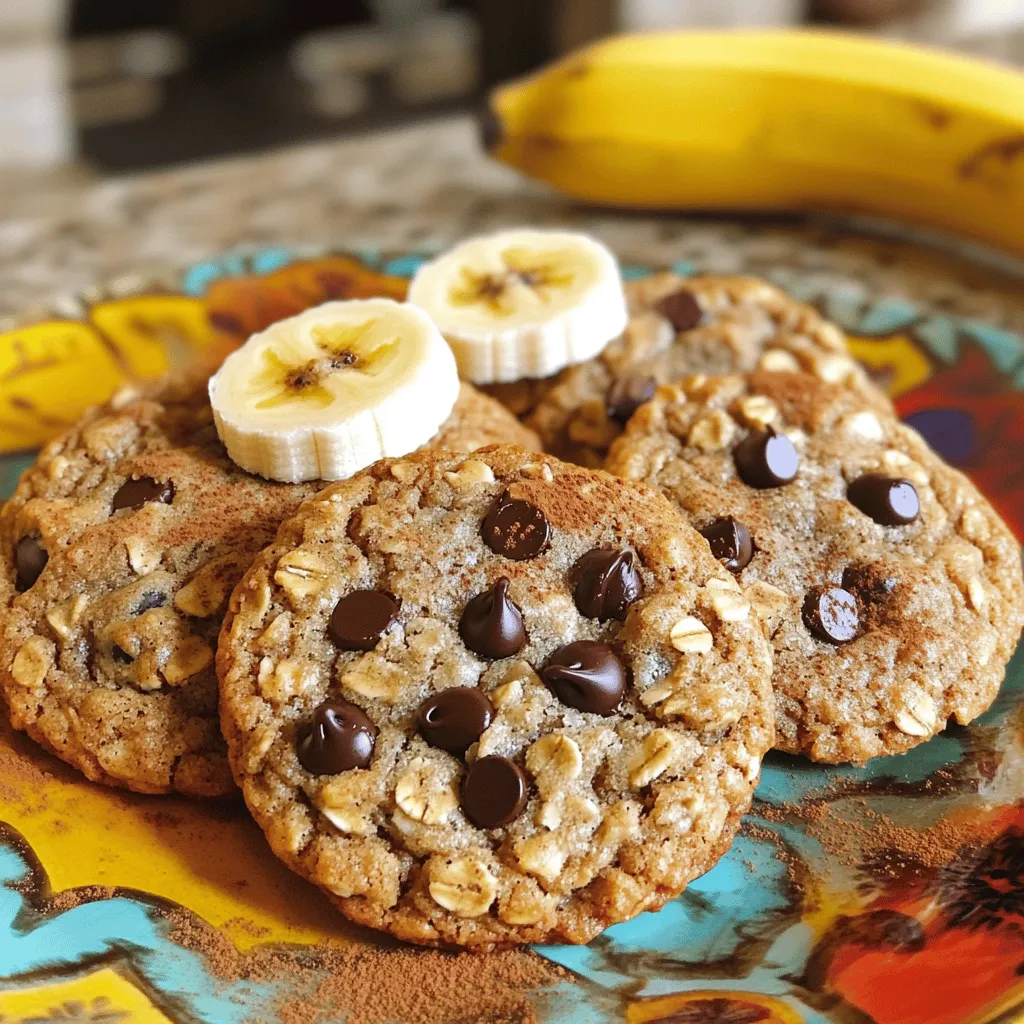
Banana Oatmeal Cookies Simple and Tasty Recipe
Looking for a quick and delicious treat? These Banana Oatmeal Cookies are the answer! With just a few simple ingredients, Read Full Recipe -

Pumpkin Spice Energy Balls Simple and Tasty Snack
Fall is here, and what better way to celebrate than with delicious Pumpkin Spice Energy Balls? These tasty snacks are Read Full Recipe -

Lemon Blueberry Muffins Delightful and Easy Recipe
Are you ready to enjoy the perfect treat that blends sweet and tangy? My Lemon Blueberry Muffins are simple to Read Full Recipe -
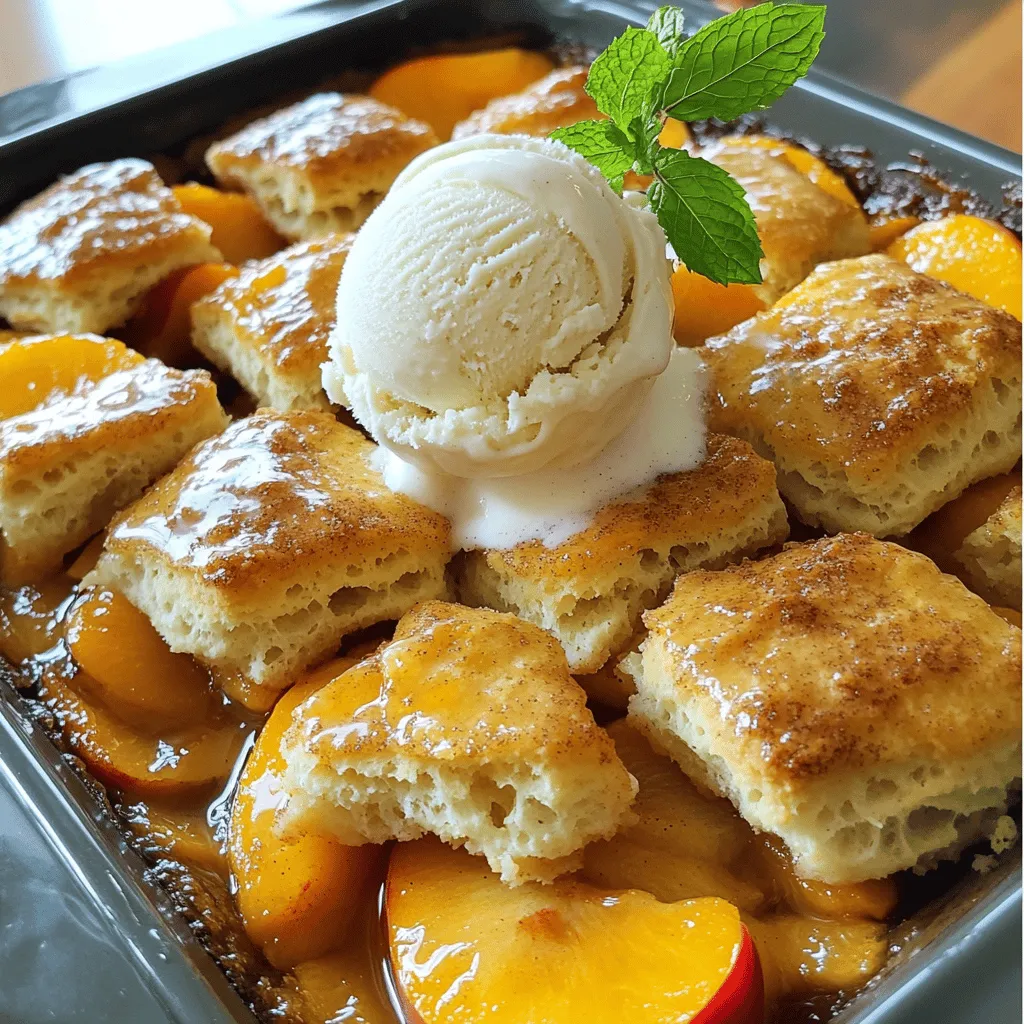
Peach Cobbler with Biscuit Topping Simple Delight
If you crave a warm, sweet dessert, you’ll love my Peach Cobbler with Biscuit Topping. This simple delight combines juicy Read Full Recipe -

Vegan Chocolate Mug Cake Simple and Delicious Treat
Craving something sweet and easy? You’re in the right place! My vegan chocolate mug cake is quick to make and Read Full Recipe
My Latest Recipes

hey,
i’m !
I’m so happy you’re here!
From my kitchen to your table, each dish is a labor of love. May they delight your palate and warm your heart. Let’s savor the beauty of cooking together.
![- 1 cup quinoa, rinsed - 2 cups vegetable broth (or water) - 1 red bell pepper, diced - 1 yellow bell pepper, diced - 1 zucchini, diced - 1 red onion, cubed - 1 cup cherry tomatoes, halved - 2 tablespoons olive oil - 1 teaspoon dried oregano - 1 teaspoon garlic powder - Salt and pepper to taste - 1 cup fresh spinach To make this roasted vegetable quinoa salad, you need fresh ingredients. Quinoa serves as the base. It is high in protein and gluten-free. Assorted vegetables add color and flavor. I love using bell peppers, zucchini, and cherry tomatoes. They roast beautifully and become sweet and tender. Seasoning is key to the dish. Olive oil helps the veggies roast perfectly. Dried oregano and garlic powder bring out the flavors. Don't forget salt and pepper to taste. - 1/4 cup feta cheese - Fresh parsley, chopped for garnish You can add feta cheese for a creamy touch. It gives a nice contrast to the roasted veggies. Fresh herbs like parsley enhance the dish's look and flavor. They add a burst of freshness to every bite. - Calories per serving: About 250 - Macronutrients breakdown: - Protein: 8g - Carbohydrates: 40g - Fat: 9g This salad is not just tasty; it's healthy too. Each serving gives you a good amount of protein. The carbs come from quinoa and vegetables, which are great for energy. The healthy fats from olive oil help keep you full. Enjoy this roasted vegetable quinoa salad knowing it's good for you. For the complete recipe, check the Full Recipe. - Preheat your oven to 425°F (220°C). - Chop the red bell pepper, yellow bell pepper, zucchini, red onion, and cherry tomatoes into bite-sized pieces. - In a bowl, mix the veggies with 2 tablespoons of olive oil, 1 teaspoon of dried oregano, 1 teaspoon of garlic powder, salt, and pepper. - Spread the seasoned vegetables on a baking sheet in one layer. - Roast the veggies in the oven for 20 to 25 minutes. They should be tender and slightly brown. - While they roast, bring 2 cups of vegetable broth to a boil in a saucepan. - Add 1 cup of rinsed quinoa, reduce to a simmer, and cover. Cook for 15 minutes until the liquid is gone. Fluff with a fork when done. - In a large serving bowl, mix the cooked quinoa and roasted vegetables. - Add 1 cup of fresh spinach and toss gently to combine. - If you like, sprinkle 1/4 cup of feta cheese on top and add fresh parsley for garnish. Enjoy this colorful and tasty salad warm or let it chill for a refreshing cold dish. For the full recipe, check the previous section. Best way to rinse quinoa: Rinsing quinoa is key for a great taste. Place quinoa in a fine mesh strainer. Run cold water over it for a few minutes. This washes off the saponins, which can taste bitter. After rinsing, drain the quinoa well. This ensures a fluffy texture in your final dish. Ensuring roasted vegetables are caramelized: Caramelization gives vegetables a sweet flavor. To achieve this, cut vegetables evenly. This helps them cook at the same rate. Spread the veggies in a single layer on the baking sheet. Avoid overcrowding, as this traps steam and hinders browning. A hot oven helps too. Roasting at 425°F ensures that they brown nicely. Warm vs. cold serving: You can serve the salad warm or cold. For a cozy meal, serve it warm. The heat enhances the flavors and makes it comforting. If you prefer a refreshing dish, let it cool. Chilling it allows the flavors to meld together beautifully. Pairing with proteins: This salad is great on its own, but adding protein boosts its nutrition. Grilled chicken or shrimp works well. For a vegetarian option, try chickpeas or black beans. These additions make the dish more filling and satisfying. Adding spices: Spices can elevate your salad. Consider adding cumin or smoked paprika. These spices add depth and warmth. A pinch of red pepper flakes gives a nice kick. Experiment with your favorite spices to find the perfect balance. Alternative dressings: While a simple olive oil dressing is tasty, you can mix it up. Try a lemon vinaigrette for brightness. A tahini dressing adds creaminess and a nutty flavor. Each dressing brings its unique twist to your roasted vegetable quinoa salad, making it exciting every time. For the complete recipe, check out the [Full Recipe]. {{image_2}} You can easily swap quinoa for other grains. Try using farro, brown rice, or even couscous. Each grain brings its own flavor and texture. Feel free to change up the vegetables too. Use seasonal veggies like asparagus, carrots, or eggplant. Mix and match to find your favorite combo. This salad is vegan-friendly. Just skip the feta cheese or use a plant-based version. You still get a tasty dish packed with flavor. For gluten-free options, stick with quinoa. It is naturally gluten-free. You can safely enjoy this salad without worry. To give your salad a Mediterranean twist, add olives, sun-dried tomatoes, or artichokes. These additions enhance the flavor and create a fresh taste. For an Asian flair, toss in sesame oil, soy sauce, or chopped scallions. Consider adding edamame or snap peas for a crunchy bite. With these ideas, you can make the roasted vegetable quinoa salad your own. Find the mix that excites your taste buds! To keep your roasted vegetable quinoa salad fresh, put it in an airtight container. Store it in the fridge. It will stay good for about four days. If you want to freeze it, use a freezer-safe bag. Squeeze out all the air before sealing. You can freeze it for up to three months. Just remember, freezing may change the texture of the vegetables. When you’re ready to eat your leftovers, the best method to reheat is in the oven. Preheat the oven to 350°F (175°C). Place the salad in a baking dish and cover it with foil. Warm it for about 15-20 minutes. You can also use the microwave. Heat it in short bursts of 30 seconds, stirring in between. After reheating, add a splash of olive oil for extra flavor. Serve it warm or let it cool for a refreshing cold salad. You can store the roasted vegetable quinoa salad in the fridge for up to four days. If frozen, it can last up to three months. To enjoy the best taste, eat it within the first month of freezing. Always check for any off smells or changes in color before eating leftovers. How to make quinoa fluffier? To make quinoa fluffier, rinse it well before cooking. This removes the natural coating called saponin. Use a fine mesh strainer for best results. After cooking, let it sit covered for 5 minutes. Then, fluff it gently with a fork. This helps separate the grains and adds lightness. Can I use frozen vegetables? Yes, you can use frozen vegetables. They save time and are often just as healthy. Just toss the frozen veggies in olive oil and seasonings. Roast them for a few extra minutes to ensure they're tender and warm. What to do if the quinoa is bitter? If quinoa tastes bitter, it may not have been rinsed well. Always rinse quinoa under cold water before cooking. If you've already cooked it, try adding a little salt or dressing. This can help balance the flavor. Is quinoa a complete protein? Yes, quinoa is a complete protein. It contains all nine essential amino acids. This makes it a great choice for vegetarians and vegans. It supports muscle growth and overall health. Plus, it's gluten-free and packed with nutrients. What are the health benefits of roasted vegetables? Roasted vegetables are full of vitamins and minerals. Roasting enhances their natural sweetness and flavor. They are high in fiber, which aids digestion. This cooking method also helps retain nutrients, making them a smart choice for a healthy diet. How to make the roasted vegetable quinoa salad ahead of time? To make this salad ahead, cook the quinoa and roast the vegetables in advance. Let them cool before mixing. Store them in the fridge in an airtight container. Combine with fresh spinach and feta just before serving for the best taste. Can I make this salad in advance? Yes, you can make this salad in advance. It tastes great cold or at room temperature. Just keep the dressing separate until you're ready to serve. This keeps the salad fresh and flavorful. For the full recipe, check out the details above. This blog post covered how to create a delicious roasted vegetable quinoa salad. We explored the main and optional ingredients, nutrition facts, and step-by-step instructions. I shared cooking tips, serving suggestions, and ways to enhance flavors. We also looked at variations, storage info, and answered common questions. Now, you're ready to make a tasty and healthy dish that fits your needs. Enjoy experimenting with it, and feel free to make it your own.](https://homecookingstyle.com/wp-content/uploads/2025/05/5bc716e5-50d7-483a-817d-057268a5e303-300x300.webp)
![To make my favorite fried rice with coconut milk flavor, gather these tasty ingredients: - 2 cups cooked jasmine rice (day-old preferred) - 1 cup coconut milk - 1/2 cup diced pineapple - 1/2 cup peas - 1/2 cup diced bell pepper - 2 green onions - 2 cloves garlic - 2 tablespoons soy sauce - 1 tablespoon vegetable oil - 1 teaspoon sesame oil - Salt and pepper - Fresh cilantro for garnish Using day-old rice helps give the dish a nice texture. Freshly cooked rice can be too moist. The coconut milk adds a rich creaminess. It makes the rice feel tropical and exciting. Fresh pineapple gives a sweet burst. The peas and bell pepper add color and crunch. This recipe is simple, yet it packs a lot of flavor. You can find the Full Recipe with detailed steps in the next section. Enjoy cooking! Using day-old rice is key here. Fresh rice can be too sticky, making it hard to fry. Day-old rice dries out a bit, which gives it the right texture. You want each grain to separate easily. Now, prepare your vegetables and aromatics. Dice half a cup of bell pepper. Mince two cloves of garlic. If you want some sweetness, get half a cup of diced pineapple, either fresh or canned. Start by heating a large skillet over medium heat. Add one tablespoon of vegetable oil and let it warm up. Next, sauté the minced garlic for about 30 seconds. You want it fragrant but not burnt. Then, toss in the diced bell pepper. Cook for about two to three minutes until it softens a bit. Now it’s time to add the rice. Stir in the two cups of day-old jasmine rice. Break up any clumps. Make sure the rice is evenly spread in the pan. Pour in one cup of coconut milk and two tablespoons of soy sauce. Stir well and let it simmer for three to four minutes. This allows the rice to soak in the flavors. After that, add the diced pineapple and half a cup of peas. Stir gently to keep the pineapple intact. Cook for another two to three minutes until everything is warmed through. Finally, drizzle one teaspoon of sesame oil over the rice and mix it in. Season with salt and pepper to taste. Remove from heat and fold in the sliced green onions. Serve hot and enjoy your delicious meal! For the full recipe, check the earlier section. Coconut milk adds a rich, creamy taste to fried rice. It also gives a hint of sweetness. This unique flavor makes the dish stand out. Fresh ingredients enhance the taste, too. I love using fresh pineapple and peas. They bring bright colors and flavors that canned items can't match. Fresh rice and day-old rice are not the same. Day-old rice is drier and perfect for frying. It helps you avoid mushy rice. Overcooking vegetables is another common error. You want them tender yet crisp, not soft and soggy. For the perfect fried texture, keep the heat high. This helps the rice fry quickly. Stir often to ensure even cooking. Ideal cooking temperatures are medium to high. This way, your rice gets crispy without burning. Remember, patience is key for great fried rice! For the full recipe, check out the Tropical Coconut Fried Rice section. {{image_2}} You can make this fried rice your own. Start by swapping out veggies. Instead of peas, try carrots or corn. Both add color and crunch. You can also boost nutrition by adding leafy greens like spinach. Next, consider proteins. Chicken, shrimp, or tofu are great choices. For chicken, use cooked pieces and add them at the end. If you prefer shrimp, cook them until pink, then mix them in. Tofu works well too. Just cube it and sauté until golden brown before adding it to the rice. To elevate your fried rice, think about spices. A pinch of ginger or chili flakes can bring warmth. Ginger adds a nice zing, while chili flakes give a spicy kick. Adjust the amounts to suit your taste. You can also explore different sauces. Teriyaki sauce adds sweetness, and fish sauce brings depth. Both options change the flavor profile. Feel free to experiment until you find your perfect blend. Making this dish plant-based is easy. Just skip the meat and use tofu or extra veggies instead. You can swap the soy sauce for a gluten-free version if needed. Many brands offer tasty gluten-free soy sauce. It keeps the flavor and works well in the recipe. Using these tips, you can create a delicious fried rice that suits your taste and needs. Explore all your options for a unique meal every time you cook! For the complete recipe, check out the [Full Recipe]. To keep your fried rice fresh, place it in the fridge. Use airtight containers for storage. This helps keep moisture out and prevents odors. Make sure to cool the rice before sealing it. It’s best to eat leftovers within three days for the best taste. When reheating fried rice, the stove works best. Heat a skillet on medium heat. Add a small splash of water or oil to help steam the rice. Stir often for even heating. If using a microwave, place rice in a bowl. Cover it with a damp paper towel. Heat it in short bursts, stirring in between. This keeps the rice soft and tasty. To freeze fried rice, allow it to cool completely. Portion it into freezer bags. Remove as much air as possible before sealing. It can last for up to three months in the freezer. To thaw, place it in the fridge overnight. Reheat it on the stove or microwave as mentioned above. Enjoy a quick meal ready to go! For the [Full Recipe], check the earlier sections. Yes, you can use different types of rice. Jasmine rice works best for fried rice. Its fluffy texture holds up well. You can also try basmati rice for a unique flavor. Short-grain rice may become sticky. For a healthier option, brown rice adds nuttiness. To avoid mushy fried rice, start with day-old rice. Freshly cooked rice holds too much water. Dry rice grains help keep the dish light. Make sure to cool cooked rice before storing it. Spread it out on a tray to cool quickly. Ensure your skillet is hot before adding rice. This helps fry rather than steam the rice. Leftover fried rice is very versatile. You can turn it into a hearty breakfast. Just add scrambled eggs and some veggies. You can also use it in stuffed peppers. Combine it with beans for a filling meal. Or, toss it with a stir-fry for a quick lunch. Be creative! This blog post provided a clear recipe for delicious coconut fried rice. We discussed essential ingredients, like jasmine rice and coconut milk, along with simple steps to prepare it. Tips on avoiding common mistakes and maximizing flavor helped make this dish stand out. You can customize the recipe to suit your taste and dietary needs. Storing leftovers properly ensures you enjoy today's meal later. Cooking fried rice can be fun and rewarding. I hope you feel ready to try this recipe and make it your own. Enjoy your cooking!](https://homecookingstyle.com/wp-content/uploads/2025/04/94e5694c-03a4-40b1-a4a4-eae926699c5f-300x300.webp)
Chocolate Chip Cookie Dough Dip Delightful Treats
Indulge in the sweet joy of Chocolate Chip Cookie Dough Dip! This treat combines creamy richness with classic flavors. It’s perfect for parties or…