

Latest & Greatest

Crispy Garlic Parmesan Potatoes Tasty and Simple Treat
Are you ready to elevate your potato game? These Crispy Garlic Parmesan Potatoes are the perfect blend of simple and
Read more…
Cheese Pizza Monkey Bread Savory and Easy Recipe
Get ready to delight your taste buds with my easy Cheese Pizza Monkey Bread recipe! This fun twist on classic
Read more…
Wild Blueberry Coffee Cake Danishes Delightful Treat
Get ready to bake a treat that will impress! In this post, I’ll show you how to make Wild Blueberry
Read more…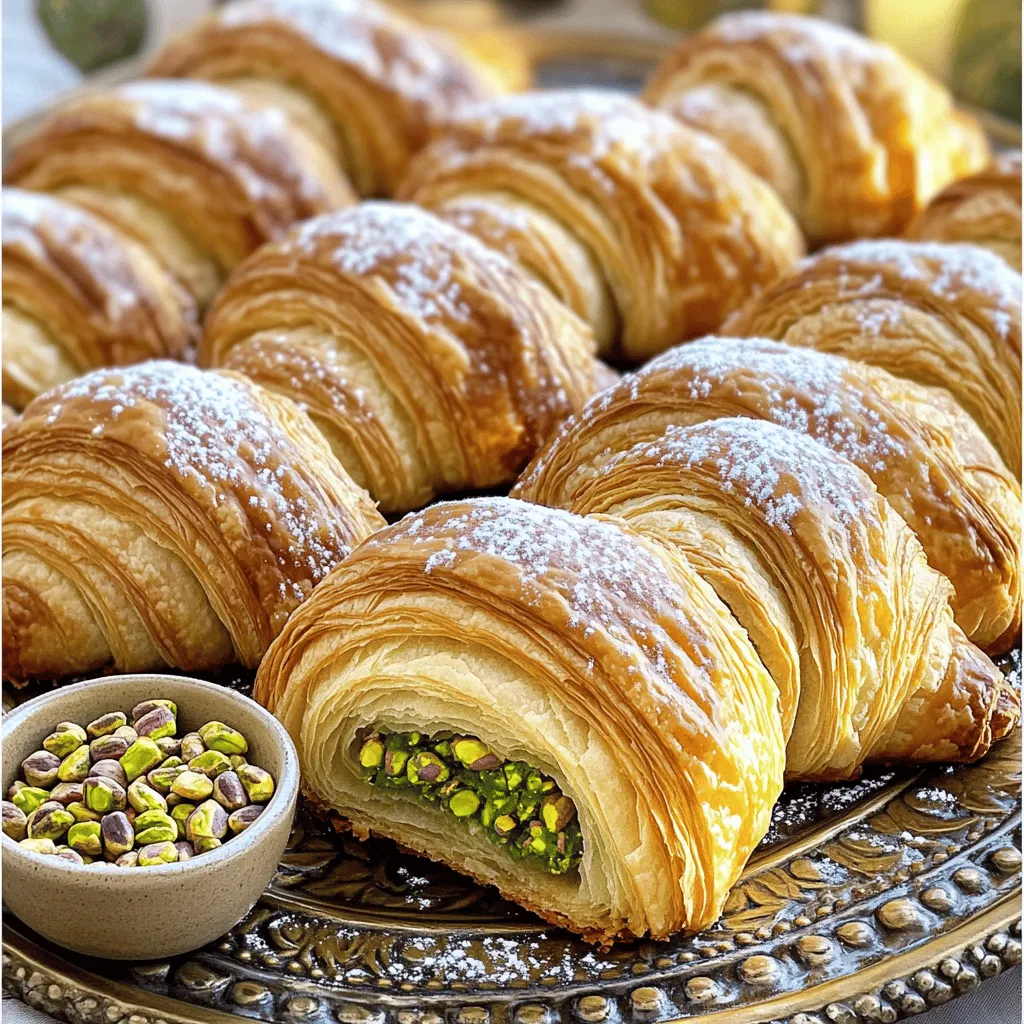
Pistachio Filled Croissants Irresistible Breakfast Treat
Wake up to the smell of fresh-baked Pistachio Filled Croissants! This treat is perfect for breakfast. Imagine buttery, flaky layers
Read more…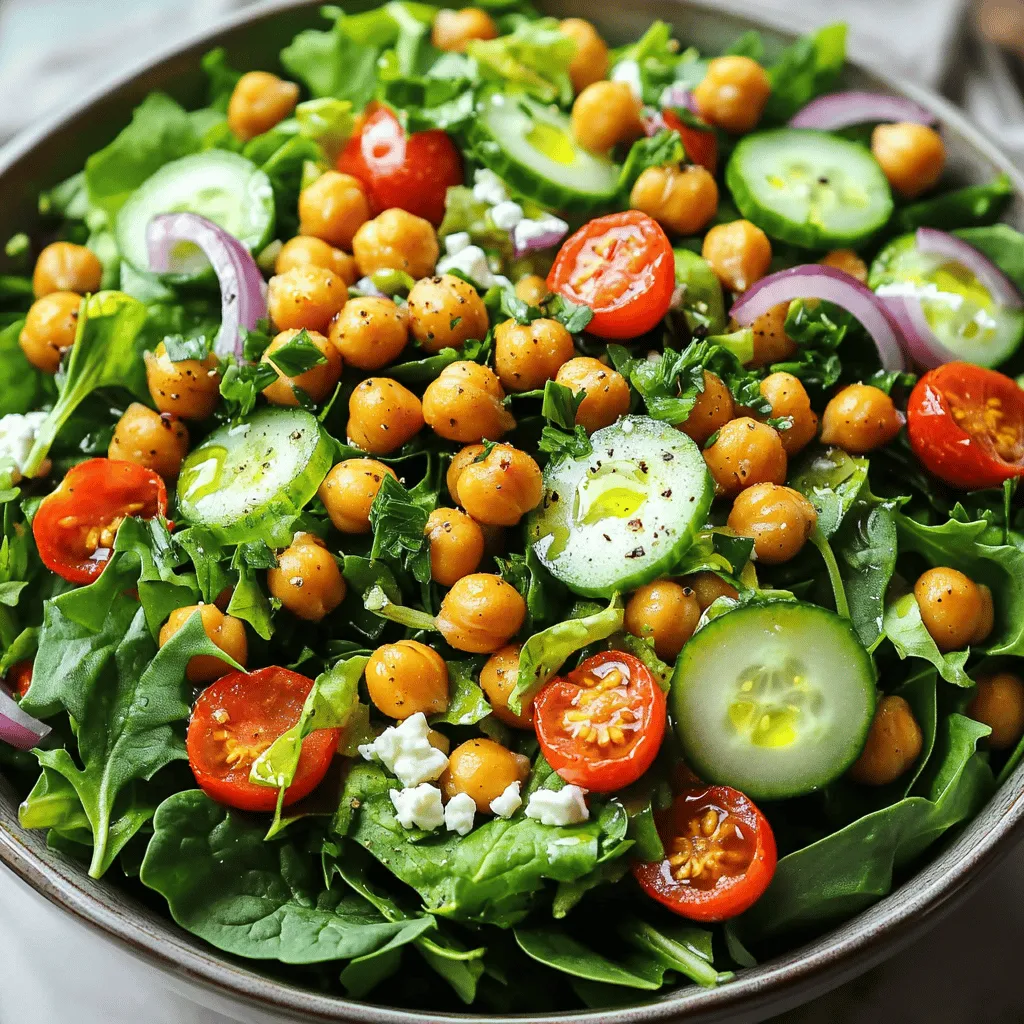
Crispy Chickpea Salad Healthy and Filling Delight
If you’re after a healthy meal that fills you up and tastes great, look no further! This Crispy Chickpea Salad
Read more…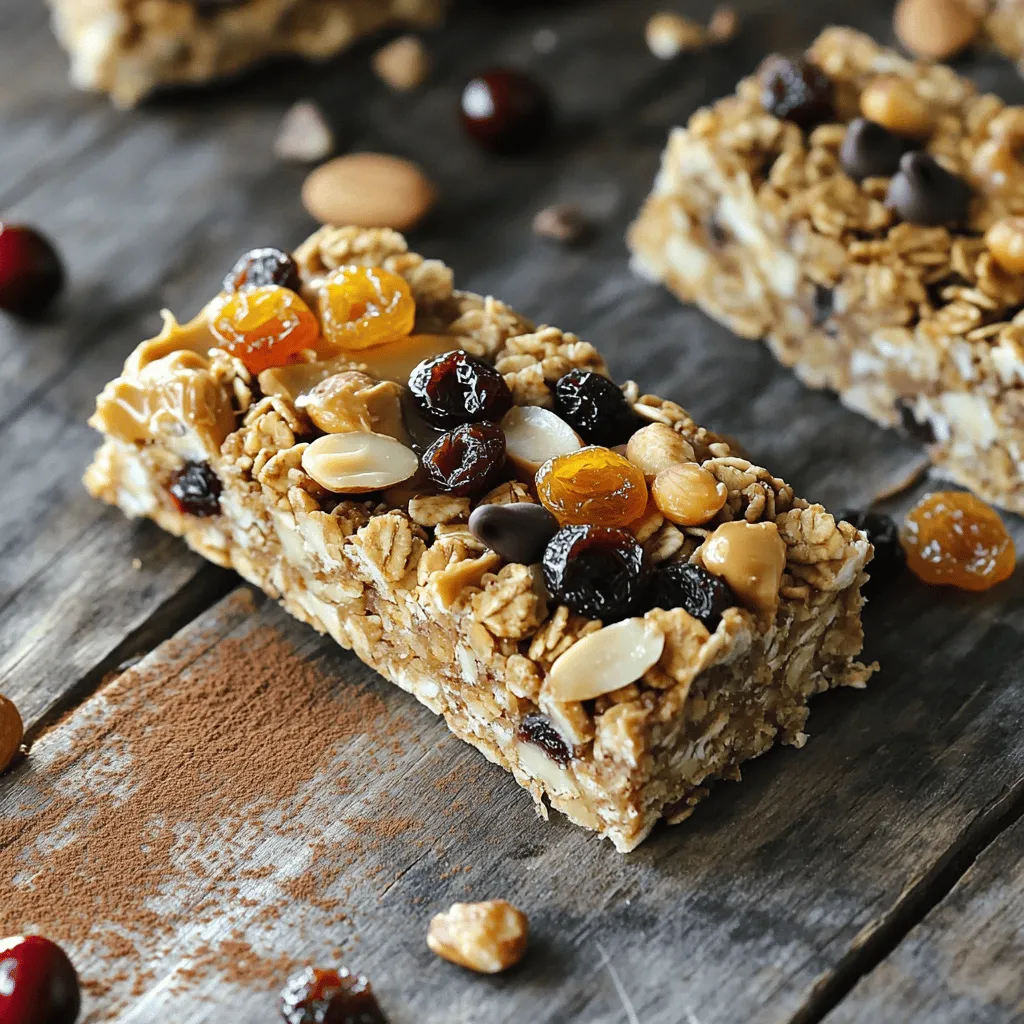
Homemade Granola Bars Easy Recipe for Healthy Snacks
Looking for a quick and healthy snack? Homemade granola bars are fun to make and perfect for any time you
Read more…
Sweet Potato and Black Bean Chili Flavorful Delight
Looking for a cozy, delicious meal? This Sweet Potato and Black Bean Chili is your answer! Packed with flavor and
Read more…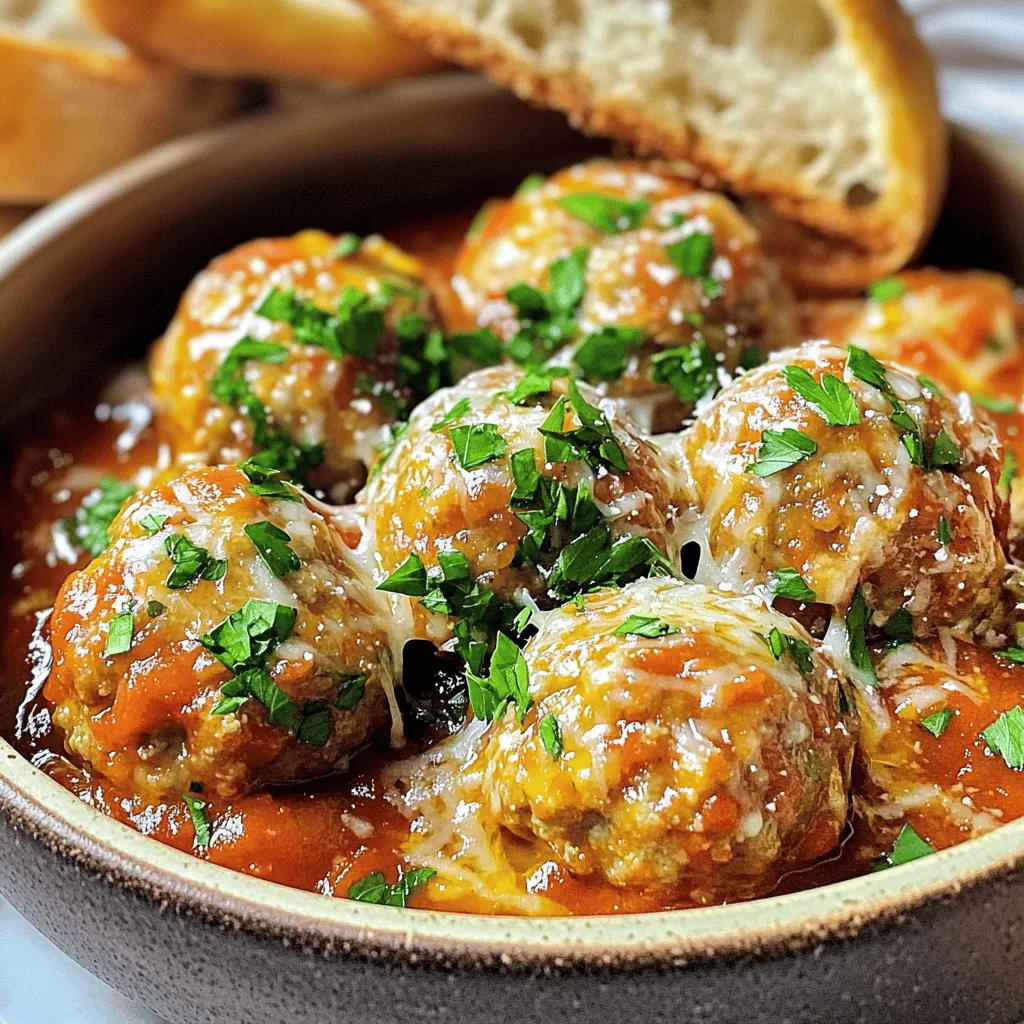
Easy Turkey Meatballs with Marinara Tasty and Simple
Are you ready to impress your family with a simple yet tasty dish? My Easy Turkey Meatballs with Marinara are
Read more…browse recipes


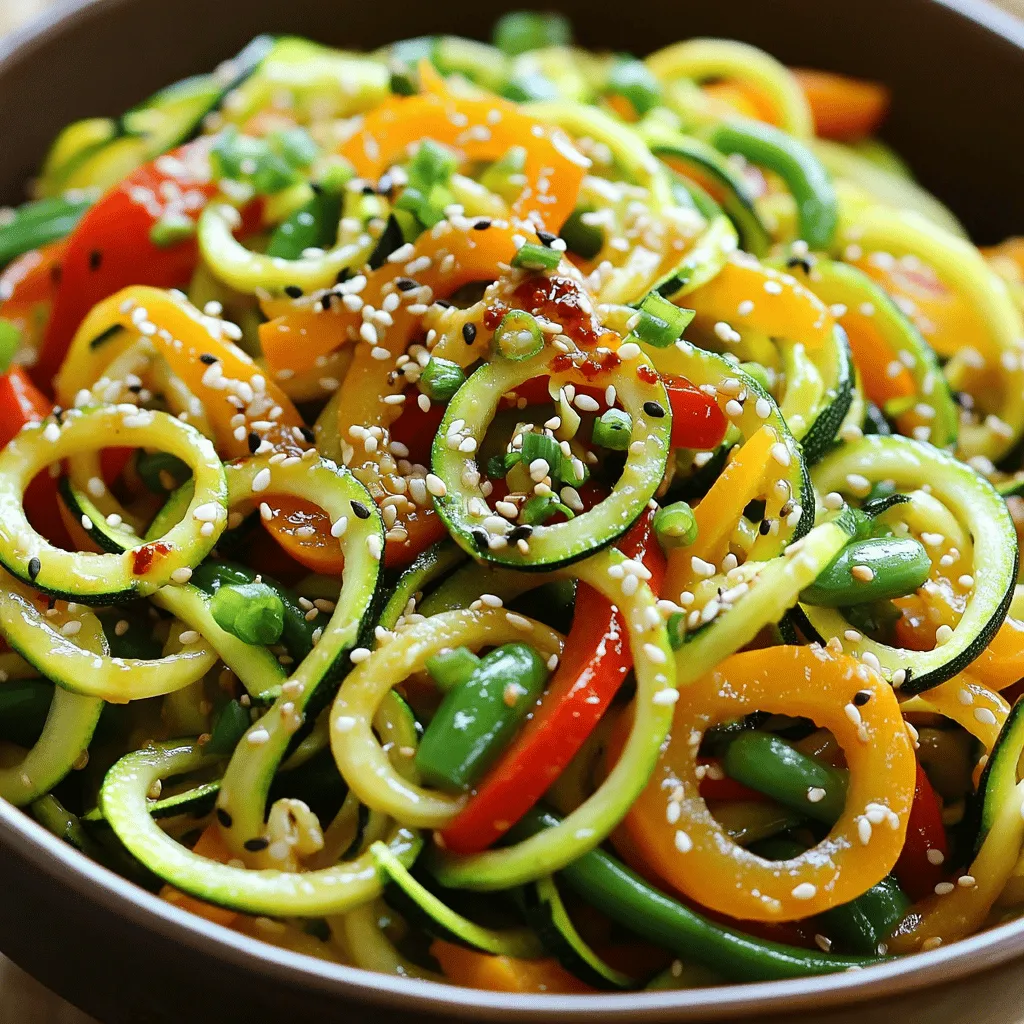
Zucchini Noodle Stir-Fry Tasty and Quick Meal
If you want a meal that’s quick and tasty, try my Zucchini Noodle Stir-Fry! This dish is perfect for busy nights when you crave…
My Latest Desserts
-
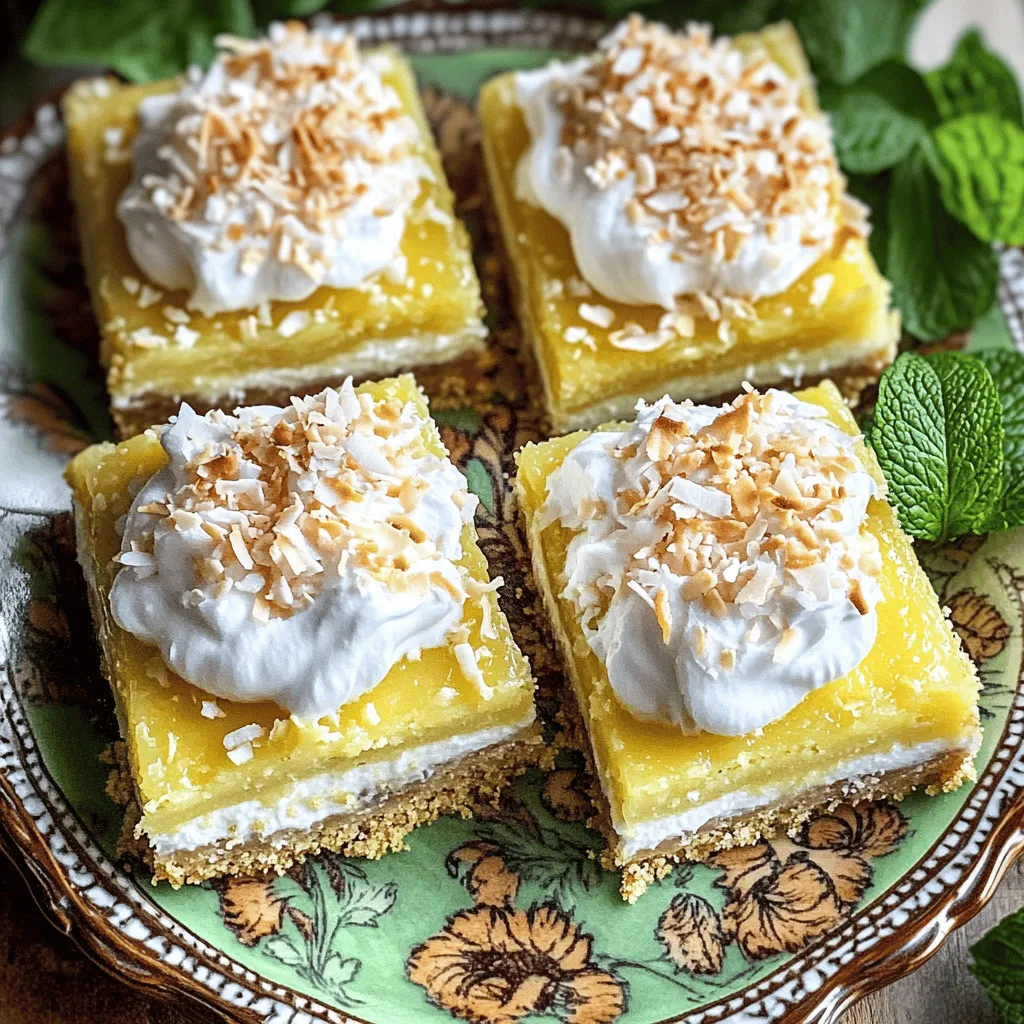
Coconut Cream Pie Bars Delightfully Creamy Treat
If you’re craving something sweet and creamy, Coconut Cream Pie Bars are your answer. These bars combine rich coconut flavor Read Full Recipe -
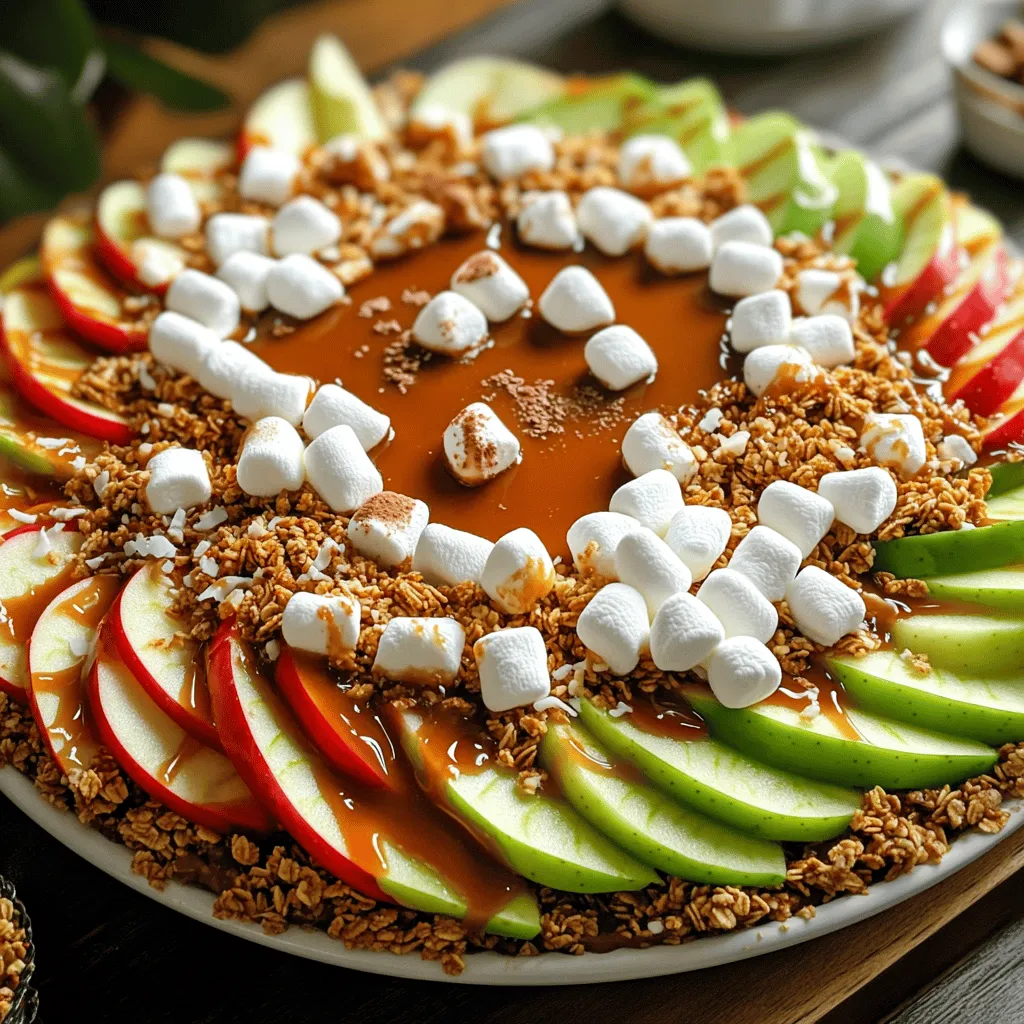
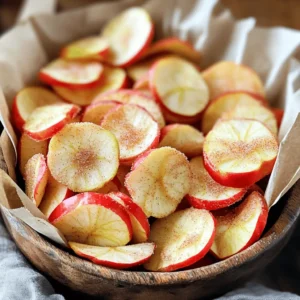
Caramel Apple Nachos Delightful Sweet Snack Idea
Get ready to indulge in a sweet twist with Caramel Apple Nachos! This fun snack combines crisp apples, gooey caramel, Read Full Recipe -
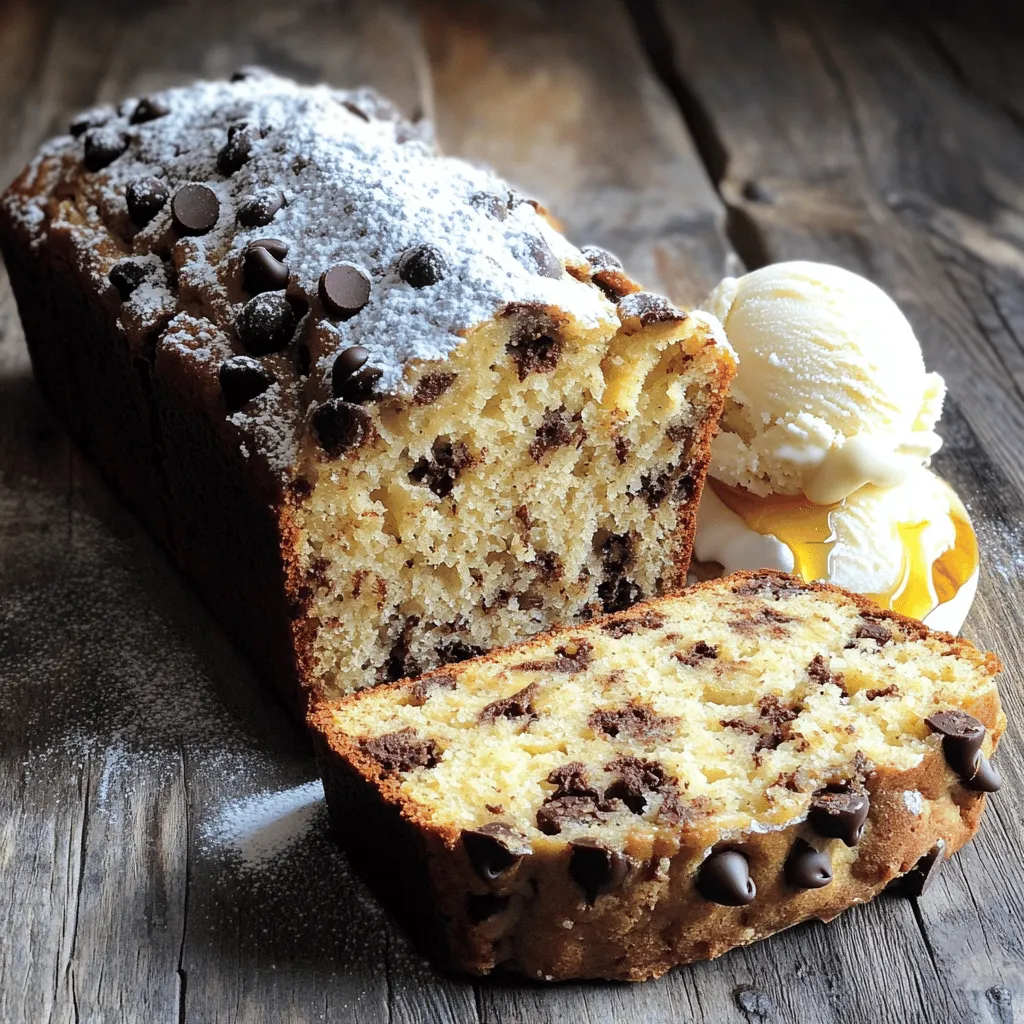
Chocolate Chip Banana Bread Simple and Tasty Recipe
Do you love warm, sweet treats? If so, you’ll adore this simple and tasty Chocolate Chip Banana Bread recipe! With Read Full Recipe -

Cinnamon Sugar Donut Muffins Soft and Tasty Treat
Get ready to satisfy your sweet tooth with these Cinnamon Sugar Donut Muffins! They’re soft, tasty, and perfect for any Read Full Recipe -
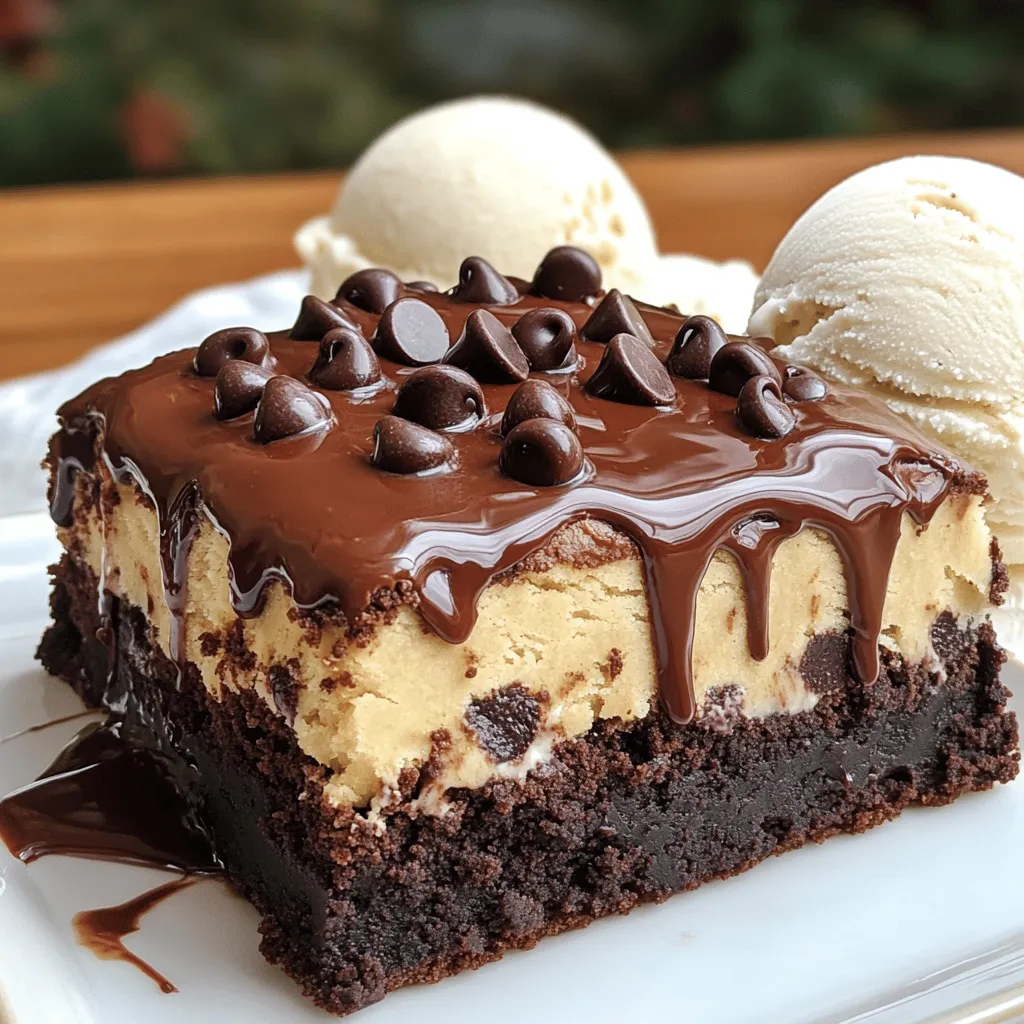
Chocolate Chip Cookie Dough Brownies Delightful Treat
Do you love brownies and cookie dough? Then, you’ll adore Chocolate Chip Cookie Dough Brownies! This delightful treat combines rich, Read Full Recipe -
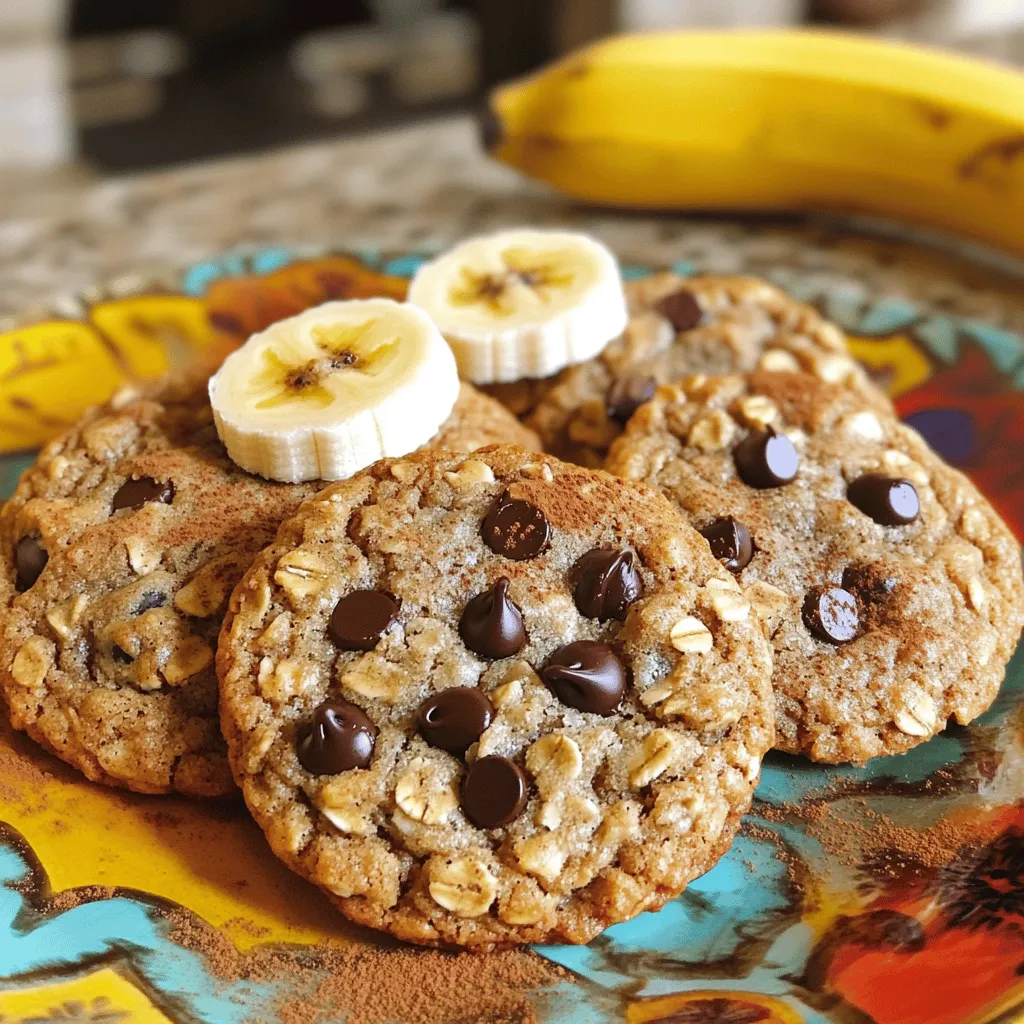
Banana Oatmeal Cookies Simple and Tasty Recipe
Looking for a quick and delicious treat? These Banana Oatmeal Cookies are the answer! With just a few simple ingredients, Read Full Recipe -
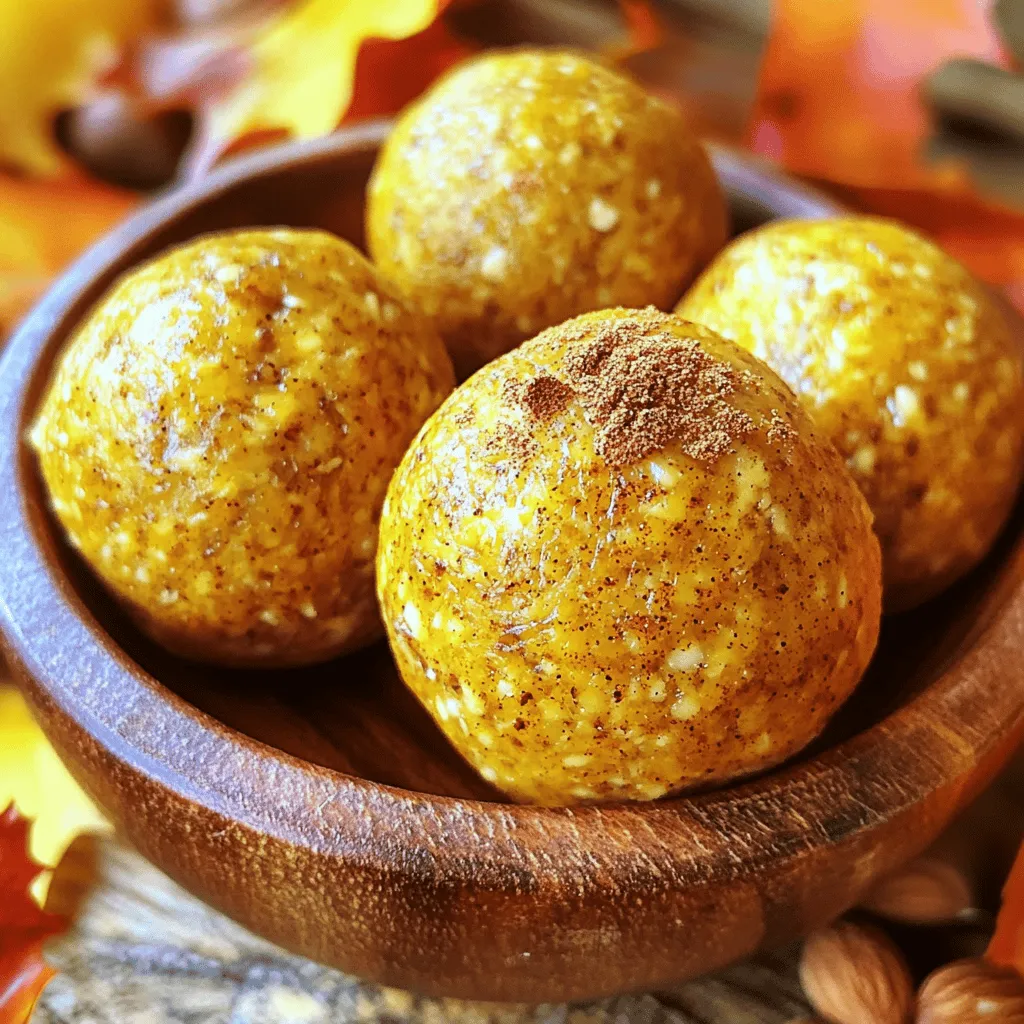
Pumpkin Spice Energy Balls Simple and Tasty Snack
Fall is here, and what better way to celebrate than with delicious Pumpkin Spice Energy Balls? These tasty snacks are Read Full Recipe -
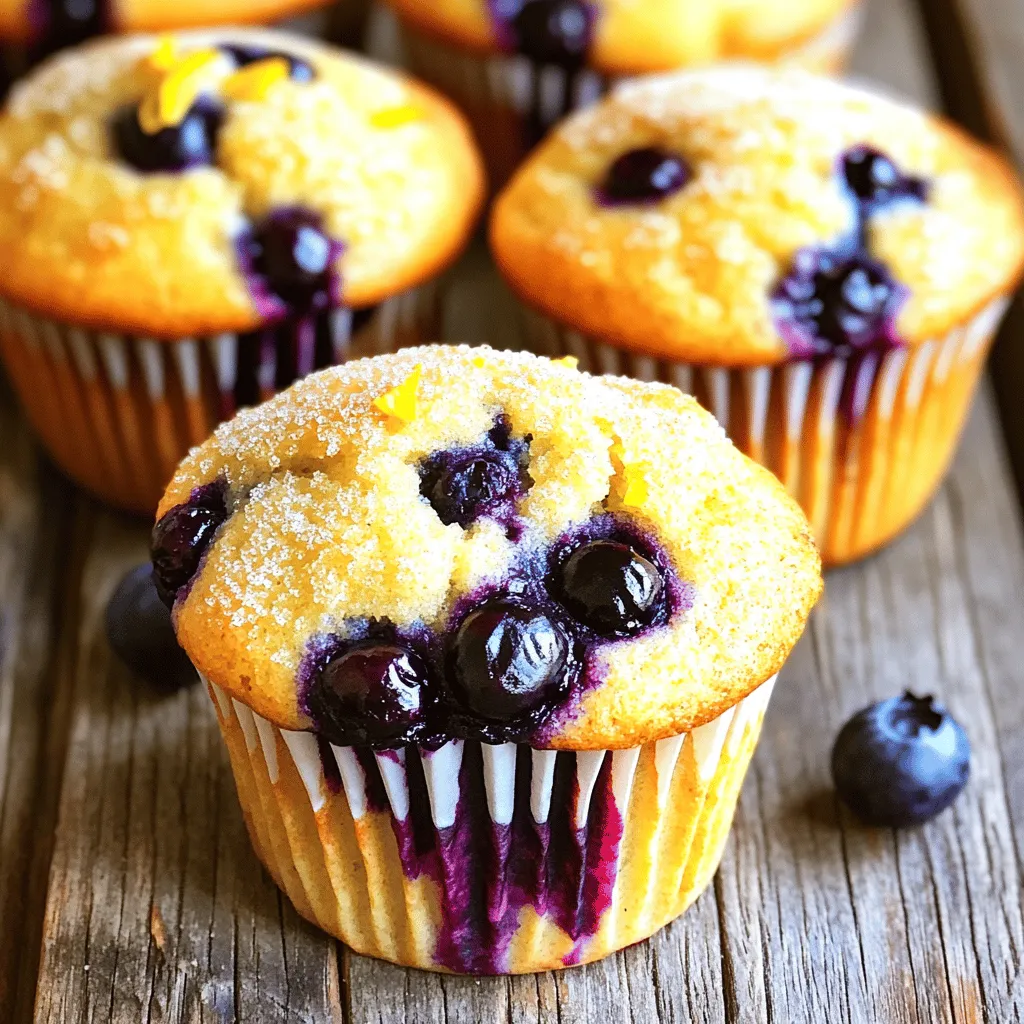
Lemon Blueberry Muffins Delightful and Easy Recipe
Are you ready to enjoy the perfect treat that blends sweet and tangy? My Lemon Blueberry Muffins are simple to Read Full Recipe -
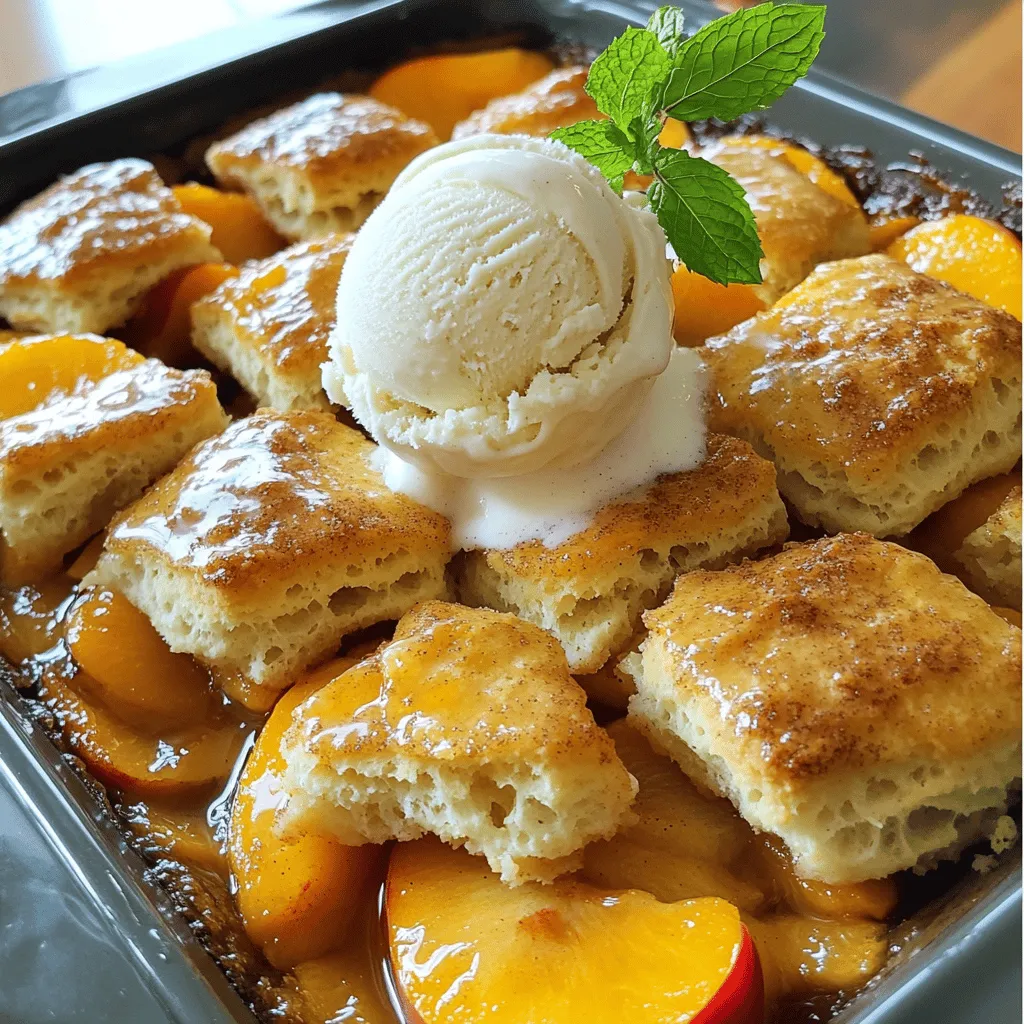
Peach Cobbler with Biscuit Topping Simple Delight
If you crave a warm, sweet dessert, you’ll love my Peach Cobbler with Biscuit Topping. This simple delight combines juicy Read Full Recipe -
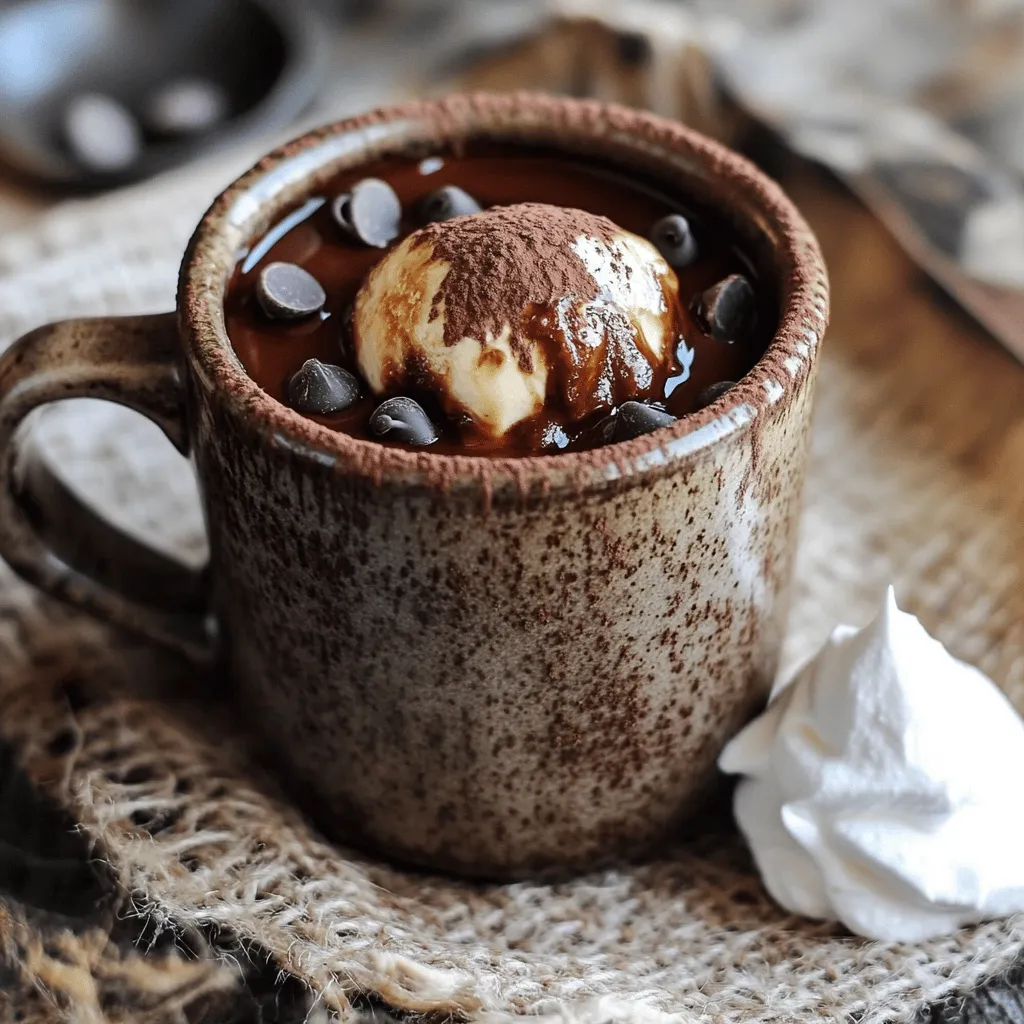
Vegan Chocolate Mug Cake Simple and Delicious Treat
Craving something sweet and easy? You’re in the right place! My vegan chocolate mug cake is quick to make and Read Full Recipe
My Latest Recipes

hey,
i’m !
I’m so happy you’re here!
From my kitchen to your table, each dish is a labor of love. May they delight your palate and warm your heart. Let’s savor the beauty of cooking together.


![- 8 oz elbow macaroni - 2 cups sharp cheddar cheese, shredded - 1 cup Gruyère cheese, shredded - 1 cup whole milk - 1 cup heavy cream - 4 tablespoons unsalted butter - 3 tablespoons all-purpose flour - 1 teaspoon Dijon mustard - 1 teaspoon garlic powder - 1/2 teaspoon onion powder - Salt and pepper to taste - 1 tablespoon truffle oil - 1 cup panko breadcrumbs - Fresh parsley, chopped for garnish (optional) I love using these ingredients to create the best mac and cheese. The combination of sharp cheddar and Gruyère brings depth to the dish. The cream and milk make it rich and smooth. Truffle oil adds a fancy twist, making it stand out. When picking your cheese, go for quality. Freshly shredded cheese melts better and tastes great. The butter and flour make a nice roux, which is key for a creamy sauce. Use the Dijon mustard and spices to enhance the flavor without overpowering it. Don't skip the panko breadcrumbs. They add a crunchy topping that contrasts the creamy inside. If you like, sprinkle fresh parsley on top for color and a hint of freshness. This list of ingredients sets the stage for a cozy meal. You will enjoy the rich flavors and creamy texture in every bite. For the full recipe, check out the complete guide to making this comforting dish. To cook elbow macaroni to al dente, start with a large pot. Fill it with water and add a pinch of salt. Bring the water to a rolling boil. Add the macaroni and cook it according to the package instructions, usually around 8-10 minutes. You want the pasta to be firm but not hard. Once done, drain the pasta in a colander and set it aside to let it cool slightly. To make the roux, grab a medium saucepan and heat it over medium heat. Melt 4 tablespoons of unsalted butter. Once melted, whisk in 3 tablespoons of all-purpose flour. Cook this mix for about 1-2 minutes until it turns golden. This is your roux base. Now, gradually whisk in 1 cup of whole milk and 1 cup of heavy cream. This slow process prevents lumps from forming. Cook this mixture for about 3-5 minutes until it thickens. Stir in 1 teaspoon of Dijon mustard, 1 teaspoon of garlic powder, and 1/2 teaspoon of onion powder. Add salt and pepper to taste. Finally, remove the pan from heat and mix in 2 cups of shredded cheese until it melts smoothly. In a large mixing bowl, combine the cooked macaroni with your cheese sauce. Mix well until every piece is coated. Now, stir in 1 tablespoon of truffle oil for a gourmet touch. Preheat your oven to 350°F (175°C). Grease a baking dish and transfer the mac and cheese mixture into it. For the topping, mix 1 cup of panko breadcrumbs with a drizzle of olive oil. Sprinkle this evenly over the mac and cheese. Bake for 25-30 minutes until the top is golden brown and bubbly. Remove from the oven and let it cool for a few minutes before serving. For a finishing touch, sprinkle fresh parsley on top. You can find the full recipe for this creamy truffle mac & cheese to make it at home! To get the creamiest mac and cheese, start with your cheese choice. I recommend using a mix of sharp cheddar and Gruyère. The sharp cheddar gives a bold flavor, while Gruyère adds a rich creaminess. Make sure your cheese is freshly shredded. Pre-packaged cheese often has additives that prevent melting well. The milk-to-cream ratio also matters. Using a 1:1 ratio of whole milk and heavy cream works best. This mix keeps the sauce rich but not too heavy. If you want a lighter option, you can increase the milk and reduce the cream. To boost the flavor, try adding fresh herbs or spices. A bit of thyme or rosemary can elevate your dish. You can also sprinkle in some smoked paprika for a subtle kick. For a special touch, drizzle a little truffle oil on top before serving. If you prefer, you can use garlic-infused olive oil or even chili oil for a different twist. How you serve your mac and cheese can make a big difference. For a fancy look, use individual ramekins. This way, each person has their own portion. If you go for a large dish, try to make it look inviting. Top it with panko breadcrumbs for a crunchy layer. Garnishing also adds visual appeal. You can sprinkle chopped parsley or chives on top right before serving. This not only adds color but also brings a fresh taste to the dish. For a touch of elegance, drizzle a tiny bit of truffle oil on top before serving. For the full recipe, check out the [Full Recipe]. {{image_2}} Using different cheeses can change the whole dish. You can mix sharp cheddar with mozzarella for a stretchier bite. Gruyère adds a nice nutty flavor. For a smoky touch, try smoked gouda. If you want a lower-fat option, use part-skim cheeses. They will still melt well. Just remember, low-fat cheese might not be as creamy. Want to make your mac and cheese more fun? Add bacon for a crispy texture. Cook it until golden, then crumble it into the mix. You can also toss in veggies like spinach or broccoli. They add color and nutrition. For a full meal, try adding cooked chicken or shrimp. This makes it hearty and satisfying. If you need a gluten-free option, swap regular pasta for gluten-free macaroni. Check labels to ensure your pasta is safe. For a vegan mac and cheese, use cashew cream or coconut milk instead of dairy. Nutritional yeast gives a cheesy flavor without using cheese. You can also try vegan cheeses made from nuts or soy. They melt well and taste great! For more details on making the perfect mac and cheese, check out the Full Recipe! To store mac and cheese in the fridge, let it cool first. Use an airtight container for best results. This keeps it fresh and tasty. You can store it for about 3 to 5 days. Check for signs of spoilage. If it smells sour or has mold, throw it away. Reheating is easy, just microwave or bake it. Add a splash of milk to restore creaminess when reheating. Freezing mac and cheese is simple. First, cool it completely. Then, spoon it into a freezer-safe container. Make sure to leave some space at the top. This helps with expansion when it freezes. Wrap the container tightly with plastic wrap. For best quality, use it within 2 to 3 months. To reheat frozen mac and cheese, thaw it in the fridge overnight. Bake it at 350°F (175°C) until it's heated through, about 20 to 30 minutes. Add a bit of milk if needed, and enjoy your creamy comfort food again! For the detailed recipe, check out the Full Recipe. The secret lies in the cheese, milk, and technique. For a rich taste, use sharp cheddar and Gruyère cheese. These two cheeses melt well and give the dish depth. You can also add a bit of Dijon mustard for a tangy kick. You need to make a smooth cheese sauce. Start by making a roux with butter and flour. This thickens the sauce and adds flavor. Then, slowly whisk in milk and cream. This step helps avoid lumps. Cook it until thickened. Finally, mix in your cheeses until they melt and become creamy. Using fresh ingredients is key. Fresh cheeses melt better than pre-shredded ones. This will take your mac and cheese to the next level. Yes, you can make mac and cheese ahead of time. Prepare the dish up to the baking step. After mixing the pasta with the cheese sauce, place it in a baking dish. Cover it and store it in the fridge for up to two days. When you're ready to eat, preheat your oven. Bake it for about 30-35 minutes or until bubbly. If it is cold from the fridge, you might need to add a few extra minutes. This method saves you time on busy days. Elbow macaroni is the classic choice for mac and cheese. Its shape holds the cheese sauce well. However, you can use other shapes too. Shells and cavatappi are also great options. They have curves that catch the sauce nicely. Avoid using thin pasta like spaghetti. It does not hold the sauce well. Choose a pasta that can stand up to the creamy cheese. This makes every bite delicious! In this article, we explored the key ingredients, steps, and tips for making creamy truffle mac and cheese. You learned how to cook pasta, create a smooth cheese sauce, and enhance the dish's flavor. Remember, the choice of cheese and add-ins can change the taste. You can customize it for any diet or preference. Follow the storage tips to enjoy leftovers later. Dive in and make this dish your own! Enjoy every cheesy bite.](https://homecookingstyle.com/wp-content/uploads/2025/05/cafb97bc-52c5-4867-b4bd-9908619132ae-300x300.webp)
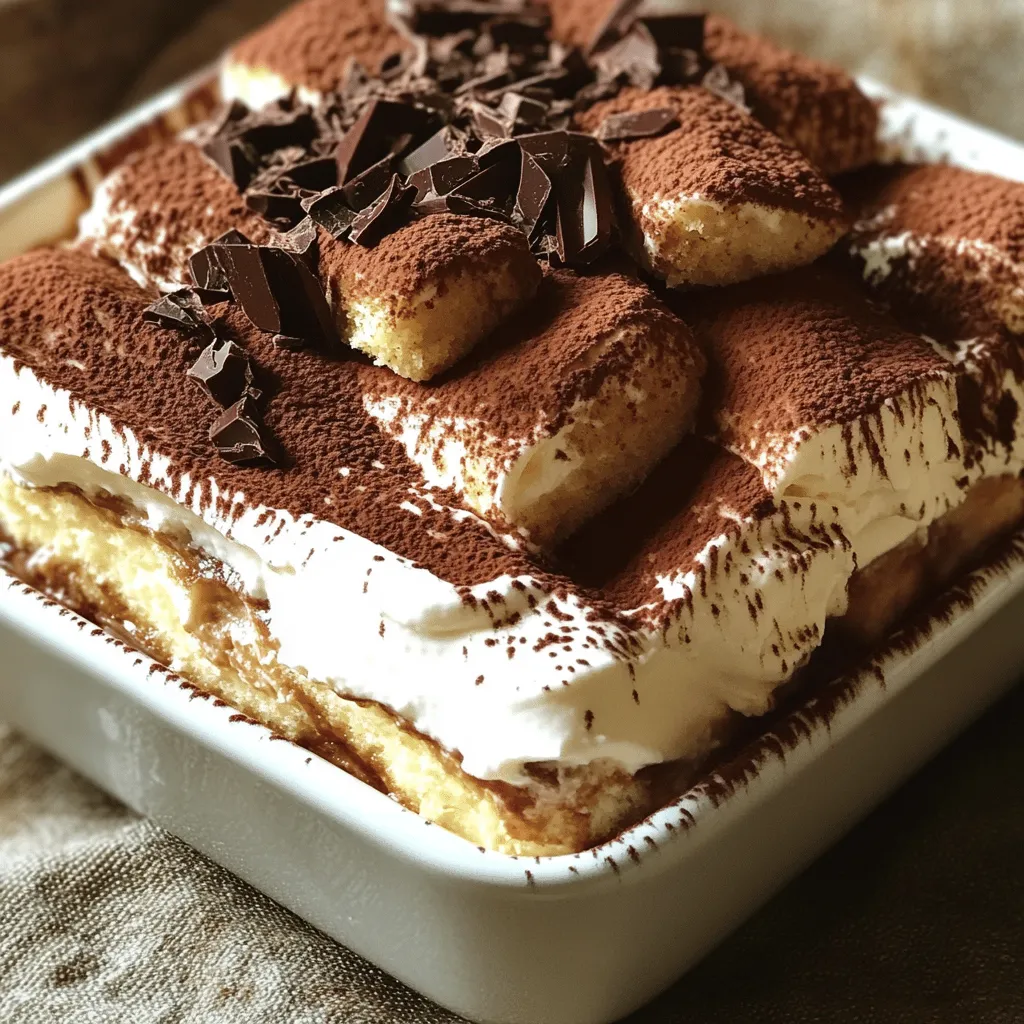
No-Bake Tiramisu Decadent and Simple Delight
Are you ready to indulge in a dessert that’s both rich and easy to make? My No-Bake Tiramisu recipe delivers creamy layers of mascarpone…