

Latest & Greatest

Honey Garlic Chicken Thighs Savory Dinner Delight
Welcome to the savory world of Honey Garlic Chicken Thighs! If you crave a quick, tasty dinner that bursts with
Read more…
Air Fryer Veggie Spring Rolls Crispy and Flavorful Recipe
Ready to impress your friends and family? These Air Fryer Veggie Spring Rolls are crispy, flavorful, and easy to make.
Read more…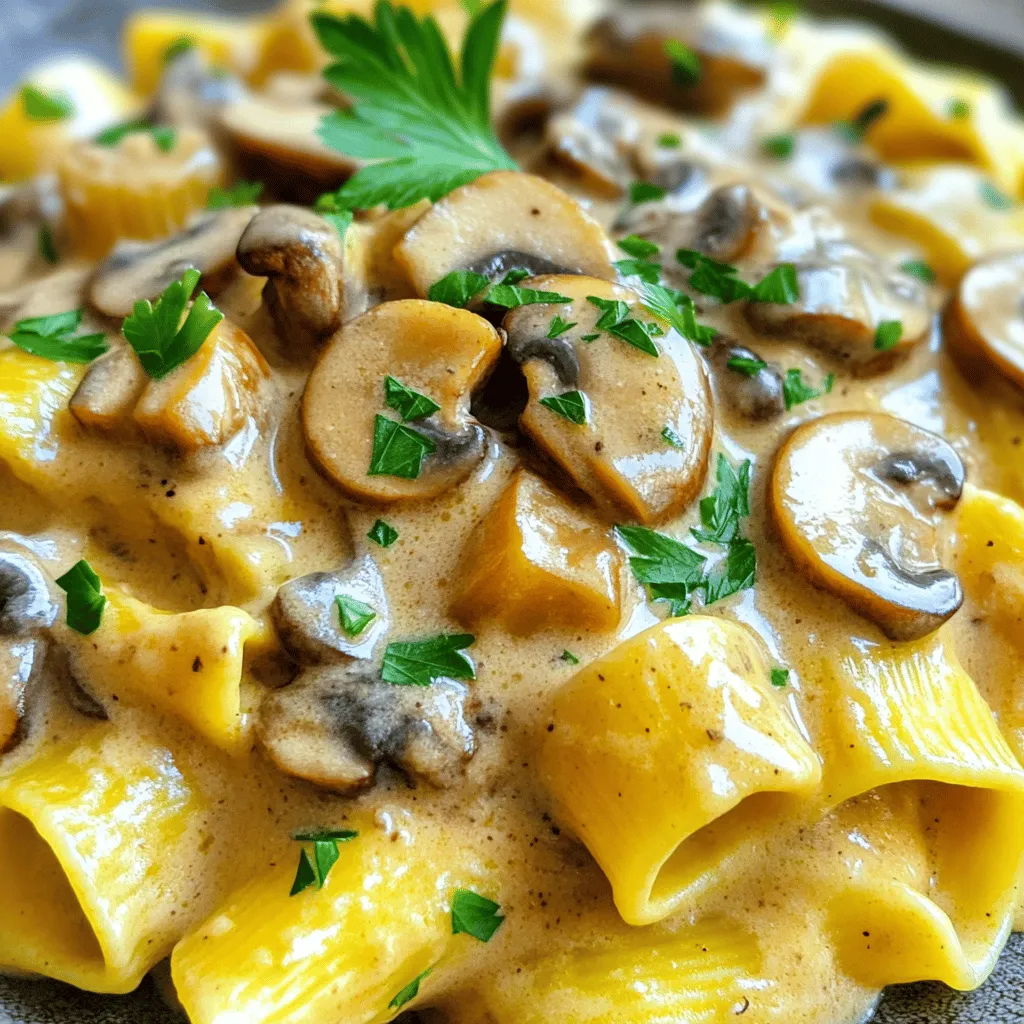
Vegan Mushroom Stroganoff Rich and Creamy Delight
Are you ready for a rich and creamy delight that satisfies your taste buds? This Vegan Mushroom Stroganoff packs a
Read more…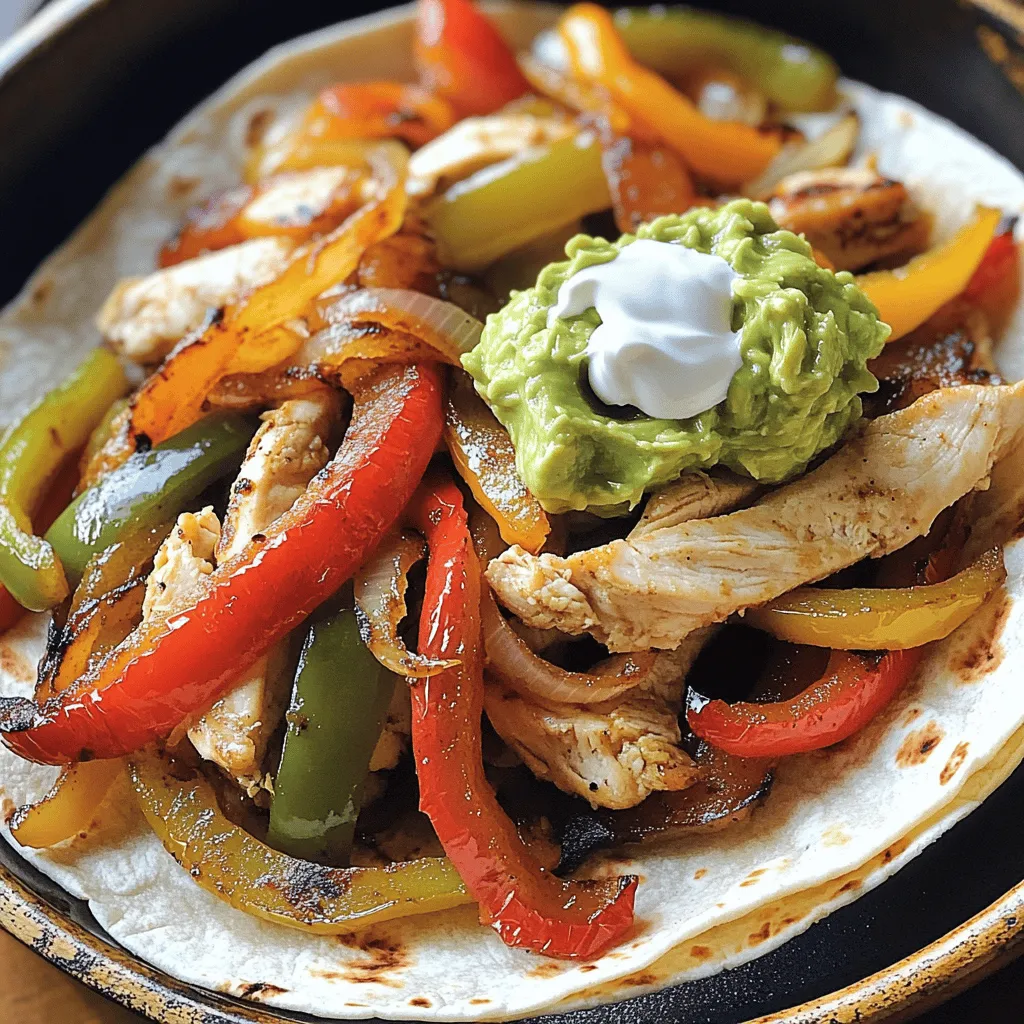
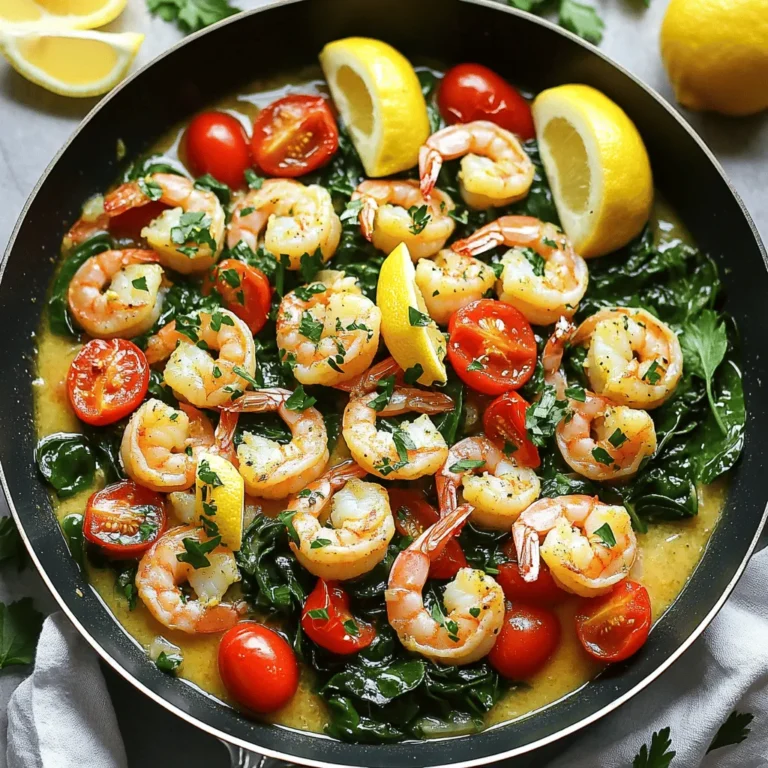
Easy Chicken Fajitas Tasty and Quick Meal Recipe
Looking for a quick and tasty meal? You’re in the right place! In this guide, I’ll show you how to
Read more…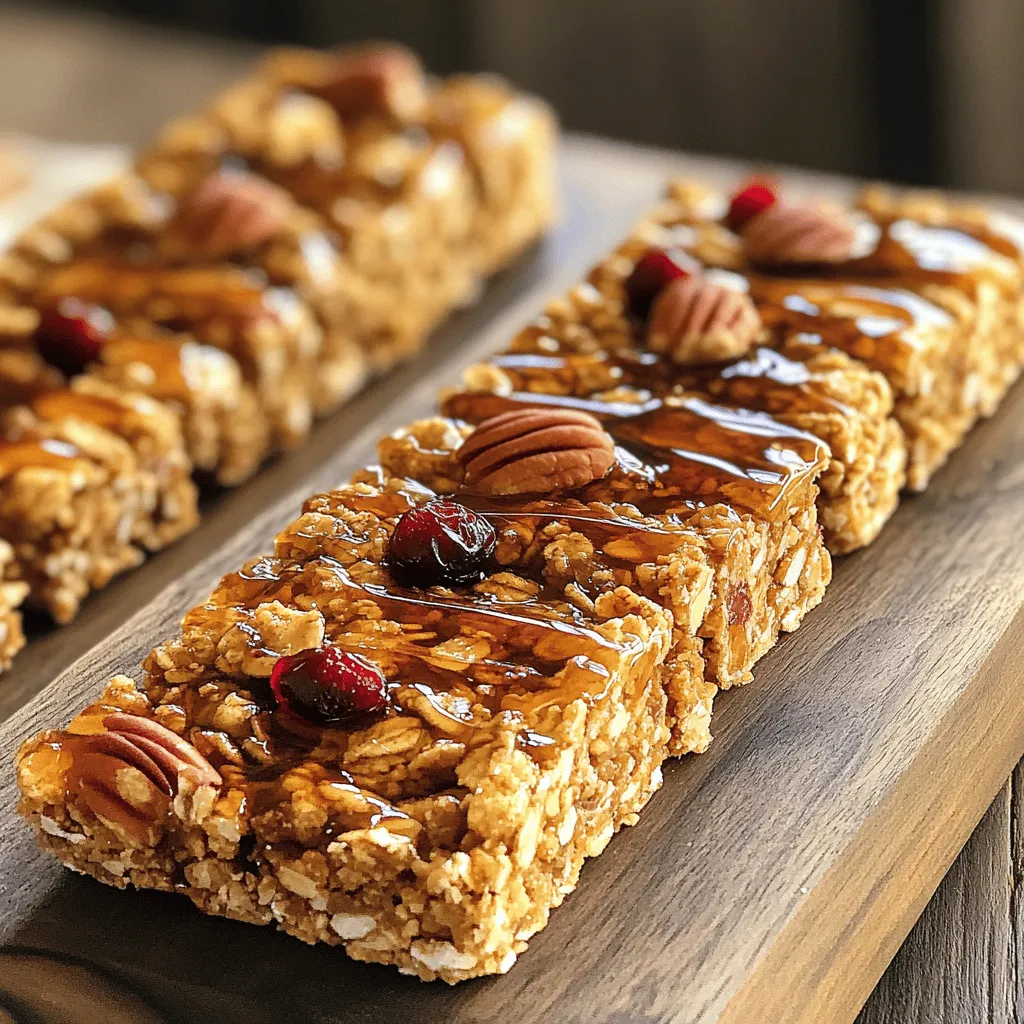
Maple Pecan Granola Bars Tasty and Easy Recipe
Are you ready to whip up a delicious snack? These Maple Pecan Granola Bars are tasty and super easy to
Read more…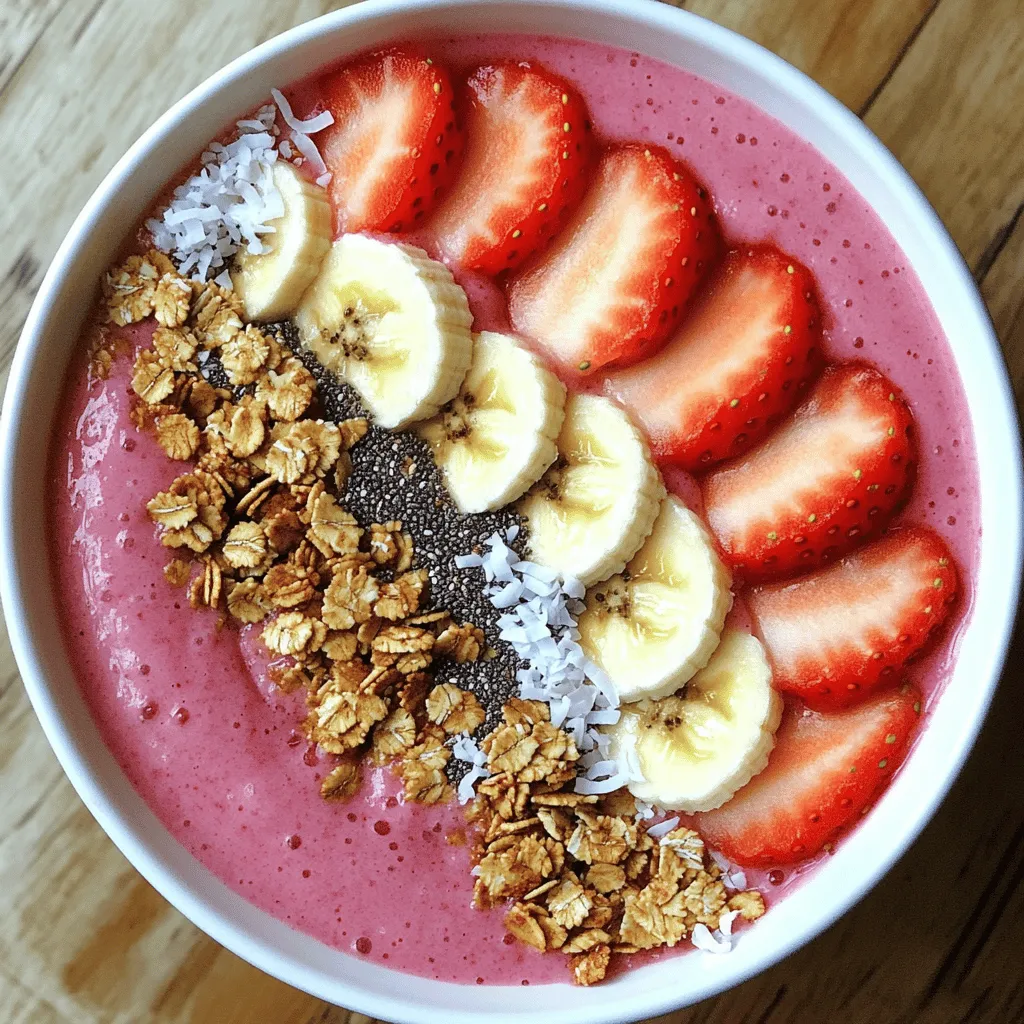
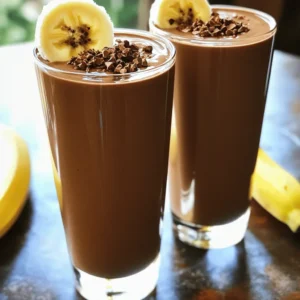
Strawberry Banana Smoothie Bowl Energizing Recipe
Are you ready to whip up a delicious and energizing breakfast? My Strawberry Banana Smoothie Bowl is quick, easy, and
Read more…
Honey Garlic Chicken Thighs Flavorful and Easy Recipe
Looking for a simple yet mouthwatering dinner option? You’re in the right place! My Honey Garlic Chicken Thighs recipe combines
Read more…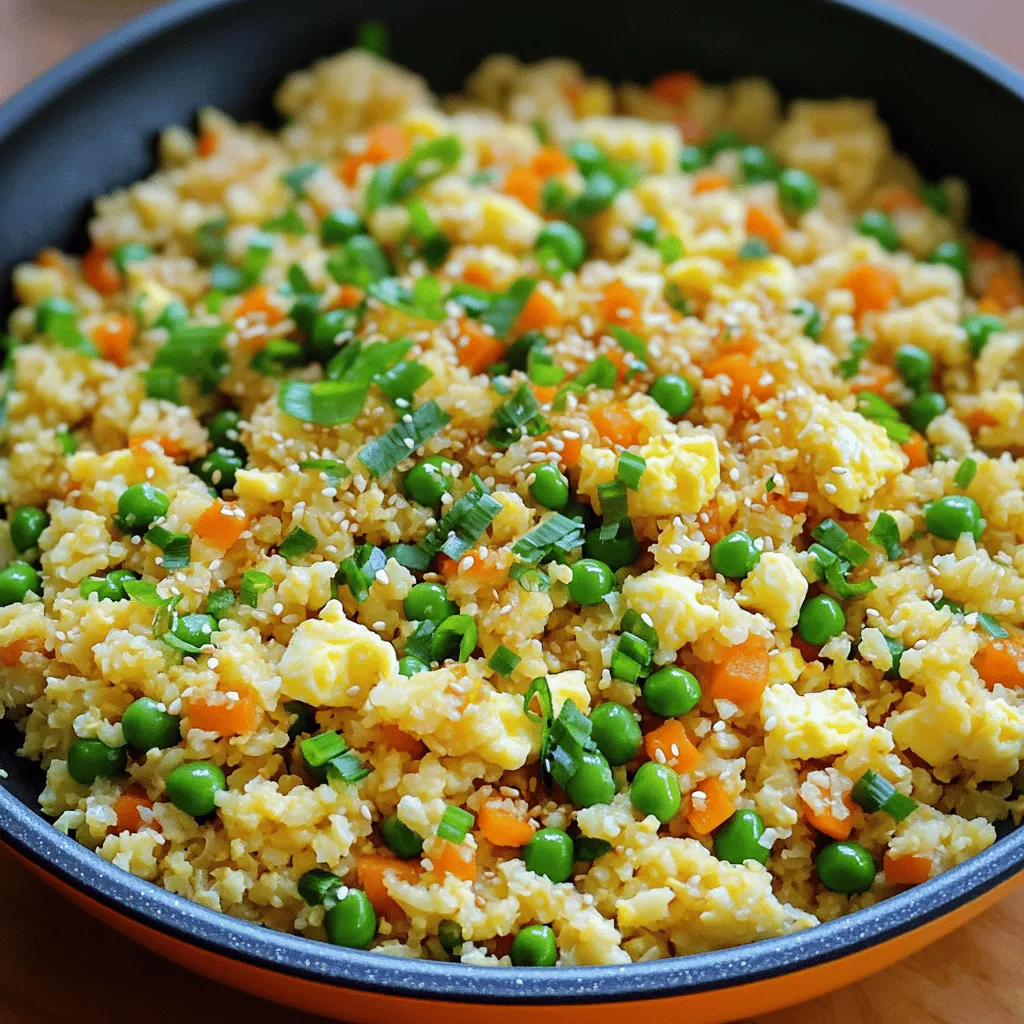
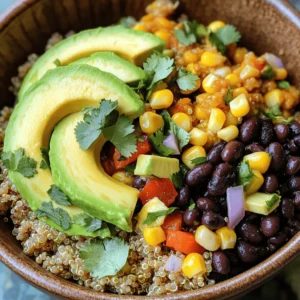
Cauliflower Fried Rice Flavorful and Easy Meal Idea
Looking for a simple, tasty meal that won’t weigh you down? Cauliflower Fried Rice is your answer! This dish swaps
Read more…browse recipes


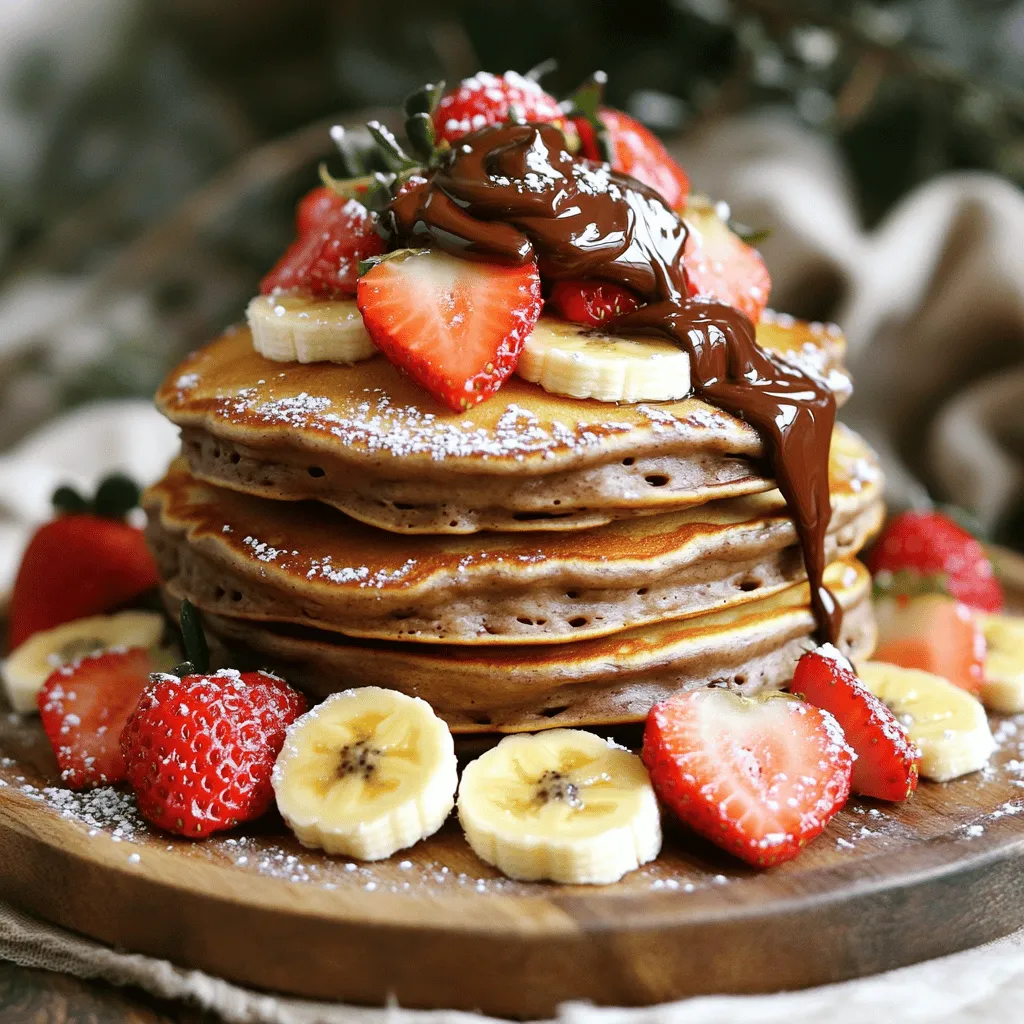
Chocolate Hazelnut Spread Pancakes Irresistible Treat
Get ready to indulge in a sweet breakfast treat! Imagine fluffy pancakes, warm from the skillet, drizzled with rich chocolate hazelnut spread. This recipe…
My Latest Desserts
-
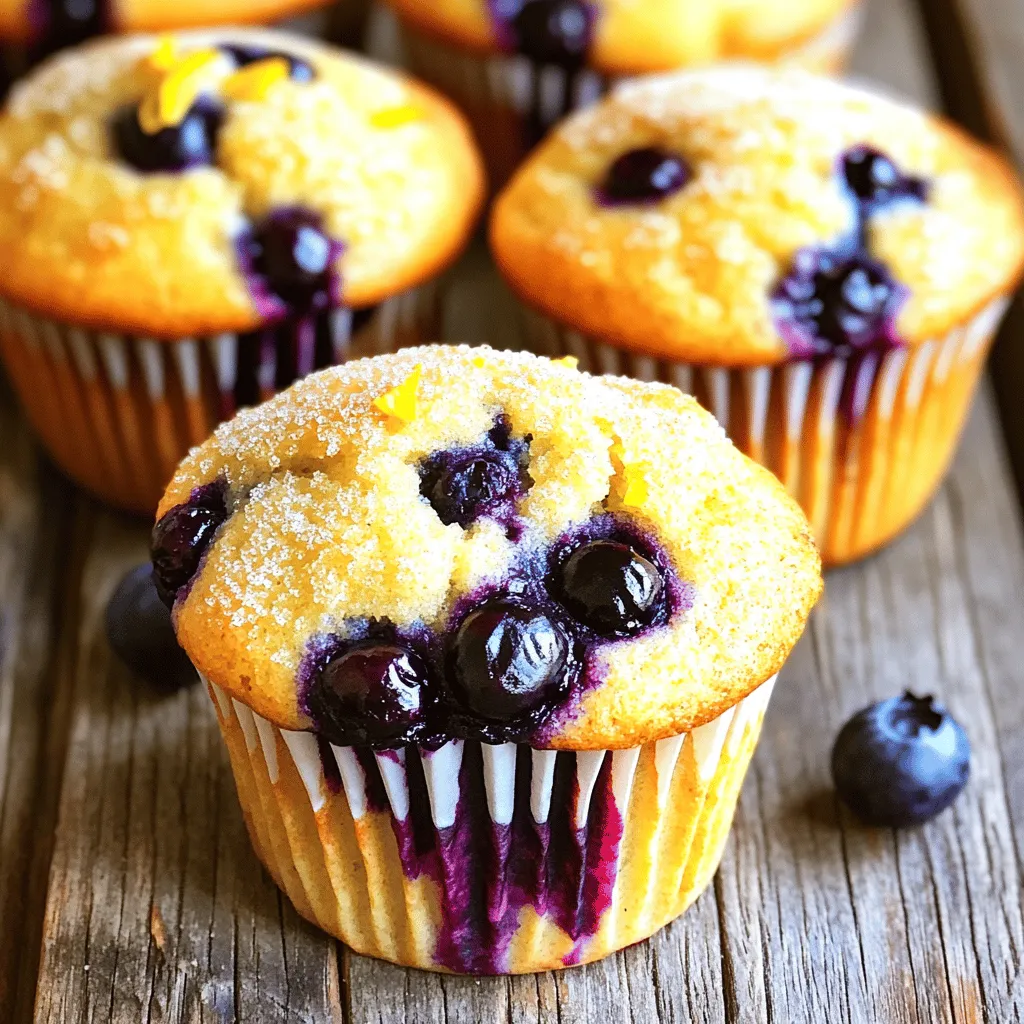
Lemon Blueberry Muffins Delightful and Easy Recipe
Are you ready to enjoy the perfect treat that blends sweet and tangy? My Lemon Blueberry Muffins are simple to Read Full Recipe -
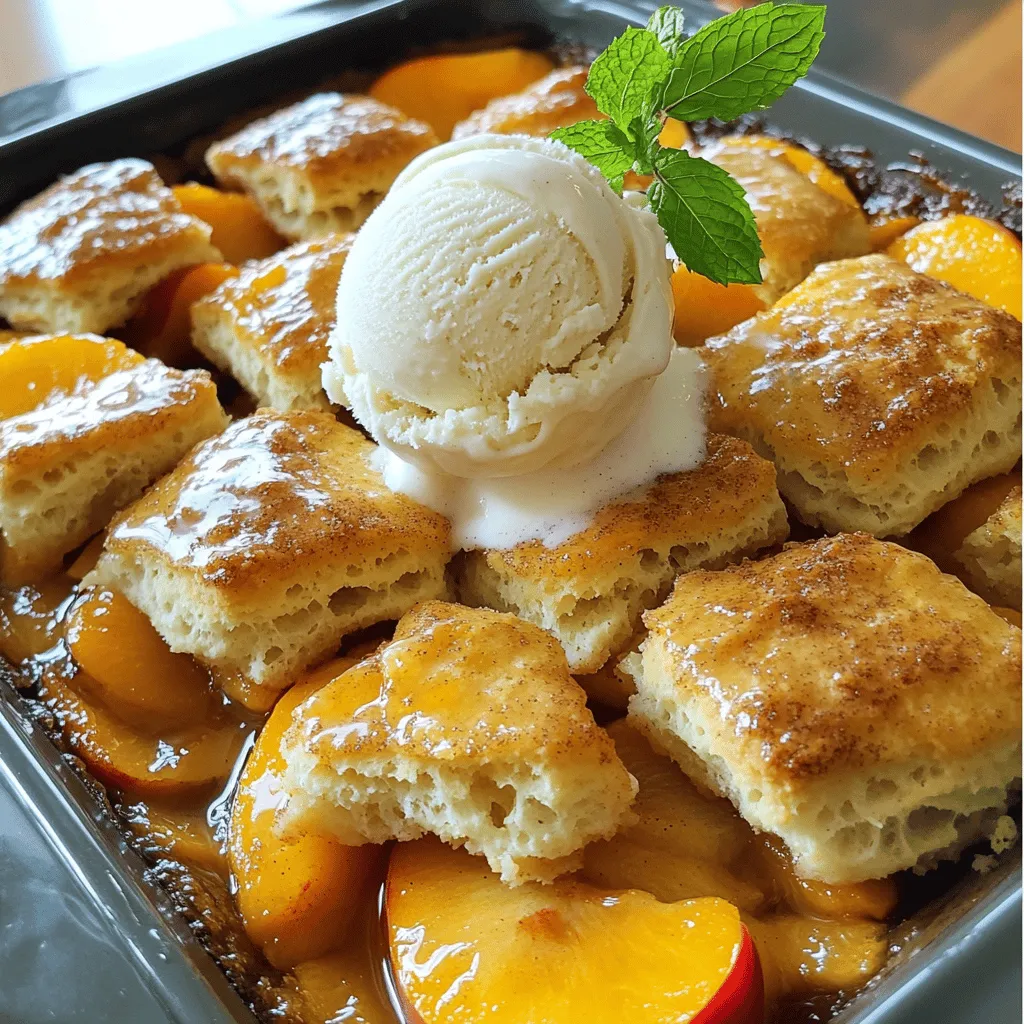
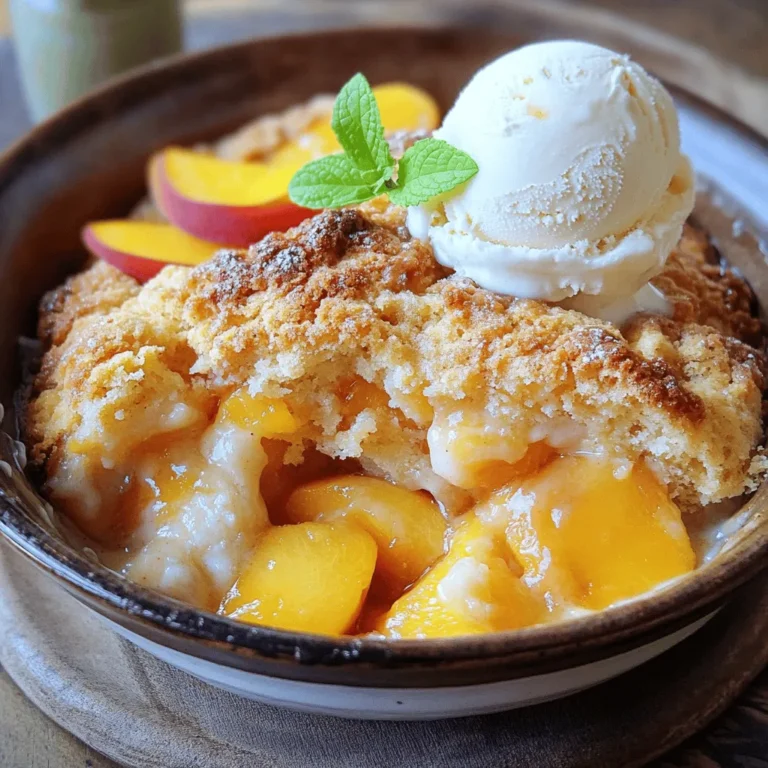
Peach Cobbler with Biscuit Topping Simple Delight
If you crave a warm, sweet dessert, you’ll love my Peach Cobbler with Biscuit Topping. This simple delight combines juicy Read Full Recipe -

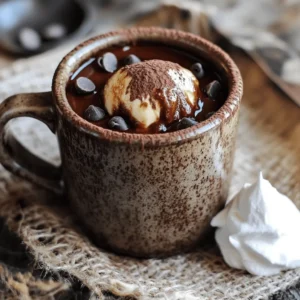
Vegan Chocolate Mug Cake Simple and Delicious Treat
Craving something sweet and easy? You’re in the right place! My vegan chocolate mug cake is quick to make and Read Full Recipe -
Chocolate Hazelnut Spread Pancakes Irresistible Treat
Get ready to indulge in a sweet breakfast treat! Imagine fluffy pancakes, warm from the skillet, drizzled with rich chocolate Read Full Recipe -
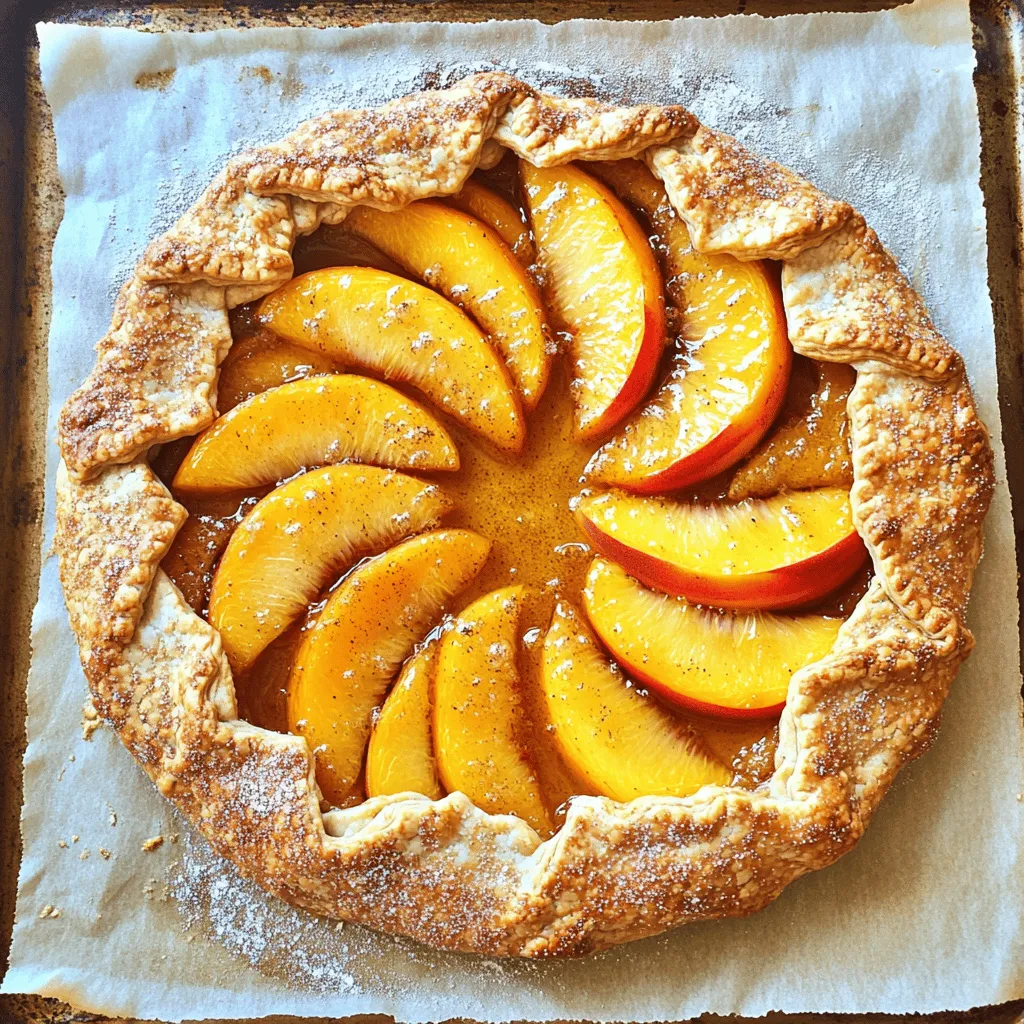
Peach Galette with Almond Crust Delightful Recipe
Are you ready to impress your friends with a stunning dessert? Try this Peach Galette with Almond Crust! This treat Read Full Recipe -
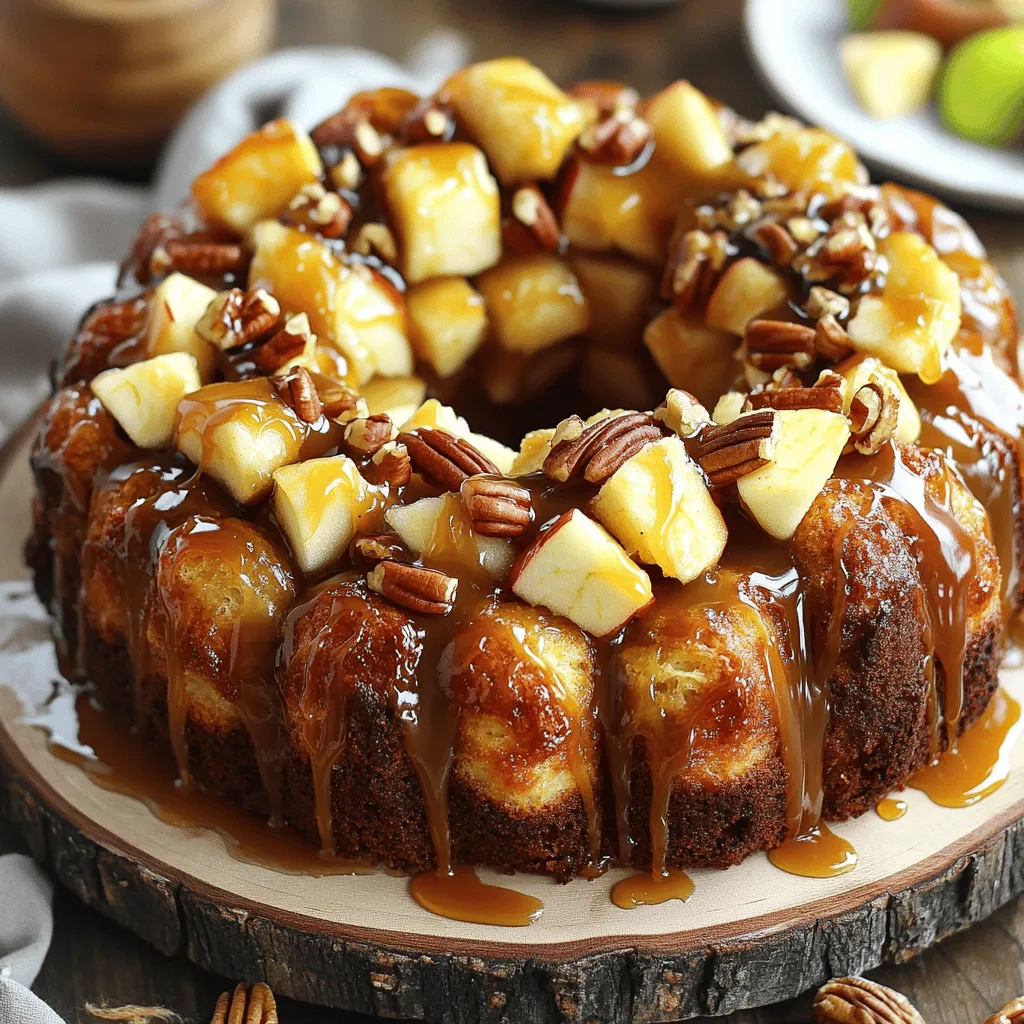
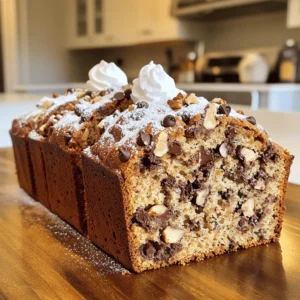
Caramel Apple Monkey Bread Irresistible Sweet Delight
Get ready to indulge in a mouthwatering treat with my Caramel Apple Monkey Bread! This sweet delight is packed with Read Full Recipe -

Banana Oatmeal Pancakes Simple and Nutritious Recipe
If you love pancakes but want a healthy twist, you’ll enjoy my Banana Oatmeal Pancakes! This simple recipe combines ripe Read Full Recipe -
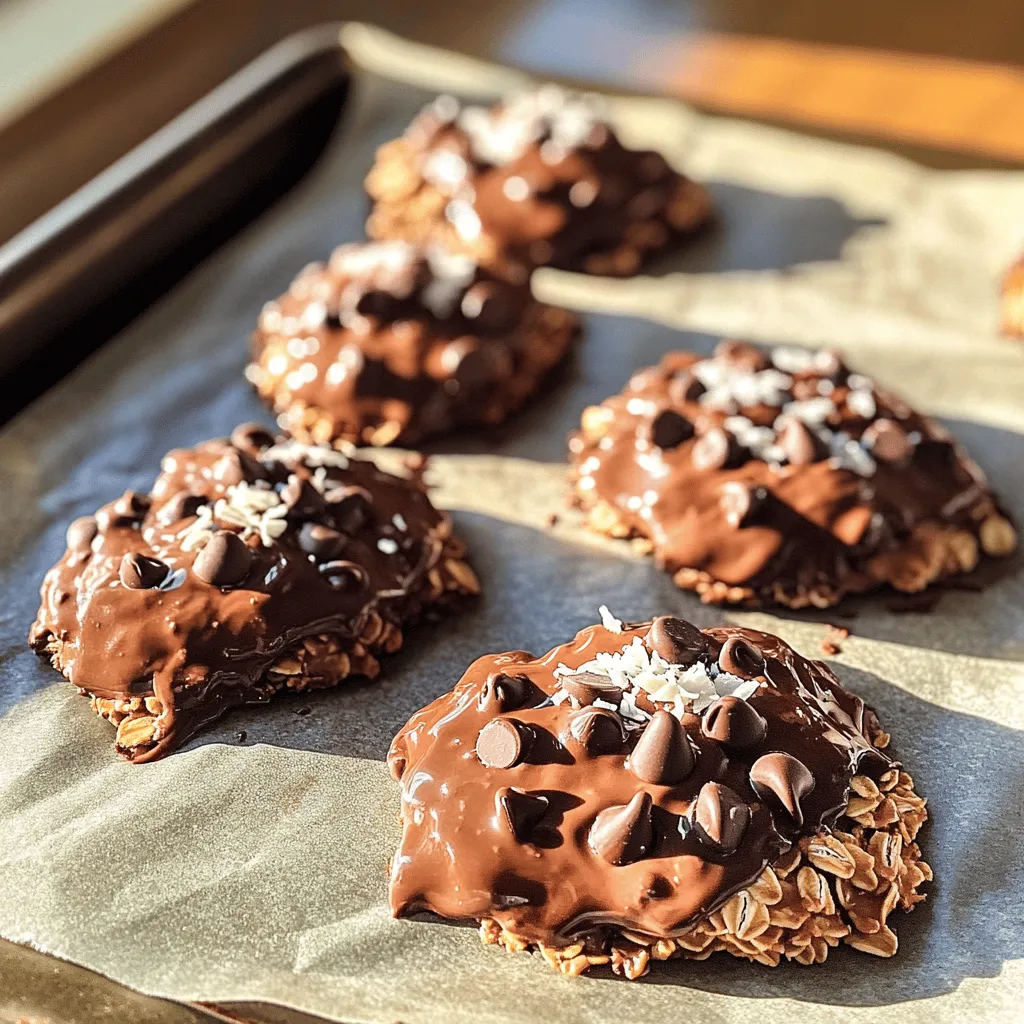
No-Bake Chocolate Oatmeal Cookies Simple Delight
Are you ready to indulge in a sweet and easy treat? My No-Bake Chocolate Oatmeal Cookies are simple to make Read Full Recipe -
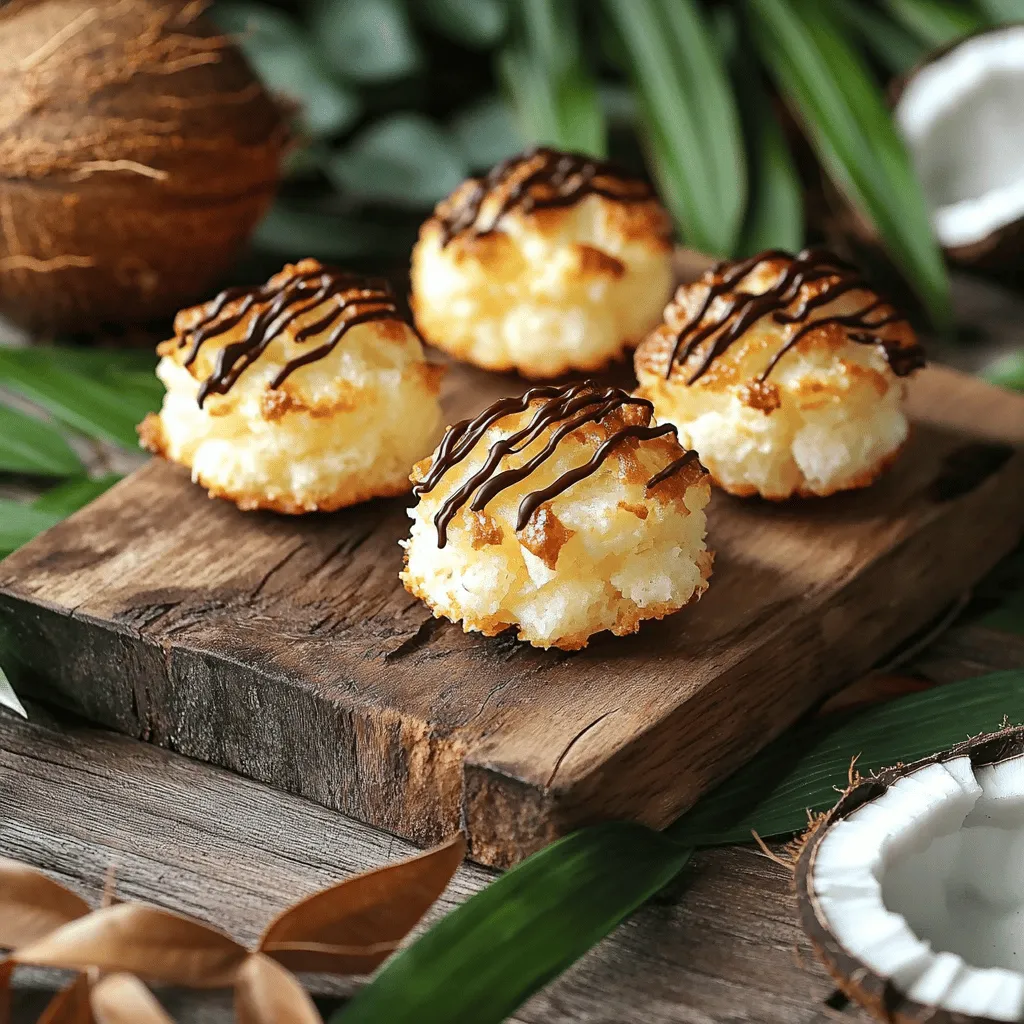
Coconut Macaroons Irresistible Sweet Treat Recipe
Are you ready to indulge in a sweet treat that is both simple and delicious? Coconut macaroons are the perfect Read Full Recipe -
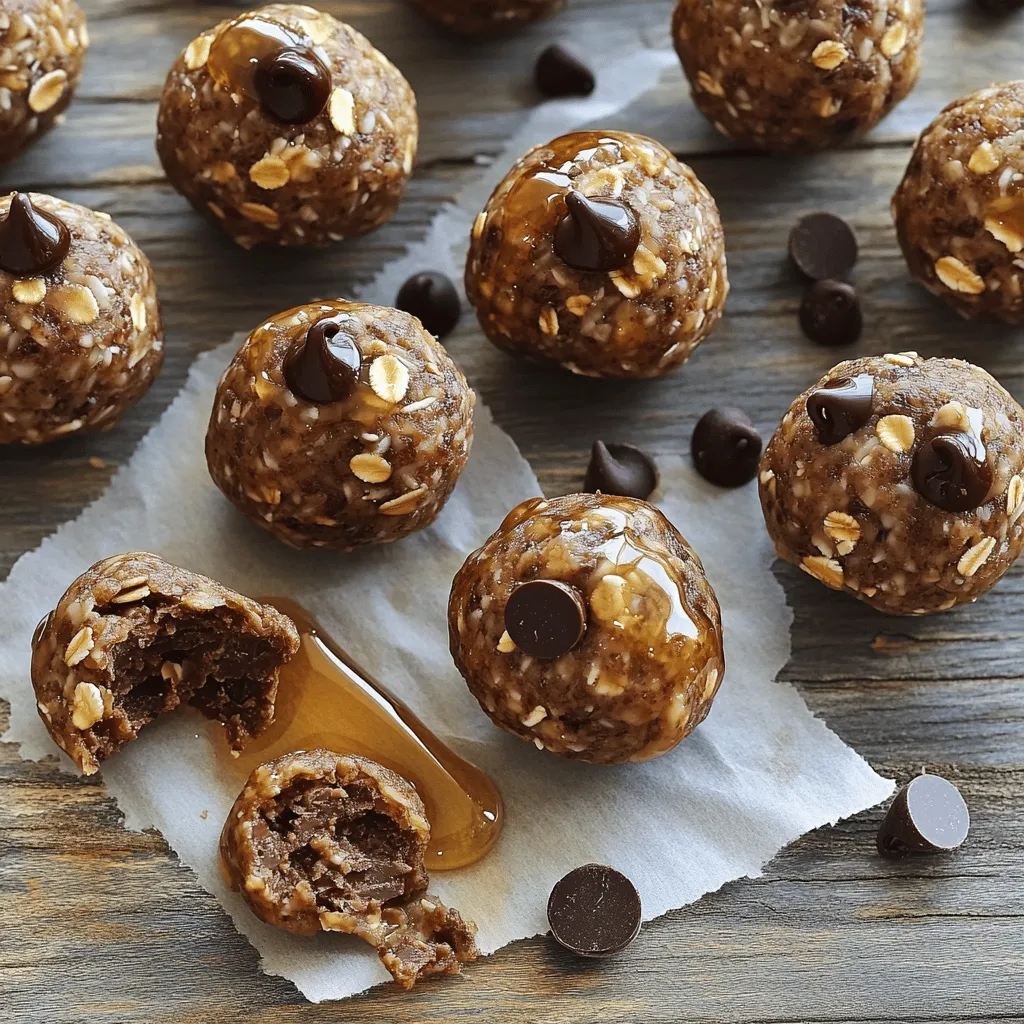
Chocolate Peanut Butter Protein Balls Simple and Easy
If you’re looking for a quick snack loaded with flavor and nutrition, you’re in the right place! Chocolate Peanut Butter Read Full Recipe
My Latest Recipes

hey,
i’m !
I’m so happy you’re here!
From my kitchen to your table, each dish is a labor of love. May they delight your palate and warm your heart. Let’s savor the beauty of cooking together.


Strawberry Shortcake Trifle Delightful Layered Dessert
Looking for a delicious dessert that impresses and satisfies? This Strawberry Shortcake Trifle is the perfect treat! With fresh strawberries, creamy whipped topping, and…
![- 2 cups fresh strawberries, hulled and sliced - 1/4 cup granulated sugar - 1 teaspoon vanilla extract - 1 cup heavy whipping cream - 1/2 cup powdered sugar - 1 teaspoon vanilla bean paste (or additional vanilla extract) - 8-10 store-bought shortcake cookies, crumbled into pieces - Fresh mint leaves for garnish To make a Strawberry Shortcake Trifle, you need fresh ingredients. Start with two cups of strawberries. Make sure they are hulled and sliced. The sugar helps bring out the strawberry’s sweet flavor. Add a quarter cup of granulated sugar and a teaspoon of vanilla extract. This combination enhances the berries' natural taste. Next, for the whipped cream, you will need one cup of heavy whipping cream. It gives the trifle its light and creamy texture. Mix in half a cup of powdered sugar. This adds sweetness without being too heavy. A teaspoon of vanilla bean paste gives a rich flavor. You can use extra vanilla extract if you don’t have the paste. For the shortcake base, grab eight to ten store-bought shortcake cookies. Crumble them into small pieces. This will create a lovely texture in your trifle. Finally, fresh mint leaves add a touch of color and freshness as a garnish. This simple list of ingredients makes a delightful treat. You can find the full recipe in the next section. Enjoy gathering your ingredients! To make the strawberries pop, start with 2 cups of fresh strawberries. Hull and slice them into thin pieces. In a medium bowl, combine the sliced strawberries with 1/4 cup of granulated sugar and 1 teaspoon of vanilla extract. Toss the mixture gently to coat the strawberries. Let them sit for about 15-20 minutes. This process is called macerating. The sugar will draw out the juices, making the strawberries sweet and syrupy. Next, you need to whip the cream. Take 1 cup of heavy whipping cream and put it in a large bowl. Add in 1/2 cup of powdered sugar and 1 teaspoon of vanilla bean paste. Use a hand mixer or whisk to whip the cream until you see soft peaks. Be careful not to over-whip. You want the cream to be fluffy and smooth. Now comes the fun part: assembling the trifle. Start with a layer of crumbled shortcake cookies at the bottom of a large glass trifle dish or individual serving glasses. Use about 8-10 store-bought shortcake cookies, crumbled into pieces. Next, add a layer of the sweet macerated strawberries. Follow this with a generous layer of whipped cream. Spread it evenly using a spatula. Repeat these layers until you reach the top of the dish. Finish with a layer of whipped cream for a beautiful look. Chill the trifle in the fridge for at least 1 hour. This helps the flavors blend together. If you want to impress, garnish with a few whole strawberries and fresh mint leaves on top. Enjoy your delicious creation! For the full recipe, refer to the earlier section. To get the best whipped cream, start with cold cream. Chill your bowl and beaters too. This keeps the cream light and fluffy. Whip the cream until soft peaks form. Be careful not to over-whip; this can turn it into butter. If it looks grainy, you’ve gone too far. If this happens, add a splash of fresh cream and mix gently until smooth again. Layering is key to a great trifle. Start with a layer of crumbled shortcake cookies. Make sure to break them into small pieces. This helps them soak up the strawberry juices. Then, add a layer of macerated strawberries. Spread them evenly for the best look. Follow this with whipped cream. Use a spatula to smooth it out. Repeat these layers until you reach the top. Finish with a thick layer of whipped cream. This gives a nice top and helps hold everything in place. Garnishing makes your trifle pop. Use fresh strawberries on top. Place them whole or slice them for a fun look. Add mint leaves for a splash of color and freshness. They also add a nice scent. You can also sprinkle chocolate shavings or crushed nuts for extra flavor. If you like a little crunch, consider adding granola. This will give a unique twist to your dessert. Explore these ideas to make your trifle shine! For the full recipe, check [Full Recipe]. {{image_2}} You can change the base of your trifle for fun. Instead of shortcake cookies, use pound cake or sponge cake. Both options add a soft and moist texture. They also soak up the fruity juices well. If you need gluten-free options, try almond flour cake or gluten-free sponge cake. These alternatives keep the dessert light and tasty. Want to give your trifle a twist? Add flavored whipped creams! You can mix in chocolate or lemon for a new taste. Using mascarpone cheese makes the filling richer and creamier. This adds depth and a touch of sweetness. Mix other fruits into your trifle for variety. Blueberries or peaches work great with strawberries. When adding different fruits, adjust the sweetness. Some fruits are sweeter, so you might use less sugar. This keeps your trifle balanced and delicious. For the full recipe, check our detailed guide on making this delightful dessert. To keep your Strawberry Shortcake Trifle fresh, store it in the fridge. Use a tight lid to cover the trifle dish. This helps keep the layers intact and prevents drying. I recommend enjoying it within three days for the best taste. The strawberries stay juicy, and the whipped cream remains fluffy. Can you freeze Strawberry Shortcake Trifle? Yes, but the texture may change. To freeze, cover the trifle tightly with plastic wrap. This prevents ice crystals from forming. Thaw it overnight in the fridge before serving. The taste will still be good, but the layers might not look as nice. If you have leftover trifle layers, don't toss them! You can use them in other desserts. Mix the layers into a parfait with yogurt for a quick snack. Or, turn it into a sundae. Just add a scoop of ice cream on top of the trifle layers. Drizzle with chocolate sauce for a sweet treat! Chill the trifle for at least 1 hour. This time helps the flavors blend well. It also makes the dessert cool and refreshing. For best results, chill it longer if you can. Some people prefer it chilled for 2-3 hours. Yes, you can make this trifle ahead of time. Just prepare the layers a day before serving. Store it in the fridge to keep it fresh. However, avoid adding the whipped cream until right before serving. This keeps it light and fluffy. You can use several options for a lighter dessert. Try coconut cream or almond cream for a dairy-free choice. You can also use whipped topping as a quick substitute. Greek yogurt works too for a thicker texture with less fat. Look for soft peaks when whipping cream. This means it will hold its shape but still be smooth. Be careful not to over-whip it. Over-whipped cream can become grainy and buttery. Stop whipping as soon as you see those soft peaks. This blog post shared a fun and easy way to make a Strawberry Shortcake Trifle. We covered fresh ingredients, step-by-step instructions, and storage tips. You learned how to prepare juicy strawberries, whip creamy delight, and layer everything for a stunning dessert. Remember, you can switch up flavors or fruits to make it your own. Enjoy crafting this tasty treat for friends and family. It will impress everyone without much fuss!](https://homecookingstyle.com/wp-content/uploads/2025/05/75259a46-00f5-4ffc-97b9-65440cc69753.webp)
