Looking for a quick and easy dessert that will impress your friends? No-bake cheesecake cups are your answer! This article will guide you through making these simple and delicious treats, with layers of creamy goodness and colorful berries. You’ll discover the best ingredients, step-by-step instructions, and helpful tips to nail this dessert. Let’s dive in and whip up some sweetness without turning on the oven!
Ingredients
To make these no-bake cheesecake cups, you need a few simple ingredients. Here’s what you will need:
– 1 cup cream cheese, softened
– 1 cup Greek yogurt
– 1/2 cup powdered sugar
– 1 teaspoon vanilla extract
– 1/4 cup heavy cream
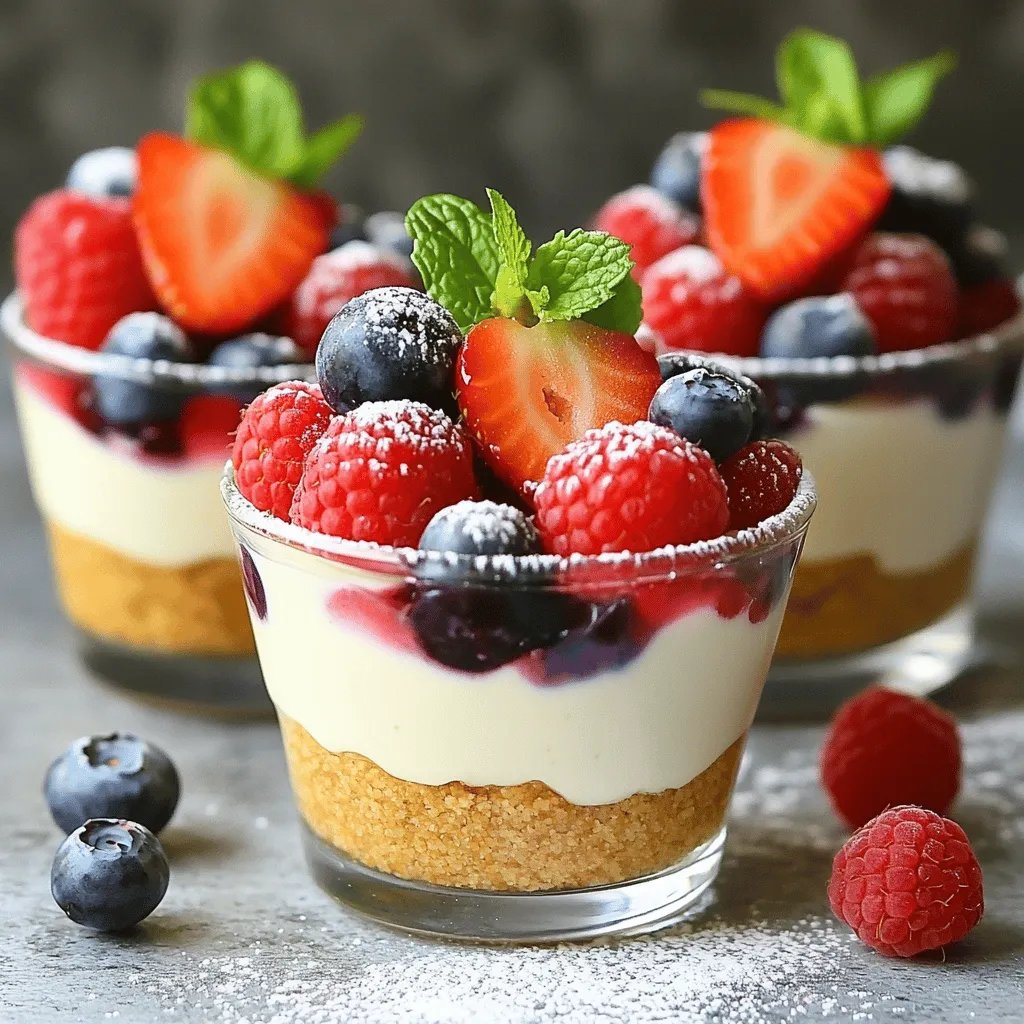
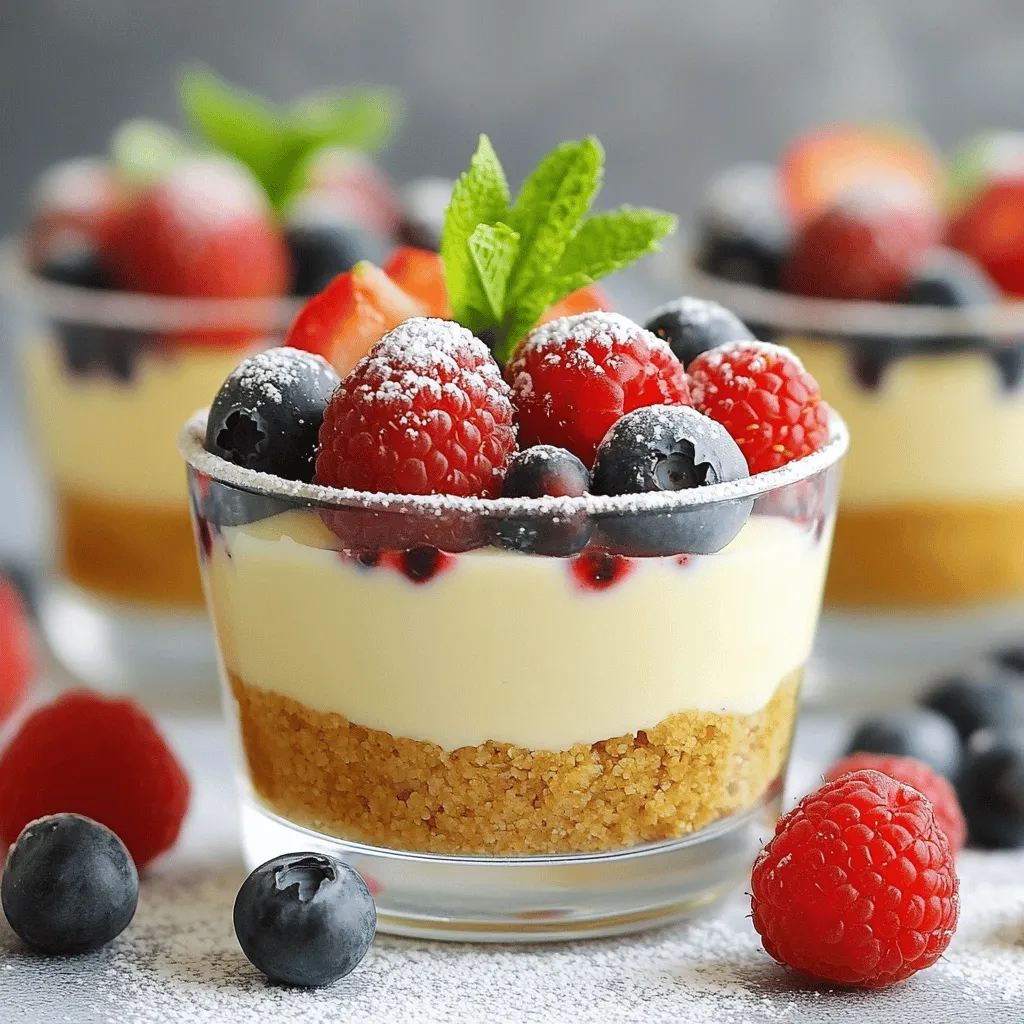
– 1 cup mixed berries (strawberries, blueberries, raspberries)
– 1/2 cup crushed graham crackers
– 2 tablespoons melted butter
– Fresh mint leaves for garnish
These ingredients create a creamy, sweet treat that anyone can enjoy. I love using Greek yogurt because it adds a nice tang and makes the cheesecake lighter. The cream cheese gives it a rich flavor. The berries on top add freshness and a pop of color. You can mix and match your favorite berries for a fun twist.
The crushed graham crackers and melted butter form a tasty crust at the bottom. This adds a nice crunch to each bite. You can use store-bought graham crackers or make your own. Both options work well.
Don’t forget the fresh mint leaves! They add a nice touch and enhance the look. This recipe is perfect for gatherings or a sweet treat at home.
Step-by-Step Instructions
To make no-bake cheesecake cups, follow these steps closely.
– Mixing the cream cheese and yogurt base
Start with a mixing bowl. Add the softened cream cheese, Greek yogurt, powdered sugar, and vanilla extract. Use an electric mixer to blend until smooth. This step creates a creamy base for your cheesecake.
– Whipping the heavy cream to stiff peaks
In a separate bowl, pour the heavy cream. Whip it with a mixer until stiff peaks form. This means the cream should hold its shape well. Stiff peaks add lightness to the cheesecake.
– Combining the two mixtures for the cheesecake filling
Gently fold the whipped cream into the cream cheese mixture. Use a spatula to avoid deflating the whipped cream. This creates a fluffy cheesecake filling.
– Preparing the graham cracker crust
In another bowl, mix crushed graham crackers with melted butter. Stir until the crumbs are moistened. This mixture serves as the crunchy base for your cups.
– Layering the cheesecake cups
Take your serving cups or bowls. Add a layer of the graham cracker mixture at the bottom. Press it down lightly to form a crust. Then, spoon the cheesecake mixture on top, filling each cup to the rim.
– Chilling for the best texture
Place the filled cups in the refrigerator. Chill them for at least two hours before serving. This step allows the cheesecake to set properly, ensuring the best texture.
Follow these steps for a simple and delicious treat.
Tips & Tricks
Key Tips for a Perfect No-Bake Cheesecake
– Ensuring cream cheese is fully softened: Always start with cream cheese at room temperature. This step makes mixing easy and helps avoid lumps. If you forget, you can cut it into small pieces and microwave it for about 10 seconds. Just be careful not to melt it!
– Folding whipped cream properly to maintain lightness: When you fold in the whipped cream, use a gentle motion. Start from the bottom of the bowl and lift the mixture. This keeps your cheesecake light and fluffy. If you stir too hard, your cream can deflate.
– Adjusting sweetness to taste: Everyone has different preferences. Taste your filling before chilling it. If you like it sweeter, add more powdered sugar. You can also switch it up with honey or maple syrup for a new twist.
Presentation Suggestions
– Creative ways to layer the cups: Layering is fun! Start with a graham cracker base, then add a creamy layer. After that, add your mixed berries and repeat. You can even create a rainbow effect with different fruits for a stunning look.
– Recommended glassware for serving: Use clear cups or jars to show off the layers. Small mason jars work great! They are cute and easy to handle. For a fancy touch, try using elegant dessert glasses.
Garnishing Ideas
– Preferred toppings besides berries: While berries are great, you can use other toppings too. Try crushed cookies like Oreos or a drizzle of caramel sauce. Shredded coconut also adds a nice texture.
– Enhancing flavor with citrus zest or chocolate: Grate some lemon or lime zest on top for a fresh kick. If you’re a chocolate lover, sprinkle mini chocolate chips for extra sweetness. This adds both flavor and visual appeal to your treats.
Variations
Flavor Variations
You can have fun with your no-bake cheesecake cups by trying different flavors.
– Chocolate no-bake cheesecake cups: To make these, add 1/2 cup of melted chocolate to the cream cheese mixture. This rich flavor is perfect for chocolate lovers.
– Tropical fruit no-bake cheesecake cups: Use 1 cup of crushed pineapple and substitute the berries. You can also add shredded coconut for an extra tropical twist.
– Coffee-flavored no-bake cheesecake cups: Mix in 2 tablespoons of instant coffee granules into the cream cheese. This gives a nice coffee kick that many will love.
Dietary Adaptations
You can also adjust the recipe to fit special diets.
– Gluten-free options: Substitute crushed graham crackers with gluten-free cookies or nuts. This way, everyone can enjoy the treat.
– Dairy-free and vegan alternatives: You can replace cream cheese with vegan cream cheese and Greek yogurt with coconut yogurt. Also, use coconut cream instead of heavy cream for a rich taste.
These variations make the no-bake cheesecake cups fun and adaptable for all.
Storage Info
Best Practices for Storing Cheesecake Cups
To keep your no-bake cheesecake cups fresh, store them in the fridge. Place them in an airtight container. This will help prevent them from absorbing other odors. You should also cover them with plastic wrap if you don’t have a container.
If you want to save them for later, freezing is an option. To freeze, place the cups in a freezer-safe container. You can also wrap each cup tightly in plastic wrap. This stops freezer burn. When ready to eat, let them thaw in the fridge overnight.
Shelf Life
In the fridge, your cheesecake cups can last about 3 to 5 days. Check for any signs of spoilage before you serve them. If they smell sour or look discolored, it’s best to throw them away. Always trust your senses. Fresh is key to enjoying those creamy flavors.
FAQs
Common Questions Related to No-Bake Cheesecake Cups
Can I use low-fat cream cheese?
Yes, you can use low-fat cream cheese. It will still work well. Just know that it may change the texture a bit. The flavor will still be tasty!
How can I make these cheesecake cups in advance?
You can prepare the cheesecake cups a day ahead. Just follow the recipe and chill them overnight. They will taste even better after sitting in the fridge!
What can I substitute for Greek yogurt?
If you don’t have Greek yogurt, you can use sour cream. It gives a nice tangy flavor. You can also try plain yogurt, but it may be a bit thinner.
Are there no-bake cheesecake cups without cream cheese?
Yes, you can make no-bake cheesecake cups without cream cheese. Use silken tofu or cashew cream instead. Both options create a creamy texture.
Troubleshooting Tips
Why is my cheesecake filling too runny?
Your filling may be too runny if the cream cheese is not soft enough. Make sure it is fully softened. Also, check that you whipped the cream to stiff peaks.
How to recover from over-whipping the cream?
If you over-whip the cream, gently fold in a bit of fresh cream. This will help bring back some smoothness. Be careful not to over-mix again!
In this post, I shared how to make delicious no-bake cheesecake cups. We covered required ingredients, step-by-step instructions, and key tips to ensure success. You can also explore tasty variations and storage tips. Remember to adjust sweetness and use creative garnishes for the best flavor. No-bake cheesecakes are fun and easy. Enjoy making them for any occasion!