Indulge in a sweet treat that’s as simple as it is delicious! My No Bake Biscoff Cheesecake Cups are perfect for any occasion. With a crunchy cookie crust and creamy filling, these cups will make your taste buds dance. I’ll share essential ingredients, swap ideas, and easy steps so you can whip these up in no time. Ready to impress your friends and family? Let’s dive into the recipe!
Ingredients
List of Required Ingredients
To make No Bake Biscoff Cheesecake Cups, you’ll need the following items:
– 250g Biscoff cookies, crushed
– 100g unsalted butter, melted
– 500g cream cheese, room temperature
– 300ml heavy cream
– 100g powdered sugar
– 1 teaspoon vanilla extract
– 150g Biscoff spread
– A pinch of salt
– Extra Biscoff cookies for garnish
Ingredient Substitutes
If you can’t find an ingredient, here are some substitutes:
– Use any crunchy cookie in place of Biscoff cookies. Graham crackers work well.
– Swap unsalted butter for margarine if you need a dairy-free option.
– Cream cheese can be substituted with mascarpone cheese for a lighter texture.
– For a dairy-free version, use coconut cream instead of heavy cream.
Tips for Choosing Quality Ingredients
Choosing good ingredients makes a big difference. Here’s what to look for:
– Select fresh Biscoff cookies without any cracks or breaks. This helps in making a sturdy crust.
– Look for full-fat cream cheese for a rich and creamy filling. Low-fat versions can be too soft.
– Choose heavy cream that has at least 36% fat. This whips better and gives a nice texture.
– If possible, buy organic ingredients. They often taste better and are healthier.
Using quality ingredients makes your No Bake Biscoff Cheesecake Cups taste even more delicious!
Step-by-Step Instructions
Preparing the Cookie Crust
To start, you need to make the cookie crust. Grab a medium bowl. Add 250g of crushed Biscoff cookies and 100g of melted unsalted butter. Mix these two ingredients well until the cookies look like wet sand. This texture is key for a solid crust.
Next, you want to spoon about 2 tablespoons of this mixture into each dessert cup. Press it down firmly. This step helps it hold together. After all the cups are filled, place them in the fridge. Let them chill while you work on the cheesecake filling.
Making the Cheesecake Filling
Now, let’s move on to the filling. In a large mixing bowl, beat 500g of room temperature cream cheese with an electric mixer. Mix it for about 2 minutes until it is smooth and creamy.
Then, add 100g of powdered sugar, 1 teaspoon of vanilla extract, and a pinch of salt. Keep mixing until everything is well blended.
In a separate bowl, whip 300ml of heavy cream. Whip until you see stiff peaks. Be careful not to overwhip, or it won’t blend well. Once whipped, gently fold this cream into the cream cheese mixture. Do this in three parts to keep it fluffy.
Finally, fold in 150g of Biscoff spread until the mixture is smooth. This adds that rich flavor you love.
Assembling the Cheesecake Cups
Now it’s time to put it all together. Take the chilled cups from the fridge. Spoon or pipe the cheesecake filling over the cookie crusts. Make sure to smooth the tops.
After that, you need to refrigerate the cups for at least 4 hours. For the best results, leave them overnight.
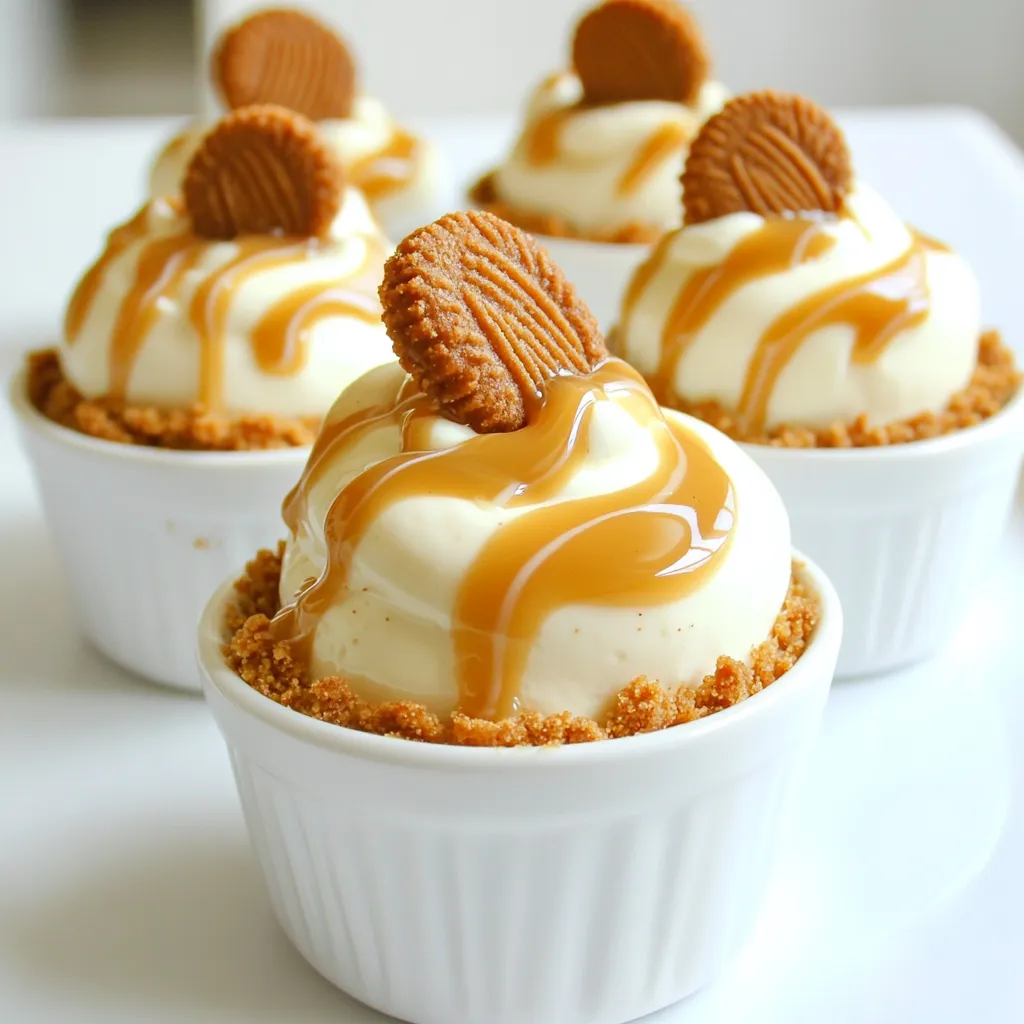
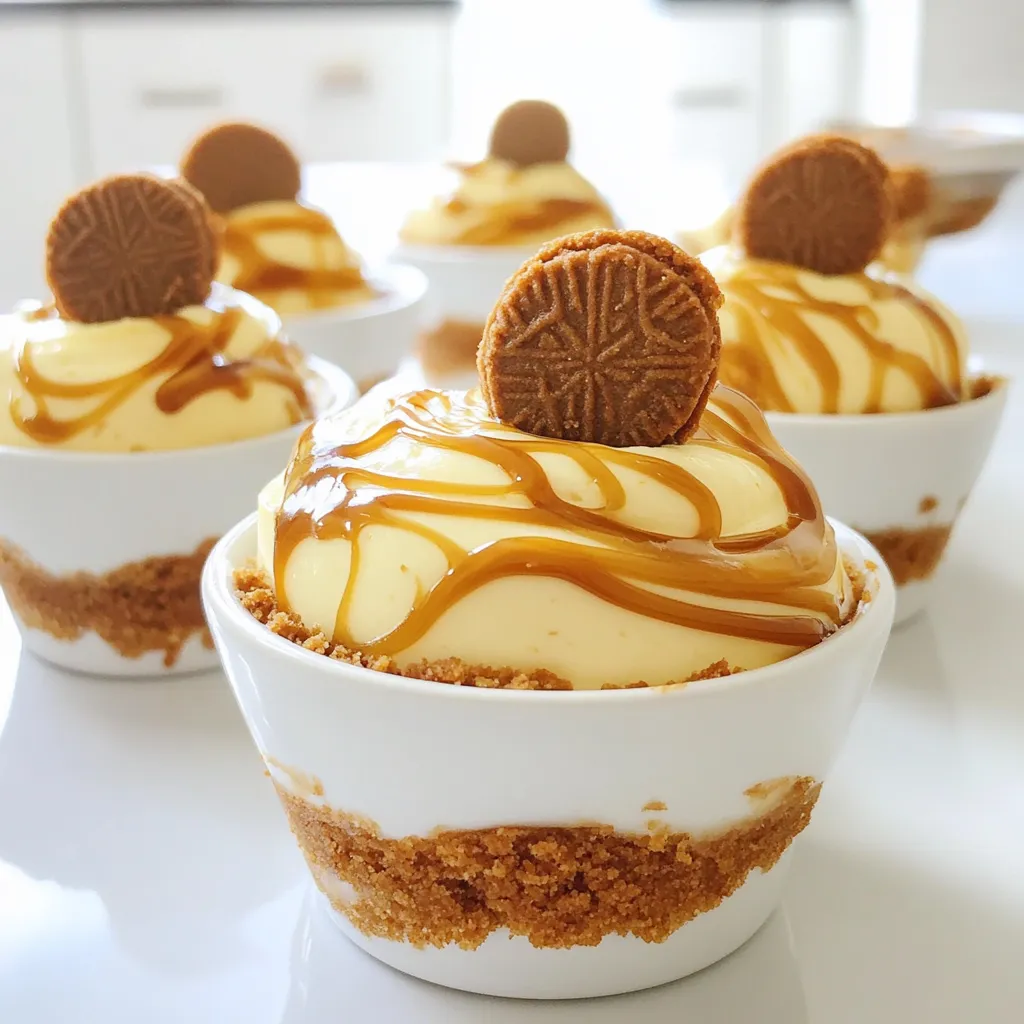
When you’re ready to serve, drizzle some leftover Biscoff spread on top. Add a whole Biscoff cookie for that perfect finish. Enjoy your tasty treat!
Tips & Tricks
How to Achieve the Perfect Texture
To get a creamy and smooth cheesecake, use room temperature cream cheese. Cold cream cheese will clump up and ruin your mix. When you whip the heavy cream, beat it until stiff peaks form. This helps add air to the mix. Be gentle when you fold the whipped cream into the cream cheese. This keeps the texture light and fluffy. If you overmix, it will become dense.
Suggestions for Serving
These cheesecake cups look great when served chilled. For a fun twist, drizzle some extra Biscoff spread on top. You can also add a whole Biscoff cookie as a garnish. It adds a nice touch and makes it more appealing. Serve these cups after dinner or at a party. They are easy to grab and eat.
Common Mistakes to Avoid
One common mistake is not letting the cream cheese warm up. This can lead to lumps in your filling. Make sure to use a fine crumb for the cookie crust. If the pieces are too big, the crust won’t hold together well. Also, be careful not to overwhip the cream. It can turn into butter if you’re not cautious. Lastly, don’t rush the chilling time. Let them set properly for the best flavor and texture.
Variations
Different Flavor Combinations
You can mix things up with your No Bake Biscoff Cheesecake Cups. Try swapping Biscoff spread for other spreads. Nutella adds a rich chocolate flavor. Creamy peanut butter gives a nutty twist. Or, use fruit preserves for a fruity note. Strawberry or raspberry work great! You can also add lemon zest to the cream cheese for a refreshing kick. Each option creates a unique taste, while still keeping the same creamy texture.
Alternative Toppings
Toppings can change the look and flavor of your cups. You can drizzle chocolate sauce or caramel on top for extra sweetness. Fresh fruit, like berries or banana slices, adds color and texture. Crushed cookies on top can add crunch. For a bit of fun, sprinkle some crushed nuts or coconut flakes. Just remember, the topping should fit the flavor base you choose!
Sizing Options for Parties
These cheesecake cups are perfect for parties! You can adjust the size based on your needs. Use smaller cups for bite-sized treats. This way, guests can enjoy a taste without filling up. You can also use larger cups if you want a bigger dessert. Just remember, the total time to set remains the same. Plan ahead to ensure they are ready when your guests arrive!
Storage Info
How to Store Cheesecake Cups
To keep your no bake Biscoff cheesecake cups fresh, use an airtight container. Place the cups in the container and seal it well. This will help keep them from drying out or absorbing other smells from the fridge. Store them in the fridge for best results. They taste great chilled!
Freezing Instructions
You can freeze these cheesecake cups if you want to save some for later. Wrap each cup tightly in plastic wrap or foil. After that, place them in a freezer-safe container. They can stay in the freezer for up to three months. When you are ready to eat them, move them to the fridge to thaw overnight.
Shelf Life and Best Practices
These cheesecake cups last about 5 days in the fridge. To enjoy them at their best, eat them within this time. The flavor and texture remain top-notch for the first few days. After that, they might lose some creaminess. If you notice any change in smell or texture, it’s best to toss them. Always check before eating!
FAQs
Can I use a different type of cookie for the crust?
Yes, you can use other cookies for the crust. Try Oreos, graham crackers, or even chocolate wafers. Each cookie gives a unique taste. Just crush them and mix with melted butter. Use the same amount as Biscoff cookies.
How long do these cheesecake cups need to set?
These cheesecake cups need at least 4 hours to set. For best results, chill them overnight. This helps the flavors blend and makes the texture firm. If you are in a hurry, 4 hours will still work well.
What can I do if I don’t have Biscoff spread?
If you don’t have Biscoff spread, try using Nutella or peanut butter. You can also make your own by blending cookies with a bit of cream. This gives you a similar flavor and texture. Just adjust the sweetness to your taste.
In this blog post, we covered all you need for cheesecake cups. We looked at essential ingredients, substitutes, and how to select the best ones. Then, I guided you through the steps to make cheesecake cups, including crust, filling, and assembly. I shared tips for texture, serving ideas, and mistakes to avoid. You also learned about flavor variations and storage options.
With these details, you can create your own delicious cheesecake cups. Enjoy experimenting and sharing them with friends!