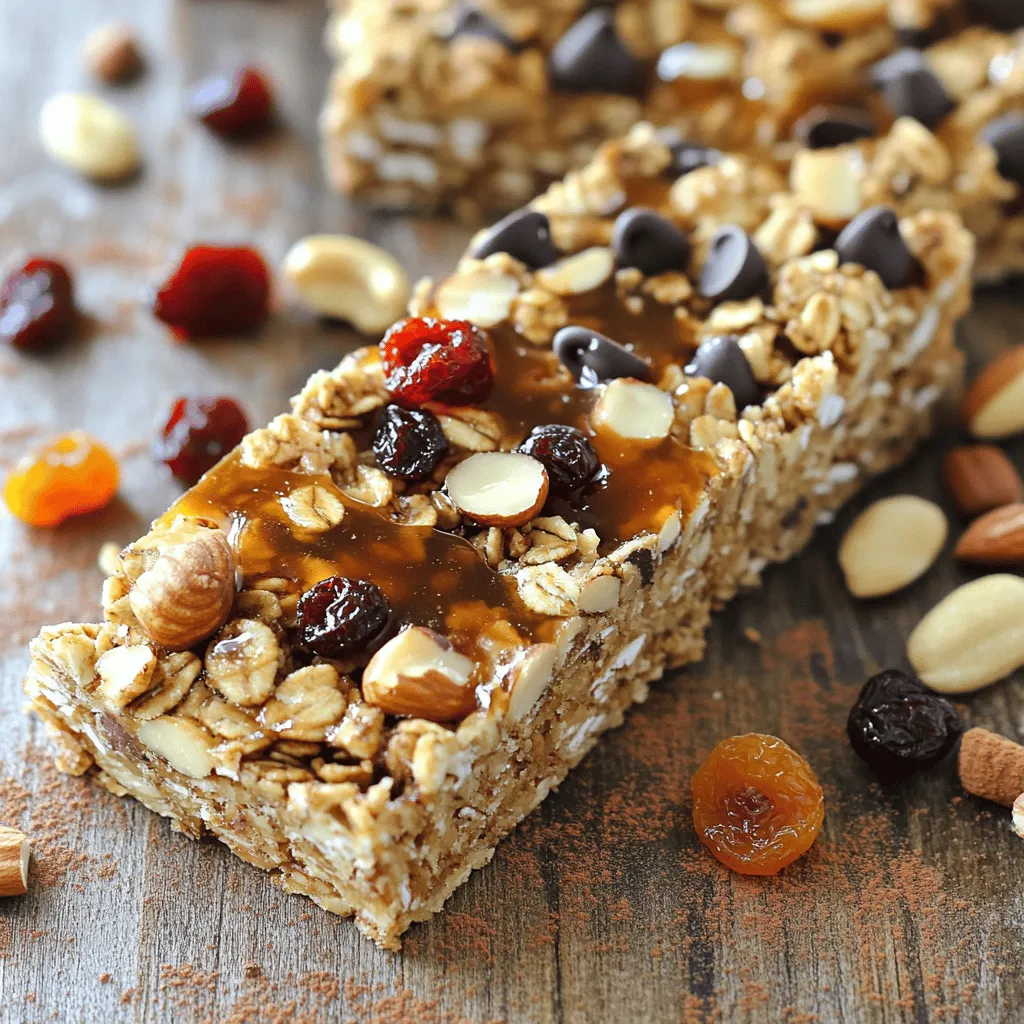
Looking for a quick and healthy snack? Homemade granola bars are fun to make and perfect for any time you need a boost. With just a few simple ingredients and tools, you’ll have a tasty treat ready in no time. Whether you love chocolate, nuts, or dried fruit, I’ll show you how to create your ideal bar. Let’s get started on this easy recipe that will have everyone asking for more!
Ingredients
Main Ingredients for Homemade Granola Bars
To make tasty homemade granola bars, gather these simple ingredients:
– 2 cups rolled oats
– 1 cup mixed nuts (almonds, walnuts, cashews) chopped
– 1/2 cup honey or maple syrup
– 1/2 cup nut butter (almond or peanut butter)
– 1/2 cup dried fruits (raisins, cranberries, apricots)
– 1/4 cup dark chocolate chips (optional)
– 1 teaspoon vanilla extract
– 1/2 teaspoon salt
– 1/2 teaspoon cinnamon
These ingredients work together to create a chewy and crunchy treat. The oats give a hearty base, while the nuts add healthy fats and protein. Dried fruits add natural sweetness, and chocolate chips bring in a fun twist.
Suggested Tools and Equipment
For making these bars, you will need a few handy tools:
– Mixing bowls
– Baking dish (8×8 inches)
– Parchment paper
– Spatula
– Saucepan
Having these tools ready makes the process smooth. The mixing bowls help combine the dry and wet ingredients. The baking dish holds everything as it bakes. Parchment paper helps with clean-up and easy removal of the bars.
If you follow this list, you’ll be set to create your own delicious granola bars!
Step-by-Step Instructions
Preparation Phase
1. Preheat your oven to 350°F (175°C).
2. Line an 8×8-inch baking dish with parchment paper. Leave some paper hanging over the sides. This helps you lift the bars out later.
3. In a large mixing bowl, add the rolled oats, chopped nuts, salt, and cinnamon. Stir them well to mix.
Combining Ingredients
1. In a small saucepan, combine honey and nut butter over low heat.
2. Stir until the mixture is smooth and well blended.
3. Remove the pan from heat and add the vanilla extract. Stir it in.
Baking Process
1. Pour the warm honey-nut butter mixture over the dry ingredients. Mix until everything is well coated.
2. If you are using dried fruits or dark chocolate chips, fold them in now. Make sure they are evenly mixed.
3. Transfer the mixture into the prepared baking dish. Spread it evenly and press down firmly with a spatula.
4. Bake in the oven for 20 to 25 minutes. Look for golden brown edges.
5. Once baked, let it cool completely in the dish. Use the parchment overhang to lift it out.
6. Cut into bars or squares. Store them in an airtight container at room temperature for up to a week.
Enjoy your crunchy nutty granola bars!
Tips & Tricks
Achieving the Perfect Texture
To get the right crunch in your granola bars, you must adjust the baking time. Bake for about 20-25 minutes. Look for a golden brown color on the edges. If you want more crunch, leave them in a bit longer. Just watch closely!
Packing the mixture tightly is key for density. After mixing all your ingredients, use a spatula to press it down firmly in the baking dish. This helps the bars hold together better once they cool.
Enhancements for Flavor
You can easily boost the flavor of your bars. Adding spices like nutmeg or chia seeds gives a nice twist. Just a pinch of nutmeg can make a big difference. Chia seeds add a nutty taste and some crunch.
Using flavored nut butters also adds variety. Try almond butter with a hint of cinnamon or chocolate nut butter for something special. These small changes create unique and tasty bars.
Nutritional Considerations
If you have dietary preferences, don’t worry! You can make simple substitutions. Use agave syrup instead of honey for a vegan option. Swap nuts for seeds if you have nut allergies.
Keep track of calorie counts and serving sizes. Each bar has about 150 calories. You can adjust the size if you need smaller or larger portions. This helps you manage your snacks better while enjoying delicious treats.

Variations
Flavor Combinations
You can mix different flavors to make granola bars fun. I love chocolate chip and peanut butter. The chocolate adds sweetness, while the peanut butter gives a nice, creamy texture. You can also try tropical fruit and coconut. This combo brings a burst of sunshine to your snack. Dried pineapple and coconut flakes pair well for a refreshing taste.
Dietary Modifications
If you follow a gluten-free diet, you can use gluten-free oats. They taste just as good! For vegan options, swap honey for maple syrup. You can also use almond butter instead of regular nut butter. These changes keep the bars tasty and healthy for everyone.
Seasonal Ingredients
Change your granola bars with the seasons. In fall, add pumpkin spice for warmth. It gives a cozy flavor that warms you up. In summer, use fresh berries like strawberries or blueberries. They add natural sweetness and color to your bars. It’s a fun way to enjoy seasonal fruits!
Storage Info
Best Storage Practices
To keep your homemade granola bars fresh, use airtight containers. This helps them stay crisp and tasty. You can store them at room temperature for up to a week. If you prefer, put them in the fridge. This can help them last longer, but they may lose some crunch.
Shelf Life Expectations
Homemade granola bars can last about one week at room temperature. If refrigerated, they can last up to two weeks. Look for signs of spoilage. If they smell off or feel very hard, it’s best to throw them out.
Freezing for Longevity
Freezing granola bars is easy and smart. First, wrap each bar in plastic wrap. Then, place them in a freezer bag or airtight container. This way, they can stay fresh for up to three months. When you want to eat one, thaw it in the fridge overnight. For the best taste, let it sit at room temperature for a bit before enjoying.
FAQs
How do you make homemade granola bars?
To make homemade granola bars, start by gathering your ingredients. You will need rolled oats, mixed nuts, honey, nut butter, dried fruits, and a few extras like chocolate chips. Here are the key steps:
1. Preheat your oven to 350°F (175°C) and line an 8×8-inch baking dish with parchment paper.
2. In a bowl, mix the oats, chopped nuts, salt, and cinnamon.
3. In a saucepan, melt the honey and nut butter together over low heat. Stir until smooth, then add vanilla.
4. Pour this mixture into the dry ingredients and stir well.
5. Add in dried fruits and chocolate chips, mixing until evenly coated.
6. Spread the mixture in the baking dish and press it down firmly.
7. Bake for 20-25 minutes until golden brown.
8. Once cool, lift it out and cut into bars.
Common mistakes to avoid include not pressing the mixture firmly enough and overbaking, which makes them hard.
Can I customize the ingredients?
Yes, you can customize the ingredients in your granola bars. Here are some great substitutions:
– Nut butter: If you have nut allergies, try sunflower seed butter or tahini.
– Sweetener: You can replace honey with agave syrup or brown rice syrup.
– Dried fruits: Use any dried fruit you like, such as figs, dates, or apples.
– Nuts: If you dislike nuts, try seeds or skip them altogether.
These adjustments allow you to tailor the bars to fit your tastes and dietary needs.
What is the best way to cut granola bars?
To cut granola bars cleanly, follow these techniques:
– Use a sharp knife and cut while the bars are still in the pan.
– Score the bars lightly with a knife before cutting all the way through.
– For neat edges, spray the knife with a little cooking oil to prevent sticking.
This method ensures you get perfect, even bars every time.
Making homemade granola bars is easy and fun. We covered the main ingredients, tools, and step-by-step instructions. You can customize flavors and textures to fit your taste. Storage tips help keep them fresh longer. Whether you like chocolate or fruit, there’s a combination for everyone. Remember, these bars are great for snacks or breakfast. Trying new variations can keep things exciting. Enjoy making your own delicious, healthy snacks at home!


