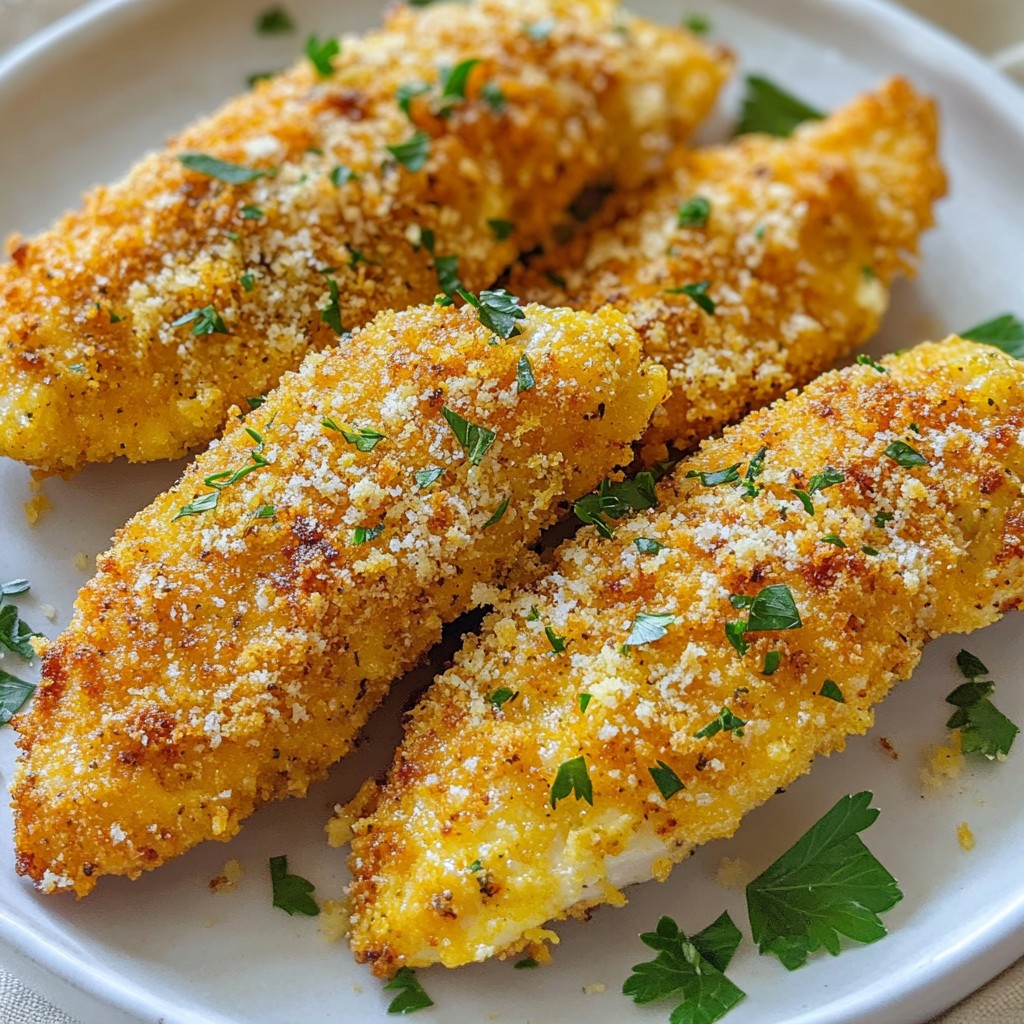
Ready to elevate your dinner game? My Garlic Parmesan Chicken Tenders are the key! With juicy chicken coated in a crispy, cheesy crust, this easy meal dazzles taste buds. In just a few simple steps, you'll whip up a dish that impresses everyone. No need for fancy cooking skills—let’s dive into the tasty world of Garlic Parmesan Chicken Tenders! Your new favorite recipe awaits!
Why I Love This Recipe
- Delicious Flavor Combination: The mix of garlic and Parmesan creates a savory and aromatic experience that complements the chicken perfectly.
- Crispy Texture: Using panko breadcrumbs ensures a delightful crunch on the outside, giving the tenders a satisfying bite.
- Quick and Easy: This recipe is simple to follow and can be prepared in just 30 minutes, making it perfect for busy weeknights.
- Versatile Serving Options: These chicken tenders pair well with various dipping sauces, allowing for customization to suit any taste.
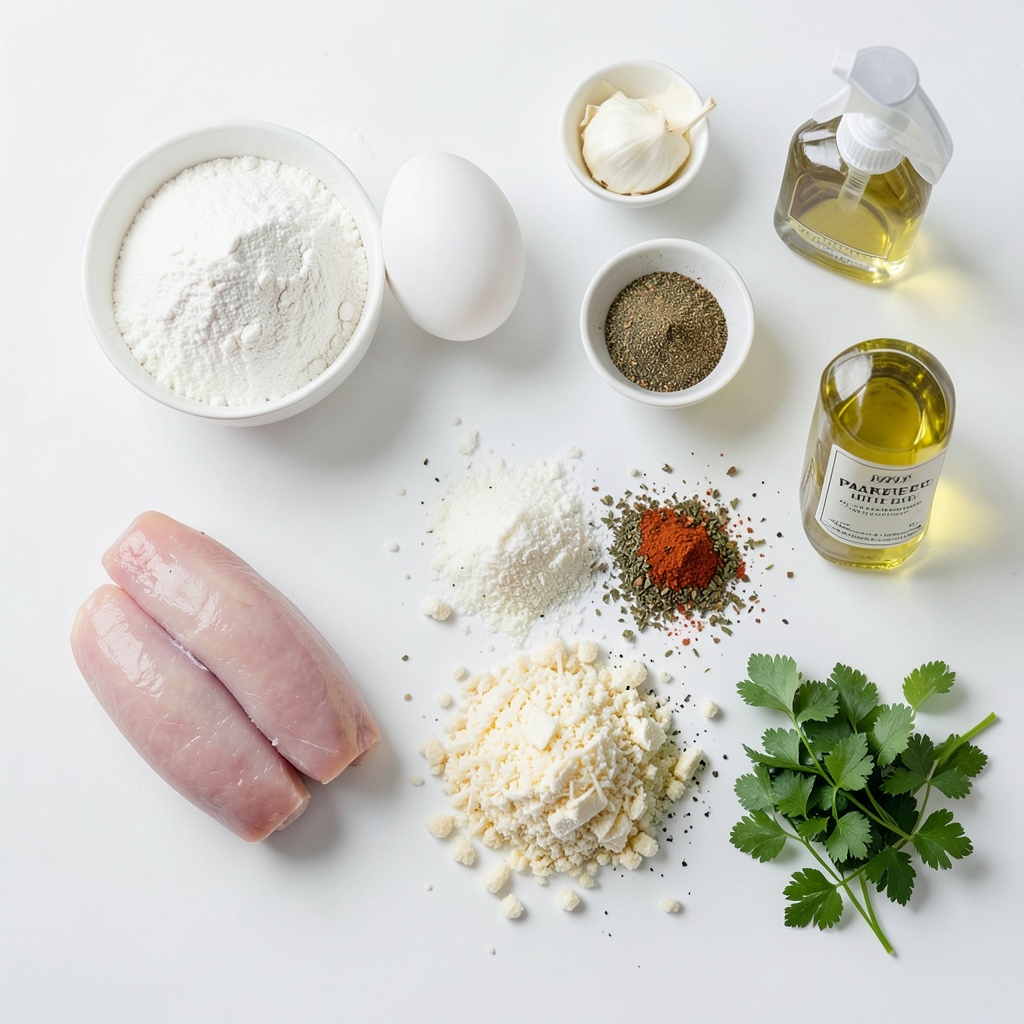
Ingredients
Main Ingredients
- 1 lb chicken tenderloins
- 1 cup all-purpose flour
- 2 large eggs
- 1 cup breadcrumbs (preferably panko)
- 1/2 cup grated Parmesan cheese
- 4 cloves garlic, minced
The main ingredients define the flavor and texture of the dish. Chicken tenderloins are juicy and cook quickly. The flour, eggs, and breadcrumbs create a crunchy coating. Panko breadcrumbs give a light, airy crispiness. Parmesan cheese adds rich, savory notes, while garlic infuses the dish with robust flavor.
Seasonings
- 1 teaspoon dried Italian herbs (oregano, basil, thyme)
- 1 teaspoon paprika
- Salt and pepper to taste
Seasonings elevate the taste of your chicken tenders. Dried Italian herbs add earthy flavors. Paprika gives a mild heat and vibrant color. Salt and pepper enhance all the other flavors. Be sure to season well to make each bite delicious.
Garnishing and Cooking Supplies
- 1/4 cup fresh parsley, chopped (for garnish)
- Olive oil spray or vegetable oil for frying
Garnishing with fresh parsley adds color and freshness. It brightens up the dish and makes it look appealing. For frying, choose either olive oil spray or vegetable oil. Both options work well for getting that golden brown crust on the chicken.
Step-by-Step Instructions
Preparing the Chicken
Start with the chicken tenderloins. Season them well with salt, pepper, and paprika. Use a bowl to mix the spices. Make sure each piece has a good coat of seasoning. This step adds flavor to your chicken.
Next, set up your dredging station. You need three shallow dishes. In the first dish, place all-purpose flour. In the second dish, beat the eggs well. In the last dish, mix breadcrumbs, grated Parmesan, minced garlic, and dried herbs. This setup makes coating easy and fun.
Coating the Chicken
Now it’s time for the dredging process. Take one chicken tender, dip it in the flour first. Shake off any extra flour. Then, dip it in the beaten eggs. Make sure it’s fully coated in egg. Next, press the tender into the breadcrumb mix. Press gently so the crumbs stick well. Repeat this for all chicken pieces.
An even coating is key. It helps the chicken cook nicely and taste great. If you see bare spots, add more crumbs.
Cooking the Chicken
Let’s heat the oil. Use a large skillet and pour enough vegetable oil to cover the bottom. Heat it over medium heat. If you use olive oil spray, spray the pan generously.
Once the oil is hot, add chicken tenders. Do this in batches to avoid overcrowding. Fry each side for 3-4 minutes. Look for a golden brown color. Make sure the chicken reaches 165°F inside. This ensures it’s fully cooked.
Draining and Serving
When the chicken is done, remove it from the skillet. Place the cooked tenders on a plate lined with paper towels. This helps drain the excess oil.
For a nice touch, sprinkle fresh parsley on top. It adds color and extra flavor. Serve your Garlic Parmesan Chicken Tenders warm. They taste great with marinara, ranch, or garlic aioli for dipping.
Tips & Tricks
Achieving the Best Texture
Using panko breadcrumbs is key for a great texture. Panko is light and airy, which makes it crisp. Regular breadcrumbs can get soggy. For a crispy coating, press the breadcrumbs onto the chicken well. This helps them stick during cooking. Also, make sure to fry the chicken in hot oil. If the oil is too cool, the coating will absorb oil and become greasy.
Flavor Enhancements
You can boost the flavor of your chicken tenders easily. Try adding more spices like cayenne or garlic powder. You can also mix in some lemon zest for brightness. Marinades can make a big difference too. Soak the chicken in a mix of olive oil, lemon juice, and herbs for a few hours. This adds moisture and flavor.
Cooking Equipment Recommendations
For frying, a heavy skillet works best. It helps maintain an even heat. Cast iron pans are my favorite for this. They hold heat well and cook evenly. You can also use an air fryer if you want a healthier option. It cooks the chicken with hot air, giving a crispy finish without much oil. Just follow the air fryer instructions for timing.
Pro Tips
- Choose the Right Oil: For frying, use oils with a high smoke point like vegetable or canola oil. This ensures the chicken cooks evenly without burning.
- Preheat the Oil: Make sure the oil is hot before adding the chicken. This helps achieve a crispy crust while keeping the chicken juicy inside.
- Don’t Overcrowd the Pan: Fry the chicken tenders in batches to prevent steaming. Overcrowding lowers the oil temperature, resulting in soggy tenders.
- Let Them Rest: After frying, allow the chicken tenders to rest for a few minutes on paper towels. This helps the coating set and keeps them crispy.
Variations
Ingredient Substitutions
For gluten-free options, swap the all-purpose flour with a gluten-free flour blend. Use gluten-free breadcrumbs too. This change keeps the dish safe for those with gluten sensitivities.
If you want a dairy-free version, skip the Parmesan cheese. Use nutritional yeast instead. It gives a cheesy flavor without dairy. You can also try almond or coconut milk for the egg wash to keep it dairy-free.
Flavor Profiles
To add some heat, try adding cayenne pepper or crushed red pepper flakes. A little spice can enhance the flavor without overwhelming it.
You can also incorporate different cheeses for a unique taste. Try cheddar or mozzarella for a fun twist. Each cheese brings its own character to the dish.
Serving Suggestions
Pair these chicken tenders with your favorite dips. Marinara sauce works great. Ranch dressing is another delicious option. Garlic aioli adds a nice touch too.
For side dishes, consider crispy fries or a fresh salad. Steamed veggies can balance the meal nicely. You can even serve it with rice for a heartier option.
Storage Info
Refrigeration
To store leftover chicken tenders, let them cool first. Place them in an airtight container. This helps keep them fresh. Use a glass or plastic container with a tight lid. Make sure to separate layers with parchment paper if needed. This way, they won’t stick together.
Freezing
To freeze your chicken tenders, let them cool completely. Arrange them in a single layer on a baking sheet. Freeze them for about an hour. Then, transfer them to a freezer bag or container. Remove as much air as possible. This prevents freezer burn. When you’re ready to eat, thaw them in the fridge overnight. Reheat them in the oven at 375°F for about 10-15 minutes. This keeps them crispy.
Shelf Life
Refrigerated chicken tenders last about 3-4 days. For frozen tenders, the shelf life is about 2-3 months. Always look for signs of spoilage. If they smell off or have a slimy texture, it’s best to throw them away. Keeping track of dates helps ensure you enjoy your meal safely.
FAQs
How can I make Garlic Parmesan Chicken Tenders healthier?
You can easily cut down on fat and calories. Here are some tips:
- Use whole wheat flour instead of all-purpose flour.
- Swap regular breadcrumbs for whole grain or gluten-free options.
- Bake the tenders instead of frying them.
- Use egg whites instead of whole eggs for coating.
- Limit the amount of oil used for frying or spray with olive oil.
These changes keep the taste while making the dish lighter.
Can I bake these chicken tenders instead of frying?
Yes, baking is a great option! Here’s how:
1. Preheat your oven to 400°F (200°C).
2. Line a baking sheet with parchment paper for easy cleanup.
3. Place the coated chicken tenders on the sheet and lightly spray them with olive oil.
4. Bake for 15-20 minutes, flipping halfway through.
Check that the chicken reaches an internal temperature of 165°F (74°C). Baking gives you crispy tenders without all the oil.
What dipping sauces pair well with Garlic Parmesan Chicken Tenders?
Many sauces taste great with these chicken tenders. Some popular options include:
- Marinara sauce for a nice Italian twist.
- Ranch dressing for a cool, creamy dip.
- Garlic aioli to enhance the garlic flavor.
- Honey mustard for a sweet and tangy kick.
Try different sauces to find your favorite!
You now have a complete guide to making Garlic Parmesan Chicken Tenders. We covered the main ingredients, the step-by-step cooking process, and tips for perfect texture and flavor. Don't forget about variations and storage tips for leftovers. These tips will help you create tasty meals each time. Enjoy experimenting with different seasonings, sauces, and cooking methods. The possibilities are endless, and the results will impress everyone at your table. Embrace your cooking journey and have fun with it!