If you’re craving a warm, flavorful treat that’s easy to make, this Garlic Herb Bread Twists recipe is for you! Picture golden-brown, soft twists bursting with garlic and fresh herbs. You can whip these up in no time, perfect for any meal or just a tasty snack. Join me as I guide you through every step, from simple ingredients to brilliant baking tips. Let’s dive in and create some magic in your kitchen!
Ingredients
List of Ingredients
– 2 cups all-purpose flour
– 1 packet (2 1/4 tsp) instant yeast
– 1 teaspoon sugar
– 1 teaspoon salt
– 3/4 cup warm water (about 110°F)
– 3 tablespoons olive oil
– 3 cloves garlic, minced
– 1 tablespoon fresh parsley, chopped
– 1 tablespoon fresh rosemary, chopped
– 1/2 teaspoon dried oregano
– 1/4 teaspoon red pepper flakes (optional)
– 1 egg (for egg wash)
– Sea salt for sprinkling
Ingredient Substitutions
Alternative flours for specific dietary needs?
You can use whole wheat flour for a heartier twist. Almond flour works well for gluten-free options. Just adjust the liquid to match the flour’s absorption.
Options for fresh herbs vs. dried herbs
Fresh herbs add bright flavor. If you use dried herbs, cut the amount in half. Dried herbs have a stronger taste.
Egg wash substitutes for a vegan option
For a vegan wash, use almond milk mixed with a bit of maple syrup. This gives a nice golden color.
Garlic Herb Bread Twists are fun to make!
Step-by-Step Instructions
Preparation Overview
To make garlic herb bread twists, follow these simple steps. First, mix warm water, sugar, and yeast in a large bowl. Let it sit for about five minutes until it bubbles. This step starts the yeast activation. Next, add flour, salt, and olive oil. Stir until you have a dough.
Now, knead the dough on a floured surface for 5-7 minutes. Kneading is crucial. It helps develop gluten, which gives the bread its nice texture. After kneading, place the dough in a greased bowl. Cover it with a towel and let it rise for about one hour. It should double in size.
Once the dough rises, preheat your oven to 375°F (190°C). Punch down the dough on a floured surface. Roll it out to about 1/4 inch thick. Then, mix minced garlic, parsley, rosemary, oregano, and red pepper flakes. Spread this mixture evenly over the dough.
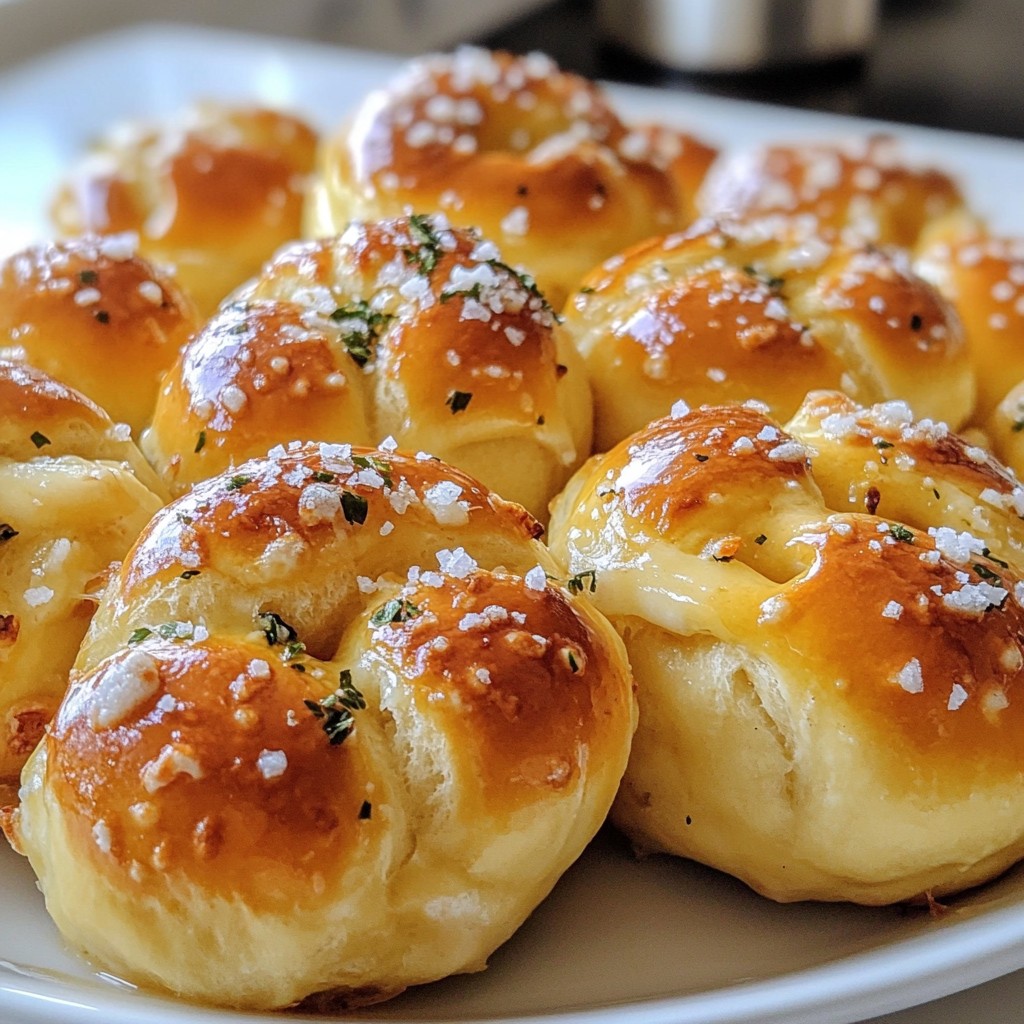
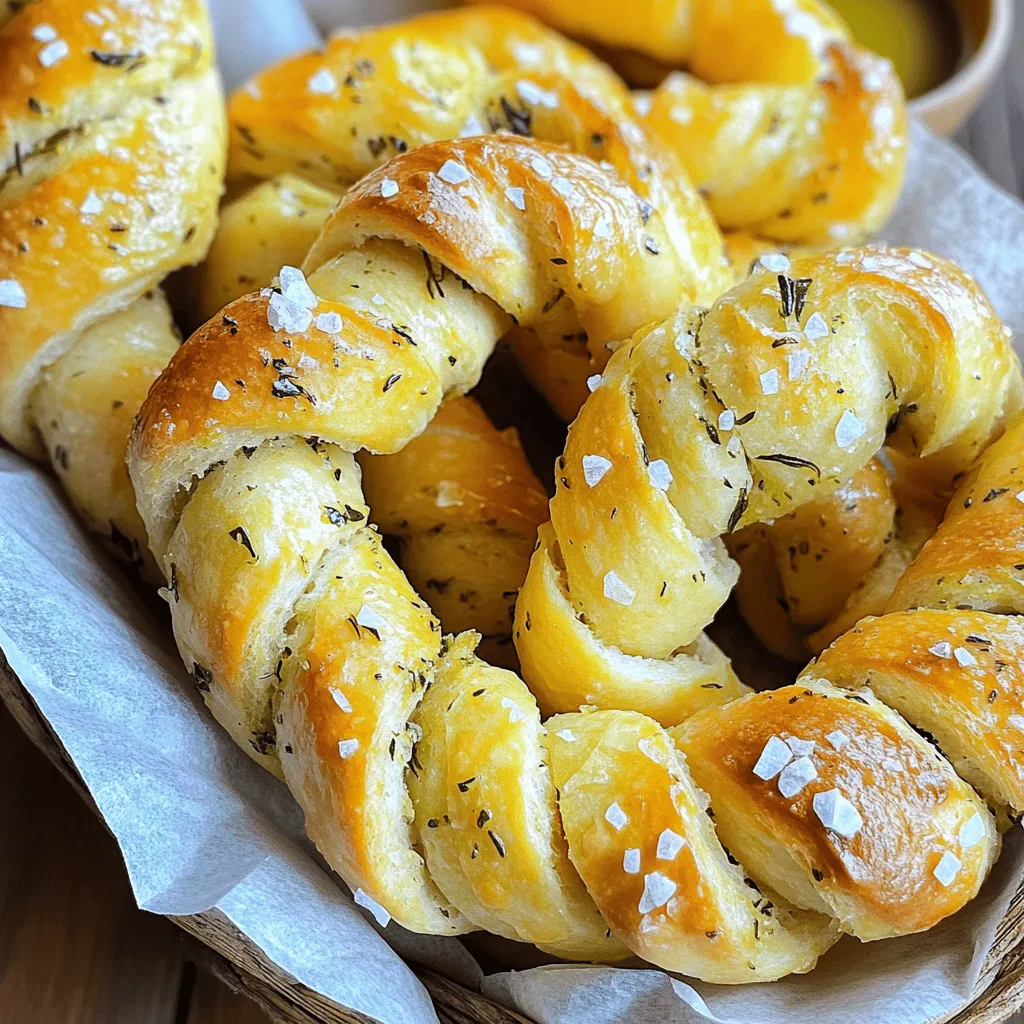
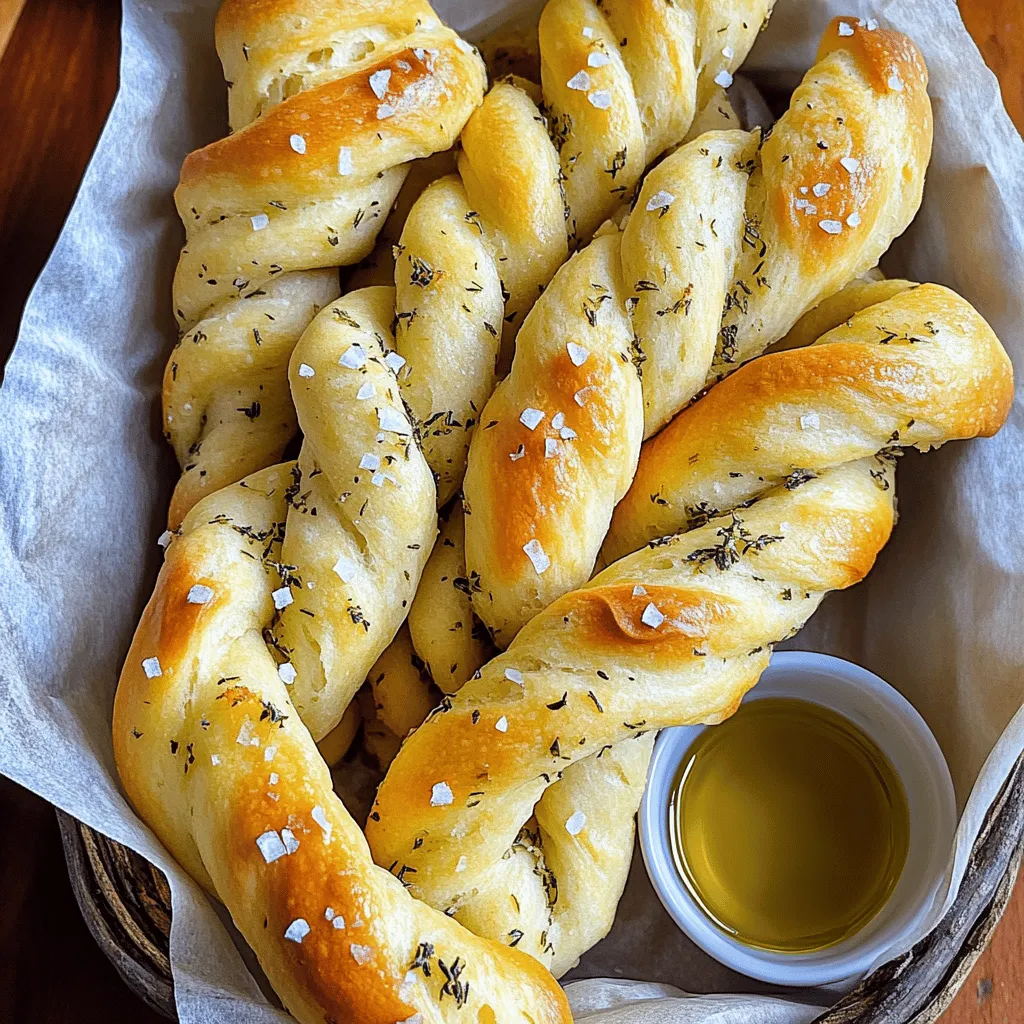
Using a pizza cutter, slice the dough into long strips, about one inch wide. Twist each strip gently to create spirals. Place them on a baking sheet lined with parchment paper. Brush each twist with an egg wash made from an egg and a splash of water. Finally, sprinkle sea salt on top.
Bake for 15-20 minutes until they are golden brown and smell amazing. Let them cool a bit before serving.
Visual Aids
For this recipe, consider taking images at key steps. Capture the bubbling yeast mixture, the kneaded dough, and the twisted strips. These photos can help guide others.
Common mistakes include not kneading enough or letting the dough rise too long. These can lead to tough or overly airy bread twists. Always check your dough’s texture and watch the rising time closely.
Tips & Tricks
Dough Handling Tips
To get the best dough texture, use warm water. This helps the yeast grow. The dough should feel soft, not sticky. If it’s too wet, add more flour, a little at a time.
When you roll the dough, use a floured surface. This keeps the dough from sticking. Roll it out into a rectangle, about 1/4 inch thick. Use a pizza cutter for even strips. Cut them about 1 inch wide to make twisting easier.
Baking Tips
Set your oven to 375°F (190°C). This temperature helps the twists bake evenly.
You know the twists are done when they turn golden brown. They should smell great, too. If they look pale, they need more time in the oven. Always check them around the 15-minute mark.
Variations
Flavor Variations
You can easily change the flavor of your Garlic Herb Bread Twists. Here are some fun ideas:
– Adding cheese: Mix in shredded mozzarella or parmesan for a cheesy twist. The cheese melts and adds a rich flavor.
– More herbs: Try using thyme, basil, or even dill for a fresh taste. Each herb brings its unique flavor.
– Spicy twists: Add more red pepper flakes if you like heat. This gives a nice kick to your bread twists.
These simple changes can make your twists fun and exciting. Each bite will surprise you with new flavors!
Dietary Variations
You can also adapt your Garlic Herb Bread Twists to fit your diet. Here are some ideas:
– Gluten-free alternatives: Use gluten-free flour blends. This way, everyone can enjoy these tasty twists.
– Vegan versions: Skip the egg wash for a vegan option. You can brush the twists with olive oil instead for a nice finish.
These options ensure that your Garlic Herb Bread Twists can please all kinds of eaters. Everyone deserves a tasty treat!Check it out above!
Storage Info
Storing Leftovers
To keep your garlic herb bread twists fresh, store them in an airtight container. You can also wrap them in plastic wrap or foil. This will help keep the twists soft. Place the wrapped twists in the fridge. They will stay good for about 3 to 4 days. If you want to keep them longer, consider freezing them.
Reheating Instructions
To reheat the twists, warm your oven to 350°F (175°C). Place the twists on a baking sheet. Heat them for about 10 minutes. This restores their crispy outside and soft inside. You can also use a toaster oven for a quick reheat.
If you have leftover twists, get creative! You can slice them up and use them in a salad. They also make a great side with soup or stew. Alternatively, try adding them to a breakfast casserole for a fun twist.
FAQs
How to Make Garlic Herb Bread Twists?
To make Garlic Herb Bread Twists, follow these simple steps:
1. First, mix warm water, sugar, and yeast in a large bowl. Let it sit for 5 minutes until frothy.
2. Next, add flour, salt, and olive oil to the yeast mix. Stir until a dough forms.
3. Knead the dough on a floured surface for 5-7 minutes until it feels smooth.
4. Place the dough in a greased bowl, cover it, and let it rise for 1 hour.
5. Preheat your oven to 375°F (190°C).
6. Punch down the risen dough and roll it out to about 1/4 inch thick.
7. Mix minced garlic, parsley, rosemary, oregano, and red pepper flakes in a bowl. Spread this mix over the dough.
8. Cut the dough into long strips about 1 inch wide.
9. Twist each strip to create spirals. Place them on a baking sheet with parchment paper.
10. Beat an egg with a splash of water. Brush this over each twist and sprinkle sea salt on top.
11. Bake for 15-20 minutes until golden brown.
12. Let them cool slightly before serving.
Can I freeze Garlic Herb Bread Twists?
Yes, you can freeze Garlic Herb Bread Twists! Here’s how:
– Allow the twists to cool completely after baking.
– Place them in a single layer on a baking sheet.
– Freeze them until solid, then transfer them to a freezer bag.
– To thaw, leave them in the fridge overnight or at room temperature for a few hours.
– Reheat in the oven at 350°F (175°C) for about 10 minutes for the best texture.
What can I serve with Garlic Herb Bread Twists?
Garlic Herb Bread Twists pair well with many dishes. Here are some ideas:
– Serve them with marinara sauce or olive oil for dipping.
– They make a great side with soups or salads.
– Enjoy them alongside pasta dishes for a flavorful touch.
– Add them to a cheese platter for a tasty snack.
You now have all the tools for making delicious garlic herb bread twists. We covered essential ingredients, substitutions, and step-by-step instructions. I shared tips for perfect dough and baking, along with tasty variations to try. Don’t forget about storage and reheating for leftovers; they can taste just as good later. Enjoy experimenting with this recipe and make it your own! Your kitchen adventure starts now.