Dairy-Free Chocolate Mousse Simple and Delicious Treat

Craving a sweet treat that’s both rich and dairy-free? I’ve got just the recipe for you! My Dairy-Free Chocolate Mousse is simple, delicious, and perfect for any occasion. Made with creamy coconut and decadent chocolate, this mousse is sure to impress your friends and family. Whether you’re covering special dietary needs or just seeking a lighter dessert, follow my step-by-step guide to whip up this delightful treat in no time!

Ingredients

Full Recipe Overview

This dairy-free chocolate mousse is a rich and creamy treat. It uses simple ingredients to create a dessert that fits many diets. You can whip it up in just 15 minutes, then chill it for a few hours. The result is a light and fluffy mousse that tastes amazing.

List of Ingredients

– 1 cup full-fat coconut milk (chilled overnight)

– 1 cup dark dairy-free chocolate chips (or dairy-free chocolate, chopped)

– 2 tablespoons maple syrup (adjust for sweetness)

– 1 teaspoon vanilla extract

– Pinch of sea salt

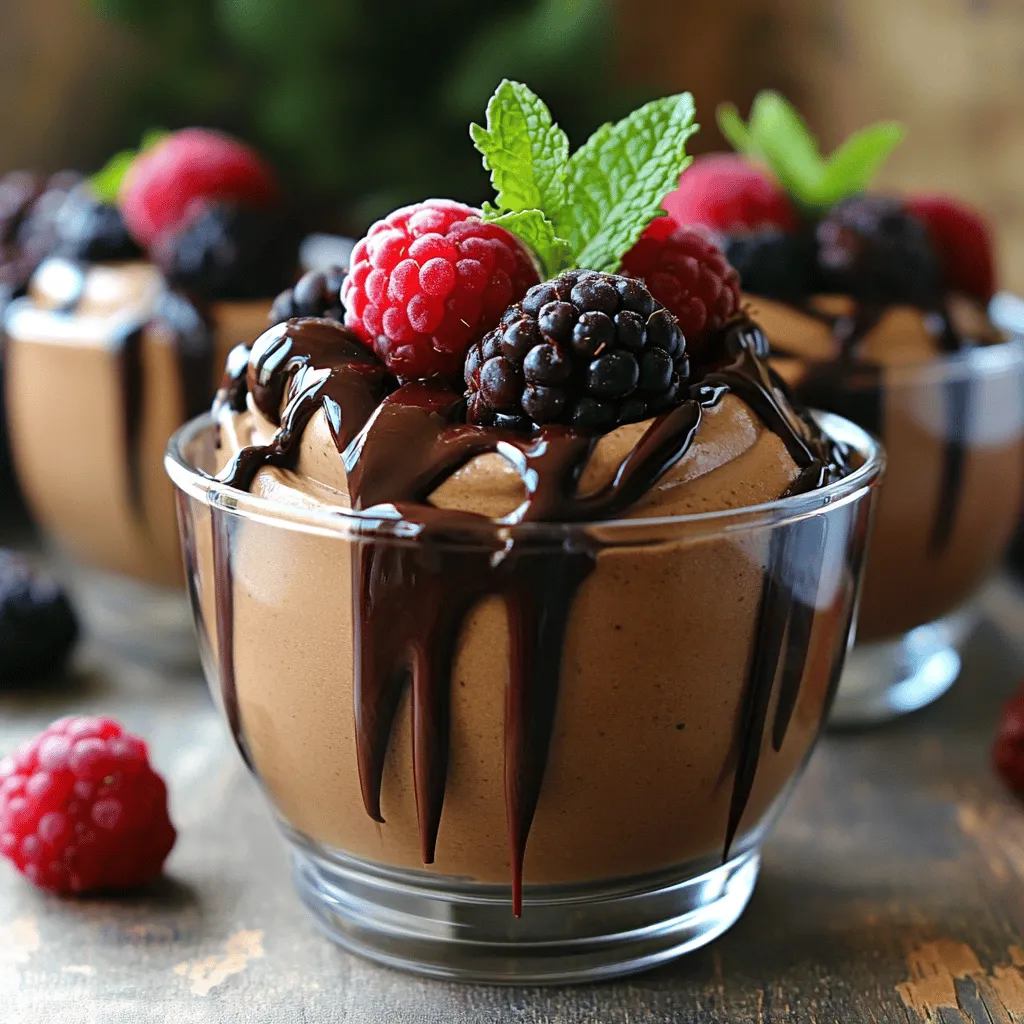
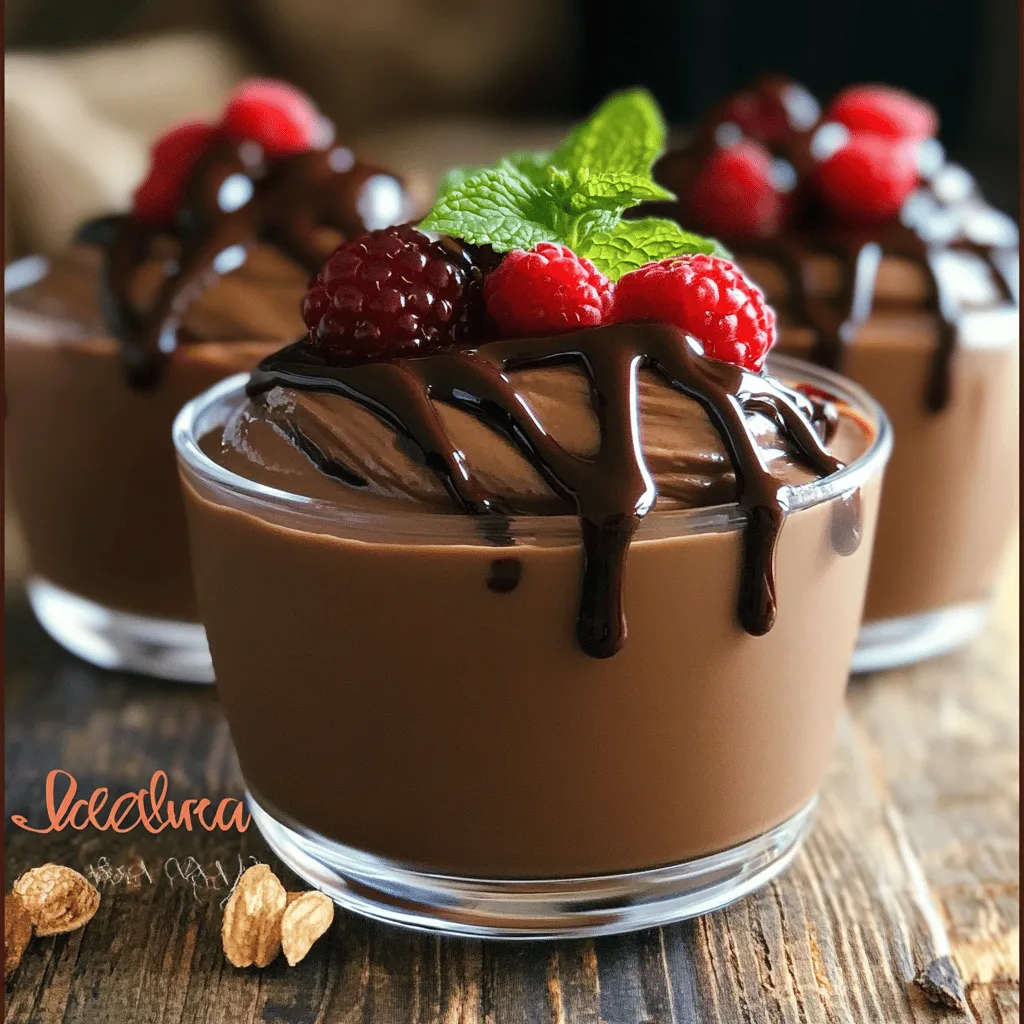
– Fresh berries (for garnish)

– Mint leaves (for garnish)

Alternative Ingredients/Substitutions

If you want to switch things up, you can try some alternatives. Use almond milk instead of coconut milk for a lighter taste. For sweeteners, agave syrup or honey can work well too. If you need it nut-free, avoid almond milk and stick with coconut milk. You can also use different types of dairy-free chocolate, like semi-sweet or dark chocolate. Explore what fits your taste buds!

Step-by-Step Instructions

Preparation of Coconut Cream

Start by chilling a can of full-fat coconut milk overnight. This step is key. When you open the can, you will find a thick layer of cream on top. Scoop out this solid cream and place it in a mixing bowl. Leave the watery liquid behind. This creamy base gives the mousse its rich texture.

Melting the Chocolate

Next, we will melt the dark dairy-free chocolate. You can use a microwave or a double boiler. If using a microwave, place the chocolate chips in a bowl. Heat the chocolate in 20-second bursts. Stir it often to avoid burning. If you choose the double boiler, heat water in a pot and place a bowl with chocolate on top. Stir until smooth and melted.

Combining the Ingredients

Now it’s time to mix everything. Add maple syrup, vanilla extract, and a pinch of sea salt into the melted chocolate. Stir well to combine. Then, gently fold the chilled coconut cream into the chocolate mixture. Use a spatula for this step. Be careful not to deflate the cream. Mix until it is fully combined and smooth. This is where the magic happens!

Tips & Tricks

Achieving the Perfect Texture

To get the best texture, use chilled coconut milk. This makes a thick cream. Scoop out the solid part only. Leave the watery part behind. This cream blends well with melted chocolate. Gently fold the cream into the chocolate. Avoid stirring too hard, or you will lose the air. The mousse should be light and fluffy.

Sweetness Adjustments

Taste is key when making mousse. Start with two tablespoons of maple syrup. You can add more if you like it sweeter. Remember, dark chocolate has its own sweetness. Adjust slowly to find your perfect balance. Always taste as you mix. This helps you get it just right.

Serving Suggestions

Serve the mousse in clear cups for a pretty look. Top each serving with fresh berries. Berries add a nice pop of color. A sprig of mint adds freshness. You can also drizzle some melted chocolate on top. For extra flair, use a spoon to create fun designs. Enjoy this simple and delicious treat with friends and family.

For the full recipe, see above.

Variations

Flavor Additions (e.g., coffee, spices)

You can add different flavors to your mousse for fun. Try mixing in a tablespoon of strong coffee for a mocha twist. Coffee enhances the rich chocolate flavor. You can also add a pinch of cinnamon or nutmeg for warmth. These spices give the mousse a cozy, unique taste. Consider adding a splash of orange zest for a bright, citrusy kick. The options are endless!

Vegan Alternatives

This mousse is already vegan-friendly, but you can tweak it further. Use agave syrup instead of maple syrup for a different sweetener. You can swap coconut milk with almond milk, cashew milk, or any nut milk. Just remember that nut milks may change the mousse’s texture. For creaminess, add extra coconut cream or silken tofu. These choices keep it tasty and dairy-free!

Serving Styles (individual cups, tart shell)

You can serve the mousse in many ways. Individual cups look great and are easy to share. Use small glass jars or dessert cups for a neat look. If you want something special, try a tart shell. Fill a pre-baked shell with the mousse for a stunning dessert. Top it with fresh berries and mint for color and flavor. Both styles will impress your guests!

Storage Info

Best Practices for Storing Leftovers

To keep your mousse fresh, store it in airtight containers. Use small jars or bowls for best results. Make sure the mousse is fully chilled before sealing. This helps keep the texture smooth. Avoid placing it near strong-smelling foods, as it may absorb those odors.

Freezing Guidelines

You can freeze dairy-free chocolate mousse, but it may change texture. Scoop the mousse into freezer-safe containers. Leave some space at the top for expansion. Seal tightly and label with the date. When ready to eat, thaw it in the fridge overnight for the best results.

Shelf Life

Dairy-free chocolate mousse lasts about 3 to 5 days in the fridge. If stored properly, it remains tasty for a while. Check for changes in smell or texture before serving. If it looks or smells off, it’s best to toss it out. Enjoy your mousse while it’s fresh for the best flavor!

FAQs

Can I make this mousse nut-free?

Yes, you can easily make this mousse nut-free. The main ingredient is coconut milk, which is safe for those with nut allergies. Ensure your chocolate chips are also nut-free. Most dark chocolate brands are free from nuts, but always check labels. You can enjoy this treat without worry!

How can I make it more chocolatey?

To boost the chocolate flavor, use a higher percentage of cocoa in your chocolate chips. You can also add cocoa powder to the mixture. Start with one tablespoon, and mix it in after melting the chocolate. Taste as you go. This way, you can find the perfect level of chocolate that you love!

What are some good pairings for dairy-free chocolate mousse?

This mousse pairs well with many flavors. Fresh berries like raspberries and strawberries add a nice tartness. Mint leaves give a refreshing touch. You can also serve it with coconut whipped cream for extra creaminess. If you enjoy crunch, try adding nuts or granola on top. These pairings enhance the dessert and make it even more enjoyable!

This blog post covered how to make a delicious dairy-free chocolate mousse. We explored the ingredients you need, step-by-step instructions, and helpful tips. You learned about storage and variations, like flavor options and serving styles.

Now you can create your own tasty mousse with ease. Remember to adjust sweetness to your taste. Enjoy your dessert, and share it with friends or family. Happy cooking!

This dairy-free chocolate mousse is a rich and creamy treat. It uses simple ingredients to create a dessert that fits many diets. You can whip it up in just 15 minutes, then chill it for a few hours. The result is a light and fluffy mousse that tastes amazing. - 1 cup full-fat coconut milk (chilled overnight) - 1 cup dark dairy-free chocolate chips (or dairy-free chocolate, chopped) - 2 tablespoons maple syrup (adjust for sweetness) - 1 teaspoon vanilla extract - Pinch of sea salt - Fresh berries (for garnish) - Mint leaves (for garnish) If you want to switch things up, you can try some alternatives. Use almond milk instead of coconut milk for a lighter taste. For sweeteners, agave syrup or honey can work well too. If you need it nut-free, avoid almond milk and stick with coconut milk. You can also use different types of dairy-free chocolate, like semi-sweet or dark chocolate. Explore what fits your taste buds! Start by chilling a can of full-fat coconut milk overnight. This step is key. When you open the can, you will find a thick layer of cream on top. Scoop out this solid cream and place it in a mixing bowl. Leave the watery liquid behind. This creamy base gives the mousse its rich texture. Next, we will melt the dark dairy-free chocolate. You can use a microwave or a double boiler. If using a microwave, place the chocolate chips in a bowl. Heat the chocolate in 20-second bursts. Stir it often to avoid burning. If you choose the double boiler, heat water in a pot and place a bowl with chocolate on top. Stir until smooth and melted. Now it’s time to mix everything. Add maple syrup, vanilla extract, and a pinch of sea salt into the melted chocolate. Stir well to combine. Then, gently fold the chilled coconut cream into the chocolate mixture. Use a spatula for this step. Be careful not to deflate the cream. Mix until it is fully combined and smooth. This is where the magic happens! To get the best texture, use chilled coconut milk. This makes a thick cream. Scoop out the solid part only. Leave the watery part behind. This cream blends well with melted chocolate. Gently fold the cream into the chocolate. Avoid stirring too hard, or you will lose the air. The mousse should be light and fluffy. Taste is key when making mousse. Start with two tablespoons of maple syrup. You can add more if you like it sweeter. Remember, dark chocolate has its own sweetness. Adjust slowly to find your perfect balance. Always taste as you mix. This helps you get it just right. Serve the mousse in clear cups for a pretty look. Top each serving with fresh berries. Berries add a nice pop of color. A sprig of mint adds freshness. You can also drizzle some melted chocolate on top. For extra flair, use a spoon to create fun designs. Enjoy this simple and delicious treat with friends and family. For the full recipe, see above. {{image_2}} You can add different flavors to your mousse for fun. Try mixing in a tablespoon of strong coffee for a mocha twist. Coffee enhances the rich chocolate flavor. You can also add a pinch of cinnamon or nutmeg for warmth. These spices give the mousse a cozy, unique taste. Consider adding a splash of orange zest for a bright, citrusy kick. The options are endless! This mousse is already vegan-friendly, but you can tweak it further. Use agave syrup instead of maple syrup for a different sweetener. You can swap coconut milk with almond milk, cashew milk, or any nut milk. Just remember that nut milks may change the mousse's texture. For creaminess, add extra coconut cream or silken tofu. These choices keep it tasty and dairy-free! You can serve the mousse in many ways. Individual cups look great and are easy to share. Use small glass jars or dessert cups for a neat look. If you want something special, try a tart shell. Fill a pre-baked shell with the mousse for a stunning dessert. Top it with fresh berries and mint for color and flavor. Both styles will impress your guests! To keep your mousse fresh, store it in airtight containers. Use small jars or bowls for best results. Make sure the mousse is fully chilled before sealing. This helps keep the texture smooth. Avoid placing it near strong-smelling foods, as it may absorb those odors. You can freeze dairy-free chocolate mousse, but it may change texture. Scoop the mousse into freezer-safe containers. Leave some space at the top for expansion. Seal tightly and label with the date. When ready to eat, thaw it in the fridge overnight for the best results. Dairy-free chocolate mousse lasts about 3 to 5 days in the fridge. If stored properly, it remains tasty for a while. Check for changes in smell or texture before serving. If it looks or smells off, it’s best to toss it out. Enjoy your mousse while it’s fresh for the best flavor! Yes, you can easily make this mousse nut-free. The main ingredient is coconut milk, which is safe for those with nut allergies. Ensure your chocolate chips are also nut-free. Most dark chocolate brands are free from nuts, but always check labels. You can enjoy this treat without worry! To boost the chocolate flavor, use a higher percentage of cocoa in your chocolate chips. You can also add cocoa powder to the mixture. Start with one tablespoon, and mix it in after melting the chocolate. Taste as you go. This way, you can find the perfect level of chocolate that you love! This mousse pairs well with many flavors. Fresh berries like raspberries and strawberries add a nice tartness. Mint leaves give a refreshing touch. You can also serve it with coconut whipped cream for extra creaminess. If you enjoy crunch, try adding nuts or granola on top. These pairings enhance the dessert and make it even more enjoyable! This blog post covered how to make a delicious dairy-free chocolate mousse. We explored the ingredients you need, step-by-step instructions, and helpful tips. You learned about storage and variations, like flavor options and serving styles. Now you can create your own tasty mousse with ease. Remember to adjust sweetness to your taste. Enjoy your dessert, and share it with friends or family. Happy cooking!

Dairy-Free Chocolate Mousse

Indulge your sweet tooth with this delightful Dairy-Free Chocolate Mousse that’s rich, creamy, and super simple to make! Perfect for any occasion, this mousse blends creamy coconut milk with decadent dairy-free chocolate, making it an irresistible treat everyone can enjoy. Follow our easy step-by-step guide to whip up this satisfying dessert in just 15 minutes. Click through for the full recipe and impress your friends and family with this simple and delicious treat!

Ingredients
  

1 cup full-fat coconut milk (chilled overnight)

1 cup dark dairy-free chocolate chips (or dairy-free chocolate, chopped)

2 tablespoons maple syrup (adjust for sweetness)

1 teaspoon vanilla extract

Pinch of sea salt

Fresh berries (for garnish)

Mint leaves (for garnish)

Instructions
 

Prepare the Coconut Cream: Open the chilled can of coconut milk and scoop out the solid cream into a mixing bowl, leaving the watery liquid behind.

    Melt the Chocolate: In a microwave-safe bowl or using a double boiler, melt the dark chocolate chips until smooth. If using a microwave, heat in 20-second intervals, stirring in-between to prevent burning.

      Combine Ingredients: Once the chocolate is melted, add the maple syrup, vanilla extract, and a pinch of sea salt. Mix well to combine.

        Add Coconut Cream: Gently fold the chilled coconut cream into the chocolate mixture using a spatula, being careful not to deflate the cream. Stir until fully combined and smooth.

          Chill the Mousse: Spoon the mousse mixture into individual serving dishes or cups. Cover with plastic wrap and refrigerate for at least 2 hours to set.

            Serve: Once set, serve the mousse chilled, topped with fresh berries and a sprig of mint for a refreshing touch.

              Prep Time: 15 mins | Total Time: 2 hrs 15 mins | Servings: 4

                - Presentation Tips: For an elegant look, use clear dessert cups to show off the mousse’s rich, creamy texture. Drizzle some melted dairy-free chocolate on top before adding the fresh berries and mint leaves for a beautiful finish!

                  Leave a Comment

                  Recipe Rating