If you crave crispy, flavorful chicken wings that are easy to make, you’re in the right place. I’ll share my simple recipe that guarantees tasty results every time. You’ll learn how to prepare wings in your oven and achieve that perfect crunch without frying. Let’s dive into the world of crispy baked chicken wings and make your next meal a hit!
Ingredients
Chicken Wing Basics
To make crispy baked chicken wings, you need the right base. Start with 2 lbs of chicken wings. Fresh or frozen wings work, but fresh wings yield better texture. Rinse them under cold water and dry them well. Removing moisture is vital for crispiness.
Spice Mix Overview
The spice mix adds great flavor. You will need:
– 1 tablespoon baking powder
– 1 teaspoon salt
– 1 teaspoon black pepper
– 1 teaspoon garlic powder
– 1 teaspoon onion powder
– 1 teaspoon smoked paprika
– ½ teaspoon cayenne pepper (optional for heat)
Baking powder is key here. It helps to dry out the skin, making it crispy. The spices give your wings a full flavor. Adjust any spices to fit your taste.
Optional Ingredients for Customization
Want to make your wings unique? Add some optional ingredients. Consider using different spices like cumin or chili powder. You could also try various sauces later. Think about buffalo, BBQ, or even teriyaki. Mix it up based on what you love!
Step-by-Step Instructions
Preparation Phase
Start by gathering your ingredients. You need 2 pounds of chicken wings, baking powder, salt, and spices. The spices include black pepper, garlic powder, onion powder, smoked paprika, and cayenne pepper if you want heat. Don’t forget olive oil and your favorite wing sauce.
Next, preheat your oven to 425°F (220°C). Line a baking sheet with aluminum foil. Place a wire rack on top. This helps air flow around the wings. Rinse the chicken wings under cold water. Use paper towels to dry them well. Removing moisture is key for crispiness.
In a large bowl, mix baking powder, salt, black pepper, garlic powder, onion powder, smoked paprika, and cayenne if you like it spicy. Stir well to combine the dry ingredients. Add the wings into the bowl. Drizzle olive oil over the wings. Toss them until well-coated.
Baking Process for Crispy Wings
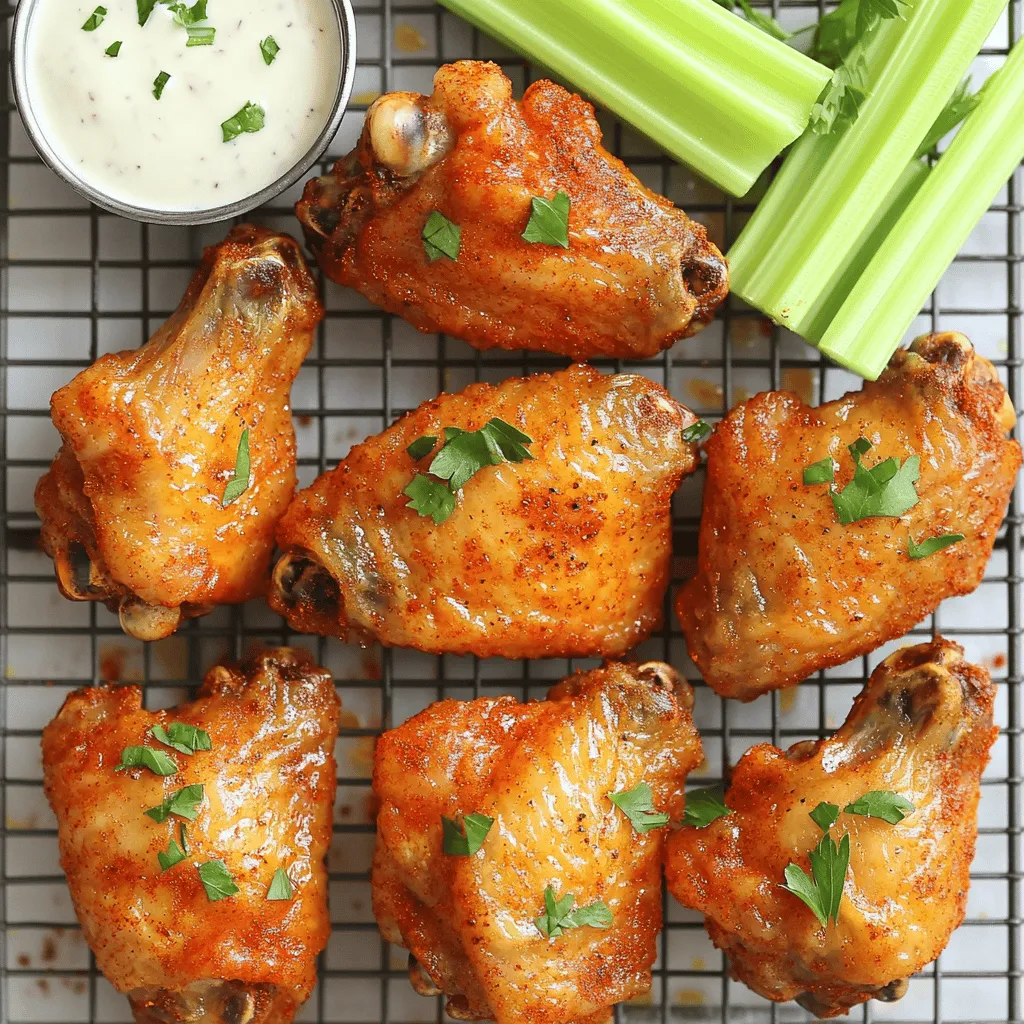
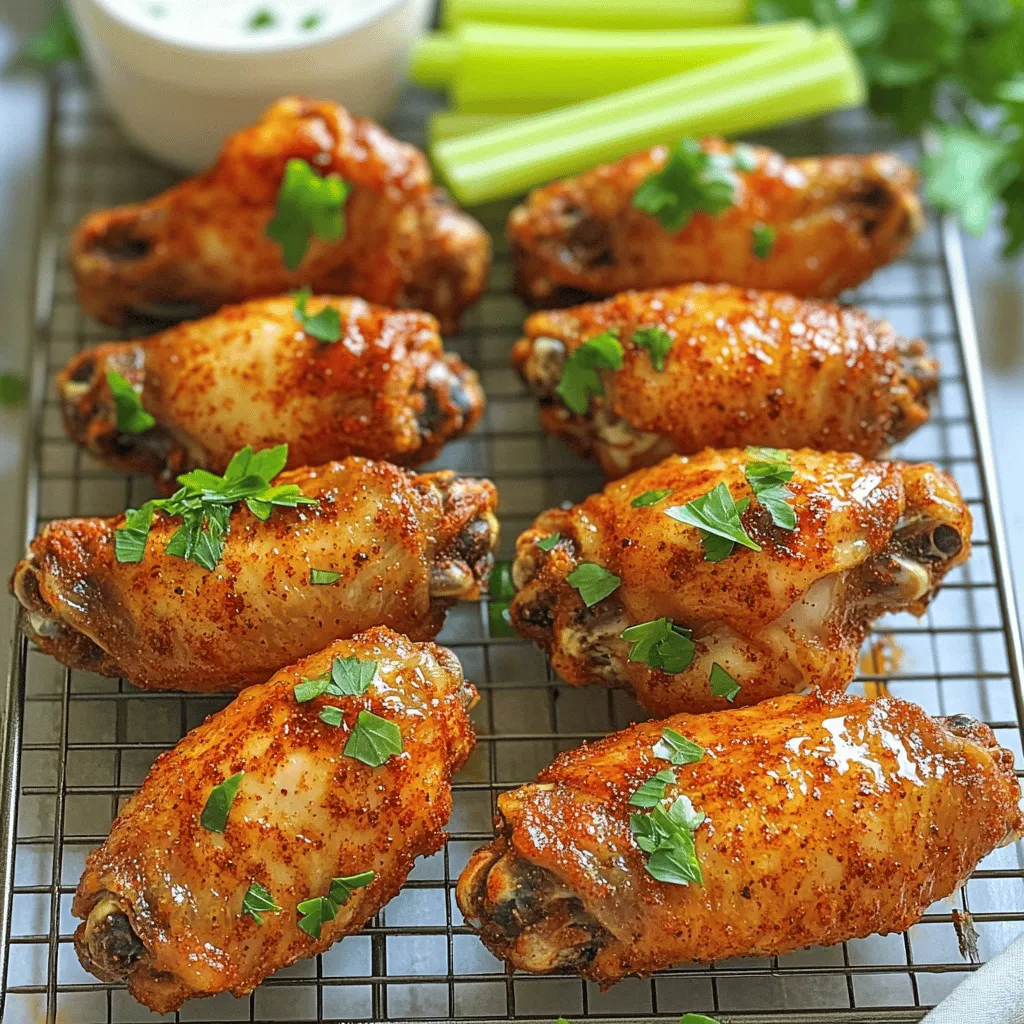
Now, arrange the chicken wings on the wire rack. Make sure they are in a single layer and not touching. This space helps them cook evenly and get crispy. Bake the wings in the preheated oven for 40-45 minutes. Flip them halfway through to ensure even cooking.
Look for a golden brown color and a crispy texture. When done, remove the wings from the oven. Let them rest for about 5 minutes. This resting time keeps them juicy.
Finishing Touches with Sauce
Take a large bowl and add your favorite wing sauce. Toss the rested wings in the sauce until they are fully coated. You can use buffalo sauce, BBQ, or any other sauce you love. This step adds flavor and brings the dish together. For serving, pair the wings with celery sticks and ranch or blue cheese dressing. Enjoy your crispy baked chicken wings!
Tips & Tricks
Achieving the Perfect Crisp
To get crispy baked chicken wings, start by drying them well. Moisture makes wings soggy. I recommend using paper towels to pat them dry. Next, use baking powder in your spice mix. Baking powder helps create a crunchy layer. Also, cook the wings on a wire rack. This allows hot air to circulate around them. Make sure the wings are not touching. This space helps them crisp up nicely.
Common Mistakes to Avoid
One big mistake is not drying the wings enough. Even a little moisture can ruin crispiness. Another mistake is overcrowding the baking sheet. Wings need space to cook evenly. Some folks skip flipping the wings halfway through. This flipping is important for even cooking and browning. Lastly, don’t forget to preheat your oven. A hot oven helps achieve that perfect crunch.
Cooking Equipment Recommendations
For the best results, use a wire rack. It keeps the wings elevated, allowing air to flow. A heavy-duty baking sheet is ideal for catching drips and keeping your oven clean. I also suggest using parchment paper for easy cleanup. If you love cooking wings often, consider an air fryer. It can also produce crispy wings with less oil.
Variations
Different Sauces to Try
You can make your wings even more fun by using different sauces. Some great options include classic buffalo sauce, tangy BBQ, or spicy garlic. You can even mix sauces for a unique flavor. Try honey mustard for a sweet twist or teriyaki for an Asian flair. The sky’s the limit when it comes to sauce!
Flavor Profiles and Seasoning Adjustments
Not everyone likes the same flavor. You can easily change the spice mix to fit your taste. Add more cayenne for heat or use lemon zest for a fresh kick. Try adding herbs like thyme or oregano for an earthy flavor. You can also experiment with smoked paprika or even curry powder for a unique twist. Adjust the seasonings based on what you enjoy!
Air Fryer vs. Oven Cooking
Do you have an air fryer? It’s a great tool for wings! Air fryers can give you that crispy texture in less time. Cook them for about 25-30 minutes, shaking the basket halfway through. Oven baking, however, allows for a larger batch. It’s perfect for parties or family dinners. Both methods can yield crispy, delicious wings, so choose based on your needs.
Storage Info
Best Practices for Storing Leftovers
After making crispy baked chicken wings, you want to save the extras. Let the wings cool down to room temperature first. Place them in an airtight container. This helps keep them fresh. Store the container in the fridge. They will last for up to four days. If you want to enjoy them later, freezing is a great option.
Reheating Methods for Optimal Texture
To reheat your chicken wings, you have a few choices. The oven is best for keeping them crispy. Preheat the oven to 350°F (175°C). Place the wings on a baking sheet and heat for about 10-15 minutes. Check them to ensure they are hot all the way through. You can also use a microwave, but this may make them soggy. If you do use the microwave, heat them in short bursts to avoid overcooking.
Freezing Tips for Long-Term Storage
Freezing wings is easy and keeps them tasty. First, let the wings cool completely. Then, wrap them tightly in plastic wrap or foil. You can also use freezer bags to save space. Make sure to remove as much air as possible. Label the bags with the date. They can be frozen for up to three months. When you are ready to eat them, thaw them in the fridge overnight before reheating.
FAQs
Can I make these wings gluten-free?
Yes, you can make these wings gluten-free. Just ensure the baking powder is gluten-free. Most baking powders are safe, but check labels to be sure. You can also use gluten-free sauces. Many brands offer delicious options.
How long do I bake chicken wings for maximum crispiness?
Bake chicken wings for 40 to 45 minutes at 425°F (220°C). Flip the wings halfway through to get even crispiness. The skin should turn golden brown and crunchy. If you want extra crispiness, you can bake them a bit longer.
What sauces pair best with crispy baked chicken wings?
Many sauces work well with crispy wings. Popular choices include buffalo sauce, BBQ sauce, and garlic parmesan sauce. You can try honey mustard or teriyaki for a twist. Toss the wings in your favorite sauce after baking for the best flavor.
The blog post covered how to make the best chicken wings. We explored the basics, spice mixes, and ways to customize your wings. I shared step-by-step instructions for preparing and baking wings to crispy perfection, with tips to avoid common mistakes. We also discussed variations, storage methods, and answered common questions.
With these tips, you can enjoy tasty wings anytime. Experiment with flavors and enjoy the process!