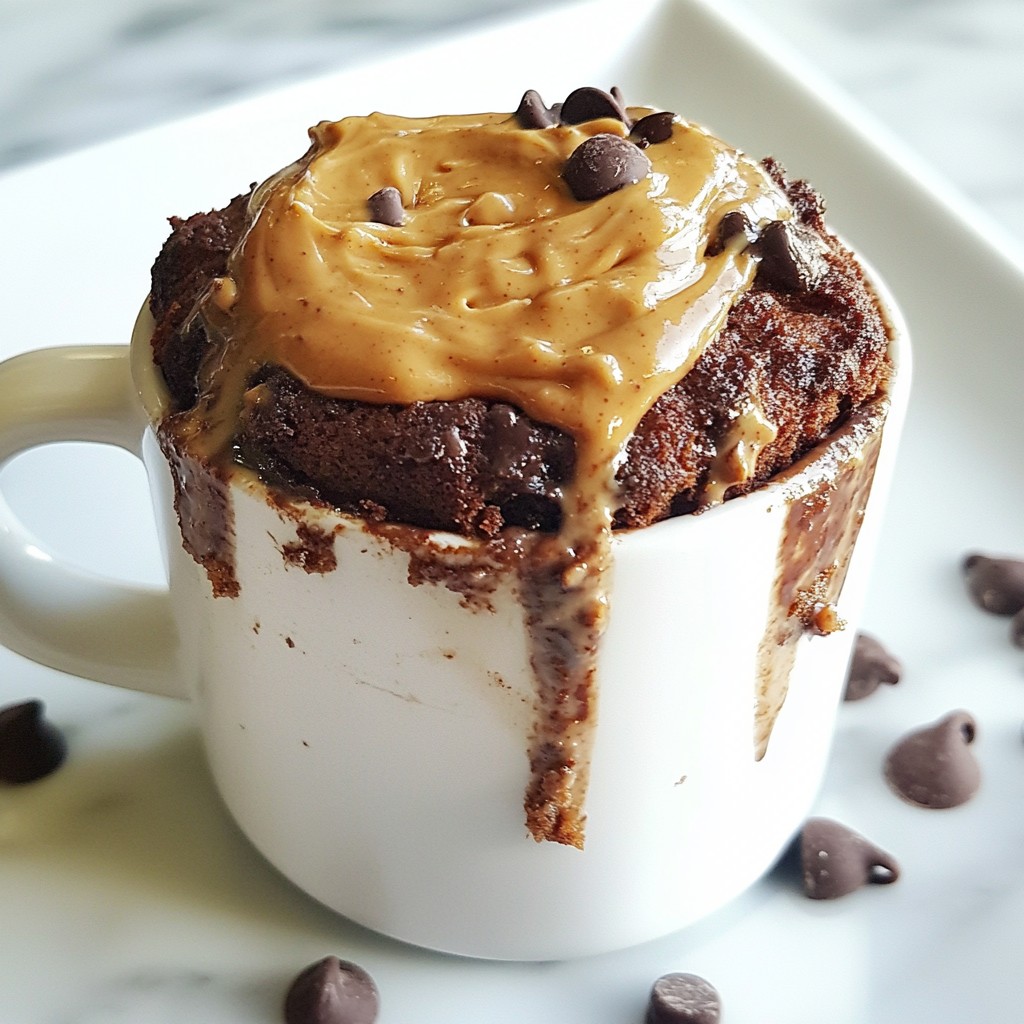
Craving something quick and delicious? This Chocolate Peanut Butter Mug Cake is your answer! With just a few ingredients, you can whip up this rich treat in minutes. Whether you need a sweet snack or a late-night dessert, this recipe delivers big flavor with minimal effort. Ready to indulge in the perfect chocolate-peanut butter bliss? Let’s dive into the simple steps to create this mouthwatering mug cake!
Why I Love This Recipe
- Quick and Easy: This mug cake can be whipped up in just 5 minutes, making it a perfect last-minute dessert!
- Decadent Flavor: The rich combination of chocolate and peanut butter creates an indulgent treat that's hard to resist.
- Single Serving: No need to make a whole cake; this recipe is perfectly portioned for one, satisfying your sweet tooth without leftovers.
- Customizable: Add chocolate chips or your favorite nuts for an extra layer of flavor and texture!
Ingredients
List of Ingredients
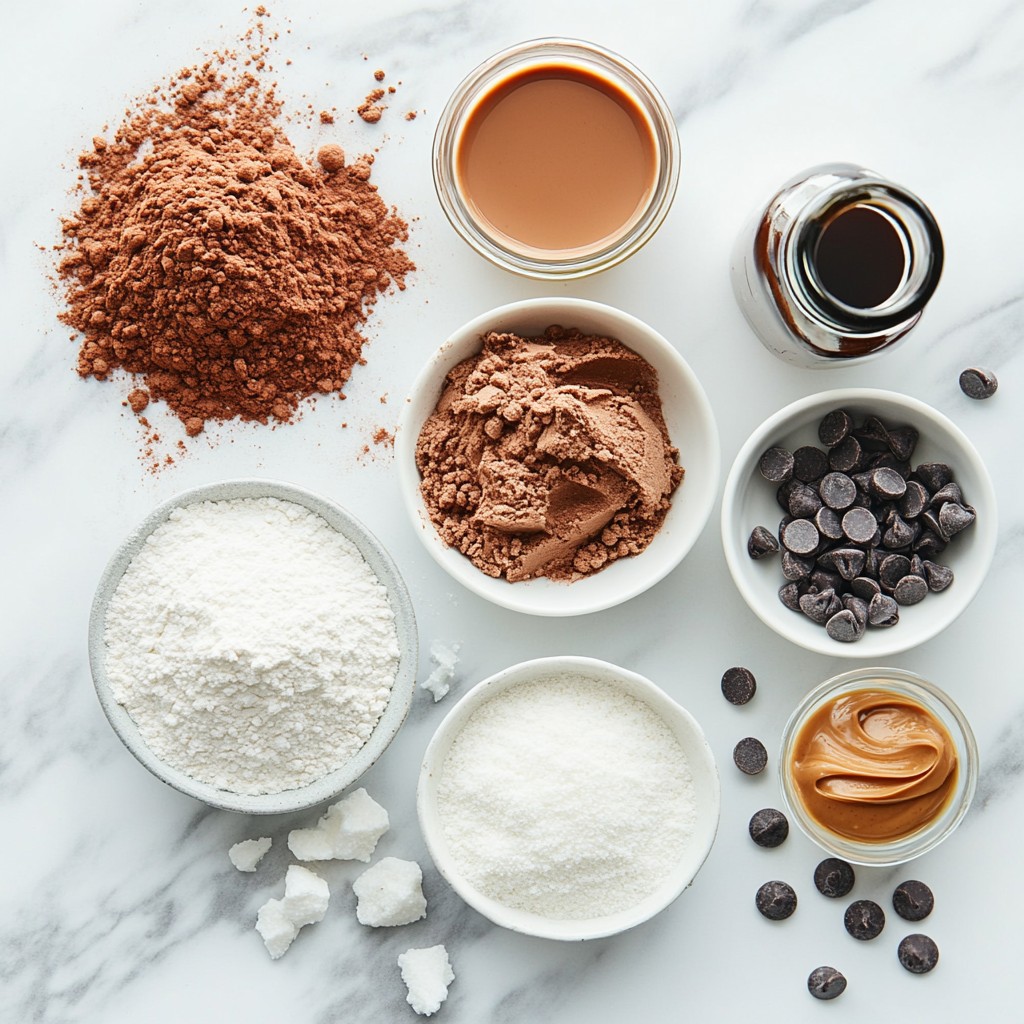
- 4 tablespoons all-purpose flour
- 4 tablespoons granulated sugar
- 2 tablespoons unsweetened cocoa powder
- 1/8 teaspoon baking powder
- 1/8 teaspoon salt
- 3 tablespoons milk (or non-dairy alternative)
- 2 tablespoons vegetable oil (or melted coconut oil)
- 1 tablespoon vanilla extract
- 1 tablespoon creamy peanut butter
- Optional: chocolate chips for extra indulgence
To make the best Chocolate Peanut Butter Mug Cake, gather your ingredients first. This cake is easy and quick, so having everything ready is key.
I love using all-purpose flour for this cake because it gives a soft texture. The granulated sugar adds sweetness, while cocoa powder gives that rich chocolate flavor. Baking powder helps the cake rise, and the salt balances the sweetness.
For the wet ingredients, milk keeps the cake moist. You can use any non-dairy milk if you want. Vegetable oil makes the cake tender, but melted coconut oil works too. Don't forget the vanilla extract; it adds a nice depth of flavor.
The star of the show is the creamy peanut butter. It makes the cake special with its nutty goodness. If you want to make it even richer, toss in some chocolate chips. They melt beautifully and add extra chocolatey bites.
These ingredients come together to make a simple yet decadent treat that will delight your taste buds.
Step-by-Step Instructions
Preparing the Dry Ingredients
Start by grabbing a microwave-safe mug. Add the dry items to the mug. You need:
- 4 tablespoons all-purpose flour
- 4 tablespoons granulated sugar
- 2 tablespoons unsweetened cocoa powder
- 1/8 teaspoon baking powder
- 1/8 teaspoon salt
Whisk these together well. Make sure there are no lumps. This step sets the base for your cake.
Mixing the Wet Ingredients
Now, you will mix the wet ingredients in a separate bowl. You’ll need:
- 3 tablespoons milk (or a non-dairy option)
- 2 tablespoons vegetable oil (or melted coconut oil)
- 1 tablespoon vanilla extract
Pour the wet mixture into the dry ingredients in the mug. Stir until everything is well combined. You want a smooth batter, so check for any dry flour. If you want extra chocolate, you can add chocolate chips here.
Final Assembly
Next, create a small well in the center of the batter. Add 1 tablespoon of creamy peanut butter. Use a toothpick or knife to swirl it gently. Don't mix it in completely. This will give you a warm peanut butter center that melts beautifully.
Cooking Method
Now it's time to cook your cake. Place the mug in the microwave. Set it to high and cook for about 1 minute. Keep an eye on it. If it needs more time, add 10-second intervals until it looks set. Your cake should rise well and look fluffy.
Let it cool for a minute. Then, enjoy your cake right from the mug!
Tips & Tricks
Best Practices for Perfect Texture
To get a smooth batter, mix well. Start by whisking the dry ingredients in your mug. Make sure the flour, sugar, cocoa powder, baking powder, and salt blend fully. No lumps should remain. Next, combine the wet ingredients in a bowl. Pour this mix into the mug. Stir gently until you see no dry flour. If you want a richer cake, fold in chocolate chips at this step. This ensures every bite is a treat.
Cooking Tips
To avoid overflow, don’t fill the mug too full. Leave some space at the top. Start cooking for one minute in the microwave. Check the cake closely. If it isn’t set, add more time in ten-second bursts. This way, you can prevent a messy overflow. The cake should rise and look firm when done.
Serving Suggestions
For a fun presentation, add a scoop of ice cream on top. A dollop of whipped cream is also great. You can sprinkle cocoa powder or crushed peanuts for extra crunch. These touches make your Chocolate Peanut Butter Mug Cake look as good as it tastes. Enjoy it right from the mug for a cozy treat!
Pro Tips
- Use a larger mug: To prevent overflow while the cake rises in the microwave, opt for a mug that has a bit more capacity.
- Experiment with flavors: Try adding a pinch of cinnamon or a splash of espresso to enhance the chocolate flavor even more.
- Check for doneness: Microwaves vary in power, so check your cake after 1 minute. It should look set but moist in the center.
- Customize your toppings: Top your mug cake with crushed peanuts, a drizzle of chocolate sauce, or a sprinkle of sea salt for a gourmet touch.
Variations
Flavor Variations
You can change the flavor of your mug cake with ease. Try adding different extracts to make it your own. For a nutty twist, add almond extract. If you crave a sweet touch, swirl in caramel. You can even mix in some coffee or hazelnut spread for a rich taste. Feel free to get creative with your mix-ins. Chocolate chips or chopped nuts add a nice crunch. Each option gives your cake a unique spin.
Dietary Adjustments
If you need to make this cake gluten-free, swap the all-purpose flour for a gluten-free blend. Make sure your blend has xantham gum for the best texture. To make it vegan, replace the milk with almond or oat milk. Use a vegan butter or coconut oil instead of vegetable oil. You can also find vegan chocolate chips for extra fun. These adjustments keep your cake delicious and suitable for everyone.
Topping Ideas
Toppings can elevate your mug cake. A dollop of whipped cream adds creaminess and looks great. You might sprinkle some crushed peanuts on top for added crunch. A scoop of vanilla ice cream melts beautifully into the warm cake. For a fun twist, drizzle some chocolate or caramel sauce over the top. These toppings make your treat even more special. Enjoy experimenting!
Storage Info
How to Store Leftovers
If you have leftover mug cake, let it cool first. Place it in an airtight container. This helps keep it fresh. You can store it in the fridge for up to two days. If you want to enjoy it later, cover the mug tightly with plastic wrap. This method works well too.
Reheating Instructions
To reheat your mug cake, use the microwave. Start with 10 seconds on high. Check if it's warm enough. If not, add 5 to 10 seconds more. Avoid overheating, as this can dry it out. For best results, enjoy it straight from the mug. This keeps the cake soft and delicious.
FAQs
How long does it take to make a Chocolate Peanut Butter Mug Cake?
It takes about 5-7 minutes to make this mug cake. You spend 5 minutes prepping the ingredients. Then, you cook it in the microwave for 1-1.5 minutes. This quick time makes it an easy treat.
Can I make this cake in the oven?
Yes, you can bake it in the oven! Preheat your oven to 350°F (175°C). Pour the batter into an oven-safe dish. Bake for 10-12 minutes. Check for doneness by inserting a toothpick into the center. If it comes out clean, your cake is ready.
What if I don’t have a microwave?
No microwave? No problem! You can steam the mug cake. Fill a pot with a bit of water and bring it to a boil. Cover the pot with a lid, then place a heat-safe mug with the batter inside. Steam for about 10-15 minutes. Check with a toothpick for doneness.
How should I modify the recipe for different flavor preferences?
You can change the flavors easily! Try adding:
- A splash of almond extract for a nutty twist.
- Swap cocoa powder for caramel or butterscotch sauce for a sweet change.
- Mix in chopped nuts or dark chocolate for extra texture.
Feel free to get creative and make it your own!
This blog post showed you how to make a simple Chocolate Peanut Butter Mug Cake. We covered the ingredients, step-by-step instructions, and helpful tips for the best results. You learned about flavor variations, storage tips, and ways to serve this treat.
Enjoying this cake is quick and fun. Whether you stick to the classic recipe or try new flavors, you can create a dessert that delights. Remember, your mug cake journey can be as sweet as you want. Happy baking!