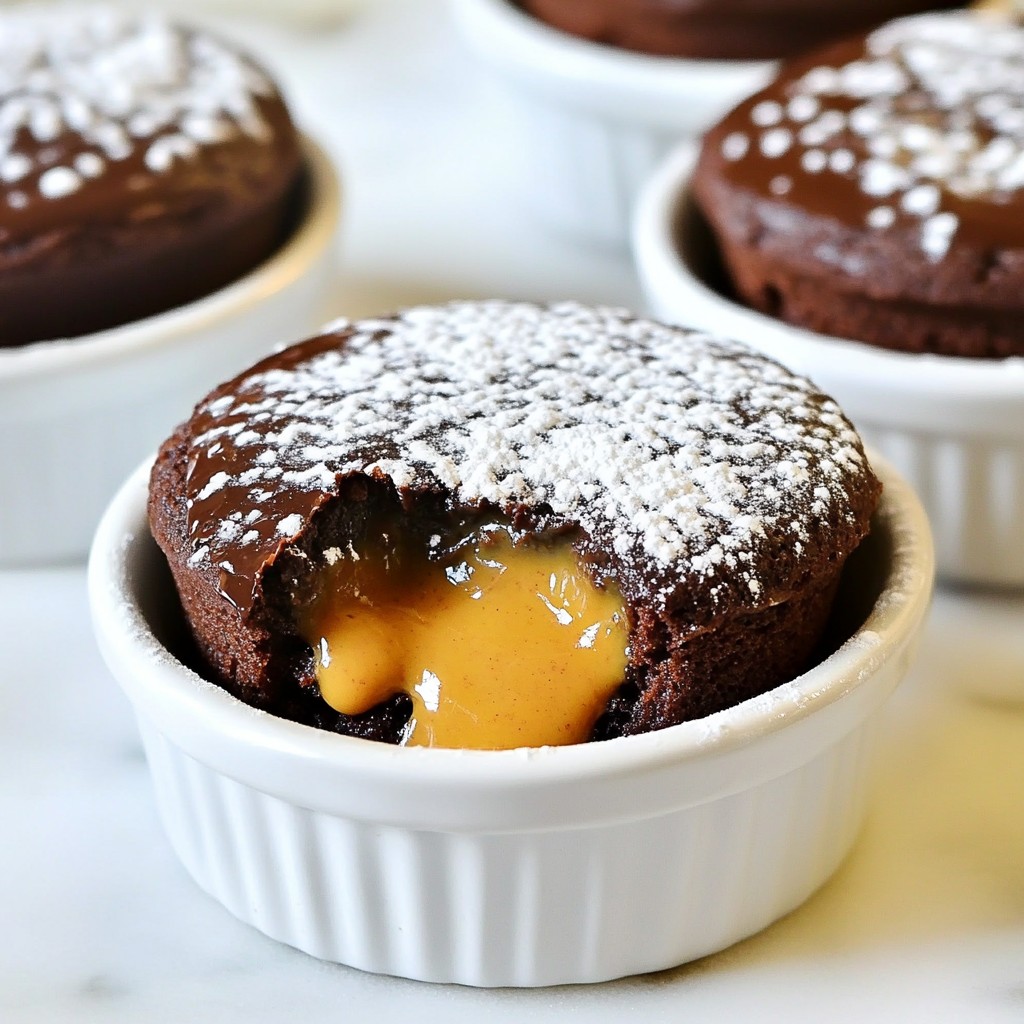
Are you ready for a treat that will make your taste buds sing? The Chocolate Peanut Butter Lava Cake is the perfect blend of rich chocolate and creamy peanut butter, creating a warm, gooey center that oozes indulgence. In this guide, I’ll walk you through every step, from selecting the best ingredients to perfecting that lava flow. Get ready to impress your friends and family with this delightful dessert!
Why I Love This Recipe
- Decadent Flavor: The combination of rich chocolate and creamy peanut butter creates an indulgent dessert that is hard to resist.
- Easy to Make: With just a few simple steps, you can whip up this delicious treat in no time.
- Impressive Presentation: The molten center makes for a stunning dessert that will wow your guests when served warm.
- Customizable: You can easily adjust the recipe by adding different fillings or toppings to suit your taste.
Ingredients
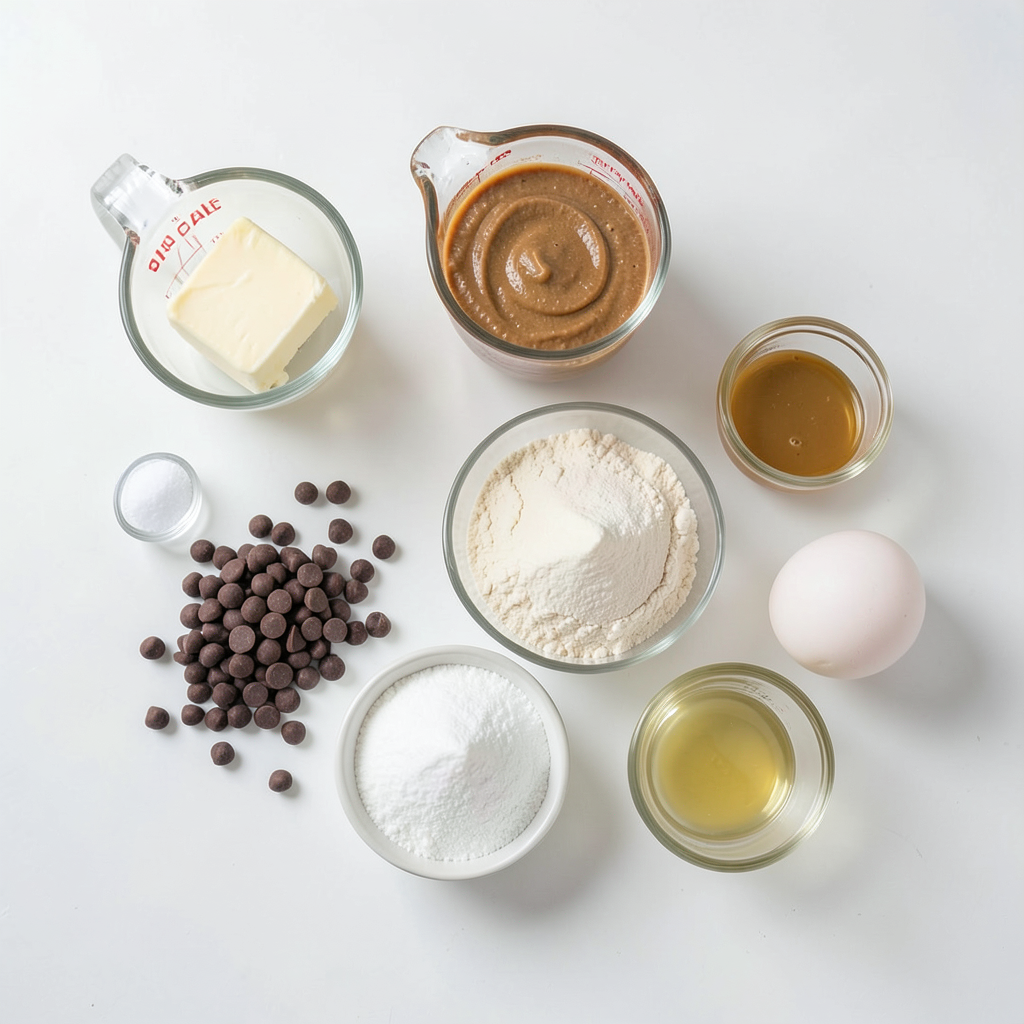
Detailed List of Ingredients
To make a perfect Chocolate Peanut Butter Lava Cake, gather these ingredients:
- 1/2 cup unsalted butter
- 1 cup semi-sweet chocolate chips
- 1/2 cup creamy peanut butter
- 1/4 cup all-purpose flour
- 1/4 cup granulated sugar
- 2 large eggs
- 1 teaspoon vanilla extract
- 1/4 teaspoon salt
- Extra peanut butter for filling (1 tablespoon per cake)
- Powdered sugar for dusting (optional)
Each ingredient plays a key role in creating the delicious lava cake.
Importance of Ingredient Quality
Using good-quality ingredients is important. Try to use unsalted butter for better taste control. Semi-sweet chocolate chips add rich flavor and a smooth texture. Creamy peanut butter gives that lovely nutty taste. Fresh eggs help achieve the perfect rise.
When your ingredients are fresh, the final cake will taste better. Quality matters in baking, so shop wisely.
Substitutions for Dietary Restrictions
If you have dietary restrictions, you can still enjoy this dessert. For a dairy-free option, use plant-based butter and dairy-free chocolate chips. Almond flour can replace all-purpose flour for a gluten-free version. Make sure to check labels to ensure all ingredients fit your needs.
These simple swaps let everyone indulge in this treat. Enjoy baking!
Step-by-Step Instructions
Preparation Overview
To start, gather all your ingredients. You will need unsalted butter, semi-sweet chocolate chips, and creamy peanut butter. Also, have flour, sugar, eggs, vanilla extract, and salt ready. Grease four ramekins with butter and dust them lightly with cocoa powder or flour. This helps the cakes come out easily after baking.
Detailed Baking Steps
1. Preheat your oven to 425°F (220°C).
2. In a microwave-safe bowl, melt the butter and chocolate chips. Do this in 30-second bursts. Stir between each burst until smooth.
3. Once melted, mix in 1/2 cup of creamy peanut butter. Stir until combined.
4. In another bowl, whisk together the flour, sugar, eggs, vanilla extract, and salt. Blend until smooth.
5. Slowly pour the chocolate-peanut butter mix into the flour mix. Stir until everything is well blended.
6. Fill each ramekin halfway with batter.
7. Add 1 tablespoon of extra peanut butter into the center of each one.
8. Top with more batter until the ramekins are about three-quarters full.
9. Place the ramekins on a baking sheet. Bake for 12-14 minutes. The edges should be firm, while the center remains soft.
10. Wait 1 minute. Then, run a knife around the edges of each ramekin. Carefully flip them onto plates.
11. If you like, sprinkle powdered sugar on top. Enjoy while warm to savor the gooey center.
Tips for Checking Doneness
To check if the cakes are done, look at the edges. They should be firm. The middle should still jiggle a bit when you shake the ramekin. If it looks too set, it may be overbaked. Trust your eyes and the time! Enjoy the warm, chocolatey lava cake right after baking for the best experience.
Tips & Tricks
How to Achieve a Perfect Lava Center
To get that perfect gooey center, watch your bake time closely. Bake for 12 to 14 minutes. The edges should be firm, but the center must be soft. It should jiggle when you move the ramekin. Always trust your instincts. If it looks too firm, it may be overbaked.
Common Mistakes to Avoid
One mistake is not greasing the ramekins well. This can lead to sticking, making it hard to release your cake. Also, avoid overmixing the batter. This can make your cake dense, rather than light and airy. Lastly, don’t skip the extra peanut butter in the center. This is what creates the lava effect!
Recommended Tools and Equipment
You will need a few simple tools to make this dish. Here’s a quick list:
- Ramekins (4 of them)
- Baking sheet
- Microwave-safe bowl
- Mixing bowls
- Whisk
- Knife for running around the edges
- Sifter for powdered sugar (optional)
Using the right tools helps make the process smoother. Enjoy your baking!
Pro Tips
- Use Quality Chocolate: The flavor of your lava cake largely depends on the quality of chocolate you use. Opt for high-quality semi-sweet chocolate chips for a rich and indulgent taste.
- Don’t Overbake: The key to a perfect lava cake is a soft, gooey center. Keep a close eye on the baking time and stick to 12-14 minutes to ensure the center remains jiggly.
- Let Them Rest: Allow the cakes to cool for just one minute before inverting them. This helps them set slightly and makes them easier to release from the ramekins without breaking.
- Serve Warm: For the best experience, serve the lava cakes immediately while they’re still warm. The gooey center is best enjoyed fresh out of the oven.
Variations
Adding Different Flavor Elements
You can easily switch up the taste of your chocolate peanut butter lava cake. Try adding a pinch of espresso powder for a rich, coffee flavor. You can also mix in some chopped nuts, like walnuts or almonds. For a fruity touch, add a few raspberries or a splash of orange zest. Each option brings a unique twist to this classic dessert.
Gluten-Free Options
If you need a gluten-free version, swap the all-purpose flour for almond flour or a gluten-free blend. This change keeps the cake soft and delicious. Make sure to check that your chocolate chips are gluten-free too. This way, you can enjoy the same gooey center without any worries.
Serving Suggestions and Pairings
When it comes to serving, warm lava cakes shine best. Pair them with a scoop of vanilla ice cream to balance the rich flavors. A drizzle of chocolate sauce or a sprinkle of sea salt can enhance the taste even more. For a fresh touch, serve with sliced strawberries or a berry compote. Each bite will be a delightful experience!
Storage Info
How to Store Leftovers
To store your chocolate peanut butter lava cake, let it cool first. Place any leftovers in an airtight container. Keep them in the fridge for up to three days. If you want to enjoy them later, make sure they are sealed well. This helps keep the rich chocolate flavor fresh.
Reheating Instructions
When you're ready to enjoy your cake again, reheating is simple. Take a lava cake out of the fridge. Place it on a microwave-safe plate. Heat it for about 20-30 seconds. Check if it's warm enough. You want it warm but not too hot. This way, the gooey center stays perfect.
Freezing for Future Enjoyment
You can freeze these cakes if you want a treat later. Wrap each cooled cake tightly in plastic wrap. Then, place them in a freezer bag. They can last up to two months in the freezer. When you're ready to eat, let them thaw in the fridge overnight. Reheat as described above for a warm, gooey delight.
FAQs
Can I make this lava cake in advance?
Yes, you can prepare the batter ahead of time. Mix all the ingredients and fill the ramekins. Cover them and store in the fridge. Bake them when you're ready to serve. Just remember, they may need a minute or two longer in the oven if they are cold.
What if I don’t have ramekins?
If you don’t have ramekins, you can use muffin tins. Just grease them well and adjust the baking time. Muffin tins may cook faster, so check them a little earlier. You can also use small oven-safe bowls, but make sure they are not too deep.
How do I know when the lava cake is done?
Check the edges of the cake. They should be firm. The center should look soft and a little jiggly. If you insert a toothpick, it should come out with some batter on it. This means it’s ready to serve. Enjoy that gooey lava center!
This blog post covered everything you need to know about making lava cake. We discussed the right ingredients, their quality, and how to make substitutions for diets. I shared step-by-step instructions for baking and tips for checking if your cake is done. You learned tricks for getting that perfect lava center and how to avoid common mistakes.
As you try out different flavors and variations, remember to store leftovers well. Happy baking! Enjoy every bite of your warm, gooey lava cake.