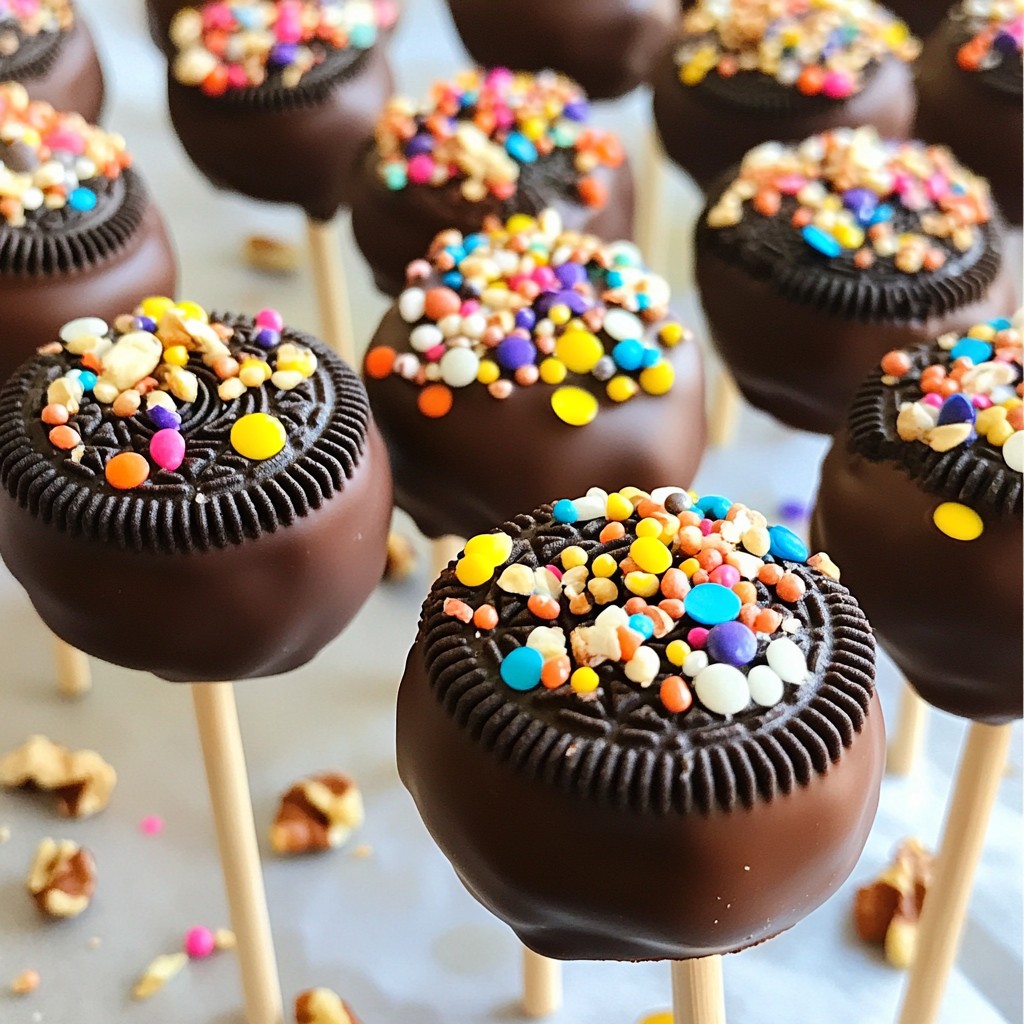
Looking for a fun and easy treat for your next party? Chocolate Covered Oreo Pops are simple to make and super delicious! With just a few ingredients, you can turn classic Oreos into a fun dessert that everyone will love. This guide will walk you through each step, from gathering your supplies to creative decorating ideas. Get ready to impress your guests with these tasty pops!
Why I Love This Recipe
- Deliciously Indulgent: These Oreo pops are a chocolate lover's dream, combining the classic cookie with rich chocolate for a treat that satisfies any sweet tooth.
- Fun for Everyone: Perfect for parties, kids love to help make these pops, and they make a great treat for birthdays or celebrations.
- Easy to Customize: Add your favorite toppings like sprinkles or nuts to make each pop unique, allowing for creativity in the kitchen!
- Quick and Simple: With just a few ingredients and minimal prep time, you can whip up these delightful treats in no time.
Ingredients
List of Required Ingredients
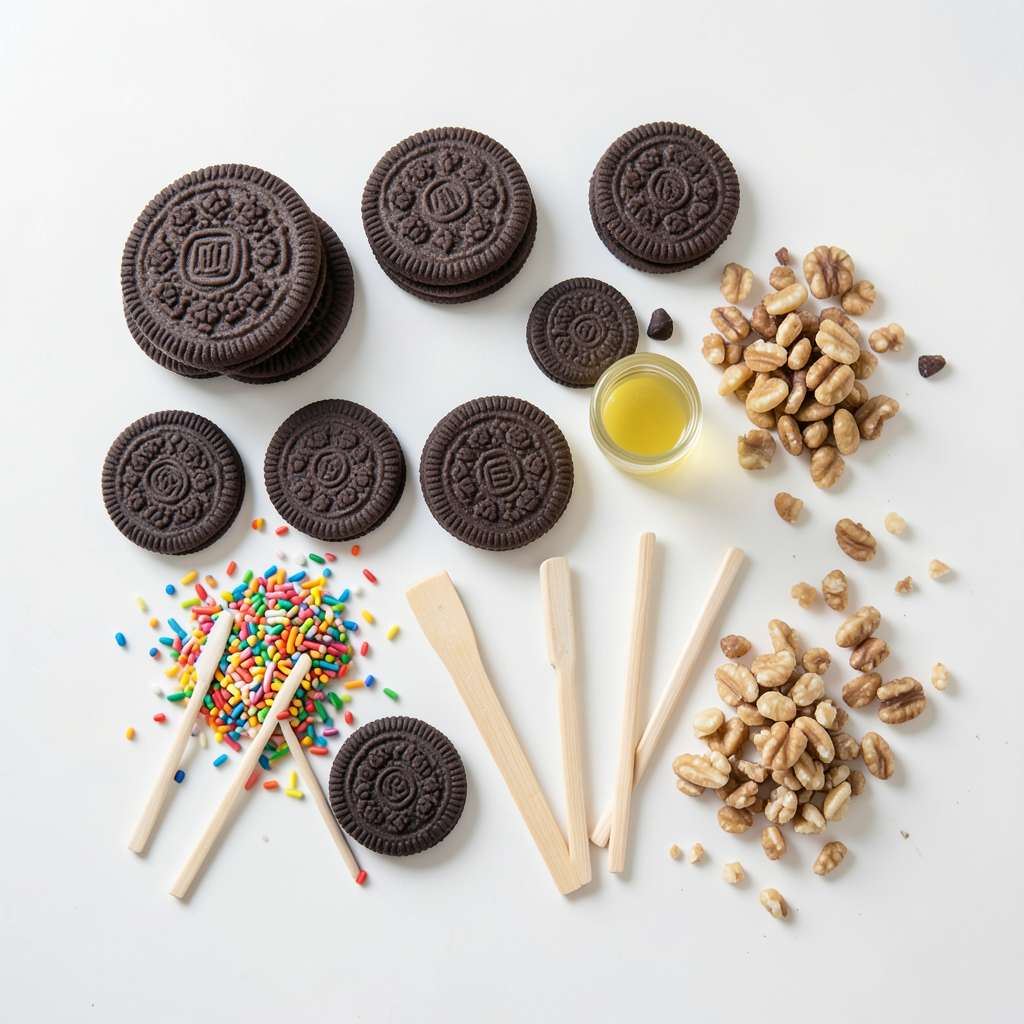
To make these fun chocolate covered Oreo pops, you will need:
- 12 Oreo cookies
- 1 cup semi-sweet chocolate chips
- 2 tablespoons coconut oil (or vegetable shortening)
- 12 lollipop sticks
Optional Add-ins for Flavor & Texture
For extra fun and crunch, consider these optional add-ins:
- 1/4 cup colorful sprinkles
- 1/2 cup crushed nuts
These add-ins make your pops even more festive and tasty. You can mix and match as you like.
Recommendations for High-Quality Chocolate
Choosing the right chocolate is key. I suggest using high-quality semi-sweet chocolate chips. They melt smoothly and taste great. Look for brands that use real cocoa butter. This ensures a rich flavor and nice shine on your pops. You can also try dark chocolate for a deeper taste.
Step-by-Step Instructions
Preparing the Oreo Cookies
Start by taking your Oreo cookies. Insert a lollipop stick into the cream. Push it halfway through the cookie. This helps keep the stick steady later. Lay the cookies on a baking sheet lined with parchment paper. This prevents sticking and makes cleanup easy.
Melting the Chocolate for Coating
Next, grab a microwave-safe bowl. Add your chocolate chips and coconut oil to it. Microwave the bowl in 30-second bursts. After each burst, stir the mix until it melts smooth. Careful! The bowl may get hot. You want a nice, even melt without lumps.
Coating and Decorating the Pops
Now, it's time to coat your Oreo pops. Dip each cookie into the melted chocolate. Make sure it’s fully covered. Lift it out and gently tap the stick. This helps shake off excess chocolate. Before the chocolate hardens, add sprinkles or crushed nuts for fun. This adds color and crunch!
Setting and Serving the Chocolate Pops
Place the coated Oreo pops back on the parchment sheet. Let them sit until the chocolate hardens. If you’re in a hurry, put them in the fridge for 10 to 15 minutes. Once set, serve them on a nice platter. They look great in a decorative container too! Enjoy your tasty treats!
Tips & Tricks
Best Practices for Melting Chocolate
To melt chocolate right, use a microwave-safe bowl. I like to mix chocolate chips with coconut oil. The oil makes the chocolate smooth and shiny. Heat in 30-second bursts. Stir after each burst. This keeps the chocolate from burning. You want it fully melted without lumps. If you have a double boiler, that works too. Just keep the water simmering, not boiling.
How to Ensure Perfect Coating
To coat the Oreos well, dip each one into the melted chocolate. Make sure to cover the entire cookie. Hold it by the stick, and tap gently on the bowl's edge. This helps shake off extra chocolate. If you see spots that are not covered, dip again. Place the coated pops on a lined baking sheet. This keeps them from sticking and makes cleanup easy.
Creative Decorating Ideas for Oreo Pops
Adding fun toppings can make your Oreo pops pop! Before the chocolate sets, sprinkle colorful sprinkles on top. You can also use crushed nuts for a crunchy bite. Try using melted white chocolate to drizzle over the pops. This adds a nice contrast in color. For holidays, use themed sprinkles or colors. Let your creativity shine and have fun with it!
Pro Tips
- Choose Quality Chocolate: Using high-quality chocolate chips will enhance the flavor of your Oreo pops. Look for brands with a high cocoa content for the best results.
- Keep Chocolate Warm: If the chocolate begins to harden while you're dipping, you can microwave it briefly for 10-15 seconds to keep it smooth and easy to work with.
- Experiment with Toppings: Don't hesitate to mix and match toppings! Try crushed pretzels, coconut flakes, or even drizzle white chocolate on top for a fun twist.
- Storage Tips: Store the finished Oreo pops in an airtight container in the refrigerator to keep them fresh for up to a week.
Variations
Flavor Combinations to Try
You can have fun with flavors! Try using different cookies. For a minty twist, use mint Oreos. For a fruity taste, try berry Oreos. You can also mix flavors with the chocolate. Add a drop of peppermint or orange extract to your chocolate. This small change makes a big difference!
Alternative Coatings and Sprinkles
Not a fan of regular chocolate? Try white chocolate or dark chocolate. Each adds a unique taste. You can also use candy melts for bright colors. For sprinkles, think beyond just color. Use crushed nuts, coconut flakes, or even edible glitter. These options add flavor and fun!
Themes and Seasonal Variations
You can match your Oreo pops to any theme. For Halloween, use orange and black sprinkles. For Christmas, try red and green sprinkles. Valentine’s Day calls for pink and red. You can even shape the pops! Use cookie cutters for fun shapes. These ideas make your treats stand out!
Storage Info
Best Methods for Storing Chocolate Covered Oreo Pops
To keep your chocolate covered Oreo pops fresh, use an airtight container. Line the container with parchment paper. Place the pops in a single layer. If you have more pops, add another layer of parchment paper. This method stops them from sticking together. Store the container in a cool, dry area away from sunlight.
Shelf Life and Freezing Tips
Chocolate covered Oreo pops last up to one week at room temperature. If you want to keep them longer, freeze them! Wrap each pop in plastic wrap. Then, place them in a freezer-safe bag. When you're ready to enjoy them, let them thaw in the fridge for a few hours. This keeps the chocolate smooth and tasty.
Preparing in Advance for Events
You can make these pops a few days before your event. Just store them properly as mentioned above. Making them ahead saves time on party day. You can focus on other fun things! Plus, they make a great treat for kids and adults alike. Enjoy your chocolate covered Oreo pops with friends and family!
FAQs
Can I use white chocolate instead of semi-sweet?
Yes, you can use white chocolate. It will give a sweeter taste. White chocolate melts well, just like semi-sweet chocolate. Follow the same melting steps. You may want to add a bit of flavor, like vanilla, to enhance it. Experiment with different types to find your favorite.
How do I prevent chocolate from cracking?
To prevent cracking, ensure you melt the chocolate gently. Use a microwave in short bursts. Stir often to keep it smooth. Adding coconut oil helps too. It makes the chocolate shine and stay flexible. After dipping, let the pops set at room temperature. This helps avoid shocks from cold air.
Where can I buy pre-made chocolate covered Oreo pops?
You can buy pre-made Oreo pops at many stores. Check local bakeries or candy shops. Online, you can find them on websites like Amazon or specialty candy stores. Always look for fresh products and read reviews to ensure quality.
In this post, we covered the key ingredients and steps to make delicious chocolate-covered Oreo pops. You learned how to prepare the cookies, melt the chocolate, and create a perfect coating. With tips for decorating and storing these treats, you can impress anyone at your next event. Don't forget to try different flavor combos and coatings for fun twists. Enjoy making these tasty snacks and sharing them with friends!