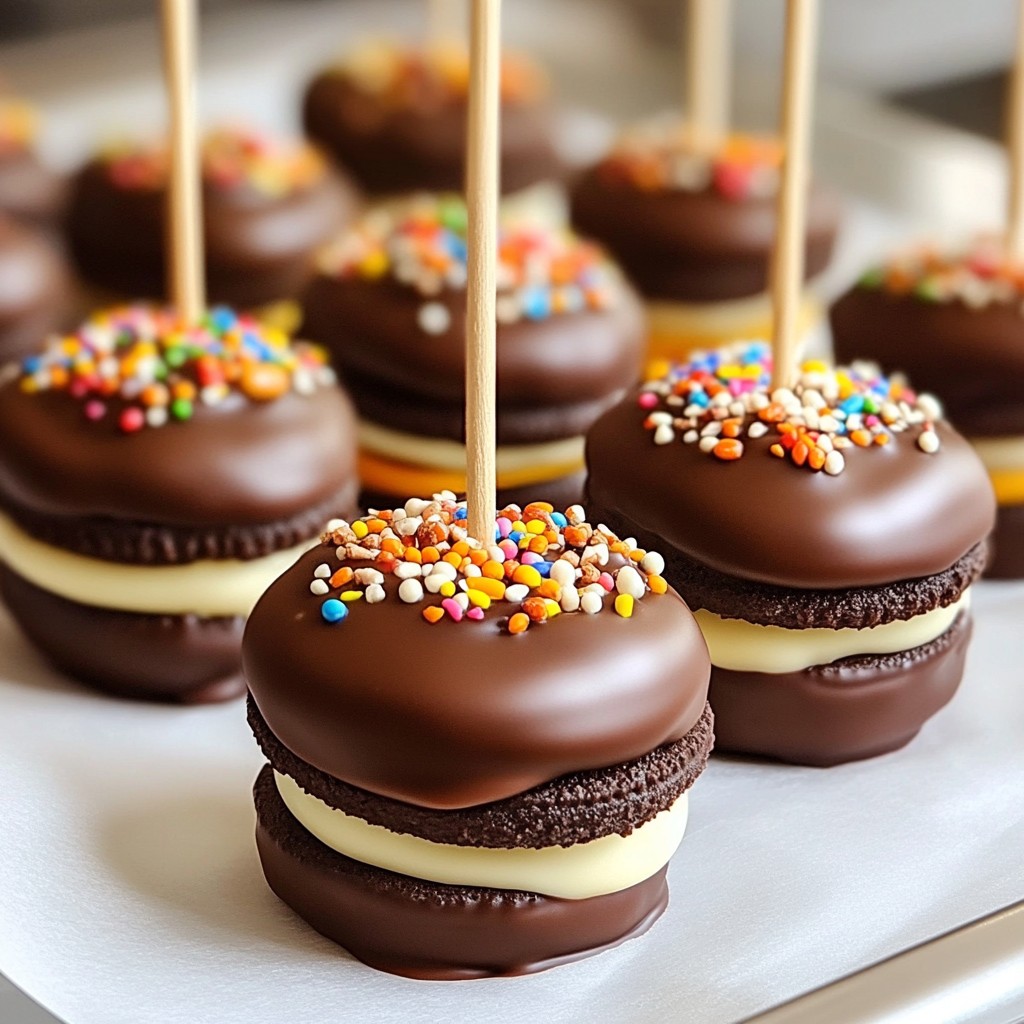
Are you ready to dive into a fun treat that’s super simple to make? Chocolate Covered Oreo Pops are a perfect snack for any occasion. I’ll walk you through every step, from gathering ingredients to creative decorating tips. You’ll learn how to achieve that smooth chocolate coat and explore tasty variations. Whether you’re a beginner or a pro, these pops will impress your friends and family. Let’s get started!
Why I Love This Recipe
- Easy to Make: This recipe requires minimal ingredients and simple steps, making it perfect for beginners or a fun activity with kids.
- Customizable: You can easily personalize these Oreo pops with your favorite toppings, whether it's colorful sprinkles or crushed nuts.
- Perfect for Parties: These Chocolate Covered Oreo Pops are a hit at any gathering, adding a delightful touch to your dessert table.
- Deliciously Indulgent: Combining the classic taste of Oreos with rich chocolate creates a treat that satisfies any sweet tooth.
Ingredients
List of Required Ingredients
To make Chocolate Covered Oreo Pops, you will need:
- 1 package of Oreo cookies
- 1 cup semi-sweet chocolate chips
- 1 tablespoon coconut oil (optional, for smoother chocolate)
- Lollipop sticks or wooden skewers
- Sprinkles or crushed nuts for decoration (optional)
- Parchment paper
Ingredient Tips
When choosing your ingredients, always pick fresh items. For chocolate, use good quality semi-sweet chocolate chips. The coconut oil can help make the chocolate smooth, but you can skip it if you want. Use strong lollipop sticks or wooden skewers to hold the pops well. Make sure your Oreos are whole and not broken. This keeps them sturdy when you dip them.
Alternative Ingredients
If you want to switch things up, try using different cookies. Golden Oreos can add a fun twist. For a sweeter option, use milk chocolate instead of semi-sweet chocolate. You can also use dairy-free chocolate chips for a vegan treat. If you need toppings, try using crushed candy bars or coconut flakes instead of sprinkles or nuts.

Step-by-Step Instructions
Preparation Steps
First, grab your package of Oreo cookies. You will need twelve cookies for this recipe. Take each Oreo and gently insert a lollipop stick into the cream filling. Make sure the stick goes in halfway to avoid breaking the cookie. Once done, place the cookies on a baking sheet lined with parchment paper. This will keep them from sticking later.
Melting the Chocolate
Next, we need to melt the chocolate. In a microwave-safe bowl, add one cup of semi-sweet chocolate chips. If you want the chocolate to be smoother, add one tablespoon of coconut oil. Microwave the bowl in 20-second bursts. Stir the chocolate in between each round. Keep going until the chocolate is fully melted and smooth. This should take about one minute in total.
Dipping and Decorating Process
Now comes the fun part! Hold an Oreo pop by the stick and dip it into the melted chocolate. Make sure to coat it well, but let any extra chocolate drip back into the bowl. If you want, add your favorite toppings right away. You can use sprinkles or crushed nuts for a colorful touch. After decorating, place the Oreo pop back on the parchment-lined baking sheet. Repeat this process with all the Oreos. Once finished, put the baking sheet in the fridge for 20 to 30 minutes. This will help the chocolate set firmly. After that, your Chocolate Covered Oreo Pops are ready to enjoy!
Tips & Tricks
Common Mistakes to Avoid
When making Chocolate Covered Oreo Pops, a few mistakes can mess up your fun. First, don’t push the stick in too far. It can break the cookie. Second, make sure your chocolate is smooth. Lumpy chocolate leads to a messy finish. Lastly, don’t rush the chilling step. If the chocolate isn't set, your pops will be a gooey mess.
How to Achieve Smooth Chocolate Coating
To get a nice, smooth coating, use semi-sweet chocolate chips mixed with coconut oil. The oil helps the chocolate melt evenly. Heat it slowly in the microwave. Go for 20 seconds at a time. Stir in between each time. When it's fully melted, it should look shiny and smooth. This is key for a perfect dip.
Best Practices for Decorating
Decorating your pops is a chance to get creative! While the chocolate is still wet, sprinkle your choice of toppings. Use colorful sprinkles or crushed nuts for added texture. Press them gently into the chocolate for better sticking. If you want to add more chocolate for design, use a piping bag. Drizzle it over the pops for a fun look.
Pro Tips
- Use High-Quality Chocolate: For the best flavor and texture, opt for high-quality semi-sweet chocolate chips or bars. This will enhance the overall taste of your Oreo pops.
- Chill Before Dipping: If your Oreo cookies are warm or soft, chill them in the refrigerator for about 10 minutes before dipping. This helps maintain their shape and prevents breakage.
- Experiment with Toppings: Get creative with your toppings! Try using different types of sprinkles, crushed cookies, or even drizzles of white chocolate for a decorative flair.
- Store Properly: To keep your Oreo pops fresh, store them in an airtight container in the refrigerator. They can last up to a week, but they’re best enjoyed fresh!
Variations
Flavor Variations
You can change the taste of your Oreo pops by using different chocolates. Try white chocolate for a sweeter treat. Dark chocolate gives a rich flavor. Milk chocolate is a classic choice. You can also mix chocolates for a fun twist. For a touch of fun, add flavored oils, like mint or orange, to the melted chocolate.
Dietary Adaptations
Making these pops for everyone is easy. For gluten-free options, use gluten-free Oreos. This way, even those with gluten issues can enjoy them. If you want dairy-free pops, choose dairy-free chocolate chips. Look for brands labeled vegan. You still get that great taste without dairy.
Seasonal Decoration Ideas
Decorations can match the season or holiday. Use pastel sprinkles for Easter. For Halloween, try orange and black sprinkles. In winter, add red and green sprinkles for Christmas. You can also use small candies or edible glitter to make them sparkle. Get creative and have fun with the designs!
Storage Info
Proper Storage Methods
To keep your Chocolate Covered Oreo Pops fresh, place them in an airtight container. Line the container with parchment paper to avoid sticking. Store them in a cool, dry place. If your kitchen is warm, the fridge is a better option. Make sure to separate layers with parchment paper. This prevents them from sticking to each other.
Shelf Life of Chocolate Covered Oreo Pops
Chocolate Covered Oreo Pops can last up to one week at room temperature. If you store them in the fridge, they may last a little longer, about ten days. Always check for signs of spoilage, like changes in smell or texture. If they seem off, it’s best to toss them.
Freezing Tips
You can freeze Chocolate Covered Oreo Pops to enjoy later. Wrap each pop in plastic wrap to keep them fresh. Place them in a freezer bag or airtight container. They can last up to three months in the freezer. To enjoy, take them out and let them sit at room temperature for a bit before eating.
FAQs
How long do Chocolate Covered Oreo Pops last?
Chocolate Covered Oreo Pops last about one week. Store them in an airtight container. Keep them in a cool, dry place. If you put them in the fridge, they can last longer. However, they may lose their crispiness.
Can I use white chocolate instead?
Yes, you can use white chocolate! It melts well and tastes sweet. Just follow the same steps. This will give your pops a different look and flavor. You can even add food coloring to make them fun.
What are the best toppings for decorations?
Some great toppings are:
- Rainbow sprinkles
- Crushed nuts
- Mini chocolate chips
- Shredded coconut
- Crushed cookies
These toppings add color and texture. Mix and match to find your favorite!
How can I gift Chocolate Covered Oreo Pops?
Gifting these pops is easy and fun! Use a clear bag for each pop. Tie them with a ribbon for a special touch. You can also place them in a cute box. Add a note to make it personal.
In this article, we explored the fun world of Chocolate Covered Oreo Pops. We covered the key ingredients, step-by-step instructions, and handy tips to avoid mistakes. You learned about decorating ideas and how to store your treats. Remember, you can mix flavors and adapt for dietary needs.
Chocolate covered Oreo pops are easy to make and so enjoyable. With the right tips, you’ll impress everyone with your treats! Enjoy creating your own tasty treats!