Craving a sweet treat that’s easy to make? You’re in the right place! Chocolate covered Oreo pops are simple, fun, and perfect for any occasion. With just a few ingredients, you can create a delightful snack that will impress kids and adults alike. Join me as I walk you through the steps to make these tasty pops. Let’s turn a classic cookie into a memorable treat with a creative twist!
Why I Love This Recipe
- Simple and Fun: This recipe is incredibly easy to make, making it a fun activity for both kids and adults. Everyone can join in on the dipping and decorating!
- Customizable: You can personalize these Oreo pops with different toppings and colors of sprinkles, making them perfect for any occasion or theme.
- Delicious Treat: The combination of creamy Oreo cookies with rich chocolate is a crowd-pleaser that satisfies any sweet tooth.
- Great for Parties: These pops make a fantastic dessert for parties and gatherings, and they’re easy to serve and enjoy on a stick!
Ingredients
List of Ingredients
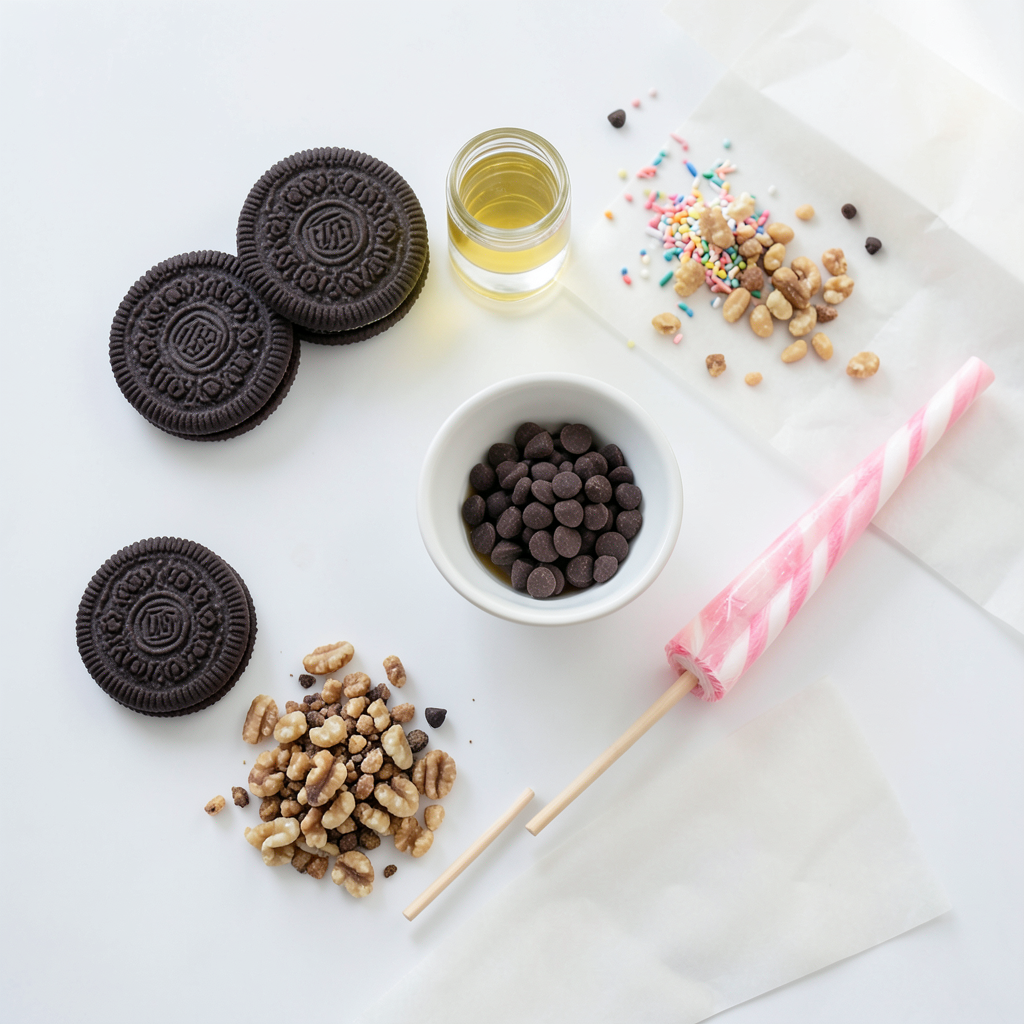
- Oreo cookies
- Semi-sweet chocolate chips
- Coconut oil (optional)
- Decorations (sprinkles or crushed nuts)
- Lollipop sticks
- Wax paper
Gathering the right ingredients is key to making great chocolate-covered Oreo pops. Start with a package of Oreo cookies. They are the star of this treat. You will also need a cup of semi-sweet chocolate chips. This chocolate adds a rich taste. If you want a smoother coating, add a tablespoon of coconut oil. It's optional but can help a lot.
Next, think about decorations. You can use sprinkles for color or crushed nuts for crunch. Both add fun touches! You will also need lollipop sticks. These help you dip the Oreos and make them easy to eat. Lastly, have some wax paper ready. This is where the pops will cool and harden.
With these ingredients, you are set to make a delicious treat. Enjoy the process!
Step-by-Step Instructions
Preparing the Oreo Cookies
To start, take your Oreo cookies and insert a lollipop stick into the cream filling. Push the stick about halfway through each cookie. This step is key. It helps keep the pops stable when you dip them in chocolate. If you don't insert the stick deep enough, the cookie might break.
Melting the Chocolate
Next, you need to melt the chocolate. Grab a microwave-safe bowl and add your semi-sweet chocolate chips. If you want smoother chocolate, add one tablespoon of coconut oil. Microwave the bowl in 30-second bursts. Stir the chocolate between each burst. Keep doing this until it is fully melted and smooth. Watch it closely so it doesn’t burn.
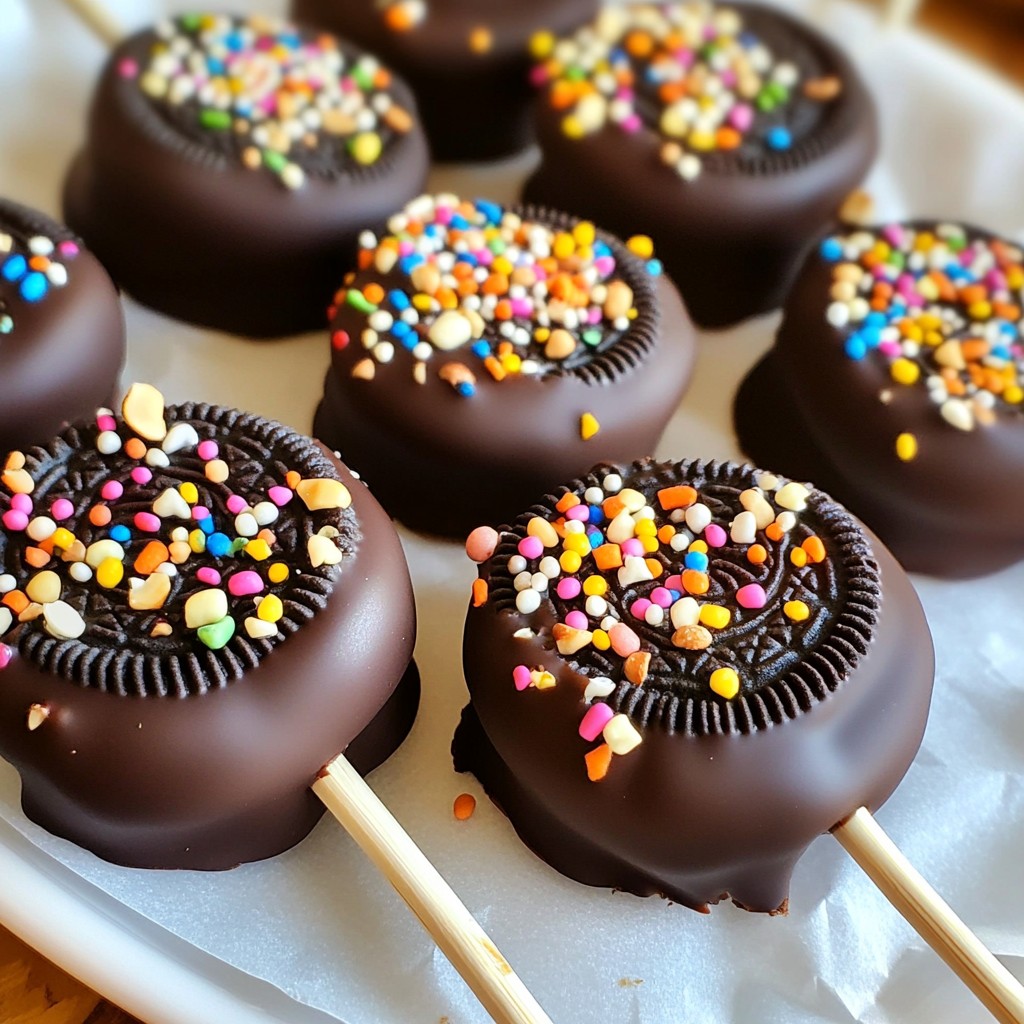
Dipping and Decorating
Now it’s time for the fun part! Hold each Oreo pop by the stick. Dip it into the melted chocolate and make sure it’s fully coated. When you pull it out, gently shake the pop to let any extra chocolate drip off. Before it hardens, add your favorite decorations like sprinkles or crushed nuts. Get creative! You can mix colors for a festive look.
Setting the Pops
To set the pops, place them upright in a block of styrofoam or on a plate lined with wax paper. This keeps them from rolling around. Let the chocolate harden completely. You can leave them at room temperature or speed up the process by placing them in the fridge for about 15 minutes. Once they are hard, your chocolate-covered Oreo pops are ready to eat!
Tips & Tricks
Making Smoother Chocolate Coating
To get a nice, smooth coating, add coconut oil to your chocolate. Coconut oil helps the chocolate melt evenly and makes it shiny. Use just one tablespoon for a full cup of chocolate chips. If you don't have coconut oil, you can melt chocolate using a double boiler or a microwave. Just make sure to stir often to keep it smooth.
Storing Leftover Ingredients
If you have extra chocolate or Oreos, store them right. Keep leftover chocolate in an airtight container in a cool place. You can also reuse Oreos for a new batch of pops. Just make sure they stay fresh and dry.
Ensuring Pops Stay Intact
To keep your pops from breaking, handle them gently. Hold the stick firmly but not too tight. Avoid pushing too hard on the pops when dipping or placing them down. If you use a block of styrofoam, it helps keep them upright while the chocolate hardens. This way, your pops stay intact and look great!
Pro Tips
- Use Quality Chocolate: For the best flavor, opt for high-quality chocolate chips or chocolate bars. This will enhance the taste of your Oreo pops.
- Chill the Cookies: Before dipping, chill the Oreo cookies in the refrigerator for about 10 minutes. This helps the chocolate set faster and prevents it from melting too quickly.
- Experiment with Flavors: Try using different types of chocolate, such as white chocolate or dark chocolate, for a unique twist on the classic Oreo pop.
- Store Properly: Keep your chocolate-covered Oreo pops in an airtight container at room temperature or in the refrigerator to maintain freshness and prevent melting.
Variations
Flavor Combinations
You can switch up the chocolate you use. Try white chocolate for a sweet twist. Milk chocolate also works well. Each type gives a different taste.
Using flavored Oreo cookies adds fun. Think about mint or peanut butter Oreos. These flavors change the whole pop game. They can surprise your taste buds and make each bite unique!
Creative Decoration Ideas
Decorating is where your fun shines! Use themed sprinkles for holidays or parties. Stars for birthdays or hearts for Valentine's Day are great choices.
You can also drizzle chocolate on top. This adds flair and more chocolate! Crushed nuts give a crunchy texture, adding a nice contrast to the smooth chocolate. Mix and match to find your favorite look!
Alternate Presentation
Want to serve them differently? You can make Oreo pops into cake pops! Just follow the same steps but roll the cookies into a cake ball.
For parties, think about how you display them. Use a block of styrofoam to hold the sticks. You can also place them on a pretty plate. This makes your treats stand out and look festive!
Storage Info
How to Store Chocolate Covered Oreo Pops
To keep your chocolate-covered Oreo pops fresh, store them at room temperature. A cool, dry place works best. Avoid direct sunlight, as it can melt the chocolate. If stored properly, these treats last about one week.
Reheating Chocolate
You may have leftover melted chocolate after making your pops. To reuse it, simply microwave it again in short bursts. Stir often to keep it smooth. If the chocolate begins to seize, add a little coconut oil. This will help bring back its smooth texture.
FAQs
How long do Chocolate Covered Oreo Pops last?
Chocolate covered Oreo pops can last about one week. Store them in an airtight container. Keep them in a cool, dry place. Heat can melt the chocolate, so avoid warm spots. Humidity can make them soggy, too.
Can I make these pops ahead of time?
Yes, you can make these pops ahead of time! Prepare them a day or two before your event. Just make sure to store them properly. Place them in an airtight container. This keeps them fresh and tasty.
What other types of cookies can I use?
You can use many cookies instead of Oreos! Try chocolate chip cookies or peanut butter cookies. Vanilla wafers also work well. For a fun twist, use thin mints or other flavored cookies. Get creative and enjoy!
Making chocolate-covered Oreo pops is fun and easy. You need just a few ingredients, like Oreo cookies and chocolate chips. The steps are simple: insert lollipop sticks, melt the chocolate, dip the cookies, and decorate. With tips to keep your pops intact and fresh storage ideas, you’ll enjoy this sweet treat for days. Experiment with flavors and decorations to make them special for any occasion. Now, grab your ingredients and start creating delicious memories!