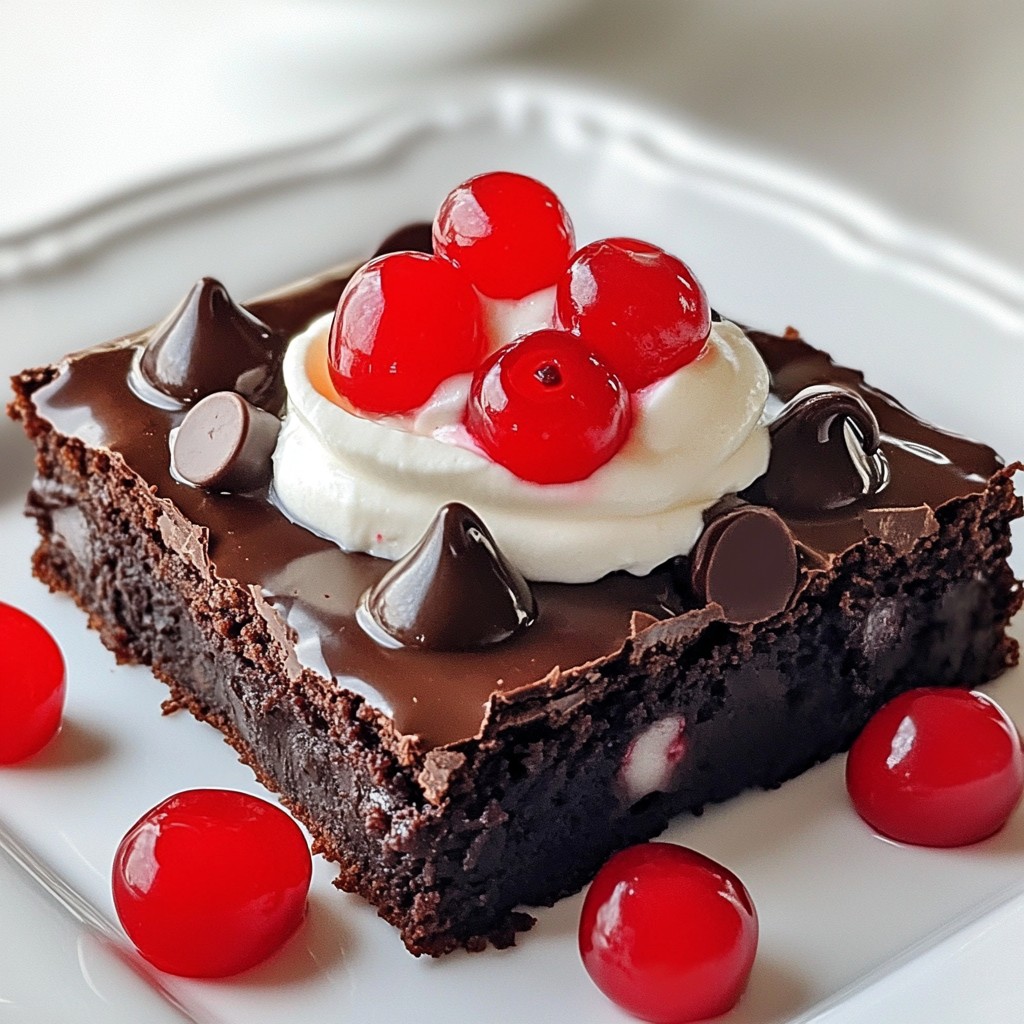
Are you ready to take your brownie game to a whole new level? In my latest recipe, I’ll show you how to create Chocolate Covered Cherry Brownies that are rich, delicious, and hard to resist. With layers of chewy chocolate goodness and sweet cherries, this treat is perfect for any occasion. Let's dive into the ingredients and steps that will make these brownies a tempting delight you’ll want to share—and keep!
Why I Love This Recipe
- Decadent Flavor: The rich chocolate combined with the sweet and tangy cherries creates a delightful explosion of flavor in every bite.
- Easy to Make: This recipe uses simple ingredients and straightforward steps, making it perfect for bakers of all levels.
- Impressive Presentation: With the glossy chocolate topping and bright cherries, these brownies look as good as they taste, making them a great dessert for gatherings.
- Customizable: You can easily adapt this recipe by adding nuts, using different types of chocolate, or even incorporating other fruits to suit your taste.
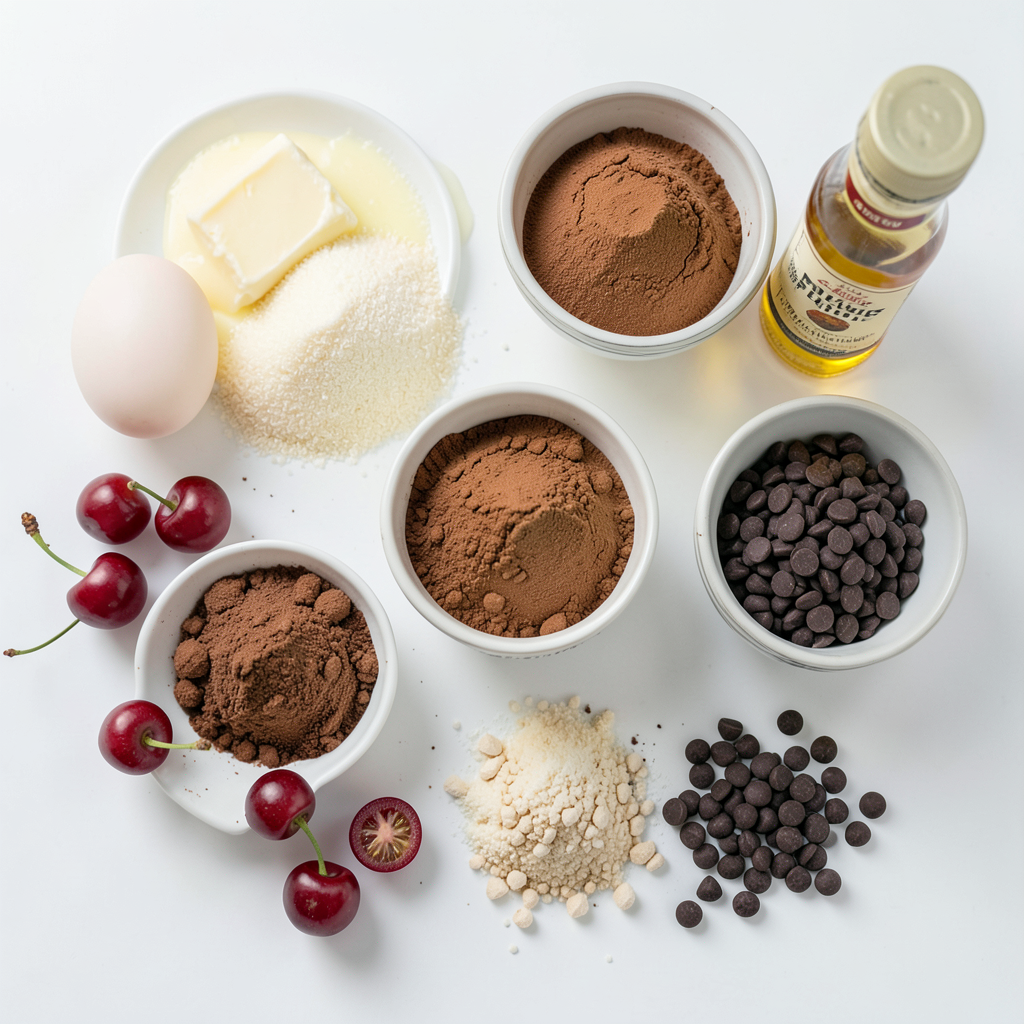
Ingredients
To make these chocolate covered cherry brownies, you need some key ingredients. Each one plays a vital role in creating the perfect texture and flavor. Here’s what you’ll need:
- 1 cup unsalted butter, melted
- 1 1/4 cups granulated sugar
- 1 cup brown sugar, packed
- 4 large eggs
- 1 teaspoon vanilla extract
- 1 1/4 cups all-purpose flour
- 1/2 cup unsweetened cocoa powder
- 1 teaspoon baking powder
- 1/2 teaspoon salt
- 1 cup dark chocolate chips
- 1 cup maraschino cherries, drained and halved
- 1 cup semi-sweet chocolate chips (for topping)
- 1 tablespoon coconut oil (for topping)
Each ingredient adds its unique flavor. The butter gives richness while the sugars create sweetness. The eggs help bind everything together. Cocoa powder and dark chocolate chips bring a deep chocolate taste. Maraschino cherries add a fruity burst. Finally, the coconut oil helps the chocolate topping stay smooth and glossy.
Be sure to gather everything before you start. This makes the cooking process smooth and fun. Enjoy the journey of creating these delightful brownies!
Step-by-Step Instructions
Prepping the Oven and Pan
- Preheat oven to 350°F (175°C).
- Grease and flour a 9x13 inch baking pan.
This step is crucial. A well-prepared pan ensures your brownies bake evenly and come out easily. Greasing prevents sticking, which helps maintain their perfect form. Flour gives an extra layer of protection.
Mixing the Batter
- Combine wet ingredients in a mixing bowl.
- Incorporate eggs and vanilla extract.
In a large bowl, mix the melted butter, granulated sugar, and brown sugar. Stir until smooth. Next, add your eggs one by one. Mix well after each addition. Finally, stir in the vanilla extract for that rich flavor.
Combining Dry Ingredients
- Sift and mix dry ingredients separately.
- Gradually blend dry mixture into wet ingredients.
In another bowl, sift the flour, cocoa powder, baking powder, and salt. This step adds air and helps the brownies rise. Gradually add this dry mix to the wet ingredients. Stir gently until just combined. Don’t overmix; you want soft brownies.
Adding Chocolate and Cherries
- Fold in dark chocolate chips and maraschino cherries.
- Pour batter into the baking pan.
Now comes the fun part! Fold in the dark chocolate chips and halved maraschino cherries. They add sweetness and texture. Pour this rich batter into your prepared pan, smoothing it out evenly.
Baking the Brownies
- Set timer for 25-30 minutes.
- Check doneness with a toothpick.
Place your pan in the oven and set a timer for 25-30 minutes. To check if they’re done, insert a toothpick into the center. If it comes out with a few moist crumbs, they’re perfect. Avoid overbaking for a fudgy texture.
Final Touches
- Melt topping ingredients and pour over cooled brownies.
- Decorate and serve with optional garnishes.
While your brownies cool, melt the semi-sweet chocolate chips and coconut oil. Use a microwave-safe bowl. Melt in 30-second bursts, stirring until smooth. Pour this luscious chocolate over the cooled brownies. Spread it evenly for a nice finish. Decorate with extra cherry halves for a lovely touch before serving.
Tips & Tricks
Baking Tips
- Do not overbake. This is key for soft, chewy brownies. Check them at 25 minutes.
- Use different baking pans. A glass pan gives a nice crust, while metal pans bake faster.
Mixing Tips
- Mix wet ingredients well. This helps the sugars dissolve and creates a smooth batter.
- Incorporate dry ingredients slowly. This keeps the batter light and fluffy. Stir just until combined.
Presentation Tips
- Serve on a decorative platter. This makes your brownies look more appealing.
- Add whipped cream or fresh cherries. These garnishes add color and extra flavor.
Pro Tips
- Use Room Temperature Eggs: Allow your eggs to come to room temperature before adding them to the batter, as this helps create a smoother mixture and better texture in the brownies.
- Don't Overmix: When combining the dry ingredients with the wet, mix just until incorporated. Overmixing can lead to dense and tough brownies.
- Quality Chocolate Matters: Use high-quality chocolate chips for both the batter and the topping. The better the chocolate, the richer and more delicious your brownies will be.
- Let Them Cool: Allow the brownies to cool completely before cutting. This helps them set properly and makes for cleaner slices.
Variations
Flavor Variations
You can easily change the flavors in these brownies. Try adding different types of chocolate. White chocolate or milk chocolate can bring a new taste. They add sweetness and creaminess. You can also mix in nuts like walnuts or pecans for a crunchy bite. Dried fruits like cranberries or raspberries can add a tangy twist. Each addition gives a unique spin to the classic taste.
Dietary Variations
If you need gluten-free brownies, swap the all-purpose flour for a gluten-free mix. Many brands work well and keep the taste great. For those who want vegan options, replace the eggs with flax eggs. Mix one tablespoon of ground flaxseed with three tablespoons of water for each egg. You can also use coconut oil instead of butter. These changes make the brownies fit many diets while still being tasty.
Serving Suggestions
These brownies shine when paired with ice cream or coffee. A scoop of vanilla ice cream on top melts beautifully. If you have leftovers, try them with yogurt for breakfast. You can also warm them up and drizzle some chocolate sauce on top. Get creative! Serving ideas can elevate your dessert experience and surprise your guests.
Storage Info
Short-term Storage
To keep your chocolate covered cherry brownies fresh in the fridge, store them in an airtight container. This helps prevent them from drying out. It's best to let the brownies cool completely before sealing them. A glass or plastic container with a lid works well. You can keep them in the fridge for up to one week.
Long-term Storage
If you want to enjoy these brownies later, freezing is a great option. First, cut the brownies into squares. Wrap each square tightly in plastic wrap, then place them in a freezer-safe bag. This way, they won't stick together. You can freeze them for up to three months. When you are ready to enjoy them, take out a square and let it thaw. Place it in the fridge overnight for best taste.
FAQs
How long do chocolate-covered cherry brownies last?
Chocolate-covered cherry brownies last about 5 days in the fridge. Make sure to store them in an airtight container. If you freeze them, they can last up to 3 months. Just let them thaw in the fridge before enjoying again.
Can I make these brownies in advance?
Yes, you can make these brownies in advance. Bake them a day or two before you plan to serve. Once cooled, store them in the fridge. This makes them taste even better as the flavors blend.
What can I substitute for maraschino cherries?
If you want to swap out maraschino cherries, try fresh cherries or raspberries. You can also use dried cherries for a chewier bite. These fruits add their unique flavor and keep the brownies tasty.
Is it possible to make these brownies dairy-free?
Yes, you can make these brownies dairy-free. Use dairy-free butter or coconut oil instead of regular butter. For the chocolate, choose dark chocolate that is dairy-free. These swaps will still give you a rich and delicious treat.
These chocolate-covered cherry brownies are a tasty treat anyone can enjoy. We covered the ingredients, step-by-step instructions, and helpful tips for baking. You also learned about flavor variations, ways to store brownies, and answers to common questions.
Experiment with different flavors and pairings to make them your own. Enjoy making and sharing these delicious brownies with friends and family!