If you’re looking for a tasty and quick appetizer, Caprese Salad Skewers are your answer! They’re simple, colorful, and bursting with flavor. Using fresh ingredients like cherry tomatoes, mozzarella, and basil, these skewers make a perfect party snack. Plus, they’re easy to customize. In this post, I’ll guide you through the steps, tips, and variations to master this delightful dish. Let’s get started on your new favorite appetizer!
Ingredients
Fresh Ingredients for Caprese Salad Skewers
– 1 pint cherry tomatoes, halved
– 8 ounces fresh mozzarella balls (bocconcini)
– Fresh basil leaves
– 1 avocado, diced
The heart of your Caprese salad skewers lies in the freshness of your ingredients. I love using ripe cherry tomatoes. They are sweet and juicy, a perfect match for the creamy mozzarella. The mozzarella balls add a rich texture, while fresh basil leaves bring a bright, herbal note. Diced avocado adds creaminess and healthy fats. Together, these ingredients create a simple yet delightful flavor.
Pantry Staples
– 1 tablespoon balsamic glaze
– 1/4 cup olive oil
– 1/4 cup pine nuts
– 1 clove garlic, minced
Balsamic glaze is a must-have for drizzling on your skewers. It adds a sweet and tangy kick that balances the dish. Olive oil enhances the flavors and gives a smooth finish. Pine nuts add a nice crunch, while minced garlic adds depth. These staples will elevate your skewers and make them memorable.
Seasonings
– Salt and pepper to taste
– Juice of half a lemon
Salt and pepper enhance all the flavors. A touch of lemon juice brightens the dish. It’s amazing how these simple seasonings can make your Caprese skewers sing. Always taste as you go to get the perfect balance.
Step-by-Step Instructions
Preparing the Basil Pesto
Ingredients for the basil pesto:
– 1/2 cup fresh basil leaves
– 1/4 cup pine nuts
– 1 clove garlic, minced
– Juice of half a lemon
– 1/4 cup olive oil
– Pinch of salt
To make basil pesto, start with the fresh basil leaves. Add them to a food processor. Next, toss in the pine nuts, minced garlic, and lemon juice. Process these ingredients for a few seconds until they blend well. While the processor runs, slowly pour in the olive oil. This helps achieve a smooth texture. When done, taste it and add salt if needed.
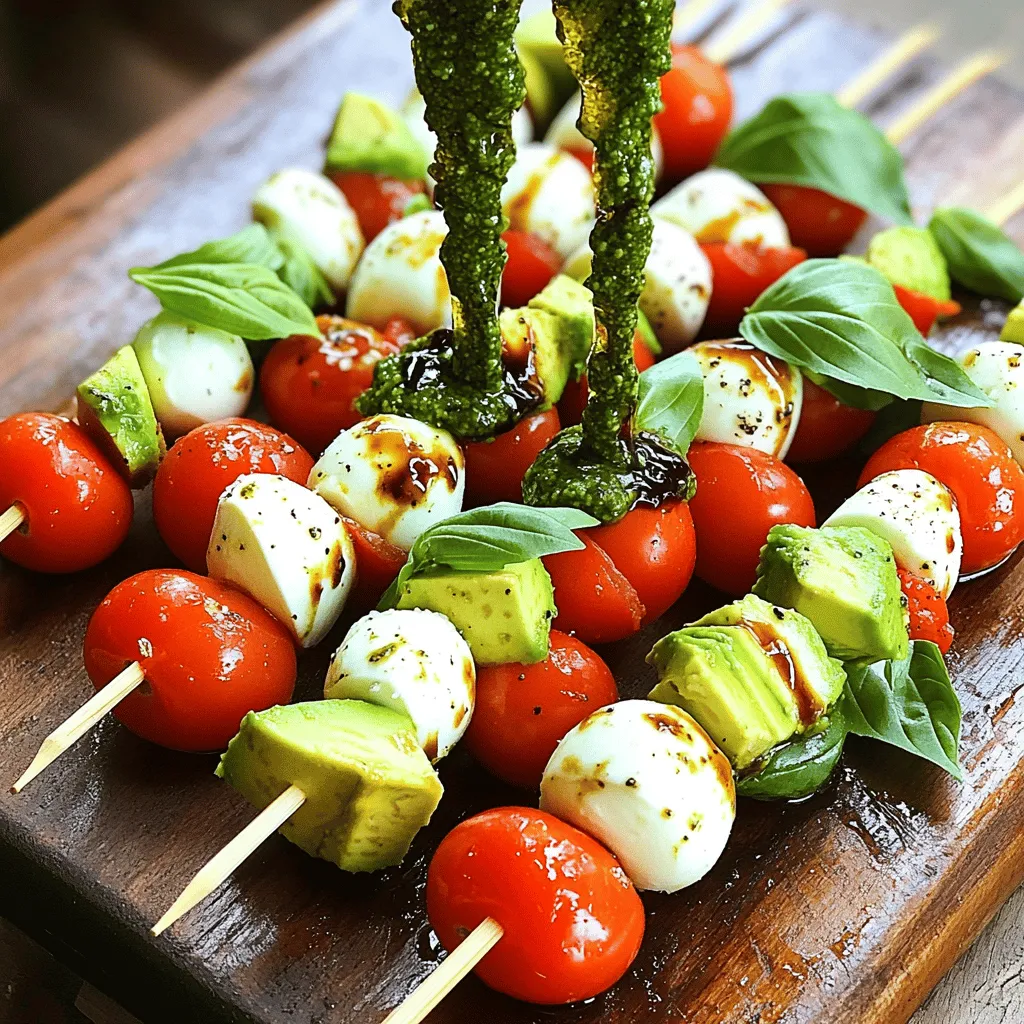
Assembling the Skewers
How do you thread the ingredients onto skewers? It’s easy! Take your wooden skewer and start with a cherry tomato half. Next, add a mozzarella ball. Follow this with a fresh basil leaf and a piece of diced avocado. Repeat this until you use all your ingredients. Remember to leave space at both ends of the skewer for easy handling.
To balance flavors, mix the ingredients well. The sweet tomato pairs great with the creamy mozzarella. The fresh basil adds a pop of flavor, while avocado gives it creaminess. This mix creates a well-rounded bite.
Final Touches
Once your skewers are ready, sprinkle them lightly with salt and pepper. This really boosts the taste. Next, grab your balsamic glaze. Use a spoon to drizzle it over the skewers. This adds a sweet and tangy kick.
Serve the skewers on a platter. Drizzle the basil pesto over them for extra flavor. You can also keep some pesto on the side for dipping.Enjoy your Caprese salad skewers!
Tips & Tricks
Perfecting the Skewer Assembly
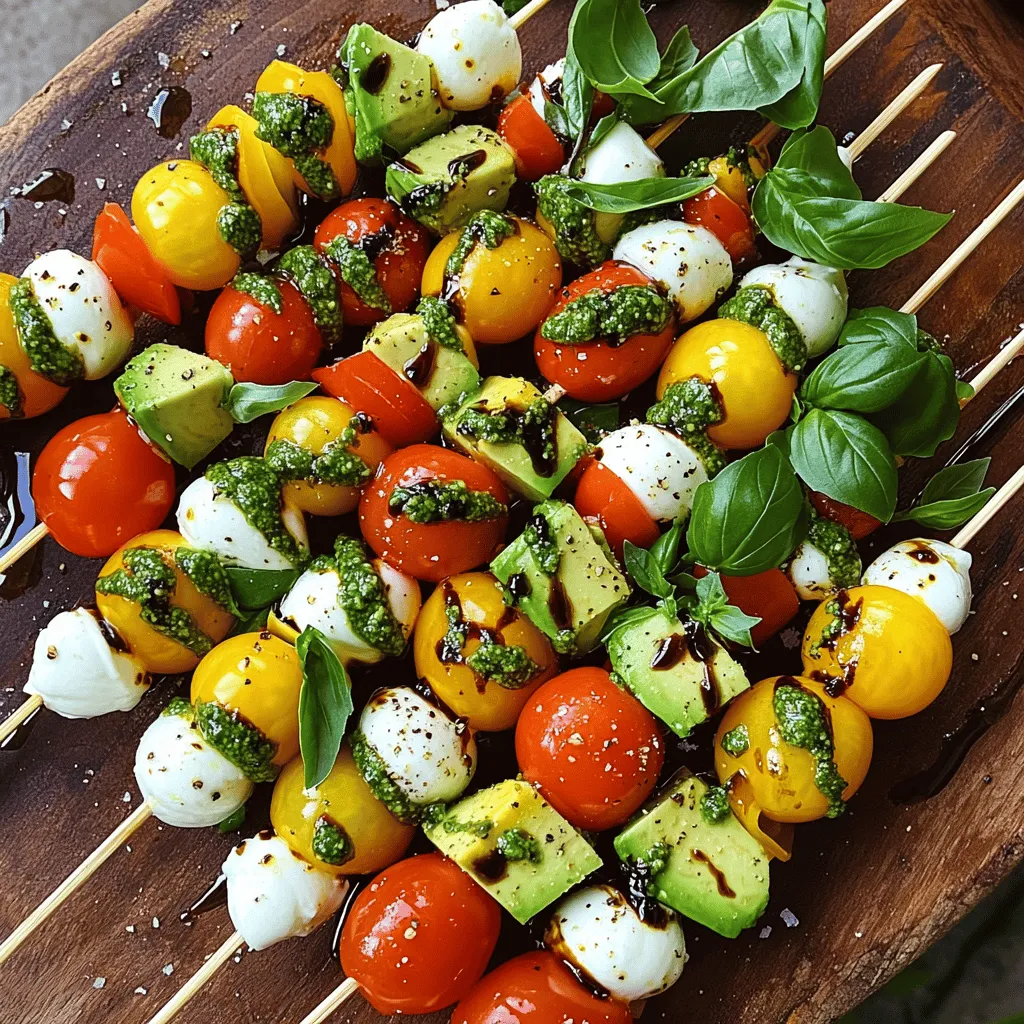
For the best Caprese salad skewers, focus on balance. Start with a cherry tomato, then add a mozzarella ball, a basil leaf, and some avocado. This order gives each bite a mix of flavors. Make sure to leave some space at the ends of the skewer. This makes them easy to hold. If you plan to serve them later, store the skewers in the fridge. Cover them with plastic wrap to keep them fresh.
Serving Suggestions
To impress your guests, plate your skewers with care. Lay them out on a nice platter in a fan shape. Drizzle the pesto and balsamic glaze over the top. This adds color and flair. You can serve these skewers with a crisp salad or some crusty bread. For drinks, pair them with a light white wine or sparkling water. This combination brings out the fresh flavors.
Enhancing Flavor Profiles
Feel free to get creative! You can add more ingredients to your skewers. Try adding olives or roasted peppers for a twist. You can also use different herbs. Oregano or thyme can add new flavors. If you want more spice, sprinkle red pepper flakes on top. These small changes can make a big difference. The goal is to make the dish your own!
Variations
Alternative Ingredients
You can switch mozzarella for burrata. Burrata offers a creamy texture that makes each bite richer. You can also add grilled vegetables like zucchini or bell peppers for a smoky flavor. Shrimp is another great option. It adds protein and pairs well with the other flavors.
Seasoning Alternatives
Try different glazes or dressings to change the taste. A honey balsamic glaze adds sweetness. You might also use a lemon vinaigrette for a fresh twist. Flavored oils can enhance the dish, too. Try using garlic-infused olive oil for an extra layer of flavor.
Creative Presentation Ideas
Use skewers for special occasions. For a picnic, you might use bamboo skewers. They are easy to transport and look nice. Colorful skewers make your dish pop visually. You can mix and match bright colors to attract guests. This makes the dish fun and engaging.
Storage Info
Storing Leftovers
To store leftover skewers, place them in an airtight container. This keeps them fresh. Make sure to put a piece of parchment paper between layers. This helps avoid sticking. You can keep them in the fridge for up to two days.
To keep the pesto fresh, store it in a small jar. Add a thin layer of olive oil on top. This creates a seal and keeps it from browning. Use it within a week for the best flavor.
Freezing Options
Can you freeze assembled skewers? I do not recommend it. The fresh tomatoes and mozzarella may change texture. Instead, refrigerate them for the best taste.
Freezing is not the same as refrigeration. When you freeze food, it can lose its flavor and texture. Stick to refrigerating your skewers for fresh taste.
Reheating Instructions
To reheat skewers, use the oven. Preheat it to 350°F. Place the skewers on a baking sheet. Heat for about 5 to 10 minutes. This warms them while keeping their taste.
Avoid using the microwave. It can make the cheese tough and the veggies mushy. Enjoy your Caprese salad skewers warm and tasty!
FAQs
Can I make Caprese Salad Skewers ahead of time?
Yes, you can prepare these skewers ahead of time. I suggest making them a few hours before serving. To store, cover them tightly with plastic wrap or place them in an airtight container. Keep them in the fridge until you’re ready to serve. This keeps the flavors fresh and vibrant.
What can I serve with Caprese Salad Skewers?
These skewers pair well with a variety of dishes. Try serving them with a fresh green salad or a light pasta. For drinks, consider offering sparkling water or a crisp white wine. Both options bring out the flavors of the skewers nicely.
How long do Caprese Salad Skewers last in the fridge?
Caprese Salad Skewers stay good in the fridge for about two days. After that, the ingredients may lose their freshness. Always check for any signs of spoilage before eating. Safety first!
What’s the best way to assemble skewers?
When assembling skewers, start by threading a cherry tomato half, then a mozzarella ball, and a basil leaf. Avoid overpacking them; leave a little space on each end for easy handling. This helps to keep everything intact and makes them easy to grab.
Caprese salad skewers are fresh, tasty, and easy to make. We explored ingredients, including tomatoes, mozzarella, and basil. I shared steps for making basil pesto and assembling your skewers. You also learned tips for perfecting flavor balance and presentation.
In conclusion, enjoy experimenting with this dish. Whether you stick to the basics or get creative, caprese skewers will impress your guests. Keep practicing, and soon you’ll master this delightful appetizer.