Skip to content
DisclaimerTerms Of UseGDPR PolicyCookie Policy

Home Cooking Style

  • Home
  • Drinks
  • Appetizers
  • Dinner
  • Dessert
  • About
  • Contact
  • Privacy Policy
DisclaimerTerms Of UseGDPR PolicyCookie Policy

Amelia

- 2 cups rolled oats - 2 cups almond milk - 2 medium carrots, finely grated - 1/2 cup applesauce - 1/4 cup maple syrup The rolled oats form the base of this dish. They provide fiber and energy. Almond milk keeps it creamy and light. Grated carrots add natural sweetness and moisture. Applesauce enhances the texture and flavor. Maple syrup gives a touch of sweetness. - 1/2 cup raisins - 1/2 cup chopped walnuts or pecans - Cream cheese frosting Raisins add chewy bites of sweetness. Nuts give a nice crunch and healthy fats. Cream cheese frosting can top it off for extra flavor. You can mix and match these to your liking! - Use coconut or oat milk for dairy-free options. - Choose honey or agave nectar for sweeteners. - For gluten-free, use certified gluten-free oats. These options help you customize the recipe to fit your diet. Experiment with what you have on hand. Cooking should be fun and flexible! For the full recipe, check out the details above. 1. Preheat the oven: Set your oven to 350°F (175°C). This helps the oatmeal bake evenly. 2. Prepare the baking dish: Lightly grease an 8x8 inch baking dish. This prevents sticking and makes serving easier. 1. Combine oats and wet ingredients: In a large bowl, mix the rolled oats, grated carrots, applesauce, and almond milk. Stir until it is well mixed. 2. Whisk dry ingredients separately: In another bowl, whisk together maple syrup, vanilla extract, cinnamon, nutmeg, baking powder, and salt. Pour this into the oat mixture and stir until just blended. 1. Pour mixture into the dish: Spread the mixture evenly in the prepared baking dish. 2. Recommended baking time and temperature: Bake for 30-35 minutes, until the oatmeal is set and slightly golden on top. Check for doneness with a toothpick; it should come out clean. For the full recipe, refer to the earlier section. Enjoy your healthy and tasty breakfast! To get the best texture for your baked carrot cake oatmeal, aim for a thick batter. Use rolled oats, as they provide a chewier bite. If your mix seems too dry, add a splash more almond milk. For baking, make sure your oven is at the right temperature. A good bake time is 30 to 35 minutes. Look for a golden top; it shows it's ready. Top your oatmeal with a dollop of yogurt or a drizzle of maple syrup. Cream cheese frosting adds a sweet touch if you like. Pair it with coffee or tea for a cozy breakfast. For a fruity twist, add banana slices or berries on top. You can prepare the oatmeal mix a day in advance. Just cover it and store it in the fridge. This saves time in the morning. To make meal prep easy, portion it out in small containers. You can grab a serving and heat it up quickly. This method keeps your mornings stress-free. {{image_2}} You can make baked carrot cake oatmeal fun with different flavors. Try adding spices like ginger or cloves for extra warmth. A touch of ginger gives a nice zing. Cloves can add depth and a hint of sweetness. You can also mix in fruits such as pineapple or apples. These fruits add natural sweetness and moisture. If you follow a vegan diet, swapping the almond milk for any plant milk works well. Use flaxseed meal mixed with water instead of eggs for binding. You can also choose low-sugar options. Replace maple syrup with mashed bananas or unsweetened applesauce. This keeps the dish sweet without extra sugar. You can adjust servings to fit your needs. If you want smaller portions, bake mini oatmeal cups. Use a muffin tin to create individual servings. These cups are great for meal prep and on-the-go breakfasts. You can store them in the fridge for easy access during busy mornings. For the full recipe, check out the details above. Enjoy making this tasty and healthy breakfast! After you bake your carrot cake oatmeal, let it cool for about 10-15 minutes. This cooling time helps it set up a bit more. Once it's cool, slice it into portions. Place each portion in an airtight container. Store it in the fridge for best results. If you want to save some for later, freezing is a great idea. Set your slices on a baking sheet and freeze them for about 1-2 hours. Once frozen, transfer the slices into a freezer bag. Squeeze out the air and seal it tightly. To eat, thaw the slices overnight in the fridge. Reheat them in the oven or microwave until warm. In the fridge, your baked carrot cake oatmeal lasts about 4-5 days. Look out for signs of spoilage. If it smells off or has mold, it’s time to toss it. Enjoy your tasty breakfast knowing you can store it well! Baked carrot cake oatmeal lasts about 4 to 5 days in the fridge. Store it in an airtight container to keep it fresh. When ready to eat, just reheat a portion in the microwave or oven. Yes, you can use quick oats. However, the texture will be softer. Quick oats absorb liquid faster, making the oatmeal creamier. If you like a firmer texture, stick to rolled oats. It can be gluten-free if you use certified gluten-free oats. Regular oats might have cross-contamination with gluten, so read labels carefully. Using gluten-free oats keeps this dish safe for those with gluten sensitivities. You can add mashed bananas or extra applesauce for natural sweetness. Another option is to use a bit more maple syrup or add dates. These ingredients enhance flavor without refined sugar. Absolutely! You can use any milk you prefer, like soy, oat, or coconut milk. Each milk adds its own flavor. Almond milk is great, but feel free to experiment with your favorite type. For the full recipe, check the original instructions and enjoy! Baked carrot cake oatmeal is a simple and tasty treat. We covered key ingredients, from rolled oats to sweeteners. You can add fun extras like raisins or nuts, and we discussed substitutes. I shared step-by-step instructions to make it easy for you. You learned tips for perfect texture and tasty serving ideas. Remember, you can customize this dish to fit your diet. Don’t forget about storage to keep it fresh. Enjoy making your baked oatmeal, and share it with others for a delightful treat!

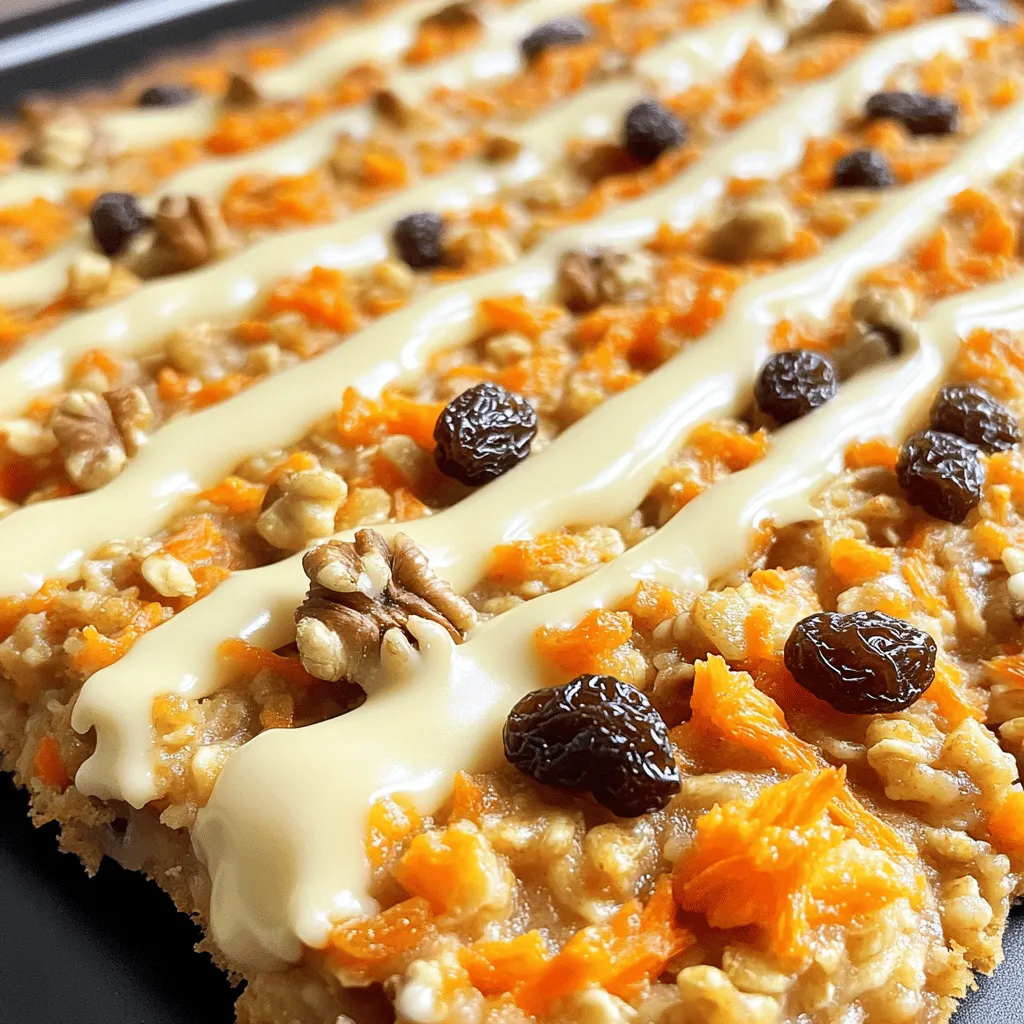
Baked Carrot Cake Oatmeal Tasty and Healthy Breakfast

Looking for a healthy breakfast that tastes like dessert? Baked Carrot Cake Oatmeal is your answer! This dish combines the

For this delightful treat, you need a few key ingredients. Each one plays a special role in the flavor and texture of your pudding. Here’s what you’ll need: - Coconut milk - Chia seeds - Maple syrup (or honey) - Vanilla extract - Fresh raspberries - A pinch of salt - Toasted coconut flakes Getting the measurements right is important for success. Here’s what you need for the perfect pudding: - 1 cup coconut milk (canned or carton) - 1/4 cup chia seeds - 2 tablespoons maple syrup (or honey) - 1 teaspoon vanilla extract - 1 cup fresh raspberries (plus extra for garnish) - A pinch of salt - Toasted coconut flakes for topping Each ingredient brings its own health perks. Let’s break them down: - Coconut milk offers healthy fats and gives creaminess. - Chia seeds are full of fiber and omega-3 fatty acids. - Maple syrup provides a natural sweet taste and some nutrients. - Vanilla extract adds flavor and can improve mood. - Fresh raspberries are rich in vitamins and antioxidants. - Salt enhances flavor and balances sweetness. - Toasted coconut flakes add crunch and fiber. By using these ingredients, you not only create a tasty treat but also enjoy health benefits. This simple and delicious recipe makes it easy to love healthy eating! If you want to dive deeper into the recipe, check out the Full Recipe for more details. To make raspberry coconut chia pudding, start by mixing the ingredients. In a bowl, combine: - 1 cup coconut milk - 1/4 cup chia seeds - 2 tablespoons maple syrup (or honey) - 1 teaspoon vanilla extract - A pinch of salt Whisk these well until they blend smoothly. After that, let the mixture sit for 10 minutes. This step helps the chia seeds absorb the liquid. Then, whisk again to break any clumps. Next, cover the bowl and place it in the fridge. Chill for at least 4 hours, or overnight if you can wait. This makes the pudding thick and creamy. Once ready, stir it well for an even texture. Now, layer the pudding in bowls and add fresh raspberries on top. Finish with toasted coconut flakes for a delightful crunch. For the best texture, use full-fat coconut milk. It gives the pudding a rich and creamy feel. Whisking after 10 minutes is key to keeping the chia seeds from clumping. If your pudding is too thick, add a splash of coconut milk to loosen it up. If it’s too runny, give it more time to chill. The chia seeds will continue to absorb liquid, thickening the pudding as it sits. Prep time is just 10 minutes, but plan for 4 hours of chilling. This recipe makes enough for four servings. Serve it fresh and chilled as a snack or dessert. You can also enjoy it for breakfast! Add extra raspberries on top for color and flavor. If you want to mix things up, try pairing it with granola or nuts. For the full recipe, check out the complete details. When making raspberry coconut chia pudding, avoid using too much liquid. The chia seeds need room to absorb. If you add too much coconut milk, the pudding will be runny. Also, give the chia seeds enough time to soak. If you skip the chilling time, your pudding won't have the right texture. Be sure to whisk the mix well to prevent clumps. For a richer flavor, try toasting the coconut flakes before using them. This adds a nice crunch and depth. You can also blend the raspberries into a sauce for a sweet drizzle on top. If you like a bit of zing, add a splash of lemon juice or zest. This brightens the flavors nicely. To make this recipe, gather a few simple tools. You'll need a mixing bowl and a whisk for combining the ingredients. A measuring cup and spoons ensure you get the right amounts. Use a spatula for serving and layering your pudding. Lastly, grab some storage containers for the fridge. These tools will help you create the perfect raspberry coconut chia pudding. For the full recipe, check out the provided details above. {{image_2}} You can mix up the flavors in your pudding. Try using mango or passion fruit instead of raspberries. Both fruits add a bright and tropical twist. You can also use berries like blueberries or strawberries, which pair well with coconut. For a chocolatey touch, add cocoa powder or chocolate chips. This fun variation opens up many taste options. This recipe is already dairy-free and vegan. You can swap coconut milk with almond or oat milk if you prefer. Just make sure the milk is unsweetened. Use maple syrup for sweetness, as it is vegan-friendly. If you want a creamier texture, try cashew milk. It works great in pudding and keeps it rich. Seasonal fruits can enhance your pudding. In summer, use fresh peaches or plums. In fall, try some pumpkin puree with cinnamon. For winter, consider using sliced citrus fruits like oranges or grapefruits. Each season brings new flavors. Adjust your toppings to match, like using nuts or spices that fit the time of year. This keeps your pudding fresh and fun all year long. Store your raspberry coconut chia pudding in an airtight container. This keeps it fresh and tasty. Place it in the refrigerator right after making it. Make sure the lid is on tight. If you have leftovers, they can stay in the fridge. Raspberry coconut chia pudding lasts about 4 to 5 days in the fridge. To keep it at its best, avoid adding toppings until you serve it. This keeps the texture nice and fresh. Always check for any off smells or changes in color. If it looks or smells strange, toss it out. Chia pudding is best served cold. If you want to refresh it, add a splash of coconut milk. This will help bring back its creamy texture. Stir well to mix. You can also top it with fresh berries or coconut flakes for extra flavor. Enjoy it chilled for a tasty treat. For the full recipe, refer back to the main article. Yes, you can use frozen raspberries. They work well in this recipe. Just thaw them first. This helps to release their flavor. They can be a bit softer than fresh ones, but they still taste great. If you want a smoother pudding, blend the thawed raspberries before adding them. Chia pudding lasts for about five days in the fridge. Store it in an airtight container. This keeps it fresh and tasty. If you see excess liquid, stir it well before eating. The chia seeds may absorb more liquid over time, so it may thicken. Yes, you can make it sugar-free. Use a sugar substitute like stevia or erythritol. You can also skip the sweetener entirely. The natural sweetness of the raspberries often suffices. Adjust to your taste. This way, you can enjoy your treat without added sugar. For the full recipe, check the details above. In this post, we covered how to make Raspberry Coconut Chia Pudding. We explored key ingredients, their measurements, and their health benefits. You learned step-by-step directions, along with tips for great results. We shared tricks to avoid common mistakes and ways to spice up flavors. Lastly, we discussed how to store your pudding for freshness. Chia pudding is easy and fun to make. I encourage you to try it! Enjoy your delicious creation and its health benefits!

Raspberry Coconut Chia Pudding Simple and Delicious Treat

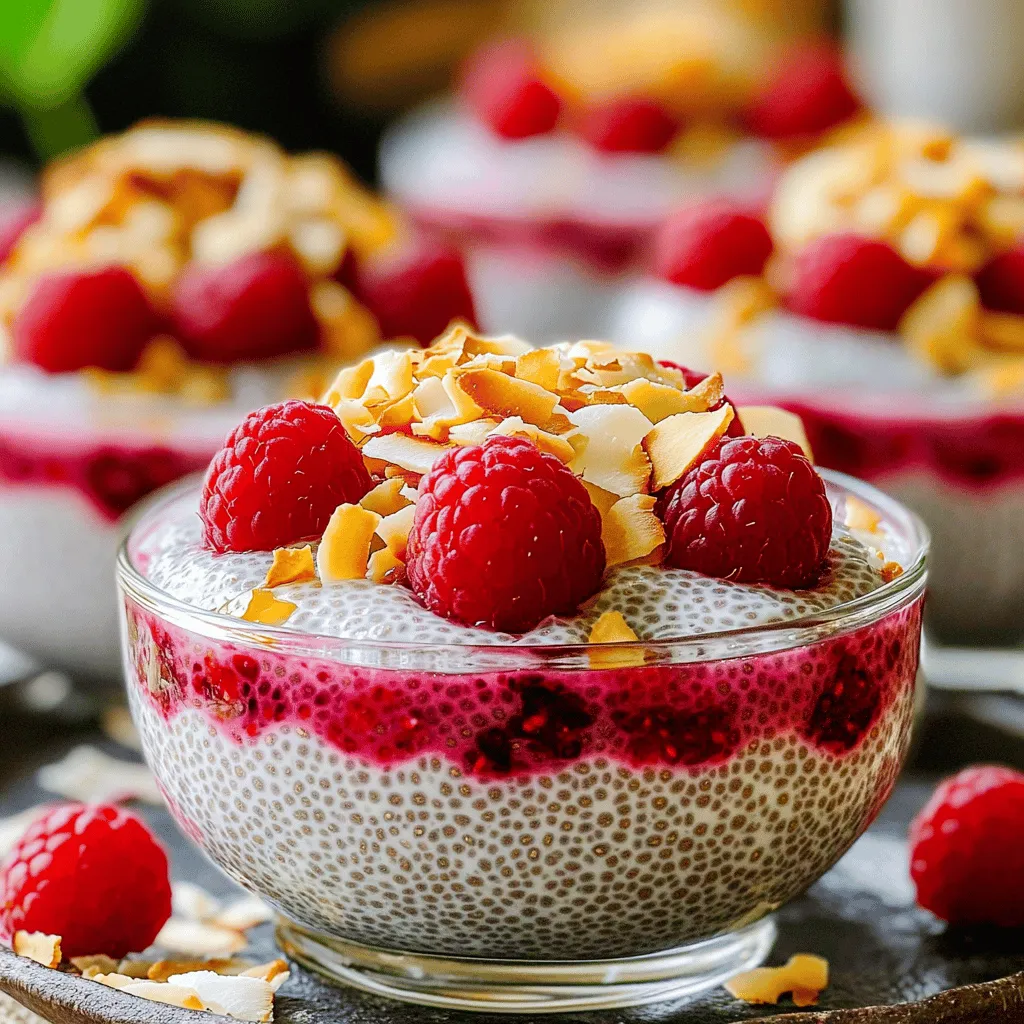
Looking for a quick and tasty treat? Raspberry Coconut Chia Pudding is simple to make and full of flavor. This
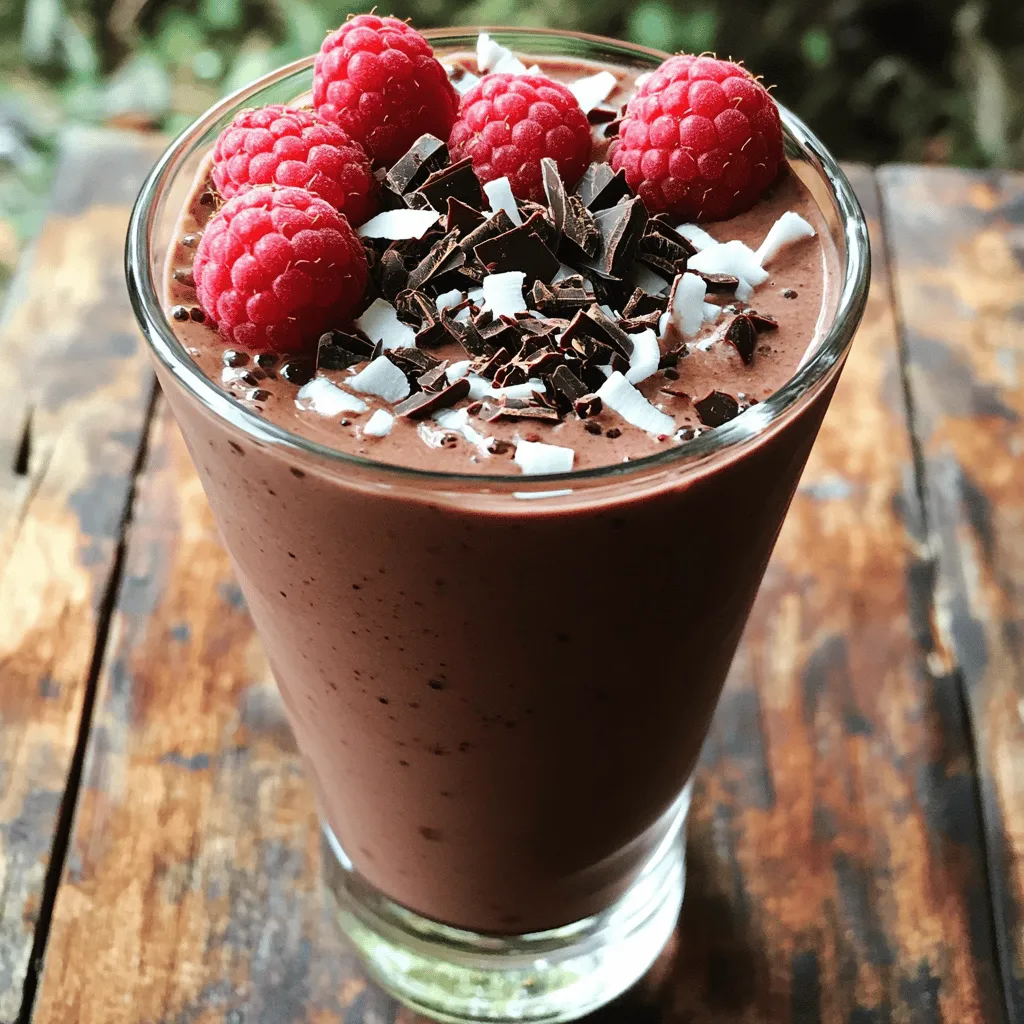
To make a delicious Chocolate Peanut Butter Smoothie Bowl, you will need the following: - 1 frozen banana - 1 cup unsweetened almond milk - 2 tablespoons natural peanut butter - 1 tablespoon cocoa powder - 1 tablespoon honey or maple syrup - 1/2 teaspoon vanilla extract These ingredients blend together to create a creamy and rich base. The frozen banana adds sweetness and thickness. Almond milk gives it a smooth texture, while peanut butter adds protein and flavor. Cocoa powder brings that rich chocolate taste. Honey or maple syrup sweetens it up, and vanilla extract rounds out the flavors. You can make your smoothie bowl more exciting with these tasty toppings: - Sliced bananas - Granola - Cacao nibs - Chopped nuts - Shredded coconut These toppings not only add flavor but also make your bowl look beautiful. Sliced bananas add freshness, while granola gives a nice crunch. Cacao nibs bring a rich chocolate flavor. Chopped nuts provide healthy fats and texture. Shredded coconut adds a tropical touch. Feel free to mix and match based on what you love. For the full recipe, check out the details above. To start, gather your ingredients. You need one frozen banana, one cup of unsweetened almond milk, two tablespoons of natural peanut butter, one tablespoon of cocoa powder, one tablespoon of honey or maple syrup, and half a teaspoon of vanilla extract. Combine all these ingredients in your blender. Make sure to place the frozen banana at the bottom. This helps it blend better. Next, blend the mixture on high. Watch it closely and scrape down the sides if needed. If your smoothie is too thick, add a splash more almond milk. Blend until it is smooth and creamy. Once your smoothie is ready, pour it into a bowl. This is where the fun begins! You can get creative with your toppings. Place sliced bananas, granola, cacao nibs, chopped nuts, and shredded coconut on top of your smoothie. Use your hands or a spoon to arrange them in a way that looks nice. Let your personal style shine through! For extra flair, consider some garnishes. A sprinkle of cacao nibs or a few extra slices of banana can enhance the look. Use a sturdy spoon to enjoy your smoothie bowl. A wide bowl makes it easy to scoop up all those tasty toppings. Enjoy each bite of your delicious creation! To make the best chocolate peanut butter smoothie bowl, you want the right thickness. If your mix is too thick, add a splash of almond milk. This will help thin it out. For a creamier bowl, use less almond milk. The ripeness of your banana can change the texture. A ripe banana will give you a sweeter, smoother mix. If you use a less ripe banana, your bowl will be thicker and less sweet. Play around with different ripeness levels to find what you like best. You can switch up the peanut butter for a new taste. Try almond butter or cashew butter for a twist. Each nut butter brings a unique flavor that can make your bowl special. Adding spices can also boost the taste. A pinch of cinnamon or nutmeg can add warmth. Superfood powders like maca or spirulina can give extra nutrition. Mix a little into your bowl for a health kick. The way you present your smoothie bowl can make it more fun. Use bowls with fun colors or unique designs to catch the eye. A vibrant bowl can make your meal feel special. Layer your toppings in creative ways. Place sliced bananas on one side and granola on the other. Try stacking cacao nibs and nuts in the center. This makes your bowl look appealing and tasty. Enjoy the experience of making it as much as eating it! {{image_2}} You can change the flavor of your smoothie bowl easily. Adding fruits like strawberries or mango gives it a fresh twist. Just toss in a handful with your other ingredients. This adds sweetness and a fun color. You can also use greens like spinach or kale. They blend well and boost nutrition without changing the taste much. This makes your bowl healthier and more vibrant! If you need nut-free or dairy-free options, you can still enjoy this bowl. Replace peanut butter with sunflower seed butter for a nut-free version. For dairy-free, stick to almond or oat milk. If you want a vegan substitute for honey, use agave syrup or more maple syrup. These swaps keep the flavor strong while fitting your diet! You can serve your smoothie as a bowl or a drink. A bowl lets you play with toppings and makes it look pretty. If you want to drink it, just pour it into a glass. For kids, make fun colors by using different fruits. Use bright toppings to catch their eye. They will love the look and taste! Store any leftover smoothie bowl in a sealed container. This keeps it fresh and tasty. Place the container in the fridge. The smoothie bowl stays good for up to two days. When you are ready to eat it, simply stir and add more toppings if you like. For blended mixtures, use a glass jar or bowl. Make sure to leave some space at the top. This lets the mixture expand if it freezes. Always seal the jar tightly to keep air out. Air can change the taste and texture. You can freeze your smoothie bowl for later. This is a great way to save time. Pour the smoothie into an ice cube tray or silicone molds. Freeze until solid, then pop them out and place them in a freezer bag. This way, you can grab a portion whenever you want. To thaw, just take out what you need. You can let it sit in the fridge overnight or place it in a bowl at room temperature for a few hours. If you need it fast, put it in the microwave for short bursts. This method is perfect for busy mornings. You can blend up a fresh bowl in no time with your frozen smoothie base. Enjoy your Chocolate Peanut Butter Smoothie Bowl anytime! Check the [Full Recipe] for more ideas on how to make this delicious treat. To make a Chocolate Peanut Butter Smoothie Bowl, follow these steps: 1. Gather Ingredients: Use a frozen banana, unsweetened almond milk, natural peanut butter, cocoa powder, honey or maple syrup, and vanilla extract. 2. Blend: In a blender, mix the frozen banana, almond milk, peanut butter, cocoa powder, honey or maple syrup, and vanilla extract. Blend until smooth and creamy. 3. Adjust Consistency: If it’s too thick, add a splash of almond milk. Blend again. 4. Serve: Pour the mixture into a bowl. 5. Add Toppings: Top with sliced bananas, granola, cacao nibs, chopped nuts, and shredded coconut. This simple process gives you a tasty and energizing breakfast in just five minutes. If you need an alternative to almond milk, here are some great options: - Soy Milk: Good for creaminess and protein. - Coconut Milk: Adds a rich, tropical flavor. - Oat Milk: Great for a smooth texture and is nut-free. - Cow's Milk: Excellent for those who don’t mind dairy. These choices can fit different diets and taste preferences. Yes, you can prepare your smoothie bowl in advance. Here are some tips: - Blend Ahead: You can blend the smoothie base and store it in the fridge. Use it within 24 hours. - Topping Storage: Keep toppings separate until you serve. This keeps them fresh and crunchy. - Freezing Option: You can freeze the blended smoothie. Just thaw it overnight in the fridge before serving. These tips help you enjoy your smoothie bowl even on busy mornings. For the full recipe, check out the earlier section. This blog post guides you through making delicious smoothie bowls. You learned the key ingredients, step-by-step instructions, tips for the perfect texture and flavor, variations for every taste, and how to store leftovers. Smoothie bowls are fun to make and enjoy. With these easy steps, you're ready to create tasty and healthy meals. Get creative with your toppings and flavors. Enjoy your smoothie bowl journey, and remember, the best part is making it your own!

Chocolate Peanut Butter Smoothie Bowl Energizing Recipe

Craving a delicious and healthy treat? Look no further! This Chocolate Peanut Butter Smoothie Bowl is packed with flavor and

To make zesty lemon roasted salmon, you need simple, fresh ingredients. Here’s the list: - 4 salmon fillets (about 6 oz each) - 2 tablespoons olive oil - 2 lemons (1 for juice, 1 for slices) - 3 cloves garlic, minced - 1 teaspoon fresh thyme leaves - 1 teaspoon fresh rosemary, chopped - Salt and pepper to taste - Fresh parsley, chopped for garnish Using high-quality salmon makes a big difference. Look for bright, firm fillets. Fresh herbs add great flavor. The lemon juice brightens the dish and keeps the salmon moist. Olive oil helps everything cook nicely and adds richness. Feel free to adjust seasonings to your taste. You can use more garlic if you love it or add a pinch of cayenne for heat. This dish is all about balance and freshness. For the complete cooking process, check the Full Recipe. First, you need to preheat the oven to 400°F (200°C). This step is key for getting crispy skin and tender fish. While it heats, let’s prepare the salmon. In a small bowl, mix together the olive oil, juice from one lemon, minced garlic, thyme, rosemary, salt, and pepper. This marinade adds a punch of flavor. Next, take your salmon fillets, and place them skin-side down on a lined baking sheet. This helps with easy cleanup. Brush the marinade generously over the top of each fillet. Make sure every piece is well coated. Slice the second lemon into thin rounds. Place 2-3 slices on each salmon fillet. This adds extra flavor and a pretty look. Now, it’s time to bake! Place the salmon in the preheated oven. Bake for about 12-15 minutes. The salmon is done when it flakes easily with a fork. Watch for the color change. The fish should be opaque and slightly firm. This means it’s ready to come out. After baking, remove the salmon from the oven. Let it rest for a couple of minutes. This helps keep the juices inside. Just before serving, sprinkle some fresh parsley on top. It adds a nice pop of color and freshness. For the full recipe, check out the detailed instructions above. Enjoy your meal! - Best herbs for pairing: Fresh herbs make a big difference. I love using thyme and rosemary. They add depth and aroma. You can also try dill or parsley for a fresh twist. These herbs boost the lemon flavor, making it pop! - Marinade adjustments: If you want more zing, add extra lemon juice. Honey can bring sweetness to balance the tang. For a spicy kick, mix in some red pepper flakes. Get creative! Each tweak brings a new flavor to your dish. - Tips for even cooking: Make sure all your salmon fillets are the same size. This helps them cook evenly. Use a lined baking sheet for easy cleanup. Always place the salmon skin-side down. This helps keep it moist and tender. - Avoiding overcooking: Salmon cooks quickly, so watch it closely. Start checking at 12 minutes. The fish is done when it flakes easily with a fork. If you see white albumin on the surface, it means it’s getting too hot. Pull it out before that happens! - Recommended side dishes: Zesty lemon roasted salmon pairs well with many sides. Try serving it with steamed asparagus or roasted potatoes. A fresh green salad also adds a nice crunch. These sides complement the salmon’s flavor beautifully. - Pairing beverages: A crisp white wine works great with this dish. Sauvignon Blanc or Pinot Grigio are excellent choices. If you prefer non-alcoholic drinks, serve sparkling water with a lemon wedge. This keeps it light and refreshing. {{image_2}} You can switch up the type of fish in this recipe. Cod, trout, or even tilapia work well. These fish have a mild flavor that pairs nicely with lemon. You can also mix in different herbs and spices. Consider dill, basil, or even a pinch of red pepper flakes. Each choice adds a unique twist to your dish. Grilling adds a smoky flavor that makes salmon shine. To grill, preheat your grill to medium-high heat. Cook the salmon skin-side down for about 6-8 minutes. Flip it gently and grill for another 4-6 minutes. If you prefer roasting, the oven is your best friend. Roasting cooks the salmon evenly, keeping it moist and tender. You can also use an air fryer for a quick option. Set your air fryer to 400°F (200°C). Cook the salmon fillets for 8-10 minutes. This method gives you a crispy outside while keeping the fish juicy inside. This recipe is already gluten-free. You can enjoy it without worry. For a low-carb meal, serve it with veggies instead of rice or bread. Think about a fresh salad or roasted asparagus. These variations let you enjoy zesty lemon roasted salmon in many ways. You can find the full recipe above for more details! To store leftovers, let the salmon cool first. Wrap each piece tightly in plastic wrap or foil. Place them in an airtight container to keep them fresh. You can store the salmon in the fridge for up to three days. For best flavor, eat it sooner rather than later. To freeze salmon properly, wrap each fillet in plastic wrap. Then put them in a freezer bag or airtight container. Remove as much air as possible to prevent freezer burn. You can freeze the salmon for up to three months. When it's time to thaw, move the salmon to the fridge. Let it thaw overnight for the best results. If you're short on time, you can use the cold water method. Just place the sealed fish in cold water for about an hour. For reheating, the oven is your best friend. Preheat it to 300°F (150°C). Place the salmon on a baking sheet and cover it with foil. Heat for about 10-15 minutes or until warm. This method keeps the salmon moist and flaky. You can also reheat it in a microwave. Use a microwave-safe dish and cover it with a damp paper towel. Heat in short bursts of 30 seconds, checking often. This way, you avoid drying out the fish. You can check if the salmon is done by looking for a few signs: - The fish should change color from a bright pink to a lighter shade. - It should flake easily with a fork. - The internal temperature should reach 145°F (63°C). When the salmon is cooked, it looks opaque and feels firm to the touch. If it is still raw in the center, it needs more time in the oven. I suggest checking it at the 12-minute mark to avoid overcooking. Yes, you can use frozen salmon! Here are some tips: - Thaw the salmon in the fridge overnight or use the cold water method. - If you are short on time, you can cook it from frozen. Just add a few extra minutes to the cooking time. - Make sure to pat the salmon dry before marinating to help the flavors stick. Using frozen salmon can be just as good as fresh if prepared properly. Pairing your salmon with great sides makes the meal even better. Here are some ideas: - Roasted vegetables like asparagus or broccoli add color and crunch. - A simple green salad with lemon vinaigrette will balance the flavors. - Quinoa or rice can soak up the zesty juices and make a filling dish. - Garlic bread offers a delicious, crunchy side. Feel free to mix and match based on what you enjoy! You can find the full recipe [here](#). In this blog post, I shared how to prepare zesty lemon roasted salmon. You learned about key ingredients, step-by-step cooking instructions, and tips for success. I also covered variations and storage. Remember, using fresh herbs and the right cooking method enhances flavor. Whether you grill, bake, or air fry, enjoy experimenting with different ingredients. With practice, you will master this dish. Now, you can impress with your delicious salmon and perfect pairings. Cook well and enjoy every bite!

Zesty Lemon Roasted Salmon Easy and Flavorful Dish

Looking for a quick, tasty dish? You’ll love this Zesty Lemon Roasted Salmon! This recipe is packed with flavor and

To make your tasty Chocolate Raspberry Smoothie, gather these main ingredients: - 1 cup fresh or frozen raspberries - 1 medium banana, frozen - 2 tablespoons unsweetened cocoa powder - 1 cup almond milk (or any preferred milk) - 1 tablespoon honey or maple syrup (adjust to taste) - 1 tablespoon chia seeds (optional, for added nutrition) - A pinch of sea salt Each ingredient adds flavor and health benefits. The raspberries provide sweetness and a burst of flavor. The frozen banana gives the smoothie a creamy texture. Cocoa powder adds rich chocolate taste. Almond milk keeps it light and refreshing. You can make your smoothie even better with these optional toppings: - Fresh raspberries - Dark chocolate shavings - Coconut flakes These toppings not only look nice, but they also add extra taste and texture. Let’s look at the benefits of the main ingredients. Raspberries are low in calories and high in fiber. They support heart health and help digestion. Bananas give you energy and potassium. Cocoa powder is rich in antioxidants, which are great for your body. Almond milk is a good dairy-free option, full of vitamins. With these ingredients, your Chocolate Raspberry Smoothie is not just delicious; it’s also good for you. For the full recipe, check the recipe details provided. Start by gathering all your ingredients. You will need: - 1 cup fresh or frozen raspberries - 1 medium banana, frozen - 2 tablespoons unsweetened cocoa powder - 1 cup almond milk (or any preferred milk) - 1 tablespoon honey or maple syrup (adjust to taste) - 1 tablespoon chia seeds (optional, for added nutrition) - A pinch of sea salt - Optional toppings: fresh raspberries, dark chocolate shavings, and coconut flakes Make sure your banana is frozen for a creamy texture. If you use fresh raspberries, they can add a nice tartness. Now it’s time to blend! In a blender, add the raspberries, frozen banana, cocoa powder, and almond milk. This mix gives you a rich chocolate flavor with a fruity kick. Next, add the honey or maple syrup. If you want more nutrition, toss in the chia seeds. The pinch of salt will help bring out the flavors. Blend everything on high until smooth. Stop to scrape down the sides if needed. Taste your smoothie. If it’s not sweet enough, add more honey or syrup. Blend again until it’s just right. Pour the smoothie into a glass. This drink looks great and tastes even better! For a lovely touch, add fresh raspberries, dark chocolate shavings, and coconut flakes on top. You can also serve it in a bowl and add toppings for a smoothie bowl. Enjoy this energizing treat! For the full recipe, check the section above. For a thick and creamy smoothie, use frozen raspberries and banana. They add great texture. If your smoothie is too thick, add a splash of almond milk. Blend it again until smooth. If it’s too thin, add a bit more banana or a few ice cubes. Taste your smoothie before serving. If it needs more sweetness, add honey or maple syrup. Start with a little; you can always add more. Remember, over-sweetening can mask the great flavors of chocolate and raspberry. A high-speed blender works best for a smooth finish. It crushes ice and blends fruits well. If you have a regular blender, cut the banana into smaller pieces. This helps it blend easier. A good blender makes all the difference in your smoothie. For the full recipe, check out the details above. Enjoy your Chocolate Raspberry Smoothie! {{image_2}} You can easily boost the nutrition of your smoothie. Adding protein helps keep you full. Try adding a scoop of protein powder or Greek yogurt. Both options mix well and add creaminess. If you want a green boost, spinach works great. It blends smoothly and adds vitamins without changing the taste. To make this smoothie dairy-free, use almond milk or coconut milk. Both add a lovely flavor. If you want it vegan, skip honey and use maple syrup. It sweetens nicely and is plant-based. This way, everyone can enjoy the smoothie! Mixing flavors can bring fun twists to your smoothie. You might add a little vanilla extract for warmth. A dash of cinnamon can also add depth. For a berry blast, toss in blueberries or strawberries. They pair well with chocolate and raspberries. Each option can take your smoothie to new heights. For the full recipe, check the main article! If you have leftover smoothie, pour it into a sealed container. Glass jars work best. Store it in the fridge. Drink it within 24 hours for the best taste. Shake or stir it well before drinking. The smoothie may separate as it sits. Freezing ingredients can save time and reduce waste. You can freeze fresh raspberries and bananas. Place them in a single layer on a baking sheet. Once frozen, transfer them to a freezer bag. This way, you can grab a handful for your next smoothie. Cocoa powder and chia seeds do not need freezing. Store them in a cool, dry place. The shelf life of your smoothie ingredients varies. Fresh raspberries last about 2 to 3 days in the fridge. Frozen raspberries stay good for about 6 to 12 months. Bananas last about 2 to 7 days when ripe. Cocoa powder and chia seeds can last well over a year when stored correctly. Always check for signs of spoilage before use. Yes, you can make this smoothie ahead of time. Blend the ingredients and store it in the fridge. It stays fresh for up to 24 hours. Give it a good shake or stir before drinking. This helps mix any settled ingredients. If you want to keep it longer, freeze it in ice cube trays. Later, blend the cubes for a cold treat. For the best flavor, use dark chocolate. It adds a rich taste and pairs well with raspberries. Look for chocolate with at least 70% cocoa. You can also use cocoa powder. It gives a deep chocolate flavor without added sugar. If you prefer milk chocolate, that works, too. Just remember it will be sweeter. To boost nutrition, add spinach or kale. They blend well and add vitamins without changing the taste much. You can also swap almond milk for a protein-rich milk like soy. Using unsweetened cocoa powder adds flavor without extra sugar. Lastly, add chia seeds for fiber and omega-3s. These changes make the smoothie both tasty and healthy. For the full recipe, check out the details above! You learned how to make a delicious chocolate raspberry smoothie. We covered key ingredients, optional toppings, and the health benefits they offer. You now know how to blend, serve, and store your smoothie. I shared useful tips for texture and sweetness adjustments. Plus, you discovered tasty variations and answers to common questions. Enjoy experimenting with your smoothie recipes. Make it your own and savor every sip!

Chocolate Raspberry Smoothie Energizing and Delicious

Get ready to treat your taste buds with a rich and fruity delight! The Chocolate Raspberry Smoothie is not just

To make the salted caramel cookie shake, you need these simple ingredients: - 2 cups vanilla ice cream - 1 cup milk (any kind) - 1/4 cup caramel sauce, plus extra for drizzling - 1/2 teaspoon sea salt, plus a pinch for garnish - 4-5 chocolate chip cookies, crumbled - Whipped cream for topping - Chocolate shavings or cookie crumbles for garnish Each ingredient plays a key role in creating a rich and creamy shake. The vanilla ice cream makes it smooth and sweet. Milk adds a nice texture. Caramel sauce gives the shake its signature flavor, while sea salt balances the sweetness. The crumbled cookies add crunch and fun! If you have allergies, you can easily swap some ingredients: - Use dairy-free ice cream for a vegan option. - Almond milk or oat milk works well as a milk substitute. - If gluten is a concern, use gluten-free cookies. - Maple syrup can replace caramel sauce for a different flavor. These swaps keep the shake tasty while making it safe for everyone. Choosing premium ingredients can elevate your shake: - Opt for artisanal vanilla ice cream for richer flavor. - Use homemade caramel sauce for a fresher taste. - Try sea salt flakes for a gourmet touch. - Look for gourmet chocolate chip cookies for added depth. Investing in quality ingredients makes this treat even more special. You can find the full recipe above to guide you through making this delightful shake! To make your salted caramel cookie shake, start by gathering your ingredients. You will need: - 2 cups vanilla ice cream - 1 cup milk (any kind) - 1/4 cup caramel sauce, plus extra for drizzling - 1/2 teaspoon sea salt, plus a pinch for garnish - 4-5 chocolate chip cookies, crumbled - Whipped cream for topping - Chocolate shavings or cookie crumbles for garnish Now, let’s get started! First, grab your blender. In the blender, combine the vanilla ice cream, milk, caramel sauce, and sea salt. Blend until smooth and creamy. Next, carefully add the crumbled chocolate chip cookies. Pulse a few times. You want some pieces to stay whole for texture. To ensure your shake is creamy, blend on low speed at first. This helps mix the ice cream and milk without overflowing. As the mixture becomes smooth, increase the speed for a few seconds. If it seems too thick, add a splash more milk. It should be thick but sippable. Once blended, it’s time to serve! Drizzle extra caramel sauce inside your serving glasses. This makes for a lovely presentation. Pour the shake into the glasses, filling them generously. Top with whipped cream. Then, sprinkle a pinch of sea salt, chocolate shavings, or extra cookie crumbles on top. Serve with a straw or spoon right away. Enjoy every sip of this delicious treat! This recipe is a fun way to treat yourself and share with friends. You can find the full recipe above for easy reference. To get the best texture, start with cold ingredients. Cold ice cream and milk blend easier. Use full-fat milk for creaminess. Blend until smooth but leave some cookie bits for crunch. If it's too thick, add a splash of milk. If too thin, add more ice cream. You can add more flavor with a few simple tweaks. Try adding a dash of vanilla extract for depth. A sprinkle of cinnamon can add warmth. For a nutty twist, use crushed nuts or toffee bits. Drizzle extra caramel on top for a sweet finish. Avoid blending too long, or the shake will turn watery. Don't forget to drizzle caramel inside the glasses; it makes a big difference. Be careful with the sea salt; too much can overpower the flavor. Lastly, remember to serve it right away for the best taste and texture. {{image_2}} You can play with flavors in your salted caramel cookie shake. Try adding peanut butter for a nutty twist. A sprinkle of cinnamon can give it a warm vibe. You can also swap vanilla ice cream for chocolate ice cream. This change adds depth and richness. For those who love fruit, blend in some banana or strawberries. Each mix can create a fun new treat. If you want a vegan shake, use plant-based ice cream. Almond, coconut, or cashew ice cream works well. Swap regular milk for almond or oat milk. Use vegan caramel sauce to keep it dairy-free. For a gluten-free option, choose gluten-free cookies. This way, everyone can enjoy the shake without worry. Seasonal ingredients can add a fresh twist to your shake. In the fall, try adding pumpkin puree and pumpkin spice. This gives a cozy, autumn flavor. In winter, a touch of peppermint extract can make it festive. During summer, fresh berries can add a bright touch. These changes keep your shake exciting all year round. For the full recipe, check out the detailed instructions provided above. If you have leftover salted caramel cookie shake, store it in an airtight container. Make sure to keep it in the fridge. It’s best to consume it within one day. The shake may lose its creamy texture over time. To refresh your shake, blend it again. If it's too thick, add a splash of milk. I do not recommend reheating it. The shake tastes best when cold and creamy. You can freeze the shake for a treat later. Pour it into ice cube trays. Once frozen, blend the cubes with a bit of milk for a quick shake. This method is fun and keeps the flavor fresh. For best results, use it within a month. For the complete recipe, check out the full recipe section above. A Salted Caramel Cookie Shake is a sweet and creamy drink. It combines vanilla ice cream, milk, and caramel sauce. The shake gets its unique flavor from sea salt and chocolate chip cookies. This treat is rich, indulgent, and perfect for dessert or a snack. You can use frozen yogurt or banana as a base. Blend one ripe banana with milk and caramel sauce. This will give you a creamy texture without ice cream. You can also add some ice cubes for a thicker shake. Many cafes offer variations of this drink. You might find it labeled as a cookie shake or caramel shake. Not every cafe will have it, so check the menu or ask the barista. Some cafes may even allow you to customize your order. Pair this shake with warm chocolate chip cookies or brownies. It also goes well with salty snacks like pretzels. If you want something lighter, try pairing it with fresh fruit like strawberries or apples. Yes, you can easily double or triple this recipe. Just adjust the ingredients accordingly. Use a larger blender to mix everything well. This way, you can serve more people or save some for later. To make the Salted Caramel Cookie Shake, you need a few simple items. Here’s what you will need: - 2 cups vanilla ice cream - 1 cup milk (any kind) - 1/4 cup caramel sauce, plus extra for drizzling - 1/2 teaspoon sea salt, plus a pinch for garnish - 4-5 chocolate chip cookies, crumbled - Whipped cream for topping - Chocolate shavings or cookie crumbles for garnish These ingredients work together to create a rich and creamy shake. The vanilla ice cream gives it a sweet base, while the milk helps to blend everything smoothly. Caramel sauce adds a sweet and salty kick. The sea salt heightens the flavor. Crumbled cookies add a fun crunch. Finally, whipped cream and toppings make it look beautiful. You can swap out the vanilla ice cream for other flavors if you like. Try using chocolate ice cream for a deeper taste. You can also change the milk. Almond or oat milk will work well too. This recipe is all about what you enjoy. For a special touch, use homemade caramel sauce. It adds freshness and depth. If you want an extra sweet treat, add more cookies on top. Don't forget to check out the Full Recipe for more details! In this blog post, we explored how to make a delicious Salted Caramel Cookie Shake. We covered the key ingredients, offered substitution options, and shared ideas for premium picks. I provided simple prep steps, blending tips, and ways to serve it nicely. We delved into texture, flavor enhancements, and common mistakes. I also suggested fun variations and how to store leftovers safely. Making this shake can be fun and easy. Enjoy creating it your own way!

Salted Caramel Cookie Shake Irresistible Treat Recipe

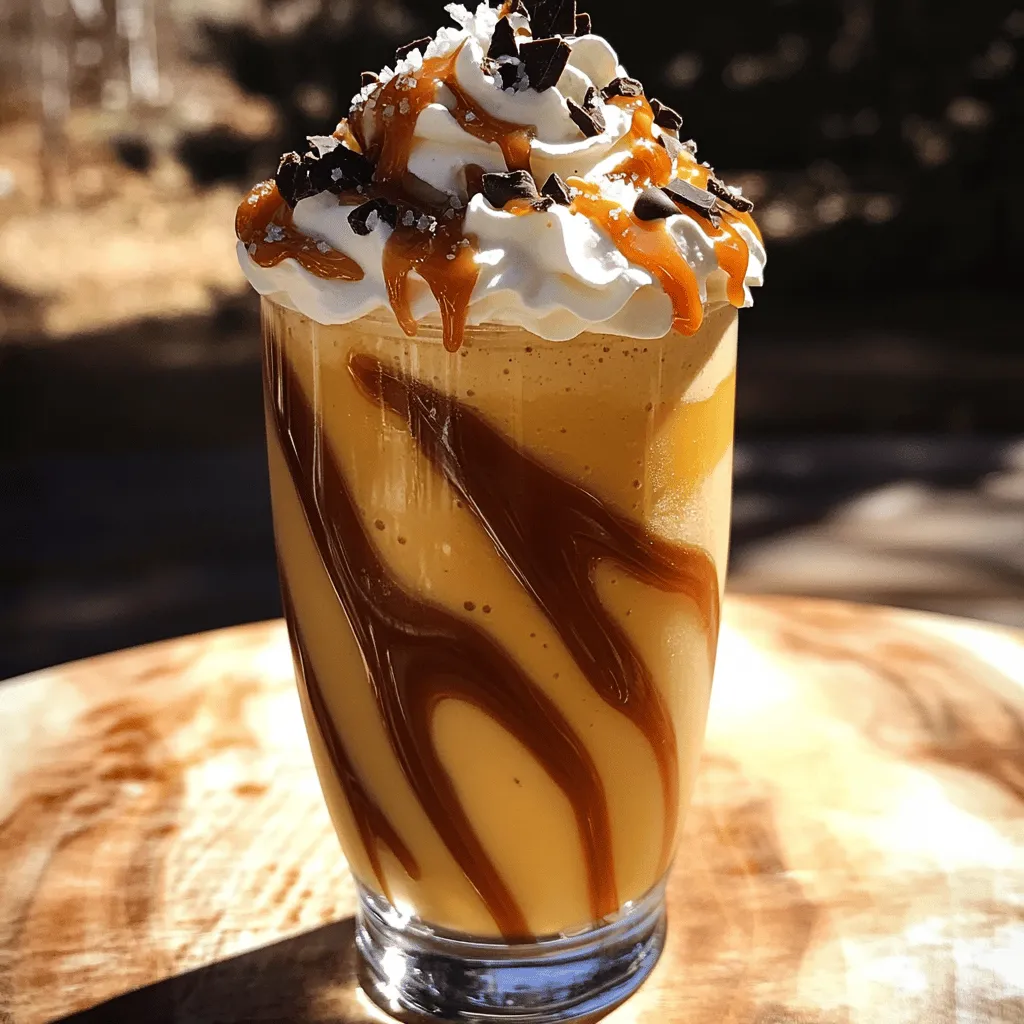
Craving something sweet and creamy? You’re in the right place! The Salted Caramel Cookie Shake is an indulgent treat sure

- 1 cup cranberry juice (no added sugar) - 1/2 cup sparkling water - 1/4 cup fresh lime juice (about 2 limes) - 2 tablespoons honey or agave syrup - Fresh mint leaves for garnish - Lime slices for garnish - Ice cubes To make a great cranberry lime spritzer, you need fresh ingredients. Start with cranberry juice that has no added sugar. This keeps your drink healthy and tasty. You will also need sparkling water, which adds a nice fizz. Fresh lime juice gives the drink a bright flavor. You can use about two limes for this. For sweetness, add honey or agave syrup. You can adjust this based on how sweet you like your drink. Fresh mint leaves and lime slices make great garnishes. They not only look good but also add a fresh aroma. Finally, don’t forget ice cubes to keep your spritzer cold and refreshing. If you don’t have cranberry juice, you can try pomegranate juice. This will change the flavor a bit but still taste great. For sweetness, if you prefer granulated sugar, feel free to use it instead of honey or agave. Just mix it well until it dissolves. You can also use bottled lime juice if fresh limes are not available. Just make sure to check the label for added sugars. The goal is to keep the drink as fresh and tasty as possible. To make the cranberry lime spritzer, start with the juices. In a large pitcher, mix 1 cup of cranberry juice with 1/4 cup of fresh lime juice. Use about 2 limes for this. Add 2 tablespoons of honey or agave syrup. Stir well until the sweetener dissolves. Next, it's time for the sparkling water. For this, you will add 1/2 cup of sparkling water. Gently stir the mixture to combine. Be careful not to stir too hard; we want to keep the fizz! For serving, grab some ice cubes. Fill each glass with ice, then pour the cranberry-lime mixture over the ice. Fill each glass about three-quarters full. To make the drinks look pretty, add garnishes. Use fresh mint leaves and a slice of lime on the rim of each glass. This adds a pop of color and makes your drink extra special! To keep your drink cold, use chilled ingredients. Store the juices in the fridge before mixing. You can also use ice cubes made from cranberry juice for an extra touch. Garnishes are key for a great presentation. They not only look nice but also add fresh flavor. Use bright mint leaves and colorful lime slices. These small details impress your guests and make the drink feel festive! You can find the Full Recipe [here]. To make your cranberry lime spritzer even better, you can add fruits or herbs. Fresh raspberries or strawberries can bring a sweet twist. You might also try adding sliced cucumbers for a refreshing touch. Fresh herbs like basil or rosemary can add depth. Balancing sweetness with tartness is key. If your drink is too sweet, add more lime juice. You can also use less honey or agave syrup. Adjust to your taste. Finding the right mix will make your spritzer shine. Selecting the right glassware can elevate your drink. Use tall glasses to show off the colors. A mason jar gives a fun, rustic look. For a fancy vibe, consider stemmed glasses. Garnishes can set the mood for your spritzer. Use lime slices on the rim for a pop of color. Fresh mint leaves not only look great but add aroma. For a festive touch, try adding edible flowers. Each occasion can have its own special flair with the right garnishes. For the full recipe, check the details above. Enjoy crafting your perfect cranberry lime spritzer! {{image_2}} You can change the flavor of your cranberry lime spritzer with other juices. Adding orange juice gives it a bright note. Pineapple juice adds a tropical twist. Mix and match to find your favorite blend. Herbs can also change the taste. Try adding fresh basil for a sweet touch. Rosemary adds an earthy flavor that surprises your palate. Just a few leaves can make a big difference. If you want to turn this drink into a cocktail, it's easy. Add your favorite spirit to the mix. Vodka pairs well because it has a clean taste. Gin can add herbal notes that complement the flavors. For a sweeter option, rum works nicely too. Just remember to adjust the sweetness if you add alcohol. Enjoy the spritzer as a fun drink for any party! You can find the full recipe to get started. To keep your cranberry lime spritzer fresh, store it in the refrigerator. Use a sealed pitcher or jar to avoid spills and preserve flavor. The spritzer stays good for up to three days. After that, it may lose some fizz and taste. You can make a batch of the spritzer ahead of time. Just remember, it tastes best fresh. To make it last longer, do not add sparkling water until you are ready to serve. You can freeze garnishes like mint and lime slices. Place them in a freezer bag and pull them out when you need them. This way, you have fun, fresh flavors ready to go. For the full recipe, check the earlier section. Can I use sugar instead of honey/agave? Yes, you can use sugar. Just dissolve it in the juices. Start with a small amount and taste. Adjust until it suits your needs. Sugar adds sweetness but may change the flavor a bit. Is cranberry-lime spritzer kid-friendly? Absolutely! This drink is perfect for kids. It has fun colors and tastes great. Just make sure to use juice with no added sugar. This keeps it healthier for little ones. How can I make this spritzer alcohol-free? The cranberry-lime spritzer is already alcohol-free! It’s a great choice for parties or family gatherings. You can also add fruit slices or herbs for extra flair. What to do if the drink is too sweet/tart? If it’s too sweet, add more lime juice to balance it. A splash of sparkling water helps, too. If it’s too tart, add a bit more honey or sugar. Taste as you go! Fixing fizzy drinks that went flat If your spritzer lost its fizz, try adding fresh sparkling water. Pour it gently to keep some bubbles. You can also serve it over ice right before serving. This helps keep it cool and fizzy! This blog post covered how to make a cranberry-lime spritzer. We explored ingredients like cranberry juice and lime juice, and discussed substitutes. I shared step-by-step instructions for preparation and tips to enhance the drink's flavor and look. You learned about fun variations and how to store leftovers effectively. In your kitchen, this spritzer can be a refreshing treat. Enjoy experimenting with flavors and sharing this drink with friends!

Cranberry Lime Spritzer Refreshing and Simple Drink

Looking for a drink that’s refreshing and easy to make? I have the perfect solution for you: a Cranberry Lime

- 1 cup fresh or frozen blueberries Blueberries are packed with antioxidants. They help protect your body from damage and support heart health. - 1 ripe banana Bananas provide natural sweetness and creamy texture. They are rich in potassium, which helps with muscle function. - 1 cup unsweetened almond milk (or your preferred milk) Almond milk is low in calories and dairy-free. It’s great for hydration and adds a nutty flavor. - 1 scoop vanilla or lemon-flavored protein powder Protein powder boosts the shake’s protein content. This helps with muscle repair after workouts. - 1 tablespoon honey or maple syrup (optional, for sweetness) Honey or maple syrup adds a natural sweet touch. They contain vitamins and minerals that support health. - 1 tablespoon chia seeds (optional, for added fiber) Chia seeds are high in fiber and omega-3s. They help keep you full and support digestion. - Juice of 1 lemon Lemon juice brightens the flavor. It’s high in vitamin C, which boosts your immune system. - Zest of 1 lemon Lemon zest adds a burst of flavor. It contains essential oils that enhance the shake’s aroma. - Ice cubes (optional, for a chilled shake) Ice makes your shake refreshing and cold. It’s perfect for hot days or post-exercise. - Spinach Adding spinach gives extra nutrients without changing the taste much. It’s low in calories and high in iron. - Nut butter (like almond or peanut) A spoonful of nut butter adds creaminess and healthy fats. It helps keep you full longer. - Coconut flakes Shredded coconut can add a nice texture and tropical flavor. Choose unsweetened for a healthier option. - Flaxseeds Similar to chia seeds, flaxseeds boost fiber and omega-3 content. Ground flaxseeds are easier to digest. When selecting optional ingredients, always choose high-quality options. Fresh fruits and natural sweeteners are the best choice for taste and health. Using organic products can also enhance the flavors and benefits of your shake. To make your Lemon Blueberry Protein Shake, start by gathering your ingredients. You will need fresh or frozen blueberries, a ripe banana, almond milk, protein powder, lemon juice, and lemon zest. 1. In a blender, add the blueberries, banana, almond milk, protein powder, lemon juice, and lemon zest. 2. If you want extra sweetness, you can add honey or maple syrup. You may also include chia seeds for more fiber. 3. Ensure all ingredients are in the blender before you start blending. This step helps to mix everything well. To achieve the best texture, blend until the mixture is smooth and creamy. If you like a thicker shake, add a bit more banana or protein powder. If you prefer a thinner texture, simply add a splash of almond milk. For blending, I recommend using high speed. Blend the mix for about 30 to 60 seconds. This time allows everything to combine well. If you want a chilled shake, add ice cubes. Add about 1/2 cup of ice for a refreshing finish. Blend again until the ice is fully incorporated. This will make your shake nice and cold. When it's time to serve, pour the shake into a tall glass. For a lovely touch, garnish it with a few fresh blueberries and a sprinkle of lemon zest on top. This adds color and makes it look more appealing. Using a clear glass can enhance the visual appeal of your shake. It allows you to see the vibrant colors and textures inside. Serve with a straw for easy sipping. Enjoy your healthy and refreshing drink! You can change the Lemon Blueberry Protein Shake to fit your taste. Try different flavored protein powders, like chocolate or berry. You can also use various milk types, such as coconut or oat milk, for a unique twist. Want it sweeter? Add more honey or maple syrup. You can even toss in a scoop of peanut butter for a richer flavor. If you want to boost the protein in your shake, add Greek yogurt or cottage cheese. This will make it creamier and increase the protein content. For a vegan option, swap the protein powder for a plant-based kind. You can also use almond or soy milk to keep it vegan. To make it gluten-free, ensure your protein powder is certified gluten-free. This shake can fit many diets! {{image_2}} You can switch things up by using seasonal fruits. In summer, add ripe peaches or strawberries. In winter, try using frozen berries or even a splash of orange juice. These fruits boost flavor and add nutrients. For nutritional needs, you can adapt the recipe. If you want low-sugar, skip the honey or maple syrup. Use unsweetened almond milk to keep it light. For high-fiber options, add more chia seeds or a tablespoon of ground flaxseed. These small changes make a big difference without losing taste. If you want to avoid protein powder, there are great alternatives. Greek yogurt adds creaminess and protein. Silken tofu blends smoothly, creating a rich texture. Both options work well in this shake. Plant-based proteins are also fantastic. Try using pea protein or hemp protein powder. They are good sources of protein and fit well into many diets. You can mix and match to find what works best for you, and still enjoy a tasty shake. For the full recipe, check the Lemon Blueberry Protein Shake details. To keep your Lemon Blueberry Protein Shake fresh, pour any leftovers into a sealed container. Glass jars work well, as they do not absorb odors. Store the shake in the fridge for the best taste. If you want to save it for a longer time, you can freeze it. Just remember to leave some space in the container. The shake will expand when it freezes. Your shake can last up to 2 days in the fridge. Always check for signs of spoilage. If the shake smells sour or has changed color, it's best to toss it. You can also give it a quick taste test; if it does not taste fresh, do not drink it. Making sure your shake is safe to consume is key to enjoying it fully! A Lemon Blueberry Protein Shake is great for many reasons. It helps with post-workout recovery. The protein aids muscle repair, while the carbs from fruit give energy. Blueberries are full of antioxidants. They help fight free radicals in your body. Lemon adds vitamin C, boosting your immune system. This shake also serves as a quick meal replacement. It is filling and nutritious, making it perfect for busy days. Yes, you can make this shake ahead of time. To do this, blend all the ingredients and pour it into a sealed container. Store it in the fridge. It will stay fresh for up to 24 hours. If you want a chilled shake, add ice just before you drink it. This keeps the texture smooth and tasty. Using protein powder is not necessary but helpful. It boosts the protein content of the shake. If you want to skip it, consider other protein sources. Greek yogurt or silken tofu are great options. They also add creaminess. You can still enjoy a balanced shake without protein powder. Just make sure to include enough fruit and healthy fats. This way, you’ll have a tasty and nourishing drink. For the full recipe, check out Zesty Blueberry Lemonade Protein Shake 🫐. We explored the key ingredients for a tasty Lemon Blueberry Protein Shake. Each ingredient offers unique health benefits. You learned about preparation steps and how to blend for the perfect texture. You can customize the shake with optional add-ins and seasonal fruits. Plus, I shared tips on storing leftovers and checking freshness. Try this shake as a refreshing snack or after a workout. Experiment with variations to find your favorite flavor. Enjoy the journey of making this healthy drink!

Lemon Blueberry Protein Shake Healthy and Refreshing Drink

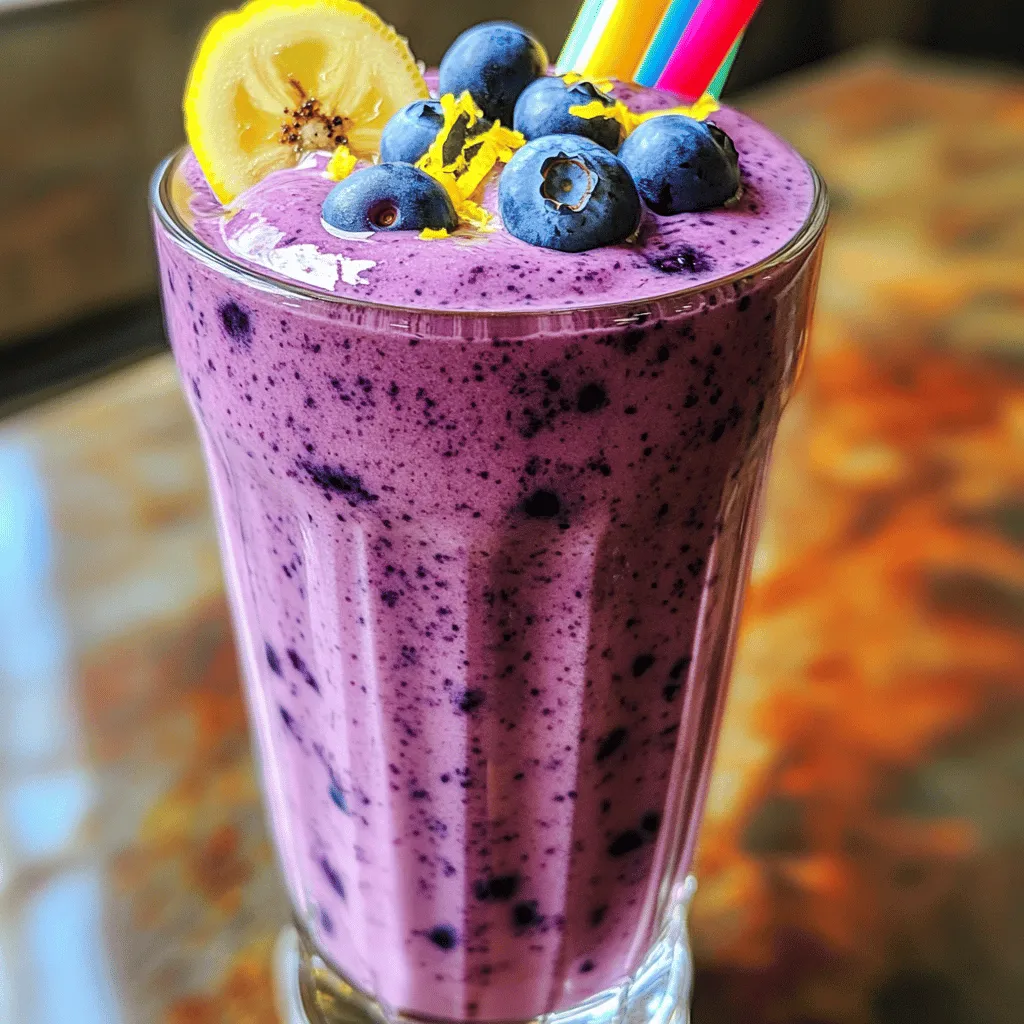
Looking for a tasty way to boost your health? A Lemon Blueberry Protein Shake is perfect! It’s packed with flavor

To make a delightful strawberry hibiscus lemonade, you need some simple and fresh ingredients. Here’s your list: - Fresh strawberries - Dried hibiscus flowers - Granulated sugar - Fresh lemon juice - Ice cubes - Garnishes: lemon slices and mint leaves Fresh strawberries add a sweet and juicy flavor. Dried hibiscus flowers give a beautiful color and a tart taste. Granulated sugar balances the tartness. Fresh lemon juice brings out the zesty notes. Ice cubes keep your drink cool. Finally, lemon slices and mint leaves make your drink look pretty and fresh. Using fresh ingredients makes a big difference. Fresh strawberries taste better than frozen ones. Choose bright red strawberries for the best flavor. For hibiscus, look for dried flowers in health stores or online. They are easy to find and use. When picking lemons, go for ones that feel heavy. This means they are juicy. Fresh lemon juice always tastes better than bottled juice. It gives a vibrant kick to your lemonade. Gather these ingredients, and you’ll be ready to make a refreshing summer drink. For the full recipe, check out the section above. 1. Start by combining 2 cups of water and 2 tablespoons of dried hibiscus flowers in a medium saucepan. The water should cover the flowers well. 2. Bring the mixture to a boil over medium heat. Watch it closely as it heats up. 3. Once boiling, reduce the heat and let it simmer for about 10 minutes. This allows the hibiscus to release its color and flavor. 4. After simmering, remove the saucepan from the heat. Strain the mixture through a fine mesh sieve into a bowl. Discard the hibiscus flowers. 1. While the hibiscus tea is still warm, stir in 1/2 cup of granulated sugar. Mix until the sugar dissolves completely. 2. In a large pitcher, combine the cooled hibiscus tea with 1/2 cup of fresh lemon juice. This adds a nice zing to the drink. 3. Now, add in the sliced strawberries. Stir gently to combine everything. 4. Fill the pitcher with ice cubes to chill the lemonade. This makes it super refreshing! 5. Before serving, taste the lemonade. If you want it sweeter, add more sugar to your liking. 6. Serve the strawberry hibiscus lemonade in glasses filled with ice. Garnish with lemon slices and fresh mint leaves for a nice touch. For the full recipe, refer to the ingredients and steps listed above. Enjoy your vibrant and tasty treat! You can sweeten your Strawberry Hibiscus Lemonade in many ways. I often use granulated sugar. It dissolves easily in warm tea. If you prefer natural sweeteners, try honey or agave. They add a nice flavor too. Adjust the sweetness to your taste. Start with half a cup of sugar. After mixing, taste it. Add more if you want it sweeter. Little by little is best. You can always add more, but you can't take it out! To make this drink even better, add more fruits or herbs. You can try raspberries or blueberries for extra flavor. Fresh herbs like mint or basil work well too. They add a fresh twist to the drink. Serving it cold is key. Fill your glasses with ice cubes before pouring the lemonade. For a beautiful touch, garnish with lemon slices and mint leaves. This not only looks nice but adds great flavor. Enjoy your refreshing drink! {{image_2}} You can switch up the fruit in this drink. Adding raspberries or blueberries gives a fun twist. These berries bring their own sweet flavors and bright colors. You can mix them in with the strawberries. Citrus fruits also work great. Try lime or orange juice for a zesty kick. This adds a fresh taste that pairs well with the hibiscus. Herbs can enhance the flavor too. Mint adds a cool note that feels refreshing. You can muddle some mint leaves before mixing them in. Basil is another option, giving a unique taste. Spices are fun to try as well. Think of adding a pinch of cinnamon or ginger. These spices can add warmth and depth to your lemonade. For a full recipe, check out the detailed steps above. To keep your strawberry hibiscus lemonade fresh, store it in the fridge. Use a clean, airtight container. This helps keep the flavors strong and prevents spills. You can also use a pitcher with a lid. Your lemonade will last about 3 to 5 days in the fridge. After that, the taste may fade. Yes, you can freeze the lemonade! Freezing is a great way to save extra lemonade for later. Use freezer-safe containers or ice cube trays. Pour the lemonade into the containers, leaving some space for expansion. If using trays, freeze until solid, then transfer the cubes to a bag. This way, you can add a splash of summer to your drinks anytime! Hibiscus has many health benefits. It is full of antioxidants. Antioxidants help fight free radicals in your body. This can lower your risk of illness. Hibiscus may also help with blood pressure. Some studies show it can lower high blood pressure. Always talk to your doctor if you have health concerns. You can make this drink low-calorie by changing some ingredients. Use a sugar substitute like stevia or monk fruit. These options can keep the sweet taste without extra calories. You can also add more strawberries for natural sweetness. They are low in calories and high in flavor. You can find dried hibiscus flowers in many stores. Look in health food stores or specialty spice shops. Brands like Frontier and McCormick often carry them. You can also buy hibiscus flowers online. Sites like Amazon and specialty food websites have good options. Check the product reviews to ensure quality. This blog post explained how to make a refreshing hibiscus lemonade. We covered the main ingredients, including fresh strawberries and dried hibiscus flowers. You learned step-by-step instructions, along with tips for sweetening and flavoring. We also explored variations, storage options, and answered common questions. In summary, making this drink is easy and fun. Enjoying your homemade hibiscus lemonade can bring a delightful twist to your drinks. It’s a tasty way to stay cool and healthy. Try it out and customize it to your taste!

Strawberry Hibiscus Lemonade Refreshing Summer Drink

Looking for a bright, refreshing drink to beat the summer heat? Strawberry Hibiscus Lemonade is a perfect choice! This vibrant

To make a Toasted Marshmallow Frappe, you’ll need simple but key ingredients. This drink combines coffee, milk, and sweet flavors into a smooth treat. Here's what you'll need for the full recipe: - 1 cup brewed coffee (cooled) - 1 cup milk (any kind or dairy alternative) - 2 tablespoons chocolate syrup - 2 tablespoons toasted marshmallow syrup (store-bought or homemade) - 1 cup ice cubes - Whipped cream, for topping - Mini marshmallows, for garnish - Additional chocolate syrup, for drizzling Each ingredient plays a special role in the flavor and texture. The brewed coffee gives a rich base. Milk adds creaminess, while chocolate syrup brings sweetness. The toasted marshmallow syrup offers a unique twist, giving that campfire vibe. Ice cubes help make the drink cold and refreshing. Using quality ingredients is key for a great frappe. Here are some suggestions: - Coffee: Use freshly brewed coffee for the best taste. Try a medium roast for balance. - Milk: Whole milk adds richness. Almond or oat milk works well for dairy-free options. - Syrups: Look for high-quality chocolate and toasted marshmallow syrups. You can find these at most grocery stores or online. - Whipped Cream: Fresh whipped cream is ideal, but store-bought can work, too. These tips ensure your Toasted Marshmallow Frappe is delightful and creamy. Enjoy every sip! First, gather all your ingredients. You need: - 1 cup brewed coffee (cooled) - 1 cup milk (any kind or dairy alternative) - 2 tablespoons chocolate syrup - 2 tablespoons toasted marshmallow syrup (store-bought or homemade) - 1 cup ice cubes - Whipped cream, for topping - Mini marshmallows, for garnish - Additional chocolate syrup, for drizzling Make sure your coffee is cool. This helps the frappe stay cold and refreshing. If you prefer, you can brew the coffee ahead of time and chill it in the fridge. Measure out your milk and syrups, so everything is ready to blend. Now it's time to blend! In a blender, combine the cooled coffee, milk, chocolate syrup, toasted marshmallow syrup, and ice cubes. Blend until smooth and frothy. You want the ice to break down well. After blending, taste the mixture. If you like it sweeter, add a bit more chocolate or toasted marshmallow syrup. Blend again briefly to mix. This step is key for a great flavor. Garnishing makes your frappe look amazing. Start by drizzling chocolate syrup inside a tall glass. This creates a lovely design. Next, pour your blended frappe into the glass. Top it off with a generous amount of whipped cream. For a touch of fun, toast mini marshmallows. You can do this using a kitchen torch or under the broiler until they are golden brown. Place the toasted marshmallows on top of the whipped cream. Finally, drizzle more chocolate syrup over everything. This adds sweetness and a beautiful finish. Enjoy your toasted marshmallow frappe! To get the best texture for your toasted marshmallow frappe, use a good blender. Blend the ice with the liquids until smooth. You want a creamy, frothy drink. If it is too thick, add a splash of milk. If it is too thin, add more ice. Aim for a milkshake-like consistency that is easy to sip. Sweetness is key to a great frappe. You can adjust the sweetness to fit your taste. Start with the two tablespoons of toasted marshmallow syrup. After blending, taste your frappe. If you want it sweeter, add more syrup or chocolate syrup. Just remember, a little goes a long way. Serve your frappe in a tall glass for a fun look. Drizzle chocolate syrup inside the glass before pouring the frappe. This adds a nice touch. Top with a generous amount of whipped cream. Toast mini marshmallows for a special garnish. Place them on top and drizzle more chocolate syrup for extra flair. Your drink will look great and taste even better! {{image_2}} You can switch up your toasted marshmallow frappe with different flavors. Try adding a splash of vanilla extract for warmth. Or, use hazelnut syrup for a nutty twist. Want a fruity vibe? Add a handful of strawberries or raspberries. These options can make your drink unique and tasty. If you want a vegan version, use plant-based milk. Almond, oat, or coconut milk work great. Instead of whipped cream, use coconut whipped cream for that same creamy texture. Ensure your chocolate syrup and toasted marshmallow syrup are dairy-free too. This way, everyone can enjoy this treat. You can enjoy this frappe cold or hot. For an iced version, follow the full recipe with ice cubes. If you prefer it hot, skip the ice and blend everything until warm. Pour it into a mug and top with whipped cream. This way, you can enjoy toasted marshmallow flavor no matter the season! If you have leftover frappe, store it in an airtight container. This keeps it fresh and tasty. Place it in the fridge and use it within two days. The taste is best when enjoyed fresh, but you can still save it for later. To reheat the frappe, pour it into a pot on low heat. Stir gently to warm it up without boiling. You want to keep that creamy texture, so avoid high heat. If it feels thick, add a splash of milk or coffee to thin it out. You can freeze the frappe for later fun! Pour it into ice cube trays or a freezer-safe container. When you want a treat, blend the frozen frappe cubes with a bit of milk. This gives you a quick, cold drink that tastes just as good. Enjoy the creamy delight anytime! Yes, you can use decaf coffee for this recipe. The flavor will still be great. Just brew your coffee as you usually do. Let it cool before blending. You won’t lose the taste you love. Toasted marshmallow syrup is a sweet flavor that tastes like roasted marshmallows. You can find it in stores or online. Look in the coffee section or the baking aisle. Many brands offer this flavor, so pick one you like. Making homemade toasted marshmallow syrup is simple. You will need sugar, water, and marshmallows. 1. In a pot, mix equal parts sugar and water. 2. Heat it gently until the sugar dissolves. 3. Add mini marshmallows and stir until they melt. 4. Let it cool and store it in a jar. This syrup works well in your Toasted Marshmallow Frappe. For the full recipe, check the details above. This blog post shared a complete guide to making the perfect frappe. We covered key ingredients, step-by-step instructions, and tips for texture and sweetness. You learned about variations, storage, and answered common questions. Remember, customizing your frappe can make it truly yours. Enjoy trying different flavors and serving styles. With practice, your frappe skills will shine, impressing everyone around you. Keep experimenting and make every sip count!

Toasted Marshmallow Frappe Delightful and Creamy Treat

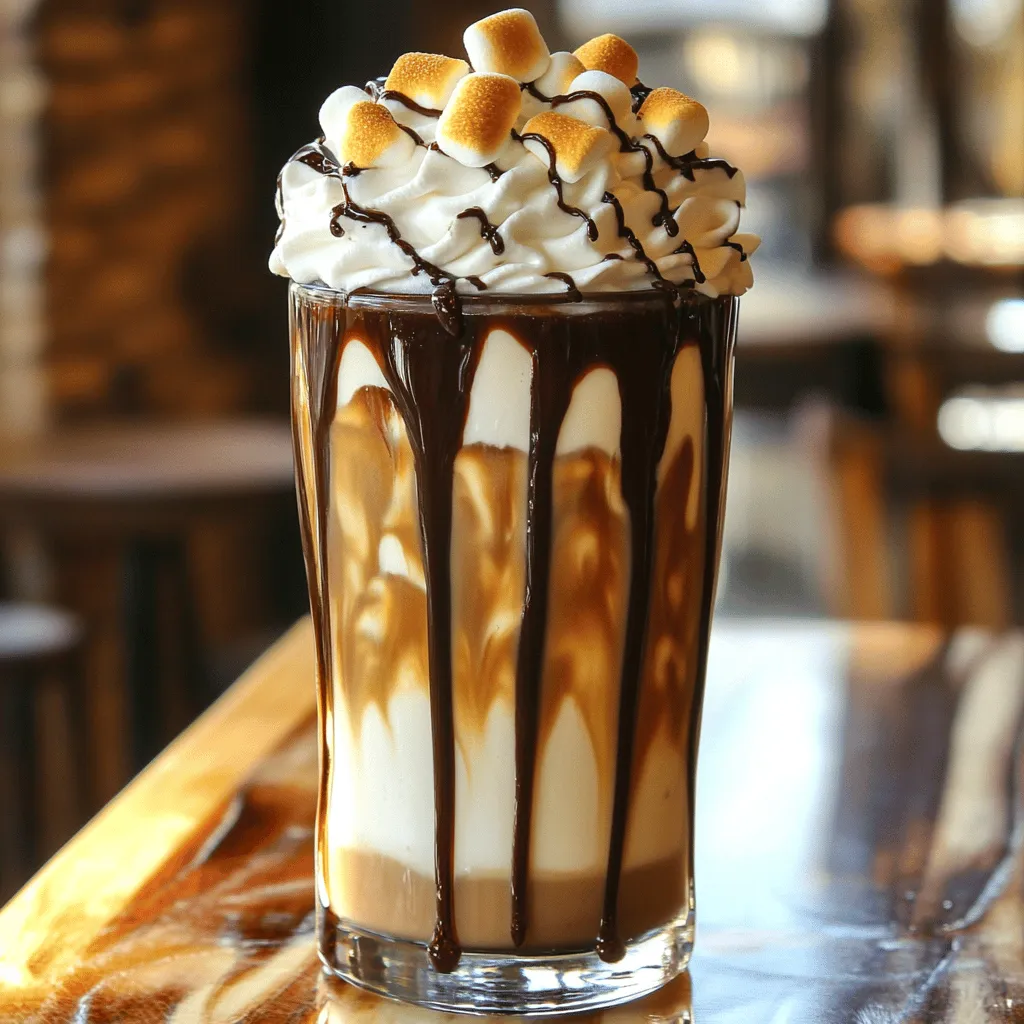
Craving a sweet treat that feels like a warm hug? Discover the joy of a Toasted Marshmallow Frappe! This delightful

Older posts
Newer posts
← Previous Page1 … Page8 Page9 Page10 … Page59 Next →

dsad

© 2025 Home Cooking Style • Built with GeneratePress

Our Policies

  • Copyright Policy
  • Cookie Policy
  • GDPR Policy
  • Privacy Policy
  • Disclaimer
  • Terms Of Use

More Information

  • Home
  • About
  • Contact
  • Appetizers
  • Dessert
  • Dinner
  • Drinks
©2025, Home Cooking Style About Back To Top