
Savory Breakfast Burritos Packed with Flavorful Goodness
Are you ready to elevate your breakfast game? In this article, I’ll share my secret recipe for savory breakfast burritos
Are you ready to elevate your breakfast game? In this article, I’ll share my secret recipe for savory breakfast burritos
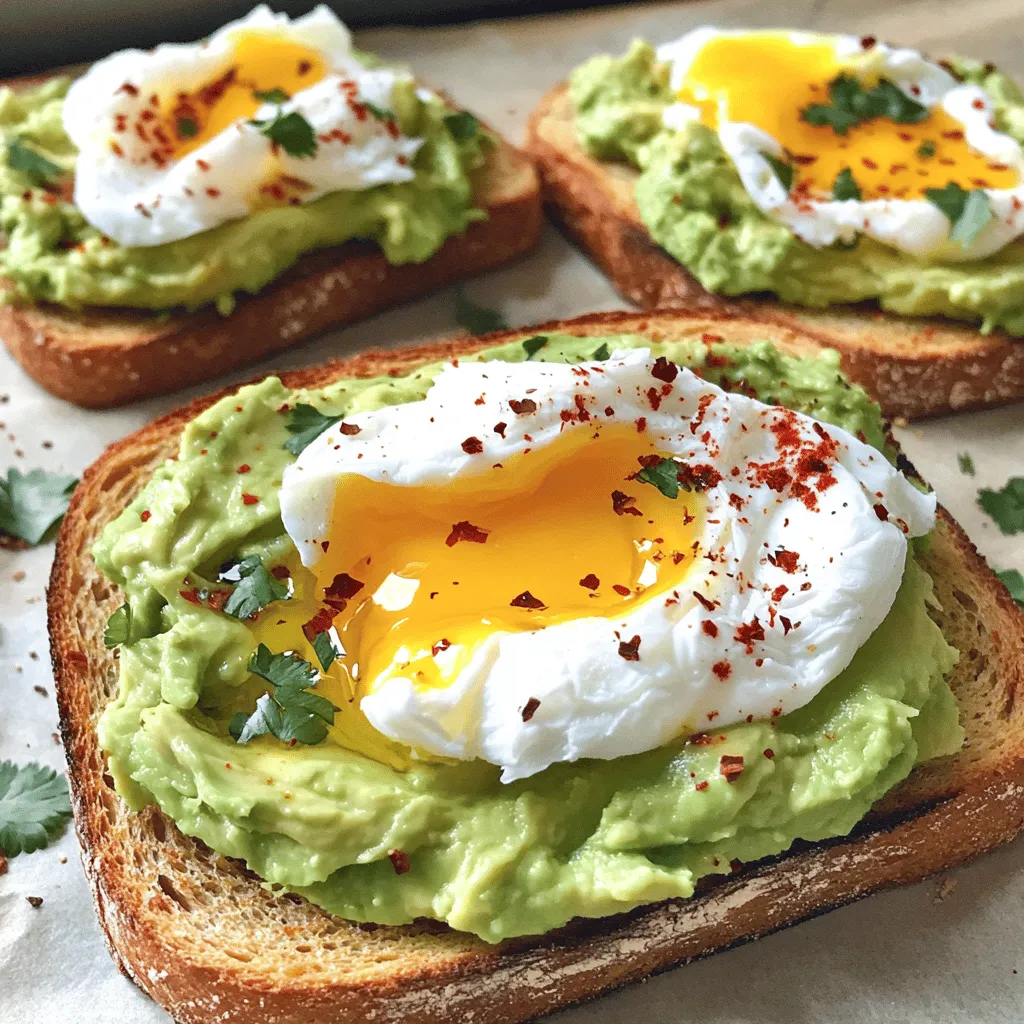
Looking for a simple and tasty meal? You’ve found it! Avocado toast with a poached egg is not only delicious
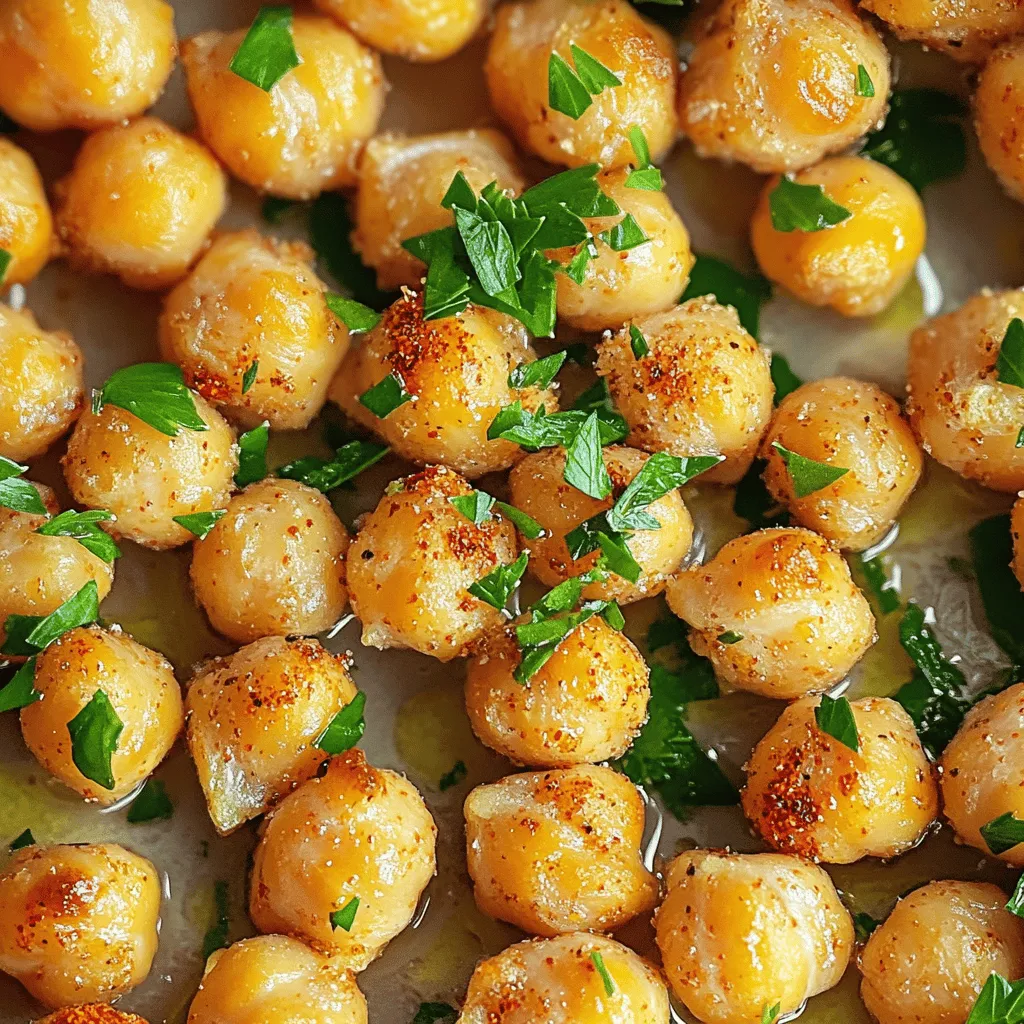
If you crave a snack that packs a punch, then you need to try Spicy Garlic Roasted Chickpeas. These crunchy
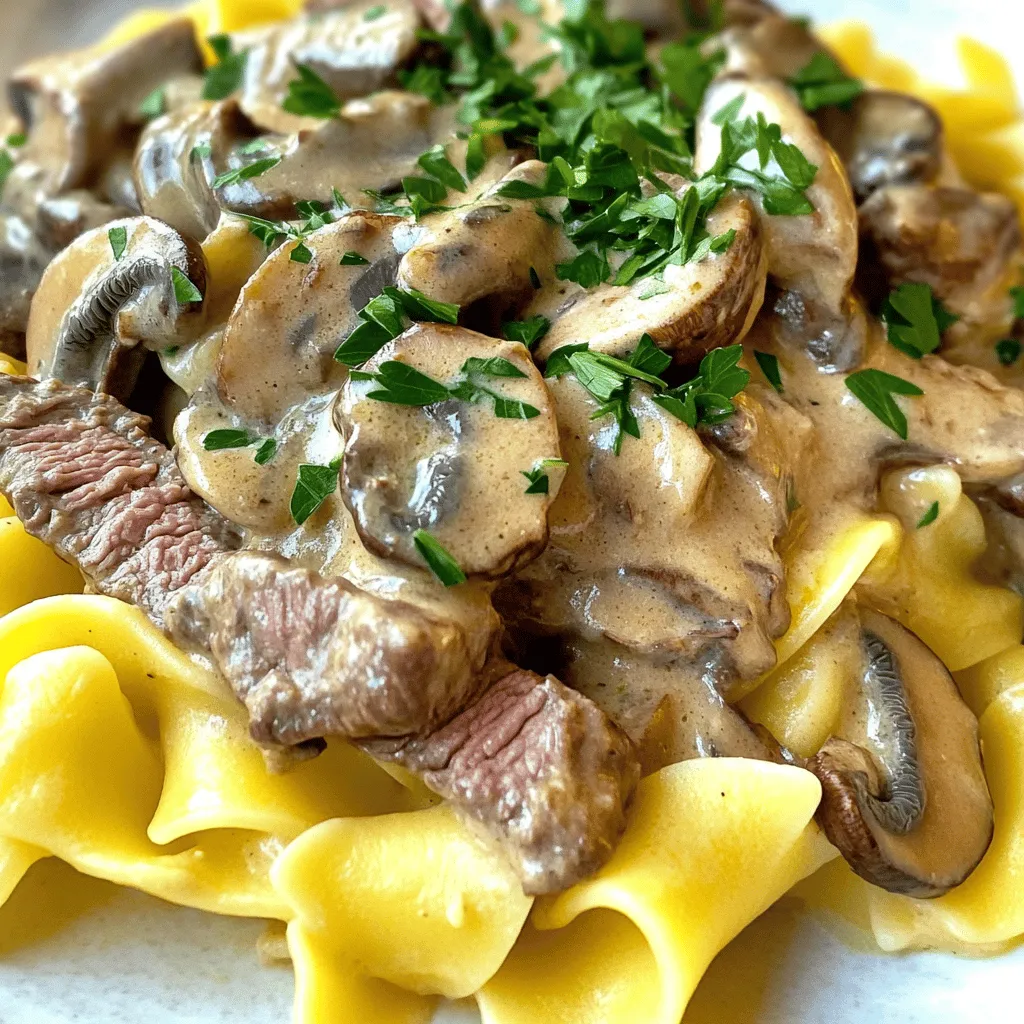
Craving a warm, comforting meal that requires minimal effort? Look no further than my Instant Pot Beef Stroganoff! In just
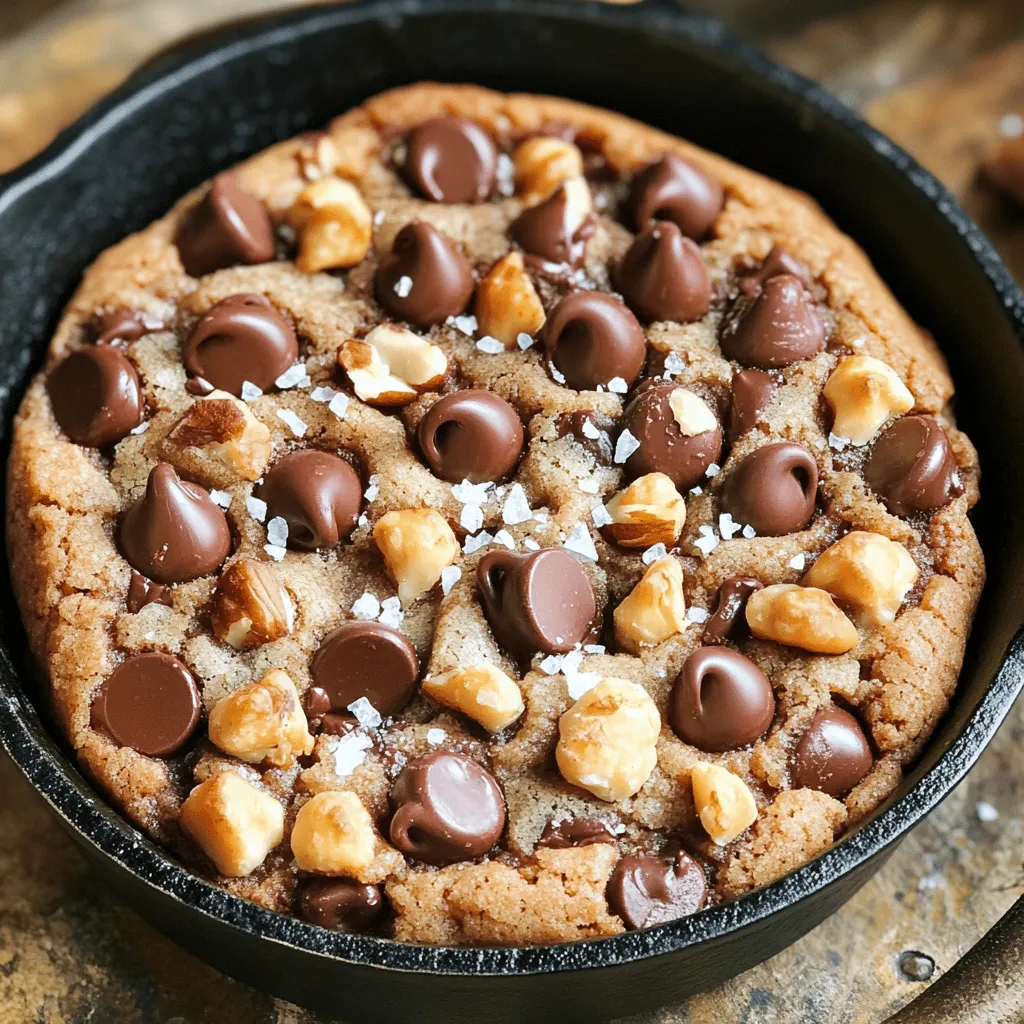
Welcome to the ultimate dessert treat: the Chocolate Chip Cookie Skillet! If you crave warm, gooey cookie goodness, this is
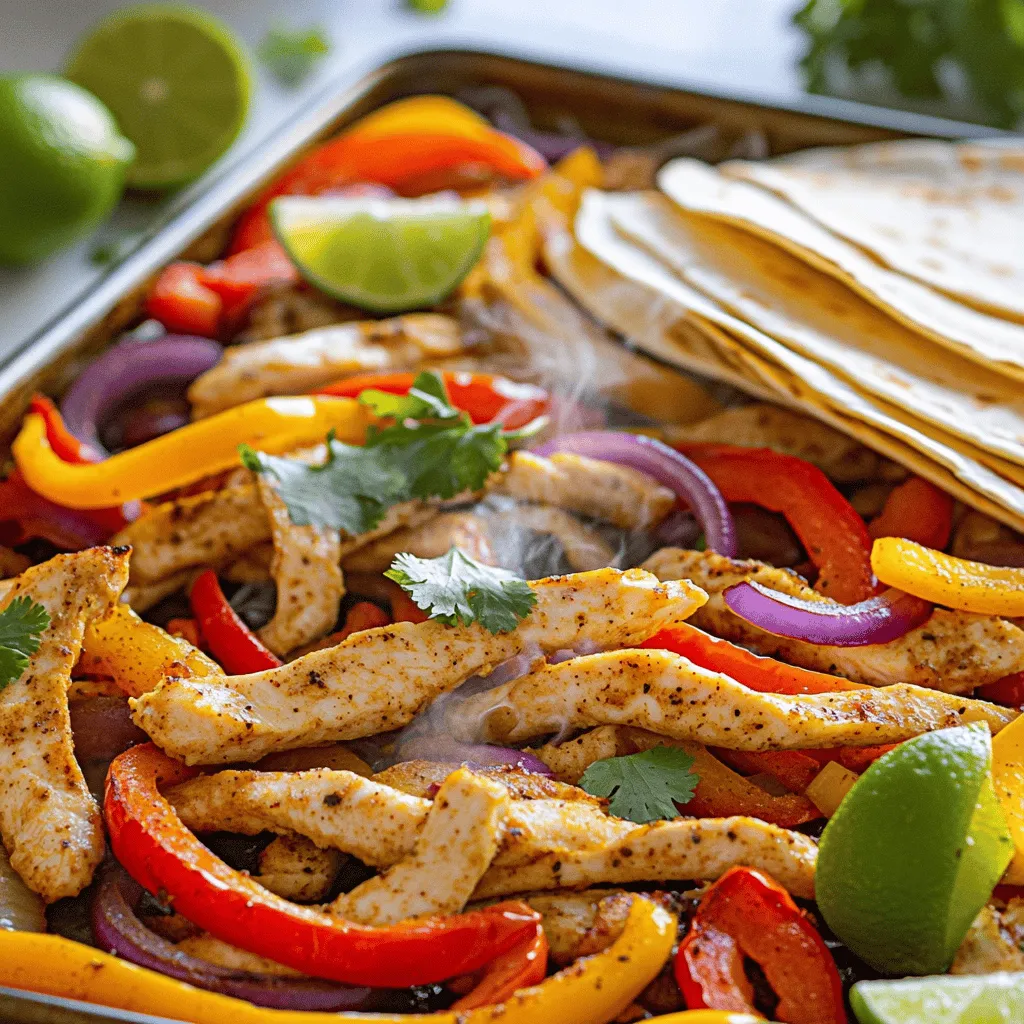
Ready to elevate your dinner game? My Sheet Pan Fajitas Packed with Flavorful Freshness will make your taste buds dance!

Looking for a quick, healthy meal that bursts with flavor? You’re in the right place! This Quick Veggie Stir-Fry is
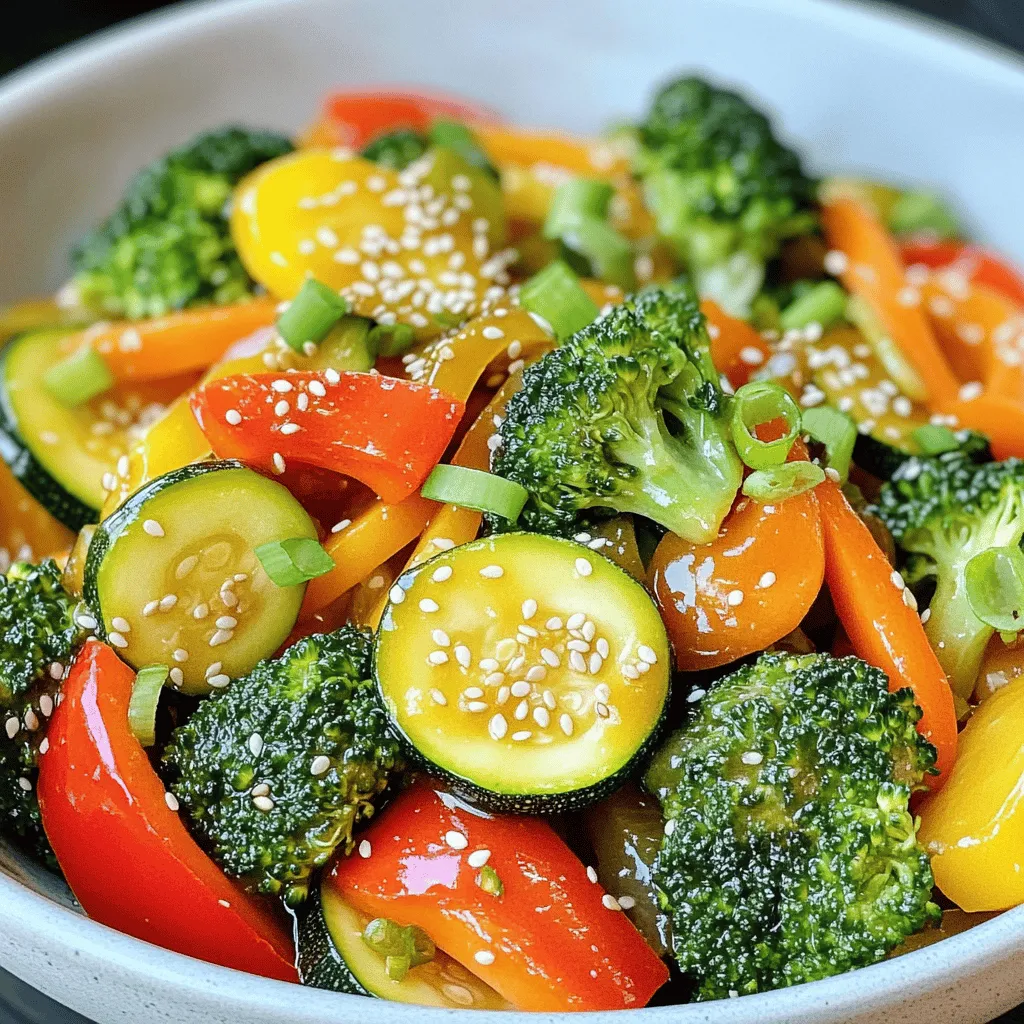
Looking for a quick, healthy meal that bursts with flavor? You’re in the right place! This Quick Veggie Stir-Fry is
. First, get your shrimp ready. If they are not already peeled and deveined, do that first. Next, pat the shrimp dry with paper towels. This step helps remove excess moisture. Dry shrimp will cook better and absorb more flavor. Now it’s time to heat the pan. In a large skillet, pour in the olive oil and set the heat to medium. Once the oil is warm, add the minced garlic. Sauté it for about 30 seconds. You want it to smell good but not burn. Next, add the shrimp to the skillet. Spread them out in a single layer. Sprinkle salt, pepper, smoked paprika, and red chili flakes on top. Cook the shrimp for 2 to 3 minutes until they start to turn pink. Then flip them over and cook for another 2 minutes. After the shrimp are almost done, pour in the lemon juice and add the lemon zest. Stir everything together. Toss the shrimp around for about a minute until they are fully cooked and coated in that tasty lemon garlic mixture. Now, we’ll add some color and nutrition. Toss in the baby spinach and halved cherry tomatoes. Cook for another 2 to 3 minutes. Stir occasionally until the spinach wilts and the tomatoes soften. Finally, take the pan off the heat. Taste the dish and adjust the seasoning if needed. Garnish with chopped parsley and serve with lemon wedges on the side. This adds a fresh burst of flavor. For the full recipe, check the details above. Enjoy your one-pan meal! When choosing shrimp, freshness matters a lot. You can pick between fresh and frozen shrimp. Fresh shrimp should smell like the ocean, not fishy. Look for firm, translucent flesh. If you go for frozen shrimp, choose ones that are flash-frozen. This keeps them fresh longer. Thaw frozen shrimp in the fridge overnight or under cold water. You can easily change the spice levels to fit your taste. If you like heat, add more red chili flakes. For a milder flavor, use less. Don't be shy to taste as you cook. This helps you find the right balance for your dish. You can also add other spices, like black pepper or lemon zest, for an extra kick. To keep shrimp tender, avoid overcooking them. Shrimp cook quickly, usually in just a few minutes. As soon as they turn pink and opaque, they’re done. If you cook them too long, they can become tough. Remember to remove them from heat right when they’re ready. This ensures a juicy, flavorful bite. {{image_2}} You can easily switch out shrimp for chicken or tofu. If using chicken, cut it into bite-sized pieces. Cook the chicken in the pan until it turns golden brown. This usually takes about 5-7 minutes. Then, follow the same steps for adding garlic, lemon, and veggies. For tofu, use firm or extra-firm types. Cut it into cubes and sauté until crispy on the outside. This will give you a nice texture and flavor. If you have dietary restrictions, you can make easy swaps. For a gluten-free option, check your spices and oils. Most are safe, but always read the labels. If you need dairy-free, skip the butter if used in other variations. You can also replace spinach with kale or Swiss chard. Both add great flavor and nutrients. Want to boost the taste? Add fresh herbs like basil or cilantro for a fresh kick. You can also toss in some capers for a briny flavor. If you like heat, try adding more chili flakes or a splash of hot sauce. Try lemon zest in the end for extra brightness. These simple changes can take your dish to a new level. Check out the Full Recipe for more tips and detailed steps. To keep your One-Pan Lemon Garlic Shrimp fresh, use airtight containers. Glass containers work well. They help keep the shrimp tasty and safe. Store the leftovers in the fridge for up to three days. Make sure to cool the dish to room temperature before sealing. When it's time to enjoy your leftovers, reheat them gently. Use a skillet over low heat. Add a splash of olive oil or a bit of water to avoid drying out the shrimp. Stir occasionally for even heating. This way, the shrimp keeps its nice texture and flavor. If you want to save some shrimp for later, freezing is a good option. Place the shrimp in a freezer-safe bag. Remove as much air as possible to prevent freezer burn. You can freeze it for up to three months. When ready to eat, thaw in the fridge overnight before reheating. It takes about 4-6 minutes to cook large shrimp. Cook them for 2-3 minutes on one side. Then flip and cook for another 2 minutes. You want them pink and firm. Yes, you can prep the shrimp and veggies ahead. Store them in the fridge for up to 24 hours. When ready to cook, follow the steps in the recipe. This dish tastes best when served fresh. You can serve this dish with various sides. Here are some great options: - Steamed rice or quinoa - Garlic bread - Mixed green salad - Roasted vegetables - Pasta with olive oil and herbs These sides will complement the flavors in the shrimp beautifully. Enjoy exploring your options! This blog post covered a simple yet tasty One-Pan Lemon Garlic Shrimp recipe. We explored the key ingredients, from fresh shrimp to vibrant veggies. I shared step-by-step instructions, tips for cooking perfectly, and ways to customize the dish. In final thoughts, this recipe is quick and adaptable for any meal. Enjoy every bite, and feel free to experiment to make it your own.](https://homecookingstyle.com/wp-content/uploads/2025/04/ce1bdca4-2a2f-4833-81a5-780b47a9fe6b.webp)
Looking for a quick and tasty dinner? You will love this One-Pan Lemon Garlic Shrimp recipe! Bursting with flavor, this

Looking to impress your guests or enjoy a tasty treat? This Creamy Spinach and Artichoke Dip is a flavorful delight
