Skip to content
DisclaimerTerms Of UseGDPR PolicyCookie Policy

Home Cooking Style

  • Home
  • Drinks
  • Appetizers
  • Dinner
  • Dessert
  • About
  • Contact
  • Privacy Policy
DisclaimerTerms Of UseGDPR PolicyCookie Policy

Amelia

To make Mediterranean Chickpea Salad, gather the following ingredients: - 1 can (15 oz) chickpeas, drained and rinsed - 1 cup cherry tomatoes, halved - 1 cucumber, diced - 1 red bell pepper, diced - 1/2 red onion, finely chopped - 1/2 cup Kalamata olives, pitted and sliced - 1/4 cup feta cheese, crumbled (optional) - 2 tablespoons fresh parsley, chopped - 1 tablespoon fresh mint, chopped - 3 tablespoons olive oil - 2 tablespoons lemon juice - 1 teaspoon dried oregano - Salt and pepper to taste When measuring ingredients, use these tips for accuracy: - Use a dry measuring cup for solids like chickpeas and vegetables. - Use a liquid measuring cup for olive oil and lemon juice. - Level off dry ingredients with a knife for precision. - If using feta, crumble it directly over the salad for easy measurement. You can swap ingredients if needed: - Use canned black beans instead of chickpeas for a different flavor. - Substitute grape tomatoes for cherry tomatoes if you prefer. - Use green bell pepper instead of red for a milder taste. - Replace Kalamata olives with green olives if you like. - For a dairy-free option, skip the feta cheese or use a vegan alternative. For the full recipe, check out Mediterranean Chickpea Delight 🥗. To make Mediterranean Chickpea Salad, gather all your ingredients first. This dish is quick and easy. You need fresh veggies and canned chickpeas. Rinsing the chickpeas helps remove extra salt. It also makes them taste better. 1. In a large bowl, mix the rinsed chickpeas, halved cherry tomatoes, diced cucumber, red bell pepper, and finely chopped red onion. 2. Add sliced Kalamata olives and crumbled feta cheese if you want. 3. In a small bowl, whisk together olive oil, lemon juice, dried oregano, salt, and pepper. Mix until smooth. 4. Pour the dressing over your chickpea mix. Gently toss everything to coat well. 5. Add freshly chopped parsley and mint. Toss again to spread the herbs evenly. 6. Let the salad rest for 15 minutes. This helps the flavors blend nicely. 7. Taste the salad. Adjust the seasoning if needed. You can add more lemon juice, salt, or pepper. To mix evenly, start with a bigger bowl. This gives you space to toss the salad. Use a gentle hand when mixing. This keeps the veggies from breaking apart. If you want, use two forks to lift and turn the salad. This method helps keep everything intact. To boost flavors, try adding a pinch of garlic powder. Fresh herbs like basil or dill can also elevate your salad. Using fresh lemon juice makes the taste bright. Adding a splash of balsamic vinegar gives depth. You can even experiment with spices like cumin or paprika for a twist. Serve your Mediterranean chickpea salad on a bed of greens for a vibrant look. You can also use it as a filling in pita bread. Top it with grilled chicken or shrimp for a hearty meal. Consider pairing it with whole-grain crackers or toasted bread for a crunchy side. One common mistake is not rinsing the chickpeas well. This can lead to a gritty texture. Another issue is adding too much salt. Taste your salad before adding more. Letting the salad sit too long can make it soggy. Aim for freshness by serving it soon after mixing. {{image_2}} You can switch things up in this salad easily. If you want a twist, try using black beans instead of chickpeas. This adds a nice color and taste. You can also use different vegetables, like zucchini or carrots. For a crunchy texture, add some radishes or jicama. If you do not have Kalamata olives, green olives work too. For a vegan option, skip the feta cheese or use a plant-based alternative. This salad is friendly for many diets. To make it vegan, simply leave out the feta cheese. It still tastes great without it. If you need a gluten-free dish, you are in luck. All the ingredients are naturally gluten-free. Just make sure any packaged items, like olives or dressings, are labeled gluten-free. You can adapt this salad to fit the seasons. In summer, add fresh corn or diced avocados for a creamy bite. In autumn, try roasted butternut squash cubes for warmth. You can also mix in seasonal herbs, like basil in summer or thyme in fall. This keeps the salad fresh and exciting all year round. For the full recipe, check out the Mediterranean Chickpea Delight 🥗. Store any leftover Mediterranean Chickpea Salad in an airtight container. This keeps it fresh and tasty. If you use a bowl, cover it tightly with plastic wrap. Avoid letting air in, as it can spoil the salad quickly. The salad lasts about 3 to 4 days in the fridge. After this time, the veggies may become soggy. Keep an eye on the texture and smell. If it smells off, it's best to throw it away. You can freeze Mediterranean Chickpea Salad, but it may change the texture. I recommend freezing only the chickpeas and dressing. Store them in a freezer-safe container. When you want to eat it, thaw it overnight in the fridge. Then, mix in fresh veggies and herbs before serving. Serve Mediterranean Chickpea Salad cold or at room temperature. I love presenting it in a large bowl. Top it with extra feta cheese and fresh mint for color. You can also add lemon wedges on the side. This makes it look pretty and adds more flavor when served. Yes, you can make this salad ahead of time. In fact, letting it sit improves the taste. I recommend making it about an hour before you want to eat. Just cover it and keep it in the fridge. If you plan to store it longer, hold off on adding the herbs. Add them right before serving for the best flavor. Mediterranean Chickpea Salad is very healthy! It is packed with nutrients. Chickpeas provide protein and fiber. Fresh veggies like tomatoes and cucumbers add vitamins and minerals. Olive oil offers healthy fats. Overall, it is a great choice for a light meal or side dish. You can enjoy it guilt-free! For the full recipe, check out Mediterranean Chickpea Delight. In this article, I covered key points to make a Mediterranean Chickpea Salad. We discussed the ingredients, their measurements, and substitutions. I provided step-by-step cooking instructions and tips for even mixing. Flavor enhancements and common mistakes made the process easier. I shared variations, including dietary adjustments and seasonal choices. Lastly, I covered storage tips to keep leftovers fresh. This salad is not just healthy; it's also fun to make and share. Enjoy making your Mediterranean Chickpea Salad your own!

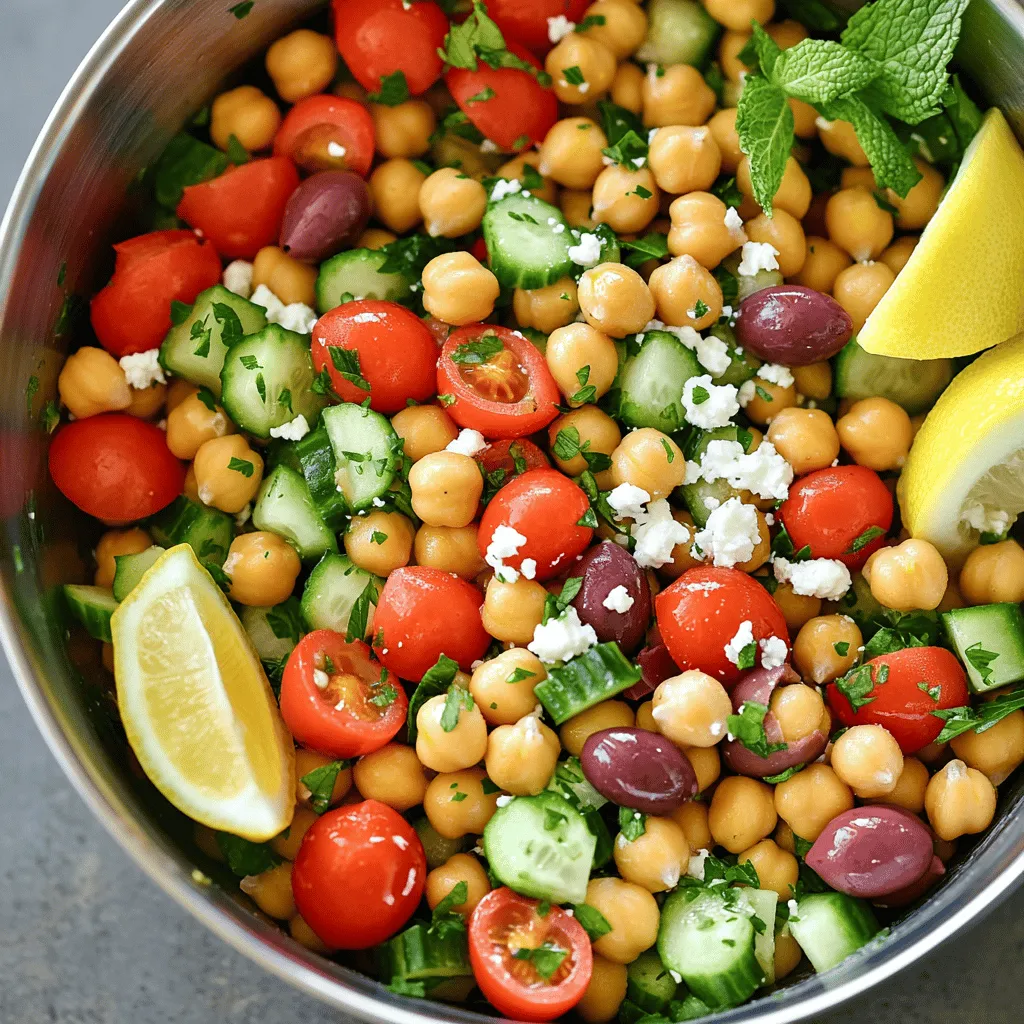
Mediterranean Chickpea Salad Fresh and Flavorful Recipe

Ready to dive into a bowl of sunshine? This Mediterranean Chickpea Salad brings fresh veggies and bold flavors together in

To make a healthy strawberry banana smoothie, gather these simple ingredients. This recipe creates two servings. - 1 ripe banana, frozen - 1 cup fresh strawberries, hulled and halved - 1/2 cup Greek yogurt (plain or vanilla) - 1 cup unsweetened almond milk (or any milk of choice) - 1 tablespoon honey or maple syrup (optional, adjust for sweetness) - 1 tablespoon chia seeds - A pinch of cinnamon (for extra flavor) - Ice cubes (optional, for a thicker smoothie) This mix packs flavor and nutrition. The frozen banana gives it a creamy texture. Fresh strawberries add vibrant color and taste. Greek yogurt boosts the protein content too. Use ripe and fresh produce for the best taste. The banana should be soft and sweet. Frozen bananas work well for creaminess. Fresh strawberries should be bright red and firm. Make sure to wash and hull them before using. Greek yogurt adds protein and creaminess. You can choose plain or vanilla based on your taste. If you prefer non-dairy options, almond milk works great. Other milk types, like oat or soy, may also suit your needs. They all blend well with the fruits. To start, gather your ingredients. You need: - 1 ripe banana, frozen - 1 cup fresh strawberries, hulled and halved - 1/2 cup Greek yogurt - 1 cup unsweetened almond milk - 1 tablespoon honey or maple syrup (optional) - 1 tablespoon chia seeds - A pinch of cinnamon - Ice cubes (optional) First, get your blender ready. Add the frozen banana and fresh strawberries. Next, scoop in the Greek yogurt. Pour the almond milk over the top. If you want it sweeter, now is the time to add honey or maple syrup. Toss in chia seeds and a pinch of cinnamon for flavor. Blend the mixture on high speed for about 30 seconds to 1 minute. Watch for a smooth and creamy texture. If the smoothie is too thick, simply add a bit more almond milk. Blend again until it reaches your desired consistency. If you like a thicker smoothie, add a few ice cubes. Blend again until everything is well mixed. Always taste your smoothie before serving. You can adjust the sweetness at this stage too. For a thinner smoothie, increase the almond milk. Blend and check again. If you want it sweeter, add more honey or maple syrup. Blend for a few seconds to mix. When you are happy with the taste and texture, pour the smoothie into glasses. Enjoy it right away for the best flavor. You can find the full recipe above. To make your smoothie creamy, start with frozen banana. It gives a thick base. Add Greek yogurt for extra creaminess. Blend on high until smooth. If it’s too thick, add a splash of almond milk. For an even thicker drink, toss in ice cubes. Choose ripe bananas for natural sweetness. Fresh, bright strawberries add flavor and color. Greek yogurt packs in protein and probiotics. Use unsweetened almond milk to keep it healthy. Always taste as you blend. Adjust sweetness with honey or maple syrup, if needed. Don’t skip the frozen banana; it’s key for texture. Avoid using too much liquid at first. Adding too many ingredients can make it hard to blend. Make sure to blend long enough for a smooth finish. And remember, enjoy it fresh for the best taste! {{image_2}} You can change up the fruits in your smoothie for new tastes. Try using mango for a tropical vibe. Pineapple adds a sweet and tangy touch. Blueberries or raspberries work well too. Each fruit gives your smoothie a different flavor and color. Mix and match to see what you like best! Superfoods can make your smoothie even healthier. Consider adding spinach for extra vitamins without changing the taste. Kale is another great option. You can also try adding flaxseeds for omega-3 fatty acids. They blend well and boost nutrition. Just a tablespoon can make a big difference! If you want a sweeter smoothie, try different sweeteners. Agave syrup is a good choice. You can use stevia if you want a no-calorie option. Dates are also a natural sweetener that blends nicely. Each sweetener offers a unique flavor that can change your smoothie. Adjust the amount to match your taste! For more tips and ideas, check out the Full Recipe for the Berry Bliss Smoothie. If you have leftover smoothie, store it in an airtight container. Glass jars work great. Keep the jar in the fridge. Use it within 24 hours for the best taste. When you are ready to drink, shake or stir well. The smoothie may separate, but that’s normal. You can freeze your smoothie ingredients to keep them fresh. Slice and freeze bananas. Wash and hull strawberries, then freeze them. Put them in freezer bags. Use these frozen fruits later for quick smoothies. Just blend them straight from the freezer. You can also freeze the smoothie itself. Pour it into ice cube trays. Once frozen, transfer the cubes to a bag. This makes it easy to grab a quick snack! Smoothies taste best when fresh, but they can last. In the fridge, a smoothie stays good for about one day. If you freeze it, the quality lasts up to three months. Keep an eye on color and smell. If it looks or smells off, it’s best to toss it. For the best flavor, drink or use your smoothie soon after making it. Yes, you can use frozen strawberries. They add a nice chill to your drink. Frozen strawberries also save time. Just toss them in the blender with the other ingredients. They blend well and still taste fresh. Strawberries are rich in vitamin C and fiber. They help boost your immune system. Bananas provide potassium and energy. They can help keep you full. Together, they make a tasty and healthy snack. To make this smoothie dairy-free, simply swap out Greek yogurt. Use a dairy-free yogurt made from almond or coconut. You can also skip the yogurt altogether. Just add more almond milk to keep it creamy. This way, you still enjoy a great taste without dairy. For the complete recipe, check the Full Recipe section above. You learned how to make a great smoothie, with tips and tricks to get the best taste. We covered fresh ingredients, blending steps, and smart storage. Remember to pick the right fruits and avoid common mistakes for the best result. Explore variations to keep things exciting. Smoothies can be fun and healthy when you experiment. Keep these ideas in mind to create your own perfect blend. Enjoy your smoothie journey!

Healthy Strawberry Banana Smoothie Refreshing Recipe

Looking for a quick and yummy treat? This Healthy Strawberry Banana Smoothie checks all the boxes! Packed with fresh fruits,

To make Zucchini Noodles with Pesto, gather these fresh and healthy ingredients: - 4 medium zucchinis - 1 ripe avocado - 1 cup fresh basil leaves - 1/4 cup pine nuts, toasted - 2 cloves garlic, minced - 1/4 cup nutritional yeast - 2 tablespoons lemon juice - 1/4 cup olive oil + extra for drizzling - Salt and pepper to taste - Cherry tomatoes, halved - Grated Parmesan or vegan alternative Each ingredient plays a key role in this dish. Zucchini serves as the base, offering a light, crunchy texture. The avocado brings creaminess to the pesto. Fresh basil adds a burst of flavor, while pine nuts provide a nice crunch. Garlic gives it a savory kick. Nutritional yeast adds a cheesy taste without dairy, and lemon juice brightens the overall profile. The olive oil ties it all together, creating a smooth sauce. Salt and pepper enhance the flavors, and cherry tomatoes add a pop of color and sweetness. For the complete cooking process, check the Full Recipe. To start, I use a spiralizer or a vegetable peeler to create the zoodles. If you prefer ribbons, the peeler works great. Once cut, I let them sit in a colander to drain excess moisture. This step is key to avoid sogginess later. Next, I grab my food processor. I add the ripe avocado, fresh basil, toasted pine nuts, minced garlic, nutritional yeast, lemon juice, and olive oil. I blend until smooth and creamy. If the pesto is too thick, I add a splash of water until it reaches the right consistency. Now, I take a large bowl and combine the drained zoodles with the avocado pesto. I toss gently to ensure every noodle gets coated evenly. Careful here! I want to keep the zoodles intact. If you like your zoodles warm, I briefly sauté them. In a non-stick skillet, I cook them over medium heat for about 2-3 minutes. I watch them closely. I want them warm but still slightly crunchy. Finally, I divide the zoodles into serving bowls. I top them with halved cherry tomatoes for a burst of color. A light drizzle of olive oil adds richness. If I want, I sprinkle grated Parmesan or a vegan alternative on top. Enjoy this fresh dish right away for the best taste! To get the best texture for your zoodles, use fresh zucchinis. Look for ones that are firm and shiny. Spiralize them quickly after cutting to keep them crisp. If you want thin noodles, a vegetable peeler works great. To avoid soggy noodles, drain the zoodles in a colander for a few minutes. This helps remove excess water. You can even sprinkle a little salt on them to draw out moisture. Pat them dry before tossing with the pesto. To make your pesto pop, try adding a pinch of red pepper flakes. This gives a nice kick without being too spicy. You can also mix in some fresh parsley or mint for new flavors. When it comes to salt, taste your pesto as you mix. A little salt can balance the flavors perfectly. If it tastes flat, adjust with more salt or a squeeze of lemon juice. For a fun plate, twist your zoodles into nests. This makes them look fancy and fun. Use a large spoon to help shape them. Garnish with colorful cherry tomatoes for a bright contrast. A sprinkle of grated Parmesan or vegan cheese adds nice texture. Drizzle a bit of olive oil on top for a shiny finish. For the Full Recipe, follow the steps carefully to ensure a delightful dish! {{image_2}} You can change the flavor of your pesto by swapping nuts or greens. Instead of pine nuts, try walnuts or cashews. You might also use spinach or arugula instead of basil. Each option brings a new taste to your dish. To make your pesto creamier, add cheese. Grated Parmesan adds a salty bite. If you want a vegan option, use nutritional yeast for a similar flavor. For a heartier meal, add protein to your zucchini noodles. Grilled chicken or shrimp works well. These proteins cook quickly and pair nicely with the fresh flavors. If you prefer plant-based options, try chickpeas or tofu. Both add protein and are easy to mix in. You can serve zucchini noodles in many ways. For a twist, place them over cooked pasta. This adds more texture and flavor. You can also use zoodles as a side dish or salad base. Top with fresh veggies or your favorite dressing. This option makes for a light and healthy meal. For the full recipe, check out the Zesty Zucchini Noodles with Avocado Pesto. To keep your zoodles fresh, store them in an airtight container. Place a paper towel in the container to absorb moisture. This helps prevent sogginess. Use the zoodles within 2-3 days for the best taste. For the pesto, store it in a small jar. Add a thin layer of olive oil on top. This layer keeps the pesto vibrant and prevents browning. Pesto stays fresh for about a week in the fridge. When reheating zoodles, use a gentle method. Try sautéing them in a pan over low heat. This warms them without making them mushy. Heat for about 2-3 minutes, just until warm. Avoid using the microwave if possible, as it can make them watery. Eat leftover zoodles within 2 days for the best flavor and texture. You can freeze pesto for later use. Just pour it into ice cube trays. Once frozen, transfer the cubes to a freezer bag. This way, you can thaw just what you need. Pesto lasts up to 3 months in the freezer. However, I do not recommend freezing zucchini noodles. They lose their texture when thawed. It's best to enjoy zoodles fresh. For the full recipe, check out the link above. Zucchini noodles, or zoodles, are long strands made from zucchinis. You can create them using a spiralizer or a peeler. They serve as a low-carb alternative to pasta. Zoodles are fresh, light, and packed with nutrients. You can enjoy them raw or cooked. They soak up flavors well, making them great with sauces like pesto. Yes, you can make zucchini noodles ahead of time. However, it's best to store them properly. Place the zoodles in a colander to drain moisture. Cover them with a clean cloth or paper towel to absorb any extra water. Keep them in the fridge for up to two days. When you’re ready to eat, toss them with your sauce. To keep zucchini noodles from getting soggy, follow these tips: - Salt the zoodles: Sprinkle salt over them and let them sit for 10-15 minutes. This draws out moisture. - Use a colander: Drain the zoodles in a colander after spiralizing. - Don't overcook: If you sauté zoodles, do it briefly. Just a few minutes will keep them firm. If you don't have pine nuts, you can use other nuts or seeds. Good options include: - Walnuts: They add a rich, earthy taste. - Almonds: They give a slight sweetness. - Pumpkin seeds: They offer a unique flavor and crunch. These substitutes work well in pesto, keeping it tasty and creamy. Absolutely! This zucchini noodles with pesto recipe is great for meal prep. You can make the pesto and zoodles separately. Store the pesto in an airtight container. Keep the zoodles in the fridge. When you're ready to eat, mix them together. This dish stays fresh and delicious for a few days. Check out the Full Recipe for more details! Zucchini noodles, or zoodles, offer a fresh twist on pasta. This blog reviewed key ingredients, step-by-step instructions, and helpful tips. You learned how to create a tasty avocado pesto and how to serve it beautifully. Remember, adjusting flavors and adding proteins can elevate your dish. Storing and reheating zoodles properly keeps them fresh. With these insights, you can enjoy zoodles that are both fun to make and healthy to eat. Embrace your creativity and make this dish your own!

Zucchini Noodles with Pesto Fresh and Healthy Dish

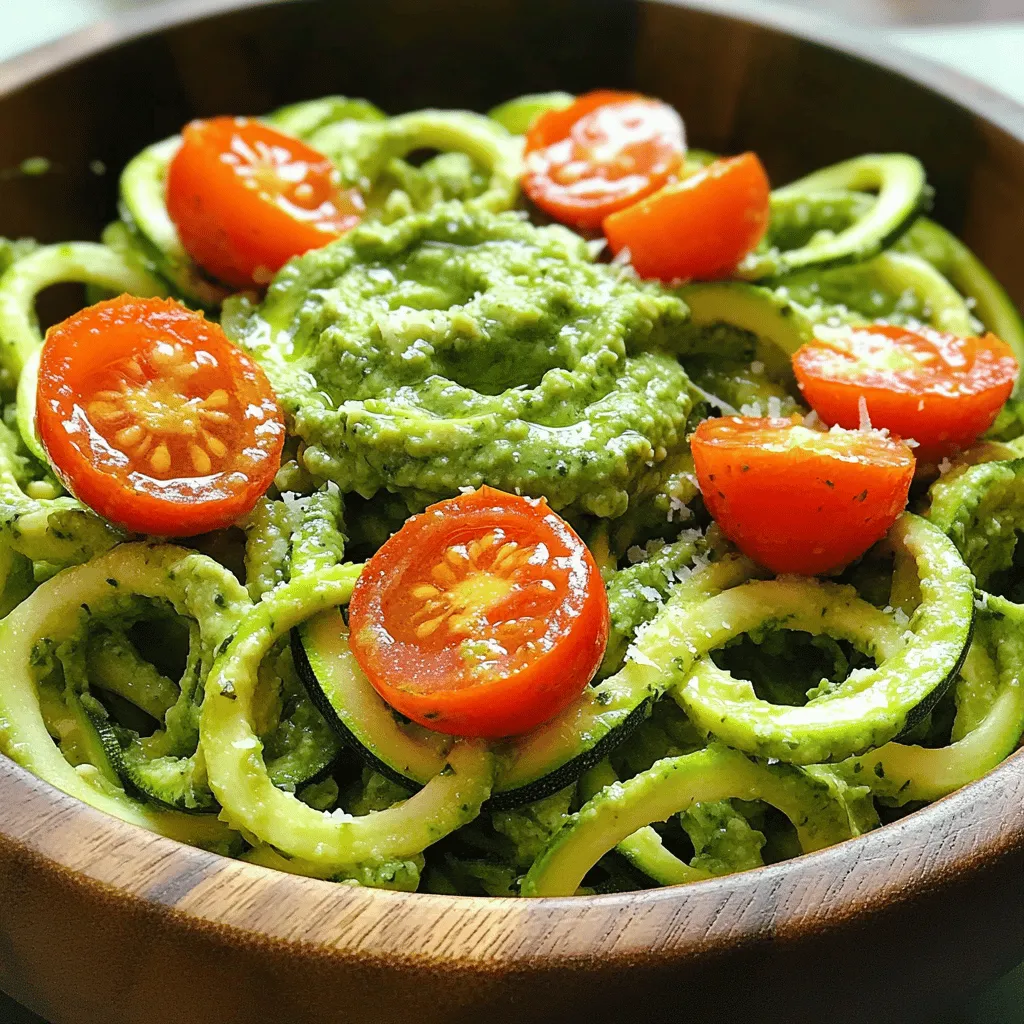
Looking for a bright and healthy meal? Zucchini Noodles with Pesto combines fresh flavors and fun textures, making it perfect

To make tasty cauliflower buffalo wings, you need a few key items: - 1 large head of cauliflower, cut into bite-sized florets - 1 cup all-purpose flour (or gluten-free flour) - 1 teaspoon garlic powder - 1 teaspoon onion powder - 1 teaspoon smoked paprika - 1/2 teaspoon salt - 1/4 teaspoon black pepper - 1 cup water (adjust as needed) These ingredients create a crispy coating for the cauliflower. The flour gives it structure, while the spices add flavor. For the sauce and to dip, consider these options: - 1 cup buffalo sauce (store-bought or homemade) - 2 tablespoons melted vegan butter (or regular butter) - Suggested garnishes: fresh parsley or chopped green onions The buffalo sauce brings heat and flavor. Mixing it with vegan butter adds richness. You can serve the wings with celery sticks and your choice of blue cheese or ranch dressing for extra flavor. To prepare your cauliflower buffalo wings, gather the following tools: - Baking sheet and parchment paper - Mixing bowls and whisk - Measuring cups and spoons Using parchment paper helps with cleanup. Mixing bowls make it easy to combine ingredients. Measuring cups and spoons ensure you get the right amounts for the best taste. For the full recipe, check out the complete guide! Preheating the oven Start by preheating your oven to 450°F (230°C). This step is key for crispy wings. While the oven heats up, line a baking sheet with parchment paper. This makes cleanup easy and helps the cauliflower not stick. Cutting the cauliflower into florets Take a large head of cauliflower and remove the leaves. Cut the cauliflower into bite-sized florets. Ensure they are even in size. This helps them cook evenly. You want pieces that are not too small, so they hold up well during baking. Mixing dry ingredients In a mixing bowl, combine 1 cup of all-purpose flour, 1 teaspoon of garlic powder, 1 teaspoon of onion powder, 1 teaspoon of smoked paprika, 1/2 teaspoon of salt, and 1/4 teaspoon of black pepper. Mix these dry ingredients well. This blend gives the wings a great flavor. Achieving the perfect batter consistency Gradually add 1 cup of water to the dry mix. Whisk until you get a smooth, thick batter. It should be thick enough to coat the cauliflower but not so thick that it drips off. If needed, adjust with a bit more water or flour. Initial baking process Dip each cauliflower floret into the batter. Make sure each piece is well-coated. Shake off any extra batter. Place the florets evenly on the baking sheet. Bake in the preheated oven for 20 minutes. This makes them crispy. Final baking steps after coating in sauce While the cauliflower bakes, mix 1 cup of buffalo sauce with 2 tablespoons of melted butter. After 20 minutes, take the baking sheet out. Toss the baked cauliflower in the buffalo sauce until well coated. Return the coated wings to the oven for another 10-15 minutes. This final bake allows the sauce to set and adds extra crispiness. To make the crispiest cauliflower buffalo wings, you need a good batter. Use a thick batter to coat each floret well. This helps create a crispy crust. Bake the wings on parchment paper to prevent sticking. Space them out on the sheet. This allows hot air to circulate around them. To prevent sogginess, do not overcrowd the baking sheet. If they touch, steam builds up. Steam makes wings soft instead of crispy. You can also bake them longer if needed. Just watch them closely to avoid burning. Adding spices to the batter can boost flavor. Try adding cayenne pepper for heat. You can also mix in cumin or Italian herbs. This makes the batter more exciting and tasty. For alternative sauces, try BBQ or teriyaki. You can also use a honey mustard sauce. These different sauces keep the meal fresh and fun each time you make it. Serving and garnishing can make your wings look great. Arrange the wings on a platter with celery sticks. Add a bowl of blue cheese or ranch dip in the center. This makes a nice display for parties. For plating suggestions, use large plates or bowls. Stack the wings high for an enticing look. Sprinkle fresh parsley or green onions on top for color. A good presentation makes your dish even more inviting. For the full recipe, check [Full Recipe]. {{image_2}} You can play with sauces to change the flavor. For a sweet twist, try honey mixed with hot sauce. This sweet and spicy mix is a crowd-pleaser. You can also make a barbecue version! Just swap buffalo sauce for your favorite BBQ sauce. Your guests will love these options. Dipping sauces can make a big difference too. Ranch dressing is a classic choice. It cools the heat from buffalo sauce. Blue cheese dressing is another great option. Its creamy texture pairs well with the spicy wings. If you need gluten-free options, use gluten-free flour. Almond flour or chickpea flour works well. These flours keep the wings crispy. They still taste amazing! For vegan-friendly options, use plant-based butter. This keeps your wings tasty without dairy. Also, make sure your buffalo sauce is vegan. Many brands offer delicious vegan choices. You can add fun ingredients to the batter. Try mixing in herbs like parsley or cilantro. They add fresh flavor to each bite. You can also toss in chopped vegetables like spinach or bell peppers for extra nutrition. Experimenting with seasonings is also fun. Add cayenne for more heat or smoked paprika for a deeper flavor. The more you play, the more unique your wings will be. Enjoy creating your own version of cauliflower buffalo wings! For the full recipe, check out the link above. To keep your cauliflower buffalo wings fresh, store them in an airtight container. Make sure the wings cool down before sealing. They will last in the fridge for about 3 to 5 days. If you want to enjoy them later, refrigeration is the best option. The best way to reheat cauliflower wings is in the oven. Preheat your oven to 375°F (190°C). Spread the wings on a baking sheet. Heat them for about 10 to 15 minutes until they feel warm and crispy. You can use a microwave, but it may make them soft. To keep them crispy, avoid the microwave if you can. You can freeze cauliflower wings before or after baking. If you freeze them before baking, coat them in batter and place them on a baking sheet. Once they’re frozen, transfer them to a freezer bag. If you freeze after baking, let them cool first. Use the same method for storage. For thawing, place them in the fridge overnight. You can also reheat them directly from the freezer. Just add a few extra minutes to the baking time. Enjoy your tasty cauliflower buffalo wings anytime! For detailed steps, check the Full Recipe. To make cauliflower buffalo wings gluten-free, use gluten-free flour. Some great options are almond flour and chickpea flour. You can also use a store-bought gluten-free flour blend. These flours work well in the batter. They give a nice crunch and flavor. Just follow the same steps in the recipe. You will enjoy tasty wings without gluten! Yes, you can use an air fryer for cauliflower buffalo wings. First, prepare the batter as usual. Then coat the cauliflower florets. Place them in a single layer in the air fryer basket. Cook at 400°F (200°C) for about 12-15 minutes. Check halfway through and shake the basket. This method gives you a crispy texture without much oil. Some great dipping sauces for cauliflower buffalo wings include ranch dressing and blue cheese dressing. They both balance the spicy heat well. You can also try honey mustard for a sweet twist. If you want something different, try a creamy avocado dip. Each sauce adds unique flavors to your wings! The spice level of the cauliflower buffalo wings can vary. The heat comes from the buffalo sauce used. If you like less spice, use a milder buffalo sauce. You can also mix in some yogurt or sour cream to tone it down. For more heat, add extra hot sauce to the recipe. Adjust it to your taste! Cauliflower buffalo wings are a healthier option than traditional wings. They are lower in calories and fat. Cauliflower is high in fiber and vitamins. This makes them a great choice for health-conscious eaters. You can enjoy the flavor without the guilt. Plus, they are plant-based, making them good for vegan diets. Check the full recipe for detailed nutritional info! In this blog post, we explored making delicious cauliflower buffalo wings. We covered essential ingredients like cauliflower, flour, and seasonings. You also learned about tasty sauces, equipment needed, and the step-by-step process from preparation to baking. We shared tips for the best texture and flavor variations to try. Finally, we discussed storage methods for leftovers to enjoy later. By following these steps and tips, you can create a tasty, healthier snack that everyone will love. Enjoy your cooking!

Cauliflower Buffalo Wings Tasty and Easy Recipe

Looking for a tasty twist on classic buffalo wings? Try these Cauliflower Buffalo Wings! You won’t believe how fun and

To make this dish, you'll need simple yet flavorful items. Here are the key ingredients: - 4 bone-in, skin-on chicken thighs - 2 tablespoons olive oil - 2 lemons (1 juiced, 1 sliced) - 3 cloves garlic, minced - 1 teaspoon dried oregano - 1 teaspoon dried thyme - 1 teaspoon smoked paprika - Salt and pepper to taste These ingredients create a tasty marinade that infuses the chicken with zesty flavor. The lemon juice brightens the dish, while the herbs add depth. Pairing the chicken with fresh veggies brings color and nutrition. I recommend these: - 1 bell pepper (red or yellow), chopped - 1 zucchini, sliced - 1 cup cherry tomatoes, halved These vegetables roast nicely, soaking up the flavors from the chicken. The bell pepper adds crunch, while the zucchini and tomatoes provide a tender bite. Having the right tools makes cooking easier and more fun. Here’s what you’ll need: - A large sheet pan - A mixing bowl - A whisk - A sharp knife - A cutting board These tools help you mix, chop, and arrange your meal perfectly. A sheet pan is key to cooking everything evenly, making cleanup a breeze. For the full experience, check out the Full Recipe for detailed steps. Start by making the marinade. In a bowl, mix together the olive oil, lemon juice, minced garlic, oregano, thyme, smoked paprika, salt, and pepper. Whisk until it blends well. This mix adds a great flavor to the chicken. Place the chicken thighs in a large bowl or a ziplock bag. Pour the marinade over the chicken. Use your hands to massage the marinade into the chicken. This helps the flavors soak in. Let the chicken marinate for at least 30 minutes. If you have time, marinate it for up to 4 hours in the fridge. While the chicken marinates, prepare the veggies. In another bowl, toss the chopped bell pepper, zucchini, and cherry tomatoes with a drizzle of olive oil, salt, and pepper. After marinating, take the chicken out. On a large sheet pan, place the marinated chicken in the center. Surround it with the seasoned veggies. Top the chicken with lemon slices for extra zest. Now, it’s time to bake! Preheat your oven to 400°F (200°C). Place the sheet pan in the oven and bake for 30 to 35 minutes. The chicken should reach an internal temperature of 165°F. The veggies will be tender and flavorful. Once done, let it rest for 5 minutes. Garnish with fresh parsley before serving. Enjoy this delicious meal! For the complete recipe, check out the Full Recipe section. To get the best flavor from your chicken, marinate it well. Use a large bowl or ziplock bag. This helps the chicken absorb all the tasty herbs and spices. I suggest marinating for at least 30 minutes. If you can, let it sit for up to 4 hours in the fridge. This time allows the lemon and herbs to work their magic. Always massage the marinade into the meat for even coverage. The more flavor, the better! Cut your veggies into similar sizes. This helps them cook evenly. I like using bell peppers, zucchini, and cherry tomatoes. Toss them in olive oil, salt, and pepper before adding them to the pan. Spread them out in a single layer around the chicken. This gives them room to roast nicely. Stir them halfway through cooking for even browning. You’ll end up with colorful, tender veggies that complement the chicken perfectly. When it’s time to serve, think about how you want to present your dish. For a rustic look, serve right from the sheet pan. It adds a homey vibe. If you prefer a polished look, plate the chicken and veggies separately. Drizzle any leftover juices from the pan over the top. It adds a nice touch and packs more flavor. Garnish with fresh parsley for a pop of color. Enjoy your beautiful meal! {{image_2}} You can change up the veggies to suit your taste. Asparagus adds a nice crunch. Carrots bring sweetness and color. Broccoli works well for a hearty bite. You might also try cauliflower or green beans. Mix and match to find your favorite combo! If you want to switch the chicken, use salmon or shrimp. Both cook fast and soak up flavors. Tofu is a great choice for a plant-based meal. Just ensure it gets a good marinade. These proteins will give you new tastes with the same cooking method. Feel free to experiment with the marinade! Try adding mustard for tang or honey for sweetness. A splash of soy sauce adds depth. You can even use fresh herbs like basil or cilantro. Each change creates a new dish with its own flair. For the full recipe, check out the complete guide above. To store leftovers, let the chicken and veggies cool first. Then, place them in an airtight container. Remember to keep the chicken and veggies together for best flavor. Store in the fridge for up to three days. If you want to keep them longer, freezing is a good option. When ready to eat, reheat in the oven for the best taste. Preheat your oven to 350°F (175°C). Place the chicken and veggies on a baking sheet. Cover them with foil to keep them moist. Heat for about 15-20 minutes, or until warm. You can also use a microwave, but the oven keeps the chicken crispy. If you want to freeze your meal, do it right after cooking. Let it cool completely, then place it in freezer-safe bags or containers. Squeeze out as much air as you can to avoid freezer burn. This dish can stay fresh in the freezer for up to three months. When you’re ready to enjoy it, thaw in the fridge overnight before reheating. For more detailed instructions, check the Full Recipe. You can check if the chicken is done by using a meat thermometer. Insert it into the thickest part of the chicken thigh. It should read at least 165°F (75°C). If you don’t have a thermometer, cut into the chicken. The juices should run clear, not pink. Yes, you can prepare the chicken and marinade a few hours in advance. Marinate the chicken for at least 30 minutes for the best flavor. You can also chop the veggies and store them separately in the fridge. This way, all you need to do is bake it when you’re ready. This dish pairs well with simple sides. You can serve it with rice, quinoa, or a fresh salad. Garlic bread or a crusty baguette can add a nice touch too. For a colorful plate, consider adding more roasted veggies or a side of steamed broccoli. For the full recipe, check out the earlier section. Lemon herb chicken pairs well with fresh veggies and simple tools for a tasty meal. We covered how to make the marinade, marinate the chicken, and bake everything for even cooking. I shared tips on serving and storing leftovers for later. You can even explore variations with different veggies or marinades. Cooking can be fun and easy if you follow these steps. Enjoy your delicious lemon herb chicken and veggies, knowing you have the right method for success!

Sheet Pan Lemon Herb Chicken and Veggies Delight

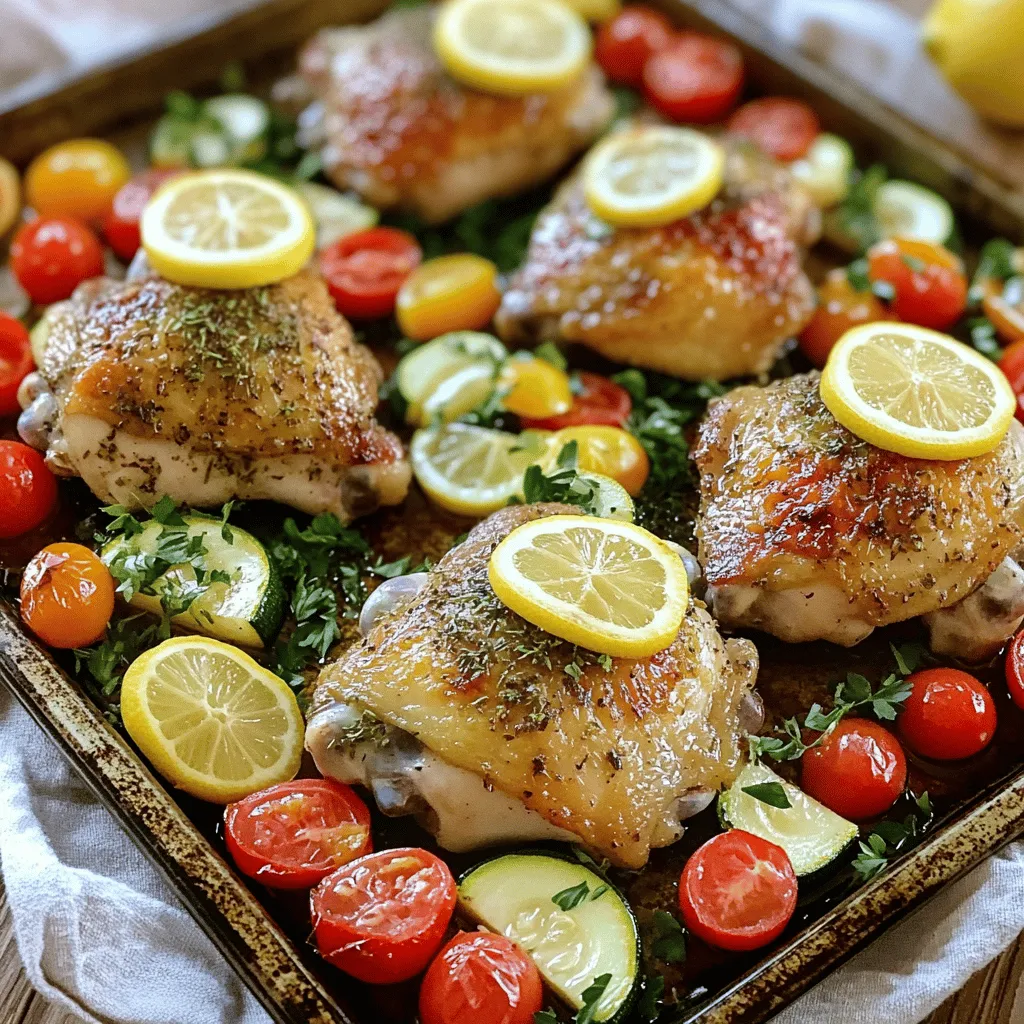
Are you ready to enjoy a delicious and easy meal? This Sheet Pan Lemon Herb Chicken and Veggies Delight is

To make a tasty quinoa tabbouleh, gather these fresh ingredients: - 1 cup uncooked quinoa - 2 cups water or vegetable broth - 1 cup fresh parsley, finely chopped - 1/2 cup fresh mint, finely chopped - 1 medium cucumber, diced - 2 medium tomatoes, diced - 1/4 red onion, finely chopped - 1/4 cup lemon juice (about 2 lemons) - 2 tablespoons olive oil - Salt and pepper to taste Quinoa is a great source of protein and fiber. It keeps you full and satisfied. - Parsley adds vitamins A, C, and K. It also gives a fresh taste. - Mint helps with digestion and adds a cool flavor. - Cucumber is hydrating and low in calories, perfect for a light dish. - Tomatoes are full of antioxidants. They add color and sweetness. - Red onion offers a slight bite and is rich in nutrients. - Lemon juice brightens the dish and adds vitamin C. - Olive oil provides healthy fats that are good for your heart. When shopping, look for vibrant colors and firm textures. Here are some tips: - Parsley and mint: Choose bright green leaves without wilting. - Cucumbers: They should be firm and smooth, with no soft spots. - Tomatoes: Pick ones that feel heavy for their size and have no blemishes. - Red onions: Select ones that are firm and dry, avoiding any soft or sprouted bulbs. Fresh ingredients make your quinoa tabbouleh shine. For the full recipe, check out [Full Recipe]. Start by rinsing 1 cup of uncooked quinoa under cold water. This step removes its natural bitterness. In a medium saucepan, mix the rinsed quinoa with 2 cups of water or vegetable broth. Bring it to a boil over medium heat. Once it boils, lower the heat to low and cover the pot. Cook for about 15 minutes. The quinoa is ready when it’s fluffy and all the liquid is absorbed. After cooking, remove the pot from the heat and let it cool. While the quinoa cools, wash and chop the vegetables. Dice 1 medium cucumber and 2 medium tomatoes. Finely chop 1/4 of a red onion. In a large mixing bowl, combine the diced cucumber, tomatoes, and onion. Next, add 1 cup of finely chopped fresh parsley and 1/2 cup of finely chopped fresh mint to the bowl. These herbs give your tabbouleh its fresh flavor. In a small bowl, whisk together 1/4 cup of lemon juice, 2 tablespoons of olive oil, salt, and pepper to taste. This dressing adds a zesty kick to your dish. Once the quinoa has cooled, fluff it with a fork and add it to the vegetable mix. Pour the dressing over the quinoa and vegetables. Stir gently to mix everything well. Make sure each bite is flavorful. Taste your tabbouleh and adjust the seasoning if needed. For the full recipe, refer to the instructions provided. Enjoy your fresh and healthy quinoa tabbouleh! To get fluffy quinoa, rinse it first. This removes bitterness. Use two cups of water or broth for each cup of quinoa. Bring this mix to a boil. Once boiling, reduce the heat to low and cover it. Cook for about 15 minutes. When done, let it sit off the heat. This step helps the grains expand. Fluff it gently with a fork before mixing it with other ingredients. Fresh herbs make a big difference in flavor. Use a lot of parsley and mint for a fresh taste. You can also add a touch of garlic or cumin for depth. If you like spice, add some red pepper flakes. Always taste as you go. Adjust flavors to make it your own. A dash of salt enhances all the flavors, so don’t skip it! You can change the recipe to fit your taste. If you don't like cucumbers, try bell peppers or carrots. Prefer a tangier taste? Add more lemon juice. Want it creamier? Consider adding a dollop of yogurt. This dish is flexible, so feel free to experiment. Your quinoa tabbouleh should reflect your taste. The goal is to make it delicious for you! For the full recipe, check out the [Full Recipe]. {{image_2}} If you want to mix it up, you can use other grains instead of quinoa. Bulgur is a popular choice in traditional tabbouleh. It has a chewy texture and can absorb flavors well. You can also try farro or brown rice for a hearty bite. Another option is to use cauliflower rice for a low-carb twist. Just pulse fresh cauliflower in a food processor until it resembles rice. To make your quinoa tabbouleh even more exciting, think about adding feta cheese or olives. Feta brings a creamy, tangy flavor that pairs well with the fresh herbs. Olives add a briny touch that enhances the overall taste. You can also try adding roasted red peppers for a sweet and smoky flavor. Mix and match these ingredients to suit your taste! Quinoa is naturally gluten-free, making it perfect for those with gluten issues. To keep it vegan, just skip any dairy products. Instead of feta, try using a vegan cheese or avocado for creaminess. You can also add chickpeas for protein and a nice texture. These changes give your dish a new life while keeping it healthy and delicious. For the full recipe, check out the Healthy Quinoa Tabbouleh Delight 🥗. To keep your quinoa tabbouleh fresh, store it in an airtight container. Place the container in the fridge right after serving. This helps lock in the flavors. If you notice extra moisture, use a paper towel to absorb it. This simple step prevents sogginess. You can keep quinoa tabbouleh in the fridge for about three to four days. After that, the veggies may lose their crunch. Always check for any signs of spoilage before eating. If it smells off or looks strange, it’s best to toss it. If you want to store it for longer, freezing is a great option. First, let the tabbouleh cool down completely. Then, portion it into freezer-safe bags or containers. Make sure to remove as much air as possible before sealing. You can freeze it for up to three months. When ready to eat, thaw it in the fridge overnight. Stir well before serving. For the best taste, enjoy it fresh! If you want the full recipe, check out the Full Recipe section. The best way to cook quinoa for tabbouleh is simple. First, rinse the quinoa under cold water. This step removes its natural bitterness. Then, in a medium saucepan, combine the rinsed quinoa and water or broth. Bring it to a boil over medium-high heat. Once boiling, reduce the heat, cover, and let it simmer for about 15 minutes. The quinoa should absorb all the liquid. After cooking, let it cool, then fluff it with a fork. This method gives you light, fluffy quinoa that works perfectly in your tabbouleh. Yes, you can make quinoa tabbouleh ahead of time! It tastes even better after resting. Prepare your tabbouleh a few hours in advance or even the night before. Just store it in the fridge in an airtight container. The flavors will blend nicely as it chills. However, I suggest adding the dressing just before serving. This keeps everything fresh and vibrant. Quinoa tabbouleh is very healthy. It is packed with nutrients and flavor. Quinoa itself is a great source of protein and fiber. It contains all nine essential amino acids. This makes it a complete protein, perfect for vegetarians. The fresh herbs, like parsley and mint, offer vitamins and minerals. The vegetables add more fiber and hydration. Lemon juice and olive oil provide healthy fats and antioxidants. Overall, this dish supports good health and well-being. You can find the full recipe linked above for your cooking pleasure! Quinoa Tabbouleh is a tasty and healthy dish you can make easily. I shared the key ingredients, how to cook quinoa, and tips for fresh veggies. Don’t forget flavor tricks and variations to suit your taste. Storing leftovers the right way helps keep your dish fresh longer. Making this dish can be fun and good for you. Dive in and enjoy a nutritious meal that you can customize!

Healthy Quinoa Tabbouleh Fresh and Flavorful Dish

Looking for a fresh, flavorful dish that packs a nutritional punch? Let’s dive into Healthy Quinoa Tabbouleh! This vibrant salad

- Ground chicken and vegetables - 1 lb (450g) ground chicken - 1 red bell pepper, diced - 1 carrot, grated - 3 cloves garlic, minced - 1 tablespoon fresh ginger, minced - 2 green onions, sliced - Sauces and seasonings - 1 tablespoon vegetable oil - 1/4 cup soy sauce (or tamari for gluten-free) - 2 tablespoons fish sauce (optional for an extra kick) - 1 tablespoon sriracha (adjust for spice level) - 1 tablespoon brown sugar - Juice of 1 lime - Accompaniments and garnishes - 1 head of butter or romaine lettuce, separated into leaves - Fresh cilantro and mint for garnish These ingredients create a burst of flavor. The ground chicken forms a rich base. The garlic and ginger add depth. The bell pepper and carrot provide crunch. The sauces bring heat and sweetness, while lime juice adds brightness. Lettuce leaves create a fresh wrap. Cilantro and mint finish the dish with freshness. For the Full Recipe, follow the steps to create this delightful dish. Start by preparing the garlic and ginger. You will want to mince them well. This step adds a fresh kick to your dish. Next, heat your skillet over medium-high heat. Add one tablespoon of vegetable oil. Once the oil is hot, toss in your minced garlic and ginger. Sauté them for about 30 seconds until they smell amazing. Now it’s time to brown the ground chicken. Add one pound of ground chicken to the skillet. Cook it for about 5 to 7 minutes. Break it apart with a spatula as it cooks. You want it to be fully browned and no longer pink. After the chicken is browned, add the diced red bell pepper and grated carrot. Stir them in and cook for another 2 to 3 minutes. You want the veggies to soften just a bit. This adds color and crunch to your filling. In a small bowl, mix your sauces together. Add 1/4 cup of soy sauce, 2 tablespoons of fish sauce (if using), 1 tablespoon of sriracha, 1 tablespoon of brown sugar, and the juice of one lime. Whisk these until they blend well. Pour this sauce over your chicken and vegetable mixture. Stir everything together to coat well. Let it heat through for about 2 minutes. This will ensure all the flavors meld together nicely. Now you can use the lettuce leaves as your wraps. Take a head of butter or romaine lettuce and separate the leaves. Each leaf will hold the filling perfectly. To serve, spoon a generous amount of the spicy chicken mixture into each lettuce leaf. Place them on a platter for everyone to enjoy. Garnish with fresh cilantro and mint for a bright touch. If you want to level up your presentation, add lime wedges on the side. This will bring extra zing to each bite. For the full recipe, check out the provided instructions. Enjoy making this delightful dish! - Sautéing tips for flavor enhancement: Start by heating your oil in a large skillet. Add garlic and ginger first. They release their oils and give a strong base flavor. Sauté for about 30 seconds. This step brings out the best taste. - Recommended cookware and utensils: Use a non-stick skillet. It helps prevent sticking and makes clean-up easy. A wooden spatula works wonders for breaking up the chicken and stirring the mix. - Ensuring chicken is cooked perfectly: Cook the ground chicken until it's browned all over. This usually takes 5 to 7 minutes. Break it apart with a spatula as it cooks. Check to ensure there’s no pink left. This means it's safe to eat. - Spicing up or toning down heat: If you like it spicy, add more sriracha. For a milder dish, reduce the sriracha. You can also mix in some coconut milk for creaminess. It tones down the spice nicely. - Using alternative sauces or sweeteners: Want a different taste? Try tamari instead of soy sauce for gluten-free. You can swap brown sugar with honey or maple syrup. This change adds a unique sweetness. - Adding extra vegetables for texture: You can toss in more veggies like mushrooms or zucchini. They add crunch and nutrition. Plus, they soak up the sauce well, giving you more flavor in each bite. - Creative serving platters: Serve your lettuce wraps on a colorful platter. Add lime wedges and fresh herbs. This makes your dish look bright and appealing. It invites everyone to dig in. - Suggestions for sauces on the side: Offer extra sauces like hoisin or peanut sauce. They provide more flavor options. Your guests can customize their wraps just how they like. - Ways to incorporate lime wedges: Place lime wedges around the platter. Guests can squeeze fresh lime juice over their wraps. This adds a refreshing zing that pairs nicely with the spicy chicken. For the full recipe, check out the Spicy Thai Chicken Lettuce Wraps 🥬 recipe above. {{image_2}} You can easily swap the ground chicken for tofu or tempeh if you want a vegetarian dish. Both options soak up flavors well and offer a great texture. If you prefer beef or pork, that works too. Just ensure that you adjust the cooking time to get those proteins nice and brown. For gluten-free options, use tamari sauce instead of regular soy sauce. This keeps the taste but makes it safe for those with gluten issues. You can also play with different herbs. Try basil or cilantro for fresh hints. You might even add some chopped peanuts for a crunchy twist. Mix in other Asian ingredients like hoisin sauce or sesame oil for a unique flavor. You can also fuse this dish with other cuisines. Think about adding avocado for a Mexican flair or using curry paste for an Indian touch. The options are endless, and each adds a fun twist to your wraps. To keep your spicy Thai chicken lettuce wraps fresh, store them in the fridge. Place the filling in an airtight container. Wrap the lettuce leaves separately to keep them crisp. Properly stored, the filling lasts about three days in the fridge. Yes, you can freeze the chicken filling! Make sure it cools completely before placing it in a freezer-safe container. This way, you avoid ice crystals forming. To reheat, let the filling thaw overnight in the fridge. Heat it on the stove over low heat until warm. You can get creative with any leftover filling. Try making a spicy chicken salad with fresh greens, or toss it into a grain bowl with rice or quinoa. You can also use it as a topping for nachos or in a stir-fry for a quick meal. Enjoy exploring these tasty options! For the full recipe, check out the Spicy Thai Chicken Lettuce Wraps. Butter lettuce and romaine lettuce both work well for wraps. Butter lettuce is soft and easy to fold. It has a mild taste that lets the filling shine. Romaine has a crisp texture and a slightly stronger flavor. It holds up better if you pile on the filling. Choose butter for a tender bite, or romaine for a crunchy experience. Yes, you can prep these wraps ahead. Cook the chicken mixture in advance and store it in the fridge. This keeps the flavors fresh and ready. You can also wash and separate the lettuce leaves early. Just keep them in a sealed container to stay crisp. When you are ready to eat, reheat the chicken mixture and assemble the wraps. These wraps pair nicely with many side dishes. Try serving them with jasmine rice or a simple salad. A cool cucumber salad adds a nice crunch. For drinks, consider iced tea or a light beer. These options enhance the meal and balance the spice. Yes, these wraps are a healthy choice. Ground chicken is lean and full of protein. The veggies add fiber and vitamins. Each wrap is low in calories but full of flavor. This makes them a great option for a light meal. If you want to know more about the recipe, check out the Full Recipe for details. You learned how to make Spicy Thai Chicken Lettuce Wraps. We covered ingredients, cooking steps, tips, and variations. You can swap proteins, mix in new flavors, and store leftovers easily. These wraps are not only fun to make but also tasty and healthy. Remember, cooking is about finding what you love. Enjoy these wraps with friends and family. Don’t be afraid to try your own twists. Happy cooking!

Spicy Thai Chicken Lettuce Wraps Flavorful Delight

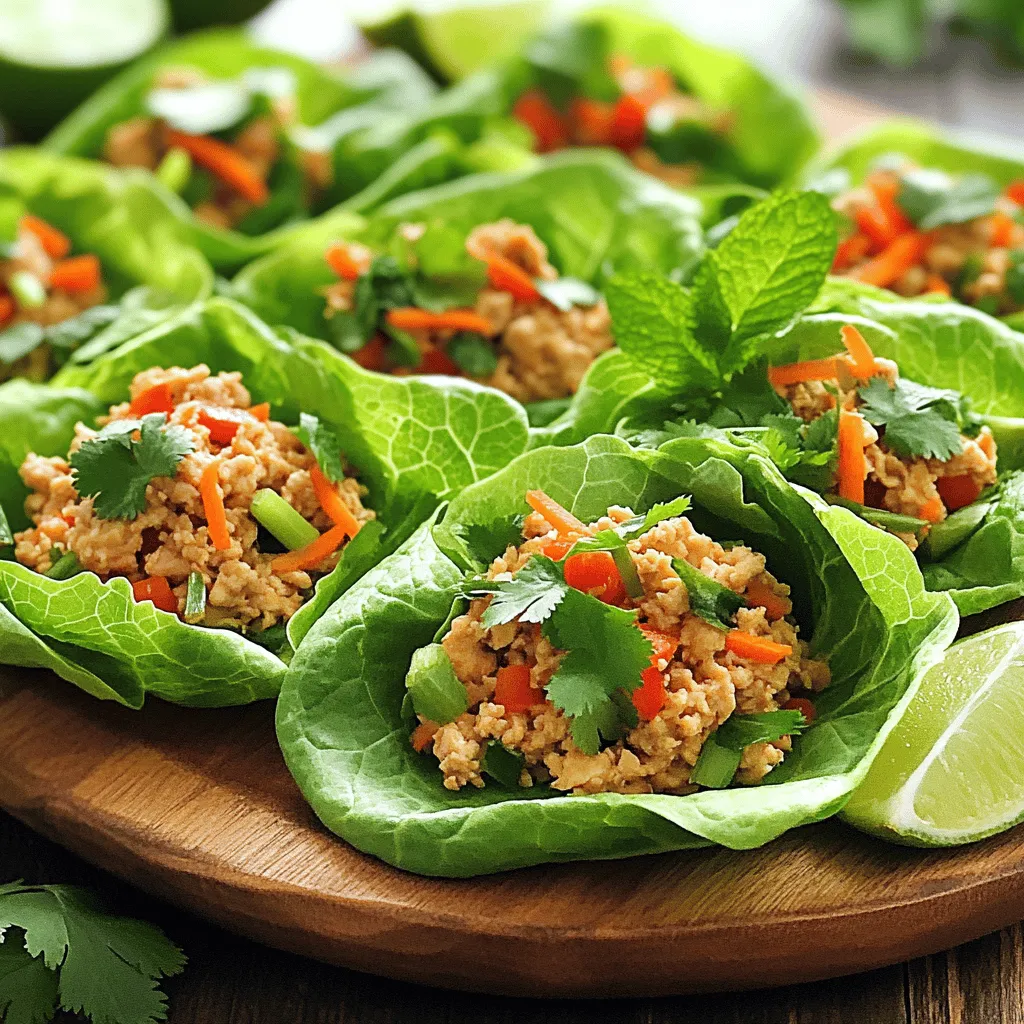
Are you ready for a meal that bursts with flavor? Spicy Thai Chicken Lettuce Wraps offer a delicious mix of

This recipe uses simple, tasty ingredients. Here’s what you need: - 1 cup coconut milk (canned or carton) - 1/4 cup chia seeds - 2 tablespoons maple syrup or honey (adjust to taste) - 1/2 teaspoon vanilla extract - 1 ripe mango, diced (reserve some for topping) - Fresh mint leaves for garnish (optional) - Coconut Milk: This creamy milk adds richness and a tropical flavor. It’s dairy-free, making it great for many diets. - Chia Seeds: These seeds pack a nutritional punch. They are high in fiber, protein, and omega-3 fatty acids. They help the pudding thicken and add a fun texture. - Maple Syrup or Honey: These sweeteners add natural sweetness. You can adjust the amount to fit your taste. - Vanilla Extract: This extract brings warmth and a hint of sweetness. It enhances the overall flavor. - Mango: A ripe mango brings a fresh, sweet taste. It’s also rich in vitamins A and C. - Mint Leaves: These leaves add a refreshing touch. They can brighten the dish and provide a lovely color. If you have dietary needs, there are easy swaps: - Coconut Milk: Use almond milk or oat milk for a different flavor. - Chia Seeds: Flaxseeds can work as a substitute, but adjust the amount. - Maple Syrup or Honey: Use agave syrup or stevia for a lower-calorie option. - Mango: Swap with other fruits like berries or bananas for variety. - Mint: If you dislike mint, you can skip it or use basil for a twist. You can find the full recipe in the recipe section above. Enjoy making this bright, tropical dish! Start by grabbing a medium bowl. Add 1 cup of coconut milk to the bowl. Then, pour in 2 tablespoons of maple syrup or honey. You can adjust the sweetness to fit your taste. Next, add 1/2 teaspoon of vanilla extract. Whisk the mixture until it is well combined. This step is key for a smooth base. Now, stir in 1/4 cup of chia seeds. Make sure they are evenly mixed in. Cover the bowl with plastic wrap or a lid. This keeps the pudding fresh while it chills. Place the covered bowl in the fridge. Let it chill for at least 4 hours, or overnight if you can wait. This time allows the chia seeds to soak up the coconut milk. They will expand and create a thick, creamy pudding. Once the chilling time is over, take the bowl out. Give it a good mix to break any clumps. Your pudding should now be thick and ready to layer. Grab some clear glasses or jars for serving. Start by adding a layer of chia pudding to the bottom. Next, add a layer of diced mango. You can use 1 ripe mango for this part. Then, top it with another layer of chia pudding. Repeat this process until your glasses are full. Finish with more diced mango on top for a colorful touch. If you like, add fresh mint leaves for garnish. This adds a nice pop of color and flavor. For extra sweetness, drizzle a little maple syrup on top. You can also sprinkle toasted coconut flakes for a crunchy finish. Try to make it look as good as it tastes! For the full recipe, check above. To get the best texture, stir the chia seeds well in the liquid. You want them evenly mixed. Let the mixture sit for about 15 minutes, then stir again. This helps avoid clumps. The chia seeds need time to soak up the coconut milk. Aim for at least four hours in the fridge. Overnight works even better for a creamier pudding. This chia pudding is great for meal prep. You can make it the night before. Just store it in the fridge. It stays fresh for about three days. This means you can enjoy it for breakfast or a snack. The flavors deepen as it sits, making it more tasty. Toppings can make your pudding even better. Use fresh fruit like sliced banana or berries. Toasted coconut adds a nice crunch. Drizzling honey or maple syrup gives extra sweetness. Fresh mint leaves look pretty and add freshness. You can mix and match toppings to keep it fun. For more ideas, check the Full Recipe for inspiration. {{image_2}} You can easily make this pudding vegan and gluten-free. All the ingredients in this recipe are already vegan and gluten-free. Use maple syrup instead of honey to keep it plant-based. Chia seeds are naturally gluten-free, so there are no worries there. Want to switch it up? You can add different flavors to the pudding. For a berry twist, mix in some pureed strawberries or blueberries. Just blend the berries until smooth and fold them in. If you love chocolate, add cocoa powder to the base mix. Use about 1-2 tablespoons for a rich taste. You can also top the pudding with fresh berries or chocolate shavings for extra flair. This pudding is fun for many occasions. Serve it as a light breakfast, a snack, or even a dessert. For brunch, layer the pudding in clear jars. Guests will love seeing the pretty layers. You can also make mini cups for parties. Add a sprig of mint or a slice of mango for a fresh touch. For a cozy night in, enjoy a bowl while watching a movie. The creamy texture and sweet flavors make it a treat for any time. For the full recipe, check out the instructions above for a delicious mango coconut chia pudding experience. To store leftover mango coconut chia pudding, place it in a clean, airtight container. This will help keep it fresh. Make sure to seal it tightly. You can keep it in the fridge for up to five days. If you notice it thickening too much, add a splash of coconut milk to loosen it up. For the best taste and texture, always store the pudding in the coldest part of your fridge. Avoid leaving it out at room temperature for long. If you find a layer of liquid on top, just stir it back in. This means the chia seeds are doing their job, soaking up the moisture. You can freeze chia pudding for later use. To do this, pour the pudding into freezer-safe containers. Leave some space at the top because it will expand when frozen. To thaw, transfer the container to the fridge for a few hours. Once thawed, stir it well before serving. Enjoy this tasty treat any time with these simple storage tips! For the complete recipe, check out the [Full Recipe]. Mango Coconut Chia Pudding can last up to five days in the fridge. Make sure to store it in a sealed container. This keeps it fresh and tasty. The pudding may thicken more over time, but it stays good to eat. Yes, you can use many fruits in this recipe. Berries like strawberries and blueberries work well. You could also try bananas or kiwi. Just remember to adjust the sweetness if your fruit is extra sweet. Chia pudding is very healthy. Chia seeds are full of fiber, protein, and omega-3 fatty acids. They help keep you full and support good digestion. Coconut milk adds healthy fats, too. This pudding is a great snack or breakfast option. If you want to switch out coconut milk, try almond milk or oat milk. These options still keep the pudding creamy. You can also use cashew milk for a richer taste. Just pick unsweetened varieties to control the sweetness. To make the pudding less sweet, reduce or skip the sweetener. You can use just a dash of maple syrup or honey. You can also add more fruit for natural sweetness. This keeps the flavor fresh without too much sugar. Mango coconut chia pudding is a tasty treat filled with healthy ingredients. You learned about key ingredients, their benefits, and easy substitutes. I shared step-by-step instructions to prepare and chill the pudding. You also discovered tips to ensure the perfect texture and flavor. Variations add fun twists, while storage tips keep it fresh longer. This pudding is a great addition to any meal or snack. Enjoy making it your own and sharing it with others!

Mango Coconut Chia Pudding Fresh and Tasty Delight

Are you ready for a fresh, tasty treat? Mango Coconut Chia Pudding is a fun and easy dessert that bursts

To make Lemon Garlic Butter Shrimp, you need these simple ingredients: - 1 pound large shrimp, peeled and deveined - 4 tablespoons unsalted butter - 4 cloves garlic, minced - Juice and zest of 1 lemon - 1 tablespoon fresh parsley, chopped - 1/2 teaspoon red pepper flakes (optional, for spiciness) - Salt and pepper to taste - Lemon slices, for garnish These ingredients come together to create a tasty and bright dish. You can use fresh or frozen shrimp. Fresh shrimp tastes great but is not always available. Frozen shrimp is easy to find and can be just as good. When using frozen shrimp, thaw it in the fridge overnight or under cold water. This keeps it safe and tasty. Both types work well in this recipe. Want to mix it up? You can add ingredients for more flavor. Here are some ideas: - Fresh herbs like basil or cilantro - Vegetables like spinach or bell peppers - Different spices like paprika or cayenne for extra heat These options let you customize the dish to your taste. You can check the Full Recipe for more ideas on making this dish unique. Start by getting your shrimp ready. Use a paper towel to pat the shrimp dry. This step is key. It helps to get a nice sear later. If the shrimp is wet, it will steam instead of sear. Next, season the shrimp with salt and pepper. You can also add red pepper flakes if you like some heat. Now, let’s cook! Grab a large skillet and place it on medium heat. Add the butter and let it melt. Once the butter is melted, toss in the minced garlic. Sauté for about one minute until it smells great. Be careful not to burn the garlic; it can turn bitter very fast. Once you smell that garlic goodness, raise the heat to medium-high. Add the shrimp to the skillet. Cook the shrimp for 2-3 minutes on each side. Keep an eye on them; they should turn pink and opaque. When they are almost done, pour in the lemon juice and zest. Stir the shrimp around so they get coated in the sauce. To get that perfect sear, do not overcrowd the skillet. If you have too many shrimp at once, they won’t sear well. Cook in batches if needed. The high heat is important. It helps develop a nice crust on the shrimp. Also, let the shrimp sit for a moment in the hot skillet. This gives them a chance to sear. Once you see the pink color, flip them gently to avoid breaking. This method gives you that lovely taste and texture. For a fresh finish, stir in the parsley at the end. Check out the Full Recipe for all the steps and details. Enjoy your cooking! When making Lemon Garlic Butter Shrimp, avoid these common mistakes: - Not drying the shrimp: Always pat the shrimp dry before cooking. Wet shrimp will steam instead of sear. - Burning the garlic: Cook garlic on medium heat. Burnt garlic tastes bitter and ruins the dish. - Overcooking the shrimp: Shrimp cooks fast. Cook only until pink and opaque. This keeps them tender. To boost the flavor, try these spices: - Cumin: A pinch adds warmth. - Paprika: Gives a nice smoky taste. - Basil: Adds a fresh herbal note. - Lemon zest: Extra zest brightens the dish. Mix and match to find your favorite blend. Serve your Lemon Garlic Butter Shrimp in these ways: - With rice: White or brown rice soaks up the sauce well. - On pasta: Toss the shrimp with spaghetti for a hearty meal. - With crusty bread: Use bread to dip into the flavorful butter sauce. - On a salad: Top mixed greens for a light option. For the full recipe, check the details above. Enjoy your cooking! {{image_2}} You can make this dish even more filling by adding pasta. I love using spaghetti or linguine. Cook your pasta according to the package. While the pasta cooks, prepare the shrimp as usual. When the shrimp is ready, toss it with the drained pasta. The lemon garlic butter will coat the pasta well. This creates a delicious and quick meal. You can even add some pasta water for creaminess. Veggies bring color and nutrients to your plate. Try adding bell peppers, zucchini, or spinach. Sauté the vegetables in the skillet before the shrimp. Cook them until they are tender. Then add the shrimp and follow the recipe. This way, you get a balanced meal and extra flavor. The veggies soak up the lemon garlic butter too! Want to switch things up? Use different herbs and spices. Basil or dill can replace parsley. These herbs add a fresh twist. For a spicy kick, use cayenne pepper instead of red pepper flakes. You can even add Italian seasoning for a new taste. Experimenting makes cooking fun and personal. Your Lemon Garlic Butter Shrimp can be new each time! For the full recipe, check out the details above. To store leftover shrimp, place it in an airtight container. Make sure the shrimp cool down first. Cover the shrimp tightly to keep air out. You can store it in the fridge for up to two days. If you want to keep it longer, consider freezing. When reheating shrimp, use low heat to avoid overcooking. You can use a skillet or microwave. If using a skillet, add a bit of butter or oil. Heat for a few minutes until warmed through. If using the microwave, place the shrimp on a plate and cover. Heat in short bursts, checking often. When freezing shrimp, place it in a freezer-safe bag. Remove as much air as possible before sealing. Label the bag with the date. You can freeze shrimp for up to three months. To thaw, move it to the fridge overnight. For quick thawing, place the bag in cold water for about 30 minutes. This keeps the shrimp tasty and safe. For more details, check the Full Recipe. Cooking shrimp is quick and easy. It takes about 5 to 6 minutes. You want to cook shrimp until they turn pink and opaque. If you cook them too long, they can become tough. Keep an eye on them. Yes, you can use frozen shrimp. Just make sure to thaw them first. Place the shrimp in cold water for about 10-15 minutes. This helps them thaw evenly. After thawing, pat them dry just like fresh shrimp. This will help you get a good sear. Lemon garlic butter shrimp pairs well with many sides. Here are a few options: - Rice: White or brown rice soaks up the sauce well. - Pasta: Toss the shrimp with your favorite pasta for a filling meal. - Vegetables: Steamed or roasted veggies add color and nutrition. - Salad: A light salad can balance the richness of the shrimp. You can find the full recipe to get started on this tasty dish! In this post, we covered key ingredients for shrimp, including fresh and frozen options. We walked through steps to prepare and cook shrimp for a perfect sear. I shared tips to avoid common mistakes and enhance flavors. We explored fun variations, like pasta and veggies, plus best storage methods. Remember, the right approach makes all the difference. Use these tips to create tasty shrimp dishes you'll love to share. Enjoy your cooking adventures!

Lemon Garlic Butter Shrimp Delightful and Easy Recipe

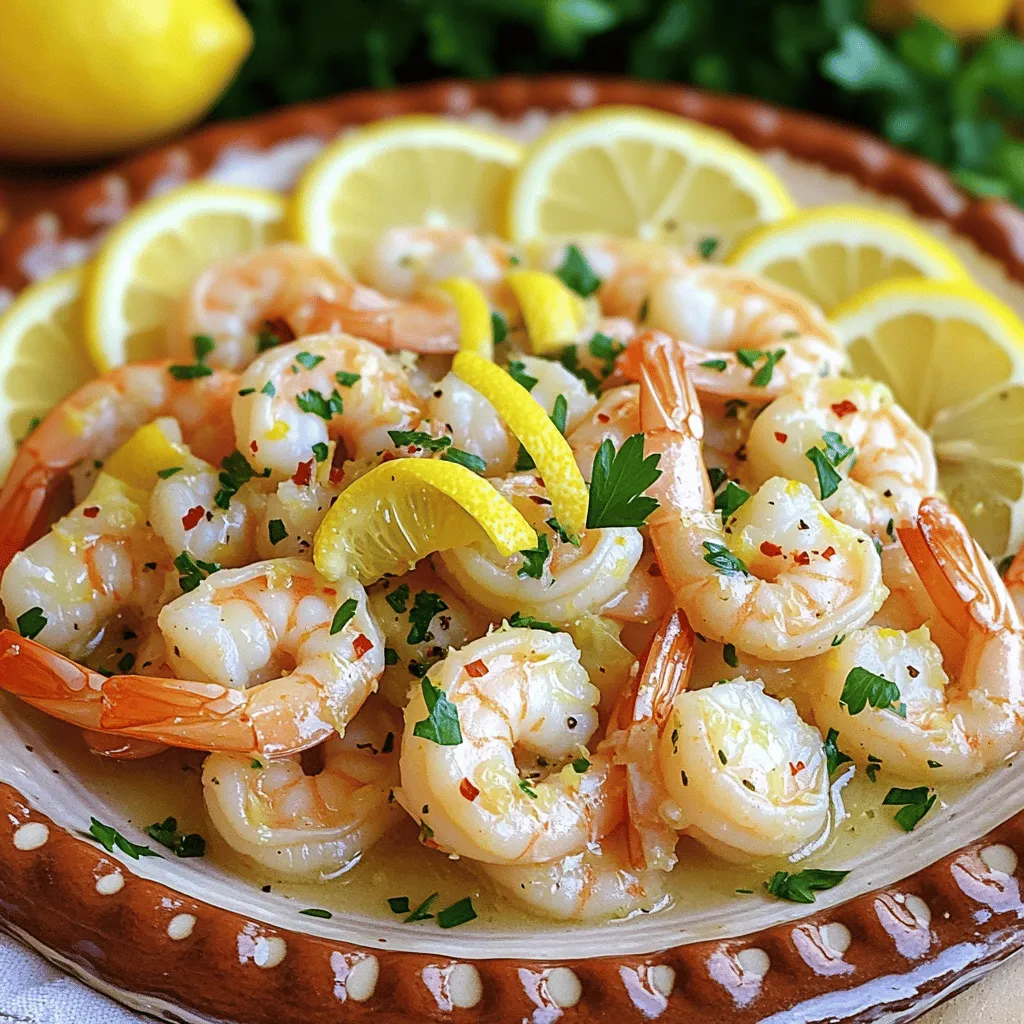
If you crave a quick and tasty meal, Lemon Garlic Butter Shrimp is for you. This dish blends zesty lemon,

- 2 medium sweet potatoes, peeled and diced - 1 can (15 oz) black beans, rinsed and drained - 1 can (15 oz) kidney beans, rinsed and drained - 1 can (15 oz) diced tomatoes (with juices) - 1 onion, diced - 3 cloves garlic, minced - 1 red bell pepper, diced - 2 cups vegetable broth - 2 tablespoons chili powder - 1 teaspoon ground cumin - 1 teaspoon smoked paprika - 1/2 teaspoon cayenne pepper (optional, for heat) - Salt and pepper to taste When I make Vegan Sweet Potato Chili, I love using these fresh and hearty ingredients. Sweet potatoes give a nice depth to the dish. They add a sweet flavor and creamy texture. The black and kidney beans pack it with protein, making it filling. I always use ripe tomatoes, as they bring a juicy tang. Onions and garlic add a great base flavor. The red bell pepper gives a nice crunch and sweetness. Plus, the vegetable broth helps everything blend well. Now, let’s talk about spices. Chili powder gives it warmth, while cumin adds a smoky note. Smoked paprika enhances the flavor too. If you want a kick, cayenne pepper is your friend, but you can skip it if you prefer mild. This recipe is easy to adjust. You can add more spices or change the beans. You can find the full recipe at the end. Enjoy cooking! - Step 1: Heat 1 tablespoon of olive oil in a large pot over medium heat. Add 1 diced onion. Cook until the onion is translucent, about 4-5 minutes. - Step 2: Add 3 minced garlic cloves and 1 diced red bell pepper. Cook for another 2-3 minutes until fragrant. - Step 3: Now, add 2 medium sweet potatoes, peeled and diced. Sauté for about 5 minutes, stirring often. Add 2 tablespoons of chili powder, 1 teaspoon of ground cumin, 1 teaspoon of smoked paprika, and 1/2 teaspoon of cayenne pepper if you like heat. Stir well to coat the sweet potatoes with spices. Cook for 2 more minutes. - Step 4: Pour in 1 can of diced tomatoes (with juices) and 2 cups of vegetable broth. Bring the mixture to a boil. - Step 5: Reduce the heat to low. Cover the pot and let it simmer for about 20-25 minutes, or until the sweet potatoes are tender. - Step 6: Stir in 1 can of rinsed black beans and 1 can of rinsed kidney beans. Cook for an additional 5 minutes to heat through. Season with salt and pepper to taste. Serve hot, garnished with fresh cilantro and optional avocado slices. For the full recipe, check the [Full Recipe]. Enjoy your cooking! - Ensure sweet potatoes are evenly diced for uniform cooking. - Adjust spice levels to your taste by varying cayenne pepper. When cooking, I always make sure to cut the sweet potatoes into even pieces. This helps them cook at the same rate, so some don't turn mushy while others stay hard. If you like it spicy, add more cayenne pepper. If you prefer mild, use less or skip it altogether. - Best served with fresh cilantro. - Optional avocado slices for garnish. Presentation matters! I love to top my chili with fresh cilantro. It adds color and a nice flavor. Avocado slices also make a great garnish. They add creaminess and balance the heat. - Add more vegetables like corn or zucchini. - Experiment with different beans or grains. You can really make this chili your own. Try adding corn for sweetness or zucchini for texture. Different beans like chickpeas or lentils can change the taste too. You can even mix in grains like quinoa for added nutrition. Explore and have fun with it! For the complete recipe, check out the [Full Recipe]. {{image_2}} You can change up the beans in your chili. Chickpeas or lentils work great as substitutes. They add a nice texture and flavor. Using different beans can really change the taste. Try pinto or cannellini beans for a new twist. Mixing beans creates a fun, colorful dish. Each type brings its own unique flavor. Do you want a milder chili? Use less cayenne pepper. You can also skip it altogether. For more heat, add more cayenne or try jalapeños. You can mix in spices like crushed red pepper or chipotle powder for a smoky flavor. Taste as you go to find your perfect heat level. This helps you get the flavor just right. If you have non-vegan guests, suggest toppings like cheese or sour cream. These add a creamy texture and rich flavor. You can also serve the chili with cornbread or tortilla chips. These options make it fun for everyone. If you want to cater to omnivores, consider adding cooked ground meat. This can make your dish more filling for different eaters. After you make vegan sweet potato chili, let it cool. Store it in an airtight container. This chili lasts up to 5 days in the fridge. Make sure to label it with the date. This helps you keep track of how fresh it is. If you want to save some chili for later, freezing is a great option. Use freezer-safe containers or bags. Leave some space in the container, as the chili will expand while freezing. The chili stays good for up to 3 months in the freezer. When you're ready to eat, thaw it in the fridge overnight. Reheat it on the stove or in the microwave until hot. Stir it well to heat evenly. Batch cooking vegan sweet potato chili makes meal prep easy. You can double or triple the recipe for extra servings. Divide it into individual portions and store them in the fridge or freezer. On busy days, just grab a container and reheat it. It’s a quick meal that is both hearty and tasty! You can serve this chili with several great sides. Here are some ideas: - Cornbread for a sweet touch - Brown rice for a hearty base - Fresh salad for a crisp bite - Tortilla chips for a crunchy contrast - Avocado slices for creaminess Each side adds a unique flavor and texture to the meal. You can mix and match based on your mood or what you have on hand. Yes, you can use a slow cooker for this chili. Here’s how: 1. Sauté the onion, garlic, and bell pepper in a pan first. This builds flavor. 2. Add all ingredients to the slow cooker, including sautéed veggies. 3. Cook on low for 6-8 hours or high for 3-4 hours. 4. Stir in the beans during the last 30 minutes of cooking. This method makes the chili even more flavorful as it simmers slowly. Leftovers are easy to store. Here are some tips: - Let the chili cool before storing. - Use an airtight container to keep it fresh. - It lasts in the fridge for 5 days. - For longer storage, freeze it for up to 3 months. When reheating, add a splash of broth or water to keep it moist. Yes, this chili is quite healthy! Here are some benefits: - Sweet potatoes provide fiber and vitamins. - Beans add protein and iron. - Tomatoes are rich in antioxidants. - The spices can boost your metabolism. Each ingredient offers health benefits, making this dish both tasty and nutritious. Making this chili is quick and easy. Here’s the time breakdown: - Prep time: 15 minutes - Cook time: 30 minutes - Total time: 45 minutes You can enjoy a warm bowl of Vegan Sweet Potato Chili in no time! For the full recipe, check out the earlier sections. In this blog post, we explored a simple and tasty vegan sweet potato chili. We covered ingredients like sweet potatoes, beans, and spices, along with step-by-step instructions for cooking. You learned tips for perfecting your dish and creative variations to keep it exciting. This chili is not just a meal; it’s a chance to enjoy healthy ingredients and customize to your taste. So, gather your ingredients and enjoy a warm bowl of goodness soon!

Vegan Sweet Potato Chili Flavorful and Hearty Recipe

If you’re craving a warm, hearty meal that’s both tasty and good for you, look no further! This Vegan Sweet

Older posts
Newer posts
← Previous Page1 … Page51 Page52 Page53 … Page59 Next →

dsad

© 2025 Home Cooking Style • Built with GeneratePress

Our Policies

  • Copyright Policy
  • Cookie Policy
  • GDPR Policy
  • Privacy Policy
  • Disclaimer
  • Terms Of Use

More Information

  • Home
  • About
  • Contact
  • Appetizers
  • Dessert
  • Dinner
  • Drinks
©2025, Home Cooking Style About Back To Top