Skip to content
DisclaimerTerms Of UseGDPR PolicyCookie Policy

Home Cooking Style

  • Home
  • Drinks
  • Appetizers
  • Dinner
  • Dessert
  • About
  • Contact
  • Privacy Policy
DisclaimerTerms Of UseGDPR PolicyCookie Policy

Amelia

- 2 cups rolled oats - 1 cup mixed nuts (almonds, walnuts, pecans), roughly chopped - 1/2 cup sunflower seeds - 1/2 cup honey or maple syrup - 1/4 cup almond butter (or any nut butter) - 1/2 cup dried fruit (cranberries, apricots, or raisins) - 1/2 teaspoon vanilla extract - 1/4 teaspoon salt - 1/2 teaspoon cinnamon (optional) Each ingredient in these nutty granola bars offers unique health perks. Rolled oats are great for fiber. They help keep you full and support digestion. Nuts like almonds, walnuts, and pecans pack protein, healthy fats, and vitamins. Sunflower seeds offer magnesium and vitamin E, which boost heart health. Honey or maple syrup brings natural sweetness and energy. Almond butter adds creaminess and protein. Dried fruits like cranberries or apricots give you antioxidants and natural sugars. Vanilla extract adds flavor without extra calories. Salt enhances taste, while cinnamon can help manage blood sugar levels. Choosing the right ingredients matters for great granola bars. Here are some tips: - Rolled Oats: Look for whole grain oats. They should be fresh and free from dust. - Mixed Nuts: Choose unsalted, raw nuts for the best flavor and health benefits. Check for freshness. - Sunflower Seeds: Buy them raw or lightly roasted without salt. They should smell nutty, not stale. - Sweeteners: Opt for pure honey or 100% maple syrup. Check the label for additives. - Nut Butter: Select a nut butter with minimal ingredients. It should have nuts as the first ingredient. - Dried Fruit: Choose unsweetened varieties if possible. Look for vibrant colors and no added sugars. Using quality ingredients makes your bars taste better and can boost their health benefits. Enjoy your nutty granola bars! For the full recipe, check the earlier section. 1. Preheat your oven to 350°F (175°C). This helps the bars bake evenly. Line your baking dish with parchment paper. Leave some paper hanging out to make lifting the bars easy later. 2. Combine the dry ingredients. In a large bowl, mix rolled oats, chopped nuts, sunflower seeds, dried fruit, salt, and cinnamon. Stir it well to ensure even distribution. 3. Melt the wet ingredients. In a small saucepan, mix honey and almond butter over medium heat. Stir until it melts. Remove it from the heat, then add vanilla extract and mix again. 4. Mix wet and dry ingredients. Pour the warm nut mixture over the oats and nuts. Stir until every piece is coated well. This step is crucial to ensure the bars stick together. 5. Press the mixture into the dish. Transfer everything into your baking dish. Use a spatula or your hands to press it down firmly. This helps the bars hold their shape after baking. 6. Bake the bars. Place your dish in the oven for 20-25 minutes. Look for golden brown edges as a sign they are ready. 7. Cool the bars. After baking, take the pan out and let it cool on a wire rack. Cooling is key to cutting them into neat bars. 8. Cut and enjoy. Once cool, use the parchment paper to lift the granola block out. Cut it into bars of your preferred size. Every step in this recipe plays a vital role. Preheating the oven ensures that the bars cook evenly. Mixing dry ingredients properly helps distribute flavors and textures. Melting the wet ingredients creates a sticky mixture that binds everything together. Pressing the mixture firmly ensures the bars won’t crumble apart. Baking until golden brown gives them a nice texture and flavor. Cooling helps them set, making cutting easier and cleaner. - Skipping the parchment paper. This can make removing the bars difficult. - Not pressing the mixture firmly. If you don’t press it down, the bars may fall apart. - Underbaking or overbaking. Keep an eye on the edges for perfect texture. - Not letting them cool. Cutting them too soon can lead to messy, crumbled bars. By following these steps closely, you can create nutty granola bars that are both delicious and packed with energy! You can change the nuts and seeds in the recipe. Try pecans, hazelnuts, or pumpkin seeds. You can also swap dried fruits. Use raisins, figs, or even coconut flakes. Want more flavor? Add chocolate chips or spices like ginger. You can adjust sweetness too. Add more honey or use less for a less sweet bar. Always preheat your oven. This helps the bars cook evenly. Use parchment paper for easy removal. Press the mixture firmly to make sure it holds together. Bake until the edges turn golden brown. This signals they are done. Let them cool completely before cutting. This helps the bars stay firm. You can serve these bars on their own. They are perfect for breakfast or snacks. Pair them with yogurt for a tasty treat. You can also enjoy them with fruit or smoothies. For a fun twist, crumble them over ice cream or oatmeal. They add crunch and flavor to any meal! {{image_2}} You can change the nuts and seeds in your granola bars. Try cashews or hazelnuts for a new taste. You can also add chia seeds or pumpkin seeds for extra crunch. Each nut and seed adds a unique flavor and texture. Feel free to mix and match to find your favorite combo. Get adventurous with flavors! Add a sprinkle of cocoa powder for a chocolate twist. You can also mix in some coconut flakes for a tropical vibe. Try using different dried fruits, like mango or figs, to switch things up. You could even add spices like nutmeg or ginger for warmth. The options are endless, so have fun experimenting! Making these bars fit your diet is easy. For gluten-free bars, ensure you use certified gluten-free oats. To make them vegan, simply replace honey with maple syrup. You can also use a plant-based butter instead of regular nut butter. These swaps keep your granola bars tasty and inclusive for everyone. For the complete process, refer to the Full Recipe. To keep your nutty granola bars fresh, store them in an airtight container. I prefer using glass jars or plastic containers. Make sure to layer parchment paper between the bars. This keeps them from sticking together. You can also wrap each bar in plastic wrap for easy grab-and-go snacks. Homemade granola bars last about one week at room temperature. If you keep them in the fridge, they can last up to two weeks. Always check for any signs of spoilage, like an off smell or change in texture. Although they are tasty, don’t eat them if they look or smell bad. If you want to save your nutty granola bars for longer, freezing is a great option. Wrap each bar tightly in plastic wrap. Then place them in a freezer-safe bag or container. They can stay fresh for up to three months in the freezer. When you're ready to eat, just take out a bar and let it thaw at room temperature. Enjoy your snack anytime! Yes, you can use other sweeteners in your nutty granola bars. Honey and maple syrup work well. You can also try agave nectar or brown rice syrup. Each sweetener brings a unique flavor. If you prefer less sugar, consider using mashed bananas or applesauce. These add sweetness and moisture. Just remember to adjust the amount based on how sweet you want your bars. Making nutty granola bars gluten-free is easy. Start by using gluten-free rolled oats. Many brands offer oats that are certified gluten-free. You can also check your nut butter and sweeteners for gluten. Always read labels to ensure they are safe. This way, you can enjoy tasty bars without gluten. The best nuts for this recipe are almonds, walnuts, and pecans. These nuts add crunch and flavor. You can mix and match to suit your taste. If you want more variety, try cashews or hazelnuts. Each nut adds its own unique taste and texture. You can also toast them for extra flavor. In this blog post, we explored the best ingredients for nutty granola bars and their benefits. I shared step-by-step instructions and highlighted common mistakes to avoid. You learned tips for customizing your bars and how to store them properly. Remember, using quality ingredients makes a big difference. Don't shy away from experimenting with flavors and textures. Enjoy your healthy snacks, and make them your own!

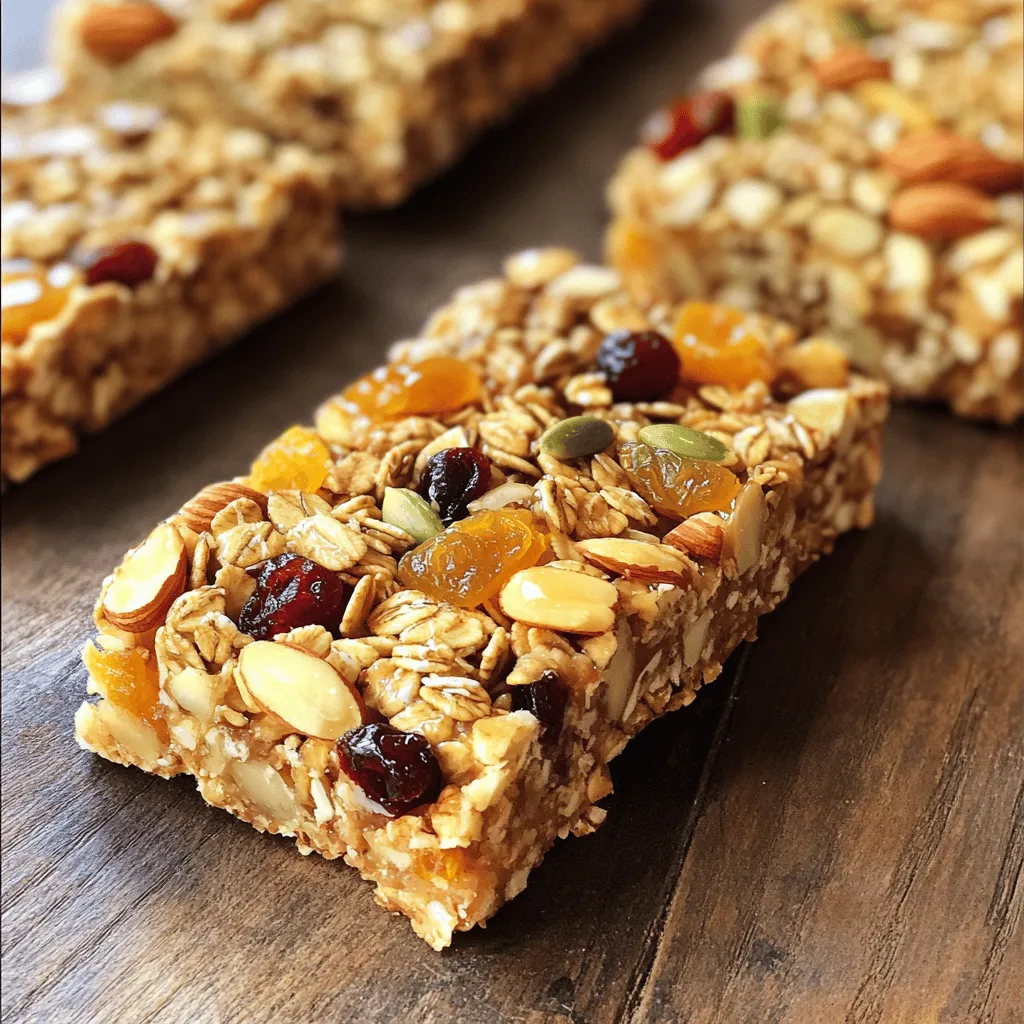
Nutty Granola Bars Packed with Energy and Flavor

Do you crave a tasty snack that fuels your day? These nutty granola bars are both packed with energy and

- 1 cup quinoa, rinsed - 2 cups vegetable broth - 1 cup cherry tomatoes, halved - 1 cucumber, diced - 1 bell pepper (red or yellow), diced - 1/2 red onion, finely chopped - 1/2 cup kalamata olives, pitted and sliced - 1 cup crumbled feta cheese - 1/4 cup fresh parsley, chopped Quinoa is the star of this dish. It is light, fluffy, and full of protein. Cooking it in vegetable broth adds rich flavor. Fresh vegetables like cherry tomatoes and cucumbers give crunch and color. The bell pepper adds sweetness while the red onion gives a bit of bite. Kalamata olives add a briny touch that brings it all together. Finally, feta cheese gives a creamy texture and tangy flavor. - 3 tablespoons olive oil - 2 tablespoons lemon juice - Salt and pepper to taste Using olive oil and lemon juice creates a simple and bright dressing. Salt and pepper help to enhance all the flavors. These staples are key to making the salad taste fresh and vibrant. - Alternative cheese options: goat cheese or mozzarella - Extra vegetables: zucchini, spinach, or carrots - Nuts and seeds: almonds, sunflower seeds, or pumpkin seeds Feel free to get creative! If you want a different cheese, try goat cheese or mozzarella. You can add more veggies for extra crunch. Nuts and seeds add healthy fats and a nice crunch. Mixing in your favorite ingredients makes this salad unique to you. For the full recipe, check [Full Recipe]. - Rinsing and Boiling First, rinse 1 cup of quinoa under cold water. This step removes any bitterness. Next, in a medium saucepan, mix the rinsed quinoa with 2 cups of vegetable broth. Bring this mixture to a boil over medium heat. - Cooking Time and Fluffing Once it boils, reduce the heat to low. Cover the pot and let it cook for about 15 minutes. You’ll know it’s done when the liquid is absorbed. Remove it from heat and let it sit for 5 minutes. Then, fluff the quinoa gently with a fork. - Chopping Techniques While the quinoa cooks, grab your knife and cutting board. Dice 1 cucumber and chop 1/2 red onion finely. Halve 1 cup of cherry tomatoes and dice 1 bell pepper. You can use red or yellow. These fresh veggies add color and crunch. - Mixing Options Place all the chopped veggies into a large mixing bowl. You can also add 1/2 cup of kalamata olives that are pitted and sliced. Toss them gently to mix the flavors. - Dressing the Salad When the quinoa cools slightly, add it to the bowl with the vegetables. Drizzle 3 tablespoons of olive oil and 2 tablespoons of lemon juice over the mix. Toss gently to coat everything evenly. - Incorporating Feta Cheese Now, it’s time for the creamy feta. Add 1 cup of crumbled feta cheese and 1/4 cup of chopped parsley to the bowl. Carefully fold the mixture, trying not to break the feta too much. Follow the Full Recipe for complete details on this vibrant dish. Cooking Tips To make the best quinoa, rinse it first. Rinsing removes the bitter coating called saponin. Use a medium saucepan for cooking. Combine 1 cup of rinsed quinoa with 2 cups of vegetable broth. Bring it to a boil, then lower the heat. Cover it and let it simmer for about 15 minutes. Once done, let it sit for 5 minutes before fluffing with a fork. This step makes the quinoa light and fluffy. Flavor Enhancements For extra flavor, try using broth instead of water. You can also add spices like garlic powder or cumin while cooking. If you want a hint of zest, add a little lemon zest to the cooking broth. This small change can elevate your quinoa's taste. Presentation Ideas When serving your salad, use a large, shallow bowl. This allows the colors to shine. Arrange the quinoa on a bed of fresh greens for a pop of color. Sprinkle extra feta and parsley on top for a beautiful finish. You can also add some sliced olives or cherry tomatoes on the side to make it look even more inviting. Accompaniments This salad pairs well with grilled chicken or fish. For a full meal, serve it alongside roasted vegetables. You can also enjoy it with warm pita bread or a side of hummus. These options will give you a well-rounded meal. Meal Prep Tips This salad is perfect for meal prep. You can make it a day in advance. Just store it in an airtight container in the fridge. The flavors will meld together beautifully overnight. Flavor Development Chilling the salad enhances its taste. As it sits, the quinoa absorbs more flavors from the veggies and dressing. You can also add a splash of lemon juice right before serving to refresh the taste. This way, you always have a burst of flavor with each bite. For the full recipe, check out the recipe section. {{image_2}} You can add protein to your salad for extra flavor and nutrition. - Grilled Chicken: Grilled chicken breast adds a savory touch. Simply slice it thin and mix it in. This makes the salad heartier. - Chickpeas: For a plant-based option, add chickpeas. They bring creaminess and a nutty taste. One cup of canned chickpeas works well. Drain and rinse them before adding to the salad. Changing up the dressings or spices can create new tastes. - Different Dressings: You can try balsamic vinaigrette or a tahini dressing. Each dressing gives a unique twist to the dish. Just pour it over and mix well. - Spice Mixes: Add spices like cumin or smoked paprika for warmth. A pinch or two can really elevate the flavor. Experiment to find your favorite mix. Using seasonal ingredients makes your salad fresh and vibrant. - Summer Variations: In summer, add zucchini or corn. Grilled zucchini brings a nice smoky flavor. Sweet corn adds a juicy crunch. - Winter Additions: In winter, try roasted root vegetables. Carrots and sweet potatoes work great. They add sweetness and warmth to the salad. Feel free to explore these variations to make the Savory Quinoa Salad with Feta your own. For the full recipe, check out the instructions above! For best storage, place your Savory Quinoa Salad with Feta in an airtight container. This keeps it fresh and tasty. Make sure it cools to room temperature before sealing it. In the fridge, it stays good for about 3 to 5 days. Check for any off smells or changes in color before eating. You can freeze this salad, but it may change texture. To freeze, portion the salad into freezer-safe bags. Squeeze out air before sealing. It can last for up to 2 months in the freezer. When you want to eat it, move it to the fridge overnight to thaw. You can also leave it at room temperature for a few hours. Leftover salad can be a great base for new meals. Add grilled chicken or chickpeas for extra protein. You can also mix it into wraps or pita pockets. Another idea is to serve it on a bed of greens for a fresh twist. Get creative with leftovers and enjoy different flavors! Yes, you can prepare this salad a day in advance. It gets better as it sits. Just keep it in the fridge. This allows the flavors to mix well. You can use goat cheese for a similar taste. If you're dairy-free, try tofu or nutritional yeast. They add a nice flavor and texture to the salad. The salad stays fresh for about three days in the fridge. Make sure to store it in an airtight container. This keeps it crisp and tasty. Yes, this recipe is gluten-free. Quinoa is a great choice for gluten-free diets. Enjoy this salad without any worries! For the full recipe, check out the section earlier in the article. To wrap up, we explored making a tasty Savory Quinoa Salad with Feta. You learned about key ingredients like quinoa, fresh vegetables, and feta cheese. We covered cooking tips and how to combine everything for the best flavor. You can customize your salad with protein and seasonal ingredients as well. Remember to store leftovers properly to keep them fresh. With these tips, you can easily create and enjoy this healthy dish! Try it out and impress yourself with your cooking skills.

Savory Quinoa Salad with Feta Fresh and Wholesome

Welcome to your new go-to dish: Savory Quinoa Salad with Feta! This fresh and wholesome salad is not only vibrant

To make creamy avocado pasta, you need some key ingredients. Here’s the list: - 3 ripe avocados - 3 cloves garlic, minced - 1/4 cup fresh basil leaves - 1/4 cup lemon juice - 1/3 cup olive oil - Salt and pepper to taste - 300g spaghetti or your preferred pasta These ingredients create a rich and creamy sauce that clings to the pasta well. The avocados provide a smooth texture. The garlic adds a nice kick. You can add some optional ingredients to boost the flavor. Consider these: - 1/2 cup cherry tomatoes, halved - 1/4 cup grated Parmesan cheese (optional) - Crushed red pepper flakes (optional, for garnish) Cherry tomatoes add a sweet burst to each bite. Parmesan cheese gives a salty, tangy note. Red pepper flakes can spice things up if you like heat. Creamy avocado pasta is not just tasty; it is also nutritious. Here’s a rough breakdown per serving: - Calories: 450 - Protein: 10g - Carbohydrates: 60g - Fat: 20g - Fiber: 7g This dish is rich in healthy fats from avocados. It also offers fiber from the pasta and veggies. Use the full recipe to create a meal that is both satisfying and healthy. To cook the pasta just right, bring a large pot of salted water to a boil. Add your spaghetti and cook it according to the package directions. You want it to be al dente, which means it should be firm but not hard. This usually takes about 8 to 10 minutes. Before you drain the pasta, save one cup of the pasta water. This water is full of flavor and can help thin your sauce later. Once drained, set the pasta aside and keep it warm. Now, let’s make the creamy avocado sauce. Grab a food processor and add three ripe avocados. Then, add three cloves of minced garlic and a quarter cup of fresh basil leaves. Pour in a quarter cup of lemon juice and a third cup of olive oil. Blend everything together until it becomes smooth and creamy. If the sauce seems too thick, just add a bit of the reserved pasta water until it’s the right consistency. This sauce is rich and bright, perfect for the pasta. In the same pot you used for the pasta, add the warm spaghetti back in. Pour the creamy avocado sauce over the pasta. Toss everything together carefully until the pasta is well coated with the sauce. If it feels too thick, add a little more reserved pasta water to loosen it up. Finally, gently fold in half a cup of halved cherry tomatoes for some color and freshness. Serve this beautiful dish with a sprinkle of grated Parmesan cheese if you like. Enjoy your creamy avocado pasta! For the full recipe, check the details above. To make creamy avocado pasta, you need ripe avocados. Look for avocados that yield slightly when you press them. This means they are soft and ready to use. Avoid any that feel too hard or have dark spots. Ripe avocados give the best texture and flavor. If you have unripe avocados, let them sit at room temperature for a few days. You can speed up the ripening by placing them in a paper bag with a banana. Avocados tend to brown quickly after being cut. To keep your sauce green, add lemon juice right after blending. The acidity helps slow down the browning process. If you have leftover sauce, store it in an airtight container. You can also press plastic wrap directly onto the surface of the sauce to limit air exposure. This helps keep the vibrant green color longer. Cooking pasta al dente means it has a firm bite. Use plenty of salted water to boil your pasta. Follow the package instructions for the right cooking time. Taste the pasta a minute or two before the time is up. It should be tender but still firm in the center. Drain the pasta, but save some cooking water. This starchy water helps to blend the sauce and pasta perfectly. {{image_2}} You can add protein to your creamy avocado pasta for more energy. Some great options are grilled chicken, shrimp, or chickpeas. If you choose chicken, cook it until golden brown, then slice it and mix it in. For shrimp, sauté them until pink and toss them in at the end. Chickpeas add a nice crunch and are a great plant-based option. You don't have to stick with spaghetti! You can use any pasta shape you like. Penne, fusilli, or even gluten-free pasta work well too. Each shape holds the creamy sauce differently. For example, penne captures more sauce inside its tubes, making every bite rich and tasty. If you want a vegan version, skip the Parmesan cheese. Instead, sprinkle on nutritional yeast for a cheesy flavor. You can also add a splash of plant-based milk to keep the sauce creamy. This way, everyone can enjoy this dish, no matter their diet. For the Full Recipe, just follow the steps outlined, and you will have a delicious meal ready to share. To store creamy avocado pasta, first, let it cool down. Place it in an airtight container. This keeps moisture in and air out. Make sure to consume leftovers within two days. If you wait too long, the avocado may brown, losing its appeal. When reheating, use medium heat. You can warm it on the stove or in the microwave. Add a splash of water or olive oil to help bring back the creaminess. Stir gently to avoid breaking the pasta. Heat until warm, but do not overcook it. Overcooking can change the texture and flavor. You can freeze creamy avocado pasta, but it may change in texture. To freeze, scoop into airtight containers. Leave some space at the top for expansion. When ready to eat, thaw it overnight in the fridge. Reheat gently as mentioned above. If the sauce looks thick, mix in a bit of water or olive oil to help. Yes, you can make Creamy Avocado Pasta ahead of time. Cook the pasta and prepare the avocado sauce. Store the sauce in an airtight container. Keep the pasta separate. This method helps keep the pasta firm. When you are ready to eat, combine them. You can reheat the pasta gently on the stove. If the sauce thickens, add a splash of pasta water. If you need a substitute for Parmesan cheese, use nutritional yeast. It gives a cheesy flavor without dairy. You can also try crushed roasted nuts for crunch. Another option is to use a dairy-free cheese. This way, you can keep your dish tasty. Feel free to experiment with flavors you like. The avocado sauce lasts about 1 to 2 days in the fridge. Keep it in an airtight container. To avoid browning, add a little lemon juice on top before sealing. If you see browning, just stir it back in. The taste will still be great, even if the color changes. This blog post covered everything about creamy avocado pasta. You learned about essential and optional ingredients, plus their nutrition. I shared the steps to cook pasta and make the sauce. You also got tips for choosing ripe avocados and keeping the sauce fresh. Variations add protein and different pasta types, making your meal fun. Finally, I explained how to store and reheat leftovers. Now, you're ready to enjoy a tasty, easy meal that fits your needs. Get cooking and savor every bite!

Creamy Avocado Pasta Delicious and Easy Meal Recipe

Looking for a quick, tasty meal? You’ve found it! This creamy avocado pasta recipe is easy and full of flavor.

- 2 cans chickpeas - 2 tablespoons olive oil - 1 tablespoon chili powder - 1 teaspoon cumin - 1 teaspoon smoked paprika - ½ teaspoon cayenne pepper (adjust for spice preference) - 1 teaspoon garlic powder - Salt and pepper to taste - 8 small corn or flour tortillas - 1 avocado, sliced - 1 cup shredded purple cabbage - 1 cup diced tomatoes - ¼ cup fresh cilantro, chopped - 2 tablespoons lime juice The main ingredients create a tasty taco. Chickpeas are the star here. They give protein and fiber. Olive oil helps in cooking and adds flavor. Spices like chili powder and cumin bring the heat and depth. Smoked paprika adds a hint of smokiness. Cayenne pepper boosts the spice level, so adjust as you like. Garlic powder gives an extra kick. - Sliced jalapeños for heat - Crumbled feta or queso for creaminess - Diced red onion for crunch - Avocado crema or sour cream for richness - Salsa verde for a flavor twist You can add extra toppings to make your tacos unique. Sliced jalapeños add more spice if you like it hot. Feta or queso gives a creamy touch. Diced red onion adds a nice crunch. Avocado crema or sour cream makes it rich and smooth. Salsa verde adds a fresh flavor that brightens the dish. - Skillet - Mixing bowl - Serving platter You will need some basic tools to make these tacos. A skillet cooks the chickpeas until crispy. A mixing bowl helps you toss the chickpeas with oil and spices. A serving platter makes it easy to present your tacos. For the full recipe, check out the link above. To start, I toss the drained and rinsed chickpeas in a large bowl. I add olive oil, chili powder, cumin, smoked paprika, cayenne pepper, garlic powder, salt, and pepper. Make sure the chickpeas are well coated. This mix gives them a nice kick! Next, I heat a non-stick skillet on medium-high heat. I add the seasoned chickpeas and sauté them for about 8 to 10 minutes. Stir occasionally to avoid burning. The goal is to make them crispy on the outside. You'll know they’re ready when they look golden and smell amazing. While the chickpeas cook, I warm the tortillas. I use a separate skillet for this step. I place each tortilla in the skillet for about 30 seconds on each side. They should feel soft and pliable. If you don’t have corn or flour tortillas, you can use lettuce leaves or whole grain wraps. These options add a nice twist to the dish! Now it’s time to build the tacos! I lay a warm tortilla flat on a plate. I scoop a generous amount of the spicy chickpeas onto the tortilla. Next, I layer on shredded purple cabbage, diced tomatoes, and sliced avocado. For a fresh touch, I drizzle lime juice over the top and sprinkle chopped cilantro. Finally, I serve the tacos warm. For a fun presentation, I like to serve them on a wooden board, along with lime wedges and extra cilantro. This makes the meal look colorful and inviting. Enjoy your delicious spicy chickpea tacos! For the full recipe, check out the details above! To achieve extra crispy chickpeas, drain and rinse them well. Pat them dry with a towel. The drier they are, the crispier they get. Heat a non-stick skillet over medium-high heat. Add the seasoned chickpeas and cook them for about 8-10 minutes. Stir them often to ensure even cooking. You want them golden brown and crunchy. Adjusting spice levels is easy. If you like it mild, cut the cayenne pepper in half. You can also add more chili powder for flavor without too much heat. For a spicy kick, keep the cayenne pepper as is. You can even sprinkle a bit more on top after cooking if you want extra heat. For side dishes, consider serving your tacos with a fresh salad. A simple green salad with a light vinaigrette pairs well. You can also offer rice or quinoa on the side for a hearty meal. These add great texture and flavor. When it comes to beverages, try pairing these tacos with a light beer or a refreshing lime soda. The citrus from the drink complements the spices in the tacos. You could also serve a fruity iced tea for a sweet balance. To store leftover tacos, place them in an airtight container. Keep the chickpeas and toppings separate from the tortillas. This helps keep everything fresh. Store them in the fridge for up to three days. For reheating, warm the chickpeas in a skillet over medium heat. This brings back their crispiness. You can also microwave them in short bursts, but they may lose some crunch. Heat the tortillas in a dry skillet for 30 seconds on each side before serving. {{image_2}} You can easily swap out ingredients in this recipe. Try using different legumes like black beans or lentils. They add unique flavors and textures. You can also use proteins like shredded chicken or tofu for variety. If you want a vegan version, stick with chickpeas or beans. For gluten-free options, choose corn tortillas instead of flour. To change the flavor, adjust the spices. Add more cayenne for heat or smoked paprika for a deeper taste. You can mix in ingredients like lime zest or fresh herbs for brightness. Try different sauces or toppings. A creamy avocado sauce or spicy salsa can elevate your tacos. Get creative by adding flavors from other cuisines. For a Mediterranean twist, use feta cheese and olives. For a Thai-inspired taco, add peanut sauce and shredded carrots. Each region has its own taco styles. For example, in Mexico, try adding pickled onions or radishes for crunch. There are endless ways to make these tacos your own. Check the Full Recipe for more ideas! Spicy chickpea tacos are not just tasty; they are also good for you. Here’s a simple look at their nutrition: - Calories: About 350 per serving - Protein: Roughly 12 grams - Fats: Around 10 grams - Carbs: Approximately 50 grams Chickpeas are a star ingredient here. They offer many health benefits: - High in protein, which helps build muscles. - Packed with fiber, aiding digestion. - Full of vitamins and minerals, boosting your immunity. If you want to lower calories or carbs, here are some ideas: - Low-Calorie Options: Use less oil or skip it. You can also add more veggies. - Low-Carb Alternatives: Try lettuce wraps instead of tortillas. For allergen considerations, ensure your tortillas are allergen-free. Check labels on sauces and toppings too. Managing portions helps with any diet plan. Here are some tips: - Serving Sizes: One or two tacos per person is a good start. - Portion Control: Use smaller tortillas or measure chickpeas to keep track. These tips can help you enjoy your spicy chickpea tacos while staying on track with your health goals. For the full recipe, check the earlier section. How to make chickpea tacos from scratch? To make chickpea tacos from scratch, start by seasoning your chickpeas. Use olive oil, chili powder, cumin, and other spices. Toss them well in a bowl. Next, cook them in a skillet until crispy. Warm your tortillas on another skillet. Finally, fill the tortillas with chickpeas and your favorite toppings. Can I use dried chickpeas instead of canned? Yes, you can use dried chickpeas. Just soak them overnight and cook until tender. Then, follow the same steps for seasoning and cooking. This method takes longer but can enhance the flavor. How long can I store spicy chickpea tacos? You can store leftover spicy chickpea tacos in an airtight container for up to three days. The chickpeas may lose some crispiness, but the taste stays great. What's the best way to reheat leftover tacos? Reheat tacos in a skillet over medium heat. This helps keep the tortillas soft and warms the filling evenly. You can also microwave them for a quick option, but be careful not to overheat. How many tacos per person? I recommend two to three tacos per person. This will depend on your guests and their appetites. Are spicy chickpea tacos a good meal prep option? Yes, spicy chickpea tacos are a fantastic meal prep choice. You can prepare the chickpeas ahead of time and store them separately from the tortillas. This makes quick meals easy throughout the week. For the full recipe, check the earlier sections! In this post, we explored how to make tasty spicy chickpea tacos. We discussed the main and optional ingredients, key equipment, and step-by-step instructions. I also shared tips for perfecting your tacos and ideas for mixing things up with different flavors. Remember, you can customize your tacos to suit your tastes and dietary needs. Enjoy experimenting with new variations! These tacos are not only delicious but also healthy, making them a great choice for any meal.

Spicy Chickpea Tacos Flavorful and Easy Recipe

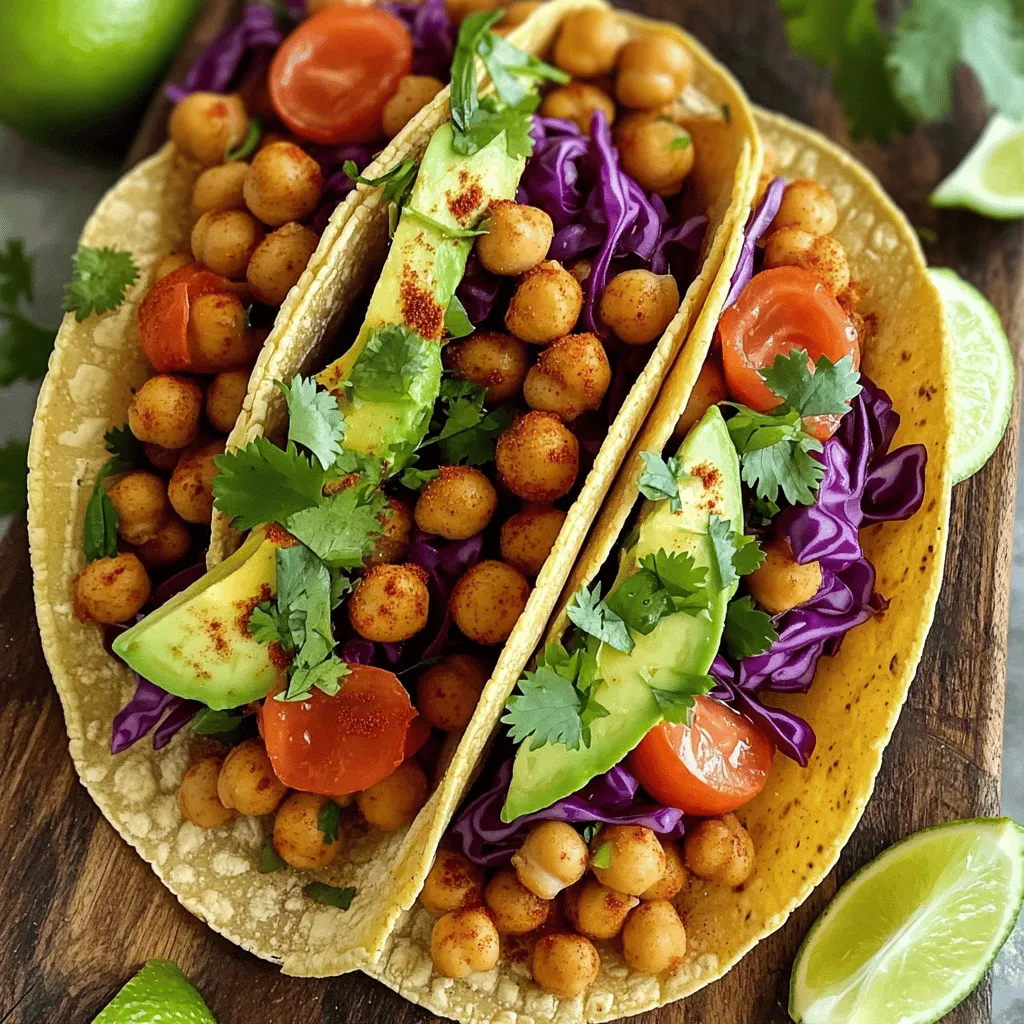
Are you ready to spice up taco night? My Spicy Chickpea Tacos bring bold flavor and simplicity to your table.

To make a tasty vegetable quinoa salad, gather these main ingredients: - 1 cup quinoa, rinsed - 2 cups vegetable broth or water - 1 red bell pepper, diced - 1 cucumber, diced - 1 cup cherry tomatoes, halved - 1 cup corn kernels (fresh or frozen) - 1 avocado, diced - ½ cup red onion, finely chopped - ½ cup fresh parsley, chopped These ingredients create a colorful mix. The quinoa adds protein, while the veggies bring crunch and flavor. For the dressing, you will need: - ¼ cup olive oil - 3 tablespoons lemon juice - 1 teaspoon garlic powder - Salt and pepper to taste This dressing ties the salad together. The lemon juice adds brightness, while garlic powder gives depth. You can customize your salad with these add-ins: - Feta cheese - Black beans - Chopped nuts (like almonds or walnuts) - Fresh herbs (like basil or cilantro) These add-ins can enhance taste and texture. Don't be afraid to mix and match based on your taste. For the full recipe, check out the Vibrant Rainbow Vegetable Quinoa Salad. First, rinse the quinoa. This step removes the bitter coating called saponin. Next, in a medium saucepan, bring two cups of vegetable broth or water to a boil. Once boiling, add the rinsed quinoa, reduce the heat to low, and cover it. Let it simmer for about 15 minutes. You want the quinoa fluffy and all the liquid absorbed. After cooking, remove it from heat and fluff with a fork. Allow the quinoa to cool to room temperature. Now, chop your vegetables. Dice one red bell pepper and one cucumber. Halve one cup of cherry tomatoes. If using fresh corn, cut kernels from the cob. If using frozen corn, just measure out one cup. Dice one avocado and finely chop half a cup of red onion. Lastly, chop half a cup of fresh parsley. This colorful mix adds flavor and crunch to your salad. In a large mixing bowl, combine all the chopped vegetables. Then, in a small bowl, whisk together olive oil, lemon juice, garlic powder, salt, and pepper. Pour this dressing over your vegetable mix. Add the cooled quinoa to the bowl. Toss everything gently until well mixed. Taste your salad and adjust the seasoning if needed. For the best flavor, refrigerate the salad for at least 30 minutes. Serve it in a large bowl or on a platter. You can garnish with extra parsley or lemon wedges for a pop of color. For a fun twist, layer it in mason jars for easy serving. Enjoy your vibrant rainbow vegetable quinoa salad! This full recipe can guide you through making this fresh and flavorful delight. To cook quinoa just right, start by rinsing it well. This removes any bitter taste. Use a ratio of 1 cup quinoa to 2 cups liquid. You can use water or vegetable broth for extra flavor. Bring the liquid to a boil. Once boiling, add the rinsed quinoa. Lower the heat, cover, and simmer for about 15 minutes. The quinoa is done when it is fluffy and has absorbed all the liquid. Use a fork to fluff it up and let it cool before mixing it with vegetables. To boost the taste, add herbs and spices. Fresh herbs like parsley or cilantro work well. Garlic powder adds a nice kick. You can also mix in lemon juice for brightness. If you like heat, a pinch of red pepper flakes gives a fun twist. Always taste your salad before serving. Adjust the seasoning to your liking with salt and pepper. A drizzle of olive oil adds richness and helps the flavors blend. Meal prepping makes life easier. First, cook a large batch of quinoa. Store it in an airtight container in the fridge. You can prepare the vegetables ahead of time, too. Cut them and keep them in separate containers. This keeps them fresh and crisp. When you are ready to eat, mix the quinoa and veggies. Pour on the dressing and enjoy! This salad stays fresh in the fridge for about 3 days. It makes a great lunch or side dish. For a quick grab-and-go option, layer the salad in mason jars. Just shake and eat! Feel free to check the Full Recipe for more details! {{image_2}} You can change the vegetables in this salad to fit your taste. Try adding spinach for a green boost. Broccoli and zucchini also work well. For a little heat, add some diced jalapeños. You can use any mix of veggies you have on hand. This keeps the salad fresh and exciting. Adding protein can make your salad even heartier. Beans are a great choice. Black beans, chickpeas, or kidney beans add fiber and taste. If you want meat, grilled chicken is a good option. Cooked shrimp or tofu are great for a twist. These protein additions help make this salad a complete meal. Make seasonal salads by using fresh ingredients from the market. In the summer, add fresh basil and peaches. In fall, try roasted butternut squash with cranberries. For holiday gatherings, mix in festive colors like red and green peppers. These themed salads can match any occasion or season. To store leftover salad, place it in a container. Make sure it is airtight. This keeps it fresh and prevents spills. You can enjoy it cold or at room temperature. If you need to, add more dressing before serving. You can freeze quinoa and vegetables for later use. First, let them cool completely. Then, place them in freezer bags. Remove as much air as you can before sealing. This helps stop freezer burn. Use them within three months for best taste. For storage, glass containers work well. They keep food fresh and are easy to clean. You can also use BPA-free plastic containers. Choose ones that are airtight. This keeps moisture out and flavors in. Yes, you can make Vegetable Quinoa Salad ahead of time. This salad tastes even better after sitting for a while. The flavors mix well when it rests. I often prepare it a day before. Just keep it in the fridge and cover it tightly. If you want a substitute for quinoa, try using brown rice or farro. Both options have a nice texture. They also add fiber and nutrients. You can use other grains like bulgur or barley too. Just adjust the cooking time based on the grain you choose. Yes, Vegetable Quinoa Salad is gluten-free. Quinoa itself is a gluten-free grain. This makes it safe for people with gluten allergies. Just be sure to check any added ingredients, like broth or dressings, for gluten. Vegetable Quinoa Salad lasts about 3 to 5 days in the fridge. Keep it in an airtight container for best results. If the salad starts to look or smell off, it's best to throw it away. Always trust your senses! Quinoa packs many health benefits. It is a complete protein, meaning it has all nine essential amino acids. This makes it great for vegans and vegetarians. Quinoa is also high in fiber, which helps digestion. It has vitamins and minerals like magnesium and B vitamins. Eating quinoa can support heart health and keep you full longer. This blog post covered the key aspects of Vegetable Quinoa Salad. We explored the main ingredients, dressings, and optional add-ins to boost flavor. You learned how to cook quinoa and prepare vegetables step-by-step. Helpful tips showed you how to enhance flavors and store leftovers. Variations let you mix it up, adding proteins or seasonal veggies. Remember, making this salad can be quick and easy. Enjoy creating your own delicious versions!

Vegetable Quinoa Salad Fresh and Flavorful Delight

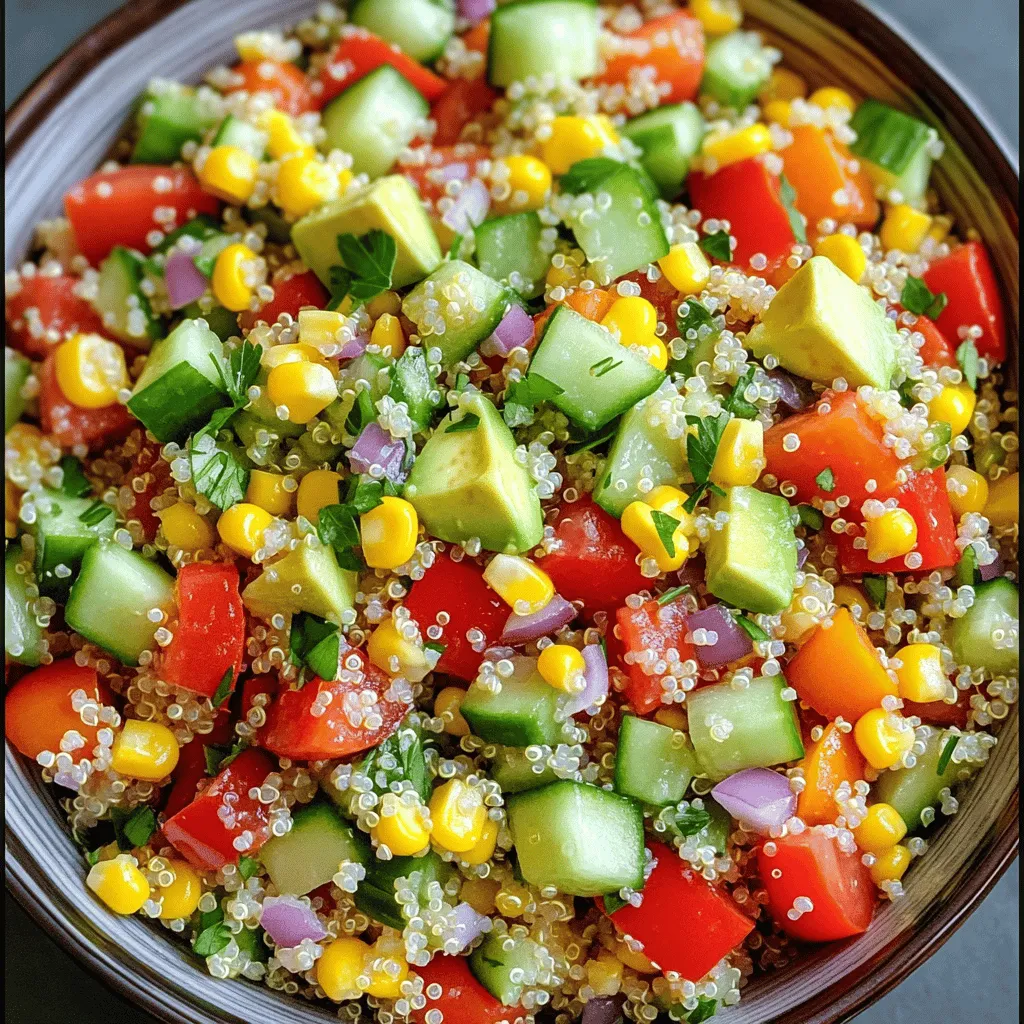
Are you ready to enjoy a fresh and flavorful delight? This Vegetable Quinoa Salad is not only colorful but also

To make these tasty churros, you need some key ingredients: - 1 cup water - 2 tablespoons granulated sugar - 1/2 teaspoon salt - 1/2 cup unsalted butter - 1 cup all-purpose flour - 3 large eggs - 1 teaspoon vanilla extract - 1 cup granulated sugar (for coating) - 2 teaspoons ground cinnamon - Oil for frying These ingredients create a fluffy dough that fries up crispy and golden. You can add your own twist with these optional ingredients: - Cocoa powder for a chocolate flavor - Nutmeg for a warm spice - Zest of an orange or lemon for a fresh taste Using these options can change the flavor profile and make your churros unique. If you lack some ingredients, here are substitutions: - Use margarine instead of butter for a dairy-free option. - Replace all-purpose flour with a gluten-free mix for a gluten-free treat. - Substitute eggs with flaxseed meal or applesauce for a vegan version. These swaps help you adapt the recipe to fit your needs without losing flavor. For the full recipe, check the earlier section. To make the dough, start by gathering your ingredients. You need water, sugar, salt, butter, flour, eggs, and vanilla extract. First, heat a medium saucepan over medium heat. Add 1 cup of water, 2 tablespoons of sugar, 1/2 teaspoon of salt, and 1/2 cup of butter. Stir until the butter melts. Once the mix boils, take it off the heat. Quickly add 1 cup of flour all at once. Stir hard with a wooden spoon until the dough forms a ball. It should pull away from the pan's sides. Let it cool for about 5 minutes. Now, add 3 large eggs one at a time. Mix well after each egg. Finally, stir in 1 teaspoon of vanilla extract. The dough should be smooth and thick. Next, heat oil in a deep fryer or large pot to 350°F (175°C). While the oil heats, get ready to coat your churros. In a shallow dish, mix 1 cup of sugar with 2 teaspoons of ground cinnamon. Once the oil is hot, transfer the churro dough into a piping bag with a star-shaped nozzle. Squeeze out 6-inch-long strips of dough into the hot oil. Cut them with scissors. Fry the churros in batches for about 2-3 minutes on each side. They should turn golden brown. Use a slotted spoon to move them to a paper towel-lined plate to drain excess oil. While the churros are still warm, roll them in the cinnamon-sugar mix. Make sure each churro gets fully coated. Repeat this process with the remaining dough. Serve your churros warm. They are great with chocolate or caramel dipping sauce. For a fun touch, arrange them on a bright plate. A dusting of extra cinnamon sugar always looks nice. Enjoy this tasty treat with family and friends! For the full recipe, check below. To make crispy churros, start with the right dough. The dough should be thick, not runny. When you fry, ensure the oil is hot enough. The ideal frying temperature is 350°F (175°C). If the oil is too cool, churros absorb oil and turn soggy. Fry in small batches to keep the oil at the right heat. The best oils for frying churros are canola and vegetable oil. Both have high smoke points and neutral flavors. This means they won't change the taste of your churros. Avoid using olive oil, as it burns too easily at high heat. Many people make a few key mistakes when frying churros: - Using cold oil: Always preheat your oil to the right temperature. - Overcrowding the pan: Fry only a few churros at a time to avoid temperature drops. - Not rolling in cinnamon sugar: Make sure to coat churros while they’re warm for the best flavor. By following these tips, you will create crispy, delicious churros every time. For the full recipe, check the earlier section. Enjoy your cooking! {{image_2}} One fun twist is to dip churros in chocolate. Use dark, milk, or white chocolate. Melt the chocolate in a bowl. Once your churros are warm, dip one end into the chocolate. Let the excess drip off before serving. The sweet chocolate pairs well with the cinnamon flavor. It adds a rich layer of taste. This treat becomes a dessert that everyone loves. Stuffed churros offer a delightful surprise. You can fill them with cream or fruit. For cream, use a pastry cream or whipped cream. For fruit, try fresh berries or apple pie filling. After frying, use a piping bag to inject the filling inside. This makes each bite extra special. The gooey filling complements the crispy outside. It’s a fun way to enjoy churros with a twist. If you need a gluten-free option, swap all-purpose flour for gluten-free flour. The texture remains light and crispy. Make sure to check the labels on all your ingredients. Some baking powders may contain gluten. Follow the same steps in the Full Recipe. You’ll still get that classic churro taste. Everyone can enjoy this treat, regardless of dietary needs. Store your leftover churros in an airtight container. This keeps them fresh and tasty. If you have some churros left over, don't worry. Place them on a paper towel to absorb any extra oil before storage. They can last up to two days at room temperature. To bring back the crunch, reheat your churros in the oven. Preheat the oven to 350°F (175°C). Place the churros on a baking sheet in a single layer. Heat for about 5 to 7 minutes. This method keeps them crispy and tasty. Avoid using the microwave. It makes churros soft and chewy, which is not what we want. You can freeze churros for a later treat. First, let them cool completely. Then, place them in a single layer on a baking sheet. Freeze for about an hour. Once frozen, transfer them to a freezer bag. Remove as much air as possible before sealing. When you're ready to enjoy, reheat them from frozen in the oven for that fresh taste. For the full recipe, check above! The best way to fry churros is in a deep fryer or a large pot. Use oil that can handle high heat, like vegetable or canola oil. Heat the oil to 350°F (175°C) for the best results. This temperature helps the churros cook evenly. Fry them in small batches to avoid crowding. Each churro should have enough space to puff up and turn golden brown. Fry for about 2-3 minutes on each side until crispy. Yes, churros can be made ahead of time. You can prepare the dough and pipe it into strips. Store the raw churros in the fridge for up to 24 hours. To fry, let the dough sit at room temperature for about 15 minutes. This helps them fry better. However, freshly fried churros taste the best. If you want to make them ahead, fry them, let them cool, and store them in an airtight container. Reheat them in the oven for a few minutes before serving. You can find the best cinnamon sugar churros at local fairs, amusement parks, and food festivals. Many bakeries also sell fresh churros. If you want the best homemade churros, try my full recipe. Making them at home allows you to enjoy them fresh and warm. You can customize the flavors to your liking and share them with friends and family! You learned how to make delicious cinnamon sugar churros. We explored essential ingredients and fun variations. I also shared helpful tips for cooking and storing your churros. Remember, you can customize flavors to fit your taste. Enjoying your homemade churros is easy if you follow the steps. If you mess up, learn and try again. Now you can impress friends and family with this simple treat!

Cinnamon Sugar Churros Crispy and Delicious Treat

Craving a sweet, crispy treat? Let me introduce you to cinnamon sugar churros! These delightful pastries are soft inside and

- 1 pound large shrimp, peeled and deveined - 4 tablespoons unsalted butter - 4 cloves garlic, minced - 1 tablespoon fresh lemon juice - 1 teaspoon paprika - ½ teaspoon red pepper flakes (optional for heat) - Salt and pepper to taste - 2 tablespoons fresh parsley, finely chopped - Skewers (soaked in water for 30 minutes if wooden) To make garlic butter shrimp skewers, these ingredients are key. The shrimp bring a sweet, juicy flavor. Unsalted butter adds richness. Garlic gives it a strong, tasty punch. Lemon juice adds brightness and balances the flavor. Paprika adds smokiness, while red pepper flakes can bring some heat. Fresh parsley adds a touch of color and freshness. If you use wooden skewers, soaking them helps prevent burning on the grill. Each ingredient plays a role in making this dish truly delicious. For the full recipe, refer to the complete guide above. - Skewers or grill basket - Grill or grill pan - Small saucepan - Mixing bowl Having the right tools makes cooking easier. Skewers help hold the shrimp together for grilling. A grill or grill pan gives that nice char. A small saucepan is perfect for melting the butter and mixing in the garlic. A mixing bowl helps you coat the shrimp well. These tools ensure that your cooking process is smooth and fun. 1. Start by melting the butter in a small saucepan over medium heat. 2. Once the butter is melted, add minced garlic. Sauté it for 1-2 minutes until fragrant. 3. Now, stir in the spices: paprika and red pepper flakes if you want some heat. 4. Remove the pan from heat and add fresh lemon juice and half of the chopped parsley. This mix will add a zing to the shrimp. 1. In a bowl, place the peeled and deveined shrimp. 2. Pour half of the garlic butter mixture over the shrimp. 3. Season the shrimp with salt and pepper. Toss everything well to coat. 4. Let the shrimp marinate for 15-20 minutes. This helps the flavors soak in. 1. Preheat your grill or grill pan to medium-high heat for best results. 2. Thread the marinated shrimp onto skewers. Aim for about 4-5 shrimp per skewer. Make sure they fit snugly but are not overcrowded. 3. Place the skewers on the grill and cook for 2-3 minutes per side. The shrimp should turn pink and opaque. 4. While they grill, brush the remaining garlic butter over the shrimp for extra flavor. Following these steps will lead you to a tasty Garlic Butter Shrimp Skewers dish. For more details, refer to the Full Recipe. - Choosing the right shrimp: I recommend using large shrimp for this recipe. They have a nice bite and cook evenly. Look for shrimp that are firm and fresh. Avoid any that smell strong or have black spots. - Avoiding overcooking: Shrimp cooks fast. Keep an eye on them while grilling. If they turn pink and opaque, they are ready. Overcooked shrimp can become rubbery and tough. - Suggestions for additional spices: You can add a pinch of cayenne for heat or some Italian herbs for depth. I also enjoy adding lemon zest for extra brightness. - Pairing ideas with side dishes: These skewers pair great with rice or a fresh salad. You can also serve them with garlic bread or grilled veggies for a complete meal. - Importance of garnishing: A sprinkle of fresh parsley makes the dish pop. You can also add some lemon wedges on the side for color. - How to serve for impressiveness: Place the skewers on a large platter. Drizzle the remaining garlic butter over them. This not only adds flavor but also makes them look stunning. {{image_2}} You can mix up your garlic butter shrimp skewers with different flavors. Try adding herbs like basil or cilantro for a fresh twist. You can also use spices like cumin or lemon zest for extra kick. If you want a sweeter taste, consider using honey or maple syrup in your marinade. For optional swaps, you can substitute olive oil for butter. This change still keeps the dish rich but adds different notes. You can also replace shrimp with scallops or chicken for a twist. The key is to marinate for at least 15 minutes. You have two great ways to cook your skewers: oven-baking or grilling. Baking is simple. Preheat your oven to 400°F (200°C). Place the skewers on a baking sheet and cook for 10-12 minutes. This method keeps the shrimp juicy. Grilling adds smoky flavors. Preheat your grill to medium-high heat. Cook each skewer for about 2-3 minutes per side. The shrimp turn pink and opaque, showing they're done. I prefer grilling for the taste, but both methods work well. Garlic butter shrimp skewers shine as both appetizers and main dishes. As an appetizer, serve them on a platter with toothpicks. They make gatherings fun and easy. For a main dish, pair them with rice or a fresh salad. These skewers fit perfectly for summer parties and festive events. Their vibrant color and aroma draw people in. They also work for casual picnics or formal dinners. You can be creative with how you serve them! For the full recipe, check out the link above. To keep your garlic butter shrimp skewers fresh, store them in the fridge. Place the skewers in an airtight container. They will last in the fridge for up to three days. If you want to keep them longer, you can freeze them. Wrap each skewer tightly in plastic wrap, then place them in a freezer bag. They can last up to three months in the freezer. When you are ready to eat the leftovers, reheating is key. The best way to reheat shrimp is on the stove. Heat a non-stick pan over medium heat. Add a little olive oil or butter, then add the skewers. Cook for about 2-3 minutes on each side. This method helps keep the shrimp juicy. You can also reheat them in the oven at 350°F for about 10 minutes. Just cover them with foil to keep moisture. You can keep garlic butter shrimp skewers in the fridge for about three days. If they smell off or have a slimy texture, it’s time to throw them out. Always trust your senses. Fresh shrimp should smell like the sea, not fishy. If you notice any signs of spoilage, it's best to discard them. For frozen skewers, the quality will start to drop after three months. Always label your bags with the date to track freshness. For the full recipe, check out the section above. Yes, you can use frozen shrimp! First, you need to thaw them. To do this, place the shrimp in a bowl of cold water for about 15-20 minutes. Change the water halfway to speed up the process. Once thawed, pat them dry with a paper towel. This helps the garlic butter stick better. You can use either wooden or metal skewers. - Wooden skewers: - Pros: They are cheap and light. They soak up flavors well. - Cons: They can burn if not soaked in water for 30 minutes before use. - Metal skewers: - Pros: They are reusable and won’t burn. They heat up quickly, cooking shrimp evenly. - Cons: They can be heavy and may get very hot. The shrimp are done when they turn pink and opaque. This usually takes about 2-3 minutes per side on the grill. You can also check by gently pressing the shrimp. If they curl into a C shape, they are ready! For garlic butter shrimp skewers, this is the perfect doneness. In this blog post, we explored how to make garlic butter shrimp skewers. We covered essential ingredients, tools, and step-by-step instructions. You learned tips to improve taste and texture, plus variations for creativity. Storage methods help keep leftovers fresh, while FAQs answer your most pressing questions. Now, armed with this knowledge, you can grill shrimp like a pro. Enjoy impressing friends and family at your next gathering!

Garlic Butter Shrimp Skewers Quick and Flavorful Recipe

Are you ready to elevate your grilling game? My Garlic Butter Shrimp Skewers recipe is quick, flavorful, and packed with

- 2 slices of whole-grain bread - 1 ripe avocado - 2 large eggs - 1 tablespoon lemon juice - Salt and pepper to taste - 1/4 teaspoon red pepper flakes - 1 tablespoon olive oil - Fresh herbs for garnish When you make avocado toast with a poached egg, you want fresh, tasty ingredients. Whole-grain bread gives a hearty base. I love the nutty flavor it brings. A ripe avocado is key. It should feel soft but not mushy. This gives the perfect creamy texture for your toast. Two large eggs are essential for poaching. They provide protein and richness. You can add lemon juice to your avocado. This brightens the flavor and keeps it from browning. Salt and pepper add the final touch for taste. For an extra kick, consider red pepper flakes. They add heat without overwhelming the dish. A drizzle of olive oil gives a nice sheen and extra flavor. Fresh herbs like cilantro or parsley make the dish pop. They add color and a fresh taste. This simple combination creates a delicious meal. You can find the full recipe [here](#). Enjoy your cooking! Toasting bread is simple but key to great avocado toast. Start with two slices of whole-grain bread. Place them in a toaster or on a grill. Toast until they are golden brown and crisp. This gives a solid base for your toppings. You want a nice crunch that holds up. Next, let’s prepare the avocado. Cut the ripe avocado in half and remove the pit. Scoop the flesh into a bowl. Use a fork to mash it. You can make it smooth or leave it chunky, depending on your taste. To enhance the flavor, add a tablespoon of lemon juice. This also keeps the avocado from browning. Don’t forget to season with salt and pepper to taste. Now, let’s poach the eggs. Fill a medium pot with water and heat it until it simmers. Crack each egg into a small bowl. Once the water is simmering, gently slide the eggs into the pot. Poach them for about three to four minutes. This will give you a nice runny yolk. If you want the yolk firmer, cook a bit longer. It’s time to put it all together. Take the toasted bread and spread the avocado mash generously on each slice. Drizzle a tablespoon of olive oil over the top. If you like spice, sprinkle some red pepper flakes. Carefully place a poached egg on each slice. Finish by sprinkling fresh herbs on top for extra flavor. Enjoy this simple and tasty treat! You can find the complete steps in the Full Recipe. When picking an avocado, feel for slight softness. Press gently with your palm. A ripe avocado will yield just a bit. Look for even color, avoiding dark spots. If it’s too hard, let it ripen at room temperature. This can take 2-5 days. Once ripe, store it in the fridge to slow down further ripening. You can poach eggs in two ways: stovetop or bake them. Stovetop poaching gives you a classic soft yolk. It’s quick and easy. You just need simmering water and a bit of vinegar. Baking eggs offers a hands-off method. Place eggs in a muffin tin and bake at 350°F for about 12-15 minutes. The texture is different, but still delicious. Pair your avocado toast with a light drink. A glass of fresh orange juice or herbal tea works great. You can also add a side salad for a full meal. Try arugula with lemon dressing for a peppery kick. If you want something heartier, serve it with crispy bacon or smoked salmon. This adds flavor and protein to your meal. {{image_2}} You can change up your avocado toast with many tasty toppings. For proteins, try adding smoked salmon. It brings a rich flavor that pairs well with the creamy avocado. You can also use crispy bacon or a sprinkle of feta cheese for a salty kick. For veggies, sliced radishes add a nice crunch. Cherry tomatoes provide sweetness and color. You can even spread some pesto on the toast before adding avocado. This gives a fresh herb taste that brightens the dish. If you need gluten-free options, look for gluten-free bread. Many brands offer tasty choices that work well for this recipe. For a vegan twist, skip the eggs entirely. Instead, add roasted chickpeas or a sprinkle of nutritional yeast. These options give a great protein boost while keeping the dish plant-based. You can still enjoy the creamy avocado and your favorite toppings! For the full recipe, check out Avocado Bliss Toast with Poached Egg. To keep your avocado toast fresh, store it properly. Place any leftover toast in an airtight container. This helps maintain its crispness. If you have extra avocado, store it separately. You can add lemon juice to prevent browning. Use the leftover toast within one to two days for the best taste. When reheating, avoid the microwave. It can make the toast soggy. Instead, use a toaster or an oven. Preheat the oven to 350°F (175°C). Place the toast on a baking sheet and heat for about 5-7 minutes. This method keeps the bread crispy. You can freeze avocado toast, but it needs some care. Freeze the toasted bread first. Wrap it tightly in plastic wrap. Store it in a freezer-safe bag. When ready to eat, thaw the bread in the fridge overnight. Then, toast it again. Adding fresh avocado after reheating keeps it tasty. To poach eggs well, start with a pot of simmering water. Make sure the water is not boiling. Crack each egg into a small bowl first. This helps you slide it gently into the water. Add a splash of vinegar to the water if you like. The vinegar helps the egg white stay together. Cook the eggs for about 3 to 4 minutes for a runny yolk. Use a slotted spoon to lift them out. Let any extra water drip off before placing them on your toast. When you pick an avocado, check for a few signs. Ripe avocados feel slightly soft when you press them gently. The skin should be dark green or almost black. If it’s bright green, it’s likely not ripe yet. Look for a smooth skin without dark spots. Another way to check is to remove the small stem. If it comes off easily and you see green underneath, the avocado is ripe. Yes, you can prepare parts of this recipe ahead of time. You can mash the avocado a few hours in advance. Just add a little lemon juice to keep it fresh. Poach the eggs just before serving. If you want to make the toast ahead, toast the bread and store it in an airtight container. Reheat it briefly in a toaster or oven before adding the avocado and egg. This keeps everything fresh and tasty. For the full recipe, check out the Avocado Bliss Toast with Poached Egg. In this post, we covered how to make delicious avocado toast. We discussed key ingredients, step-by-step instructions, and useful tips. You learned how to choose ripe avocados and poach eggs perfectly. We also explored cool topping variations and storage methods. This meal is simple, tasty, and healthy. You can impress friends or enjoy it yourself. Now, with this knowledge, go and make your own perfect avocado toast!

Avocado Toast with Poached Egg Simple and Tasty Treat

If you love simple, tasty meals, you’ll adore this Avocado Toast with Poached Egg recipe. This dish combines creamy avocado

- 1 cup quinoa, rinsed - 2 cups vegetable broth - 1 cup chickpeas, canned or cooked The base of our Vegan Buddha Bowl starts with quinoa. Quinoa is a great source of protein and fiber. I love using vegetable broth for cooking it. It adds extra flavor. Chickpeas are next. They bring a nice creaminess and a protein boost. - 1 medium sweet potato, diced - 1 cup broccoli florets - 1 avocado, sliced - 1 cup red cabbage, shredded - 1 carrot, grated Now, let’s focus on fresh produce. Sweet potato adds a hint of sweetness. It also brings vibrant color to the bowl. Broccoli is another great veggie. It adds crunch and a bright green color. Avocado is creamy and rich. It makes the dish feel luxurious. Red cabbage gives a nice pop of color and crunch. Grated carrot adds sweetness and texture. - 2 tablespoons olive oil - 1 teaspoon smoked paprika - 2 tablespoons tahini Next, we have flavor enhancers. Olive oil is a must for roasting our veggies. It helps them crisp up nicely. Smoked paprika adds a warm, smoky flavor. It pairs well with sweet potatoes. Finally, tahini is key for our dressing. It creates a creamy texture and nutty taste. You can find the full recipe to make this delicious bowl. Preheat the oven I start by preheating the oven to 400°F (200°C). This ensures the sweet potatoes roast evenly and get a nice flavor. Prepare sweet potato Next, I take one medium sweet potato and dice it into small cubes. I toss these cubes in one tablespoon of olive oil, smoked paprika, salt, and pepper. Then, I spread the sweet potato on a baking tray. I roast it for about 25 minutes or until it’s tender and slightly caramelized. Cooking quinoa While the sweet potato roasts, I prepare the quinoa. I measure one cup of rinsed quinoa and add it to a medium saucepan with two cups of vegetable broth. I bring this to a boil, then reduce the heat to low. I cover it and let it simmer for 15 minutes until the broth is absorbed. Once done, I fluff the quinoa with a fork. Blanching broccoli In a pot of boiling water, I add one cup of broccoli florets. I blanch the broccoli for one to two minutes until it turns bright green. Then, I drain the broccoli and quickly transfer it to a bowl of ice water. This stops the cooking process and keeps the color vibrant. After a few minutes, I drain the broccoli again. Prepare bowl ingredients Now, I gather all the bowl ingredients. In a large bowl, I add a scoop of quinoa, the roasted sweet potatoes, blanched broccoli, and one cup of chickpeas. I also include sliced avocado, shredded red cabbage, and grated carrot for crunch and color. Make the tahini dressing In a small bowl, I mix two tablespoons of tahini with a splash of water. I add a pinch of salt and stir until smooth. If it’s too thick, I can adjust the consistency with more water. Assemble the bowl I drizzle fresh lemon juice over the assembled ingredients. Then, I generously drizzle the tahini dressing on top for extra flavor. Serve Finally, I serve the Buddha bowl immediately. It looks vibrant and colorful, ready to enjoy! To create a tasty Vegan Buddha Bowl, mix different crunch levels. Pair soft items like avocado with crunchy ones like raw carrot. This gives each bite a fun texture. Use spices wisely to enhance flavors. I recommend smoked paprika for a warm note. A pinch of cumin adds a nice depth. Don't forget to sprinkle salt and pepper for balance. To fluff quinoa correctly, wait a few minutes after cooking. Use a fork to gently separate the grains. This keeps it light and fluffy. For cooking quinoa, rinse it well to remove bitterness. Use two parts broth to one part quinoa for rich flavor. Bring it to a boil, then reduce heat and cover. Simmer for about 15 minutes, and it will be perfect! Presentation matters in a Buddha Bowl. Start by arranging the ingredients in sections. This creates a vibrant look. Place colorful veggies next to each other for contrast. Garnish with fresh herbs like parsley or cilantro for extra flair. A lemon wedge adds brightness and a pop of color. For a fun touch, drizzle tahini artfully over the top. These steps make your bowl not just tasty but also beautiful. For the full recipe, check out the vibrant Vegan Buddha Bowl! {{image_2}} You can switch up the protein in your vegan Buddha bowl. Tofu or tempeh adds great texture and taste. Both are easy to find and work well with many flavors. For a fun twist, try marinating them first. You can also use other beans like black beans or kidney beans. They add protein and fiber, making your meal heartier. While quinoa is a favorite, you can use other grains too. Brown rice is a solid choice and is more filling. Couscous cooks quickly and has a light, fluffy texture. Both grains absorb flavors well, giving your bowl even more taste. Adding seasonal veggies makes your Buddha bowl unique. Think about using zucchini, bell peppers, or kale for variety. I love mixing in roasted beets or fresh spinach for color and flavor. Personalize it with your favorites to keep the dish exciting. Each bowl can be a new creation! Use airtight containers to store your Vegan Buddha Bowl. Glass containers work best. They keep food fresh and make it easy to see what you have. If you use plastic, make sure it is BPA-free. Leftovers stay good in the fridge for about three to four days. To make meal prep easy, prepare your ingredients ahead. Cook quinoa and roast sweet potatoes in advance. You can also chop vegetables and store them in the fridge. For longer storage, freeze cooked quinoa and sweet potatoes. They can last for up to three months in the freezer. When you reheat, do it gently on the stove or in the microwave. This keeps the flavors fresh. For veggies, add a splash of water while reheating. This helps avoid sogginess. You want each bite to stay crisp and tasty. Enjoy your flavorful freshness from the Vegan Buddha Bowl! A Vegan Buddha Bowl is a colorful dish. It mixes grains, greens, and proteins. The key components are quinoa, veggies, and legumes. These ingredients provide many nutrients. - Quinoa: It's a complete protein and gluten-free. - Chickpeas: They add protein and fiber. - Sweet Potatoes: Great for vitamins A and C. - Broccoli: Packed with vitamins K and C. - Avocado: Offers healthy fats. Together, these ingredients make a balanced meal. You get energy, good fats, and fiber in one bowl. Yes, you can customize a Buddha Bowl. This dish is flexible for all diets. If you have restrictions, swap ingredients. - Protein Alternatives: Use tofu or tempeh if you don’t like chickpeas. - Grain Substitutes: Try brown rice or couscous instead of quinoa. - Veggie Options: Add seasonal veggies like spinach or bell peppers. This makes it easy to enjoy the dish according to your taste. Tahini dressing is a popular choice. It adds creaminess and flavor. You can mix tahini with water, lemon, and salt. This simple recipe makes it smooth. If you want other options: - Vinaigrette: A mix of vinegar and oil is a lighter choice. - Nut-based dressings: These add a rich taste. Choosing the right dressing can change the bowl's flavor. Tailor it to what you like best! A vegan Buddha bowl is easy to make and full of flavor. We covered key ingredients like quinoa, fresh veggies, and flavor boosters. You now know how to put it all together with simple steps. Remember, you can make this dish your own by swapping ingredients. With tips on storage and reheating, you can enjoy your bowls longer. Whether for a meal prep or a quick dinner, this bowl is a great choice. Cook, create, and enjoy fresh flavors every time.

Vegan Buddha Bowl Packed with Flavorful Freshness

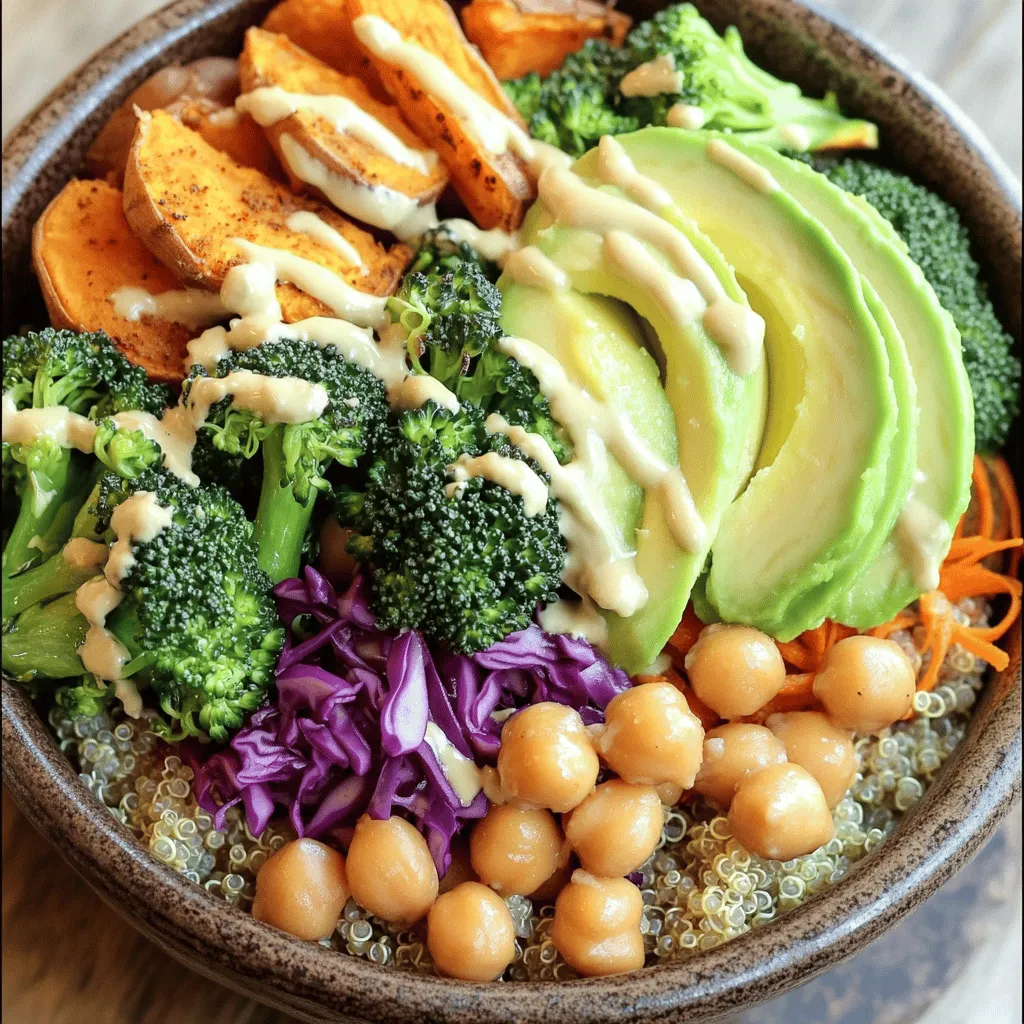
Are you ready to dive into a bowl of pure goodness? My Vegan Buddha Bowl is loaded with fresh ingredients,

- 1 cup all-purpose flour - 1/2 teaspoon baking soda - 1/4 teaspoon salt - 1/2 cup unsalted butter, melted - 1/2 cup brown sugar, packed - 1/4 cup granulated sugar - 1 teaspoon vanilla extract - 1 large egg - 1 cup semi-sweet chocolate chips - 1/2 cup chopped nuts (optional, such as walnuts or pecans) When measuring flour, use a spoon to scoop it into your cup. Level it off with a knife. For brown sugar, pack it tightly in the cup. This ensures you get the right amount. Use a liquid measuring cup for melted butter. Always check your ingredients before you start. You can swap all-purpose flour for gluten-free flour if needed. Coconut sugar works well in place of brown sugar. For a dairy-free option, use coconut oil instead of butter. If you don’t have eggs, try using applesauce or a flax egg (1 tablespoon ground flaxseed mixed with 2.5 tablespoons water). For the chocolate chips, you can use dark chocolate or white chocolate based on your taste. Nuts are optional but add a nice crunch. Just remember to adjust your measurements based on what you have. For the full recipe, check out the details in the earlier section. Start by preheating your oven to 350°F (175°C). If you use a cast-iron skillet, place it in the oven to heat. This helps your cookie cook evenly and gives it a nice crust. Make sure to use oven mitts when you take it out! In a medium bowl, whisk together the flour, baking soda, and salt. Mixing these dry ingredients well ensures that the baking soda spreads evenly. This step is key for a fluffy cookie. Set this bowl aside for now. In a large mixing bowl, add the melted butter, brown sugar, and granulated sugar. Mix until smooth. Then, stir in the vanilla extract and egg. Keep mixing until everything blends nicely. This creates a rich and sweet base for your cookie. Gradually add the dry ingredients to your wet mixture. Stir with a spatula until no flour is visible. Then, fold in the chocolate chips and nuts if you want some crunch. This dough should feel thick and sticky, perfect for a skillet. Carefully pour the cookie dough into your hot skillet. Spread it out evenly. Bake in the oven for 20 to 25 minutes. The edges should turn golden. The center should be soft but set. This gooey texture makes the cookie extra special! After baking, remove the skillet from the oven. Let it cool for about 10 minutes. This waiting time helps the cookie firm up a bit. Serve warm, right from the skillet, with a scoop of vanilla ice cream on top. Drizzle chocolate sauce over it for a treat. Add a sprinkle of flaky sea salt for a flavor boost. Enjoy your delicious creation! For the best results, I suggest using a cast-iron skillet. Cast iron holds heat well, giving your cookie a lovely golden edge. You can also use an oven-safe non-stick skillet if you prefer. Just make sure it’s oven-safe! To get that soft and gooey center, be careful not to overbake your cookie. Bake it until the edges are golden but the center still looks soft. It will continue to cook after you take it out. This is the secret to a perfect cookie! Serve your cookie hot right from the skillet. Top it with a big scoop of vanilla ice cream and a drizzle of chocolate sauce. A pinch of flaky sea salt on top adds a nice touch. You can also add fresh berries for a fruity twist. This dessert will wow your family and friends! {{image_2}} You have many choices for chocolate chips. Each type adds a unique taste. - Dark chocolate offers a rich, bold flavor. It also has less sugar, making it a bit less sweet. - Milk chocolate is creamy and sweet. This is a great choice for those who love sweetness. - White chocolate adds a smooth, sweet touch. It’s not technically chocolate, but it pairs well with all flavors. Feel free to mix different types. A blend of dark and milk chocolate can create a great balance. You can add fun ingredients to your cookie skillet. Here are a few ideas to get you started: - Nuts like walnuts or pecans add a crunchy texture. - Caramel bits bring a gooey sweetness that melts in. - Sea salt makes flavors pop. Just a sprinkle adds depth and contrast. These add-ins can make your dessert feel special and unique. Experiment with your favorites! To give your cookie skillet a twist, try adding extracts. Here are some tasty options: - Vanilla extract enhances the overall flavor. - Coffee extract adds a deep, rich taste. It’s perfect for coffee lovers. - Almond extract gives a nutty aroma that blends well with chocolate. These small changes can turn a good dessert into a great one. Mix and match to find your favorite flavor combo. For the full recipe, check out the earlier section. After your cookie skillet cools, store leftovers in an airtight container. This helps keep it fresh. You can leave it at room temperature for up to two days. If you need it to last longer, refrigerate it. Just remember to cover it well to avoid drying out. To reheat your cookie skillet, preheat your oven to 350°F (175°C). Place the skillet in the oven for about 10 minutes. This will warm it through and help keep that gooey center. If you want a quick fix, you can also use the microwave. Heat a slice for about 20 seconds, but be careful not to overdo it. You can freeze your cookie skillet for longer storage. Just let it cool completely first. Wrap it tightly in plastic wrap and then in aluminum foil. This protects it from freezer burn. It should stay good for up to three months. When ready to eat, thaw it overnight in the fridge. Then, reheat as mentioned above. Enjoy that warm, gooey goodness again! You can tell when your cookie skillet is done by checking the edges. They should be golden brown. The center may look a bit soft but will firm up as it cools. A toothpick inserted in the center should come out with a few moist crumbs, not wet dough. If the edges are browning, but the center is still too gooey, give it another 2-3 minutes. This will help get that perfect texture. Yes, you can make the dough ahead of time. Simply mix the ingredients as directed, then cover the bowl with plastic wrap. Store it in the fridge for up to 24 hours. When you are ready, just preheat the oven and bake it straight from the fridge. This is a great way to save time for last-minute guests. You can serve your Chocolate Chip Cookie Skillet with many tasty additions. A scoop of vanilla ice cream on top is a classic choice. You can also add whipped cream, chocolate syrup, or fresh berries for a burst of flavor. A sprinkle of flaky sea salt will enhance the sweetness and make it extra special. Yes, you can use a non-cast iron skillet. Just make sure it is oven-safe. Non-stick skillets work well, too. The baking time may vary slightly, so keep an eye on your cookie as it bakes. If you use a non-stick skillet, keep the heat low to avoid damaging the coating. To make your cookie crust crispier, try a few simple tips. Increase the baking time by a couple of minutes. Use a bit less butter for less moisture. Another trick is to add a touch of cornstarch to the flour. This helps create a crisper crust while keeping the inside soft and chewy. You now have all the tools to create a tasty chocolate chip cookie skillet. We covered the key ingredients, step-by-step instructions, and helpful tips to perfect your dish. Remember, you can make fun variations by changing chocolate or adding nuts. Proper storage ensures your leftovers stay fresh too. Enjoy your warm, gooey cookie skillet with ice cream or your favorite toppings. Each bite promises comfort and joy. So, grab your skillet and start baking! You’ll love the results.

Chocolate Chip Cookie Skillet Irresistible Dessert Treat

Are you ready to indulge in the ultimate dessert? This Chocolate Chip Cookie Skillet will melt your heart and taste

Older posts
Newer posts
← Previous Page1 … Page49 Page50 Page51 … Page60 Next →

dsad

© 2025 Home Cooking Style • Built with GeneratePress

Our Policies

  • Copyright Policy
  • Cookie Policy
  • GDPR Policy
  • Privacy Policy
  • Disclaimer
  • Terms Of Use

More Information

  • Home
  • About
  • Contact
  • Appetizers
  • Dessert
  • Dinner
  • Drinks
©2025, Home Cooking Style About Back To Top