Skip to content
DisclaimerTerms Of UseGDPR PolicyCookie Policy

Home Cooking Style

  • Home
  • Drinks
  • Appetizers
  • Dinner
  • Dessert
  • About
  • Contact
  • Privacy Policy
DisclaimerTerms Of UseGDPR PolicyCookie Policy

Amelia

To make these tasty and nutritious Lemon Blueberry Breakfast Bars, you need the following: - 1 cup rolled oats - 1 cup almond flour - 1/4 cup honey or maple syrup - 1/3 cup melted coconut oil - 1/2 teaspoon baking powder - 1/4 teaspoon salt - Zest of 1 lemon - 2 tablespoons fresh lemon juice - 1 cup fresh blueberries - 1/4 teaspoon vanilla extract These ingredients work together to create a delicious blend of flavors. The oats and almond flour form the base, while honey or maple syrup adds natural sweetness. Coconut oil gives a rich texture, and the lemon zest and juice provide a bright, fresh flavor. You can easily swap some ingredients if needed. Here are some ideas: - Rolled oats: Use quick oats or gluten-free oats for a different texture. - Almond flour: Substitute with all-purpose flour or oat flour for a varied taste. - Honey or maple syrup: Try agave syrup or brown sugar for sweetness. - Coconut oil: You can use unsalted butter or another oil, like canola. - Fresh blueberries: Swap with raspberries, chopped strawberries, or dried fruit for new flavors. These substitutions help customize the bars to your liking while keeping them delicious and nutritious. Each serving of these Lemon Blueberry Breakfast Bars offers a healthy treat. Here’s a quick look at the nutrition: - Calories: Approximately 180 - Protein: Around 4g - Fat: About 9g - Carbohydrates: Close to 24g - Fiber: Roughly 3g - Sugar: About 7g This snack is not only tasty but also packed with nutrients. You get a good balance of healthy fats, carbs, and fiber, making it a great start to your day or a perfect snack. Enjoy these bars knowing they are both wholesome and satisfying. For the full recipe, check out the complete guide. To make these tasty lemon blueberry breakfast bars, start by preheating your oven to 350°F (175°C). Next, line an 8x8 inch baking dish with parchment paper. Leave some paper hanging over the edges. This helps you lift the bars later. In a large bowl, mix together the rolled oats, almond flour, baking powder, and salt. Ensure it’s well blended. In another bowl, whisk the honey or maple syrup, melted coconut oil, lemon zest, lemon juice, and vanilla extract together until smooth. Next, pour the wet mix into the dry mix. Stir until just combined. Gently fold in the fresh blueberries. Be careful not to crush them. Spread the mixture into your prepared baking dish, pressing it down firmly. Bake in the oven for 20-25 minutes. You know it’s done when the edges turn golden brown. Use a toothpick to check if the center is clean. Let it cool in the pan for about 10 minutes. Then, use the parchment paper to lift it out and cool completely. To get the best texture, use rolled oats instead of quick oats. This keeps the bars chewy. Make sure to press the mixture firmly into the dish. This helps the bars hold together when baked. Keep an eye on the baking time. Ovens can vary. Check for a golden edge and a clean toothpick. If the bars are too soft, they may fall apart. Once cooled completely, cut the bars into squares. Serve them on a wooden board. Drizzle a bit of honey on top and add some extra blueberries. A few lemon slices on the side make for a lovely presentation. These bars are great for breakfast or as a snack. Enjoy your delicious creation! To make perfect Lemon Blueberry Breakfast Bars, follow these simple tips: - Use fresh blueberries for the best taste. They burst with flavor. - Grate the lemon zest finely. This helps spread the flavor evenly. - Mix the dry and wet ingredients gently. This keeps the bars soft. - Press the mixture firmly into the pan. Firm bars hold together better. Avoid these common mistakes for great bars: - Don't skip the baking powder. It helps the bars rise. - Be careful not to overmix the batter. Too much mixing makes them tough. - Let the bars cool fully before cutting. This helps them hold their shape. - Don’t use too much lemon juice. It can make the bars too soggy. You can change up the bars for a fun twist: - Add nuts like almonds or walnuts for crunch. - Swap blueberries for raspberries or strawberries for different flavors. - Mix in seeds like chia or flax for added nutrition. - Drizzle with chocolate for a sweet treat. For the full recipe, check out the details above. Enjoy baking! {{image_2}} You can mix things up with different flavors. Try adding almonds or walnuts for crunch. For a tropical twist, add shredded coconut. If you love chocolate, mix in some dark chocolate chips. You can also use other berries like raspberries or strawberries for a fun change. Each option gives a new taste and texture. To make these bars gluten-free, swap almond flour for gluten-free flour. You can also use oats labeled gluten-free. For a vegan version, replace honey with maple syrup or agave nectar. This keeps the bars sweet and delicious without using any animal products. These changes make the bars fit for many diets. Using seasonal fruits adds a fresh touch. In the summer, try peaches or cherries. In the fall, you can use diced apples or pears with a bit of cinnamon. Winter is great for cranberries or citrus fruits. Each season offers unique flavors that make your breakfast bars exciting. For the full recipe, you can refer back to the complete list of ingredients and instructions. Store your Lemon Blueberry Breakfast Bars in an airtight container. This keeps them fresh longer. Place parchment paper between layers if you stack them. They stay tasty for about a week at room temperature. For longer storage, put them in the fridge. Cold bars taste great and last up to two weeks. If you want to keep these bars for a while, freezing is a smart choice. Wrap each bar in plastic wrap. Then, place them in a freezer bag. Be sure to remove as much air as possible. They freeze well for up to three months. When you're ready to enjoy, just thaw them in the fridge overnight. Reheating is easy and brings back their fresh taste. To reheat, place a bar in the microwave for about 15-20 seconds. This warms them without drying them out. You can also warm them in the oven at 350°F (175°C) for about 5-10 minutes. This method keeps them soft and delicious. Enjoy them warm for the best flavor! Lemon Blueberry Breakfast Bars stay fresh for about one week at room temperature. If you store them in the fridge, they can last up to two weeks. For longer storage, freeze them. They will keep well for up to three months in the freezer. Just remember to wrap them tightly to prevent freezer burn. Yes, you can use frozen blueberries! Just make sure to thaw and drain them first. This helps avoid extra moisture in the bars. The flavor will still be great, but the texture might change slightly. Frozen berries may also burst more when mixed in, so handle them gently. These breakfast bars are perfect on their own or paired with yogurt. You can also serve them with a drizzle of honey for added sweetness. For a fun twist, top them with a dollop of whipped cream or Greek yogurt and some extra blueberries. Enjoy them warm or cold, as they are delicious either way! Lemon Blueberry Breakfast Bars are fun and easy to make. We covered ingredients, tips, and storage. You learned how to make them tasty and fresh. Remember, you can swap ingredients and try new flavors. Storage and reheating tips help keep them yummy longer. Making these bars can bring joy to your mornings. Get creative and enjoy each bite!

Lemon Blueberry Breakfast Bars Tasty and Nutritious Snack

Are you looking for a tasty and nutritious snack to start your day? Look no further! These Lemon Blueberry Breakfast

For a tasty burrito bowl, you need: - 1 cup brown rice or quinoa - 1 can black beans, rinsed and drained - 1 cup corn (fresh, frozen, or canned) These main ingredients form the heart of your dish. I love using brown rice for its nutty flavor and texture. Quinoa is a great swap if you want something lighter and gluten-free. Black beans add protein and creaminess, while corn gives a sweet crunch. To make your burrito bowl colorful and fresh, gather: - 1 ripe avocado, diced - 1 cup cherry tomatoes, halved - 1 small red onion, diced - 1 cup bell peppers, diced (red, yellow, or green) These veggies not only add color but also great taste. Avocado brings creaminess, while tomatoes and peppers add juiciness and crunch. Red onion gives a nice sharp bite that balances the creaminess of the avocado very well. For flavor, you will need: - 1 teaspoon cumin - 1 teaspoon paprika - 1 teaspoon chili powder - Juice of 1 lime - Olive oil, salt, and pepper to taste These spices are key to giving your burrito bowls a warm, earthy flavor. Cumin adds depth, paprika brings a hint of sweetness, and chili powder spices things up. A squeeze of lime brightens everything up, making it taste fresh and zesty. By using these ingredients, you can create a delicious burrito bowl that is easy to prepare and full of flavor. For the full recipe, check out the details on how to put it all together. Enjoy! To start, combine one cup of brown rice and two cups of water (or vegetable broth) in a medium saucepan. Bring the mixture to a boil. Once boiling, lower the heat and cover the pan. Let it simmer for 30-35 minutes until the rice is fully cooked. Fluff the rice with a fork and set it aside. Next, heat a tablespoon of olive oil in a large skillet over medium heat. Add one diced small red onion and one cup of diced bell peppers. Sauté these for about 4-5 minutes until they are soft. Then, stir in one cup of corn and one can of black beans, rinsed and drained. Let these cook for another 3 minutes until heated through. Sprinkle in one teaspoon each of cumin, paprika, and chili powder. Also, add a pinch of salt and pepper. Mix everything well and let it cook for 2 more minutes. This allows the spices to blend nicely. Now it’s time to build your burrito bowl! Start with a base of the cooked brown rice (or quinoa) in a bowl. Layer the sautéed mixture on top of the rice. Next, add diced avocado and halved cherry tomatoes on the side. To brighten the flavors, drizzle fresh lime juice over the entire bowl. Finally, garnish with fresh cilantro for a pop of color and flavor. Enjoy your delicious and vibrant Easy Burrito Bowls! For the full recipe, check out the details above. To make your burrito bowls pop with flavor, consider these tips. First, use vegetable broth instead of water when cooking the rice. This simple swap adds depth to the dish. Second, squeeze fresh lime juice over the entire bowl. It brightens every bite and enhances the taste. To save time, prep all your ingredients in advance. Chop vegetables and measure spices before you start cooking. This way, you can assemble your bowls quickly. Cook the rice or quinoa ahead of time too. This step cuts down cooking time during busy weeknights. For a beautiful display, serve your burrito bowls in clear glass bowls. The vibrant colors of the ingredients will stand out and look appealing. Don’t forget to add lime wedges on the side. They not only look great but also invite guests to customize their flavor. {{image_2}} You can easily change the protein in your burrito bowls. Try adding grilled chicken for a classic taste. Shrimp is another great option, bringing a bit of seafood flair. If you want a meatless choice, tofu works well too. You can also use quinoa instead of rice for a fun twist. Both quinoa and rice offer a great base for your meal. Making your burrito bowls vegetarian or vegan is simple. Swap in plant-based cheese or sour cream for creamy goodness without dairy. You can also add more vegetables for extra nutrition. Think about bell peppers, zucchini, or spinach. These options boost flavor and color while keeping things healthy. Don’t shy away from flavors! You can mix in different spices like cayenne for heat or oregano for a fresh taste. Try adding salsa on top for a burst of flavor. Hot sauce can give your bowl an extra kick, too. Feel free to experiment until you find your perfect combination. Each variation can change the whole meal! Check out the Full Recipe to explore more ideas. To keep your burrito bowls fresh, store each part separately. This method helps maintain flavors and textures. Use airtight containers to seal in freshness. This way, your rice, beans, and veggies stay tasty until you're ready to eat again. You can freeze your cooked rice or quinoa for later use. It’s best to freeze these separately from your toppings. This helps keep everything fresh when you reheat later. When you’re ready to eat, gently reheat the rice or quinoa. This keeps the texture nice and fluffy. Leftovers from your burrito bowls last in the fridge for up to four days. After that, the taste may change. If you freeze the components, they can last up to three months. Just remember to label your containers with the date. This way, you won’t forget what's inside! To make your burrito bowls vegetarian, you just need to skip the meat. Use plant-based proteins like black beans or lentils instead. These ingredients pack a protein punch and add great flavor. You can also add more veggies, like sweet potatoes or zucchini, for extra nutrients and taste. Yes, you can meal prep burrito bowls easily! Cook and store each component in separate containers. This way, you can mix and match as you like. Keep cooked rice or quinoa in one container. In another, store your sautéed veggies and beans. Add fresh toppings like avocado or salsa just before serving for the best taste. Adding extra ingredients can really boost the flavor of your burrito bowls. Consider incorporating beans, such as pinto or kidney beans, for more texture. Different veggies, like roasted corn or jalapeños, can add a fun twist. You can also drizzle sauces like salsa or guacamole for a creamy finish. Don’t forget fresh herbs like cilantro or green onions for an added burst of flavor. For the complete recipe, check out the Full Recipe section. In this guide, we explored how to create easy burrito bowls. We covered the key ingredients, cooking steps, and storage tips. Remember to use fresh veggies and flavorful spices. You can customize these bowls to fit your taste. Feel free to experiment with proteins or toppings. These simple meals keep well, making them great for leftovers. Enjoy trying your own variations! Making burrito bowls is fun and a delicious way to eat healthy.

Easy Burrito Bowls Perfect for Quick Meal Prep

Are you tired of spending hours in the kitchen but still want a delicious meal? Look no further! These easy

- 1 lb large shrimp, peeled and deveined - 4 cloves garlic, minced - 2 tablespoons olive oil - 1 lemon, zested and juiced The main ingredients are simple yet full of flavor. Large shrimp make the dish hearty. Fresh garlic adds a punch that brightens each bite. Olive oil helps the shrimp cook evenly and adds richness. Finally, lemon gives a fresh tang that brings everything together. - 1 teaspoon smoked paprika - ½ teaspoon red pepper flakes (optional) - Salt and pepper to taste - 2 tablespoons fresh parsley, chopped Seasonings are key to elevating this dish. Smoked paprika adds depth and a subtle smokiness. Red pepper flakes give a little heat, but you can skip them if you prefer milder flavors. Salt and pepper enhance all the other tastes. Fresh parsley adds a pop of color and freshness when you serve the shrimp. - Lemon wedges - Side dishes that complement shrimp Lemon wedges are perfect for serving. They boost the lemon flavor when squeezed over the shrimp. You can pair this dish with light sides like a salad or roasted veggies. Rice or pasta also goes well, soaking up the tasty juices. For a fun twist, try serving the shrimp in tacos or on skewers. For the full recipe, visit [Full Recipe]. To start, mix together the olive oil, minced garlic, lemon zest, and lemon juice in a large bowl. This mix creates a bright and zesty marinade. Next, add the smoked paprika, red pepper flakes, salt, and pepper to the bowl. Stir everything well until combined. The flavors will blend together beautifully. Now, it’s time for the shrimp. Add the peeled and deveined shrimp to the bowl. Toss the shrimp in the marinade until they are fully coated. This step helps the shrimp soak up all those great flavors. For the best taste, let the shrimp marinate for at least 15 minutes. You can chill them in the fridge while they soak. Preheat your oven to 400°F (200°C). While the oven heats, spread the marinated shrimp evenly on a baking sheet lined with parchment paper. Make sure they are in a single layer for even cooking. Roast the shrimp for 8 to 10 minutes. Keep an eye on them; they should turn pink and opaque. Remember, overcooking can make them tough. Once done, take them out and garnish with fresh parsley. Enjoy your Lemon Garlic Roasted Shrimp right away! For more details, check the Full Recipe. To get shrimp just right, avoid overcooking them. Shrimp cook fast. If you leave them in too long, they turn tough and rubbery. The magic time is 8 to 10 minutes at 400°F (200°C). Check for color. When they are pink and opaque, they are done. You can add more flavor to your shrimp. Fresh herbs like thyme or basil work well. Try adding a pinch of cumin for a warm taste. You can also use lemon pepper for a zesty twist. Feel free to change the spice levels. If you like heat, add more red pepper flakes or even chili powder. Make your dish look great! After cooking, sprinkle fresh parsley on top. This adds a pop of green. Serve the shrimp on a bright plate. Add lemon wedges for color and zest. You can pair the shrimp with a side of rice or a fresh salad for a full meal. {{image_2}} To spice up your lemon garlic roasted shrimp, add some heat. Use fresh peppers like jalapeños or serranos. Chop them finely and mix them in the marinade. This adds a nice kick to the dish. If you prefer, try using crushed red pepper flakes for a similar effect. Adjust the amount based on your taste. You can make it mild or hot, depending on your mood! You can transform the shrimp into a hearty pasta dish. Cook your favorite pasta while the shrimp roasts. Once both are ready, toss them together in a large bowl. Add olive oil, lemon juice, and parsley for extra flavor. This makes a quick and filling meal. You can also add vegetables like spinach or cherry tomatoes for color and nutrition. Grilling the shrimp on skewers is a fun way to serve them. First, marinate the shrimp as usual. Then, thread them onto soaked wooden skewers. Preheat your grill to medium heat. Grill the skewers for about 2-3 minutes on each side. Watch closely to avoid overcooking. This method gives a nice smoky flavor and makes for easy serving at parties. For all the details and deliciousness, check the Full Recipe. To keep your lemon garlic roasted shrimp fresh, place them in an airtight container. A glass or plastic container works well. Make sure the shrimp cool down to room temperature first. After that, cover the container and put it in the fridge. Properly stored, they can last for up to three days. Always check for any bad smell before eating leftovers. When you want to enjoy your shrimp again, reheating safely is key. The best method is using a skillet over low heat. Add a splash of olive oil to keep the shrimp moist. Stir gently until they are warm. You can also use the microwave, but be careful. Heat in short bursts of 30 seconds, stirring in between, to keep the shrimp tender. Avoid high heat to prevent overcooking. If you have extra shrimp, freezing is a great option. First, place the cooled shrimp in a single layer on a baking sheet. Freeze them for about one hour. This step helps keep them from sticking together. After that, transfer the shrimp to a freezer-safe bag. Be sure to squeeze out as much air as possible. They can last up to three months in the freezer. To thaw, place them in the fridge overnight or run them under cold water for a quick thaw. Roasting shrimp takes about 8-10 minutes in a preheated oven at 400°F (200°C). The shrimp cook fast, so keep an eye on them. You want to remove them from the oven as soon as they turn pink and opaque. Overcooking makes them tough and rubbery. Yes, you can use frozen shrimp. Just make sure to thaw them first. You can do this by placing them in cold water for about 15-20 minutes. Frozen shrimp may have more water, so drain them well before marinating. Fresh shrimp usually have a better texture and flavor, but frozen works too. Lemon Garlic Roasted Shrimp pairs well with many dishes. Here are a few ideas: - Rice: Serve it over white or brown rice for a filling meal. - Pasta: Toss it with linguine or spaghetti for a tasty pasta dish. - Salad: A light salad with mixed greens balances the shrimp nicely. - Vegetables: Roasted or steamed veggies like asparagus or green beans complement the dish. You know shrimp is done when they turn pink and opaque. The tails will curl slightly. If you cut one open, it should be white and firm, not translucent. If they look gray or feel slippery, they need more time. Always check to avoid undercooking or overcooking your shrimp. For the full recipe, check out the [Full Recipe]. This blog post covered how to make delicious lemon garlic roasted shrimp. We discussed key ingredients like shrimp, garlic, and olive oil. I also shared tips for marinating, roasting, and ensuring perfect doneness. You can try different variations, like spicy shrimp pasta or skewers. In the end, cooking shrimp can be simple and tasty. Enjoy experimenting with flavors and serving ideas. You now have everything you need to impress your taste buds!

Lemon Garlic Roasted Shrimp Flavorful and Simple Dish

Are you ready to make a tasty, easy dish that will impress everyone? My Lemon Garlic Roasted Shrimp is packed

Energy balls are simple to make and need just a few key ingredients. Here’s what you will need: - 1 cup rolled oats - 1 cup grated carrots - 1/2 cup almond butter (or any nut butter of choice) - 1/4 cup maple syrup - 1/2 teaspoon vanilla extract - 1/2 teaspoon ground cinnamon - 1/4 teaspoon ground nutmeg - 1/4 cup raisins or dried cranberries, chopped - 1/4 cup chopped walnuts or pecans - Pinch of salt These ingredients work together to create a healthy snack. The rolled oats provide fiber and energy. Grated carrots add natural sweetness and vitamins. Almond butter gives protein and healthy fats. Maple syrup adds a lovely touch of sweetness. Cinnamon and nutmeg bring warmth and spice. The raisins or cranberries add chewiness, while the nuts give a nice crunch. You can mix and match these ingredients based on your taste. For the full recipe, check out the detailed instructions. Enjoy making these tasty treats! - Step 1: Combine dry ingredients First, I take a large bowl. I add 1 cup of rolled oats, 1 cup of grated carrots, and 1/4 cup of chopped nuts. I mix these dry ingredients well. - Step 2: Mix wet ingredients In another bowl, I add 1/2 cup of almond butter, 1/4 cup of maple syrup, and 1/2 teaspoon of vanilla extract. Then, I sprinkle in 1/2 teaspoon of ground cinnamon, 1/4 teaspoon of ground nutmeg, and a pinch of salt. I stir this until it’s smooth. - Step 3: Combine mixtures Next, I pour the wet mixture into the bowl with the dry ingredients. I mix them together until everything is well combined. I want to ensure the oats are coated nicely. - Step 4: Shape into balls Now comes the fun part! I use my hands to shape the mixture into small balls, about 1 inch in diameter. If the mixture sticks, I slightly wet my hands with water. - Step 5: Refrigerate Lastly, I place the energy balls on a baking sheet lined with parchment paper. I put them in the fridge for at least 30 minutes to firm up. This helps them hold their shape better. You can find the full recipe by following the steps above. Enjoy these tasty and nutritious treats as a quick snack! - Use fresh ingredients for optimal flavor Fresh carrots and nuts enhance the taste. They add crunch and sweetness you crave. - Experiment with different nut butters Almond butter works great, but try peanut or cashew butter. Each nut butter changes the flavor. - Adjust sweetness to taste If you like it sweeter, add more maple syrup. You can also use honey or agave. - Overmixing the ingredients Stir just enough to combine. Overmixing makes the mixture tough. - Not refrigerating long enough Chill the balls for at least 30 minutes. This helps them hold their shape. - Failing to coat hands with water to prevent sticking Wet your hands before rolling the mix. This small step makes shaping easier. {{image_2}} You can make carrot cake energy balls even more fun! Here are some ideas to switch things up: - Add-ins: Try mixing in chocolate chips or shredded coconut. Both give a nice texture and flavor. - Nut butter substitutions: If you don’t have almond butter, use peanut butter, sunflower seed butter, or even tahini. Each will add a unique taste! - Spice adjustments: Want a bolder flavor? Increase the cinnamon or nutmeg. You can also add ginger or allspice for a warm kick. Making these energy balls fit your diet is easy! Here are some tips: - Nut-free options: To make the recipe nut-free, simply replace the nut butter with sunflower seed butter. This keeps the taste great without nuts. - Vegan alternatives: To make it vegan, ensure you use maple syrup instead of honey. All the ingredients fit a vegan diet. With these variations, you can create the perfect carrot cake energy balls for your taste! For the full recipe, check out the details provided earlier. To keep your carrot cake energy balls fresh, store them in an airtight container. This helps lock in moisture and flavor. You can keep them in the fridge for up to one week. If you find you have extras, that's a great sign! Freezing is a smart way to extend their life. To freeze the energy balls, place them in a single layer on a baking sheet. Once they are frozen solid, transfer them to a freezer-safe bag. This way, you can enjoy them later without any hassle. When you're ready to eat them, simply take out the number you want. Let them thaw in the fridge for a few hours or at room temperature for about 30 minutes. Enjoy them as a quick snack or a healthy treat anytime! How long do carrot cake energy balls last? Carrot cake energy balls last about one week in the fridge. Store them in an airtight container. This keeps them fresh and tasty. Can I use gluten-free oats? Yes, you can use gluten-free oats. They work well in this recipe. Just make sure to check the label for certification. What are the health benefits of these energy balls? These energy balls are packed with nutrients. Carrots provide vitamins, while oats give you fiber. Almond butter adds healthy fats and protein, making them a great snack. How to make them nut-free? To make nut-free energy balls, use sunflower seed butter instead of almond butter. This substitution keeps the flavor and texture similar. Can I make these ahead of time for meal prep? Absolutely! These energy balls are perfect for meal prep. Make a batch and store them for quick snacks. Are carrot cake energy balls suitable for kids? Yes, kids love these energy balls! They are sweet and fun to eat. Plus, they are healthy for growing bodies. Can I substitute maple syrup with honey? Yes, honey works as a great substitute. It adds sweetness and flavor. Just use the same amount as the maple syrup. What’s the calorie count for each ball? Each energy ball has about 100 calories. This makes them a good snack option without too much guilt. In this article, I shared a simple recipe for carrot cake energy balls. We covered all the ingredients, steps, and helpful tips for success. I also suggested variations to suit your taste. Remember to use fresh ingredients for the best flavor. Avoid common mistakes like overmixing and not refrigerating long enough. These energy balls are great for snacks, meal prep, or quick energy boosts. Enjoy making them, and don’t hesitate to get creative with your flavors!

Carrot Cake Energy Balls Tasty and Nutritious Treat

Are you ready to boost your energy and satisfy your sweet tooth? These Carrot Cake Energy Balls are the perfect

- 1 pound fresh asparagus, trimmed - ½ cup grated Parmesan cheese - ¼ cup breadcrumbs (panko for extra crunch) - 2 tablespoons olive oil - 1 teaspoon garlic powder - ½ teaspoon paprika - Salt and pepper to taste - Zest of 1 lemon (for a fresh twist) - Baking sheet - Parchment paper - Mixing bowls - Measuring cups and spoons When I make baked Parmesan asparagus, I always start with fresh asparagus. Choosing bright green stalks with firm tips ensures great taste. You want to avoid limp or yellowing asparagus. I also use panko breadcrumbs. They give a crispier texture than regular breadcrumbs. The cheese adds a nice salty flavor that makes this dish sing. Don’t forget the lemon zest! It brightens up the flavors. The garlic powder and paprika add depth, creating a well-rounded taste. Using the right tools makes cooking easier. A baking sheet lined with parchment paper helps with cleanup. Mixing bowls let you combine the ingredients well, so each piece gets coated. I find that these ingredients come together to create a dish that is both crispy and flavorful. You can enjoy it as a side or a healthy snack. For the full recipe, check the earlier sections. - Preheat the oven to 425°F (220°C). - Prepare the baking sheet with parchment. This makes cleanup easy. - In a bowl, combine the grated Parmesan, breadcrumbs, garlic powder, paprika, lemon zest, salt, and pepper. Mix until all is blended well. - In another bowl, drizzle olive oil over the trimmed asparagus. Toss the asparagus to coat it well. - Now, take each piece of asparagus. Roll it in the cheese and breadcrumb mix. Press gently so it sticks well. - Arrange the coated asparagus on the baking sheet in a single layer. - Bake in the oven for 12-15 minutes. The asparagus should be tender and the coating crispy. To make your asparagus really crunchy, use panko breadcrumbs. They add a great texture. Adjust your oven rack to the middle. This helps heat circulate evenly. You want all sides of the asparagus to cook well. Think about adding fresh herbs or spices to boost flavor. Basil, thyme, or dill work great. You can also try different cheese types. Goat cheese or cheddar can create fun twists. Experimenting can lead to tasty surprises. For a beautiful presentation, serve your asparagus on a nice platter. Drizzle a little olive oil or fresh lemon juice over the top. It adds shine and flavor. Garnish with lemon wedges and fresh parsley. This gives a pop of color and freshness. {{image_2}} You can make this dish even more colorful and tasty. Consider adding roasted cherry tomatoes. Their sweet flavor pairs well with the asparagus. You can also slice bell peppers for extra color and crunch. Both options enhance the dish without much work. If you want to change the cheese, try using feta or goat cheese. These cheeses offer a tangy taste that works well with asparagus. For a different flavor, incorporate cheddar. Its sharpness adds a unique twist to the dish. To spice things up, add chili flakes for a spicy version. This will give your asparagus a nice kick. You can also try a Mediterranean style. Mixing in olives and feta creates a fresh and vibrant dish. These variations keep the recipe fun and interesting. For more details on how to make this dish, check the Full Recipe. After you bake your crispy asparagus, let it cool completely. This step helps keep the texture right. Once cooled, place the asparagus in an airtight container. It stays fresh for up to 3 days in the fridge. Just remember to avoid stacking them too high to keep them crisp. If you have leftovers, you can freeze them. First, let the asparagus cool. Then, place them in a single layer on a baking sheet. Freeze them for about 1 hour. Once frozen, transfer them to a freezer bag. They can last for up to 2 months. For reheating, bake them at 400°F (200°C) for about 10-12 minutes. This warms them up while keeping them crispy. To keep asparagus fresh before cooking, store it upright in a jar with water like flowers. Cover the tops with a plastic bag. Change the water every few days. Look for signs of spoilage, like soft spots or a slimy texture. Fresh asparagus should feel firm and snap easily when bent. Bake the asparagus at 425°F (220°C) for 12 to 15 minutes. This time gives the asparagus a tender inside and a crispy outside. Keep an eye on it near the end. You want it golden, not burnt. Yes, you can prep the asparagus ahead. Coat it and place it on the baking sheet. Cover it with plastic wrap and store it in the fridge. When you're ready, bake it straight from the fridge. It may need a minute or two longer to cook. Baked Parmesan asparagus pairs well with many dishes. Try it with grilled chicken, fish, or steak. It also goes great with pasta or as part of a veggie platter. The flavors mix well with lemony or herby meals. For detailed instructions and variations, check the [Full Recipe]. Baked Parmesan asparagus is simple and tasty. You learned the best ingredients, tools, and steps to make it. You can boost the flavor with fresh herbs or try different cheeses. Store leftovers well to enjoy later. Follow my tips for the perfect crunch and presentation. With these ideas, you can impress your family and friends. Start your cooking adventure today, and enjoy every bite!

Baked Parmesan Asparagus Crispy and Flavorful Side

Looking for a simple and tasty side dish? Baked Parmesan Asparagus will hit the spot! It’s crispy, flavorful, and a

- 1 ½ cups fresh strawberries, hulled and sliced - 1 ½ cups rhubarb, chopped into 1-inch pieces - 1 cup granulated sugar - ¼ cup cornstarch - 1 teaspoon vanilla extract - 1 teaspoon lemon juice - ¼ teaspoon salt - 1 tablespoon unsalted butter, cut into small pieces - 1 package (14 oz) refrigerated pie crusts (or homemade, if preferred) - 1 egg, beaten (for egg wash) - Sugar for sprinkling on top (optional) To make this pie, you need fresh strawberries and rhubarb. The sweet strawberries balance the tartness of the rhubarb. Use sugar to sweeten the filling. Cornstarch helps thicken the mixture. Vanilla extract adds a nice flavor. Lemon juice brightens and enhances the taste. Salt balances the sweetness. Butter adds richness to the filling. You can use store-bought pie crusts for ease. If you prefer, make your own crust for a personal touch. The beaten egg gives the crust a shiny finish. Sprinkling sugar on top adds a sweet crunch. You will need some kitchen tools. Mixing bowls help combine the filling. A 9-inch pie pan holds your pie. A rolling pin helps you flatten the dough. A pastry brush is used for the egg wash. For the full recipe, check the Classic Strawberry Rhubarb Pie section. Enjoy the baking journey! 1. Preheat your oven to 425°F (220°C). This helps the pie cook evenly. 2. In a large bowl, combine 1 ½ cups of fresh strawberries and 1 ½ cups of chopped rhubarb. 3. Add 1 cup of sugar, ¼ cup of cornstarch, 1 teaspoon of vanilla extract, 1 teaspoon of lemon juice, and ¼ teaspoon of salt. 4. Mix everything well and let it sit for about 15 minutes. This helps the flavors blend. 1. Roll out one pie crust and fit it into a 9-inch pie pan. Trim off any excess crust. 2. Pour the strawberry-rhubarb filling into the crust. Spread it out evenly. 3. Dot the top with small pieces of 1 tablespoon of unsalted butter. This adds rich flavor. 1. Roll out the second pie crust and cover the filling. Trim and crimp the edges to seal the pie. 2. Cut a few small slits in the top crust. This allows steam to escape during baking. 3. Brush the top with a beaten egg and sprinkle with sugar if you like. 4. Bake for 15 minutes at 425°F (220°C). Then, lower the temperature to 350°F (175°C) and bake for another 35-40 minutes. 5. Check for doneness. The filling should be bubbly, and the crust should be golden brown. Once baked, let the pie cool for at least 2 hours before slicing. This helps the filling set nicely. For more details on the full process, check out the Full Recipe. To make a great strawberry rhubarb pie, you need a good balance of sweet and tart. The strawberries add sweetness while the rhubarb brings the tang. Taste your filling before baking. If it's too sweet, add a bit more rhubarb. If it’s too tart, add some sugar. Let the filling sit for about 15 minutes after mixing. This helps the flavors meld together, making each bite delicious. A flaky crust is key to a great pie. For a perfect crust, keep your butter cold. Use a pastry cutter to mix the butter with the flour until it looks like crumbs. If you prefer convenience, store-bought crust works well too. Just remember to follow the package directions for best results. Homemade crust can be fun and rewarding, but it takes practice. Cooling your pie is very important. Let it sit for at least 2 hours before slicing. This helps the filling set and makes serving easier. When it’s time to serve, I recommend adding a scoop of vanilla ice cream or a dollop of whipped cream. This adds a creamy texture that pairs perfectly with the fruity filling. Enjoy your pie with friends and family! {{image_2}} You can change up the fruit in this pie. Try adding blueberries or peaches for a fun twist. Both fruits bring their own sweet and tart notes, enhancing the classic flavor. You can also use alternative sweeteners, like honey or maple syrup. This option suits those looking for healthier choices while still enjoying dessert. If you need a gluten-free option, use almond or coconut flour for the crust. These flours give the pie a unique flavor and texture. You can also experiment with lattice crusts. A lattice crust looks stunning and lets the filling peek through, adding a rustic charm. To make your pie even better, add spices like cinnamon or nutmeg. These spices warm up the flavors and make your pie smell amazing. You can also add zest from citrus fruits, like lemon or orange. This extra touch brightens the filling and lifts the overall taste. For the full recipe, check out the Classic Strawberry Rhubarb Pie 🥧 section above. To keep your pie fresh, store it in the fridge. Place it in an airtight container. This helps keep the crust from getting soggy. Your pie will last about 3 to 4 days in the fridge. If you want to enjoy it longer, consider freezing it. You can freeze your pie before or after baking. If you freeze it before baking, wrap it well in plastic wrap. Then, place it in a freezer bag. Bake it straight from the freezer when you're ready. If freezing after baking, let it cool first. Wrap it tightly and store it in the freezer. To thaw a frozen pie, place it in the fridge overnight. This keeps the filling from becoming watery. If you need it fast, you can thaw it at room temperature for a few hours. Always bake a thawed pie until it is hot and bubbly. For the complete recipe, check the Full Recipe section. To keep your crust crisp, use these simple tips: - Blind bake the crust: Pre-bake the crust for 10 minutes before adding filling. - Use a hot oven: Start baking at a high temperature to set the crust quickly. - Avoid too much moisture: Drain any excess liquid from the fruit before mixing. These steps help create a flaky, golden crust that stands up to juicy filling. Yes, you can use frozen fruit! Just remember these adjustments: - Thaw the fruit: Let it sit until soft, then drain excess liquid. - Increase cornstarch: Add an extra tablespoon of cornstarch to help thicken the filling. Frozen fruit works well, but fresh fruit gives a better texture and taste. Look for these signs to check doneness: - Bubbling filling: The fruit juices should be bubbling through the slits in the crust. - Golden crust: The top crust should be a nice, golden brown. - Temperature check: An internal temperature of about 200°F means the pie is ready. These cues help ensure your pie is perfectly baked and ready to enjoy. Cornstarch is important for thickening your pie filling. Here’s why: - Prevents a runny filling: It helps absorb the juices from the fruit, making it thick. - Creates a nice texture: A thicker filling holds together better when you slice the pie. While you can use other thickeners, cornstarch is the easiest and most effective. For the full recipe, check out the Classic Strawberry Rhubarb Pie! This blog post covered how to make a delicious strawberry-rhubarb pie. We talked about the key ingredients, step-by-step instructions, tips for the perfect pie, and fun variations. Remember to balance sweetness with tartness and let your pie cool before serving. This pie is a great treat, and you can experiment with flavors and crusts. With practice, you’ll find your own perfect recipe and make every bite amazing. Enjoy your baking adventure!

Classic Strawberry Rhubarb Pie Delightful and Easy Recipe

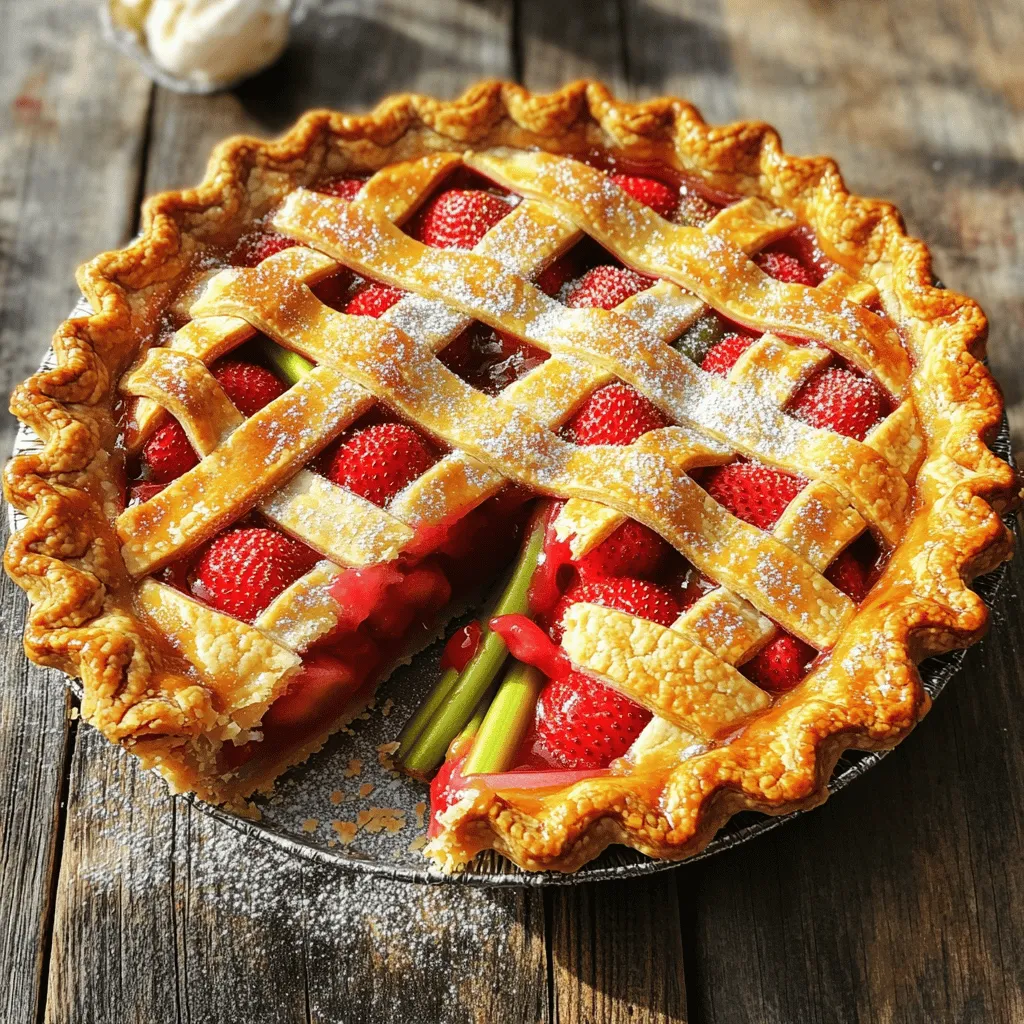
Are you ready to make a timeless treat that’s both easy and delicious? This Classic Strawberry Rhubarb Pie combines sweet

- Chicken and Marinade Components - 1 lb chicken breast, thinly sliced - 3 tablespoons olive oil - 2 tablespoons Greek yogurt - 1 tablespoon lemon juice - 2 cloves garlic, minced - 1 teaspoon dried oregano - ½ teaspoon paprika - Salt and pepper to taste - Fresh Vegetables - 4 pita breads - 1 cup lettuce, shredded - 1 tomato, diced - ½ cucumber, sliced - Optional Toppings - Feta cheese, crumbled - Tzatziki sauce (store-bought or homemade) I choose chicken breast for this recipe. It cooks quickly and stays juicy. The marinade is key. I mix olive oil, Greek yogurt, lemon juice, garlic, oregano, paprika, salt, and pepper. This mix gives the chicken great taste. I let the chicken marinate for at least 30 minutes. This step makes a big difference. For fresh veggies, I use lettuce, tomato, and cucumber. They add crunch. You can also use feta cheese for extra flavor. Tzatziki sauce is a must. It pairs well with the chicken. You can buy it or make it at home. Gather these ingredients to make tasty chicken gyros. Check the full recipe for more details. Start by gathering your ingredients for the marinade. You need olive oil, Greek yogurt, lemon juice, minced garlic, dried oregano, paprika, salt, and pepper. In a mixing bowl, combine these ingredients. Mix them well to form a smooth marinade. Now, take your thinly sliced chicken breast. Add it to the marinade and stir. Make sure each piece gets coated. This step is key for flavor. Cover the bowl and let it chill in the fridge for at least 30 minutes. If you have time, two hours will deepen the taste. After marinating, heat a non-stick skillet or grill to medium-high. Once hot, add the marinated chicken. Cook it for about 6-8 minutes. Flip the chicken occasionally. It should turn golden brown and be cooked through. You can check if it's done by cutting a piece. If it’s no longer pink inside, it’s ready! While the chicken cooks, warm your pita bread in a separate dry pan for 1-2 minutes on each side. You want it soft and easy to fold. Now comes the fun part! Take your warm pita and place some cooked chicken in the center. Next, add your toppings: shredded lettuce, diced tomato, and cucumber slices. If you like cheese, sprinkle some crumbled feta on top. Finally, drizzle tzatziki sauce over everything. This sauce gives it that classic gyros taste. Fold the pita in half or roll it up to hold all the tasty fillings inside. Serve your gyros warm. You can keep extra tzatziki on the side for dipping. Enjoy your homemade chicken gyros, a great dish that brings flavor to the table! For the full recipe, check out the detailed instructions. To make your chicken gyros burst with flavor, focus on the marinade. Use fresh garlic for the best taste. Try adding a splash of vinegar for a tangy kick. If you love heat, consider a pinch of red pepper flakes. Marinate the chicken for at least 30 minutes, but longer is better. This allows the flavors to soak in deeply. You can even marinate overnight for a bold flavor. There are a few ways to cook your chicken for gyros. Here are three popular methods: - Grilling: This gives a smoky flavor and nice grill marks. - Pan-searing: This method keeps the chicken juicy and adds a crisp outside. - Baking: This is an easy, hands-free option, but it may not have the same char. Each method brings a unique taste to your dish. Choose the one you like best! Tender chicken is key for great gyros. Here are some tips to achieve that: - Slice thinly: Cutting the chicken into thin strips helps it cook evenly. - Don’t overcook: Chicken turns dry quickly. Cook it just until it’s no longer pink. - Let it rest: After cooking, let the chicken sit for a few minutes. This helps keep the juices inside. By following these tips, your chicken will be tender and full of flavor. For the complete process, check the Full Recipe. {{image_2}} You can switch ingredients for your chicken gyros. For the chicken, try turkey or even tofu for a plant-based option. Instead of Greek yogurt, use regular yogurt or sour cream. You can also swap olive oil for avocado oil or any other oil you like. If you want a kick, use cayenne pepper instead of paprika. Lastly, feel free to use whole wheat or gluten-free pita bread. Tzatziki is a must for gyros. If you want a twist, mix Greek yogurt with mashed avocado. This gives a creamy texture and a unique flavor. You can also blend Greek yogurt with dill and lemon zest for a fresh taste. For a spicy version, add some jalapeños or hot sauce. These options keep the essence of tzatziki while adding a fun twist. You can cook the chicken in various ways. Grilling gives a smoky flavor and nice char. You can also bake the chicken in the oven for a healthier choice. If you want a quick meal, try sautéing the chicken in a skillet. Each method offers a different taste, so choose what suits you. You can even use a slow cooker for tender chicken that falls apart. Each style makes delicious chicken gyros! To store leftover gyros, wrap each gyro tightly in foil or plastic wrap. This keeps them fresh and prevents them from drying out. Place the wrapped gyros in an airtight container or a resealable bag. Store them in the fridge for up to three days. If you have any leftover chicken, store it separately in a sealed container. When it's time to reheat your gyros, unwrap them to avoid sogginess. You can use a microwave, oven, or skillet. For the microwave, heat on medium for about 1-2 minutes until warm. If using the oven, wrap in foil and heat at 350°F for 10-15 minutes. A skillet works well too; heat over medium for about 5 minutes, turning occasionally. This keeps the gyro crispy. If you want to freeze gyros, it's best to freeze the chicken separately. Cool the cooked chicken completely before placing it in a freezer-safe bag. You can freeze it for up to three months. When ready to eat, thaw in the fridge overnight. Then, reheat it following the same steps as above. You can also freeze the tzatziki sauce separately if needed. Just remember to stir it well before using it again. Yes, you can use frozen chicken. Just remember to thaw it first. You can do this in the fridge overnight or use the microwave. After thawing, slice it thinly. Then, marinate it as you would with fresh chicken. The flavors will seep in, making your gyros tasty. To make tzatziki, you need a few simple ingredients. Combine 1 cup of Greek yogurt with 1 grated cucumber. Add 1 clove of minced garlic, 1 tablespoon of lemon juice, and salt to taste. Mix well and chill it for at least 30 minutes. This will let the flavors blend nicely. Homemade tzatziki is fresh and really elevates your gyros. Chicken gyros pair well with many sides. You can serve them with fries or a simple Greek salad. Rice pilaf or roasted vegetables also complement the dish. For a refreshing drink, try serving it with lemonade or iced tea. These sides will enhance the meal and make it a feast. For the full recipe, check out the details above! In this blog post, we covered all you need for delicious chicken gyros. We discussed key ingredients like chicken, marinade, fresh veggies, and toppings. You learned step-by-step instructions for marinating, cooking, and assembling the gyros. I shared tips for enhancing flavor and various cooking methods. We also explored ingredient variations and how to store leftovers. Remember, you can easily adapt this recipe to suit your taste. Enjoy making gyros that impress your family and friends!

Easy Chicken Gyros Simple and Flavorful Recipe

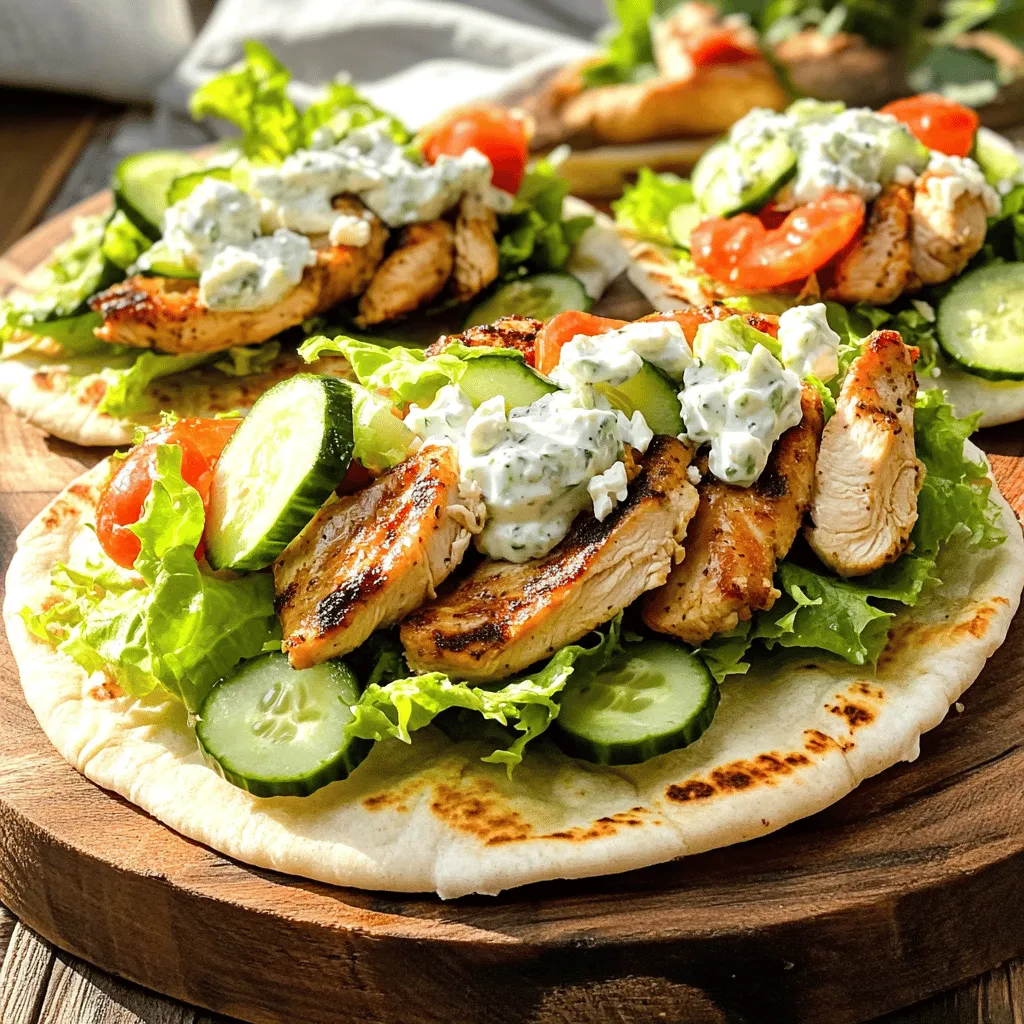
Get ready to impress your family and friends with my easy chicken gyros recipe! These simple and flavorful wraps are

To make One Pot Creamy Mushroom Pasta, you need some key items. - 250g pasta (penne or fusilli works well) - 1 tablespoon olive oil - 1 medium onion, finely chopped - 3 cloves garlic, minced - 300g mushrooms, sliced (white or cremini) - 4 cups vegetable broth - 1 cup heavy cream or coconut cream for a dairy-free option - 1 teaspoon dried thyme - 1 teaspoon Italian seasoning - Salt and pepper to taste - 1/2 cup grated Parmesan cheese (omit for a vegan version) - Fresh parsley, chopped (for garnish) These ingredients form the base of your dish. The pasta absorbs the flavors from the broth and cream. The mushrooms add depth, and the herbs create a lovely aroma. You can enhance your dish with some extra ingredients. - Cheese alternatives (like nutritional yeast for a vegan option) - Garnishes (like extra parsley or chives) - Spices for added flavor (like red pepper flakes or paprika) These optional items let you customize the dish. You might want a little extra kick with spices or a cheesy touch with alternatives. Add whatever makes your taste buds dance! If you're ready to dive deeper, check the Full Recipe for all steps and tips. Enjoy cooking! To start, heat the olive oil in a large pot over medium heat. Add the finely chopped onion. Sauté for about 3-4 minutes until the onion turns soft and clear. This step builds a great flavor base. Next, stir in the minced garlic. Add the sliced mushrooms and cook for about 5-7 minutes. You want the mushrooms to be tender and nicely browned. This enhances their taste. Now, it's time to combine everything in one pot. Pour in the vegetable broth and bring the mixture to a boil. Once boiling, add the pasta. Stir in the dried thyme, Italian seasoning, salt, and pepper. Make sure everything mixes well. Cover the pot and reduce the heat to a simmer. Cook for 12-15 minutes until the pasta reaches that perfect al dente texture. Stir occasionally to stop it from sticking to the pot. Once the pasta is cooked, stir in the heavy cream. If you want a dairy-free option, use coconut cream. Add the grated Parmesan cheese for extra creaminess. Cook for 2-3 minutes until the sauce is warm and thick. Make sure to taste it and adjust the seasoning. Add more salt or pepper if needed. Let it sit for a few minutes as the sauce thickens. Serve hot, garnished with fresh chopped parsley for a nice touch. Preventing pasta from sticking: To keep your pasta from sticking, stir it often while it cooks. Adding a splash of olive oil to the boiling water can also help. Remember to cook your pasta until it is al dente. This means it should be firm but not hard. Overcooking can lead to sticky pasta. Choosing the right type of pasta: For this dish, I love using penne or fusilli. These shapes hold the creamy sauce well. You can also try spaghetti or farfalle if you prefer. The key is to pick a pasta that can catch the sauce. Adjusting the cream consistency: To make your sauce creamy, add the heavy cream slowly. Stir it in gently. If you want a thicker sauce, let it cook a bit longer. Keep in mind that the sauce will thicken as it cools. Dairy-free alternatives: If you want a dairy-free option, use coconut cream. It gives a nice flavor and keeps the dish creamy. You can also try cashew cream for a nutty taste. Pairing with salads or bread: This creamy mushroom pasta goes great with a fresh salad. A simple green salad with lemon dressing works well. You could also serve it with crunchy garlic bread. Best wine options: For wine lovers, a crisp white wine pairs nicely. Try a Pinot Grigio or a Chardonnay. These wines enhance the flavors of the dish without overpowering them. For the full recipe, check out the One Pot Creamy Mushroom Pasta recipe. {{image_2}} You can easily make this dish vegan by swapping some ingredients. Use coconut cream instead of heavy cream. For cheese, simply omit the Parmesan or use a vegan alternative. To boost the flavor, add chopped nuts like cashews or walnuts. Seeds, such as sunflower or pumpkin seeds, also work well for crunch. They add texture and flavor without dairy. Want to add some protein? You can include cooked chicken or shrimp for a heartier meal. Simply sauté the protein with the onions and garlic. If you prefer a vegetarian option, chickpeas or lentils are great choices. They provide protein and fiber. Just mix them in when you add the pasta. Mushrooms add depth to your dish. You can use various types to change the flavor. Try shiitake, portobello, or oyster mushrooms. Mixing different kinds makes the dish more interesting. Each mushroom brings its unique taste. This variety creates a rich, complex flavor profile in your pasta. To keep your One Pot Creamy Mushroom Pasta fresh, let it cool first. Place it in an airtight container. It should stay good for up to three days in the fridge. When you want to eat it again, just reheat it gently on the stove or in the microwave. Stir it well to make sure it heats evenly. If you want to freeze your pasta, use a freezer-safe container. Let the dish cool completely before packing it. Label the container with the date to track freshness. You can freeze it for up to three months. When ready to eat, thaw it overnight in the fridge. Reheat it gently on the stove, adding a splash of broth or cream to bring it back to life. Enjoy your creamy meal anytime! Can I use other pasta shapes? Yes, you can use any pasta shape you like. Fettuccine, spaghetti, or even shells work great. Just adjust the cooking time as needed. Each shape adds a fun twist to the dish. How can I make it gluten-free? To make this dish gluten-free, choose gluten-free pasta. Many brands offer great options that taste just as good. Be sure to check for cross-contamination if you have a severe allergy. What can I use instead of heavy cream? You can use coconut cream for a dairy-free option. It gives a rich flavor without the dairy. For a lighter choice, use half-and-half or milk with a bit of flour to thicken. Dairy-free cheese options? There are many dairy-free cheese options available. Nutritional yeast adds a cheesy flavor. You can also find brands that make vegan Parmesan or cream cheese alternatives. How long can I store leftovers? You can keep leftovers in the fridge for up to three days. Store them in an airtight container to keep them fresh. Reheat on the stove or in the microwave. Is it better to cook pasta al dente? Yes, cooking pasta al dente is best. It adds a nice bite and texture to your dish. Plus, it holds up better when mixing with sauce. Enjoy the perfect pasta every time! This blog post explored making a creamy pasta dish. We looked at key ingredients like pasta, vegetables, cream, and seasonings. You learned how to sauté and cook the pasta to get perfect texture. Tips on keeping pasta from sticking and achieving creaminess were also shared. In the end, use these simple steps to create your perfect pasta. Don’t hesitate to mix in your favorite flavors and personal touches. Enjoy your cooking!

One Pot Creamy Mushroom Pasta Quick Comfort Dish

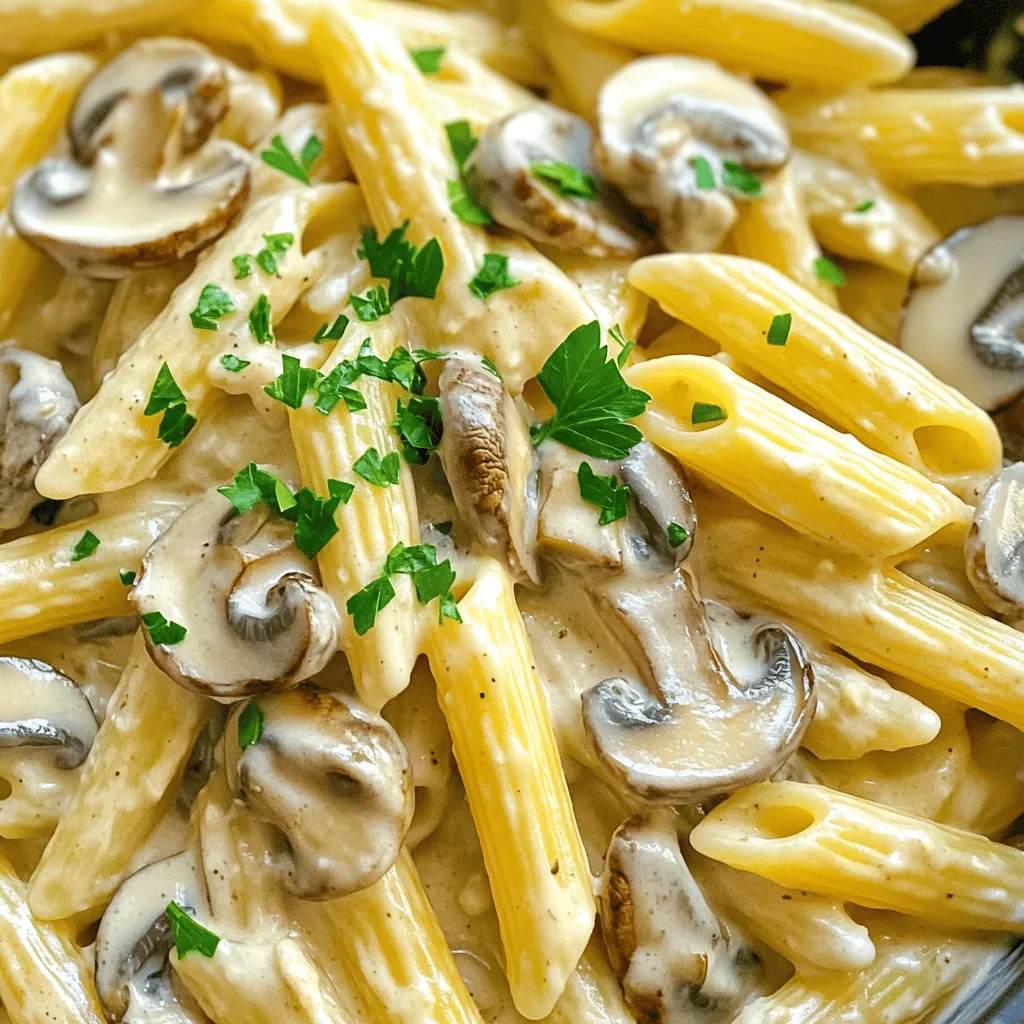
Looking for a quick and easy dinner idea? One Pot Creamy Mushroom Pasta is the perfect comfort dish for you!

- Baby carrots or regular carrots - Olive oil and garlic - Fresh herbs: thyme and rosemary - Seasoning: salt and pepper To make garlic herb roasted carrots, gather your ingredients first. Use baby carrots for ease, or slice regular carrots into sticks. Carrots bring a sweet flavor and colorful touch. Olive oil adds richness and helps the carrots roast well. Garlic gives a bold taste that pairs perfectly with the sweet carrots. Fresh herbs like thyme and rosemary elevate the dish. Thyme has a minty flavor, while rosemary adds a piney note. Together, they create a lovely herb blend. Don’t forget salt and pepper! They enhance all the flavors. If you want to make it special, add lemon zest. It brightens the dish and adds freshness. You can also include balsamic vinegar for a tangy twist. This ingredient is optional but worth a try. Now that you have everything, you’re ready to cook. Check out the Full Recipe to see how to combine all these tasty ingredients! First, preheat your oven to 425°F (220°C). This high heat helps the carrots roast perfectly. Next, prepare your baking sheet by lining it with parchment paper. This makes for easy cleanup and ensures the carrots don't stick. In a large mixing bowl, combine the baby carrots with olive oil, minced garlic, thyme, rosemary, salt, and pepper. If you want a tangy twist, add balsamic vinegar too. Toss everything together until the carrots are evenly coated. This step is key to getting that rich flavor in every bite. Spread the carrots out in a single layer on the prepared baking sheet. It’s important they are not crowded, so they can roast well. Now, place the sheet in the preheated oven. Roast the carrots for about 25-30 minutes. They should be tender and slightly caramelized. Remember to stir halfway through for even cooking. Once done, the carrots will be ready to enjoy, packed with flavor. Check out the Full Recipe for more details! To get the best flavor and texture from your carrots, space them evenly on the baking sheet. Crowding leads to steaming, not roasting. You want each carrot to have its own space to brown and caramelize. Stir the carrots halfway through roasting. This helps them cook evenly and develop a nice, golden color. To boost the flavor, try adding balsamic vinegar. This adds a sweet and tangy kick. Drizzle it over the carrots before roasting for a rich taste. After roasting, sprinkle fresh parsley on top. It adds a pop of color and freshness. You can also add lemon zest for a bright finish. For the full flavor experience, check out the Full Recipe. {{image_2}} You can switch up the herbs to change the flavor. Try using parsley or oregano instead of thyme and rosemary. Each herb brings its own taste. For less flavor, use less of the herbs. If you want more flavor, add a bit more. This way, you can make the dish suit your taste. Want to add a sweet touch? Honey or maple syrup can create a nice glaze. Just drizzle a little over the carrots before roasting. You can also try adding citrus flavors. Lemon juice or orange zest can brighten the dish. These options let you explore new flavors while keeping it simple. For the full recipe, check out the details. To store your garlic herb roasted carrots, let them cool first. Place them in an airtight container. They will stay fresh in the fridge for about 3 to 5 days. If you want to enjoy them later, freezing is a great option. To freeze roasted carrots, spread them on a baking sheet in a single layer. Freeze them for about 1 hour until firm. Then, transfer the carrots to a freezer bag. Remove as much air as possible. They can last for up to 3 months in the freezer. When it's time to reheat, the oven works best. Preheat your oven to 350°F (175°C). Spread the carrots on a baking sheet and heat for about 10-15 minutes. This method keeps them crispy and tasty. You can also reheat them in a microwave. Place the carrots in a bowl and cover with a damp paper towel. Heat for 1-2 minutes. This keeps them from drying out. Enjoy these carrots warm, and they will taste just as good as when you first made them. Yes, you can use frozen carrots. However, fresh carrots taste better. Frozen carrots may become softer during cooking. If you use them, reduce the roasting time. Check for tenderness as they cook. Garlic herb roasted carrots make a great side dish. They pair well with chicken, beef, or fish. You can also serve them with grains like quinoa or rice. For a fun twist, add them to salads or grain bowls. They add color and flavor to any meal! You can prep the carrots ahead of time. Just wash, peel, and cut them. Store them in the fridge in an airtight container. You can also mix the garlic and herbs in advance. Toss the carrots with the mix right before roasting. This helps save time and makes cooking easier. For the full recipe, refer to the section above! Roasting carrots is simple and fun. We looked at all the key ingredients, from fresh herbs to olive oil. I shared easy steps to prep, mix, and roast your carrots for a perfect dish. Tips like even spacing and flavor boosts help make your carrots shine. You can even mix it up with herbs or sweetness. Remember to store leftovers properly and reheat to keep great taste. Enjoy your roasted carrots as a healthy side dish or snack!

Garlic Herb Roasted Carrots Simple Flavorful Side

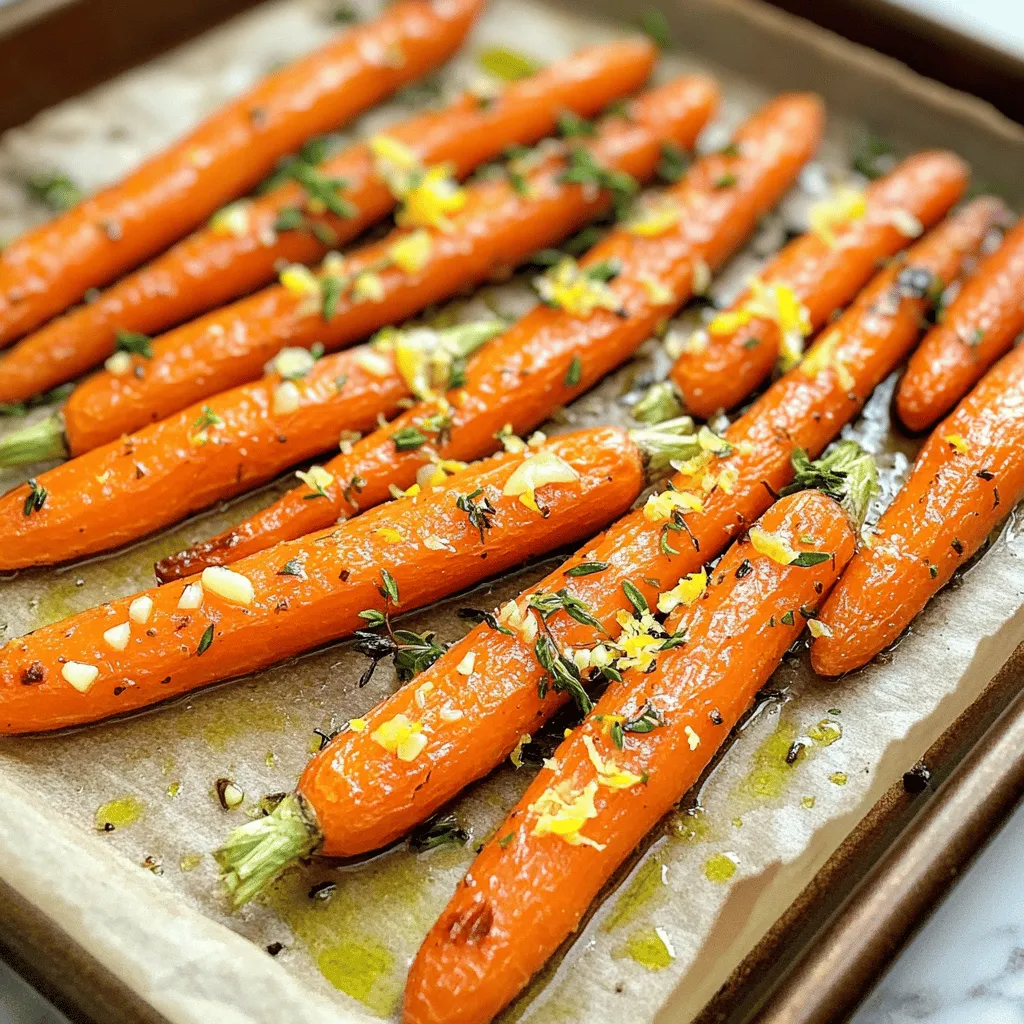
Looking for a tasty side dish that’s easy to make? Garlic Herb Roasted Carrots are your answer! This simple recipe

For a delightful Mango Black Bean Salsa, you'll need a few fresh ingredients. Here’s what to gather: - 1 ripe mango, diced - 1 can (15 oz) black beans, rinsed and drained - 1 red bell pepper, diced - 1 small red onion, finely chopped - 1 jalapeño, deseeded and minced - 1/4 cup fresh cilantro, chopped - Juice of 2 limes - Salt and pepper, to taste - 1 tablespoon olive oil - 1 teaspoon ground cumin These ingredients come together to create a bright and tasty dish. The ripe mango adds sweetness, while black beans give it a hearty base. The red bell pepper and onion add crunch and color. The jalapeño offers a little heat, but you can adjust it to your taste. Fresh cilantro brings a burst of freshness. Lime juice and olive oil tie everything together, adding a zesty flair. Lastly, cumin adds a warm, earthy note that enhances the overall flavor. You can find the full recipe for preparation details and serving suggestions. Enjoy making this salsa! To make Mango Black Bean Salsa, start with a large bowl. Combine these diced ingredients: - 1 ripe mango, diced - 1 can (15 oz) black beans, rinsed and drained - 1 red bell pepper, diced - 1 small red onion, finely chopped - 1 jalapeño, deseeded and minced - 1/4 cup fresh cilantro, chopped Next, mix your lime dressing in a smaller bowl. Whisk together: - Juice of 2 limes - 1 tablespoon olive oil - 1 teaspoon ground cumin - Salt and pepper, to taste Once your dressing is ready, pour it over the salsa mix. Gently toss everything together to coat the ingredients well. After mixing, taste the salsa. Adjust the seasoning to your liking. You might want more salt, pepper, or lime juice based on your taste. Cover the bowl with plastic wrap and refrigerate the salsa for at least 30 minutes. This resting time helps all the flavors meld together beautifully. When it’s time to serve, give the salsa another gentle toss. For a colorful presentation, use a bright bowl. Serve it with tortilla chips for dipping. Add lime wedges and extra cilantro on top for a fun touch. This salsa pairs well with grilled chicken or fish, making it a versatile dish to enjoy. For the full recipe, check back to ensure you have everything you need for this tasty treat! To pick the perfect mango, look for a few signs. A ripe mango feels slightly soft when you squeeze it. Its skin should have a nice color, often yellow or red. If it smells sweet near the stem, it’s likely ripe. If you find hard mangoes, leave them at room temperature for a few days. Once ripe, store them in the fridge to slow down ripening. Feel free to swap ingredients based on your taste. You can use black-eyed peas instead of black beans. If you like heat, add more jalapeños or even some diced serrano peppers. For a twist, try adding diced avocado or corn. To enhance flavor, sprinkle in some smoked paprika or chili powder. This adds a fun kick to your salsa. Cut your ingredients in different styles for more interest. Try dicing the bell pepper small and slicing the red onion into thin rings. This adds a nice visual touch. You can also mix in extra veggies like diced cucumber or chopped radishes. These additions bring crunch and color that make your salsa pop. This salsa is delightful and easy to make using the full recipe. Enjoy the vibrant flavors and fresh ingredients! {{image_2}} You can add a fun twist to mango black bean salsa. Try mixing in diced pineapple for a sweet touch. The juicy pineapple enhances the salsa's flavor and adds a tropical feel. You can also swap out black beans for kidney beans or chickpeas. Each legume brings its own taste and texture, making the salsa unique. If you want heat, add more jalapeños or a splash of hot sauce. This will give the salsa a spicy kick. You can also try using chili powder for a different type of heat. Just a pinch can change the flavor. Adjust the spice to fit your taste buds. Herbs can bring freshness to the salsa. Adding fresh mint or basil can brighten the dish. These herbs create a unique flavor that pairs well with the mango. You can also try other herbs like parsley or dill. Each herb gives the salsa a special twist. For more details on creating this flavorful dish, check out the Full Recipe. To store leftover salsa, place it in an airtight container. This helps keep it fresh. You can store it in the fridge for up to three days. After that, the flavors fade, and it may not taste as good. If you want to keep salsa longer, freezing is a good option. Use a freezer-safe container or bag. Be sure to leave some space for the salsa to expand. When you’re ready to eat it, thaw the salsa in the fridge overnight. This method keeps the taste and texture intact. To spot bad salsa, look for changes in color or smell. If it smells sour or has a strange hue, it’s best to throw it away. Always check for mold. To prevent spoilage, use clean utensils when serving and seal it tightly after each use. Keeping it cold also helps it last longer. You can serve Mango Black Bean Salsa with many dishes. It pairs well with grilled chicken or fish. Use it as a topping for tacos or burritos. You can also enjoy it with tortilla chips for a tasty snack. Try adding it to salads for extra flavor and crunch. Homemade salsa stays fresh in the fridge for up to five days. Store it in an airtight container. Always check for any signs of spoilage before eating. If it looks or smells off, it’s best to toss it out. You can use canned mango, but fresh mango tastes better. Canned mango may have added sugar. Always rinse it well before using. Fresh mango gives the salsa a bright taste and firm texture. If you choose canned, look for fruit packed in its own juice. Yes, this salsa is healthy! It is low in calories, and high in fiber and vitamins. Each serving has about 100 calories. The black beans add protein, while the mango provides vitamins A and C. Enjoy it guilt-free as a snack or side dish. You can prepare Mango Black Bean Salsa a day in advance. This allows the flavors to blend well. Just cover it tightly and refrigerate. Give it a gentle stir before serving. It remains fresh for up to five days in the fridge. For the full recipe, check out the details above. This blog post covered how to make a tasty mango black bean salsa. We looked at the needed ingredients, easy steps for prep, and tips to enhance flavor. You learned ways to store salsa and variations to try. Mango black bean salsa is fun to make and share. You can customize it to fit your tastes. Enjoy the fresh flavors and healthy benefits this dish brings to your table. Happy cooking!

Mango Black Bean Salsa Flavorful and Fresh Delight

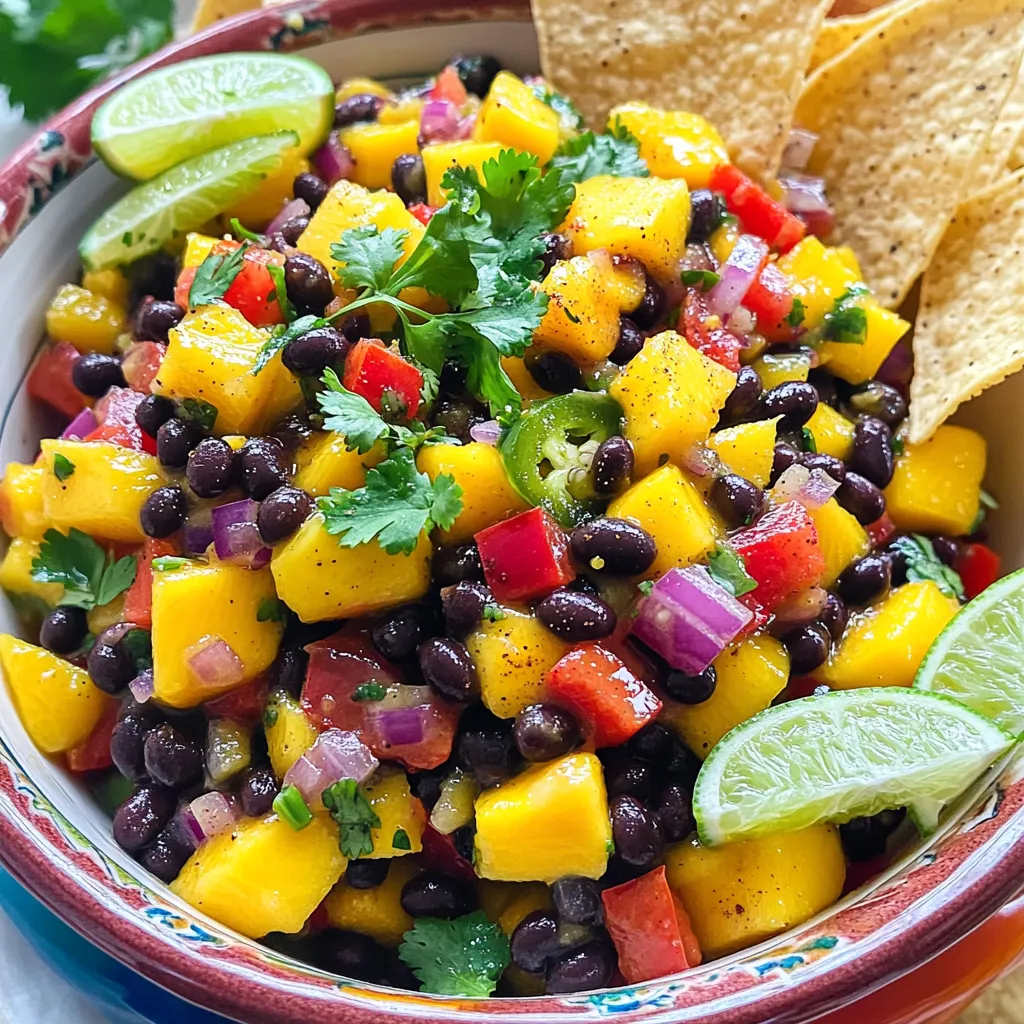
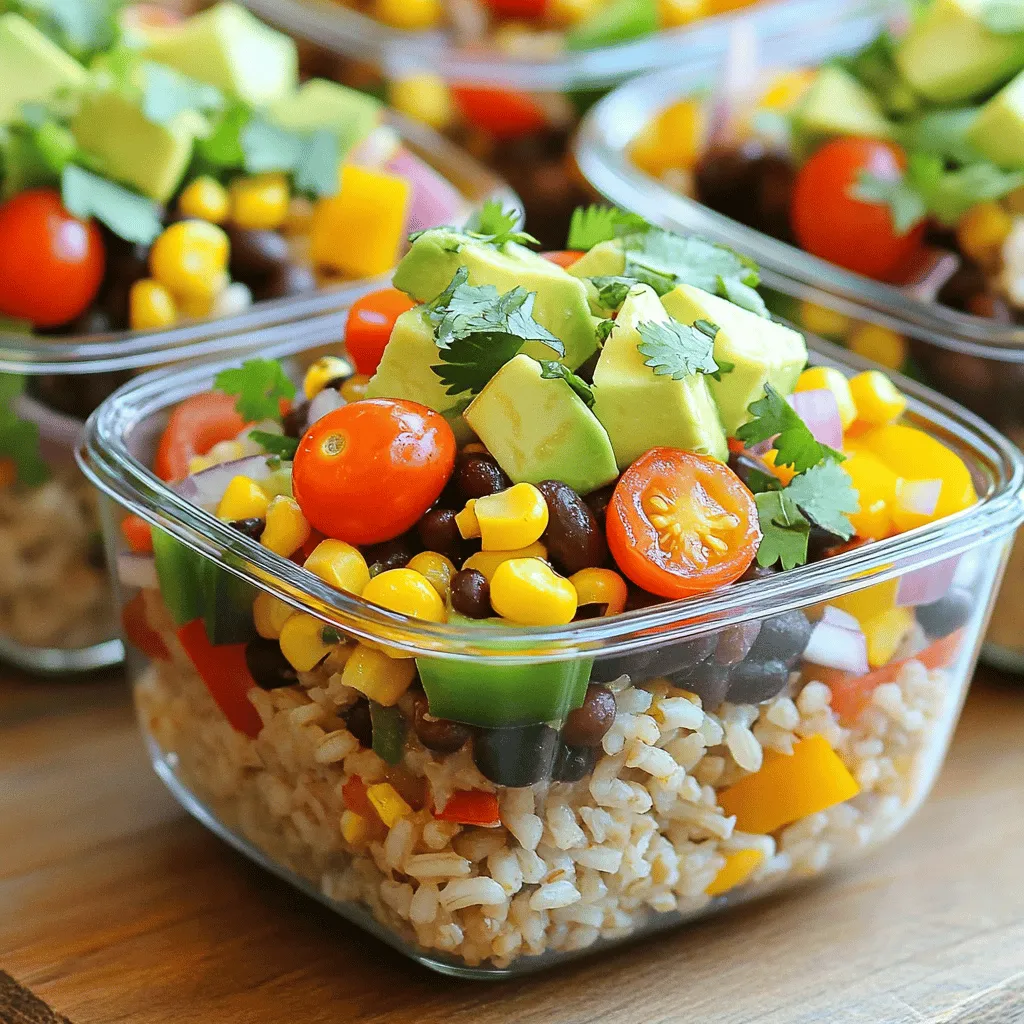
Looking for a fresh and lively dish to brighten up your meals? Mango Black Bean Salsa is the perfect pick!

Older posts
Newer posts
← Previous Page1 … Page4 Page5 Page6 … Page58 Next →

dsad

© 2025 Home Cooking Style • Built with GeneratePress

Our Policies

  • Copyright Policy
  • Cookie Policy
  • GDPR Policy
  • Privacy Policy
  • Disclaimer
  • Terms Of Use

More Information

  • Home
  • About
  • Contact
  • Appetizers
  • Dessert
  • Dinner
  • Drinks
©2025, Home Cooking Style About Back To Top