![Potstickers are fun to make and eat! You need simple ingredients for the dough and fillings. The dough is soft and chewy, while the fillings offer many flavors. You can mix and match to find your favorite. Here are the key ingredients: - All-purpose flour - Boiling water - Filling ingredients (choose one from the list below) This filling is a classic. It combines savory pork with fresh ginger. The flavors blend well to create a tasty bite. Here’s what you need: - 1 pound ground pork - 1 tablespoon grated fresh ginger - 2 garlic cloves, minced - 2 green onions, finely chopped - 1 tablespoon soy sauce - 1 teaspoon sesame oil - Salt and pepper to taste Mix these ingredients in a bowl. Make sure to taste and adjust the seasoning. This filling is perfect for those who want a veggie option. The mushrooms add umami, while spinach gives a fresh touch. Gather these ingredients: - 1 cup chopped mushrooms - 1 cup fresh spinach, chopped - 1 tablespoon soy sauce - 1 teaspoon sesame oil - 1 garlic clove, minced - Salt and pepper to taste Combine them in a bowl and mix well. For a lighter choice, try the chicken filling. The chicken is tender, and cilantro adds a bright flavor. Use these ingredients: - 1 pound ground chicken - 1 tablespoon fresh cilantro, chopped - 1 tablespoon soy sauce - 1 teaspoon ginger paste - Salt and pepper to taste Mix these in a bowl and taste for flavor. This filling is unique and hearty. Sweet potato adds sweetness, while black beans give protein. Here’s what you need: - 1 cup cooked sweet potato, mashed - 1 cup black beans, rinsed and drained - 1 teaspoon cumin - 1 teaspoon chili powder - Salt and pepper to taste Stir these together until well combined. This filling is full of flavor and has a nice texture. Shrimp adds a seafood twist, and scallions bring freshness. Gather these ingredients: - 1 cup shrimp, peeled and chopped - 1/4 cup scallions, finely chopped - 1 tablespoon soy sauce - 1 teaspoon ginger, grated - Salt and pepper to taste Mix them together in a bowl and taste for seasoning. For the full recipe and detailed instructions, check out the [Full Recipe]. To make the dough, start with 2 cups of all-purpose flour. In a bowl, mix the flour with 3/4 cup of boiling water. Stir it well until it forms a sticky dough. Knead the dough on a floured surface for about 5 minutes. You want it to be smooth and elastic. Cover it with a damp cloth for 30 minutes. This rest time helps the dough become easier to handle. For each filling, gather the ingredients first. Mix them well in a bowl. Here are the steps for each filling: - Classic Pork & Ginger Filling: Combine ground pork, grated ginger, minced garlic, green onions, soy sauce, sesame oil, salt, and pepper. - Vegetarian Mushroom & Spinach Filling: Mix chopped mushrooms, fresh spinach, soy sauce, sesame oil, minced garlic, salt, and pepper. - Chicken & Cilantro Filling: Blend ground chicken, chopped cilantro, soy sauce, ginger paste, salt, and pepper. - Sweet Potato & Black Bean Filling: Combine mashed sweet potato, black beans, cumin, chili powder, salt, and pepper. - Shrimp & Scallion Filling: Mix peeled and chopped shrimp, finely chopped scallions, soy sauce, grated ginger, salt, and pepper. Taste the filling and adjust the spices if needed. You want each filling to burst with flavor. After making the fillings, it’s time to shape the potstickers. Divide the dough into two parts. Roll each part into a log and cut it into small pieces, about 1 inch long. Roll each piece into a circle, about 3 inches wide. Place a tablespoon of your filling in the center of each circle. Fold the dough in half to make a half-moon shape. Pinch the edges tightly to seal them. For a nice touch, you can pleat the edges. You can cook potstickers in different ways. Here’s how I do it: 1. Pan-Frying: Heat 1 tablespoon of vegetable oil in a large non-stick skillet over medium-high heat. Place the potstickers in the skillet. Cook for 2-3 minutes until the bottoms are golden brown. 2. Steaming: Carefully add 1/4 cup of water to the skillet. Quickly cover it with a lid. Steam the potstickers for 5-7 minutes until the water evaporates, and they are cooked through. Once cooked, transfer the potstickers to a serving plate. Serve them with a dipping sauce made of soy sauce, a bit of sesame oil, and chili flakes. This adds a nice kick to your potstickers. Enjoy your delicious meal! For more details, check out the Full Recipe. To make great potstickers, follow these tips. Start with fresh ingredients. Fresh herbs add bright flavors. Use the right dough. Make sure it's not too thick or too thin. Roll it out evenly. This helps potstickers cook well. When filling, don’t overstuff. A tablespoon of filling is enough. Seal the edges tightly to avoid leaks. Avoid common pitfalls when making potstickers. Don’t rush the dough resting time. This makes it easier to roll out. If your potstickers stick to the pan, add more oil. Keep the heat at medium. Too high can burn the bottoms. Lastly, do not skip the steaming step. Steaming helps cook the filling through. For perfect potstickers, use a few key tools. A rolling pin is essential for dough. A large non-stick skillet ensures even cooking. A lid is important for steaming. For filling, use a mixing bowl and a spatula. If you want to make many at once, consider a bamboo steamer. It’s great for steaming potstickers. A tasty dipping sauce adds flavor. Here are some ideas. Mix soy sauce with sesame oil for a classic touch. For heat, add chili flakes. You could also mix soy sauce with rice vinegar and ginger. Another option is to blend hoisin sauce with a dash of lime juice. These sauces pair well with any filling. Check out the Full Recipe for more serving suggestions. {{image_2}} You can play with potsticker fillings. Here are some fun ideas: - Classic Pork & Ginger Filling: A mix of pork, ginger, garlic, and green onions. This is a go-to favorite. - Vegetarian Mushroom & Spinach Filling: Use chopped mushrooms and fresh spinach. Add soy sauce for extra flavor. - Chicken & Cilantro Filling: Ground chicken with cilantro and ginger makes a fresh, tasty filling. - Sweet Potato & Black Bean Filling: Mashed sweet potatoes and black beans give a hearty, healthy option. - Shrimp & Scallion Filling: Chopped shrimp with scallions brings a light and savory taste. You can cook potstickers in two main ways: steaming or pan-frying. - Steaming: This method keeps potstickers moist. Use a steamer basket over boiling water. Cook for about 10 minutes. This is a great choice for delicate fillings. - Pan-Frying: This method gives a crispy bottom. Heat oil in a skillet, add potstickers, and fry until golden. Then, add water and cover to steam them through. This gives a nice contrast of textures. Using seasonal ingredients can change the flavor of your potstickers. Here are some ideas: - Spring: Use fresh peas and asparagus for a light filling. - Summer: Try zucchini and corn for a sweet, bright taste. - Fall: Incorporate pumpkin and sage for a warm, cozy filling. - Winter: Use root vegetables like carrots and parsnips. This adds heartiness to your dish. For detailed instructions on making these delicious potstickers, check the Full Recipe. Uncooked potstickers need careful storage. Place them on a parchment-lined tray. Make sure they don’t touch each other. Cover the tray with plastic wrap. This keeps them fresh. You can store them in the fridge for up to 24 hours. If you need to keep them longer, freeze them. Lay the tray flat in the freezer. Once frozen, transfer the potstickers to a freezer bag. Remove excess air and seal it tight. They can last for up to three months in the freezer. Cooked potstickers can be stored too. Let them cool to room temperature first. Place them in an airtight container. Make sure they are in a single layer to avoid sticking. You can keep them in the fridge for up to three days. If you have more than you can eat, freezing is an option. Just layer them with parchment paper in the container. They can also last for about three months in the freezer. Reheating potstickers is easy. For cooked potstickers, I recommend using a skillet. Heat a little oil over medium heat. Add the potstickers and cook for about three minutes. This makes them crispy again. You can also use the microwave, but they won’t be as crispy. Place them on a plate and cover them with a damp paper towel. Heat for about 30 seconds to one minute. If they were frozen, make sure to thaw them first. Enjoy your potstickers with fresh dipping sauce from the Full Recipe! Yes, you can make potstickers ahead of time. Prepare them and store them in the fridge. They can stay fresh for about one day. If you need a longer storage option, freeze them. This keeps them safe for up to three months. Just remember to cook them from frozen; do not thaw first. All-purpose flour works best for potsticker dough. It gives the dough the right texture. When you combine it with boiling water, it becomes soft and pliable. This makes it easy to roll out and shape. You can also try rice flour for a gluten-free option. Potstickers are a type of dumpling. They have a crispy bottom and a soft top. You cook them by pan-frying and then steaming. Dumplings can be boiled or steamed. They do not have the crispy bottom that potstickers do. Both are delicious, but potstickers offer a fun texture. Yes, you can freeze potstickers. After you form them, place them on a baking sheet. Make sure they are not touching. Freeze them for about one hour. Once frozen, transfer them to a freezer bag. This method keeps their shape and prevents sticking. You can customize potstickers in many ways. Think about different meats, veggies, or spices. Use ground beef, turkey, or tofu for new flavors. Add herbs like basil or mint for freshness. You can also mix in unique ingredients, like cheese or nuts. Be creative and make a filling you love! For more ideas, check the Full Recipe. Potstickers are fun and easy to make. We covered the key ingredients and several tasty fillings, like pork, mushrooms, and sweet potatoes. You learned how to prepare the dough, form the potstickers, and cook them using different methods. Plus, we shared tips for the perfect results and fun variations to try. Now, you can enjoy making potstickers at home. Get creative with fillings and enjoy every bite!](https://homecookingstyle.com/wp-content/uploads/2025/05/67ee8ec8-f708-4d30-8557-1ee002193192.webp)
Potstickers 5 Ways to Enjoy Flavorful Fillings
Potstickers are a delicious treat, and I’m excited to show you five tasty ways to enjoy them! Whether you crave
Potstickers are a delicious treat, and I’m excited to show you five tasty ways to enjoy them! Whether you crave
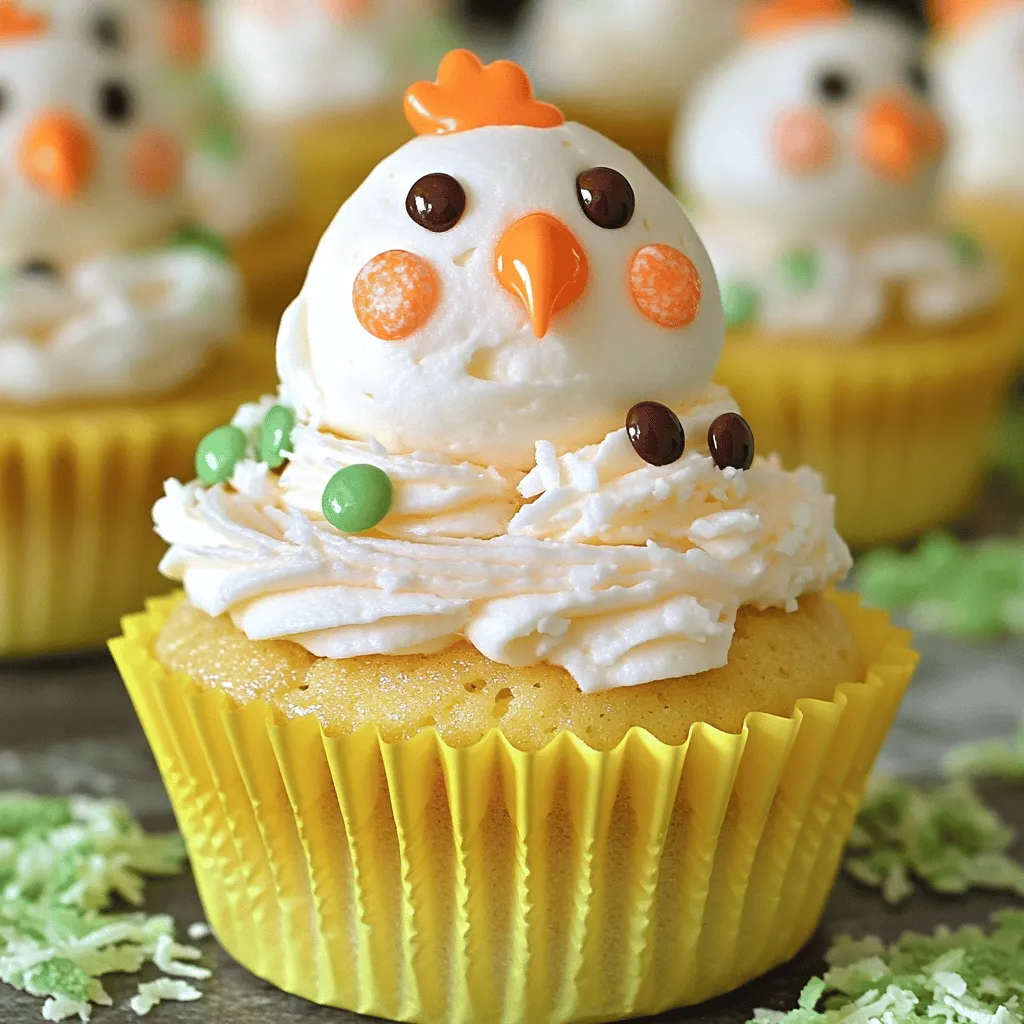
Are you ready to make Easter extra fun? These Easter Chicks Cupcakes are perfect for any celebration. With their bright
. Enjoy crafting these bowls with ease and confidence! - In a medium bowl, combine diced mango, minced jalapeño, red onion, and cilantro. - Drizzle the mixture with lime juice and season with salt to taste. - Stir gently to combine and set aside to let the flavors meld. - Heat olive oil in a large skillet over medium-high heat. - Season the shrimp with salt and pepper while the oil heats. - Cook the shrimp for about 2-3 minutes on each side until they turn pink and opaque. - Start by placing a generous scoop of cooked quinoa at the bottom of each serving bowl. - Add halved avocados to each bowl, spooning out and slicing the flesh if you like. - Top the quinoa and avocado with the cooked shrimp, halved cherry tomatoes, and diced cucumber. - Finally, spoon a generous amount of mango salsa over the shrimp and veggies. - Sprinkle fresh cilantro on top for garnish. For the full recipe, check out the earlier section! - Ensure shrimp are cooked just until pink for tenderness. - Use fresh ingredients for the best flavor. Cooking shrimp can be tricky. You want them tender, not rubbery. When they turn pink, they are ready. Cook them for only 2-3 minutes on each side. If you overcook, they will be tough. Fresh ingredients make a big difference in taste. Use ripe avocados and juicy tomatoes. They will elevate your dish. - Serve with lime wedges on the side. - Consider colorful bowls for a visually appealing presentation. Adding lime wedges gives a zesty kick. The bright green avocado and the colorful mango salsa look great in a vibrant bowl. This makes your meal more fun! Use different colored bowls to impress your guests. They will love the look as much as the taste. {{image_2}} You can switch up the shrimp in this dish. Grilled chicken works great and adds a nice texture. If you prefer a plant-based option, try tofu. It absorbs flavors well and is very filling. For a fun twist, add crispy bacon or smoked salmon. Both will give your bowl a unique and savory kick. The mango salsa is fresh and bright, but feel free to experiment. Pineapple or peach salsa adds a fruity twist that can surprise your taste buds! You can also mix in black beans or corn. These add texture and a burst of flavor to every bite. You’ll have endless options to keep your meals exciting. For the full recipe, check out the complete instructions and details. Store your assembled bowls in an airtight container for up to 1 day. This keeps the flavors fresh. Remember to keep the mango salsa separate. This helps to maintain its bright taste and texture. You can freeze shrimp, but it is not a great idea for avocados and salsa. These ingredients do not freeze well and may lose their taste. If you freeze shrimp, thaw it before reheating. This ensures you enjoy tasty and safe shrimp every time you serve your bowl. Yes, you can prepare the mango salsa and cook the shrimp ahead. Just assemble the bowls right before you serve. To stop avocados from browning, squeeze lime juice over them. The acid in the juice slows down the process. These bowls go well with a light salad. They also work as a standalone meal, so you can enjoy them alone. If you want milder salsa, just leave out the jalapeño. For more heat, add extra jalapeño to taste. The shrimp avocado bowls offer a fresh and colorful meal, easy to prepare. We explored key ingredients like shrimp, avocados, and quinoa, along with the zesty mango salsa. Cooking tips helped ensure tender shrimp, while variations opened the door to creative options. Remember, fresh ingredients make all the difference. Store leftovers properly to enjoy the tasty flavors longer. Dive in and enjoy your healthy, vibrant bowls today!](https://homecookingstyle.com/wp-content/uploads/2025/05/aee0e685-8ad5-4aa8-adb0-40c1a330015d.webp)
Looking for a fresh, tasty meal that’s also simple to make? You’re in the right place! These shrimp avocado bowls
![To make perfect s’mores cupcakes, gather these simple ingredients: - 1 cup all-purpose flour - 1/2 cup unsweetened cocoa powder - 1 teaspoon baking soda - 1/2 teaspoon salt - 1/2 cup unsalted butter, softened - 1 cup granulated sugar - 2 large eggs - 1 teaspoon vanilla extract - 1/2 cup whole milk - 1/2 cup mini marshmallows - 1/2 cup crushed graham crackers - 1 cup milk chocolate chips - 1 cup prepared chocolate frosting - Extra mini marshmallows for topping Each ingredient plays a key role. The flour gives the cupcakes structure. Cocoa powder adds rich chocolate flavor. Baking soda helps them rise, while salt balances the sweetness. Softened butter brings a creamy texture. Sugar sweetens the mix, and eggs add moisture and binding. Vanilla extract enhances the flavor. Whole milk ensures the batter stays moist. Mini marshmallows and crushed graham crackers bring that classic s’mores taste. Milk chocolate chips melt into gooey pockets of goodness. Finally, chocolate frosting and extra marshmallows create the delightful topping. For the full recipe, check the details above. 1. Preheat the oven and prepare the muffin tin. Set your oven to 350°F (175°C). Line a muffin tin with cupcake liners to make clean-up easy. 2. Mix dry ingredients in a separate bowl. In a medium bowl, whisk together 1 cup of all-purpose flour, 1/2 cup cocoa powder, 1 teaspoon baking soda, and 1/2 teaspoon salt. This mix adds flavor and texture to your cupcakes. 3. Cream together butter and sugar. In a large bowl, use an electric mixer to blend 1/2 cup softened butter with 1 cup granulated sugar. Mix until it looks light and fluffy, which takes about 2-3 minutes. 4. Add eggs and vanilla, mixing well. Beat in 2 large eggs, one at a time. Then add 1 teaspoon vanilla extract. Make sure everything is mixed well for a smooth batter. 5. Gradually combine dry and wet mixes. Slowly add your dry mixture to the wet mix. Alternate with 1/2 cup whole milk. Start and end with the dry mix. Mix just until combined; do not overmix. 6. Fold in marshmallows, graham crackers, and chocolate chips. Gently stir in 1/2 cup mini marshmallows, 1/2 cup crushed graham crackers, and 1 cup milk chocolate chips. This step creates that classic s'mores taste in each bite. 7. Fill liners and bake. Pour the batter into the cupcake liners, filling each about 2/3 full. Bake in your preheated oven for 18-20 minutes. The cupcakes are done when a toothpick comes out clean. 8. Cool before frosting. After baking, let the cupcakes cool in the pan for about 10 minutes. Then, transfer them to a wire rack to cool completely. 9. Torch the marshmallows (optional). Once cooled, frost the cupcakes with chocolate frosting. Top each with extra mini marshmallows. For a fun finish, use a kitchen torch to toast the marshmallows until golden brown and gooey. For the complete recipe, check out the [Full Recipe]. Enjoy your baking journey! - Use room temperature ingredients for better mixing. Cold butter or eggs can make it hard to blend. - Avoid overmixing the batter. Mix just until combined. This keeps the cupcakes light and fluffy. - Check for doneness with a toothpick. Insert it into the center. If it comes out clean, your cupcakes are ready. - For perfect frosting, aim for a creamy, spreadable texture. Beat the frosting until it feels light. - To toast marshmallows, use a kitchen torch or broiler. Keep an eye on them, so they don’t burn. - Add more chocolate or graham cracker crumbs for extra flavor. This makes each bite even better. - Use flavored extracts for variation. Try almond or orange for a fun twist. These tips will help you make the best Perfect S'mores Cupcakes. For the full recipe, check out the complete guide. {{image_2}} You can swap regular flour for gluten-free flour. This makes the cupcakes safe for those with gluten issues. Use a 1:1 gluten-free flour blend for best results. For a vegan option, replace the butter with vegan butter. You can use flax eggs instead of regular eggs. To make one flax egg, mix one tablespoon of ground flaxseed with two and a half tablespoons of water. Let it sit for five minutes to thicken. Want to switch things up? Try peanut butter s’mores cupcakes! Mix in half a cup of creamy peanut butter with the batter. This adds a rich, nutty taste that pairs well with chocolate. Another idea is to add nuts for a crunchy texture. Chopped pecans or walnuts work great. Just fold in half a cup before baking. This gives your cupcakes an extra layer of flavor and bite. Make your cupcakes look amazing with a chocolate drizzle. Melt some chocolate and drizzle it over the frosting. This adds a beautiful touch and extra sweetness. For fun cupcake toppers, use mini chocolate bars or even gummy bears. Skewering them on a toothpick makes them easy to place on top. This adds an element of surprise and fun to your treats. For the complete recipe, check out the [Full Recipe]. To keep your perfect s'mores cupcakes tasty, store them in an airtight container. This keeps them fresh. If you leave them uncovered, they can dry out quickly. You want to protect those fluffy marshmallows and rich chocolate. Place a piece of wax paper between layers to avoid sticking. You can freeze your cupcakes if you want to save some for later. For unfrosted cupcakes, wrap each one in plastic wrap. Then, place them in a freezer bag. If they are frosted, chill them first on a tray before wrapping. This avoids mess. To thaw, leave them in the fridge overnight or at room temperature for a few hours. This keeps the texture nice. These cupcakes can stay good at room temperature for about 2 to 3 days. Always check for signs of spoilage. Look for changes in smell or texture. If they feel hard or dry, they are no longer fresh. Enjoy your s'mores cupcakes while they are still soft and sweet! For the full recipe, check out the earlier section. S’mores cupcakes are a fun twist on the classic treat. They have layers of flavors and textures. Here are the key ingredients: - 1 cup all-purpose flour - 1/2 cup unsweetened cocoa powder - 1 teaspoon baking soda - 1/2 teaspoon salt - 1/2 cup unsalted butter, softened - 1 cup granulated sugar - 2 large eggs - 1 teaspoon vanilla extract - 1/2 cup whole milk - 1/2 cup mini marshmallows - 1/2 cup crushed graham crackers - 1 cup milk chocolate chips - 1 cup prepared chocolate frosting - Extra mini marshmallows for topping Each ingredient adds to the rich, sweet flavor. The cocoa gives a deep chocolate taste, while the marshmallows provide that gooey texture. The graham crackers add crunch, making every bite a delight. Yes, you can make s’mores cupcakes in advance. Here are some best practices: - Bake the cupcakes: Cool them completely before storing. - Store unfrosted: Keep them in an airtight container. This helps maintain freshness. - Frost before serving: Frost them the day you plan to serve. This keeps the frosting from getting too soft or melting. You can also prep the batter a day ahead. Just store it in the fridge and bake when you’re ready. To reheat s’mores cupcakes safely, use these methods: - Microwave: Place a cupcake on a microwave-safe plate. Heat for 10-15 seconds. Check if it’s warm. If not, heat a little longer. - Oven: Preheat the oven to 350°F. Wrap cupcakes in aluminum foil and heat for about 5-10 minutes. These methods help keep the cupcakes moist and tasty. Enjoy your perfect s’mores cupcakes with a warm, gooey center! These s'mores cupcakes bring joy with each bite. We gathered simple ingredients and steps to create these tasty treats. You learned about preparation, baking, and even tips for perfecting flavor. Remember, you can try alternatives and exciting variations too. Storage tips ensure your cupcakes stay fresh. So, whip up a batch, enjoy the process, and share these delightful cupcakes with others. They’re perfect for any occasion. Happy baking!](https://homecookingstyle.com/wp-content/uploads/2025/05/078af63c-c379-4e6a-baaa-6c19ddb42be8.webp)
Are you ready to take your dessert game to the next level? My Perfect S’mores Cupcakes recipe combines all the
![To create a great One-Pan Honey BBQ Chicken Rice, gather these fresh ingredients: - 4 boneless, skinless chicken thighs - 1 cup jasmine rice - 2 cups chicken broth - 1/2 cup barbecue sauce (your favorite brand) - 1/4 cup honey - 1 red bell pepper, diced - 1 small onion, finely chopped - 2 cloves garlic, minced - 1 teaspoon smoked paprika - Salt and pepper to taste - 2 tablespoons olive oil - Fresh cilantro or parsley for garnish (optional) Each ingredient plays a key role. The chicken thighs bring richness and flavor. Jasmine rice gives a nice texture and absorbs the sauce well. The barbecue sauce and honey provide a sweet and tangy profile. The bell pepper, onion, and garlic add color and depth to the dish. Smoked paprika enhances the flavor with a subtle smokiness. Olive oil helps in sautéing and adds healthy fat. Salt and pepper elevate all the flavors. Finally, fresh herbs can brighten up your plate. For more detailed instructions, check the Full Recipe. Seasoning Tips Start by seasoning your chicken thighs. Use salt, pepper, and smoked paprika. Make sure to coat both sides well. This adds flavor to the chicken. Cooking Methods I recommend browning the chicken in a pan. Heat olive oil over medium heat. Cook the chicken for about 5 minutes on each side. You want it golden brown. Resting Instructions After cooking, remove the chicken from the pan. Let it rest for a few minutes. This helps keep it juicy and tender. Choosing the Right Pan Use a large skillet or wide pan. This allows enough space for cooking. A good pan helps with even cooking. Cooking Time for Onions and Garlic Add chopped onions and minced garlic to the hot pan. Sauté them for 2-3 minutes. The onions should turn translucent. This step builds a solid flavor base. Toasting Rice Tips In the same pan, add jasmine rice and diced red bell pepper. Stir them together. Toast the rice for 1-2 minutes. This adds a nutty flavor. Adding Vegetables The diced red bell pepper brings color and sweetness. Mix it well with the rice as it toasts. This adds depth to the dish. Ingredients for Sauce You will need barbecue sauce and honey. Choose your favorite brand of barbecue sauce. The honey adds a nice touch of sweetness. Mixing Instructions In a bowl, combine the barbecue sauce and honey. Stir until they blend well. Pour this sauce into the pan with rice. Nestling Chicken in Rice Return the browned chicken to the pan. Nestle it into the rice mixture. Make sure the chicken is partially submerged. This helps the flavors mix. Water to Rice Ratio Add chicken broth to the pan. The right ratio is 2 cups of broth for 1 cup of rice. This will ensure the rice cooks perfectly. Proper Heat Levels Bring the mixture to a gentle simmer. Cover the pan with a lid. This keeps the heat and moisture in. Cooking Time Details Cook for 20-25 minutes. Check occasionally to prevent sticking. The rice should be fully cooked and absorb most of the liquid. For the full recipe, check [Full Recipe]. Using Homemade BBQ Sauce Making your own BBQ sauce can boost the flavor a lot. You can mix ketchup, vinegar, and spices to create a perfect blend. This adds depth and freshness to your dish. If you want a sweet twist, add some brown sugar or maple syrup. Marinating Options Marinating the chicken can make it extra tender and tasty. Try mixing honey, soy sauce, and garlic for a quick marinade. Let the chicken soak for at least 30 minutes before cooking. This extra step will enhance the final dish. Avoiding Sticking Rice To prevent rice from sticking, rinse it well before cooking. Use cold water to wash away excess starch. This simple step helps keep the grains separate and fluffy. Keeping an eye on heat levels is also key. Ensuring Even Cooking Make sure to stir the rice and liquid well before simmering. This helps distribute the heat evenly. Cover the pan with a tight lid to trap steam. This keeps everything cooking at the right pace. Accompaniments Serve this dish with a simple side salad or steamed veggies. Fresh greens add crunch and balance. You can also pair it with corn on the cob for a sweet touch. Presentation Ideas Use a large platter to serve the rice and chicken. Garnish with fresh herbs like parsley or cilantro. This adds color and makes it look fancy. You can also slice the chicken for easier serving. Check out the Full Recipe for more ideas. {{image_2}} You can use chicken breasts or thighs for this recipe. Chicken thighs stay juicy and tender. They are great for this one-pan dish. Breasts cook faster but may dry out if overcooked. You can also replace chicken with beef or tofu. Tofu is a good choice for a meat-free meal. Make sure to cube it and adjust cooking times. Want some heat? Add diced jalapeños or crushed red pepper flakes. They will give your dish a nice kick. If you prefer smoky flavors, try smoked paprika or chipotle powder. These spices enhance the BBQ taste and add depth. Switching up your grains can add variety. Brown rice is a healthy option, though it takes longer to cook. If you prefer a fluffier texture, stick with jasmine rice. For a protein boost, consider quinoa. It cooks quickly and pairs well with the sauce. Just adjust the cooking time and liquid amounts for each grain. For the full recipe, check out the One-Pan Honey BBQ Chicken Rice . Refrigeration Guidelines After enjoying your One-Pan Honey BBQ Chicken Rice, store leftovers in an airtight container. Place it in the fridge within two hours of cooking. It should stay fresh for up to three days. Freezing Instructions For longer storage, freeze leftovers. Use a freezer-safe container or bag. Squeeze out as much air as possible to prevent freezer burn. This dish can last up to three months in the freezer. Best Methods for Reheating Reheat leftovers in a skillet over low heat. Stir occasionally to heat evenly. You can also use the microwave. Cover the dish to keep moisture in. Avoiding Dryness To prevent dryness, add a splash of chicken broth or water while reheating. This keeps the rice moist and flavorful. How Long it Lasts in the Fridge Stored properly, One-Pan Honey BBQ Chicken Rice lasts about three days in the fridge. Always check for freshness before eating. Signs of Spoilage Look for changes in color or smell. If the rice is dry or the chicken feels slimy, it’s best to discard it. Always trust your senses! Yes, you can use brown rice. It adds a nuttier taste. Keep in mind, brown rice takes longer to cook. You will need to adjust the liquid and cooking time. Use about 2.5 cups of broth and cook for around 40-45 minutes. You can use maple syrup or agave nectar. Both options work well for sweetness. If you prefer, try brown sugar mixed with a bit of water. This will give you a similar consistency and flavor. Sautéing the chicken adds flavor and color. It gives the dish a nice crust. If you skip this step, the chicken may not be as tasty. However, you can cook it all together if you’re short on time. To make it gluten-free, choose a gluten-free barbecue sauce. Most brands offer this option now. Also, check your chicken broth. Some may contain gluten. Yes, you can use a slow cooker. Brown the chicken and sauté the onions first. Then combine all ingredients in the slow cooker. Cook on low for 4-6 hours or high for 2-3 hours. Enjoy the ease of a one-pot meal! You learned about making a delicious chicken dish with rice and veggies. We covered each step, from preparing the chicken to simmering your meal. I shared tips for flavor, storage, and variations to make it your own. Remember, cooking is all about trying new things. Enjoy the process and have fun experimenting in your kitchen. With these easy steps, you’ll create a tasty meal sure to please everyone. Happy cooking!](https://homecookingstyle.com/wp-content/uploads/2025/05/e16f15cc-787d-4301-bc97-c87b3309398b.webp)
Are you ready for a tasty dinner that’s both easy and delicious? One-Pan Honey BBQ Chicken Rice is a meal
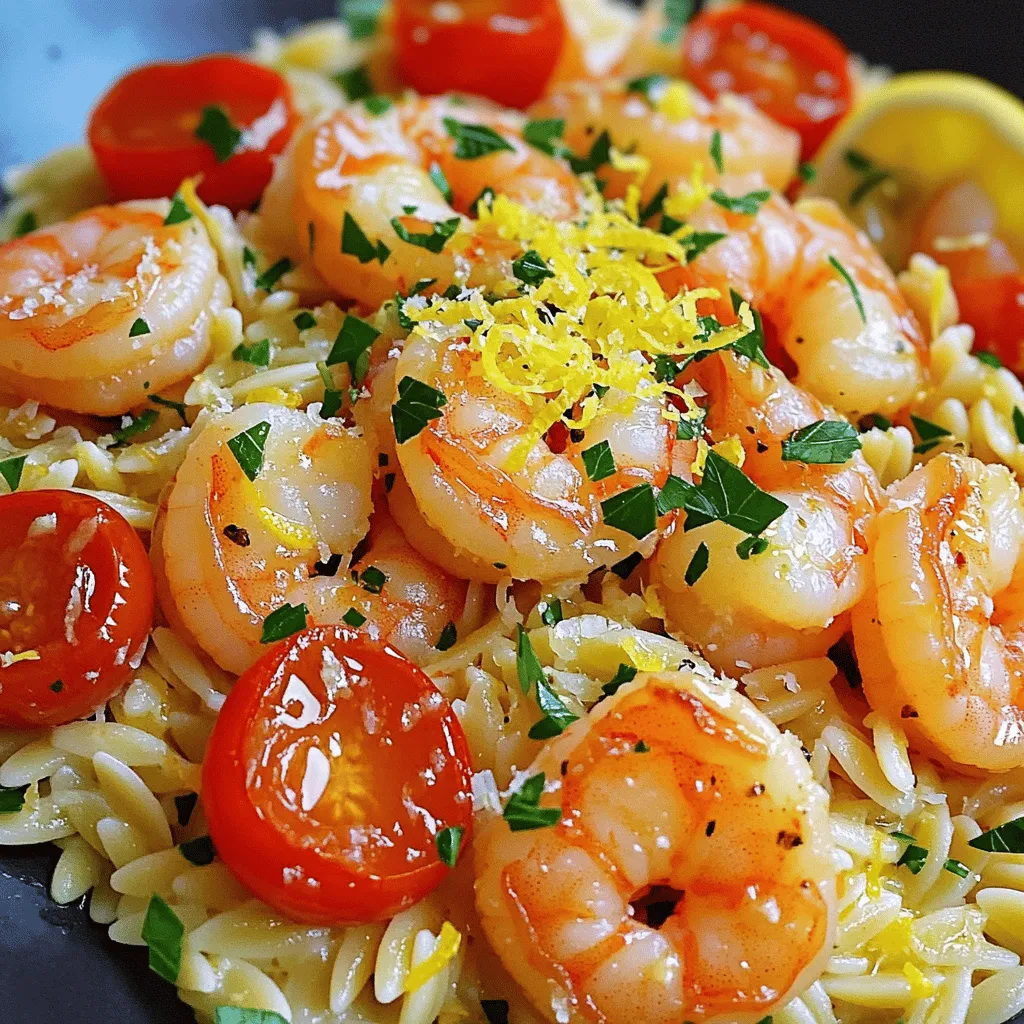
Looking for a quick, tasty meal? Lemon Garlic Shrimp Orzo is your answer! This dish combines juicy shrimp, zesty lemon,
![- 1 cup quinoa, rinsed - 2 cups vegetable broth - 1 cup chickpeas, cooked (or 1 can, drained and rinsed) - 1 sweet potato, diced - 1 tablespoon olive oil - 1 teaspoon paprika - 1 teaspoon garlic powder - 1 avocado, sliced - 1 cup baby spinach - ½ cup cherry tomatoes, halved - ¼ cup red cabbage, shredded For a Vegan Buddha Bowl, I love using quinoa as the base. It is full of protein and cooks quickly. Sweet potato adds a sweet and creamy texture. Chickpeas give a hearty feel. Avocado adds creaminess and healthy fats. Fresh vegetables bring crunch and color. - 2 tablespoons tahini - 2 tablespoons lemon juice - Salt and pepper to taste The dressing is key for flavor. I use tahini to add richness. Fresh lemon juice brightens up the bowl. Seasoning with salt and pepper ties it all together. - Fresh herbs (such as parsley or cilantro) - Seeds (sesame or pumpkin) Garnishes can elevate your dish. Fresh herbs add a burst of flavor. Seeds provide a nice crunch. You can find the full recipe [here]. First, preheat your oven to 400°F (200°C). This step is key for getting that nice caramelization. Next, toss the diced sweet potato in a bowl. Add olive oil, paprika, garlic powder, salt, and pepper. Make sure every piece is coated well. Spread the sweet potato on a baking sheet. Roast it for 20 to 25 minutes. You want them tender and slightly crispy. While the sweet potato roasts, you can cook the quinoa. In a medium saucepan, combine 1 cup of rinsed quinoa and 2 cups of vegetable broth. Bring the mixture to a boil. Once boiling, reduce the heat. Cover the pot and let it simmer for about 15 minutes. When all the liquid is absorbed, remove it from heat. Fluff it with a fork for a light texture. Now, let's make the tahini dressing. In a small bowl, whisk together 2 tablespoons of tahini and 2 tablespoons of lemon juice. Add a pinch of salt. If the dressing is too thick, add a little water to thin it out. Taste and adjust the seasoning if needed. This dressing adds a creamy touch to your bowl. To assemble your Buddha bowl, choose a large bowl or a plate. Start with a base layer of quinoa. Next, layer the roasted sweet potato, chickpeas, and avocado slices. Add fresh baby spinach, halved cherry tomatoes, and shredded red cabbage on top. Finally, drizzle your tahini dressing over everything. Garnish with fresh herbs for extra flavor and color. For the full recipe, check out the complete instructions and tips. Enjoy your vibrant vegan Buddha bowl! To make your Vegan Buddha Bowl easy, prep your ingredients ahead of time. Wash and chop vegetables like sweet potatoes and cherry tomatoes the night before. Store them in airtight containers to keep them fresh. You can also cook quinoa in advance. It keeps well in the fridge for about five days. Store it in a separate container to avoid sogginess. Want to boost flavor? Add spices or herbs to your veggies and grains. Try cumin or turmeric for warmth. Fresh herbs like cilantro or parsley add bright notes. Experiment with different dressings too! A zesty lemon vinaigrette or a spicy tahini can change the whole dish. You can mix things up and find your favorite combo. Make your bowl look as good as it tastes. Use colorful layering techniques to create a feast for the eyes. Start with a base of quinoa, then stack on roasted sweet potatoes, chickpeas, and fresh greens. Serve in shallow bowls to show off the layers. Sprinkle sesame or pumpkin seeds on top for extra crunch. It makes each bowl inviting and fun to eat. For the full recipe, check out the Vibrant Vegan Buddha Bowl 🥗. {{image_2}} You can switch up the proteins in your Vegan Buddha Bowl. I love using alternative legumes like black beans or lentils. They add a great texture and flavor. If you want something hearty, try adding plant-based proteins like tofu or tempeh. These options soak up flavors well and pack a protein punch. Feel free to change the grains too. Instead of quinoa, use brown rice, farro, or barley. Each grain gives a unique taste and texture. If gluten is a concern, choose gluten-free grains like quinoa or rice. They work well in any bowl. Don’t hesitate to play with the veggies. Use seasonal vegetables for the freshest taste. Think about adding roasted carrots, zucchini, or bell peppers. You can prepare these vegetables in different ways too. Try steaming or grilling them for a smoky flavor. Each method brings out different tastes and makes your bowl exciting. For the full recipe, check out the vibrant Vegan Buddha Bowl. To keep your Vegan Buddha Bowl fresh, use airtight containers. Glass containers work well. They keep food safe and make your dish easy to see. You can store leftovers in the fridge for up to three days. This way, you can enjoy your meal again without losing flavor. When it's time to eat, reheat the bowl in the microwave. Use a low setting to warm it gently. You can also use a stovetop. Heat it in a pan with a splash of water. This helps keep the quinoa and veggies moist. Avoid high heat, as it can change the texture of the sweet potato and avocado. If you want to save some for later, freeze the quinoa and veggies separately. Sweet potatoes freeze well. You can store them for up to three months. Chickpeas can also be frozen. Just make sure they are cool before you freeze them. When ready to eat, thaw them in the fridge overnight. Reheat them gently to keep the taste fresh. You can easily make your Buddha Bowl gluten-free by choosing the right grains. Here are some great options: - Quinoa - Brown rice - Buckwheat - Millet - Cauliflower rice These grains work well and keep your meal tasty. Just make sure to check any packaged items for hidden gluten. Absolutely! You can change up the flavors to fit your taste. Here are some tips: - Add spices like cumin, turmeric, or cayenne for heat. - Use different sauces, such as soy sauce, sriracha, or a peanut sauce. - Mix in fresh herbs like basil or dill for a burst of flavor. Experimenting with flavors makes your meal fun and unique. A Vegan Buddha Bowl is full of health benefits. Here’s what you get: - Quinoa is a complete protein, meaning it has all essential amino acids. - Sweet potatoes provide vitamins A and C, plus fiber. - Chickpeas are rich in protein and help keep you full. - Avocado gives healthy fats that are good for your heart. - Fresh veggies add vitamins, minerals, and antioxidants. Eating this bowl supports a balanced diet and boosts energy. For a full recipe, check out the Vibrant Vegan Buddha Bowl 🥗. You learned how to create a Vegan Buddha Bowl, packed with healthy ingredients. We covered the main foods like quinoa, sweet potatoes, and chickpeas. You also learned how to whip up a tasty tahini dressing. By now, you have tips for meal prep and storage too. Incorporating these steps and ideas can lead to a colorful and nutritious meal. Try different flavors and ingredients, and make this bowl your own! Enjoy your cooking and stay healthy!](https://homecookingstyle.com/wp-content/uploads/2025/05/bf563991-f509-4f16-9106-23957488e9c9.webp)
Looking for a tasty and filling meal? A Vegan Buddha Bowl is your answer! Packed with wholesome ingredients like quinoa,
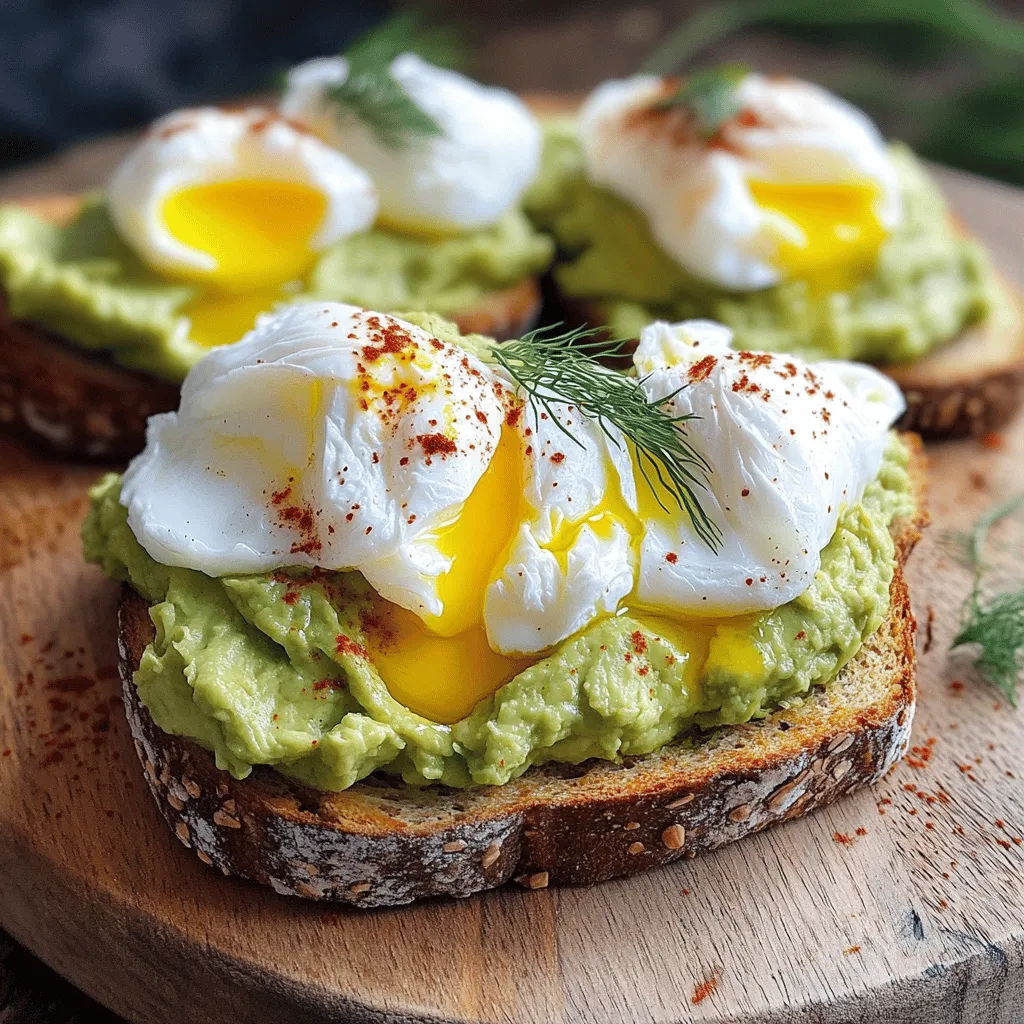
Start your day with a boost! Avocado toast with a poached egg is the perfect energizing breakfast delight. This combo
![To make these no-bake chocolate peanut butter bars, you need a few key items: - 1 cup creamy peanut butter - 1 cup rolled oats - 1/2 cup honey or maple syrup - 1/2 cup cocoa powder - 1/2 cup dark chocolate chips - 1/4 teaspoon salt - 1 teaspoon vanilla extract These ingredients blend together to create a rich, tasty treat. The peanut butter brings creaminess, while the cocoa powder adds deep chocolate flavor. You can get creative with your bars! Here are some optional ingredients to try: - 1/4 cup unsweetened shredded coconut - Chopped nuts like almonds or walnuts - Dried fruits such as raisins or cranberries These additions can help you tailor the bars to your taste. Experiment to find your favorite mix! Using high-quality ingredients makes a big difference in flavor and texture. Here are some tips for selecting your ingredients: - Peanut Butter: Choose natural peanut butter without added sugars or oils. It gives a pure taste. - Honey or Maple Syrup: Go for raw honey or pure maple syrup for better flavor. - Cocoa Powder: Look for unsweetened cocoa powder with a rich color for the best chocolate taste. Quality ingredients will enhance your no-bake bars, making them even more delightful. For the full recipe, check out the details above! Making no-bake chocolate peanut butter bars is quick and easy. You only need about 15 minutes to prep. The bars will set in the fridge for about 2 hours. This recipe gives you 16 tasty bars. 1. Start by mixing your creamy peanut butter, honey (or maple syrup), and vanilla extract in a bowl. Stir until it’s smooth. 2. In a new bowl, sift together rolled oats, cocoa powder, and salt. Mix well. 3. Gradually add the dry mix to the peanut butter mix. Stir until everything is well combined. If you want, fold in the shredded coconut now. 4. Line an 8-inch by 8-inch baking dish with parchment paper. Leave some paper hanging over the sides for easy removal. 5. Spread the mixture into the dish. Press it down firmly to make it even. 6. Melt your dark chocolate chips in a microwave-safe bowl. Heat for 30 seconds at a time and stir until smooth. 7. Pour the melted chocolate over the peanut butter layer. Spread it evenly on top. 8. Pop the dish in the fridge. Let it chill for at least 2 hours until it sets. 9. Once set, lift the bars out using the parchment paper. Place them on a cutting board and cut into squares or rectangles. 10. Store any leftovers in an airtight container in the fridge for up to one week. The key to this recipe is mixing well. Each ingredient must blend together for the best flavor and texture. Pressing the mixture firmly into the baking dish ensures the bars hold together. Melting the chocolate in short bursts keeps it smooth and prevents burning. For serving, a dusting of cocoa powder adds a nice touch and enhances presentation. If you want the full recipe, check it out [Full Recipe]. When making no-bake chocolate peanut butter bars, some common mistakes can ruin your treat. - Not measuring correctly: Use measuring cups for accuracy. This affects taste and texture. - Overmixing the peanut butter mixture: Mix just until smooth. Overmixing can make it too runny. - Skipping the fridge time: Refrigerate the bars until set. This gives them the right firmness. You can boost the flavor and texture of your bars with simple tweaks. - Add a pinch of cinnamon: This adds warmth and depth to the taste. - Use crunchy peanut butter: This gives a nice texture contrast. - Mix in chopped nuts: Almonds or walnuts work well for added crunch. Presentation can make your bars even more appealing. - Dust with cocoa powder: This adds a rich look and extra flavor. - Top with sea salt: A sprinkle of sea salt balances the sweetness. - Serve with fresh fruit: Sliced strawberries or bananas add freshness. For the full recipe, follow the steps to create these delightful treats! {{image_2}} You can switch up the flavors in these bars. For a twist, try almond butter instead of peanut butter. It gives a nice nutty taste. You could also use cashew butter for a creamier texture. Instead of cocoa powder, mix in some carob powder for a milder flavor. Adding a pinch of cinnamon can give the bars a warm spice that pairs well with chocolate. These bars fit well into gluten-free diets. Just use gluten-free oats to keep it safe. For vegan options, replace honey with maple syrup. This keeps the sweetness but makes it plant-based. Ensure that your chocolate chips are dairy-free. This way, you can enjoy tasty treats without any animal products. Get creative with add-ins for extra texture. Chopped nuts like almonds or walnuts add crunch. Dried fruits like raisins or cranberries can bring sweetness. You might want to sprinkle in some mini marshmallows for a fun twist. If you like a salty kick, add a few pretzel pieces. These add-ins can elevate your no-bake bars and make them even more delightful. For the full recipe, check out the details above. To keep your no-bake chocolate peanut butter bars fresh, use an airtight container. This helps prevent them from drying out or absorbing other smells from the fridge. If you want to stack the bars, place parchment paper between layers. This way, they won’t stick together. Always store them in the fridge. These bars last up to one week in the fridge. If you want to keep them longer, freeze them. To freeze, wrap each bar in plastic wrap and place them in a freezer bag. They can last up to three months in the freezer. When ready, let them thaw in the fridge for a few hours before enjoying. You don’t need to reheat these bars. They taste best cold and firm. If the bars feel too hard after freezing, you can leave them out for a few minutes. This will soften them slightly, making them easier to bite into. Enjoy your sweet treat at the right temperature! To make No-Bake Chocolate Peanut Butter Bars, start by mixing the peanut butter, honey, and vanilla in a bowl. Then, in another bowl, sift together the oats, cocoa powder, and salt. Combine the two mixtures until smooth. Press this mix into a lined baking dish. Melt the dark chocolate and pour it over the top. After that, chill the bars in the fridge for about two hours until set. For the full recipe, check out the detailed instructions above. Yes, you can swap some ingredients! If you don’t have honey, use maple syrup instead. You can also use crunchy peanut butter if you prefer some texture. For a nut-free option, try sun butter. If you need a gluten-free version, use certified gluten-free oats. Feel free to get creative with flavors or textures! To cut your bars, start by lifting them out of the dish using the parchment overhang. Place them on a cutting board. Use a sharp knife for clean cuts. If the bars feel too soft, let them chill a bit longer. For even pieces, score the top with a knife before cutting all the way through. Now you know all about making No-Bake Chocolate Peanut Butter Bars. We covered the key ingredients and how to customize them for your taste. The step-by-step guide helps you make these tasty bars easily. I shared tips to avoid mistakes and improve flavor. You can also try fun variations and learn about storage. In the end, these bars are a fun snack for everyone. Enjoy making them your way!](https://homecookingstyle.com/wp-content/uploads/2025/05/716214c3-f958-4936-bd50-54f6877c3af9.webp)
Craving a sweet treat that’s quick and easy? Let me introduce you to No-Bake Chocolate Peanut Butter Bars. This simple
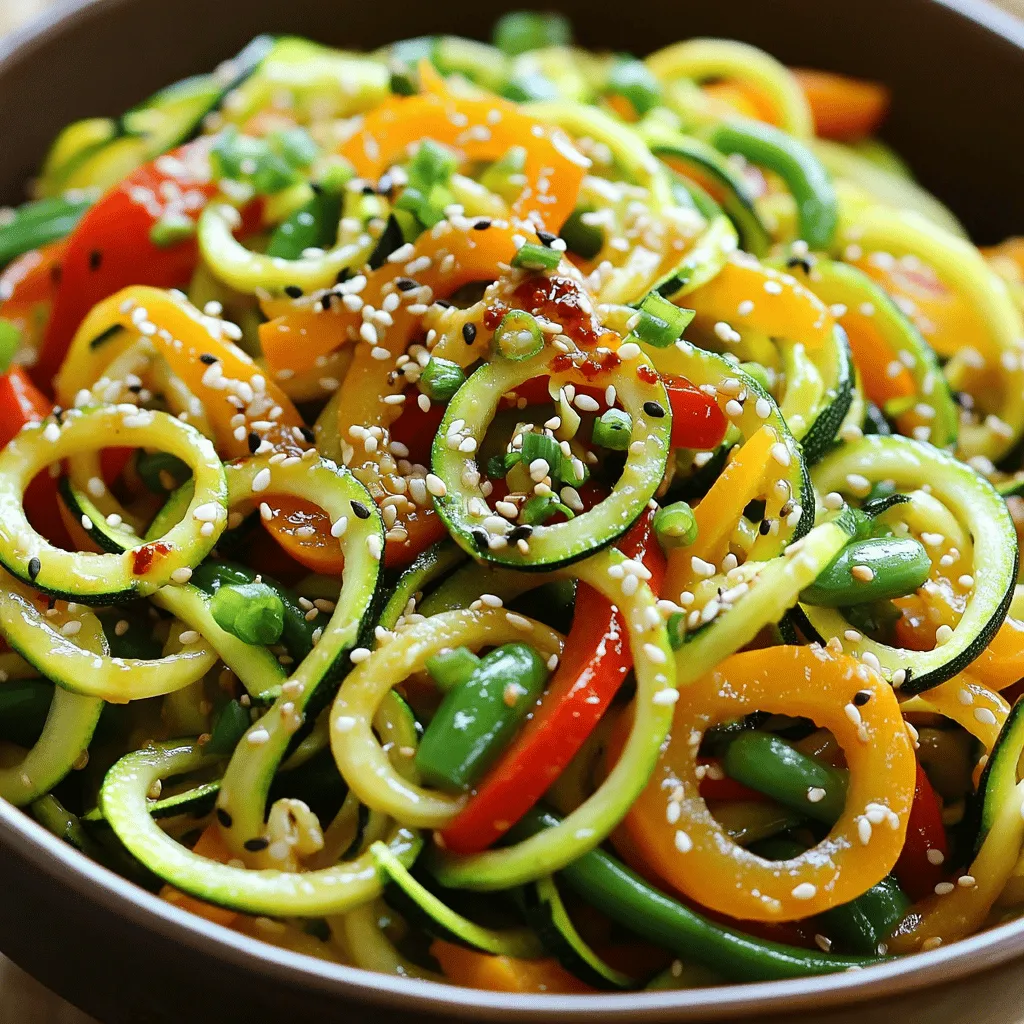
If you want a meal that’s quick and tasty, try my Zucchini Noodle Stir-Fry! This dish is perfect for busy
