Skip to content
DisclaimerTerms Of UseGDPR PolicyCookie Policy

Home Cooking Style

  • Home
  • Drinks
  • Appetizers
  • Dinner
  • Dessert
  • About
  • Contact
  • Privacy Policy
DisclaimerTerms Of UseGDPR PolicyCookie Policy

Amelia

- 1 cup creamy peanut butter - 1/2 cup unsalted butter, melted - 1 cup brown sugar, packed - 1/2 cup granulated sugar - 2 large eggs - 1 teaspoon vanilla extract - 1 1/2 cups all-purpose flour - 1 teaspoon baking powder - 1/2 teaspoon salt - 1 cup semi-sweet chocolate chips - 1/4 cup chopped peanuts (optional) For these blondies, the key ingredient is creamy peanut butter. It gives the blondies their rich flavor and moist texture. If you prefer a nutty crunch, feel free to add chopped peanuts. If you need a substitute for peanut butter, try almond butter or sunflower seed butter. Both will add a unique taste. For sugar, you can use coconut sugar or a sugar alternative like stevia. If you want a gluten-free option, consider using almond flour or gluten-free all-purpose flour. To make these blondies, you'll need: - Mixing bowls - Baking pan (8x8 inch) - Parchment paper Using parchment paper helps with easy removal and cleanup. It prevents the blondies from sticking to the pan. This makes serving them much easier! Check out the Full Recipe for all the steps to create this delightful treat. 1. Preheat your oven to 350°F (175°C). 2. Line an 8x8 inch baking pan with parchment paper. Leave some paper hanging over the sides for easy removal later. 3. In a large mixing bowl, combine 1/2 cup melted butter and 1 cup creamy peanut butter. Mix until smooth. 4. Add 1 cup packed brown sugar and 1/2 cup granulated sugar. Stir until it's well mixed. 5. Beat in 2 large eggs, one at a time. Then, add 1 teaspoon of vanilla extract. Mix until smooth. 1. In a separate bowl, sift together 1 1/2 cups all-purpose flour, 1 teaspoon baking powder, and 1/2 teaspoon salt. 2. Gradually add this dry mixture to the wet ingredients. Fold it in until just mixed. Do not overmix! 1. Carefully fold in 1 cup semi-sweet chocolate chips and 1/4 cup chopped peanuts if you want extra crunch. 2. Pour the blondie batter into your prepared pan and spread it evenly. 3. Bake for 25-30 minutes. The edges should be golden brown. A toothpick in the center should come out clean, with a few moist crumbs being okay. Following these steps will help you create Peanut Butter Chocolate Chip Blondies that are soft, chewy, and packed with flavor. Enjoy the process and the tasty results! For the full recipe, check the previous section. To achieve the best blondies, avoid overmixing the batter. When you mix too much, the blondies can turn out tough. Mix just until you see the flour disappear. This keeps them soft and chewy. Next, checking for doneness is key. You want a toothpick inserted in the center to come out with a few moist crumbs. If it comes out clean, they may be overbaked. Look for golden edges and a slightly soft center. Cutting and serving blondies can be simple. Use a sharp knife to slice them after they cool. For neat squares, clean the knife between cuts. This helps keep the edges tidy. For serving, add a scoop of ice cream on top. You can drizzle chocolate or caramel sauce for extra flavor. Chopped nuts or sprinkles can add a nice crunch and color. You can freeze the uncooked batter or cooked blondies. If you freeze the batter, scoop it into the pan and cover it well. When you're ready to bake, just thaw it in the fridge overnight. For cooked blondies, let them cool completely. Wrap them tightly in plastic wrap and place them in an airtight container. When you want to enjoy them, thaw them at room temperature. This keeps them fresh and tasty. If you want the full recipe for Peanut Butter Chocolate Chip Blondies, check it out! {{image_2}} You can change up the flavors in your blondies. Try adding white chocolate chips for a sweet twist. Dark chocolate chips can also add a rich depth. If you like a bit of crunch, mix in chopped nuts like walnuts or pecans. You can also add dried fruits, like cranberries or apricots, for a chewiness that pairs well with peanut butter. If you need gluten-free blondies, swap regular flour for a gluten-free blend. Just make sure the blend has a good structure for baking. For a vegan option, use flax eggs instead of regular eggs. Mix one tablespoon of flaxseed meal with three tablespoons of water, let it sit, and then add it to your mix. This keeps the texture soft and moist. Adding spices can make your blondies fit the season. For autumn, try cinnamon or nutmeg. These spices make the blondies taste warm and cozy. During the holidays, top your blondies with festive sprinkles or a drizzle of melted chocolate. These small changes can make your treats feel special for any occasion. For the complete recipe, check the Full Recipe section above. You can store leftover blondies at room temperature or in the fridge. If you keep them at room temperature, place them in an airtight container. This helps keep them fresh and moist. If you want to store them longer, the fridge is a better choice. Just make sure to seal them well to avoid drying out. These blondies last about five days at room temperature. In the fridge, they can stay fresh for up to a week. Look out for signs of spoilage. If they smell off or have a dry texture, it’s time to toss them. To enjoy these blondies warm, you can reheat them. The best method is to use the microwave. Heat for about 10-15 seconds. This warms them without making them dry. You can also use an oven. Wrap them in foil and heat at 350°F for about 5-10 minutes. This keeps them soft and tasty. For the full recipe, check out the earlier section! It takes about 15 minutes to prep the blondies. The cook time is 25-30 minutes. So, the total time is around 45 minutes. Yes, you can use crunchy peanut butter. It will add a fun texture. The blondies will have little bits of peanuts. This makes each bite even more exciting! You can serve them with a scoop of vanilla ice cream. Whipped cream also works well. Fresh fruit like strawberries or bananas can add a nice touch too. To check if your blondies are done, use a toothpick. Insert it into the center. If it comes out clean or with a few moist crumbs, they are ready. The edges should look golden brown too. This blog post covered all you need for perfect Peanut Butter Chocolate Chip Blondies. We went over essential ingredients, helpful substitutions, and the best techniques to bake. You learned tips to ensure great results and how to store leftovers. Now you can bake with confidence. Enjoy delicious blondies any time by following these easy steps. Happy baking!

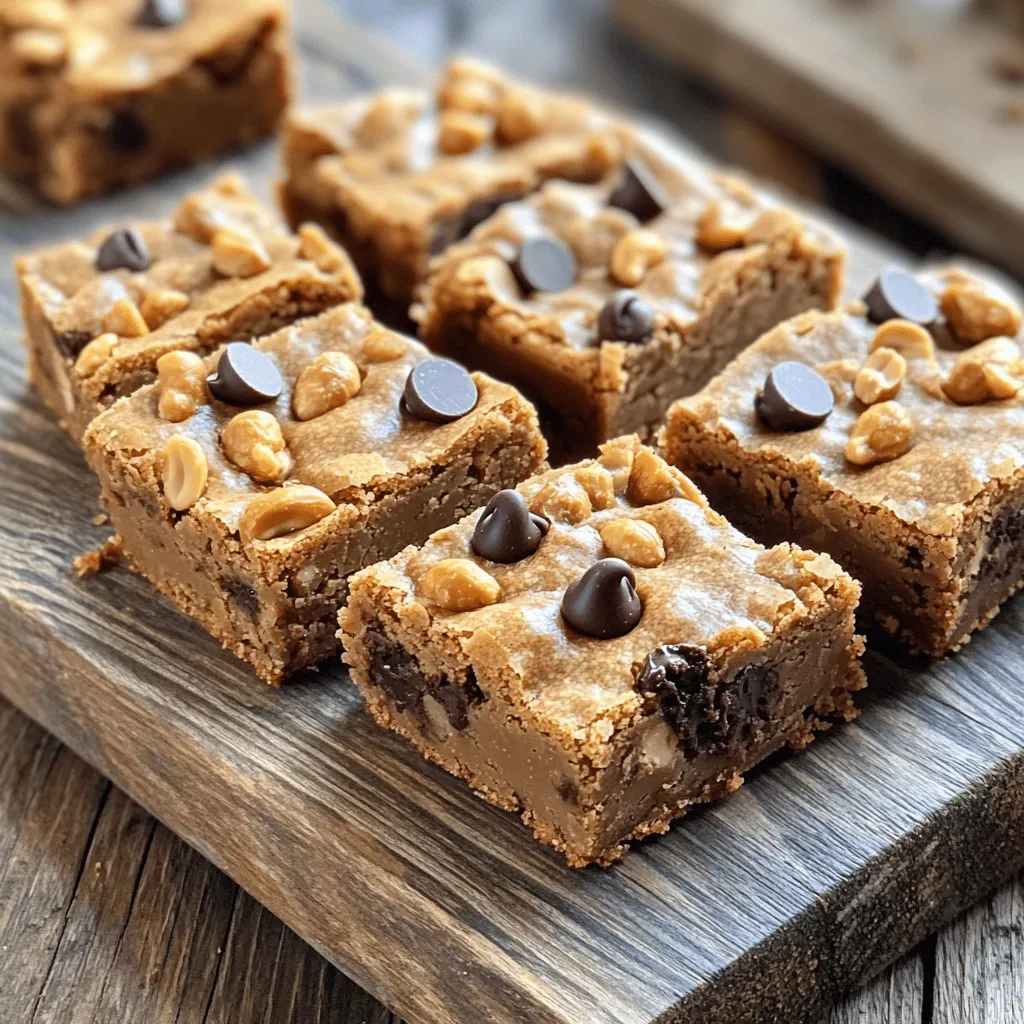
Peanut Butter Chocolate Chip Blondies Delightful Treat

Craving a sweet treat that’s both rich and satisfying? These Peanut Butter Chocolate Chip Blondies are just the ticket! With

To make a delicious eggnog cake, you'll need a few key ingredients that bring warmth and flavor to each bite. Here’s a complete list for the cake and frosting: - 2 cups all-purpose flour - 1 ½ teaspoons baking powder - ½ teaspoon baking soda - ½ teaspoon ground nutmeg - ½ teaspoon ground cinnamon - ½ teaspoon salt - 1 cup unsalted butter, softened - 1 ½ cups granulated sugar - 4 large eggs - 1 cup eggnog (store-bought or homemade) - 1 teaspoon vanilla extract For the frosting, gather these simple ingredients: - 1 cup powdered sugar - 2 tablespoons butter, softened - 2 tablespoons eggnog - Ground nutmeg for garnish These ingredients work together to create a soft, moist cake with a rich flavor. The eggnog adds a festive touch. The ground spices bring warmth and spice that make every slice special. 1. First, preheat your oven to 350°F (175°C). Grease and flour two 9-inch round cake pans. 2. In a medium bowl, whisk together the dry ingredients: flour, baking powder, baking soda, nutmeg, cinnamon, and salt. This mix adds flavor. 3. In a large bowl, cream the softened butter and sugar. Mix until it is light and fluffy, about 3-4 minutes. This step is key to a soft cake. 4. Add the eggs one by one. Mix well after each egg. Then, stir in the vanilla extract for a nice aroma. 5. Gradually add the dry mix to the wet mix. Alternate with the eggnog. Stir until just combined. Be careful not to overmix, or your cake can turn out tough. 6. Divide the batter evenly between the two prepared pans. This ensures they bake evenly. 7. Bake in the preheated oven for 25-30 minutes. Check with a toothpick. If it comes out clean, the cake is done. 8. Allow the cakes to cool in the pans for about 10 minutes. Then transfer them to a wire rack to cool completely. 9. For the frosting, beat softened butter and powdered sugar in a medium bowl. Gradually stir in eggnog until smooth and spreadable. 10. Once the cakes are cool, place one layer on a serving plate. Spread frosting on top. Add the second layer and frost the top and sides. 11. To finish, sprinkle ground nutmeg on top. This adds a lovely festive touch to your eggnog cake. For more details, you can refer to the Full Recipe. - Ensure all ingredients are at room temperature. This helps the batter mix well. Cold ingredients can lead to a dense cake. - Avoid overmixing the batter for a tender cake. Mix just until everything comes together. Overmixing can make your cake tough, which we want to avoid. - Achieve smooth frosting consistency. Beat your softened butter and powdered sugar well. Gradually add eggnog until it’s spreadable. - Use ground nutmeg for the perfect finish. A sprinkle on top brings out the eggnog flavor. It adds a festive touch to your cake. These tips will help you create a delightful eggnog cake. For the full recipe, check the section above! {{image_2}} You can enjoy a gluten-free version of this eggnog cake. Start by using gluten-free flour. Look for a blend that works well in cakes. Brands like Bob's Red Mill or King Arthur Flour offer great options. When you switch to gluten-free flour, you may need to adjust some ingredients. Gluten-free flour can absorb more liquid. Add a little extra eggnog to keep the cake moist. You might also want to include a binding agent like xanthan gum. This helps give the cake a good texture. If you want a vegan eggnog cake, the swaps are simple. Replace the eggs with flaxseed meal or applesauce. For each egg, mix one tablespoon of flaxseed meal with three tablespoons of water. Let it sit until it thickens. For butter, use coconut oil or vegan butter. You can find vegan eggnog at many stores. Just check the label for dairy-free options. This vegan version will still taste rich and festive. You will get all the flavors of the original cake. The texture may differ slightly, but it will be just as delightful. For the full recipe, check the section above. Enjoy baking! Store your eggnog cake at room temperature if you plan to eat it within a few days. Use a cake keeper or cover it with plastic wrap. This keeps the cake moist and fresh. If you won’t eat it quickly, store it in the fridge. Refrigeration helps the cake last longer. Just remember to cover it well to avoid drying out. You can freeze eggnog cake for up to three months. First, let the cake cool completely. Wrap each layer tightly in plastic wrap. Then, place the wrapped layers in a freezer bag or airtight container. When you want to enjoy it, remove it from the freezer. Thaw it in the fridge overnight. This keeps the cake tasty and moist. Eggnog cake is a festive treat that captures the classic flavors of eggnog. It has a rich, creamy taste with hints of nutmeg and cinnamon. The cake is moist and fluffy, perfect for holiday gatherings. You can enjoy it plain or topped with a smooth eggnog frosting. This cake brings warmth and joy to any festive table, making it a seasonal favorite. Yes, you can make eggnog cake ahead of time! Bake the cake layers and let them cool completely. Wrap each layer in plastic wrap and store them in the fridge for up to three days. You can also freeze the layers for up to a month. Frost the cake just before serving for the best taste and texture. Making homemade eggnog is simple. You'll need: - 4 large eggs - 1 cup granulated sugar - 2 cups milk - 1 cup heavy cream - 1 teaspoon vanilla extract - 1 teaspoon ground nutmeg 1. In a bowl, beat the eggs and sugar until smooth. 2. Stir in the milk, heavy cream, and vanilla. 3. Chill the mixture for at least one hour. 4. Add nutmeg before using it in your cake. This eggnog is perfect for baking and sipping! For the complete recipe, check the [Full Recipe](#) section above! In this blog post, we've explored the delightful world of eggnog cake. From the essential ingredients to a simple step-by-step guide, I aimed to equip you with everything you need. Don’t forget the frosty touch with nutmeg on top for that holiday spirit. Whether you're baking a gluten-free or vegan version, you can enjoy eggnog cake your way. Remember, proper storage keeps your cake fresh longer. I hope you're excited to try this festive treat soon! Now, gather your ingredients and start baking!

Eggnog Cake Delightful Festive Flavor to Savor

Eggnog cake is the perfect treat for the holidays! This delightful dessert blends rich flavors of nutmeg, cinnamon, and creamy

To make Crispy Garlic Parmesan Potatoes, gather these simple ingredients: - 1.5 lbs baby potatoes, halved: Choose small, firm baby potatoes for the best texture. They cook evenly and turn crispy. - 4 tablespoons olive oil: This oil helps the potatoes crisp up nicely while adding a rich flavor. - 4 cloves garlic, minced: Fresh garlic gives a great taste. You can adjust the amount based on your love for garlic. - 1 teaspoon dried oregano: This herb adds a warm, earthy flavor that pairs well with potatoes. - 1 teaspoon smoked paprika: This spice adds a nice smoky taste. It makes the potatoes even more delicious. - ½ cup grated Parmesan cheese: This cheese melts beautifully and adds a savory finish. - Salt and pepper to taste: Don't forget to season! It makes all the flavors pop. - Chopped fresh parsley for garnish: Fresh parsley adds color and a hint of freshness to the dish. These ingredients come together to create a tasty and simple treat. For the full recipe, check out the detailed steps to bring these crispy potatoes to life. First, preheat your oven to 425°F (220°C). This step is key for crispy potatoes. While the oven heats, prepare your baking sheet. Line it with parchment paper. This makes cleanup easy and keeps the potatoes from sticking. Next, gather your ingredients. In a large bowl, add the halved baby potatoes. Pour in 4 tablespoons of olive oil. Add 4 minced garlic cloves, 1 teaspoon of dried oregano, 1 teaspoon of smoked paprika, salt, and pepper. Toss everything together until the potatoes are well coated. You want every piece to get flavor. Now, spread the coated potatoes on the baking sheet. Place them cut-side down in a single layer. This helps them crisp up nicely. Roast the potatoes in your preheated oven. Cook them for about 25 to 30 minutes. Watch for them to turn golden brown and crispy. Halfway through cooking, flip the potatoes. This step ensures they brown evenly on both sides. Use a spatula to turn them gently. When the potatoes are crispy, take them out of the oven. Sprinkle ½ cup of grated Parmesan cheese evenly over the top. The cheese adds a rich flavor and wonderful texture. Return the baking sheet to the oven for another 5 minutes. This final baking step melts the cheese and makes it golden. Once done, take them out and garnish with chopped fresh parsley. Now, your crispy garlic Parmesan potatoes are ready to enjoy! For further details, check the Full Recipe. To get the best crispiness, choose baby potatoes. They have the perfect size and shape. Halve them to expose more surface area. This helps them get crispy and golden. Set your oven to 425°F (220°C). This high heat helps the potatoes cook quickly. Use a baking sheet lined with parchment paper. This makes for easy cleanup and helps with browning. Place the baking sheet in the middle of the oven. This ensures even heat all around the potatoes. For extra flavor, try adding fresh herbs like rosemary or thyme. These herbs pair well with garlic and Parmesan. You can also use spices like cayenne pepper for a kick. When seasoning, taste as you go. Adjust the salt to your liking. Too much salt can overpower the dish. A little pepper adds a nice touch. For a unique twist, sprinkle lemon zest before serving. This brightens the dish and adds freshness. You can find all the details on how to make these delicious potatoes in the Full Recipe. {{image_2}} You can change up the cheese to suit your taste. Try using cheddar or feta. Both will add a nice twist to the crispy garlic parmesan potatoes. If you prefer something creamier, go for goat cheese. When choosing herbs, use fresh ones for a brighter flavor. Fresh parsley or thyme can make a big difference. If you only have dried herbs, that's okay too! Just remember they’re more potent. Use less if you swap fresh for dried. Crispy garlic parmesan potatoes pair well with many dishes. They are great with roasted chicken or grilled fish. You can also serve them with a fresh salad. The crunch and flavor work well with lighter meals. For presentation, place the potatoes on a large platter. Drizzle some extra olive oil and sprinkle more cheese on top. Add a few sprigs of fresh parsley for color. You want them to look as good as they taste. For the full recipe, check out the details above. To keep your crispy garlic parmesan potatoes fresh, store them in the fridge. Place them in an airtight container. This helps keep moisture away and keeps them crispy. They stay good for about three days. When you want to reheat them, use the oven. Set it to 350°F (175°C). Spread the potatoes on a baking sheet. Heat them for about 10-15 minutes. This method makes them crispy again. You can also use an air fryer for quick reheating. Yes, you can freeze crispy garlic parmesan potatoes! However, freezing may change their texture. For the best results, freeze them after cooking. Let them cool first. Then, place them in a freezer-safe bag. Remove as much air as possible to avoid freezer burn. When you're ready to eat them, thaw in the fridge overnight. Reheat them in the oven at 350°F (175°C). This will help restore some crispiness. You can also use an air fryer to reheat them. For the best flavor, try to eat them within a month. For the full recipe, check out Crispy Garlic Parmesan Potatoes 🥔🧄. Can I use other types of potatoes? Yes, you can use other types of potatoes. Yukon Gold or red potatoes work well. Just cut them into similar sizes for even cooking. How can I make them vegan-friendly? To make these potatoes vegan, skip the Parmesan cheese. You can use nutritional yeast for a cheesy flavor instead. What should I serve with this dish? These crispy potatoes pair well with grilled meats, salads, or as a snack. Try them with a dip like ranch or garlic aioli. How do I ensure they stay crispy? To keep them crispy, make sure the potatoes are dry before adding oil and seasoning. Spread them in a single layer and flip halfway through cooking. Can I prepare them ahead of time? You can prep the potatoes earlier in the day. Just coat them in oil and seasoning. Store them in the fridge until you are ready to roast. What should I do if they are not browning? If the potatoes are not browning, check your oven temperature. Make sure it’s set to 425°F. You can also try placing them on a higher rack. Can I add more garlic for flavor? Absolutely! If you love garlic, feel free to add extra cloves. Just keep in mind that it can become overpowering if you add too much. For the full recipe, check out the comprehensive guide on how to make these tasty bites! In this article, I shared how to make crispy garlic Parmesan potatoes. We covered ingredients, step-by-step instructions, and tips for crispiness. I also discussed variations and storage options so you can enjoy leftovers. Remember, the right potato type and proper seasoning make a big difference. Don’t hesitate to get creative with flavors or pairing suggestions. With a little practice, you can serve these tasty potatoes as a winner at any meal. Enjoy your cooking journey!

Crispy Garlic Parmesan Potatoes Tasty and Simple Treat

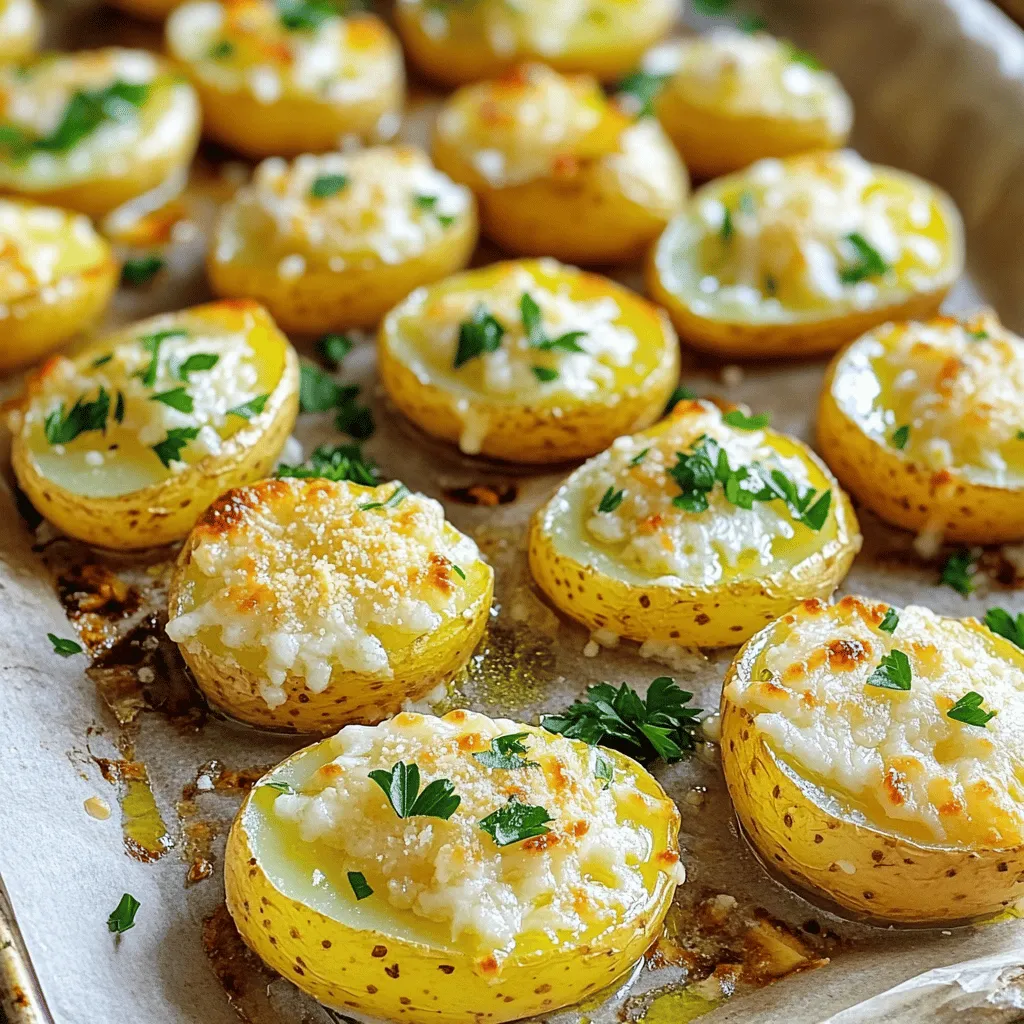
Are you ready to elevate your potato game? These Crispy Garlic Parmesan Potatoes are the perfect blend of simple and

- 2 cans (16 oz each) refrigerated biscuit dough - 1 cup shredded mozzarella cheese - 1 cup pepperoni slices or veggie alternative - 1/2 cup pizza sauce, plus extra for dipping To make Cheese Pizza Monkey Bread, we need a few key ingredients. First, grab two cans of refrigerated biscuit dough. This dough gives us the fluffy base we love. Next, we need a cup of shredded mozzarella cheese. This cheese melts beautifully and adds that classic pizza flavor. Don’t forget the pepperoni slices; you can also use a veggie alternative if you prefer. Lastly, we need half a cup of pizza sauce. This sauce makes the bread tasty and perfect for dipping. - 2 tablespoons olive oil - 1 teaspoon Italian seasoning - 1/2 teaspoon garlic powder - 1/4 teaspoon crushed red pepper flakes - Fresh basil leaves for garnish If you want to add more flavor, there are some optional ingredients you can use. Drizzle in two tablespoons of olive oil to help the dough crisp up. One teaspoon of Italian seasoning will bring great taste, and half a teaspoon of garlic powder adds a nice kick. For a bit of heat, include a quarter teaspoon of crushed red pepper flakes. Finally, fresh basil leaves make a lovely garnish on top of the warm bread. For the full recipe, check out the [Full Recipe]. First, set your oven to 350°F (175°C). This step is key for a perfect bake. While your oven heats up, grab a 10-inch bundt pan. Grease it well with non-stick spray. This will help the monkey bread come out easily later. Next, open the cans of refrigerated biscuit dough. Take each biscuit out and separate them. Cut each biscuit into quarters. This makes it easy to mix and cook. Place the biscuit pieces in a large mixing bowl. Handling biscuit dough can be sticky. Keep your hands floured to avoid mess. Also, work quickly so the dough stays cold. Now, drizzle 2 tablespoons of olive oil over the biscuit pieces. Add 1 teaspoon of Italian seasoning, 1/2 teaspoon of garlic powder, and 1/4 teaspoon of crushed red pepper flakes if you like spice. Toss everything together until the biscuit pieces are well coated. Next, fold in 1 cup of shredded mozzarella cheese and 1 cup of pepperoni slices. If you want a veggie option, use diced bell peppers instead. Mix gently to spread the fillings evenly. Once mixed, spoon half of this mixture into the greased bundt pan. Pour half of the 1/2 cup of pizza sauce over this layer. Repeat with the remaining biscuit mixture and pizza sauce on top. Use a spatula to make sure it’s all even. Now, you are ready to bake. Place the bundt pan in the oven for 25-30 minutes. Check with a toothpick to make sure there’s no raw dough inside. For a complete guide with all the details, check the Full Recipe. To bake Cheese Pizza Monkey Bread well, set your oven to 350°F (175°C). This temperature ensures a golden crust. Bake it for 25-30 minutes. Keep an eye on it to avoid overcooking. To check for doneness, insert a toothpick into the center. If it comes out clean, it’s ready! Serve the monkey bread warm right from the bundt pan. It looks great on any table. Pair it with pizza sauce for dipping. You can also try ranch dressing or garlic butter. Add some fresh veggies on the side for a nice touch. To make it even better, think about adding herbs. Fresh or dried basil works well. You can also use oregano for more flavor. If you want to customize cheese, try cheddar or pepper jack. Adding veggies like mushrooms or olives can boost taste too. {{image_2}} If you want to swap mozzarella, try using provolone or gouda. They melt well and add flavor. For a plant-based option, use vegan mozzarella. This works great if you want a dairy-free dish. Just ensure it melts nicely in the oven. You can mix up the meats in your cheese pizza monkey bread. Try diced ham, sausage, or even crispy bacon. If you prefer veggies, add mushrooms, spinach, or olives. For the sauce, feel free to switch it up. Pesto or a creamy white sauce can bring a new twist. They add different tastes that keep it exciting. For a fall version, consider adding pumpkin puree and sage. This gives a nice autumn flavor. During the holidays, think about using cranberry sauce or turkey bits. These festive ingredients turn your monkey bread into a seasonal treat. To keep your Cheese Pizza Monkey Bread fresh, place leftovers in an airtight container. Store it in the fridge. Make sure it is cool before sealing it. For longer storage, you can freeze it. Wrap the monkey bread in plastic wrap, then place it in a freezer bag. This helps prevent freezer burn. When you want to enjoy your monkey bread again, reheating is easy. The oven gives the best results. Preheat your oven to 350°F (175°C). Place the monkey bread on a baking sheet. Heat for about 10-15 minutes. If you use the microwave, place a slice on a plate. Heat for about 30-60 seconds. The oven makes the bread crispier, while the microwave is quicker. In the fridge, your Cheese Pizza Monkey Bread lasts about 3-4 days. If you freeze it, it can last up to 2-3 months. Just remember to label the container with the date. This way, you know when to enjoy your tasty treat! Yes, you can prepare Cheese Pizza Monkey Bread in advance. To do this, follow these tips: - Prep the dough: Cut the biscuit dough and toss it with seasonings ahead of time. - Layer, but don’t bake: Place the biscuit mixture and sauce in the bundt pan. Cover tightly with plastic wrap. - Refrigerate: Store the pan in the fridge for up to 24 hours before baking. - Baking: When ready, remove the wrap and bake. You may need to add a few extra minutes to the baking time. There are many fun ways to change up this recipe! Here are some ideas: - Different cheeses: Swap mozzarella for cheddar or pepper jack for a spicy kick. - Veggie options: Use bell peppers, mushrooms, or olives instead of pepperoni. - Sauce swaps: Try pesto or alfredo sauce for a twist on flavor. - Herbs and spices: Add fresh herbs like basil or oregano to enhance taste. To check if your monkey bread is done, look for these signs: - Golden brown top: The top should be a nice golden color. - No raw dough: Insert a toothpick into the bread. It should come out clean. - Firm texture: Gently press the top; it should spring back without leaving an indent. For a delicious meal, remember to follow the Full Recipe for perfect results every time! You now have a complete guide to making Cheese Pizza Monkey Bread. We covered required and optional ingredients, step-by-step instructions, and tips for serving. You can customize flavors and try unique variations. Remember, this dish is fun and easy. You can prepare it for any occasion. Enjoy your cooking, and share this tasty treat with family and friends!

Cheese Pizza Monkey Bread Savory and Easy Recipe

Get ready to delight your taste buds with my easy Cheese Pizza Monkey Bread recipe! This fun twist on classic

- Puff pastry: This light and flaky dough forms the base of our danishes. It puffs up nicely when baked, creating a delightful texture. You can find it in the freezer section of most grocery stores. Just thaw it before use. - Wild blueberries: These tiny gems pack a punch of flavor. They are sweet and slightly tart, making them perfect for our recipe. You can use fresh or frozen wild blueberries. If using frozen, there’s no need to thaw them first. - Cream cheese and its role: Cream cheese adds a rich and creamy texture. It balances the sweetness of the blueberries and gives a nice base for our filling. Make sure it’s softened for easy mixing. - Sugar, vanilla extract, and optional cinnamon: Sugar sweetens the filling and adds a nice crunch when baked. Vanilla extract enhances the flavor, while cinnamon gives an extra warmth. It's optional, but I love how it complements the blueberries. These simple ingredients come together to make a treat you’ll want to share with everyone. For the complete recipe, check out the Full Recipe section. 1. Preheat your oven and prepare the baking sheet. Set your oven to 400°F (200°C). Line a baking sheet with parchment paper. This step keeps the danishes from sticking. 2. Roll out puff pastry and cut into squares. On a lightly floured surface, roll out the thawed puff pastry. Smooth out any creases. Cut the pastry into four equal squares. 3. Create the filling mixture. In a small bowl, mix the softened cream cheese, sugar, vanilla extract, and cinnamon (if using). Stir until it is smooth and creamy. This mixture will be the heart of your danish. 1. Add cream cheese and blueberries. Place a generous spoonful of the cream cheese mixture in the center of each puff pastry square. Top it with a handful of wild blueberries. Make sure to spread them evenly. 2. Form the pastry pockets. Carefully lift each corner of the pastry squares towards the center. Pinch the edges to create a pocket around the filling. This step keeps the filling inside while baking. 1. Apply the egg wash. In a separate bowl, whisk together the egg and milk to create your egg wash. Brush this mix over the tops of the danishes. This gives them a nice golden finish. 2. Bake time and desired doneness. Place the danishes in the preheated oven. Bake for 15-20 minutes, or until puffed and golden brown. Keep an eye on them to avoid over-baking. Once baked, let them cool slightly. Drizzle with lemon glaze for extra flavor. Enjoy your Wild Blueberry Coffee Cake Danishes! For the full recipe, check out the detailed instructions above. To make your Wild Blueberry Coffee Cake Danishes even better, try adding lemon zest. The zest gives a bright, fresh taste. Almond extract also works well. Just a drop can add a nice nutty flavor. You can even try spices like nutmeg or cardamom for a richer taste. These small tweaks can change everything. Getting that puff pastry to rise evenly is key. Make sure your oven is hot enough before baking. This helps the pastry puff up perfectly. To avoid soggy bottoms, bake on parchment paper. This keeps moisture away. You can also place the danishes on the top rack for better heat circulation. Serve these danishes warm for the best experience. They pair well with coffee or tea. A nice cup of dark roast coffee complements the sweetness. You could also enjoy them with a light herbal tea. Garnish with extra powdered sugar for a lovely look. Adding a few wild blueberries on the side makes for a pretty plate. For the full recipe, check out the instructions above. {{image_2}} You can easily switch out wild blueberries for fruits like raspberries or peaches. Raspberries add a tart twist, while peaches bring a sweet touch. Just make sure to adjust the sugar based on the fruit's natural sweetness. This way, you can enjoy a new flavor each time you make these danishes. If you need gluten-free options, look for gluten-free puff pastry. Many brands offer great choices. For a dairy-free version, try using a dairy-free cream cheese. These substitutions keep the taste rich while meeting dietary needs. Enjoying this treat should be fun and easy for everyone! Think beyond lemon glaze! You can explore flavors like vanilla or maple. Vanilla adds a warm, sweet note. Maple gives a rich, earthy flavor. Just mix powdered sugar with your chosen flavoring and a little milk to achieve the right consistency. These glazes will elevate your danishes even more! For the full recipe, check out the detailed instructions above and start baking! To store your leftover danishes, place them in an airtight container. You want to keep moisture out. The fridge is the best spot for short-term storage. They stay fresh for up to three days. Just make sure they cool completely before sealing. For longer enjoyment, freeze the danishes. Start by placing them on a baking sheet. Make sure they are not touching each other. Freeze them for about an hour. Once solid, transfer them to a freezer-safe bag. They will keep for up to three months. To reheat your danishes, use an oven to retain their crispiness. Preheat the oven to 350°F (175°C). Place the danishes on a baking sheet and heat for about 10 minutes. This helps keep the pastry flaky and warm. You can also use a toaster oven for smaller batches. Enjoy your treat just like fresh! You can make Wild Blueberry Coffee Cake Danishes from scratch easily. Start by gathering your ingredients: puff pastry, wild blueberries, cream cheese, sugar, and vanilla. Roll out the thawed puff pastry and cut it into squares. Mix the cream cheese, sugar, and vanilla until smooth. Place a spoonful of this mix in the center of each square. Top with blueberries, fold the pastry, and bake until golden. For the full recipe, check the earlier section. Yes, you can use frozen blueberries. They work great in this recipe. Just make sure to thaw and drain them before adding to avoid extra moisture. Frozen blueberries may burst during baking, creating a lovely burst of flavor. If you need a substitute for cream cheese, try using mascarpone cheese or Greek yogurt. Both give a creamy texture and flavor. You can also use a dairy-free cream cheese if you prefer a vegan option. You can find pre-made danishes at local bakeries or grocery stores. Many larger stores have a bakery section with fresh options. Check the freezer aisle too, as some brands offer frozen danishes that you can bake at home. These danishes stay fresh for about two days at room temperature. For longer storage, keep them in the fridge for up to a week. You can also freeze them for up to three months. Just reheat in the oven to restore their crispiness. Making Wild Blueberry Coffee Cake Danishes is simple and fun. You learned about the key ingredients, like puff pastry and blueberries. Following easy steps, you can create delicious pastries to impress anyone. Don’t forget my tips to enhance flavor and perfect your technique. Feel free to try other fruits or glazes for variety. Store extras well, so you enjoy them later. Now, you can savor fresh-baked treats at home anytime!

Wild Blueberry Coffee Cake Danishes Delightful Treat

Get ready to bake a treat that will impress! In this post, I’ll show you how to make Wild Blueberry

- 1 package of store-bought puff pastry (2 sheets) - 1 cup shelled pistachios, finely ground - 1/4 cup sugar - 1/4 cup unsalted butter, softened - 1 egg (for egg wash) - 1 teaspoon vanilla extract - 1/2 teaspoon almond extract - Pinch of salt - Powdered sugar for dusting Each ingredient plays a key role in the flavor and texture of our croissants. The puff pastry gives a light and flaky crust. The finely ground pistachios add a rich, nutty taste. Sugar balances the flavors and helps with browning. Softened butter gives a nice richness. The egg wash creates a shiny, golden finish. Vanilla and almond extracts add depth. Lastly, salt enhances all the flavors. You can find quality pistachios at local markets or specialty stores. Look for fresh, bright green nuts without any blemishes. For pistachio paste, check health food stores or online. Make sure it has no added sugars or oils for the best taste. Using high-quality ingredients makes a big difference in your croissants. First, gather all your ingredients. This makes the process smooth and fun. Preheat your oven to 400°F (200°C). Line a baking sheet with parchment paper to avoid sticking. Next, mix the pistachios, sugar, softened butter, vanilla, almond extract, and salt in a medium bowl. Stir until you get a smooth paste. This filling is the star of your croissants! Roll out each sheet of puff pastry. You want it to be about 1/8 inch thick. Cut each sheet into four triangles. This shape helps in rolling them up nicely. Place about 1 tablespoon of the pistachio filling on the wide end of each triangle. Make sure to spread it evenly. Then, roll the triangle from the wide end towards the pointed end. Tuck in the ends to form a crescent shape. Put each croissant on your prepared baking sheet. Next, beat the egg in a small bowl. Brush the egg wash over each croissant. This step gives them a beautiful, golden finish when baked. Bake in the oven for 15-20 minutes. Look for a puffed and golden brown appearance. Once they are ready, let them cool for a few minutes on the baking sheet. Then, transfer them to a wire rack. Finally, dust with powdered sugar for a lovely finish. To make perfect pistachio filled croissants, keep these tips in mind: - Use cold puff pastry. This helps them rise better. - Don’t overfill the croissants. It can make rolling tricky. - Brush the egg wash evenly. This ensures even coloring. - Keep an eye on them while baking. Ovens can vary in heat. For the best results, bake your croissants at 400°F (200°C). This temperature creates a nice balance of crispiness and fluffiness. Bake for 15-20 minutes. Check for a golden brown color to know they're ready. Enjoy them warm or after they cool! For the full recipe, you can refer back to the earlier section. When baking croissants, avoid common mistakes to get the best results. First, do not skip chilling the dough. Cold dough helps create layers. If the butter melts too soon, your croissants will be dense. Second, do not rush the rolling process. Take your time to roll evenly. Uneven layers lead to uneven textures. Lastly, avoid overcrowding the baking sheet. Croissants need space to puff up and expand. To get that perfect flaky texture, start with cold ingredients. Cold butter and dough help form those lovely layers. Roll the dough out gently, and fold it properly. Each fold creates more layers. Use a light hand while shaping the croissants. If you press too hard, the layers will stick together. Finally, bake at a high temperature. This helps the layers rise quickly and get that golden, flaky crust. Having the right tools makes croissant baking easier. Here are some must-haves: - Rolling pin: For even dough thickness. - Parchment paper: Keeps croissants from sticking to the baking sheet. - Sharp knife or pastry cutter: For clean cuts when shaping. - Baking sheet: A sturdy surface for baking. - Pastry brush: For applying the egg wash smoothly. These tools help ensure your pistachio filled croissants come out perfectly every time. For more details, check the Full Recipe. {{image_2}} Pistachio filled croissants are tasty, but you can mix it up! Try almond filling for a nutty twist. You can also use chocolate for a sweet surprise. Hazelnut paste gives a rich flavor. For a fruity taste, spread raspberry or apricot jam inside. The options are endless! Serve your croissants warm, fresh from the oven. Arrange them on a pretty platter for guests. You can pair them with coffee or tea for a cozy breakfast. A drizzle of honey adds sweetness. If you want extra crunch, sprinkle crushed pistachios on top. Add a side of whipped cream for a touch of luxury! To make your croissants pop, try adding citrus zest. Lemon or orange zest brightens the flavor. You can also sprinkle in spices like cinnamon or cardamom for warmth. A hint of nutmeg can bring a holiday feeling. Experiment with different flavors to find your favorite combination. For the full recipe, check out the detailed steps in the Full Recipe section! To keep your pistachio filled croissants fresh, store them in an airtight container. This helps keep moisture in and air out. Place a piece of parchment paper between layers to avoid sticking. Keep the container in a cool, dry spot away from heat. Leftover croissants stay fresh for up to two days this way. When you want to enjoy your croissants again, preheat your oven to 350°F (175°C). Place the croissants on a baking sheet. Heat them for about 5 to 10 minutes. This warms them and brings back their crispness. Avoid using the microwave, as it can make them soggy. If you have extra croissants, freezing is a great option. Wrap each croissant tightly in plastic wrap. Then, place them in a freezer bag. They can last up to two months in the freezer. When you're ready to eat, thaw them in the fridge overnight. Then, reheat in the oven for a fresh taste. Yes, you can use homemade puff pastry. It can add a fresh flavor. Making your own can be tricky, but it’s rewarding. Homemade pastry can be flakier and tastier. Just roll it out to the right thickness, about 1/8 inch. Then, follow the same steps in the Full Recipe. If you don’t have pistachio paste, you can make your own. Blend shelled pistachios with a little oil until smooth. You can also use almond paste or hazelnut paste. They will change the flavor, but they work well. You may need to adjust the sugar in the recipe for taste. Pistachio Filled Croissants taste best fresh. You can keep them at room temperature for 1-2 days. If you want to keep them longer, store them in the fridge for up to a week. Make sure to wrap them well to avoid drying out. You can also freeze them for up to a month. Just reheat them in the oven for a crispy finish. Making Pistachio Filled Croissants is a fun and rewarding process. We covered key ingredients, preparation steps, and helpful tips for baking. You learned about different fillings, storage methods, and common mistakes to avoid. With practice, you can create croissants that impress anyone. Embrace your creativity with flavors and enjoy the tasty rewards of your baking journey. Happy baking!

Pistachio Filled Croissants Irresistible Breakfast Treat

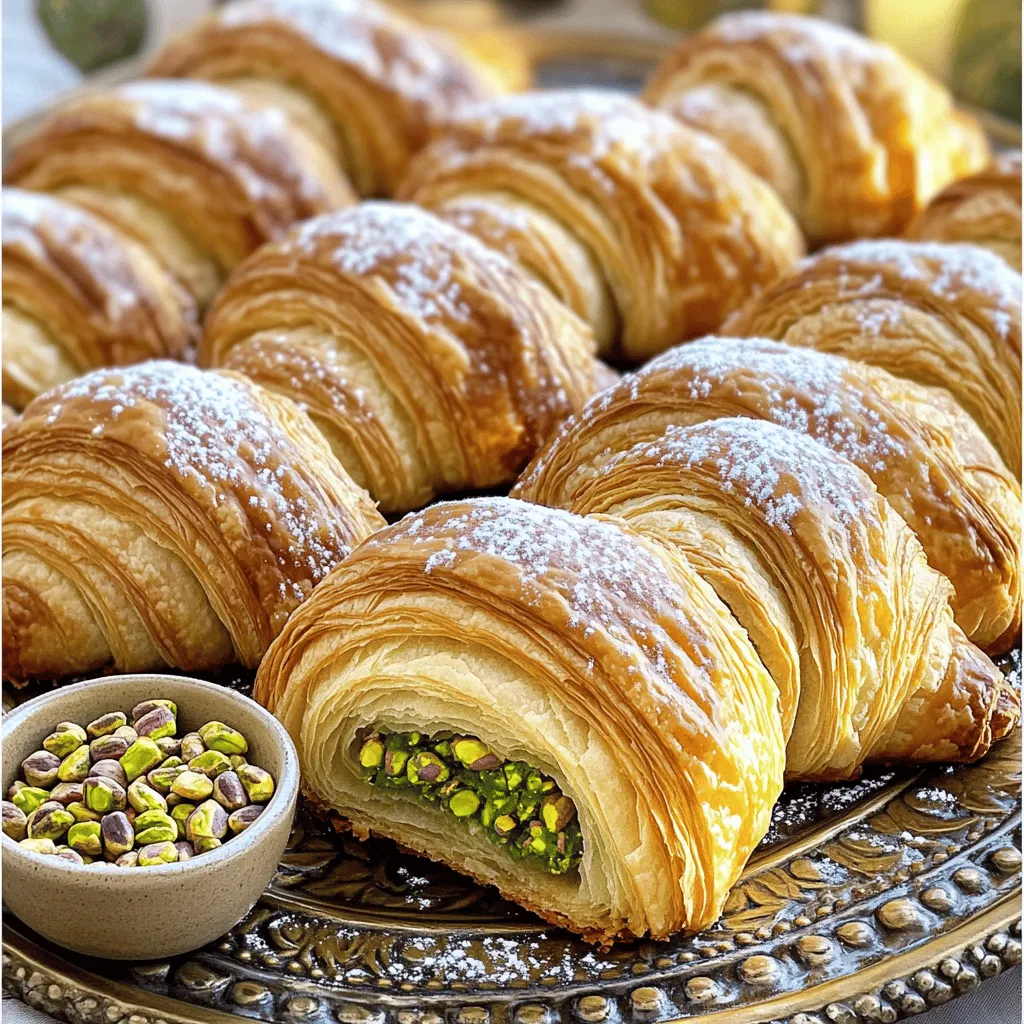
Wake up to the smell of fresh-baked Pistachio Filled Croissants! This treat is perfect for breakfast. Imagine buttery, flaky layers

When making a crispy chickpea salad, the right ingredients matter. Here’s what you need: - 1 can (15 oz) chickpeas, rinsed and drained - 2 tablespoons olive oil - 1 teaspoon smoked paprika - 1 teaspoon garlic powder - 1/2 teaspoon cumin - Salt and pepper to taste - 4 cups mixed greens (spinach, arugula, and romaine) - 1 cup cherry tomatoes, halved - 1 cucumber, diced - 1/4 red onion, thinly sliced - 1/4 cup feta cheese, crumbled (optional for a creamier texture) - 2 tablespoons lemon juice - 1 tablespoon balsamic vinegar - Fresh herbs (parsley or cilantro) for garnish These ingredients create a healthy and filling dish. The chickpeas bring protein and fiber. The mixed greens add crunch and freshness. Cherry tomatoes and cucumbers add color and juicy bites. The spices and dressings tie everything together with flavor. I love to use fresh herbs to make the salad pop. You can swap out the feta for other cheeses or leave it out for a vegan version. This recipe is flexible, so feel free to adjust based on your taste or what you have at home. For a full guide on how to prepare this tasty dish, check the Full Recipe. First, preheat your oven to 425°F (220°C). This high heat helps the chickpeas get crispy. Next, take a medium bowl and add the drained chickpeas. Pour in 2 tablespoons of olive oil. Sprinkle in 1 teaspoon of smoked paprika, 1 teaspoon of garlic powder, and 1/2 teaspoon of cumin. Don’t forget salt and pepper to taste! Toss the chickpeas until they are well-coated with the oil and spices. This step is key to getting great flavor. Now, it's time to arrange the chickpeas. Spread them out in a single layer on a baking sheet lined with parchment paper. Make sure they have space to breathe. This helps them roast evenly. Roast the chickpeas for about 25-30 minutes. They should turn golden brown and crispy. Remember to shake the pan halfway through. This ensures they cook evenly and don’t stick together. While the chickpeas roast, prepare the salad base. In a large bowl, mix together 4 cups of mixed greens, 1 cup of halved cherry tomatoes, 1 diced cucumber, and 1/4 thinly sliced red onion. In a small bowl, whisk together 2 tablespoons of lemon juice and 1 tablespoon of balsamic vinegar. Drizzle this over your salad mix and toss gently to coat. Once the chickpeas are done roasting, let them cool just a bit. Then, add them to the salad. If you want a creamier texture, sprinkle 1/4 cup of crumbled feta cheese on top. Toss everything gently again. For a final touch, garnish your salad with fresh herbs like parsley or cilantro. Enjoy this delicious, healthy, and filling delight! For the full recipe, check out the details above. To get your chickpeas nice and crunchy, set your oven to 425°F (220°C). This high heat helps them roast evenly. While cooking, make sure to shake the baking pan halfway through. This step keeps the chickpeas from sticking and helps them cook all around. You want every bite to be crispy! Adding herbs and spices can elevate your chickpeas. Try using oregano, thyme, or chili powder for a kick. For dressings, you can mix lemon juice with olive oil and a bit of honey. This blend adds zing to your salad. You can also play with balsamic vinegar for a sweet twist. Pair this salad with crusty bread or grilled chicken for a full meal. You can serve it in a large bowl, making it easy to share. For a stunning look, layer the crispy chickpeas on top. A drizzle of olive oil can add extra shine and appeal. If you want, sprinkle some fresh herbs on top for color and freshness. This salad not only tastes good but looks amazing too! For the complete recipe, check out the [Full Recipe]. {{image_2}} If you want to change things up, try different beans instead of chickpeas. Black beans or white beans work well. You can also use lentils for a nice twist. For greens, you can swap mixed greens with kale or romaine. Each choice brings its own flavor and texture. This salad is already vegan and gluten-free. If you want more protein, add grilled chicken or diced tofu. Both options boost the protein without losing taste. You can also add hard-boiled eggs for extra richness. These swaps keep the salad filling and satisfying. Using seasonal produce makes your salad fresh and vibrant. In summer, add juicy peaches or sweet corn. For fall, try roasted butternut squash or apples. These ingredients not only taste great but also add color to your dish. Feel free to adjust based on what’s available at your local market. For the full recipe, check out the recipe section. To keep your crispy chickpea salad fresh, store it in an airtight container. This helps prevent air from making the salad soggy. You can put the salad in the fridge for up to three days. If you plan to save the salad, keep the crispy chickpeas separate. This way, they stay crunchy and tasty. You can add them back just before serving. For best results, use glass containers. They don’t stain and keep the food fresh. Reheating crispy chickpeas can be tricky. You want to keep them crunchy, not soft. To do this, spread them on a baking sheet. Then, put them in a preheated oven at 350°F (175°C) for about 5-10 minutes. This will help them regain their crispiness. Avoid using the microwave, as it makes them soggy. Instead, enjoy them hot and crispy atop your salad for the best flavor. Can I make this salad ahead of time? Yes, you can prepare the salad ahead. Keep the crispy chickpeas separate until ready to serve. This way, they stay crunchy. You can mix the salad base and dressing in advance. Just store them in airtight containers in the fridge. What can I substitute for feta cheese? If you want a dairy-free option, try using avocado. It adds creaminess and healthy fats. Crumbled tofu is another great choice. You can also use nutritional yeast for a cheesy flavor without dairy. How can I increase the protein content of this salad? To boost protein, add grilled chicken or chickpea pasta. You can also mix in some quinoa or lentils. Nuts and seeds, like almonds or sunflower seeds, work well too. These ingredients will make the salad more filling. For the full recipe, check out the Crispy Chickpea Salad 🥗 section! This blog post covered how to make a tasty crispy chickpea salad. We talked about key ingredients, step-by-step prep, and helpful tips. You learned about storage and great serving ideas. In the end, mixing fresh ingredients and crispy chickpeas leads to a satisfying meal. Try your own twists for the best flavor. Enjoy your cooking journey!

Crispy Chickpea Salad Healthy and Filling Delight

If you’re after a healthy meal that fills you up and tastes great, look no further! This Crispy Chickpea Salad

To make tasty homemade granola bars, gather these simple ingredients: - 2 cups rolled oats - 1 cup mixed nuts (almonds, walnuts, cashews) chopped - 1/2 cup honey or maple syrup - 1/2 cup nut butter (almond or peanut butter) - 1/2 cup dried fruits (raisins, cranberries, apricots) - 1/4 cup dark chocolate chips (optional) - 1 teaspoon vanilla extract - 1/2 teaspoon salt - 1/2 teaspoon cinnamon These ingredients work together to create a chewy and crunchy treat. The oats give a hearty base, while the nuts add healthy fats and protein. Dried fruits add natural sweetness, and chocolate chips bring in a fun twist. For making these bars, you will need a few handy tools: - Mixing bowls - Baking dish (8x8 inches) - Parchment paper - Spatula - Saucepan Having these tools ready makes the process smooth. The mixing bowls help combine the dry and wet ingredients. The baking dish holds everything as it bakes. Parchment paper helps with clean-up and easy removal of the bars. If you follow this list, you'll be set to create your own delicious granola bars! For the full recipe, check the detailed instructions ahead. 1. Preheat your oven to 350°F (175°C). 2. Line an 8x8-inch baking dish with parchment paper. Leave some paper hanging over the sides. This helps you lift the bars out later. 3. In a large mixing bowl, add the rolled oats, chopped nuts, salt, and cinnamon. Stir them well to mix. 1. In a small saucepan, combine honey and nut butter over low heat. 2. Stir until the mixture is smooth and well blended. 3. Remove the pan from heat and add the vanilla extract. Stir it in. 1. Pour the warm honey-nut butter mixture over the dry ingredients. Mix until everything is well coated. 2. If you are using dried fruits or dark chocolate chips, fold them in now. Make sure they are evenly mixed. 3. Transfer the mixture into the prepared baking dish. Spread it evenly and press down firmly with a spatula. 4. Bake in the oven for 20 to 25 minutes. Look for golden brown edges. 5. Once baked, let it cool completely in the dish. Use the parchment overhang to lift it out. 6. Cut into bars or squares. Store them in an airtight container at room temperature for up to a week. Enjoy your crunchy nutty granola bars! For more details, check the Full Recipe. To get the right crunch in your granola bars, you must adjust the baking time. Bake for about 20-25 minutes. Look for a golden brown color on the edges. If you want more crunch, leave them in a bit longer. Just watch closely! Packing the mixture tightly is key for density. After mixing all your ingredients, use a spatula to press it down firmly in the baking dish. This helps the bars hold together better once they cool. You can easily boost the flavor of your bars. Adding spices like nutmeg or chia seeds gives a nice twist. Just a pinch of nutmeg can make a big difference. Chia seeds add a nutty taste and some crunch. Using flavored nut butters also adds variety. Try almond butter with a hint of cinnamon or chocolate nut butter for something special. These small changes create unique and tasty bars. If you have dietary preferences, don’t worry! You can make simple substitutions. Use agave syrup instead of honey for a vegan option. Swap nuts for seeds if you have nut allergies. Keep track of calorie counts and serving sizes. Each bar has about 150 calories. You can adjust the size if you need smaller or larger portions. This helps you manage your snacks better while enjoying delicious treats. {{image_2}} You can mix different flavors to make granola bars fun. I love chocolate chip and peanut butter. The chocolate adds sweetness, while the peanut butter gives a nice, creamy texture. You can also try tropical fruit and coconut. This combo brings a burst of sunshine to your snack. Dried pineapple and coconut flakes pair well for a refreshing taste. If you follow a gluten-free diet, you can use gluten-free oats. They taste just as good! For vegan options, swap honey for maple syrup. You can also use almond butter instead of regular nut butter. These changes keep the bars tasty and healthy for everyone. Change your granola bars with the seasons. In fall, add pumpkin spice for warmth. It gives a cozy flavor that warms you up. In summer, use fresh berries like strawberries or blueberries. They add natural sweetness and color to your bars. It's a fun way to enjoy seasonal fruits! To keep your homemade granola bars fresh, use airtight containers. This helps them stay crisp and tasty. You can store them at room temperature for up to a week. If you prefer, put them in the fridge. This can help them last longer, but they may lose some crunch. Homemade granola bars can last about one week at room temperature. If refrigerated, they can last up to two weeks. Look for signs of spoilage. If they smell off or feel very hard, it’s best to throw them out. Freezing granola bars is easy and smart. First, wrap each bar in plastic wrap. Then, place them in a freezer bag or airtight container. This way, they can stay fresh for up to three months. When you want to eat one, thaw it in the fridge overnight. For the best taste, let it sit at room temperature for a bit before enjoying. For the full recipe, check out the Crunchy Nutty Granola Bars section. To make homemade granola bars, start by gathering your ingredients. You will need rolled oats, mixed nuts, honey, nut butter, dried fruits, and a few extras like chocolate chips. Here are the key steps: 1. Preheat your oven to 350°F (175°C) and line an 8x8-inch baking dish with parchment paper. 2. In a bowl, mix the oats, chopped nuts, salt, and cinnamon. 3. In a saucepan, melt the honey and nut butter together over low heat. Stir until smooth, then add vanilla. 4. Pour this mixture into the dry ingredients and stir well. 5. Add in dried fruits and chocolate chips, mixing until evenly coated. 6. Spread the mixture in the baking dish and press it down firmly. 7. Bake for 20-25 minutes until golden brown. 8. Once cool, lift it out and cut into bars. Common mistakes to avoid include not pressing the mixture firmly enough and overbaking, which makes them hard. Yes, you can customize the ingredients in your granola bars. Here are some great substitutions: - Nut butter: If you have nut allergies, try sunflower seed butter or tahini. - Sweetener: You can replace honey with agave syrup or brown rice syrup. - Dried fruits: Use any dried fruit you like, such as figs, dates, or apples. - Nuts: If you dislike nuts, try seeds or skip them altogether. These adjustments allow you to tailor the bars to fit your tastes and dietary needs. To cut granola bars cleanly, follow these techniques: - Use a sharp knife and cut while the bars are still in the pan. - Score the bars lightly with a knife before cutting all the way through. - For neat edges, spray the knife with a little cooking oil to prevent sticking. This method ensures you get perfect, even bars every time. Making homemade granola bars is easy and fun. We covered the main ingredients, tools, and step-by-step instructions. You can customize flavors and textures to fit your taste. Storage tips help keep them fresh longer. Whether you like chocolate or fruit, there’s a combination for everyone. Remember, these bars are great for snacks or breakfast. Trying new variations can keep things exciting. Enjoy making your own delicious, healthy snacks at home!

Homemade Granola Bars Easy Recipe for Healthy Snacks

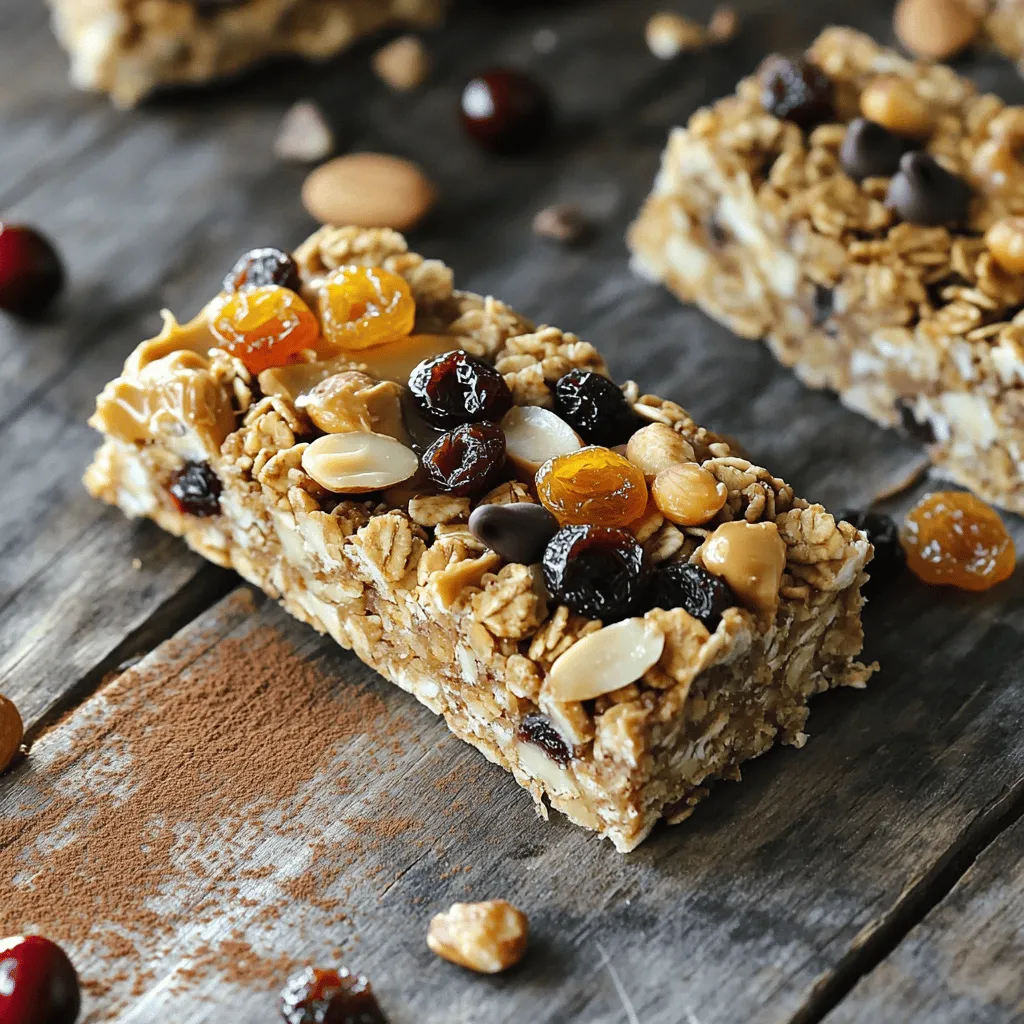
Looking for a quick and healthy snack? Homemade granola bars are fun to make and perfect for any time you

For the best sweet potato and black bean chili, gather these ingredients: - 2 medium sweet potatoes, peeled and diced - 1 can (15 oz) black beans, drained and rinsed - 1 medium onion, diced - 2 cloves garlic, minced - 1 red bell pepper, diced - 1 can (14 oz) diced tomatoes (with juices) - 2 cups vegetable broth - 1 tablespoon chili powder - 1 teaspoon cumin - 1 teaspoon smoked paprika - ½ teaspoon cayenne pepper (adjust to taste) - 1 tablespoon olive oil - Salt and pepper to taste - Fresh cilantro, for garnish - Avocado slices, for serving There are many tasty toppings to enhance your chili: - Sour cream or yogurt for creaminess - Shredded cheese for a savory touch - Lime wedges for a zesty kick - Jalapeño slices for some heat You can easily swap some items if needed: - Use pumpkin instead of sweet potatoes for a twist. - Any canned beans work well; try pinto or kidney beans. - If you lack vegetable broth, water will do. - Use fresh herbs like parsley if cilantro isn’t your favorite. This flavorful chili recipe is a great way to enjoy healthy ingredients. For the full recipe, check out the recipe section. First, gather all your ingredients. You will need: - 2 medium sweet potatoes, peeled and diced - 1 can (15 oz) black beans, drained and rinsed - 1 medium onion, diced - 2 cloves garlic, minced - 1 red bell pepper, diced - 1 can (14 oz) diced tomatoes (with juices) - 2 cups vegetable broth - 1 tablespoon chili powder - 1 teaspoon cumin - 1 teaspoon smoked paprika - ½ teaspoon cayenne pepper (adjust to taste) - 1 tablespoon olive oil - Salt and pepper to taste - Fresh cilantro, for garnish - Avocado slices, for serving Make sure everything is ready. This helps the cooking go smoothly. Start by heating the olive oil in a large pot over medium heat. Once the oil is hot, add the diced onion. Sauté it for about 5 minutes. Wait until it turns translucent. Then, add the minced garlic and diced red bell pepper. Cook these for another 3-4 minutes. The bell pepper should soften. Next, stir in the diced sweet potatoes. Add the chili powder, cumin, smoked paprika, cayenne pepper, salt, and pepper. Mix all the spices well to coat the sweet potatoes. Now, pour in the diced tomatoes and vegetable broth. Stir to combine all the ingredients. Bring this mixture to a boil. Once it boils, reduce the heat to low and cover the pot. Let it simmer for about 25-30 minutes. You want the sweet potatoes to be tender. After that, add the black beans to the pot. Stir gently to mix them in. Allow it to heat through for another 5-10 minutes. Check the seasoning and adjust if needed. Finally, remove the pot from heat. Let the chili sit for a few minutes before serving. To make your chili pop with flavor, use fresh spices. Fresh spices are more fragrant and give a better taste. You can also add a squeeze of lime before serving. This adds a bright note that balances the sweetness of the potatoes. If you want more depth, try toasting the chili powder and cumin in the oil before adding the onion. This boosts their flavor. Serve the chili in bowls, topped with fresh cilantro and avocado slices. A lime wedge on the side can give that final zest. You can follow the full recipe for detailed steps and timing. Enjoy your cooking! To adjust spice levels, start slow. If you like heat, add cayenne pepper. Use only half a teaspoon at first. You can always add more later if needed. For a milder chili, skip the cayenne. Instead, use sweet paprika for flavor without heat. Remember, you control the spice! Meal prepping this chili makes your life easier. Chop all your vegetables ahead of time. Store them in airtight containers in the fridge. You can also make a big batch of chili. It keeps well in the fridge for up to four days. This chili freezes nicely too. Just store in freezer-safe bags or containers. For a thicker chili, mash some of the sweet potatoes. This step adds creaminess and depth. You can also add corn for a sweet crunch. Fresh herbs, like cilantro, brighten the dish. Squeeze fresh lime juice on top before serving for a zesty kick. These tips will take your chili from great to amazing! {{image_2}} You can switch out black beans for other beans. Kidney beans, pinto beans, or chickpeas work well. Each bean adds its own flavor and texture. If you want creaminess, use cannellini beans. Feel free to mix beans to create your own blend. You can add more veggies to boost flavor and nutrition. Corn, zucchini, or carrots can enhance the chili. For a hearty touch, try adding chopped spinach or kale. This gives a fresh taste and bright color to your dish. Just make sure to adjust cooking times to keep veggies tender. Adjust the heat to fit your taste. To make it spicy, add more cayenne pepper. You can also use fresh jalapeños for a kick. If you prefer mild chili, skip the cayenne. Add more sweet potatoes to balance the heat. You can enjoy this chili no matter your spice level. For the full recipe, check out the Spicy Sweet Potato & Black Bean Chili. To keep your Sweet Potato and Black Bean Chili fresh, let it cool first. Once cooled, transfer it to an airtight container. Store it in the fridge for up to five days. Make sure to label the container with the date. This way, you will know how long it has been there. When you're ready to enjoy your leftovers, you can reheat them easily. Pour the chili into a pot over medium heat. Stir it often until it gets hot. You can also use a microwave. Just place the chili in a microwave-safe bowl and cover it. Heat it in 30-second bursts, stirring in between, until warm. If you want to save some for later, freezing is a great option. Allow the chili to cool completely. Then, pour it into freezer-safe bags or containers. Remove as much air as possible to prevent freezer burn. Label the bags with the date. You can freeze the chili for up to three months. To thaw, place it in the fridge overnight before reheating. For the full recipe, check out the Spicy Sweet Potato & Black Bean Chili . Yes, you can make this chili in a slow cooker. Just follow these steps: - Sauté the onion and garlic in olive oil on the stove. - Add all ingredients to the slow cooker. - Cook on low for 6-8 hours or on high for 3-4 hours. This method allows the flavors to blend well. You will still enjoy a rich taste! Yes, this chili is vegan-friendly! It uses only plant-based ingredients. - Sweet potatoes provide great texture and flavor. - Black beans add protein and fiber. - All spices and vegetables are also vegan. You can enjoy this dish without any animal products. This chili is almost gluten-free as it is! Just make sure of a few things: - Check the vegetable broth label to ensure it’s gluten-free. - Use gluten-free spices if you have any concerns. With these small changes, you will have a delicious gluten-free meal! For the full recipe, check out the Spicy Sweet Potato & Black Bean Chili . Enjoy making this dish! You now know how to make delicious Sweet Potato and Black Bean Chili. We covered the ingredients, step-by-step cooking, and clever tips to boost flavor. I shared easy ways to adjust spice levels and suggested various ingredient options. Storage tips ensure your leftovers stay fresh. This chili is versatile and packed with nutrients. Whether you enjoy it mild or spicy, you’ll make a dish that warms hearts. Give it a try and savor the rich flavors!

Sweet Potato and Black Bean Chili Flavorful Delight

Looking for a cozy, delicious meal? This Sweet Potato and Black Bean Chili is your answer! Packed with flavor and

To make tasty turkey meatballs, gather these key ingredients: - 1 pound ground turkey - 1/2 cup breadcrumbs - 1/4 cup grated Parmesan cheese - 1/4 cup fresh parsley, chopped - 1 large egg - 2 cloves garlic, minced - 1 teaspoon onion powder - 1 teaspoon Italian seasoning - Salt and pepper to taste These ingredients create a great mix of flavor and texture. Ground turkey keeps meatballs light and healthy. Breadcrumbs help bind the mix and add a nice bite. The egg works as a binder too. For the marinara sauce, you need: - 2 cups marinara sauce (store-bought or homemade) - Olive oil for cooking Marinara sauce adds a rich taste and moisture to the meatballs. You can use store-bought sauce for speed or make your own for a personal touch. To make your meal even better, consider these garnishes and serving ideas: - Extra grated Parmesan cheese - Fresh parsley for garnish - Crusty bread on the side - Spaghetti for a classic pairing These options not only add flavor but also make your dish look inviting. Serving with bread or pasta turns this simple meal into a feast. For the full recipe, check out Turkey Meatball Bliss! Start by gathering your ingredients. You will need ground turkey, breadcrumbs, Parmesan cheese, parsley, an egg, garlic, onion powder, Italian seasoning, salt, and pepper. In a large bowl, mix the ground turkey with the breadcrumbs. Add the grated Parmesan and chopped parsley. Crack the egg into the bowl. Then, add the minced garlic, onion powder, and Italian seasoning. Season with salt and pepper. Now, use your hands or a spatula to combine everything. Mix gently, but do not over-mix. This keeps the meatballs tender. Once mixed, shape the mixture into meatballs about one inch in size. You should get around 18 to 20 meatballs. Place them on a baking tray as you shape them. Heat a large skillet over medium heat. Add a drizzle of olive oil to the hot pan. Carefully add the meatballs in batches. Make sure not to crowd the pan. Cook the meatballs for about 5 to 7 minutes. Turn them occasionally to brown all sides. This gives them a nice crust. Once browned, it’s time to add the marinara sauce. Carefully pour it over the meatballs in the skillet. Lower the heat and let it simmer for 10 to 15 minutes. This step helps the flavors blend and ensures the meatballs cook through. Use a meat thermometer to check; the internal temperature should reach 165°F. For the marinara sauce, you can use store-bought or make your own. If you want to make it, use canned tomatoes, garlic, onion, and herbs. Cook the sauce until thickened. Once the meatballs are done, they should be coated in the warm marinara. Serve the turkey meatballs hot. You can enjoy them on their own, over pasta, or in a sub sandwich. For a special touch, sprinkle extra Parmesan cheese and parsley on top. This adds color and flavor. You can find the full recipe linked above for more details. To make your turkey meatballs pop, use a mix of spices. I love combining Italian seasoning with garlic and onion powder. This adds depth and warmth. You can also try adding crushed red pepper for some heat. Fresh herbs like parsley and basil brighten the flavor. Keep in mind that salt and pepper are key. Always taste your mixture and adjust as needed. Cooking meatballs may seem easy, but there are tricks for the best results. First, do not overcrowd the pan. Cook them in batches if needed. This ensures even cooking and browning. Use a medium heat. It helps to cook the meatballs through without burning them. Once browned, adding marinara sauce allows flavors to blend. Let them simmer until the internal temperature reaches 165°F. This way, they stay juicy and tender. Presentation matters when serving turkey meatballs. Start by placing meatballs in a bowl or on a plate. Spoon marinara sauce generously over them. Use a sprinkle of grated Parmesan cheese for a tasty touch. Add fresh parsley on top for color. Serve with crusty bread or over pasta for a lovely meal. You can also use a sub roll for a delicious meatball sandwich. These small details make your dish look inviting and delicious. {{image_2}} You can easily swap ingredients in this recipe. If you can't find ground turkey, try ground chicken or beef. Breadcrumbs can be replaced with crushed crackers or oats. For a gluten-free option, use gluten-free breadcrumbs. Instead of Parmesan cheese, try Pecorino or nutritional yeast for a dairy-free choice. Fresh parsley can be replaced with basil or cilantro to change the flavor. You can serve turkey meatballs in many fun ways. Try them over spaghetti for a classic dish. Slide them into a sub roll for a tasty meatball sandwich. You can also serve them on a bed of mashed potatoes or rice. For a lighter meal, pair them with a fresh salad. They are great for meal prep and can be eaten cold in wraps too. Your marinara sauce can become even better with some tweaks. Add red pepper flakes for a spicy kick. For depth, include a splash of red wine or balsamic vinegar. You can mix in sautéed mushrooms, bell peppers, or spinach for extra veggies. If you love herbs, toss in fresh basil or oregano while it simmers. For a sweet touch, add a pinch of sugar or a grated carrot. Check out the Full Recipe for more ideas! After you enjoy your turkey meatballs, store any leftovers in an airtight container. This keeps them fresh and tasty. You can place them in the fridge for up to three days. Be sure to let them cool first. This helps prevent condensation, which can make them soggy. If you have more meatballs than you can eat, freezing is a great option. First, let the cooked meatballs cool completely. Then, place them in a freezer-safe bag or container. You can also freeze the marinara sauce in a separate container. They can last up to three months in the freezer. When you're ready to enjoy them, just thaw in the fridge overnight. To reheat, you can use the microwave or the stove. If using the microwave, heat in short bursts. Stir in between to ensure even heating. If you use the stove, add a little marinara sauce to prevent drying out. Heat over medium-low until warm. This keeps your turkey meatballs juicy and flavorful. For more detailed cooking, check the Full Recipe. If you want to swap out ground turkey, you have options. You can use ground chicken or lean beef. These meats have similar textures and flavors. You can also try ground pork or a plant-based option like lentils. Each choice will give a unique taste to your meatballs. Yes, you can easily make marinara sauce from scratch. Just use canned tomatoes, garlic, onion, and herbs. Cook them together for about 20 minutes to blend the flavors. This homemade sauce can add a special touch to your turkey meatballs. If you want a quick option, you can use store-bought sauce. Cooked turkey meatballs last about 3 to 4 days in the fridge. Make sure to store them in an airtight container. This keeps them fresh and tasty for your next meal. If you want to keep them longer, consider freezing them. They can last for up to 3 months in the freezer. For best flavor, reheat them gently before serving. Turkey meatballs are tasty and easy to make, as we discussed. You learned about ingredients, step-by-step cooking, and great tips. Exploring variations adds fun, too. Storing leftovers keeps meals quick and fresh. In the end, turkey meatballs are a great dish. They fit many tastes and fit into your meal plan easily. Enjoy trying these tips and sharing them with others!

Easy Turkey Meatballs with Marinara Tasty and Simple

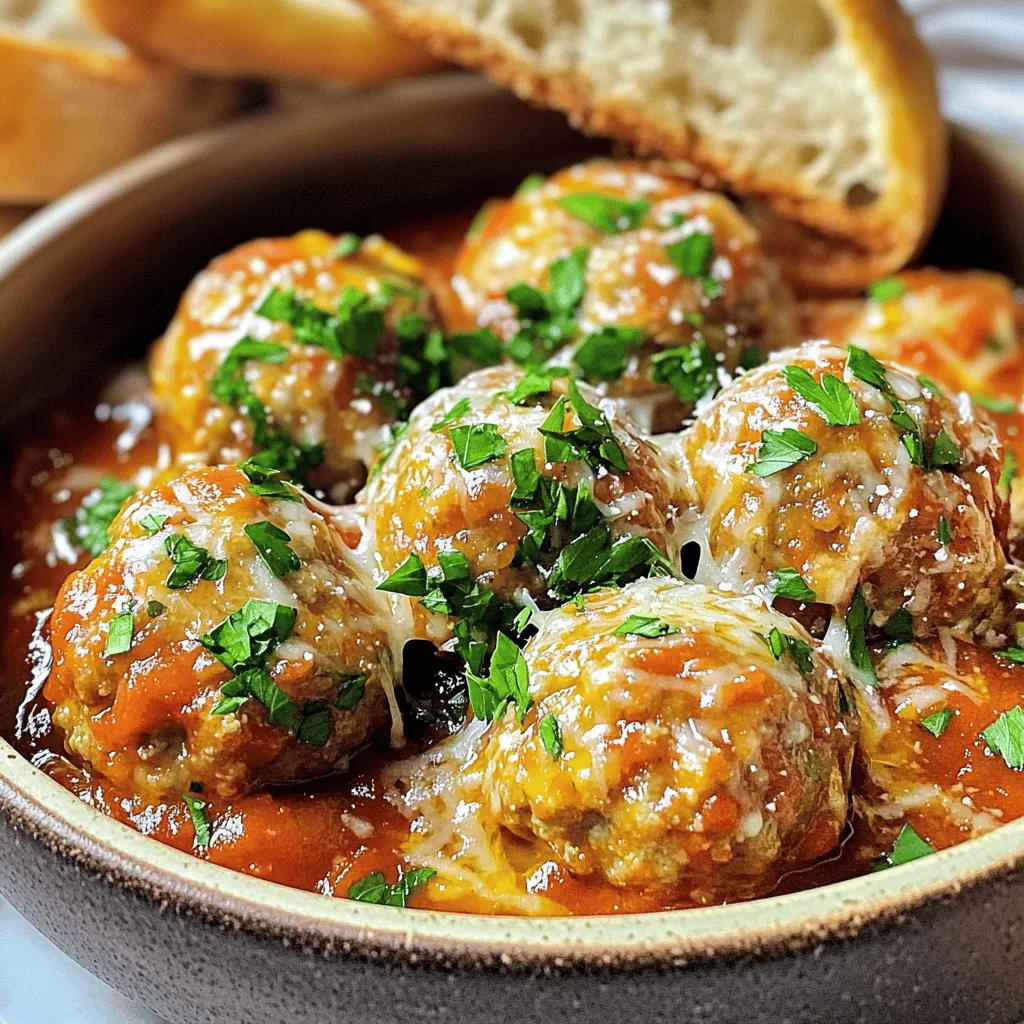
Are you ready to impress your family with a simple yet tasty dish? My Easy Turkey Meatballs with Marinara are

Older posts
Newer posts
← Previous Page1 … Page11 Page12 Page13 … Page29 Next →

dsad

© 2025 Home Cooking Style • Built with GeneratePress

Our Policies

  • Copyright Policy
  • Cookie Policy
  • GDPR Policy
  • Privacy Policy
  • Disclaimer
  • Terms Of Use

More Information

  • Home
  • About
  • Contact
  • Appetizers
  • Dessert
  • Dinner
  • Drinks
©2025, Home Cooking Style About Back To Top