![To make Chocolate Peanut Butter Banana Bites, you need the following: - 2 large ripe bananas - 1/2 cup creamy peanut butter - 1 cup dark chocolate chips - 1 tablespoon coconut oil - Sea salt, for sprinkling - 1/4 cup chopped nuts (e.g., walnuts or almonds) for topping (optional) These ingredients come together to create a delightful snack that is both sweet and healthy. If you have allergies or dietary needs, you can easily swap some ingredients: - Use almond butter or sunflower seed butter instead of peanut butter. - Choose dairy-free chocolate chips for a vegan option. - If nuts are a concern, skip the chopped nuts entirely. These swaps keep the recipe fun and accessible for everyone. Selecting the right products can enhance your bites. Here are some favorites: - For chocolate, I recommend using high-quality dark chocolate chips, like Ghirardelli or Enjoy Life. - Choose organic peanut butter without added sugar or oils for a pure flavor. - Look for ripe bananas that are firm yet slightly soft for the best taste. Using high-quality products makes a big difference in both flavor and texture. Check out the full recipe for more details! First, gather your ingredients. You need ripe bananas, creamy peanut butter, dark chocolate chips, coconut oil, sea salt, and optional nuts. 1. Slice the Bananas: Peel the bananas and cut them into rounds that are about 1/2 inch thick. Set these aside on a plate. 2. Prepare Your Baking Sheet: Line a baking sheet with parchment paper. This helps the bites not stick. Next, you need to melt the chocolate. 1. Combine Ingredients: In a microwave-safe bowl, mix the dark chocolate chips and coconut oil. This will make the chocolate smooth. 2. Heat in Microwave: Place the bowl in the microwave. Heat it in 30-second bursts, stirring after each round. Keep going until it is melted and smooth. Now comes the fun part—putting it all together! 1. Dip Banana Slices: Take a banana slice and dip it into the melted chocolate. Make sure it is fully coated. Then, place it on the parchment-lined sheet. 2. Add Peanut Butter: Use a teaspoon to add a small amount of peanut butter on top of each chocolate-covered banana slice. This is where the magic happens. 3. Drizzle Extra Chocolate: If you like, drizzle a bit more melted chocolate over the peanut butter. This adds a nice touch. 4. Sprinkle for Flavor: Add a sprinkle of sea salt and some chopped nuts if you want extra crunch. 5. Freeze: Place the baking sheet in the freezer. Let them freeze for at least 1 hour until the chocolate is hard. Once you finish, you'll have tasty Chocolate Peanut Butter Banana Bites ready to enjoy. Check [Full Recipe] for more details! To make the best Chocolate Peanut Butter Banana Bites, choose ripe bananas. They should be yellow with a few brown spots. These bananas are sweeter and softer. Cut the bananas into even slices. Each slice should be about 1/2 inch thick. This size helps them freeze well and taste great. When melting chocolate, use dark chocolate chips for a rich flavor. Add coconut oil to make the chocolate smooth and shiny. Stir the chocolate often while heating. This keeps it from burning. After you freeze the bites, store them in an airtight container. This keeps them fresh and tasty. You can keep them in the freezer for up to three months. Serve these bites as a fun snack or dessert. They are great for parties or movie nights. Just take them out of the freezer about 10 minutes before serving. This makes them easier to eat. For extra crunch, sprinkle some chopped nuts on top. Walnuts or almonds work well. You can also add a pinch of sea salt. This makes the sweet taste pop. If you want more flavor, try adding a dash of cinnamon to the peanut butter. It gives a warm, cozy taste. For a twist, dip them in white chocolate instead of dark chocolate. Each change adds a new layer of fun. For the full recipe, check out the main article. {{image_2}} You can change the toppings to fit your taste. Try adding shredded coconut for a tropical twist. Crushed graham crackers give a fun crunch. You can also use mini chocolate chips for extra sweetness. If you love spice, a sprinkle of cinnamon adds warmth. Get creative and mix and match! While peanut butter is a classic, other nut butters work well too. Almond butter has a nice, smooth flavor. Cashew butter is creamy and rich. Sunflower seed butter is great for nut allergies. Each option brings new taste and texture to the bites. Experiment to find your favorite! Seasonal flavors can add a fun twist to your bites. In fall, add a dash of pumpkin spice for warmth. In winter, try a hint of peppermint extract for a fresh taste. During summer, a touch of fresh berries can brighten the flavor. These little changes keep the bites exciting all year round! For the full recipe, check out the details above. Store any leftover chocolate peanut butter banana bites in an airtight container. Keep them in the fridge. This way, they stay fresh for about three days. If you want them to last longer, freezing is a great option. To freeze these bites, place them in a single layer on a baking sheet. After they freeze for an hour, transfer them to a freezer-safe bag. Be sure to remove as much air as possible. This helps prevent freezer burn. They will stay good for up to three months in the freezer. These bites are best enjoyed straight from the freezer. If you want to thaw them, take them out and let them sit for about 10 minutes. This lets the chocolate soften a bit. Enjoy them as a cool snack. You can even dip them in more peanut butter if you want! For the full recipe, check the earlier section. Yes, you can use milk chocolate. Milk chocolate adds a creamier taste. It also makes the bites sweeter. If you love chocolate, this swap will delight you. Just melt it the same way as dark chocolate. These bites can last up to three months in the freezer. Make sure to store them in an airtight container. This helps keep them fresh and tasty. You can grab a few whenever you want a quick snack. Yes, these bites are gluten-free! The main ingredients are bananas, peanut butter, and chocolate. Just check the labels on your peanut butter and chocolate chips. You want to ensure they have no gluten. Enjoy this sweet treat worry-free! We explored the key ingredients and steps to make delicious Chocolate Peanut Butter Banana Bites. You learned about substitutions for allergies and which products work best. I shared tips for perfect bites and variations to keep things fun. Store extras properly and reheat if needed. Remember, these bites are customizable and great for everyone. Enjoy experimenting with flavors and toppings!](https://homecookingstyle.com/wp-content/uploads/2025/06/0c2d9726-fb35-4ede-b655-56bd63beaef8.webp)
Chocolate Peanut Butter Banana Bites Delightful Snack
Craving a sweet treat that’s both delicious and easy to make? Chocolate Peanut Butter Banana Bites are the perfect snack!
Craving a sweet treat that’s both delicious and easy to make? Chocolate Peanut Butter Banana Bites are the perfect snack!

Are you ready to make chicken souvlaki that bursts with flavor? This easy and delicious recipe can be your new

If you’re looking for a quick and tasty snack, these Simple Garlic Knots are perfect! With just a few ingredients,
![- Shredded chicken: Cooked chicken works best for enchiladas. You can use rotisserie chicken or your own cooked chicken. Shredding it allows the flavors to blend well. It also makes rolling easier. - Tortillas: You can choose between corn or flour tortillas. Corn tortillas give a nice texture and taste. They hold up well with the sauce. Flour tortillas are softer and easier to roll. Both options work great for this dish. - Enchilada sauce: You can use store-bought or homemade enchilada sauce. Store-bought is quick and easy. Homemade sauce allows you to control flavors and spice level. If you have time, I recommend making your own for a fresh taste. - Spices: Cumin and garlic powder are key spices. Cumin adds a warm, earthy flavor. Garlic powder gives a nice savory taste. Together, they enhance the chicken and make your enchiladas pop. - Beans: Adding black beans provides extra protein and fiber. They make the dish heartier and more filling. Plus, they add a creamy texture that complements the chicken. - Cheese: The best cheese options for melting are cheddar or a Mexican blend. Cheddar has a sharp flavor that pairs well with the spices. Mexican blend cheese melts beautifully and adds richness to your dish. For the complete recipe, check out the [Full Recipe]. Sautéing the onion: Tips for perfect flavor Start by heating olive oil in a skillet over medium heat. Add the diced onion and cook until it turns soft and clear, about 3 to 4 minutes. This brings out a sweet flavor that makes your enchiladas taste great. Combining chicken and spices: Ensuring even seasoning Next, add the shredded chicken, black beans, cumin, garlic powder, salt, and pepper to the onion. Stir everything well. Cook this mix for 2 to 3 minutes until it’s warm throughout. This step lets the spices flavor the chicken evenly. Assembling the filling: How to fill tortillas properly Take a tortilla and place a scoop of the chicken mixture in the center. Roll it up tightly and place it seam-side down in a baking dish. Repeat this for all tortillas. Filling them right helps keep everything inside while baking. Layering enchiladas: Importance of sauce and cheese Once all enchiladas are in the dish, pour the rest of the enchilada sauce over them. Make sure each one gets a nice coating. Then sprinkle the remaining cheese on top. This makes for a tasty, cheesy layer once baked. Baking times: When to cover and uncover Cover the baking dish with foil. Bake it at 375°F (190°C) for 20 minutes. After that, remove the foil and bake for another 10 minutes. This helps the cheese melt and brown nicely on top. Tips for checking doneness: Ensuring optimal melty cheese To check if they are done, look for bubbly and slightly golden cheese. If it looks good, take them out of the oven. Let them cool for a few minutes before serving. This way, you avoid burning your mouth with hot cheese! - Avoiding soggy tortillas: To keep your tortillas from getting soggy, warm them before filling. Heat them in a pan for a few seconds on each side. This helps them stay firm when you bake them. - Flavor enhancements: Add more depth to your enchiladas with spices like chili powder or smoked paprika. Fresh herbs, like cilantro or oregano, also bring brightness to the dish. - Presentation tips: To make your enchiladas look great, sprinkle fresh cilantro on top. A dollop of sour cream or Greek yogurt adds a nice touch too. Serve with lime wedges for a zesty kick. - Common mistakes: One common mistake is overfilling your tortillas. This can cause them to break. Also, avoid using too much sauce; it can make the dish too watery. - Fixing dry enchiladas: If your enchiladas turn out dry, add more sauce on top before serving. A drizzle of sour cream can also help add moisture and flavor. For the full recipe, refer to the Classic Chicken Enchiladas section. Enjoy creating these tasty, comforting meals! {{image_2}} You can switch the chicken for other proteins. Ground beef or turkey works well. Both options give a rich taste. Just cook them in the skillet as you would with chicken. Drain any fat before adding spices. This keeps your enchiladas light and tasty. For a meatless option, try beans or mushrooms. Black beans add protein and fiber. They also bring a nice texture. You can use sautéed mushrooms for a hearty feel. Combine them with spinach for extra flavor. These vegetarian enchiladas are just as satisfying. Enchilada sauce comes in many flavors. You can try red or green. Red sauce has a rich, deep flavor. It pairs well with chicken and beef. Green sauce, or salsa verde, is bright and tangy. It works great with vegetables and pork. Choose what you like best. If you enjoy a spicy kick, add some chili powder to your sauce. For a creamier sauce, mix in some sour cream. This gives your dish a unique twist. You can even blend different sauces for a custom flavor. Just remember to adjust the spices to match. When you have leftover enchiladas, store them in an airtight container. This keeps them fresh. Make sure the enchiladas are cool before you seal them up. They last in the fridge for about 3 to 4 days. If you want to enjoy them later, consider freezing. To freeze enchiladas, you can do this before or after baking. If you freeze them unbaked, wrap them tightly in plastic wrap and place them in a freezer bag. They will stay good for about 2 to 3 months. When you’re ready to bake, remove the plastic and add a bit more sauce on top before baking. If you freeze baked enchiladas, let them cool down first. Then, wrap them well in foil or plastic wrap. They can last in the freezer for about 2 months. To reheat frozen enchiladas, preheat your oven to 350°F (175°C). Place them in a baking dish, cover with foil, and bake for about 25 to 30 minutes. Remove the foil for the last 10 minutes to make the cheese nice and bubbly. Enjoy your enchiladas just like when they were fresh! Enchiladas come from Mexico. They date back to ancient times. The Aztecs rolled tortillas around food. They then covered them with sauce. Enchiladas became a popular dish in Mexican cuisine. They are now loved worldwide. The dish reflects Mexico's rich culture and diverse flavors. People enjoy them in celebrations and family meals. Yes, you can make enchiladas ahead of time! This saves you time on busy days. Prepare the filling and roll the tortillas. Place them in a baking dish. Cover and refrigerate until you are ready to bake. You can also freeze them. Just make sure to wrap them well. When you are ready, bake them straight from the fridge or thawed from the freezer. To add heat to your enchiladas, use spicy sauce. You can choose a hot enchilada sauce or salsa. Add chopped jalapeños to the filling. You can also sprinkle some cayenne pepper on top. For a kick, use pepper jack cheese instead of cheddar. Experiment with these options to find your perfect spice level. Enchiladas pair well with many side dishes. Popular options include Mexican rice and refried beans. You might enjoy a fresh salad or guacamole. Chips and salsa are also great choices. Cilantro-lime rice adds a nice touch. You can even serve sour cream or Greek yogurt on the side. These sides balance the flavors and make your meal complete. You now have the tools to create delicious chicken enchiladas. We explored key ingredients, such as shredded chicken and tortillas. You learned how to prepare your filling and bake perfect enchiladas. Tips helped you avoid common mistakes and enhance flavors. Remember, you can customize with different proteins and sauces. With these steps, you can enjoy tasty meals while impressing family and friends. Dive into the fun of making enchiladas! Enjoy your cooking journey and make it yours.](https://homecookingstyle.com/wp-content/uploads/2025/06/7121b354-f26f-4bd9-bbbe-6c9f0e299b08.webp)
Craving a delicious and easy meal? You’re in the right place! Let’s dive into my Classic Chicken Enchiladas recipe. With
![For this delightful dish, you'll need the following: - 9 lasagna noodles - 2 cups ricotta cheese - 2 cups shredded mozzarella cheese - 1 cup grated Parmesan cheese - 2 cups spinach, fresh or frozen (thawed and drained) - 1 medium zucchini, thinly sliced - 1 medium bell pepper (red or yellow), diced - 1 cup mushrooms, sliced - 2 cups marinara sauce - 2 cloves garlic, minced - 1 tablespoon olive oil - 1 teaspoon dried oregano - 1 teaspoon dried basil - Salt and pepper to taste - Fresh basil for garnish (optional) Each ingredient plays an important role in the flavor and texture of the lasagna: - Lasagna noodles: These serve as the base and structure. - Ricotta cheese: This adds creaminess and richness to the layers. - Mozzarella cheese: It melts beautifully and gives a gooey texture. - Parmesan cheese: This brings a sharp flavor and a nice golden crust. - Spinach: This adds color and nutrients, making the dish healthier. - Zucchini and bell pepper: These veggies add crunch and sweetness. - Mushrooms: They provide an earthy flavor and umami. - Marinara sauce: This binds everything together and adds moisture. - Garlic: This boosts flavor with its strong aroma. - Olive oil: It helps to sauté vegetables and adds healthy fats. - Dried herbs: Oregano and basil enhance the overall taste. - Salt and pepper: These season the dish, bringing out all the flavors. You can easily customize this lasagna to fit your needs: - Noodles: Use gluten-free lasagna noodles for a gluten-free option. - Cheese: Try vegan cheese for a dairy-free version. - Vegetables: Substitute with any of your favorite veggies, like eggplant or broccoli. - Marinara sauce: Swap it with pesto for a different flavor profile. - Herbs: Fresh herbs can replace dried ones for a brighter taste. This Easy Veggie Lasagna recipe is simple to make and full of flavor. You can find the full recipe [here]. First, boil water in a large pot. Add salt to the water. Cook the lasagna noodles as per the package guide. You want them to be al dente. This means they should still have a slight bite. Once cooked, drain the noodles and rinse them with cold water. This stops the cooking process and keeps them from sticking. In a big skillet, pour in some olive oil and heat it over medium heat. Add minced garlic, diced bell pepper, and sliced mushrooms. Cook these for about five minutes. Stir until they soften. Next, toss in the spinach and zucchini. Cook for three to four more minutes. Season this mix with oregano, basil, salt, and pepper. Once done, remove it from heat and let it cool a bit. Grab a large mixing bowl. Combine ricotta cheese, half of the mozzarella, and half of the Parmesan. Mix well until smooth. Next, grease a 9x13 inch baking dish lightly with olive oil. Start with a thin layer of marinara sauce at the bottom. Place three lasagna noodles over this sauce. Spread half of your ricotta mix on the noodles. Then add half of the sautéed veggies and a layer of marinara sauce. Repeat this process: three noodles, the rest of the ricotta, remaining veggies, and more sauce. Finally, top with the last three noodles and cover them with the remaining marinara sauce. Sprinkle the rest of the mozzarella and Parmesan on top. Cover your dish with aluminum foil. Bake it in a preheated oven at 375°F (190°C) for 25 minutes. After that, remove the foil. Bake for another 15 minutes. You want the cheese to be golden and bubbly. Once baked, let the lasagna sit for about ten minutes before slicing. This makes serving easier. Enjoy your delicious veggie lasagna! You can find the Full Recipe above for more details. To get the best texture in your lasagna, cook your noodles just right. They should be al dente, which means they are firm to the bite. This helps them hold up when layered. If you overcook them, they can turn mushy. Also, let your vegetable mixture cool before adding it to the layers. This keeps the cheese creamy and prevents the noodles from getting soggy. One common mistake is not seasoning your veggies. A pinch of salt and pepper brings out their flavors. Another mistake is skipping the resting time after baking. Letting the lasagna sit for about 10 minutes helps it set. If you slice it too soon, it may fall apart. Lastly, make sure to cover your lasagna while it bakes. This helps the cheese melt evenly and keeps it moist. You can easily make this lasagna ahead of time. Prepare it, but don’t bake it right away. Cover it tightly with plastic wrap and foil. It can stay in the fridge for 1-2 days or in the freezer for up to 3 months. When you’re ready to bake, let it thaw overnight in the fridge. Then, bake it as directed in the Full Recipe. This way, you’ll have a delicious meal ready to go! {{image_2}} You can mix up your easy veggie lasagna by adding other veggies. Think about using veggies like carrots, eggplant, or broccoli. Each of these brings a new flavor and texture. For a crunch, try adding some bell peppers or even corn. You can also use seasonal vegetables for a fresh twist. If you want a vegan or dairy-free option, simply swap out the cheeses. Use cashew cheese or store-bought vegan cheese instead. You can also replace the ricotta with blended tofu for a creamy texture. Make sure to check the marinara sauce for any hidden dairy ingredients. This way, you can enjoy a tasty dish without any animal products. You can play with sauces too. Try pesto for a different flavor or a creamy Alfredo sauce. Each sauce gives the lasagna its own unique taste. When it comes to cheese, you can mix it up as well. Use gouda or feta for a fun twist. Mixing cheeses can enhance the flavor and make your dish stand out. For the full recipe, check the details above. After enjoying your easy veggie lasagna, store leftovers in an airtight container. Let it cool first. You can keep lasagna in the fridge for up to five days. If you want to store it longer, consider freezing. To reheat, preheat your oven to 350°F (175°C). Place the lasagna in a baking dish. Cover it with foil to keep it moist. Bake for about 20-25 minutes. Check if it’s heated through before serving. You can also microwave individual portions. Just heat for 2-3 minutes on high. Freezing is a great option for easy veggie lasagna. To freeze, wrap the lasagna tightly in plastic wrap. Then, cover it with foil to prevent freezer burn. It can stay in the freezer for up to three months. When you’re ready to eat, thaw it overnight in the fridge. Bake it at 350°F (175°C) for about 45-60 minutes. Enjoy that homemade taste again! For the complete recipe, check the Full Recipe. Easy veggie lasagna takes about 1 hour to cook. This includes 25 minutes of covered baking and 15 minutes uncovered. You also need about 20 minutes for prep. Yes, you can add meat! Ground beef, turkey, or sausage work well. Just cook the meat before mixing it with the veggies. This will add flavor and protein to your lasagna. Start with a layer of marinara sauce. Then, place three lasagna noodles. Spread half of the ricotta mixture next, followed by half of the sautéed veggies. Repeat this, then top with noodles, sauce, and cheese. This method keeps the layers even. Your lasagna is done when the cheese is golden and bubbly. You can also check the center with a knife. If it is hot and the layers are set, it's ready! Veggie lasagna pairs well with a fresh salad. Garlic bread is another great choice. You can also serve it with roasted vegetables for a complete meal. For more ideas, check the Full Recipe. Easy veggie lasagna is a simple and tasty dish. We covered its ingredients, cooking steps, and helpful tips. You learned about veggie options and how to store leftovers. Remember to avoid common mistakes while cooking. This recipe is great for anyone wanting a healthy meal. Now you can enjoy a delicious dish that fits your needs. I hope you try making this easy veggie lasagna soon!](https://homecookingstyle.com/wp-content/uploads/2025/06/e31b09e4-d452-48cf-ae8a-4c03a6824816.webp)
Are you ready to make a delicious, Easy Veggie Lasagna? This simple recipe is packed with fresh flavors and colorful
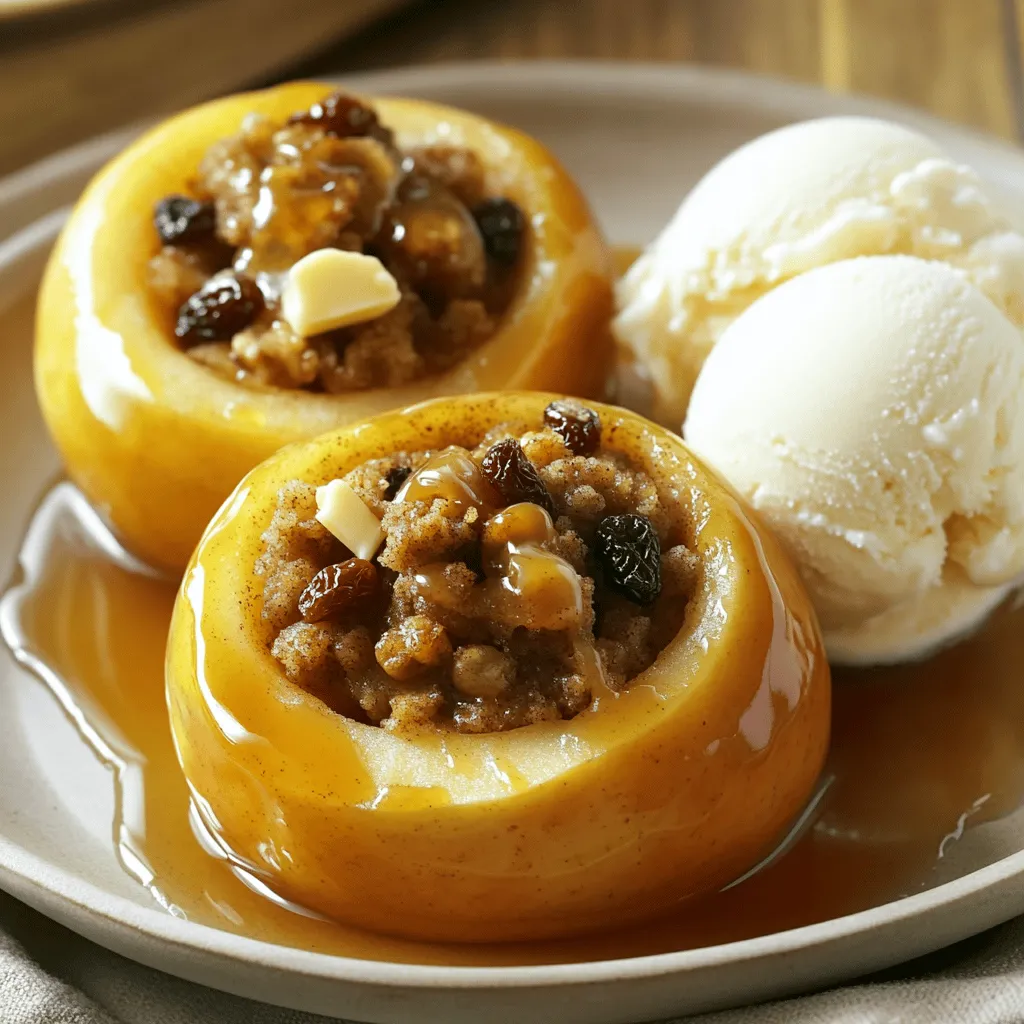
Looking for a simple yet delicious dessert? Let me show you how to make delightful baked apples! This recipe uses
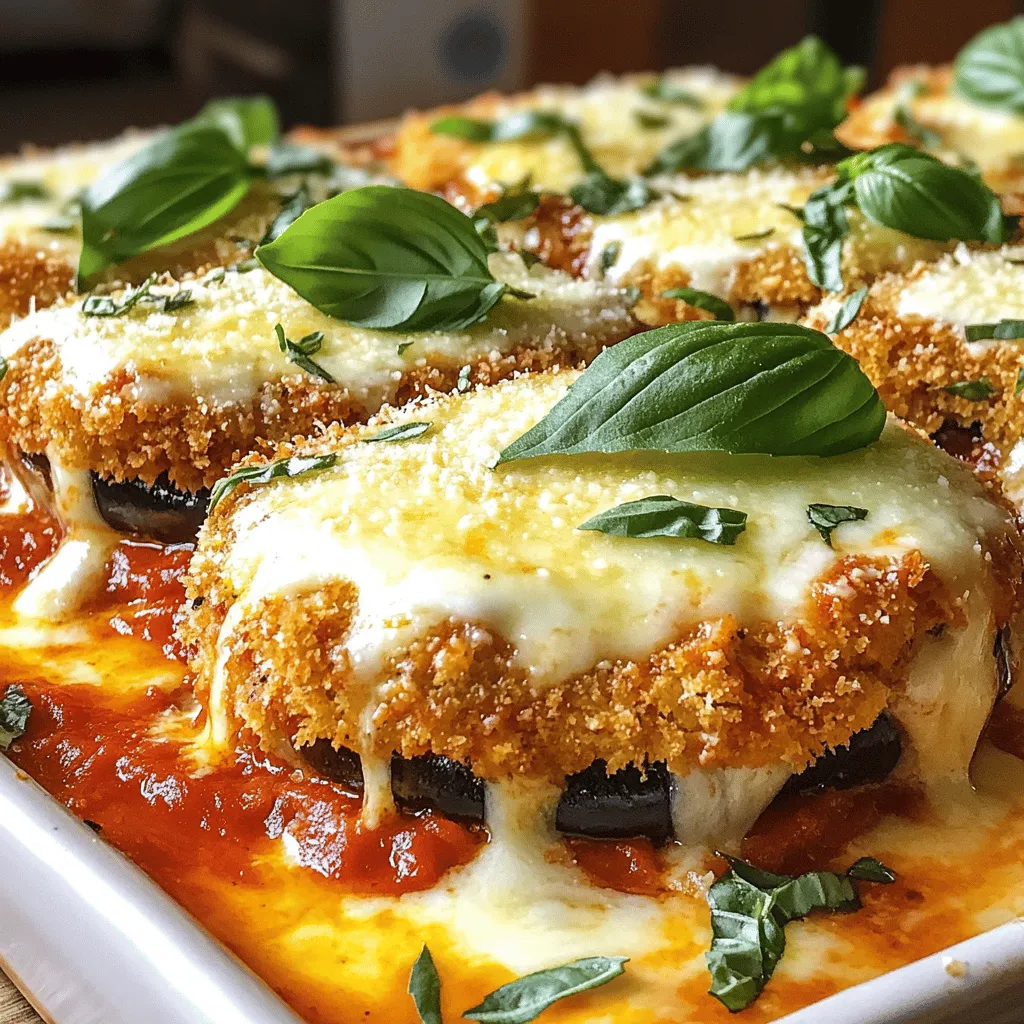
Are you ready to bring restaurant-quality flavor to your home kitchen? Classic Eggplant Parmesan is a rich, satisfying meal that
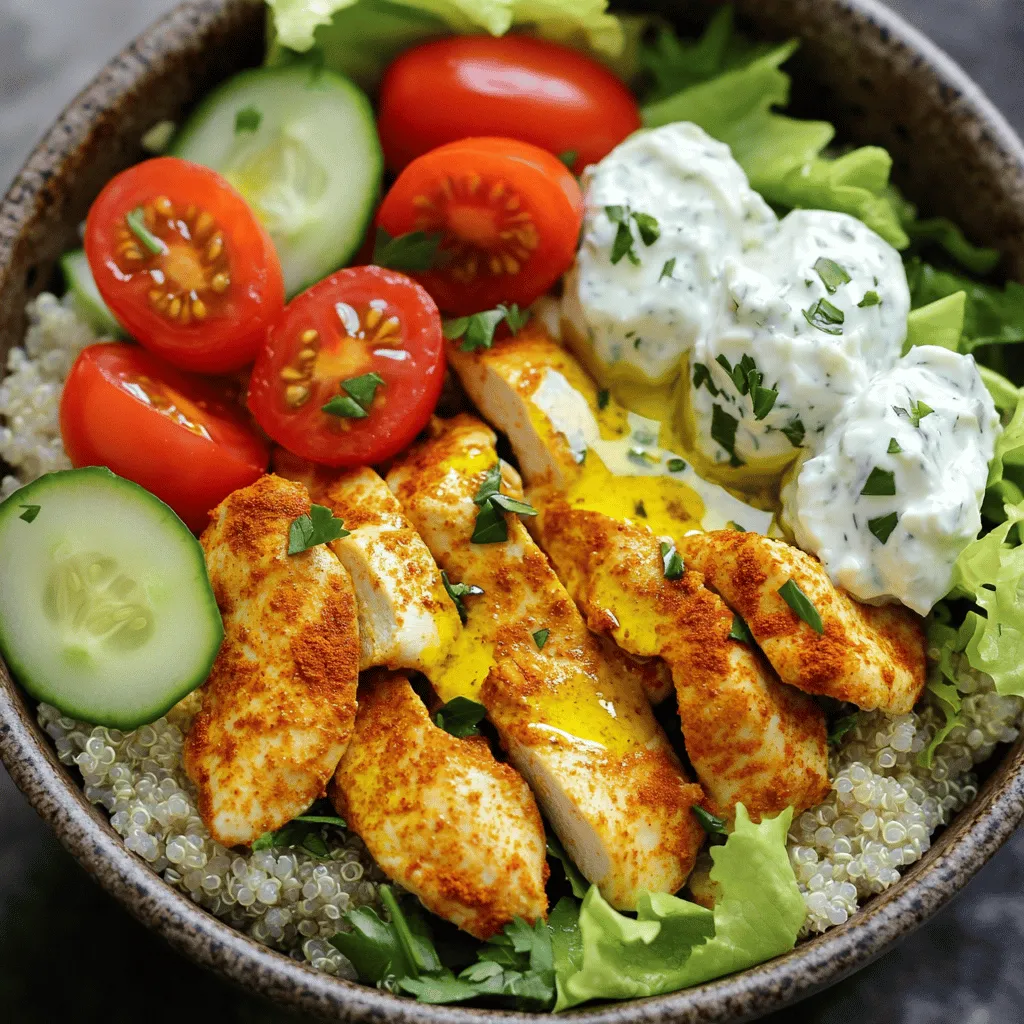
Craving a quick, tasty meal? I’ve got just the recipe for you! Easy Chicken Shawarma Bowls are packed with flavor
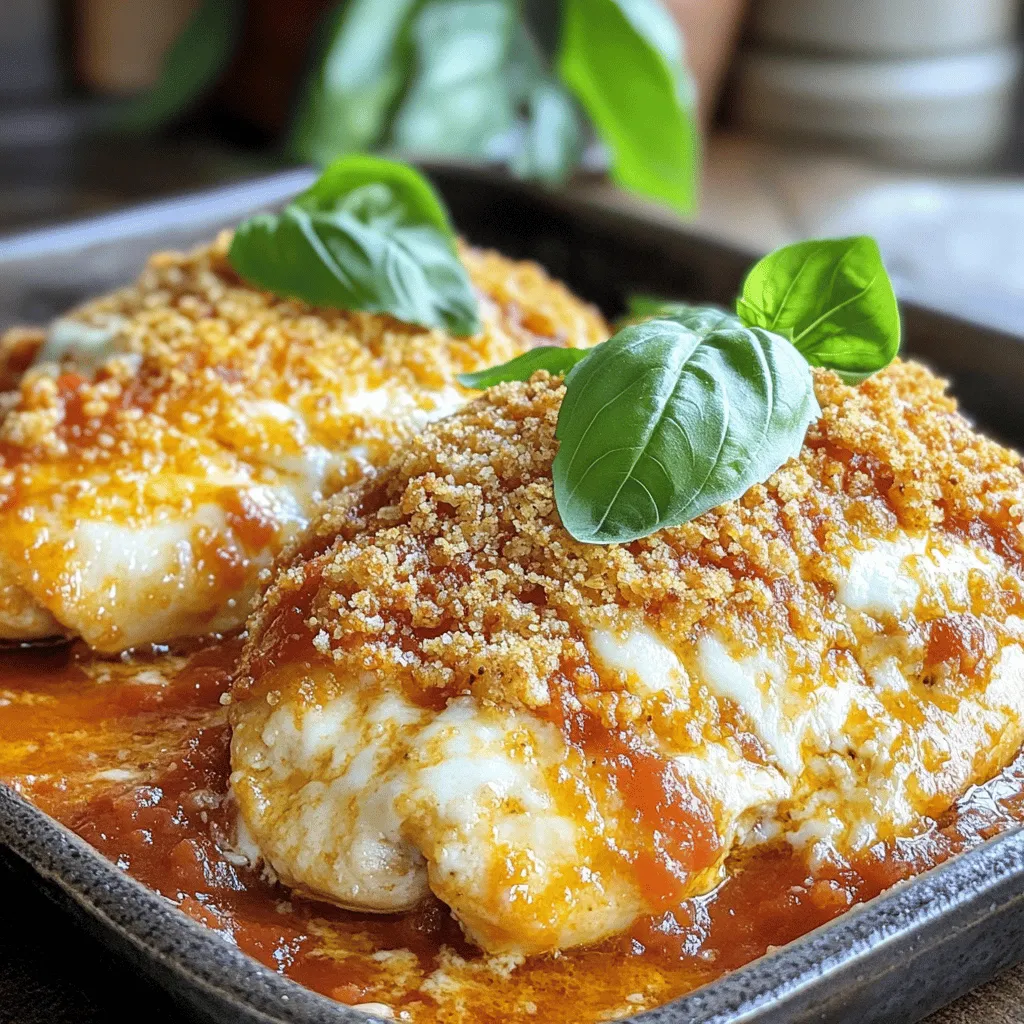
Are you ready to impress your family with a delicious meal? This Simple Chicken Parmesan recipe is both flavorful and

Craving a quick and tasty meal? Garlic Butter Steak Bites are your answer! These juicy pieces of sirloin, cooked to
