Looking for a simple yet delicious dessert? Let me show you how to make delightful baked apples! This recipe uses just a few easy ingredients, like sweet apples and warm spices. In no time, you can enjoy a warm treat that’s perfect for any occasion. Whether you want a cozy dessert or a tasty snack, these baked apples have you covered. Let’s dive in and make something special!
Ingredients
Main Ingredients for Simple Baked Apples
– 4 medium-sized apples (Honeycrisp or Granny Smith recommended)
– 1/2 cup brown sugar
– 1 teaspoon ground cinnamon
– 1/4 teaspoon nutmeg
Additional Fillings and Flavor Enhancers
– 1/4 cup walnuts, chopped
– 1/4 cup raisins or dried cranberries
– 2 tablespoons unsalted butter, cut into small pieces
Liquid for Baking
– 1/2 cup apple juice or apple cider
Simple baked apples are a great treat. I love how they warm up the kitchen with sweet scents. The main ingredients are easy to find. Honeycrisp and Granny Smith apples work best for flavor. The brown sugar gives a lovely sweetness. Cinnamon adds spice, while nutmeg offers warmth.
You can enhance the filling with walnuts or raisins. Walnuts give a nice crunch. Raisins add a chewy texture. Butter makes everything rich and delicious.
Apple juice or cider keeps the apples moist. This liquid helps them bake perfectly. When you combine these ingredients, you create a tasty dessert. It’s simple yet satisfying.
Step-by-Step Instructions
Prepping the Apples
First, preheat your oven to 350°F (175°C). This step warms up your kitchen and gets the baking process started. Next, wash the apples under cold water to remove any dirt. When they are clean, it’s time to core them. To do this, use a sharp knife or an apple corer. Carefully cut out the core, but leave the bottom intact. This keeps the filling from falling out.
Making the Filling
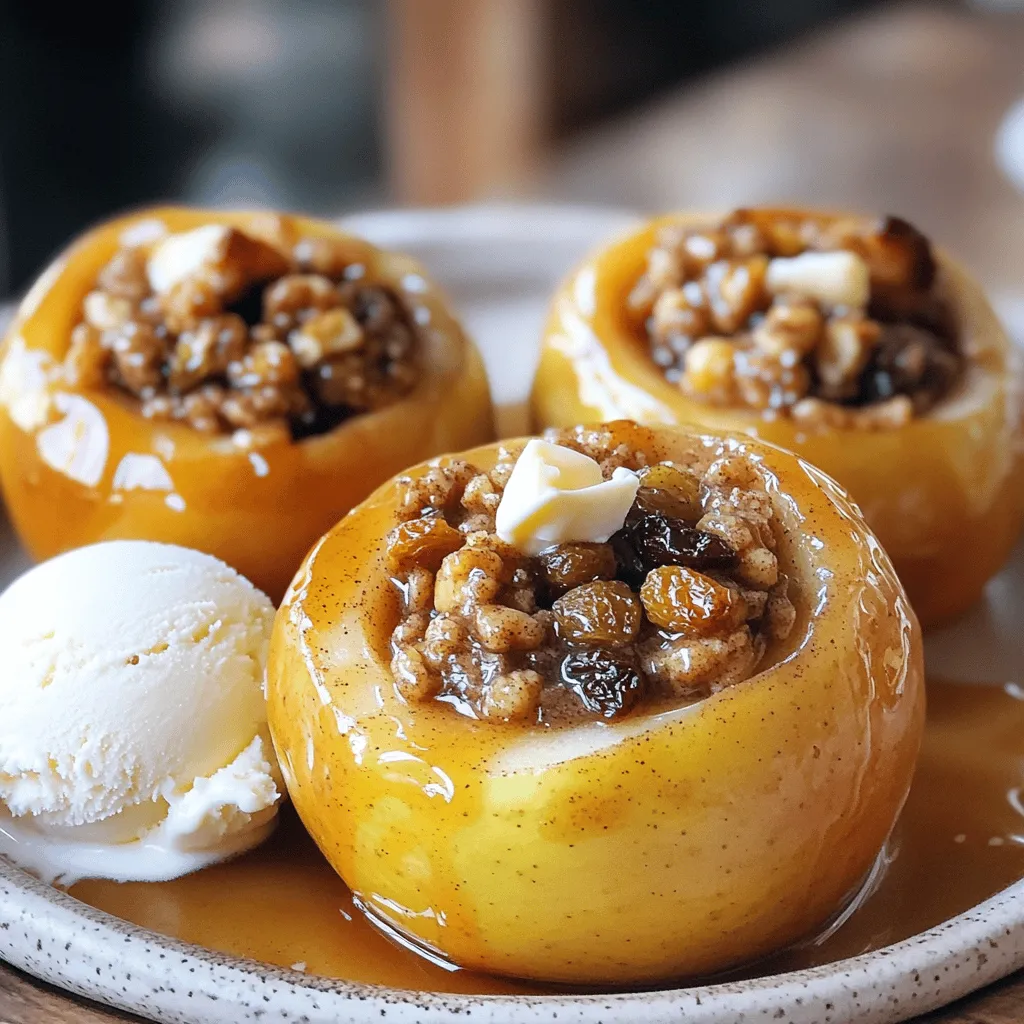
In a medium bowl, mix together the brown sugar, ground cinnamon, nutmeg, chopped walnuts, and raisins. Stir until everything combines well. This mix will bring out the sweetness and spice of your apples. Once done, take each apple and stuff it with the filling. Press down gently to pack it in tight. Then, add a couple of small pieces of butter on top of each apple to create a rich flavor.
Baking Process
Next, arrange the filled apples upright in a baking dish. Pour the apple juice or cider into the bottom of the dish. This liquid helps steam the apples as they bake. Cover the dish with aluminum foil to keep the moisture in. Bake in the oven for 25 minutes. After that, remove the foil and bake for another 15-20 minutes. Check for doneness by poking an apple with a fork; it should be tender and slightly caramelized. Let the apples cool for a few minutes before serving. Enjoy the delightful aroma that fills your kitchen!
Tips & Tricks
Perfecting the Recipe
Best types of apples for baking
I recommend using Honeycrisp or Granny Smith apples. They hold their shape well. Their slight tartness balances the sweetness of the filling.
How to achieve a caramelized finish
To get that lovely caramelized look, keep an eye on the apples. Bake them covered for part of the time. Then, uncover to let them brown nicely. The sugar in the filling will create a beautiful glaze.
Presentation Ideas
Serving suggestions and garnishing tips
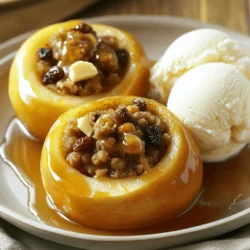
Serve your baked apples warm on a dessert plate. Drizzle the warm apple juices over them. This adds flavor and makes the dish look inviting.
Pairing with ice cream or other toppings
A scoop of vanilla ice cream pairs well with baked apples. The cold ice cream contrasts the warm apples perfectly. You can also sprinkle some chopped nuts for extra crunch.
Common Mistakes to Avoid
Tips for preventing mushy apples
To avoid mushy apples, do not overbake them. Check for doneness with a fork. They should be tender but still firm.
Ensuring an even bake
Arrange the apples evenly in your baking dish. This helps them cook evenly. Make sure they are not too close together. If they touch, they may not bake well.
Variations
Ingredient Swaps
You can easily change the nuts and dried fruits in this recipe. If you have pecans or almonds, use those instead of walnuts. For dried fruits, try dried apricots or figs. They add unique flavors to the apples.
If you’re looking for vegan or gluten-free options, use plant-based butter. Also, make sure to check that your sugar is gluten-free. You can swap brown sugar for coconut sugar for a different taste.
Flavor Additions
Adding a splash of vanilla extract gives baked apples a warm, sweet flavor. You can also use other spices like ginger or allspice for a twist. For sweeteners, try honey or maple syrup instead of brown sugar. These options can make the dessert even more fun!
Custom Toppings
Toppings can change the whole dish. Drizzle caramel sauce or chocolate sauce over the baked apples for a rich touch. You can also serve them with yogurt or whipped cream for a creamy contrast.
To add crunch, sprinkle granola or oats on top before serving. This adds texture and makes your dish even more delightful.
Storage Info
Storing Leftover Baked Apples
After you bake your apples, let them cool for about 10 minutes. This cooling helps keep the texture right. Place the cooled apples in an airtight container. They will stay fresh for about 3 to 5 days in the fridge.
Reheating Tips
To reheat baked apples, the oven works best. Preheat it to 350°F (175°C). Place the apples in a baking dish. Cover them lightly with foil to keep moisture in. Heat for about 10 to 15 minutes. This keeps them warm and tasty without making them soggy.
Freezing Baked Apples
You can freeze baked apples for later. If freezing before baking, prepare them as usual, then wrap them well. Use plastic wrap and foil to keep out air. If freezing after baking, let them cool completely first. Store them in a container or freezer bag. To thaw, place them in the fridge overnight. Reheat in the oven at 350°F (175°C) for about 15-20 minutes to enjoy later.
FAQs
How long do baked apples last?
Baked apples last about 3 to 5 days in the refrigerator. To store them, let them cool down. Then place them in an airtight container. This keeps them fresh and tasty. Make sure to check for any signs of spoilage each time you take one out.
Can I make baked apples in advance?
Yes, you can make baked apples ahead of time. You can bake them, cool them, and store them in the fridge. When you are ready to eat, just reheat them. This makes them a perfect dessert for busy days or special occasions.
What can I serve with baked apples?
Baked apples pair well with many treats. You can serve them warm with vanilla ice cream. They also go great with whipped cream or a drizzle of caramel sauce. For drinks, enjoy them with hot cider or a cup of coffee.
Can I use different fruits?
You can use other fruits instead of apples. Pears are a great option. They bake well and have a sweet flavor. Peaches and plums also work nicely. Just adjust the baking time as needed for softer fruits.
How to make them healthier?
To make baked apples healthier, reduce the brown sugar. You can use just a few tablespoons instead of half a cup. Another option is to substitute some butter with unsweetened applesauce. This cuts down on fat while keeping the moisture.
Baked apples are simple yet delicious. We covered the essentials: the right ingredients, step-by-step instructions, and helpful tips for perfect results. From ingredient swaps to storage advice, these apples can fit any meal. Remember to experiment with flavors and toppings for a unique touch. Keep these tips in mind, and you will impress everyone with your treat. Enjoy your tasty, warm baked apples, and happy baking!