![Here is what you need for the No-Bake Chocolate Oatmeal Cookies: - 1 cup smooth peanut butter - 1/2 cup honey or maple syrup - 1/4 cup unsweetened cocoa powder - 2 cups rolled oats - 1 teaspoon vanilla extract - 1/2 teaspoon salt - 1/2 cup dark chocolate chips (or dairy-free chips for a vegan option) - 1/4 cup shredded coconut (optional) - 1/4 cup chopped nuts (such as almonds or walnuts, optional) Each ingredient plays an important role. The peanut butter adds creaminess and protein. Honey or maple syrup brings sweetness and binds it all together. Cocoa powder gives that rich chocolate flavor. Oats add texture and heartiness. Vanilla and salt enhance the taste and balance the flavors. You can make this recipe your own! Here are some easy swaps: - Peanut Butter: Use almond butter or sunflower seed butter if you have allergies. - Honey or Maple Syrup: Agave syrup works well for a vegan option. - Cocoa Powder: Try carob powder for a unique, caffeine-free flavor. - Rolled Oats: Quick oats can be used, but the texture will change slightly. - Dark Chocolate Chips: Use white chocolate or skip them for a simpler cookie. - Shredded Coconut: If you don’t like coconut, leave it out or use dried fruit. - Chopped Nuts: You can use any nut or seed you like, or skip them entirely. These substitutions keep the spirit of the recipe while catering to your tastes or needs. For the full recipe, refer to the previous section. Melting Peanut Butter and Honey To start, you need a medium saucepan. Place it on low heat. Add 1 cup of smooth peanut butter and 1/2 cup of honey or maple syrup. Stir continuously until smooth. This step is key to a creamy base. Adding Cocoa and Vanilla Once your mixture is smooth, add 1/4 cup of unsweetened cocoa powder, 1 teaspoon of vanilla extract, and 1/2 teaspoon of salt. Mix well. This brings rich flavor to your cookies. Methods for Mixing Oats Now, remove the saucepan from heat. Fold in 2 cups of rolled oats. Make sure every oat gets coated in that chocolate goodness. This step gives your cookies their chewy texture. Optional Add-ins (Chips, Coconut, Nuts) If you like, toss in 1/2 cup of dark chocolate chips, 1/4 cup of shredded coconut, or 1/4 cup of chopped nuts. These add texture and flavor. You can choose what you enjoy most. Shaping the Cookies Grab a tablespoon. Scoop out the mixture and place it on a parchment-lined baking sheet. Shape them into cookie rounds. Keep some space between them for even setting. Refrigeration Process Once you form all the cookies, put the baking sheet in the fridge. Let them chill for about 30 minutes. This helps the cookies firm up and hold their shape. You can enjoy these tasty treats right after! For the complete recipe, check out the [Full Recipe]. - Best Practices for Airtight Storage Keep your cookies in an airtight container. This prevents them from getting hard. You can use a glass jar or a plastic container. Make sure the lid fits well. Store them in the fridge for best results. - How to Maintain Texture If you want a softer cookie, leave them at room temperature. For firmer cookies, keep them in the fridge. Avoid stacking them without parchment paper. This stops them from sticking together. - Involving Kids in the Preparation Kids love to help! They can measure ingredients or mix the dough. Let them scoop the cookies onto the sheet. This makes cooking fun and teaches them skills. - Suggestions for Kid-Friendly Add-ins Add-ins can make the cookies more fun. Try mini chocolate chips or colorful sprinkles. Dried fruits like raisins or cranberries are great too. Kids can choose their favorite mix-ins. - What to Do If Cookies Don’t Set If your cookies are too gooey, they might need more time in the fridge. Give them an extra hour. If they still don’t set, you can try adding more oats next time. - Adjustments for Too Dry or Wet Mixture If the mixture is too dry, add a splash of milk. This helps it stick together. If it’s too wet, add more oats or cocoa powder. Adjust until you get the right consistency. For the full recipe with detailed steps, check the [Full Recipe]. {{image_2}} To make vegan no-bake cookies, switch honey for maple syrup. This keeps the sweetness but maintains a plant-based option. Choose gluten-free oats if you need a gluten-free version. Look for oats labeled gluten-free to avoid cross-contamination. You can add different extracts to change the taste. Vanilla is common, but almond extract adds a nice twist. Consider spices like cinnamon or nutmeg for warmth. These can bring new life to your cookies. If you want to cut sugar, use less sweetener. Start with half the amount and taste as you go. You can also add protein powder for extra nutrition. Superfoods like chia seeds or flaxseeds boost health benefits. These small changes make your treats both tasty and better for you. For the complete recipe, check out [Full Recipe]. To keep your no-bake chocolate oatmeal cookies fresh, store them in an airtight container. You can keep them in the fridge or at room temperature. If you want a firmer cookie, the fridge is best. For a softer bite, leave them out. These cookies last about a week in the fridge. If you store them at room temperature, they may soften faster. Freezing these cookies is easy. Just place them in a single layer on a baking sheet. Freeze them until solid, then transfer to a freezer bag. This way, they won’t stick together. They can stay frozen for up to three months. When you want to eat them, take out the cookies and let them thaw. You can leave them on the counter for about 30 minutes. For an extra treat, warm them slightly in the microwave. Enjoy your cookies as a quick snack or dessert! For the full recipe, check out the detailed instructions above. Yes, you can use quick oats. Quick oats are thinner and softer. They absorb liquid faster than rolled oats. This change may make your cookies softer. If you want a chewier texture, stick with rolled oats. Rolled oats help give the cookies a more classic taste and feel. No-bake cookies need about 30 minutes to set in the fridge. This helps them firm up and hold their shape. If you want them firmer, you can leave them for an hour. Keep an eye on them to make sure they don't get too hard. The setting time may vary based on your fridge's temperature. If you need a nut-free option, try sun butter or soy nut butter. Both are great for allergies. You can also use tahini, which is made from sesame seeds. These alternatives still give a nice texture and flavor to your cookies. Each option may change the taste a little, but they all work well. You now have a clear guide to making delicious no-bake cookies. We covered all essential parts, from ingredients to storage tips. Whether you want to make them vegan or kid-friendly, there are options for everyone. Remember, the right storage keeps your cookies fresh and tasty. Experiment with flavors and enjoy the fun of making these treats. Follow these steps, and you’ll create cookies that impress. Happy baking!](https://homecookingstyle.com/wp-content/uploads/2025/05/6c398aab-d3af-4a54-8a1f-cd04ce3f2a0d-768x768.webp)
Are you ready to indulge in a sweet and easy treat? My No-Bake Chocolate Oatmeal Cookies are simple to make and perfect for satisfying your chocolate cravings. You won’t need an oven, just a few key ingredients and minimal time. Whether you’re a busy parent or just looking for a delightful snack, these cookies are for you. Let’s dive into the world of no-bake goodness!
Ingredients
Complete List of Ingredients
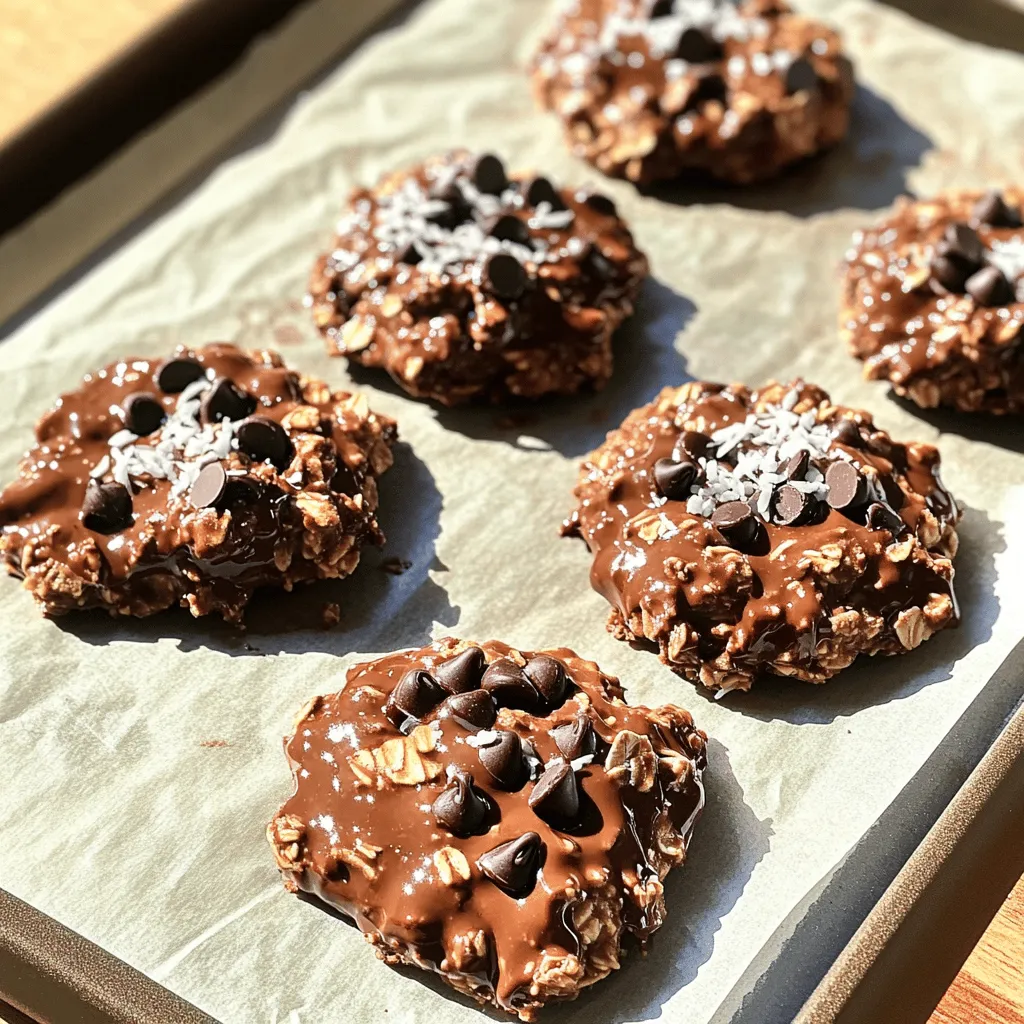
Here is what you need for the No-Bake Chocolate Oatmeal Cookies:
– 1 cup smooth peanut butter
– 1/2 cup honey or maple syrup
– 1/4 cup unsweetened cocoa powder
– 2 cups rolled oats
– 1 teaspoon vanilla extract
– 1/2 teaspoon salt
– 1/2 cup dark chocolate chips (or dairy-free chips for a vegan option)
– 1/4 cup shredded coconut (optional)
– 1/4 cup chopped nuts (such as almonds or walnuts, optional)
Each ingredient plays an important role. The peanut butter adds creaminess and protein. Honey or maple syrup brings sweetness and binds it all together. Cocoa powder gives that rich chocolate flavor. Oats add texture and heartiness. Vanilla and salt enhance the taste and balance the flavors.
Ingredient Substitutions
You can make this recipe your own! Here are some easy swaps:
– Peanut Butter: Use almond butter or sunflower seed butter if you have allergies.
– Honey or Maple Syrup: Agave syrup works well for a vegan option.
– Cocoa Powder: Try carob powder for a unique, caffeine-free flavor.
– Rolled Oats: Quick oats can be used, but the texture will change slightly.
– Dark Chocolate Chips: Use white chocolate or skip them for a simpler cookie.
– Shredded Coconut: If you don’t like coconut, leave it out or use dried fruit.
– Chopped Nuts: You can use any nut or seed you like, or skip them entirely.
These substitutions keep the spirit of the recipe while catering to your tastes or needs.
Step-by-Step Instructions
Preparing the Base Mixture
Melting Peanut Butter and Honey
To start, you need a medium saucepan. Place it on low heat. Add 1 cup of smooth peanut butter and 1/2 cup of honey or maple syrup. Stir continuously until smooth. This step is key to a creamy base.
Adding Cocoa and Vanilla
Once your mixture is smooth, add 1/4 cup of unsweetened cocoa powder, 1 teaspoon of vanilla extract, and 1/2 teaspoon of salt. Mix well. This brings rich flavor to your cookies.
Incorporating the Dry Ingredients
Methods for Mixing Oats
Now, remove the saucepan from heat. Fold in 2 cups of rolled oats. Make sure every oat gets coated in that chocolate goodness. This step gives your cookies their chewy texture.
Optional Add-ins (Chips, Coconut, Nuts)
If you like, toss in 1/2 cup of dark chocolate chips, 1/4 cup of shredded coconut, or 1/4 cup of chopped nuts. These add texture and flavor. You can choose what you enjoy most.
Forming and Setting the Cookies
Shaping the Cookies
Grab a tablespoon. Scoop out the mixture and place it on a parchment-lined baking sheet. Shape them into cookie rounds. Keep some space between them for even setting.
Refrigeration Process
Once you form all the cookies, put the baking sheet in the fridge. Let them chill for about 30 minutes. This helps the cookies firm up and hold their shape. You can enjoy these tasty treats right after!
Tips & Tricks
Storing Your Cookies
– Best Practices for Airtight Storage
Keep your cookies in an airtight container. This prevents them from getting hard. You can use a glass jar or a plastic container. Make sure the lid fits well. Store them in the fridge for best results.
– How to Maintain Texture
If you want a softer cookie, leave them at room temperature. For firmer cookies, keep them in the fridge. Avoid stacking them without parchment paper. This stops them from sticking together.
Making the Recipe Kid-Friendly
– Involving Kids in the Preparation
Kids love to help! They can measure ingredients or mix the dough. Let them scoop the cookies onto the sheet. This makes cooking fun and teaches them skills.
– Suggestions for Kid-Friendly Add-ins
Add-ins can make the cookies more fun. Try mini chocolate chips or colorful sprinkles. Dried fruits like raisins or cranberries are great too. Kids can choose their favorite mix-ins.
Troubleshooting Common Issues
– What to Do If Cookies Don’t Set
If your cookies are too gooey, they might need more time in the fridge. Give them an extra hour. If they still don’t set, you can try adding more oats next time.
– Adjustments for Too Dry or Wet Mixture
If the mixture is too dry, add a splash of milk. This helps it stick together. If it’s too wet, add more oats or cocoa powder. Adjust until you get the right consistency.
Variations
Vegan and Gluten-Free Alternatives
To make vegan no-bake cookies, switch honey for maple syrup. This keeps the sweetness but maintains a plant-based option. Choose gluten-free oats if you need a gluten-free version. Look for oats labeled gluten-free to avoid cross-contamination.
Flavor Variations
You can add different extracts to change the taste. Vanilla is common, but almond extract adds a nice twist. Consider spices like cinnamon or nutmeg for warmth. These can bring new life to your cookies.
Healthier Versions
If you want to cut sugar, use less sweetener. Start with half the amount and taste as you go. You can also add protein powder for extra nutrition. Superfoods like chia seeds or flaxseeds boost health benefits. These small changes make your treats both tasty and better for you.
Storage Info
Ideal Storage Conditions
To keep your no-bake chocolate oatmeal cookies fresh, store them in an airtight container. You can keep them in the fridge or at room temperature. If you want a firmer cookie, the fridge is best. For a softer bite, leave them out. These cookies last about a week in the fridge. If you store them at room temperature, they may soften faster.
Freezing and Reheating Tips
Freezing these cookies is easy. Just place them in a single layer on a baking sheet. Freeze them until solid, then transfer to a freezer bag. This way, they won’t stick together. They can stay frozen for up to three months.
When you want to eat them, take out the cookies and let them thaw. You can leave them on the counter for about 30 minutes. For an extra treat, warm them slightly in the microwave. Enjoy your cookies as a quick snack or dessert!
FAQs
Can I use quick oats instead of rolled oats?
Yes, you can use quick oats. Quick oats are thinner and softer. They absorb liquid faster than rolled oats. This change may make your cookies softer. If you want a chewier texture, stick with rolled oats. Rolled oats help give the cookies a more classic taste and feel.
How long do no-bake cookies need to set?
No-bake cookies need about 30 minutes to set in the fridge. This helps them firm up and hold their shape. If you want them firmer, you can leave them for an hour. Keep an eye on them to make sure they don’t get too hard. The setting time may vary based on your fridge’s temperature.
What can I substitute for peanut butter?
If you need a nut-free option, try sun butter or soy nut butter. Both are great for allergies. You can also use tahini, which is made from sesame seeds. These alternatives still give a nice texture and flavor to your cookies. Each option may change the taste a little, but they all work well.
You now have a clear guide to making delicious no-bake cookies. We covered all essential parts, from ingredients to storage tips. Whether you want to make them vegan or kid-friendly, there are options for everyone. Remember, the right storage keeps your cookies fresh and tasty. Experiment with flavors and enjoy the fun of making these treats. Follow these steps, and you’ll create cookies that impress. Happy baking!
![Here is what you need for the No-Bake Chocolate Oatmeal Cookies: - 1 cup smooth peanut butter - 1/2 cup honey or maple syrup - 1/4 cup unsweetened cocoa powder - 2 cups rolled oats - 1 teaspoon vanilla extract - 1/2 teaspoon salt - 1/2 cup dark chocolate chips (or dairy-free chips for a vegan option) - 1/4 cup shredded coconut (optional) - 1/4 cup chopped nuts (such as almonds or walnuts, optional) Each ingredient plays an important role. The peanut butter adds creaminess and protein. Honey or maple syrup brings sweetness and binds it all together. Cocoa powder gives that rich chocolate flavor. Oats add texture and heartiness. Vanilla and salt enhance the taste and balance the flavors. You can make this recipe your own! Here are some easy swaps: - Peanut Butter: Use almond butter or sunflower seed butter if you have allergies. - Honey or Maple Syrup: Agave syrup works well for a vegan option. - Cocoa Powder: Try carob powder for a unique, caffeine-free flavor. - Rolled Oats: Quick oats can be used, but the texture will change slightly. - Dark Chocolate Chips: Use white chocolate or skip them for a simpler cookie. - Shredded Coconut: If you don’t like coconut, leave it out or use dried fruit. - Chopped Nuts: You can use any nut or seed you like, or skip them entirely. These substitutions keep the spirit of the recipe while catering to your tastes or needs. For the full recipe, refer to the previous section. Melting Peanut Butter and Honey To start, you need a medium saucepan. Place it on low heat. Add 1 cup of smooth peanut butter and 1/2 cup of honey or maple syrup. Stir continuously until smooth. This step is key to a creamy base. Adding Cocoa and Vanilla Once your mixture is smooth, add 1/4 cup of unsweetened cocoa powder, 1 teaspoon of vanilla extract, and 1/2 teaspoon of salt. Mix well. This brings rich flavor to your cookies. Methods for Mixing Oats Now, remove the saucepan from heat. Fold in 2 cups of rolled oats. Make sure every oat gets coated in that chocolate goodness. This step gives your cookies their chewy texture. Optional Add-ins (Chips, Coconut, Nuts) If you like, toss in 1/2 cup of dark chocolate chips, 1/4 cup of shredded coconut, or 1/4 cup of chopped nuts. These add texture and flavor. You can choose what you enjoy most. Shaping the Cookies Grab a tablespoon. Scoop out the mixture and place it on a parchment-lined baking sheet. Shape them into cookie rounds. Keep some space between them for even setting. Refrigeration Process Once you form all the cookies, put the baking sheet in the fridge. Let them chill for about 30 minutes. This helps the cookies firm up and hold their shape. You can enjoy these tasty treats right after! For the complete recipe, check out the [Full Recipe]. - Best Practices for Airtight Storage Keep your cookies in an airtight container. This prevents them from getting hard. You can use a glass jar or a plastic container. Make sure the lid fits well. Store them in the fridge for best results. - How to Maintain Texture If you want a softer cookie, leave them at room temperature. For firmer cookies, keep them in the fridge. Avoid stacking them without parchment paper. This stops them from sticking together. - Involving Kids in the Preparation Kids love to help! They can measure ingredients or mix the dough. Let them scoop the cookies onto the sheet. This makes cooking fun and teaches them skills. - Suggestions for Kid-Friendly Add-ins Add-ins can make the cookies more fun. Try mini chocolate chips or colorful sprinkles. Dried fruits like raisins or cranberries are great too. Kids can choose their favorite mix-ins. - What to Do If Cookies Don’t Set If your cookies are too gooey, they might need more time in the fridge. Give them an extra hour. If they still don’t set, you can try adding more oats next time. - Adjustments for Too Dry or Wet Mixture If the mixture is too dry, add a splash of milk. This helps it stick together. If it’s too wet, add more oats or cocoa powder. Adjust until you get the right consistency. For the full recipe with detailed steps, check the [Full Recipe]. {{image_2}} To make vegan no-bake cookies, switch honey for maple syrup. This keeps the sweetness but maintains a plant-based option. Choose gluten-free oats if you need a gluten-free version. Look for oats labeled gluten-free to avoid cross-contamination. You can add different extracts to change the taste. Vanilla is common, but almond extract adds a nice twist. Consider spices like cinnamon or nutmeg for warmth. These can bring new life to your cookies. If you want to cut sugar, use less sweetener. Start with half the amount and taste as you go. You can also add protein powder for extra nutrition. Superfoods like chia seeds or flaxseeds boost health benefits. These small changes make your treats both tasty and better for you. For the complete recipe, check out [Full Recipe]. To keep your no-bake chocolate oatmeal cookies fresh, store them in an airtight container. You can keep them in the fridge or at room temperature. If you want a firmer cookie, the fridge is best. For a softer bite, leave them out. These cookies last about a week in the fridge. If you store them at room temperature, they may soften faster. Freezing these cookies is easy. Just place them in a single layer on a baking sheet. Freeze them until solid, then transfer to a freezer bag. This way, they won’t stick together. They can stay frozen for up to three months. When you want to eat them, take out the cookies and let them thaw. You can leave them on the counter for about 30 minutes. For an extra treat, warm them slightly in the microwave. Enjoy your cookies as a quick snack or dessert! For the full recipe, check out the detailed instructions above. Yes, you can use quick oats. Quick oats are thinner and softer. They absorb liquid faster than rolled oats. This change may make your cookies softer. If you want a chewier texture, stick with rolled oats. Rolled oats help give the cookies a more classic taste and feel. No-bake cookies need about 30 minutes to set in the fridge. This helps them firm up and hold their shape. If you want them firmer, you can leave them for an hour. Keep an eye on them to make sure they don't get too hard. The setting time may vary based on your fridge's temperature. If you need a nut-free option, try sun butter or soy nut butter. Both are great for allergies. You can also use tahini, which is made from sesame seeds. These alternatives still give a nice texture and flavor to your cookies. Each option may change the taste a little, but they all work well. You now have a clear guide to making delicious no-bake cookies. We covered all essential parts, from ingredients to storage tips. Whether you want to make them vegan or kid-friendly, there are options for everyone. Remember, the right storage keeps your cookies fresh and tasty. Experiment with flavors and enjoy the fun of making these treats. Follow these steps, and you’ll create cookies that impress. Happy baking!](https://homecookingstyle.com/wp-content/uploads/2025/05/6c398aab-d3af-4a54-8a1f-cd04ce3f2a0d-250x250.webp)
