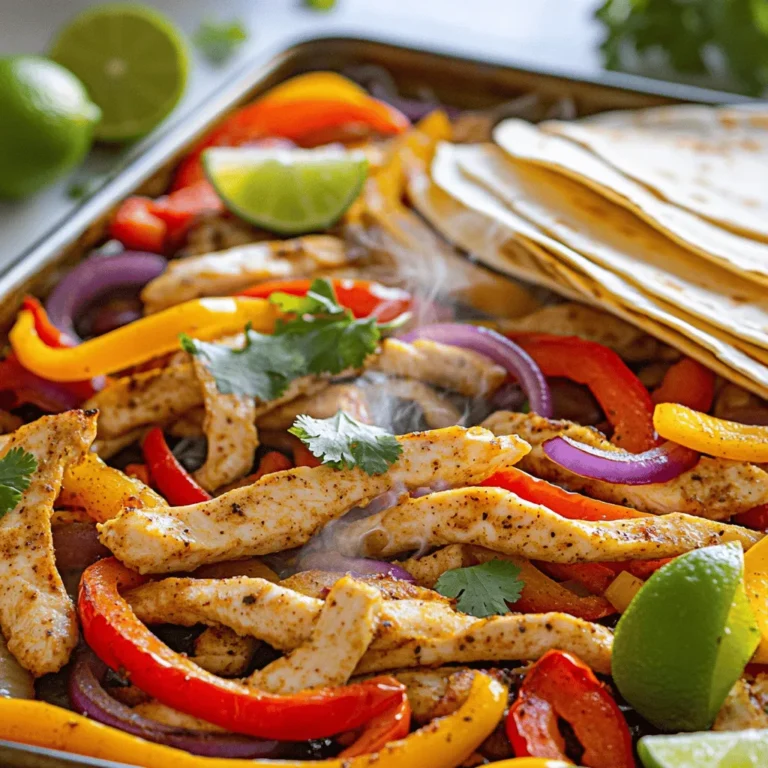
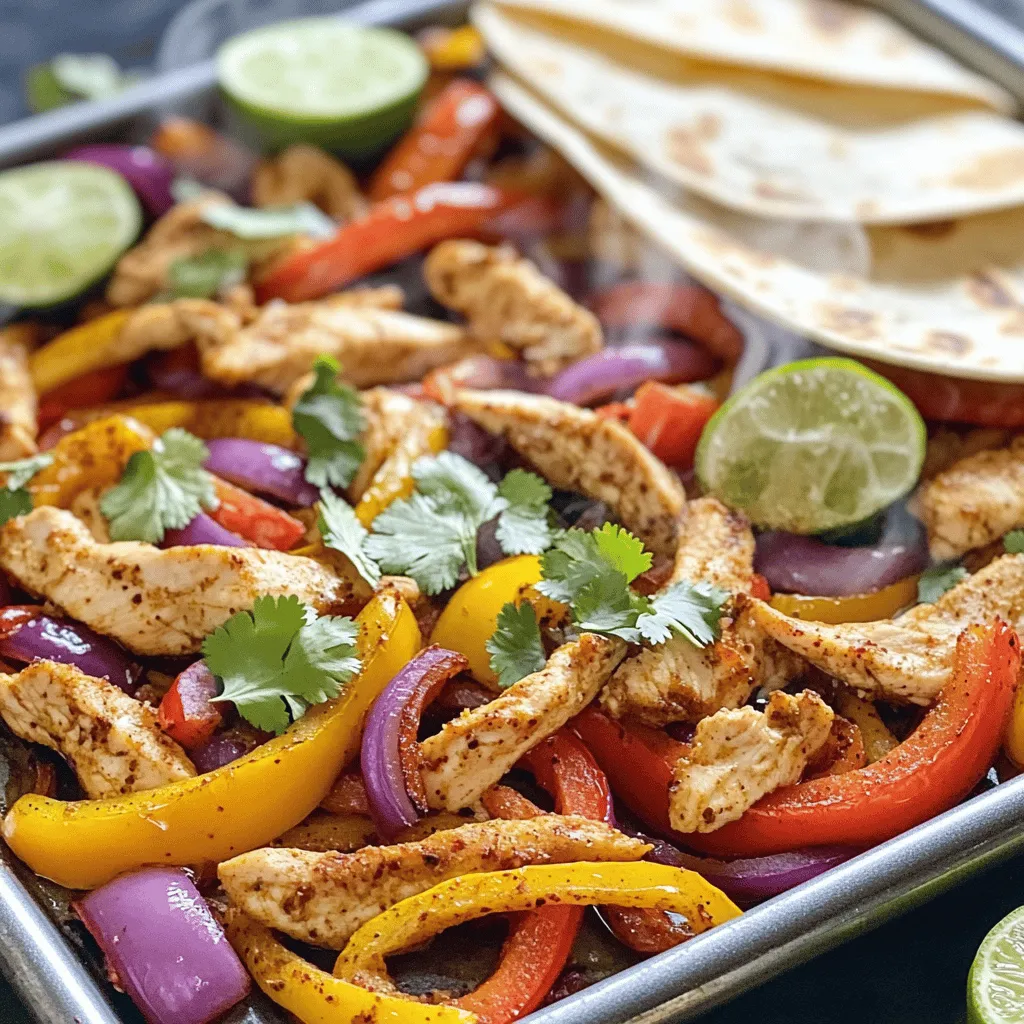
Ready to elevate your dinner game? My Sheet Pan Fajitas Packed with Flavorful Freshness will make your taste buds dance! This one-pan meal is not only quick and easy to prepare, but it also bursts with vibrant flavors from fresh veggies and spices. Whether you’re hosting a taco night or simply craving a tasty dinner, you’ll find the perfect mix of ingredients and tips to create a dish everyone will love. Let’s get cooking!
Ingredients
Main Ingredients
– 1 lb chicken breast, sliced into thin strips
– 1 red bell pepper, sliced
– 1 yellow bell pepper, sliced
– 1 red onion, sliced
– 3 cloves garlic, minced
For these fajitas, I love using fresh chicken breast. It cooks quickly and stays juicy. The colors of the bell peppers make the dish pop. Red and yellow bell peppers add sweetness. The red onion brings a nice bite. Garlic gives a lovely aroma that fills the kitchen.
Seasonings and Oil
– 2 tablespoons olive oil
– 1 tablespoon chili powder
– 1 teaspoon cumin
– 1 teaspoon paprika
– 1 teaspoon smoked paprika
– Salt and pepper to taste
The spice blend is key for flavor. Chili powder gives heat without being too spicy. Cumin adds warmth, while paprika brings a hint of smokiness. I like to mix these spices with olive oil. This helps the spices stick to the chicken and veggies.
Tortillas and Garnishes
– 8 small flour or corn tortillas
– Fresh cilantro, chopped (for garnish)
– Lime wedges (for serving)
Tortillas are the heart of fajitas. You can use corn or flour, based on your taste. Fresh cilantro adds brightness. Lime wedges bring a zesty kick when squeezed on top.
Step-by-Step Instructions
Preparing the Chicken and Vegetables
First, I preheat the oven to 400°F (200°C). This helps cook the fajitas evenly. In a large bowl, I combine the sliced chicken, red bell pepper, yellow bell pepper, red onion, and minced garlic. Mixing these fresh ingredients together adds great flavor.
Mixing the Spice Blend
Next, I take a small bowl and whisk together the olive oil, chili powder, cumin, paprika, smoked paprika, salt, and pepper. This spice blend brings life to the dish. I pour this mixture over the chicken and veggies, tossing everything until it is evenly coated. Each piece should be covered well for the best taste.
Baking and Serving
Now, I spread the chicken and vegetable mixture in a single layer on a large sheet pan. This allows them to cook evenly and get a nice roast. I bake everything in the preheated oven for 20 to 25 minutes. I check that the chicken reaches an internal temperature of 165°F (75°C) and that the veggies become tender and slightly roasted. While the fajitas bake, I warm the tortillas in a separate pan over medium heat for about 30 seconds per side. This makes them soft and ready to hold all that delicious filling. Once the fajitas are done, I remove the sheet pan from the oven to cool slightly. Then, I serve the sizzling fajita mixture on the warm tortillas. I like to garnish with fresh cilantro and lime wedges for some extra zing.
Tips & Tricks
Perfecting the Fajitas
To ensure even cooking, spread the chicken and veggies in one layer on your sheet pan. This helps all the pieces cook at the same rate. When you crowd the pan, some ingredients may cook slower than others.
To avoid soggy tortillas, warm them right before serving. You can heat them in a pan for about 30 seconds on each side. This makes them soft but not too wet.
Flavor Enhancements
You can add more spices to kick up the flavor. Try adding cayenne pepper for heat or oregano for a fresh twist. Adjust the spice levels to your taste.
Marinating your chicken can enhance flavor greatly. Mix the chicken with olive oil and spices, then let it sit for 30 minutes. This extra time allows the flavors to soak in.
Presentation Tips
For garnishing, fresh cilantro adds a nice touch. Sprinkle it over the fajitas just before serving. Lime wedges on the side provide a fresh burst when squeezed.
When serving, place the fajita mixture directly on warm tortillas. You can create a fajita station with toppings like cheese, salsa, or guacamole. This way, everyone can customize their meal.
Variations
Protein Swaps
You can swap chicken for beef or shrimp. Both options bring a different taste. If you choose beef, use flank or sirloin. For shrimp, select large, raw shrimp. Both proteins cook quickly and stay juicy.
If you prefer a vegetarian meal, try using firm tofu or tempeh. Both options add protein and soak up the flavors. You can also use beans, like black beans or pinto beans, for a hearty option.
Vegetable Additions
Adding more veggies makes fajitas even better. You can include zucchini, mushrooms, or corn. These veggies add color and flavor.
Seasonal vegetables work well too. In summer, use fresh tomatoes and summer squash. In fall, add butternut squash or Brussels sprouts. Experiment, and find the mix you love.
Dietary Adjustments
For gluten-free fajitas, use corn tortillas instead of flour ones. This simple swap keeps all the taste without gluten.
If you’re looking for low-carb options, skip the tortillas. Serve the fajita mix in a lettuce wrap instead. You get all the flavor with fewer carbs.
Storage Info
Storing Leftovers
To keep your fajitas fresh, place them in an airtight container. Let them cool first, then seal tightly. Store them in the fridge for up to four days. If you want to keep them longer, freezing works great too. Place the fajitas in freezer bags, press out the air, and seal well. They can last up to three months in the freezer.
Reheating Tips
You can reheat fajitas in two main ways: microwave or oven. If you use the microwave, place the fajitas on a microwave-safe plate. Heat in short bursts, checking often to avoid overcooking. If you prefer the oven, preheat it to 350°F (175°C). Spread the fajitas on a baking sheet and heat for about 10-15 minutes. This method keeps them crispy and tasty.
To keep the fajitas flavorful, add a splash of lime juice before reheating. This brightens up the dish and enhances the taste.
Shelf Life
Leftovers last about four days in the fridge. If you freeze them, they can stay good for three months. Always check for signs of spoilage. If the fajitas smell off or look discolored, it’s best to throw them away. When in doubt, trust your senses!
FAQs
Can I use frozen chicken for this recipe?
Yes, you can use frozen chicken for these fajitas. To ensure safety, thaw the chicken completely before cooking. The best way to thaw chicken is in the fridge overnight. If you’re short on time, you can use the cold water method. Place the chicken in a sealed bag and submerge it in cold water. Change the water every 30 minutes until it’s thawed. Avoid thawing chicken in hot water, as it can raise bacteria levels.
What toppings go well with fajitas?
Toppings enhance the flavor and add freshness to your fajitas. Here are some popular suggestions:
– Shredded cheese
– Sour cream
– Guacamole
– Salsa or pico de gallo
– Sliced jalapeños
– Avocado slices
– Fresh lime juice
– Shredded lettuce
– Chopped tomatoes
Feel free to mix and match your favorites. Each topping brings its own flair to the dish.
How do I know when the chicken is cooked?
To check if the chicken is cooked, use a meat thermometer. The internal temperature should reach 165°F (75°C). Insert the thermometer into the thickest part of the chicken. If you don’t have a thermometer, cut into the chicken. The meat should be white and no longer pink. Juices should run clear. This ensures that your chicken is safe to eat and tender.
This blog explained how to make tasty chicken fajitas. We covered ingredients like chicken, veggies, and spices. I shared step-by-step instructions for preparation and cooking. The tips help you perfect your dish and try fun variations. Storing and reheating ideas keep your leftovers great.
In conclusion, making fajitas is easy and fun. Experiment with flavors and toppings to suit your taste. Enjoy your cooking adventure!

